
Brumby, my 1992 Jeep YJ, was a stinky ride whenever I filled the gas tank. It was so bad I tried to fill it less than 3/4 full to keep odors down. That worked for a while but the problem became worse as time stayed on its ever-forward push towards entropy. The thing got so bad raw fuel (is there any other kind?) would slosh out on rough roads.
In addition, the in-tank electric fuel pump kept getting noisier and noisier. If I let the tank drop below ½ it made a real racket that you could here over the flapping canvas roof and the squeaking suspension. These two issues combined left me with a usable tank capacity of between 1/2 and 3/4, or about 37 miles in layman’s terms. I knew I had to drop the tank and have a look at the situation.
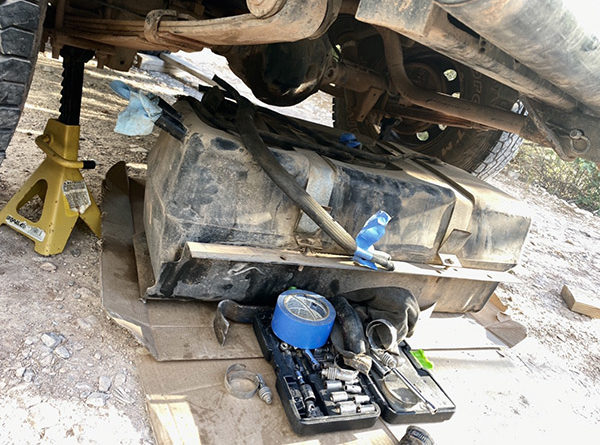
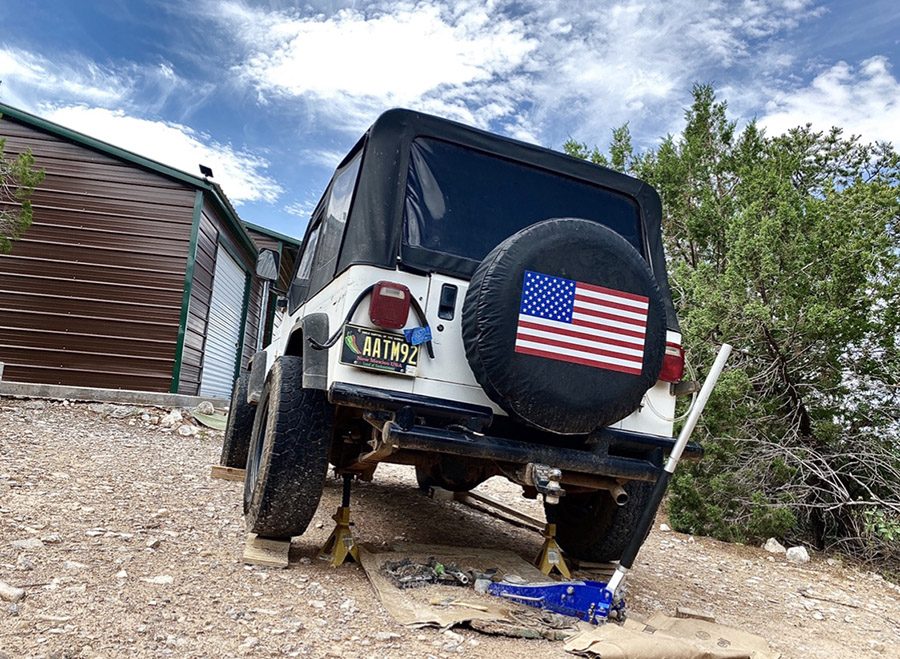
The Jeep YJ tank is behind the rear axle and attached to a steel skid plate. After unhooking the fuel fill hoses, no easy feat, you have to use a floor jack to let the tank down. I siphoned out as much fuel as I could to make the tank lighter. Once you’ve got the tank lowered and a bit of clearance you can disconnect the rest of the fuel lines. Being fuel injected there are three lines: pressure, return and a small vent that goes to the charcoal canister I think.

The big leak was at the fuel pump flange. The YJ’s tank is an aftermarket, rotocast plastic unit. This pump-to-tank area warps with age. There is no metal flange cast into the tank top to insure a flat gasket surface. Look for this feature on your next Jeep YJ gas tank purchase.
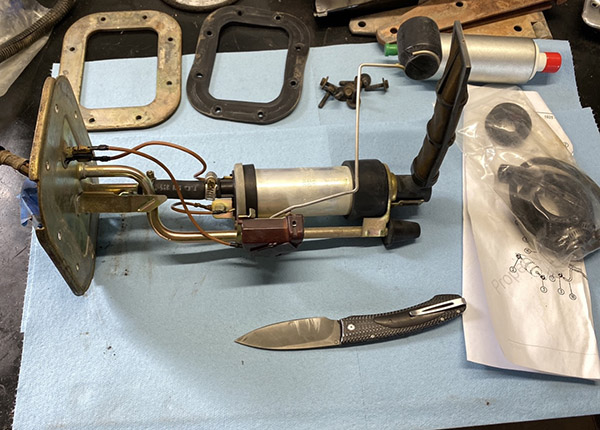
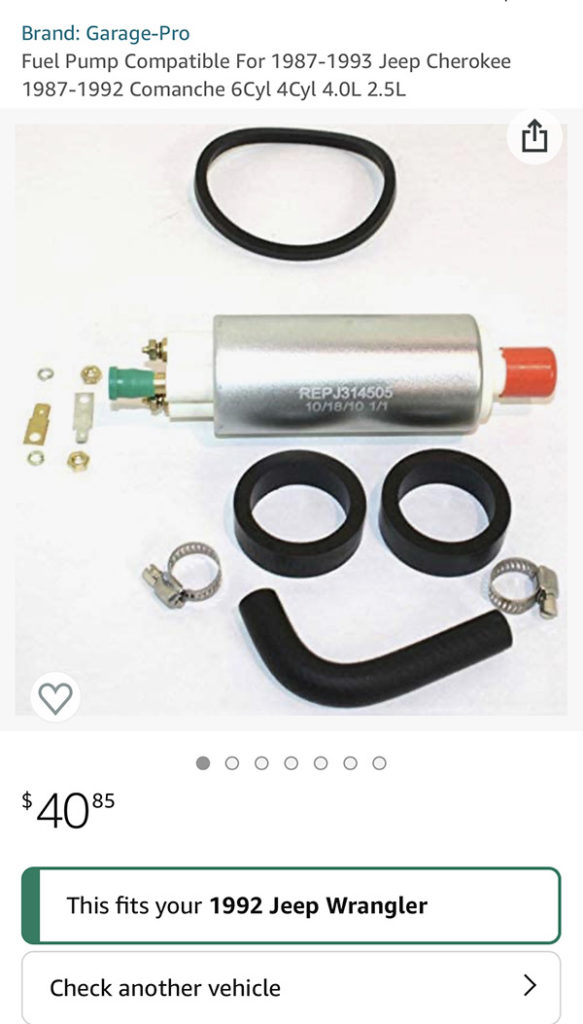
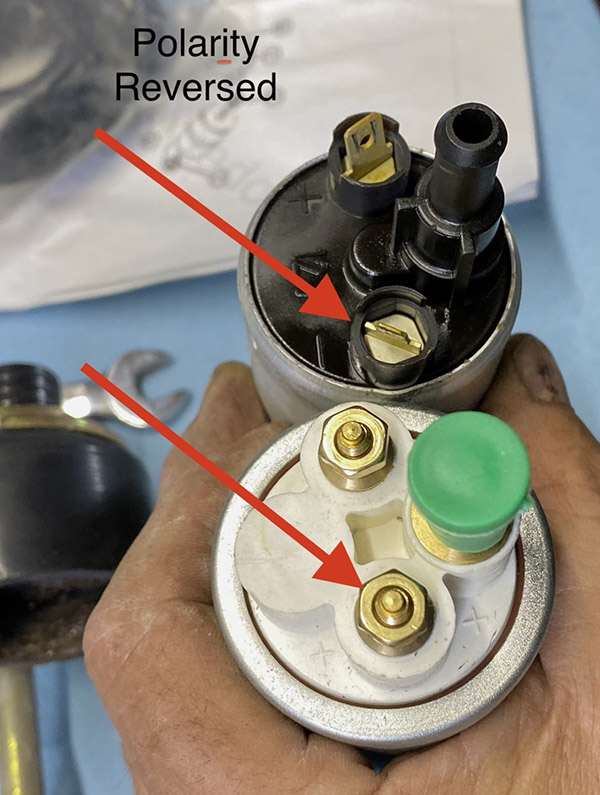
Removing the fuel pump assembly revealed that the replacement pump was not an exact replacement. The new fuel pump’s electrical connections were reversed but there was plenty of slack in the wires to reach. The bottom pickup of the new pump didn’t quite fit into the pickup screen correctly so I messed around with the extra rubber bushings that came with the new fuel pump until I got something that worked.
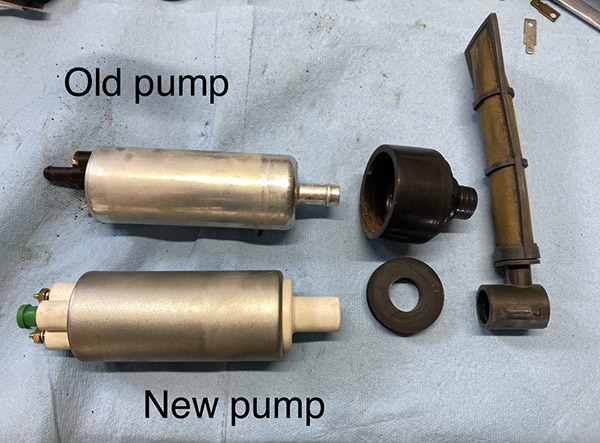
I managed to get the fuel pump installed into the new assembly in only a few hours. Remind me next time to spring for the complete pump assembly. When I reinstalled the pump assembly I used a new gasket and a steel backing plate that came with the gasket. Copious quantities of black RTV silicone filled the dips and voids of the warped plastic tank top.

I cleaned and re-painted the gas tank skidpan and attached the tank straps to the pan. Now the whole assembly is situated on the floor jack, rolled into position and jacked up into place only pausing long enough to connect the new rubber fuel lines (also from Amazon!).
Some YJ owners cut out the floor to replace the fuel pump. That’s a good idea but it isn’t very hard to drop the tank. For roadside emergency repairs a hatch cut into the floor would make replacing the pump a half-hour job instead of the two days it took me. I think I’ll do the hatch next time.
Brumby is running fine with its new fuel pump and I can fill the tank without fuel sloshing out onto the hot exhaust pipe. My fuel mileage has improved slightly without the constant loss of gasoline from the leaky tank. The old pump looked like original equipment and lasted 29 years. Stay tuned to ExhaustNotes for a follow up report when the new fuel pump quits.
More ExhaustNotes product reviews are here!
Guns, motorcycles, bicycles, product reviews, travel stories, and more! Subscribe here for free!