The Camino de Santiago, also known as the Way of St. James, is a network of pilgrimage routes that lead to the shrine of the apostle Saint James the Great in the cathedral of Santiago de Compostela in Galicia, Spain. The Camino has been a popular destination for Christian pilgrims for more than a thousand years, and it is now visited by people of all faiths and backgrounds from around the world.
There are several routes of the Camino de Santiago, including the Camino Frances (French Way), which is the most popular, and the Camino Portugués (Portuguese Way), which starts in Lisbon or begins in Porto for a two-week shorter Camino. The Camino de Santiago is a long-distance walk or hike that typically takes 30-40 days to complete, depending on the route and the pace of the individual pilgrim.
Along the way, pilgrims stay in Albergues (pilgrim hostels) or other types of accommodation and follow the yellow arrows and shells which mark the way. The Camino de Santiago offers a unique opportunity to experience the beauty of the Spanish landscape and culture and to challenge oneself physically and spiritually.
Please click on the popup ads!
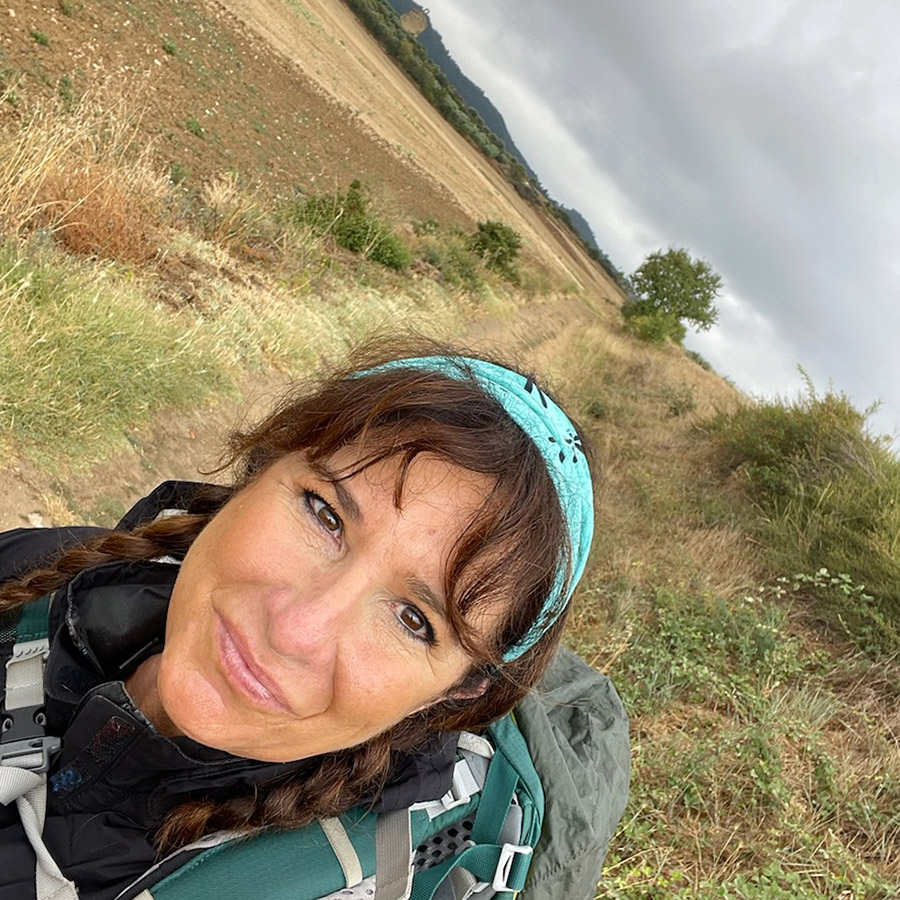
I walked seven different Camino Routes with my first Camino in 2012 and the last in September 2021. My last walk found me starting in Pamplona, Spain, a vibrant city never lacking a reason for a fiesta, a city known worldwide for the Running of the Bulls every July. I ended my journey in Leon, Spain. With my added side trips, I walked over 300 miles, experiencing high desert plateaus, the Rioja wine region, the blissful Logrono’s tapas, the magnificent Burgos Cathedral, the Meseta’s emptiness, and the joy of Leon.
I was on a multi-month motorcycle/camping trip through Arizona, Utah, Colorado, Wyoming, and Montana. When riding, there are times when every part of your brain is laser-focused on the road ahead of you and who might try to run you over from the back or side, but every now and then, the ride is so peaceful that you have time to turn a portion of your brain to the gift of “I wonder.” This led me to reminisce over my six prior walks along different Camino routes in Spain, Portugal, and France. Once released, an avalanche of memories and images flowed to the point that I knew I would be booking my flight to Europe as soon as I stopped my ride for the day.
A quick Google Flights search gave me what I needed, and I soon had a ticket. This was another solo walk, my favorite way for most hikes. My arrival in Pamplona was early enough that I decided to start my Camino right from the Pamplona Airport, bypassing one of my favorite cities in Spain.
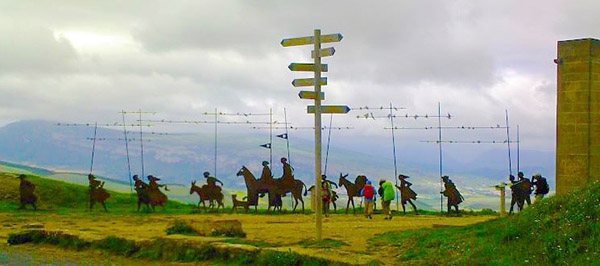
The morning had the hope of the fall weather yet to come as I headed slowly up the first of several foothills with the goal of a 10-mile walk for my first day. The gravel crunched satisfactorily underfoot as I quickly adjusted my backstraps to climb up to an iconic ridge that all pilgrims look forward to, the Alto del Perdón, a mountain pass in the province of Navarra in northern Spain, about 12 miles outside of Pamplona. I had returned to the Camino Frances trail after nine-year of absence, taking in beautiful views of the surrounding landscape and a chance to rest and recharge. The mountain pass is named after a sculpture of the Virgin Mary and the phrases “Señora del Camino” (Lady of the Way) and “Perdón” (Forgiveness), which are inscribed on the base of the sculpture. The windswept ridge and the massive wind turbines in the background contrast the sculptures that represent a pilgrimage from the Middle Ages. I took my first full breath after 18 hours of travel and an excellent 8-mile walk to this point. I thought about my intentions for this walk, what I hoped to gain and whom I would miss in the coming weeks of a long walk across most of Spain.
Reluctantly leaving the ridge late afternoon, I knew it would be challenging to reach my Albergue for the night. The steep loose gravel trail reminds me that my knees are not what they used to be, and motorcycle riding for the prior months did little to prepare me for the rigors of this walk. Soon the village of Uterga appeared with another climb up to her main street. My arrival timed perfectly to watch the evening stroll of the locals begin, kids running in the square, little old ladies with perfectly quaffed hair and well-put-together outfits ambling in deep conversations. Adults were sitting in outdoor cafes having a drink, visiting each other, and enjoying the last dregs of daylight. I wanted to plop my disheveled self within their mist and order my first long-awaited glass of Vino Tinto, but I pulled myself together and made the last of my walk to my Albergue in short order.
This first night’s stay found me in a dorm room in a private Albergue with its small restaurant and bar. After showing my pilgrims pass (issued to show you are walking the Camino) and paying 12 Euros for my place in the dorm room, I quickly dumped my backpack on my bed, looked in the mirror, confirmed I looked like a wreck, dashed for the bar, and ordered my first of many good Rioja wines. Settling in, I met my first group of fellow pilgrims. A portly German fellow in his mid-fifties that I would painfully learn would serenade us throughout the night with his epic snoring. Also, a group of Italian bicycle riders. They were loud, and all were talking at once with what would become the usual question: Why is an American woman walking the Camino alone? Well, that’s a question for another day! I order my second glass of wine and move into the restaurant for the start of the evening’s Pilgrim meal, an inexpensive three-course meal with portions that could feed a small family, and your choice of bottled water or a bottle of wine, Good God, man, why would you order the water? I certainly did not.
I had equal feelings of contentment and joy seeping in as German, Italian, and Spanish conversations swirled around me—fellow pilgrims sharing their day’s success and physical hardships. Many of the pilgrims had started 60 miles back on the French side of the Pyrenees, had survived the celebrations of Pamplona, and were still in high spirits so early in their walk. I listened to their stories and their countless toasts made in several languages. I left the room while the wave of conversation and laughter reminded me of how lucky I was to be on this walk for a 7th time. This surely was the beginning of an epic adventure and the hope of what Spain had in store for me.
This is an update on my 9mm 1911 sudden unintended disassembly saga. I will address four topics:
Zeroing in on the cause.
Rework of the ammo I had loaded on my Lee turret press.
My reconstituted 9mm 1911.
Preventing a recurrence.
Let’s get into it.
Zeroing In On The Cause
I’m down to thinking the 1911 event was due to either of two causes: A double propellant charge, or bullet setback (i.e., the bullet slid deeply into the case as the round was being chambered, thereby raising the chamber pressure).
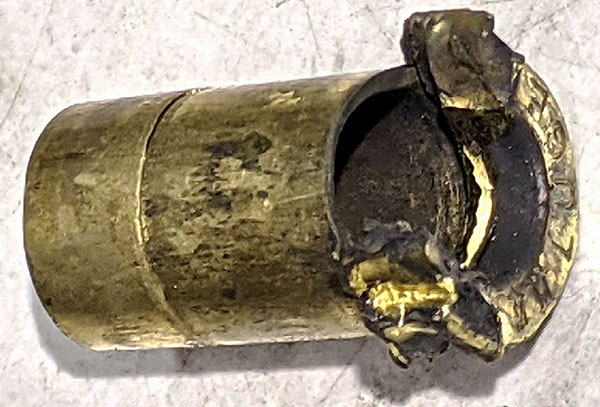
My burst 9mm cartridge case. It was a Remington case, not that it makes any difference. Any case would likely have burst. Photo by TJ of TJ’s Custom Gunworks. Compare this to the photo of the double-charged case at the end of the video below.
A Double Charge
I did a Google search on double-charged cartridges, and what do you know, there’s actually someone out there who did the same thing I did. He caught it on video and posted it with a photo of the case. His burst cartridge case sure looks a lot like mine.
If you compare the photo at the end of the above video to the case stuck in my chamber, they are identical. I’ve convinced myself that this is the most likely of the two scenarios, but I’ll describe the other scenario (bullet setback) as well.
Bullet Setback
What has me thinking deep thoughts about the second failure mode (pushing the bullet deeper into the case during chambering) is that I think it is relatively easy to screw up while reloading and induce this failure, and from what I’ve read, 1911s are more prone to do this than are other semi-autos.
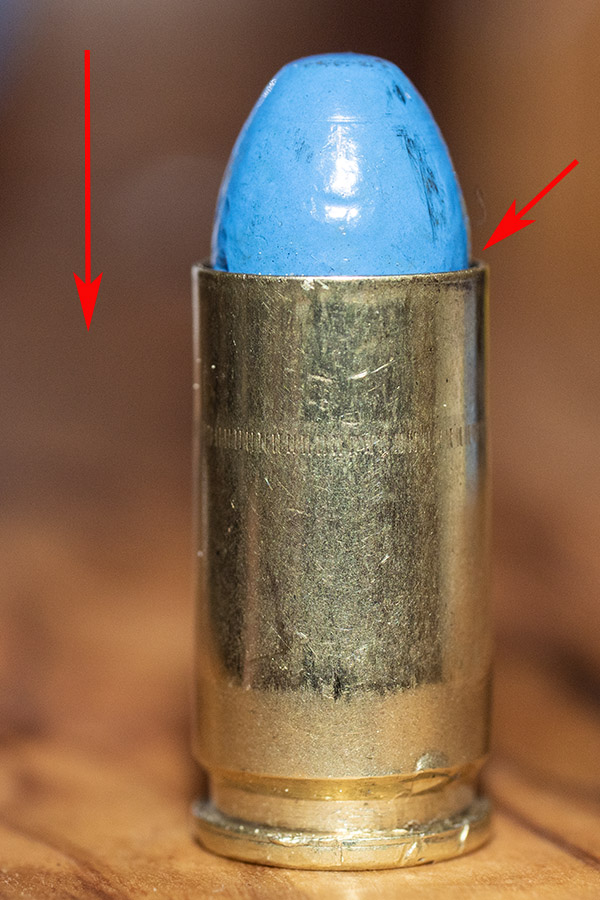
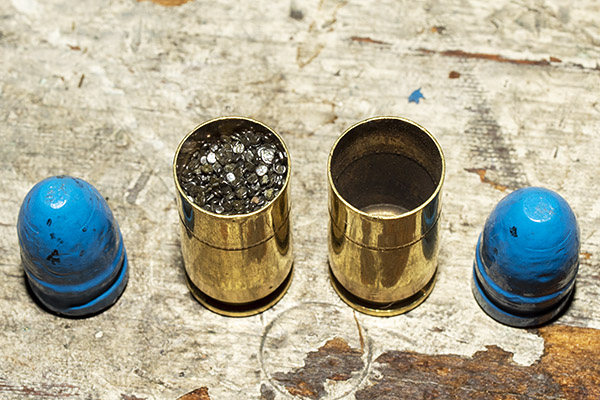
This is what bullet setback would look like. The bullet is seated much deeper in the case than it is supposed to be, which would raise chamber pressure. This example did not occur in the gun; I loaded dummy case and pushed the bullet in much deeper using my reloading press. Theoretically, it can be induced by the gun if the bullet is not crimped sufficiently.
Let’s discuss screwing up the reloading process in a manner that could induce bullet setback. On my Lee Classic turret press, bullet seating and crimping occur in two separate operations (seating refers to pushing the bullet into the case; crimping refers to locking the bullet in place by crimping the cartridge case mouth). The third (of the four) dies seats (but does not crimp) the bullet; the fourth die applies a taper crimp to the bullet. Here’s the screwup: I’ve had at least a couple of instances where I took the cartridge out of the press after seating the bullet (but before crimping it). I know; you’re thinking that’s stupid, and I can’t argue with that conclusion. I don’t know why I did it (too eager to see the completed round, maybe?). I caught myself, returned the cartridge the press, and crimped it. But it’s possible I missed the crimping step on a cartridge.
I think setback is the less likely of the two failure modes discussed here. I tested the crimp by tapping on the bullet with a rubber mallet and it didn’t move. Failure to crimp or a weak crimp may have caused setback, but on properly crimped bullet, I don’t think setback will occur. Also, when I made the cartridge shown in the photo above on my RCBS Rockchucker press, it took more effort than I thought it would to seat the bullet as deeply as you see in the photo (and the case had not been crimped). I doubt that simply chambering the round would drive the bullet in that deeply (even without a crimp). If you think otherwise, please leave a comment below.
Gun Design and Bullet Setback
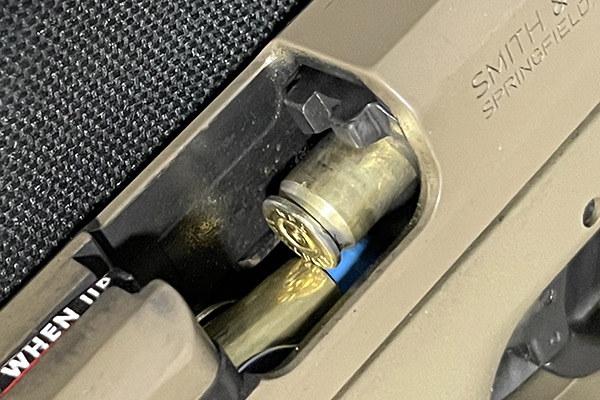
As mentioned above, bullet setback is more likely to occur on a 1911 than it is on other semi-auto handguns. It has to do with cartridge location in the magazine, and how it feeds into the chamber. On more modern handguns, the top round in the magazine sits higher in the gun than it does on older design guns. When the slide shoves the round forward, cartridges in more modern handguns have a straighter path into the chamber. On a 1911, the top round in the magazine sits lower in the gun. When the slide pushed it forward, the bullet impacts the ramp, it has to stay situated in the cartridge case without experiencing setback, and the cartridge has to rotate up and then into the chamber. Because of this, a 1911 is more likely to experience bullet setback than is, say, a gun like the S&W Shield.
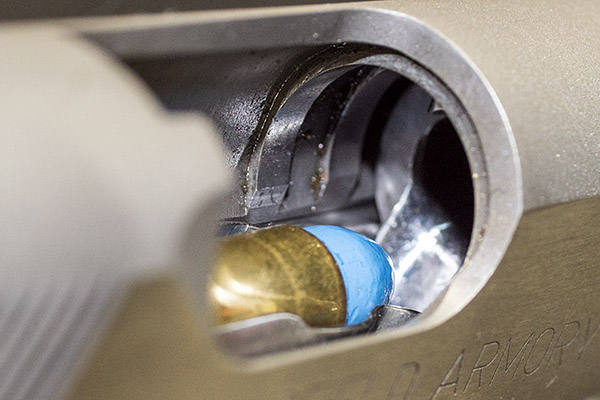
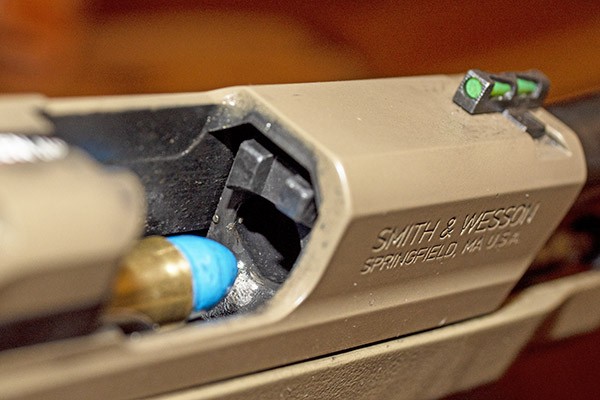
A 9mm cartridge waiting to be chambered in a 1911. It’s a little hard to see in this photo (I did the best I could), but the bullet nose will hit the ramp head on and then slide up the ramp and into the chamber. The potential for bullet setback is a little higher here than on most other modern 9mm semi-auto handguns.A 9mm cartridge waiting to be chambered in the S&W Shield. Notice how the round is nearly aligned with the chamber as it sits in the magazine.
That’s not to say the Smith and Wesson Shield is a better design or that it’s all sunshine and rainbows. There’s a tradeoff the engineers made on the Shield. Yep, the Shield’s higher cartridge position makes for a straighter path into the chamber. It also allows for higher capacity in a smaller gun (my little Shield holds 8 in the magazine and one in the chamber). But the higher cartridge position can induce another issue: Failure to extract and eject.
A cartridge case in the S&W Shield caught during extraction on the mouth of the case immediately below it.
During extraction, the round being extracted has to drive the magazine’s top cartridge down into the magazine as it is being extracted. it does so by using the next cartridge’s bullet as a cam surface. The rear edge of the cartridge being extracted bumps into the mag’s top cartridge, and then it has to drive it down so the case can exit the gun after firing. As it uses the bullet of the mag’s top round for that cam surface, the rear of the cartridge case rim encounters the case mouth of the mag’s top cartridge, and that can cause a failure to extract and eject. It’s happened to me. I’ve found the Shield is sensitive to ammo brand, bullet configuration, and crimp. Too much crimp, and the cartridge goes too deep into the Shield’s chamber and the firing pin won’t light the round off. Too little crimp and it jams in the manner described above. Too little crimp and it might experience bullet setback. Like most things in life, the design is a tradeoff.
Again, I don’t think bullet setback is what happened in my 9mm 1911. I’m including it here simply because it is interesting and relevant to this discussion.
Ammo Rework
One of the personally dismaying and embarrassing things about blowing up my 9mm 1911 is that it immediately threw into question the approximately 1500 rounds of 9mm and .45 ACP ammo I had reloaded on the Lee turret press.
I thought I could use weighing the rounds as a way to screen for double loads, but on both the 9mm and the .45 cartridges, the weight variation exceeds the weight of the powder charge. That means I could have a double charge and if it was in a lighter round, it would be within the variability for the loaded cartridge. So weight was not a way to screen. I know there will be keyboard commandos with advice to stick to one case manufacturer (or to segregate cases by brand), but the same variability problem exists even when cases are segregated (I’ve checked). I wish the self-styled “experts” on Facebook would slither back under their rocks (or at least refrain from commenting when they just don’t know what they are talking about, which is most of the time).
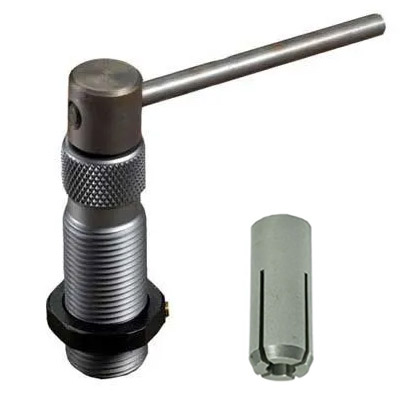
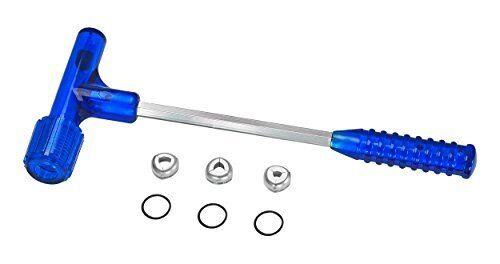
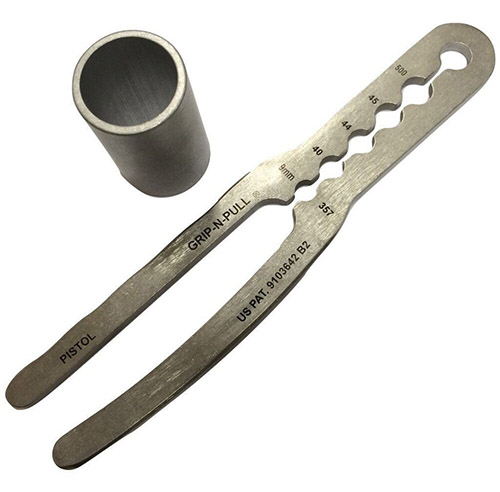
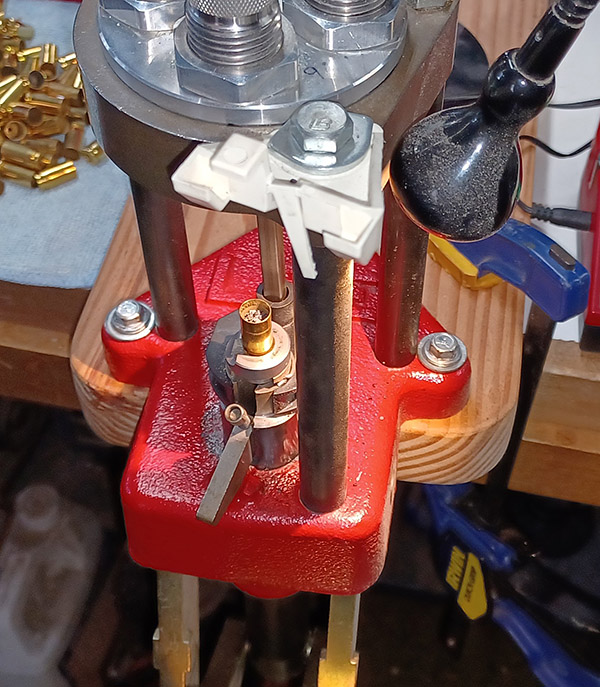
The RCBS collet bullet puller. You put your cartridge into the press shell holder, raise it into the collet (the gizmo on the right, which fits inside the gizmo on the left), tighten the crank, and lower the press ram. Voila, the bullet is pulled. Most of the time. Sometimes it doesn’t work.An impact bullet pullerr. You put a loaded cartridge into the cap on the hammer head, whack the opposite end against a hard surface a few times, and inertia drives the bullet out of the case. It is a lot of work.The Grip-N-Pull. It works occasionally. I tried a few cartridges and gave up on it.
I’ve disassembled and reassembled the 800 9mm rounds I loaded on the Lee turret press. I did not find a single one with a double charge. I used my buddy Greg’s RCBS collet bullet puller for this on my 9mm ammo and it worked like a champ with minimal or no bullet damage. Surprisingly, with all brands of brass, after pulling the 9mm bullets from crimped cartridges I did not have to expand the case mouths again to reseat the bullets. They slid right in. I just seated them to the right depth and crimped them again. Reusing the bullets didn’t seem to affect accuracy, either.
The RCBS collet bullet puller did not work on my .45 ACP ammo. The .45 collet couldn’t get a good enough grip on powder coated 230-grain roundnose bullets or on my 185-grain cast semi wadcutters. I tried one of those Grip-N-Pull devices and that didn’t work, either. The bullets slid right out of it. To disassemble the .45 cartridges, I had to use an impact bullet puller, and that was tough sledding. It takes forever. I don’t like impact bullet pullers, but hey, it is what it is. And what it is, well, is a lot of labor. I’m working it a little at time, at a rate of about a box per week. Three or four months and the rework will be in the rearview mirror.
That double charge sure turned out be one expensive mistake, both in terms of damage to the 1911 and the need to rework a lot of ammo. Live and learn, I guess.
The Reconstituted 1911
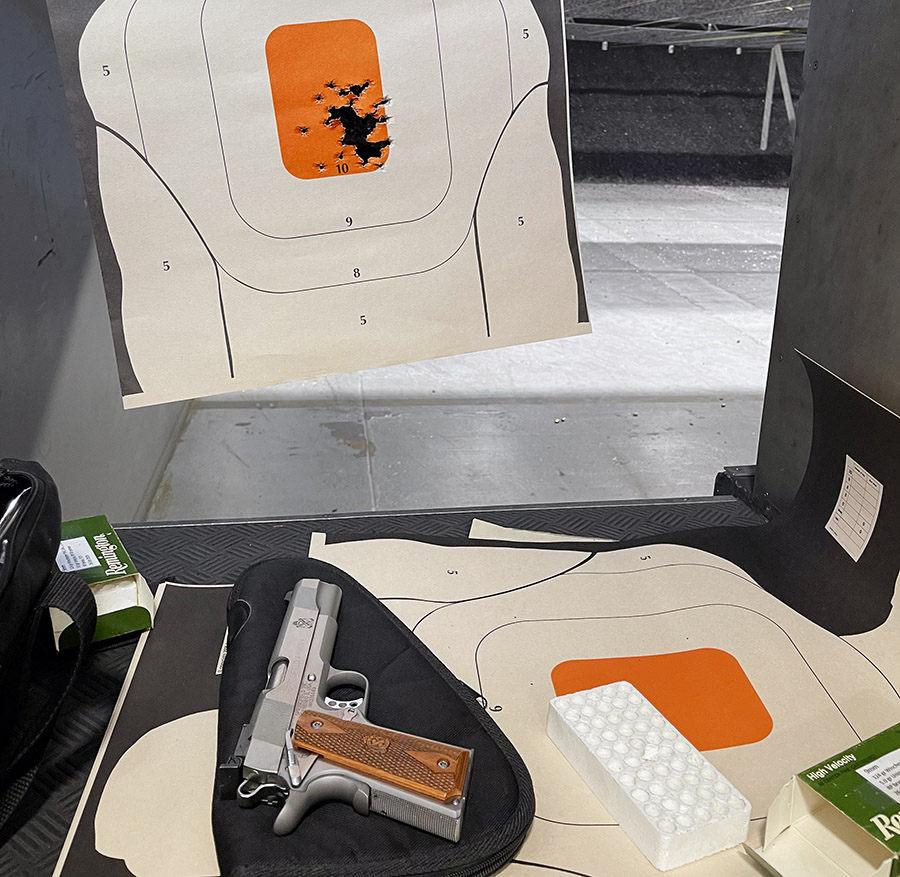
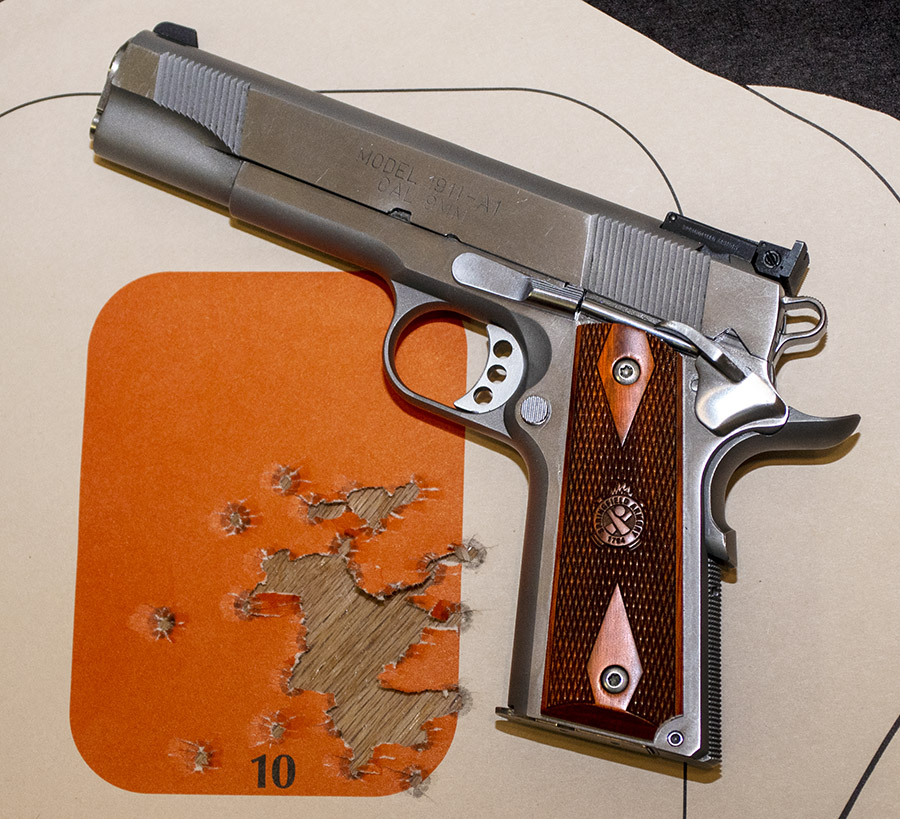
TJ (of TJ’s Custom Gunworks) worked his magic on my 9mm 1911. As mentioned in a previous blog, in addition to addressing the damage from the burst cartridge, he polished the barrel and ramp, refit an extractor that actually works (shame on you, Springfield Armory, for letting this one get out of the factory with an extractor that didn’t even contact the cartridge case), he recontoured the slide release and the slide release pin (shame on you again, Springfield Armory, for a slide release that was extremely difficult to install), he fit a one-piece guide rod (which is what I asked him to do), and he did one of his magnificent trigger jobs (this 1911 has a “breaking glass” 2 1/2 pound trigger now, with zero creep and no discernible takeup). This 1911 is a pure joy to shoot. I loved it before and I love it even more now. That target at the top of this blog? It’s a full box of my reloaded 9mm ammo (50 rounds) fired without resting the gun on anything. No failures to feed, no failures to eject, no misfires, and every bullet hit in the 10 ring.
50 rounds shooting offhand with the 9mm Springfield Armory 1911. Custom work by TJ’s Custom Gunworks.
Preventing a Recurrence
Wow. Where to begin.
I am implementing a number of changes in my reloading to prevent this from occurring again:
I’m slowing down and paying more attention. Duh. I’m no longer complacent. Duh again.
I’m installing better lighting on my press.
I’m standing up so I can see into the cartridge case.
I’m switching to a bulkier powder so that a double charge, if it ever occurs again, will spill over the case mouth and make a big, impossible-to-ignore mess.
I don’t mind sharing with you that when this first occurred, my thought was to abandon the Lee Classic turret press and return to loading on my single stage RCBS Rockchucker press. Double charging a case using a single stage press is (in my opinion) a much less likely thing to happen, and in 50 years of reloading on the Rockchucker, I’ve never had it happen.
When you load on a single stage press, it’s easier to view all of the charged cartridge cases. If any have been double charged, they will stand out.
I have a friend who works for Colt in their customer service department, and he tells me that when he sees a blown up gun sent in, there’s usually a progressive or a turret press somewhere in the story. But good buddy Paul told me to think about it a while longer and I did. I’m back to using the Lee turret press, but I’m a little older and a lot wiser now. The older part wasn’t really necessary, but the wiser part is and hopefully, readers can benefit from my screwup.
Slowing Down and Paying Attention
You know, when I worked in the munitions industry I participated in two fatality investigations where inadvertent detonations were involved. Multiple human errors caused those inadvertent detonations, and one of the key human errors was complacency. That’s what I had become using the Lee Classic turret press: Complacent. I’d been reloading for so long I became entranced with the turret press’s speed, and I started reveling in the thousands of rounds I was cranking out (and it was, literally, thousands of rounds). I always knew that double charges or skipped steps (like crimping) were really, really bad, but I just never thought I’d be the guy making either mistake. I wasn’t taking the time I needed to and I became complacent. That’s changed. I’ve slowed the pace, and you can bet I’m looking into every case immediately before I place a bullet on top to make sure I haven’t double charged it. You can also bet that I’m making sure I hit the crimping step on every round. I’ve actually posted a sign on my reloading bench with the best advice I’ve ever given myself: Slow down.
Better Lighting
Good buddy Duane (who is both smarter and better looking than me) also reloads with the Lee Classic turret press. Duane mounted a light above his press to allow better visibility into the charged case. I’m going to do the same.
Standing Up
I used to sit at the reloading station. My bench, though, is higher than a standard work table (it’s how I had it built 50+ years ago). When I’m seated, it’s not as easy to see into the case. I reload standing up now, and that allows seeing directy into the case.
Bulkier Propellant
My last change concerns the propellant. One of the things I investigated shortly after my 9mm hand grenade episode was if it was possible to get a double charge into a 9mm case. With the load I was using (5.4 grains of Accurate No. 5), the answer was yeah, you could. It even had a little room left over. My thinking at the time was that I needed to go to a propellant that would overflow the case if I double charged it. In the past, I’ve found 4.8 to 5.0 grains of Unique with the 125 grain bullet is a marvelous 9mm load. Doubling that (i.e., 9.6 grains of Unique will overflow a 9mm case) and if that happens when loading, that’s a good visual indicator that something’s wrong. So, from here on out when using the Lee turret press, my load will be 4.8 grains of Unique. That only works for 9mm, though. Other cartridges (the .45 ACP, for example) will handily swallow a double charge. There, it’s back to paying serious attention (which we need to do on everything when we reload; it’s just using a propellant that will spill over with a double charge adds an additional indicator if things aren’t done correctly).
A double charge in the case on the left. My load was 5.4 grains of Accurate No. 5. I loaded both cases with this charge, and then took the propellant from the case on the right and poured it into the case on the left. A 9mm can easily swallow a double charge of Accurate No. 5.A single (correct) charge: 5.0 grains of Unique in a 9mm case.The most Unique I could load into a 9mm case was 7.9 grains. A double charge would spill over the top of the case and be immediately noticeable (at least in 9mm; the .45 ACP case will take a double charge of Unique without a spillover).
Incidentally, when this happened, I wrote to Lee and asked them if they offered any accessories to prevent a double charge (my Star reloader has a mechanical feature that prevents this from occurring). The answer was no, but Lee advised using a propellant that, well, read the above again and you’ll know. I checked the literature that came with the Lee Classic turret press kit, and sure enough, Lee has a recommendation in there to do exactly what I describe here.
Hornady’s Powder Cop
When I posted earlier blogs on Facebook, a few people mentioned a reloading cop. In 50 years of reloading, I’d never heard of such a thing, but I found it on Amazon. Hornady’s Powder Cop die is a die with a pushrod indicator. You add it to a vacant station on the reloading turret after the propellant charging station and when the charged round goes into it, if the case is double charged the rod will go higher than it normally does.
Hornady’s Powder Cop. The idea is that a double-charged case will lift the rod another 3/16 of an inch or so.
I don’t think the Powder Cop is the answer for several reasons. The Lee Classic turret press doesn’t have an empty station in its turret (all four stations are taken by the Lee 4-die set), you would have to notice that the pushrod indicator rose marginally higher than it was supposed to, and I believe that if a double charge was present, the pushrod might just push into the powder and not rise enough to indicate the double-charge condition. The Powder Cop might be right for some people, but my equipment can’t use it and I don’t think it’s an effective check. If you missed the double charge, you would probably miss the rod extending upward a bit further, too.
The RCBS Lockout Die
RCBS offers their lockout die which is, in my opinion, the best option for preventing a double charge on a reloading press, if the press that has an open station. If the case has an overcharge or an undercharge (or no charge), the lockout die locks the press, which positively lets you know that something isn’t right. It’s a clever mechanical device that detects either and overcharge or an undercharge and then stops the process.
The RCBS lockout die. If the case has an undercharge or an overcharge, this device stops the reloading process.
Unlike Hornady’s powder cop die, the RCBS lockout die isn’t just a rod moving up and down. The lockout die stops the show and forces you to check the cartridge that has locked up press movement. I think it’s a much better approach. The problem, though, is that you need that extra station on either a turret or a progressive press, and I don’t have that on the Lee Classic turret press (so for me it’s a nonstarter). What it says to me is that if I were to buy a new press, I would want one that has an extra station. I think the lockout die is a stellar idea; I just don’t have the real estate for it on my press.
The Bottom Line
I’m convinced that I had a double charge in the round that burst in my 1911. I’m also convinced that it’s on my to prevent it from happening again. As explained above, here’s what I’m doing:
I’m slowing down and paying attention to what I do. There is no place for complacency in the reloading world.
I will continue to use my Lee Classic turret press, but I’m installing better lighting and standing up so I can see into the cartridge case.
I’m switching to a bulkier powder so that a double charge, if it ever occurs again, will spill over the case mouth and make a big, impossible-to-ignore mess.
So there you have it. If you have any thoughts on any of the above, I’d sure like to hear them.
Never miss an ExNotes blog:
Check out our Tales of the Gun page for more firearms and reloading articles.
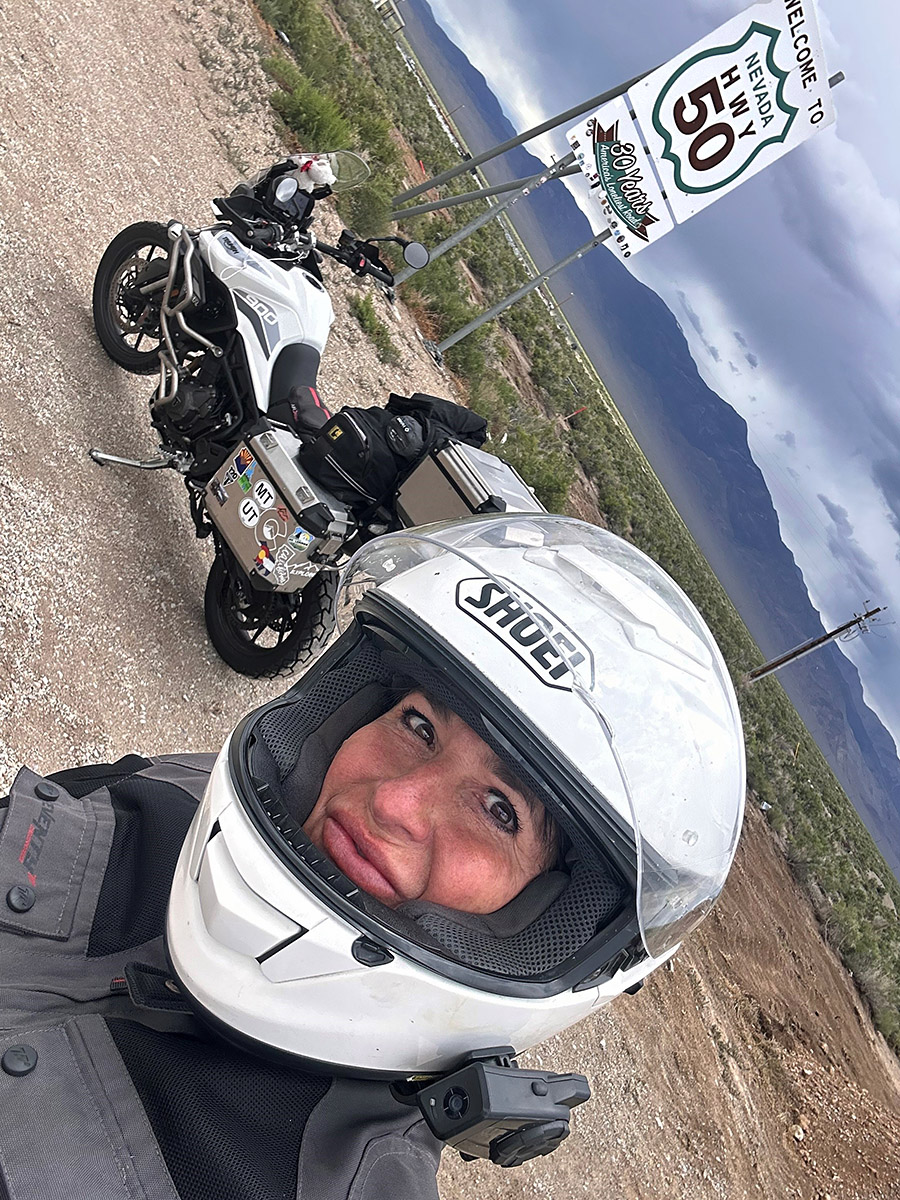
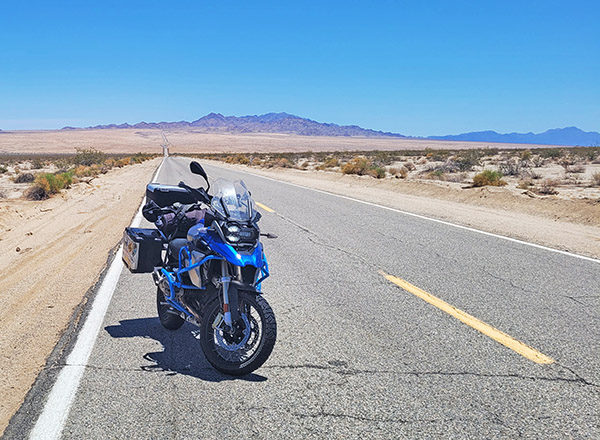
Embarking on a motorcycle trip from Arizona to British Columbia I set two goals for myself: to visit as many national parks as possible and to explore remote and intriguing roads. During my pursuit of the latter that I stumbled upon Highway 50, also known as the “Loneliest Road in America.” It offered the bonus of passing through the Great Basin National Park.
Like any good planner, I turned to social media for advice on surviving this desolate route (add in a touch of sarcasm). The responses I received were mostly negative, with warnings about the challenges of riding alone, extreme heat, lack of gas stations, and overall boredom. However, a few seasoned riders who were familiar with the road reassured me that not only would I survive, but I would also have the opportunity to earn a certificate attesting to my survival. With this mixed bag of feedback, I embarked on my journey, eager to uncover the truth about the Loneliest Road.
Highway 50, stretching from West Sacramento, California, to Ocean City, Maryland, is a scenic route that earned its moniker from a 1986 Life magazine article that described it as desolate and isolated. The section of Highway 50 referred to as the Loneliest Road is in Nevada. This road winds through vast stretches of remote desert landscapes, featuring rugged mountains and expansive plains that contribute to its reputation.
Traveling along the Loneliest Road offers a unique experience, characterized by long stretches between services. It is essential for travelers to come well-prepared, as gas stations, restaurants, and accommodations are few. Adequate fuel, extra food and water supplies, and an acute awareness of weather conditions, particularly during extreme heat or summer and winter storms, are crucial.
Despite its reputation for solitude, the Loneliest Road in America showcases stunning natural beauty, allowing travelers to immerse themselves in the vastness of the American West. Along the route, one can encounter remarkable attractions such as the Great Basin National Park, Lehman Caves, and several ghost towns. These highlights offer a glimpse into the unique charm and allure of this road less traveled.
Let’s dive into my own epic experience along this renowned route.
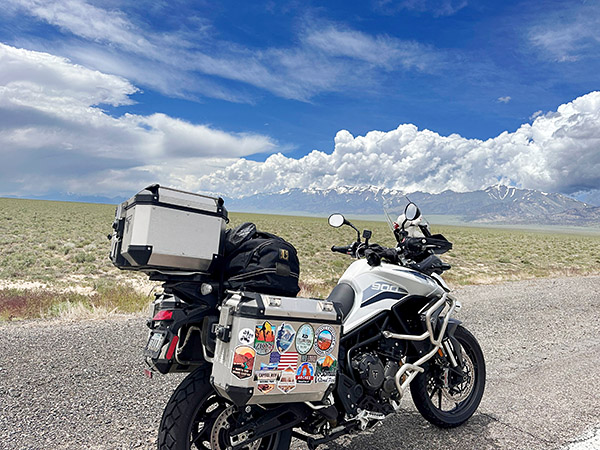
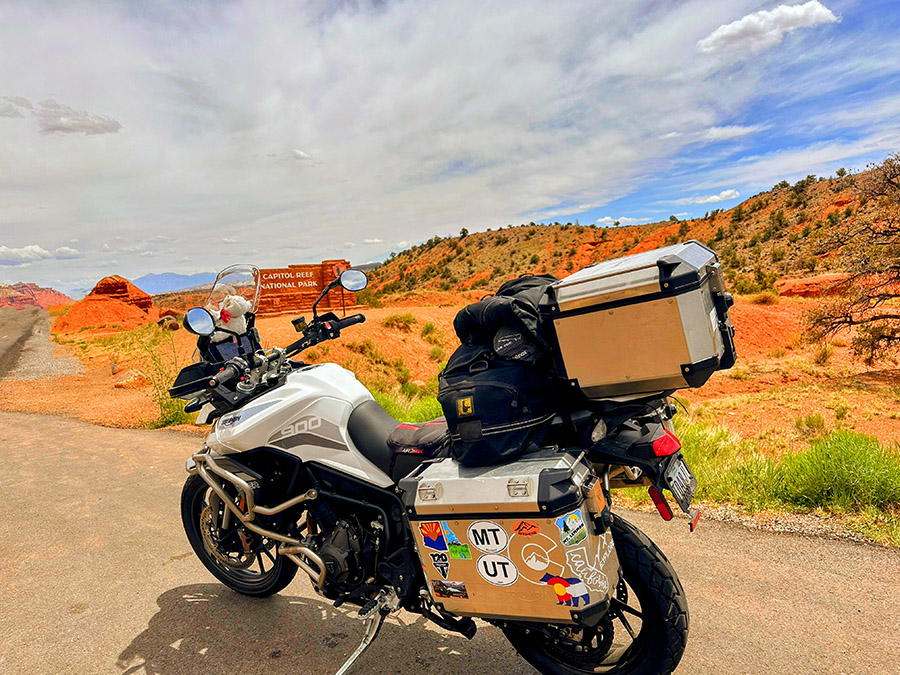
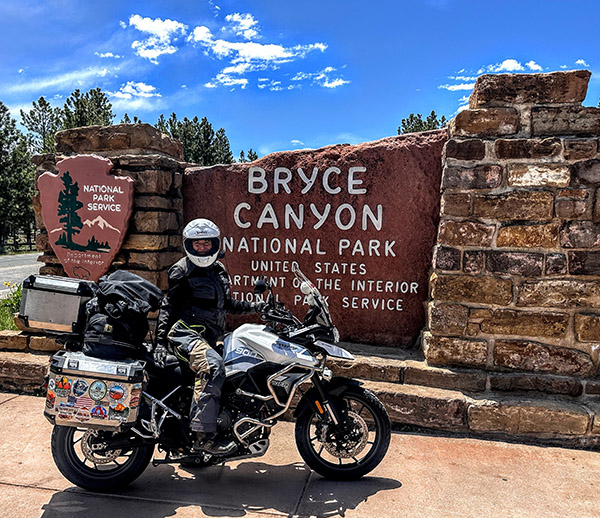
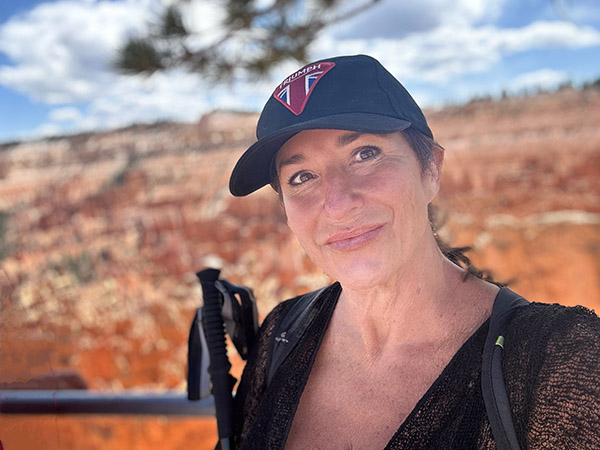
My journey began when I left my home in Sedona, AZ, riding my trusty Triumph Tiger 900 GT Pro, affectionately nicknamed “Tippi,” as she likes to take what I call unscheduled naps tipping over often at inconvenient locations. Loaded with gear for a summer of adventure, I set off on a bright June Sunday morning, spending five days exploring North Grand Canyon, Zion, Bryce Canyon, and the captivating Highway 12, before spending two nights in Capitol Reef.
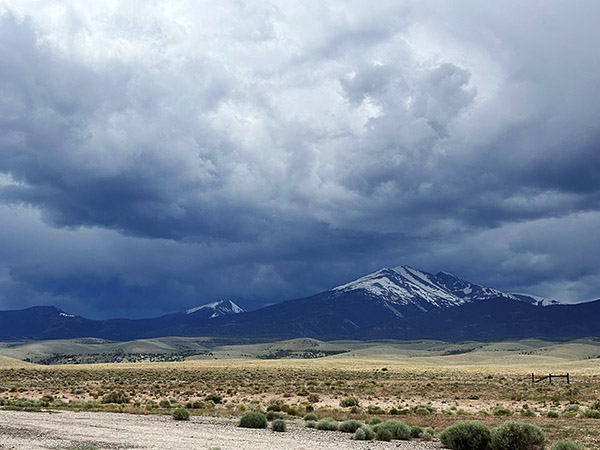
Leaving Capitol Reef, I eagerly anticipated joining the long-awaited Highway 50, where it intersected Interstate 15 in Utah. Initially, the road meandered through open plains with scattered ranches along the way, offering nothing too remarkable. However, about an hour later, the ride became more intriguing as the winds picked up. As I glanced ahead, an ominous sky threatened an impending storm. Riding past sand and salt fields, I witnessed a bewildering phenomenon—the salt in the fields seemed to defy the wind, rising straight up in vertical columns rather than blowing or swirling. Bracing myself against the wind’s force, I pulled over to capture this puzzling sight but struggled to capture it adequately, settling for a short video clip as proof of my encounter.
Continuing across more plains, I found myself nearing the turnoff to Baker and the Great Basin National Park, my intended destination for two nights of camping and sightseeing. As I gazed at the mountain, I found an angry and ominous sky with snow-covered peaks that seemed to dare me to face the challenges of reaching its 7700-foot elevation to my destination at Upper Lehman Campground. Rain and lightning accompanied me as I rode into the tiny town of Baker, where I hastily stopped at the Visitor Center to check the weather report and determine how cold it would get during the night. Assured of temperatures above freezing, I pressed onward, rewarded with an epic campsite at Great Basin. Nestled alongside the rushing Lehman River, my campsite offered complete privacy, and I reveled in the wonders of the park over the next two rain-filled days and nights. The Lehman Cave tour was an unforgettable highlight not to be missed. As an avid hiker I loved that I was able to experience an epic 7-mile round trip hike along the mountain following ever upwards along the Lehman River complete with snow covered meadows and towering views of the mountain summit.
During my stay in Baker, Nevada, I discovered two places that I highly recommend. The first is the 489 Grill and Whispering Elms Motel and RV Park, which boasts a bar, RV and tent camping facilities, firewood, and the best burger I have ever tasted. Trust me when I say this is a significant claim, as I am a true burger aficionado. The food is not the only remarkable aspect; the owner and staff are incredibly hospitable, making your visit all the more enjoyable. The second recommendation is the Bristlecone General Store, a quaint establishment offering unique local gifts, an unexpectedly diverse selection of food options given its small size, and a coffee bar serving locally roasted beans by a blind roaster with an extraordinary sense of smell, resulting in a delightful brew devoid of the bitterness found in commercial beans. Among the store’s charms, one staff member named Rachel stood out for her warmth, hospitality, and willingness to share insights about Baker and local hidden gems. I was informed that Sandra’s Food Truck serves excellent and affordable Mexican cuisine—an experience I now eagerly anticipate for my future visits.
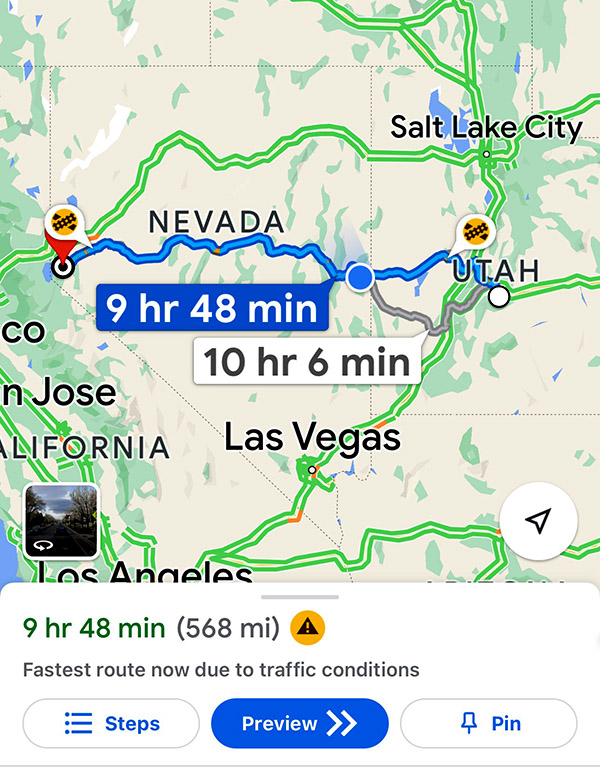
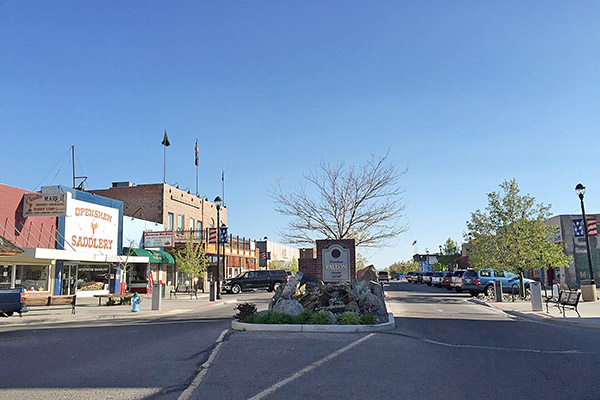
Reluctantly bidding farewell to Baker, I rejoined Highway 50, heading towards my next destination, South Lake Tahoe. Contrary to the dire warnings of scarce gas stations, I discovered that this notion was unfounded. Approximately 70 miles down the road, I arrived at Ely, another small mining town with plenty of services. After a quick refuel, I resumed my journey, realizing that the otherwise flat stretches of road were intermittently punctuated by mountain passes exceeding 7000 feet in elevation. These segments offered breathtaking vistas and enough twists and turns to satisfy both Tippi and me.
My first mountain pass, before descending into Ely, Nevada, presented an exhilarating ordeal with rain, lightning, and a brief ten-minute ride through hail. Eighty miles further, I found myself in the town of Eureka, where the threatening skies curtailed my exploration time. Nevertheless, I managed to visit a few must-see attractions, including the Opera House, built in 1879, the still-functional Courthouse of the same vintage, and a brief excursion to the town’s cemetery, where a variety of burial sites represented different social organizations, religious groups, and ethnicities. This walk-through history provided a fascinating glimpse into the town’s past.
Continuing on Highway 50, with the ominous skies in my rearview mirrors, I was reminded of the urgency to press on towards my next stop—Austin, NV. This old mining camp retains its rustic charm and has evolved into a haven for camping, hiking, and mountain biking, thanks to its proximity to the towering Toiyabe Mountains. During a pit stop, I encountered a large group of riders following the Pony Express Trail, who praised my adventure, while I vowed to return in the near future to explore that historic route.
Reluctantly bidding farewell to this enchanting mountain town, I embarked on another 112-mile stretch to Fallon, Nevada. This promised a well-deserved lunch break and refueling opportunity before the final leg of my journey to Lake Tahoe. As hunger pangs intensified, I hurriedly pulled into the first gas station I encountered. Curiously, the ground appeared slanted, making it impossible to safely park my bike with its kickstand without an extreme lean. Oddly, as my kickstand tends to be a bit high, I often worry about Tippi toppling over. Trying another station, I realized that my kickstand was not misaligned but broken—a sudden and unfortunate realization. With every ounce of strength, I fought to prevent Tippi’s full weight from pinning me between the gas pump curb and the engine crash bar. As I cried out for help, a kind soul named Caleb rushed to my aid, assisting me in righting Tippi. Examining the kickstand, I conceded that my lunch break was a lost cause. I refueled while seated on my bike and came to terms with the fact that I would have to ride the rest of the way without lunch and with a dangling kickstand, just inches off the ground.
Determined to soldier on, I pushed forward to Carson City, Nevada, before ascending the switchbacks and descending towards Lake Tahoe. The ride and the stunning view of the lake were awe-inspiring. I completed the remaining portion of my day’s journey with ease, covering over 400 miles. A warm hotel bed awaited me after seven nights of camping, and I eagerly anticipated reuniting with my boyfriend, Mike Huber, a fellow adventure rider who also happens to be a badass. I recommend checking out his posts on ExhaustNotes for a combination of insightful rides and outrageous travel stories.
In conclusion, my time on the Loneliest Road in America was an unforgettable experience. Despite the dire warnings I received, I found this historic stretch of highway to be well worth the ride. Contrary to popular belief, there are plenty of services available along the route, and the road itself is intermittently adorned with scenic mountain passes. The friendly locals and the sense of freedom that permeates this lightly traveled road are rare treasures that I seldom encounter. If you’re seeking a unique journey through the American West, I wholeheartedly recommend venturing onto the Loneliest Road in America.
Don’t forget to help bring content to you: Please click on the popup ads!
I probably shouldn’t badmouth them because they seem to have the business model sewn up and are industry giants, but Partzilla sucks. I’ve ordered quite a few ZRX parts from them and several things they do annoy me. First, I get CT to order everything because it just works out better. Next, many parts you take the time to look up on their parts diagrams are not priced unless you go through the hassle of signing in to their website. Comparison shopping is difficult. The worst is when the page shows the part as available and in reality they don’t have it. This happened to me with the reed valve gaskets. The site said available (which is not the same thing as in stock) but I’ve been waiting about 3 weeks. CT emailed Partzilla about the situation and got a semi-snarky email in return. Is it better to lose a sale or lose a customer?
I get my Kawasaki parts from Southwest Suzuki Kawasaki in Alamogordo now. It’s actually faster than Partzilla and they give me a little discount if the part is outrageous (like those float needles). I go see Dave or Taylor at Southwest with part numbers I get off the Internet and the stuff is there within a week. Maybe the massive vertical integration of the ‘Zilla monster has reached an evolutionary dead end. I’m done with them, no matter that they’ve bought the first three pages of results on Google.
Rant over.
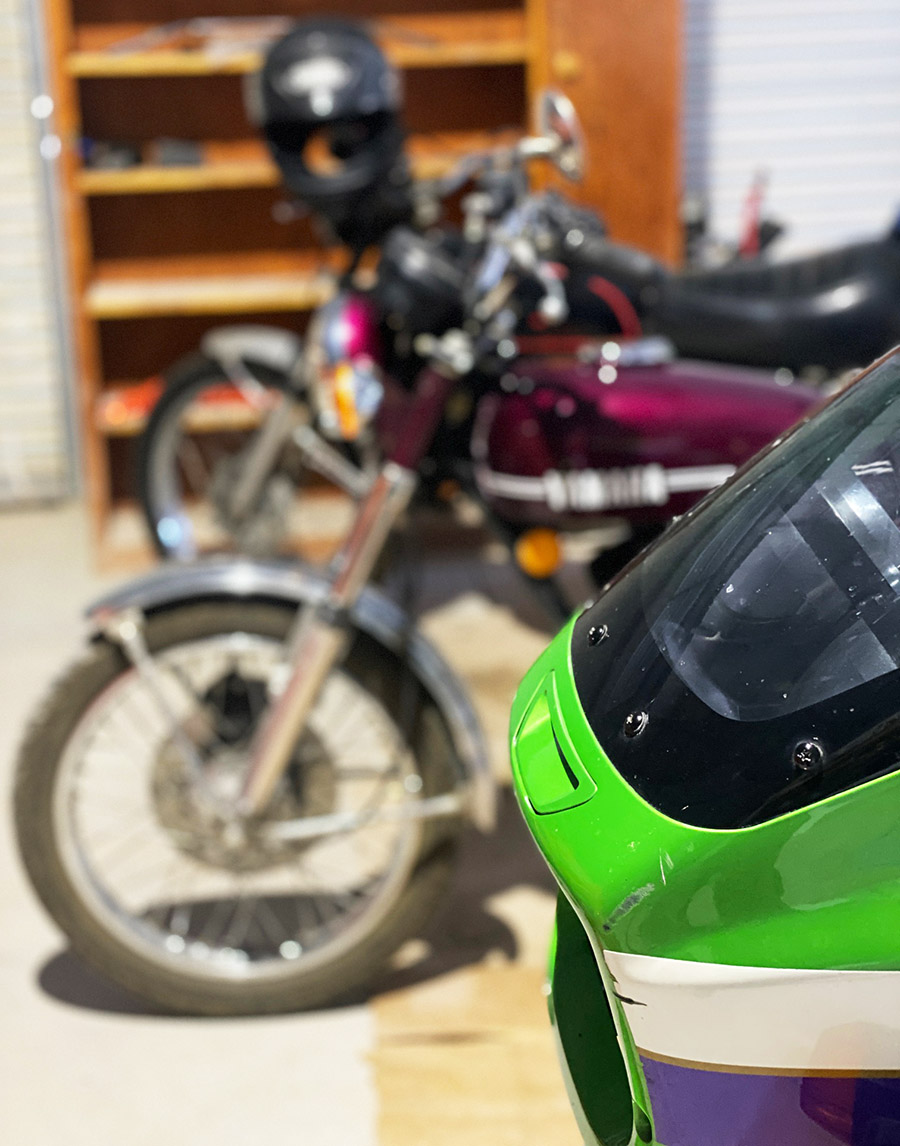
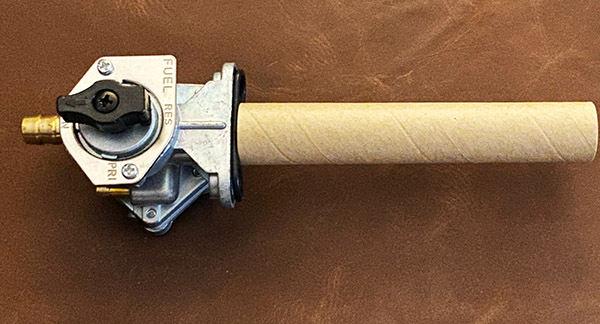
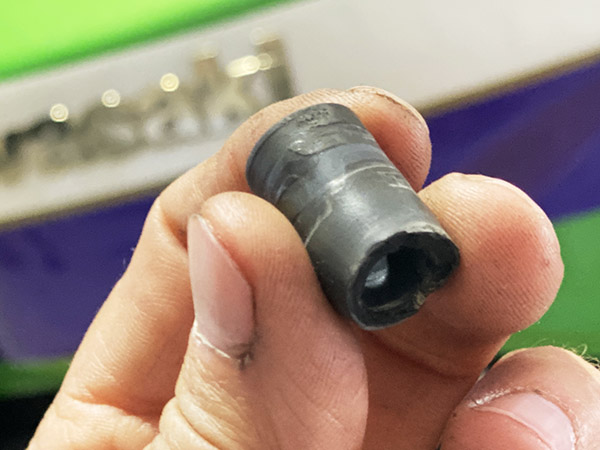
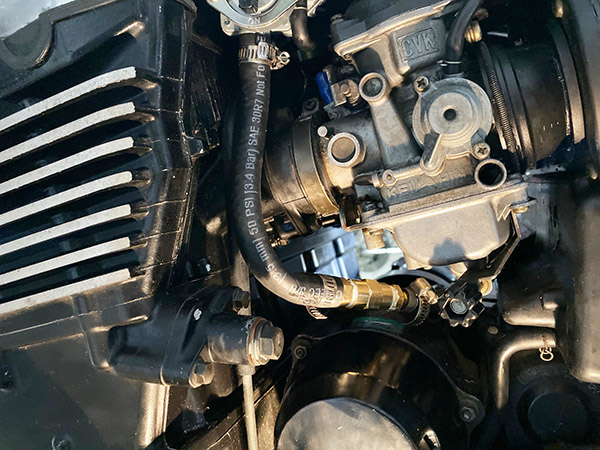
My Chinese petcock showed up and it looks exactly like the original Kawasaki petcock and fit perfectly. Unfortunately, when I tried to connect the old fuel line it had a pinhole leak right where the line expands from 5/16-inch to 3/8-inch. I don’t know why Kawasaki went with the oddball molded fuel line. A 5/16-inch line will provide plenty of fuel to the 1100cc Kawasaki engine.
This is horrible but there are reasons why it is horrible. First, the OEM Kawasaki fuel line would need to be ordered and I don’t want to wait for it. Second, The original line connects to a plastic T-fitting between the No. 2 and No. 3 carburetors. Knowing my luck with old plastic fittings, I feared that replacing the hose entirely would lead to a broken T-fitting, which would mean pulling those damn carbs again. Then there’s the wait for a new T-fitting. I decided to let sleeping T-fittings lie and added a 3/8-inch to 5/16-inch hose barb adaptor complete with an ugly pipe connection between the two. Then I ran a new 3/8-inch line to the petcock. I mean to fix this mess later on but it works and doesn’t leak.
I gave up on getting the gaskets for the reed valves and made two block-off plates to seal the air intake to the exhaust ports. Then I spun up a little aluminum plug to seal the hole in the airbox where the reeds connected. I didn’t take photos of this part because I was in a hurry to hear the bike run.
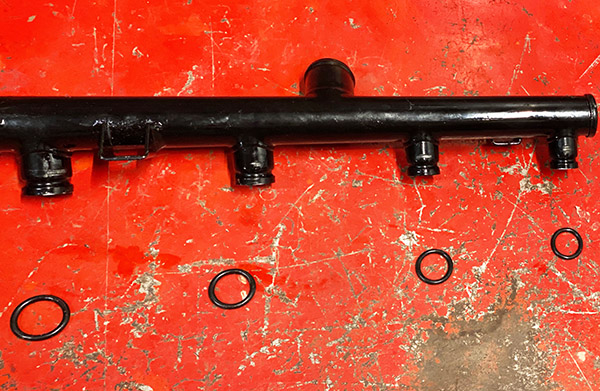
I installed the rest of the radiator plumbing and started to fill the Kawasaki radiator with coolant and found the slippery green stuff running out the bottom as fast as I put it in. The front log manifold was pissing coolant, which was odd because I had replaced the four O-rings with new Kawasaki parts. This log manifold is behind the header pipes and not easy to access. Off came the pipe and the O-rings looked like they were deformed a bit.
My mistake was lubing the O-rings on the pipe manifold. This made them too slippery and when the pipe was pushed into position the rings slid out of the pipe O-ring grooves. I gave the rings a through examination and decided to clean all traces of lube from the pipe and O-rings. I shoved the thing back together, reconnected the hoses and it leaked as much as it did last time.
I pulled the log manifold for the third time and cussing up a storm. I tossed the new Kawasaki O-rings and dug some Harbor Freight O-rings out of an assorted kit I bought years ago. I was so frustrated I managed to cross thread one of the bolts that hold the manifold onto the engine block. Back off comes the manifold. For the fourth time. Remember, I’m doing all this behind the header pipes and I can barely get my fingers between the pipes.
I managed to get a tap started into the cross-threaded hole and using the tip of a finger to hold the tap and needle nose pliers to turn it, I ran the tap into the hole and straightened out the cross-threaded bit. Amazingly, the hole holds tension and I got the manifold back in place and the hoses connected. The manifold didn’t leak.
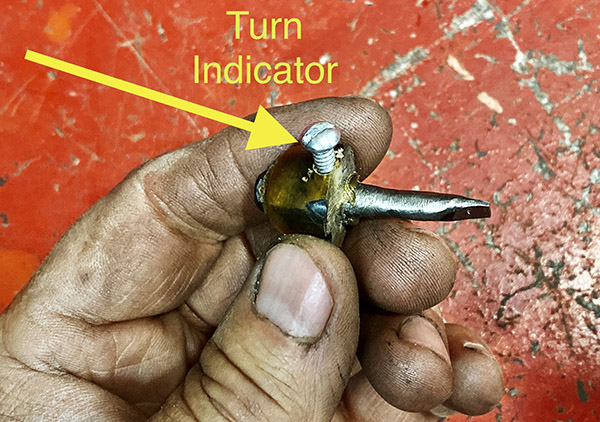
With the radiator full of coolant I started the bike. It smoked quite a bit but after a few minutes the smoke eased off. I had set the idle screws at 1-1/2 turns out but the bike seemed rich. The idle mixture screws are accessible with the carbs on the bike but you need a special, shorty screwdriver to turn them. I made one out of bits and pieces. Make sure you have some sort of identifier so you can count the turns by feel. I used a small screw as my tactile-pointer and reset the screws to 1 turn out.
I tossed the seat on the bike and went for celebratory tacos at the Alomar Diner in Tularosa. The bike ran fair if a little rich. After I ate the tacos the bike wouldn’t start. What with everything having been messed with in the preceding weeks I wasn’t sure where to begin. So I kept cranking. And Cranking. And cranking.
Then I started smelling gas so I held the throttle wide open and cranked some more. The bike started making sounds like it wanted to start. I kept cranking. The Kawasaki sputtered to life stinking of fuel. I rode the bike home and it was running rich. I calculated my fuel mileage as 36 miles to a gallon. The ZRX1100 fuel tank vent was whistling like a teapot on boil and gave a gush of pressure when I opened the gas cap. This led me to believe there was a problem with venting.
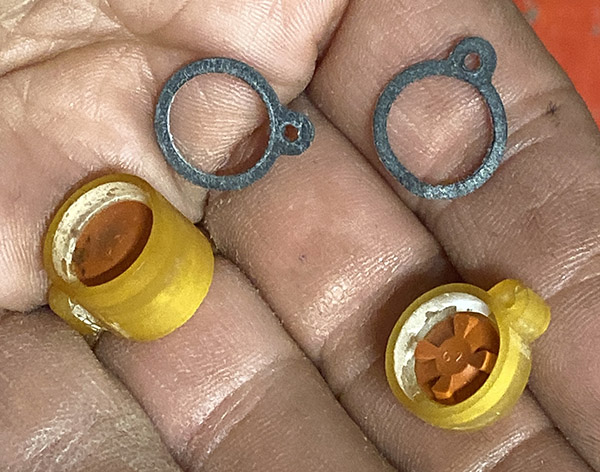
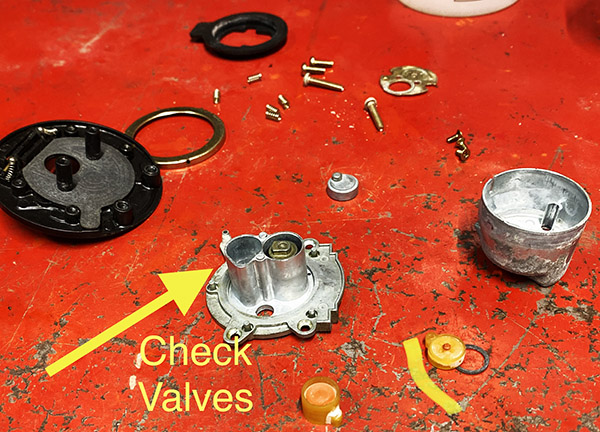
Inside the ZRX gas cap is some sort of check valve assembly. It consists of two little red rubber valves and I couldn’t figure out how tank pressure was supposed to vent out. The ZRX has a vacuum operated petcock and with only a little pressure the shutoff diaphragm can be overridden. It’s a fine line. Naturally, removing the source of the problem is easier than making it work as intended so I removed the check valves and the bike whistled no more.
The bike was running much better and if anything was now lean-ish off idle. I did a 200-mile test loop through the mountains and the old ZRX1100 returned 53 miles to a gallon.
The Rex is running pretty well right now. I hate to do it but I’m going to buy four more Kawasaki O-rings for that coolant manifold and try again. Even though they aren’t leaking I don’t trust the Harbor Freight O-rings for longevity. I’ll order a new OEM fuel hose and I might take a stab at installing it. I also want a new fan switch O-ring for the radiator. I’m also going to set the idle mixture screws to 1-1/4 turns to see if it helps the off-idle lean spot, The ZRX stumbles a bit off the start. Once all this is sorted, watch for a ride report on the ZRX1100 in a future ExNotes blog.
Throughout my adult life (although, many will argue I have yet to reach mature adulthood) one of my greatest passions is motorcycling. Like many of you, I seek out the most beautiful and exciting roads to experience on two wheels. Whenever possible I try to achieve this on a global level and not limit this quest to just my state, or even my country. This isn’t always the easiest objective to reach. Many roads that are the pinnacle of any rider’s dreams are usually quite far off the beaten path. This can seem like a deterrent to many, but my mindset is to use the distance to reach these places only adds more depth to the adventure and in doing so adds not only miles, but new friends and stories to each road.
Transfagarasan Highway
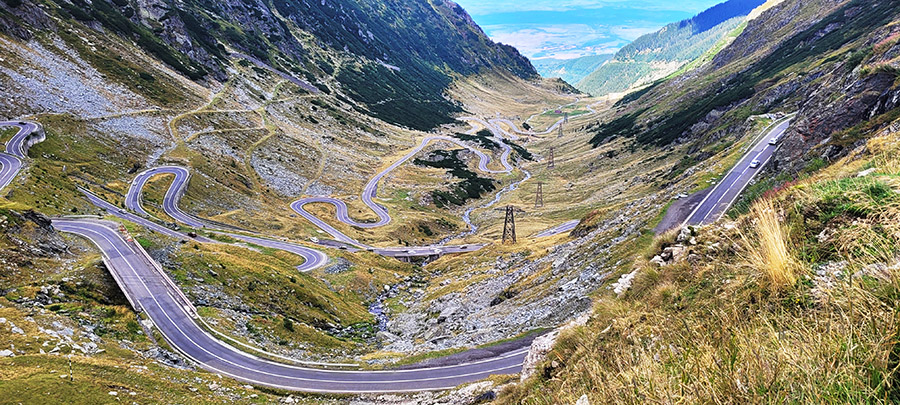
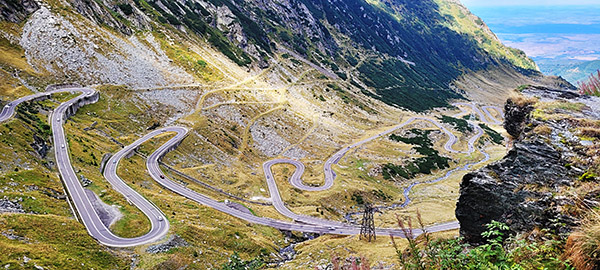
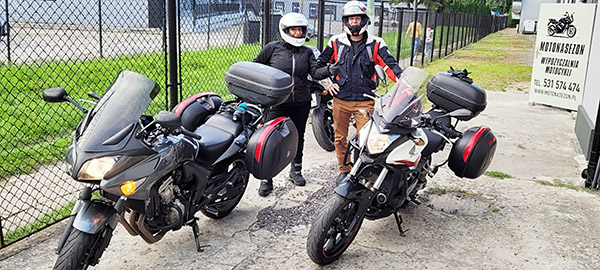
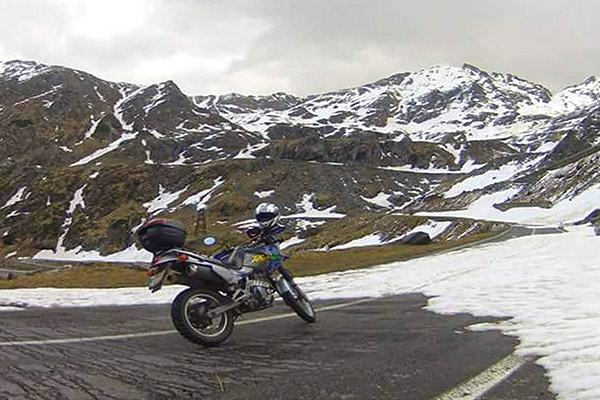
If you perform a Google search on “best motorcycle roads on Earth” or any similar phrase, what will appear before you in the top images will be a photo of the Transfagarasan Highway. This mind-blowing highway is nestled deep in the Transylvania Mountains of Romania, and for us it was a four-day ride from Krakow, Poland. This is where my girlfriend Bobbie and I rented our Honda motorcycles (she had a CBX500 and I had the CB600F).
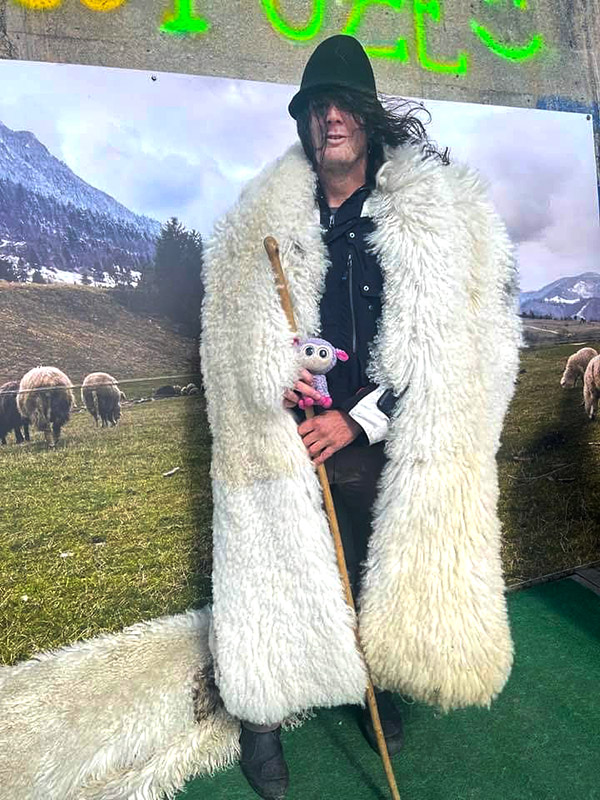
We began the day waking up in a yurt at an amazing moto camp in Sibiu, Romania that is hosted by Doru Dobrota. Doru has been running this camp out of his family’s old mountain cabin for years and over that time has meticulously grown the camp to a perfect launching point to the many beautifully challenging roads of Romania. Once we finished breakfast, confirmed the weather would cooperate with us, performed routine maintenance checks on the bikes, and a had chat with some other riders staying at the camp, we were ready to set out for one of the greatest days possible on a motorcycle.
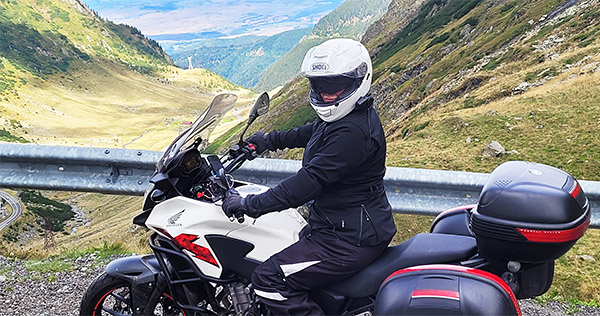
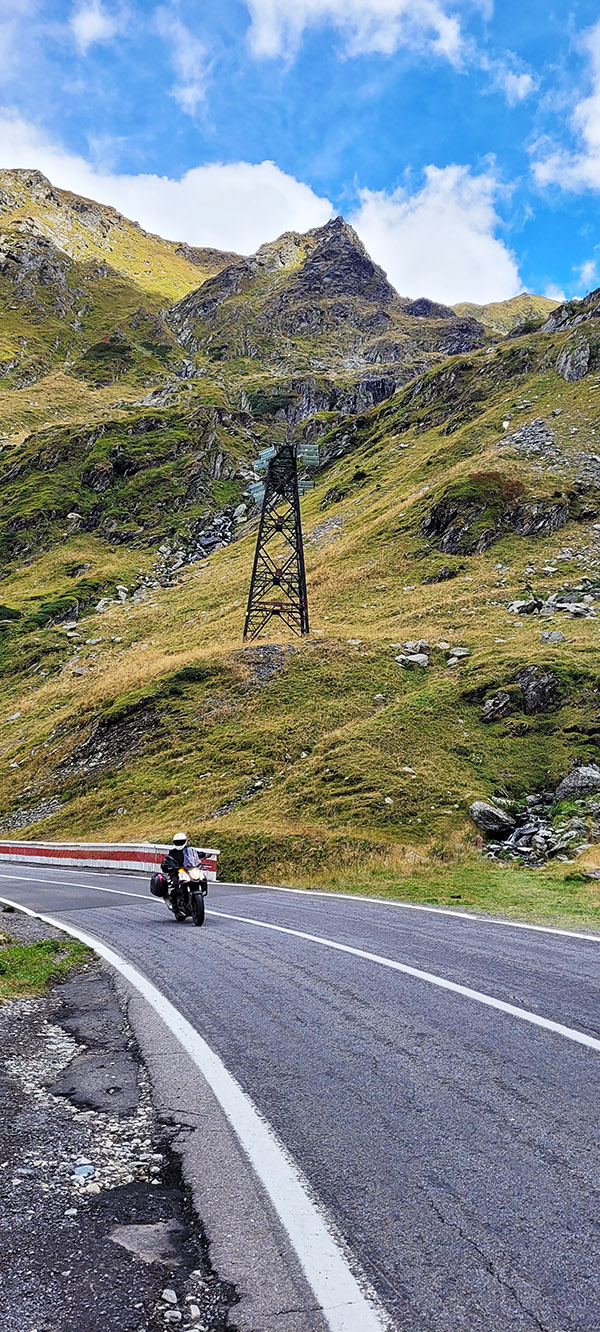
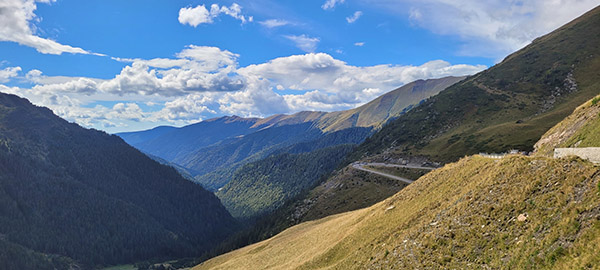
It was a two-hour ride through some remote Romanian villages that we had to remain alert for deer, cattle, horses, and the usual obstacles to dodge around as we traveled from Sibiu to the base of the mountain pass where the roads started really becoming fun. Once the switchbacks began in the lower parts of the pine forests, we quickly twisted the throttle and leaned into the perfectly paved corners as we begin to ascend the highway to where you eventually are at the bottom of what would be like in skiing terms a giant bowl. Looking up I am instantly in awe of what looks like a gigantic matchbox car racetrack thrown recklessly together by a 6-year-old.
After regaining our emotions of what lies before us, we jump on the Hondas and hit the throttles hard. The road has nonstop switchbacks but since its so open it allows you the ability to constantly overtake any vehicle in front of you easily. This enables us to really lean in deep to each corner pushing the red line of these little Hondas, as well as challenging our own riding abilities. We continue to traverse the switchbacks for what seemed like forever and just as we summit the pass, we stop for a quick breather at a waterfall to absorb what we have just completed and imagine what was ahead of us.
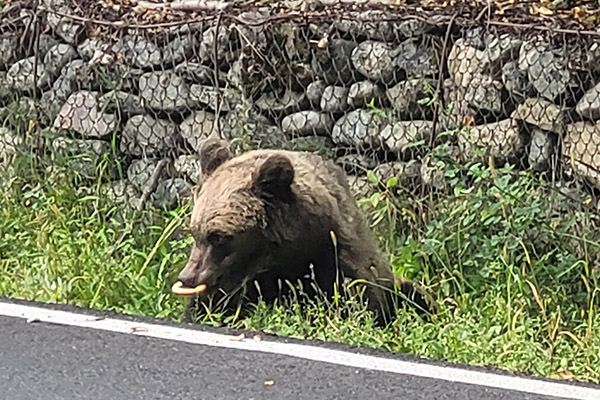
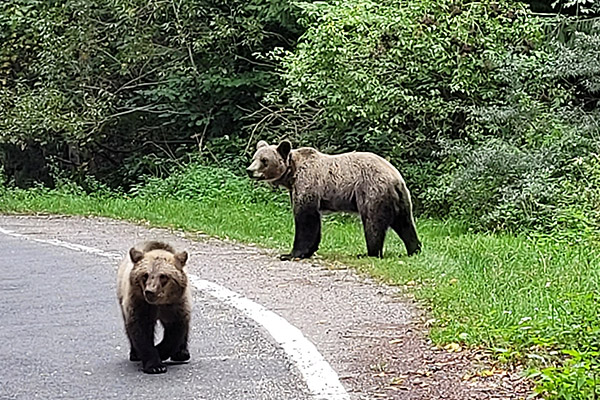
We now begin our decent down the south side of the pass. The southern side is less dramatic but nonetheless has spectacular views for miles until we are well below the tree line and back into another tight pine forest with switchbacks. This seemed less dramatic until out of the corner of my left eye I spotted something crawling onto the road. At this point the road has some sand on it, so we were only traveling at about 25 miles per hour. My first thought was a deer, but when I was able to decipher what it was, I had to stop and shake my head. It was a grizzly bear eating a bagel. Now THAT is worth stopping for a photo of. As I am taking the picture, I hear a loud shout through my headset “Go! Go! Go!”
I looked in front of me and there were three more grizzlies. What was so concerning at this point was they consisted of a mother bear and two cubs, fully blocking the road. So, I have one next to me eating a bagel and three in front of me. I hang my head down and reply over the headset with my usual response to when I am in a bad situation “So this is how it ends…” We sat extremely still on the bikes for a few minutes until the bears dispersed in front of us, retreating into the thick pine forest.
As the sunlight retreated into the dense forests, we still were admiring the beauty of the road and what Romania had shined upon us this day. After a fresh fish dinner and the semi comfort of a hostel bed we were able to fully absorb and appreciate the experience for having ridden one of the greatest roads on Earth: The Tranfagarasan Highway.
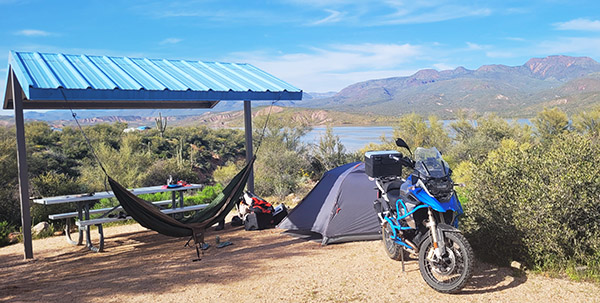
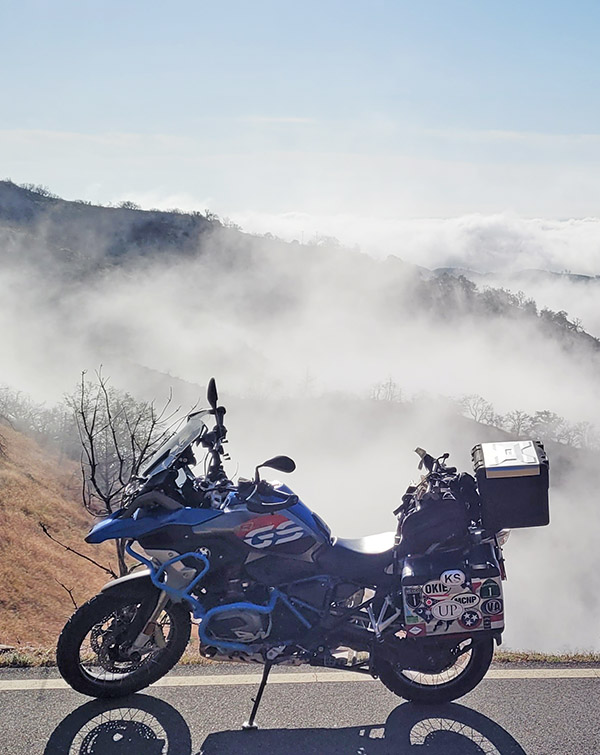
It feels like the perfect time to do a write up on packing for a long-distance motorcycle trip. I left Sedona, Arizona, two weeks ago for a motorcycle journey to British Columbia on my BMW GS1200. I didn’t quite pack everything I own, but close to it. Having recently taken a hiatus from my day job there is no time frame for returning to Arizona other than when the weather changes in the Fall. With this being the case packing had to be tight, yet diverse enough for every possible type of weather that I may encounter.
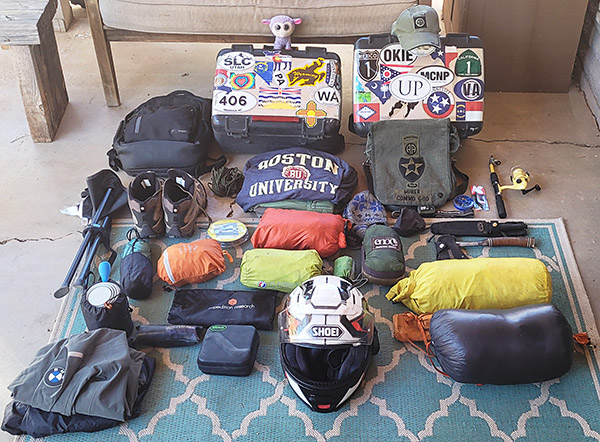
My philosophy has always been less is better. This holds even more true when you have such minimal storage space on a motorcycle. There is no need to have every centimeter packed to the gills. Having a bit of remaining space allocated is important in the event you need to add gear or choose to pack sloppily after camping in the rain. That buffer space should be held sacred. So, here is everything I am bringing along this journey.
Kelty 1-person Tent
Enu 2-person hammock (I like a larger hammock so I can wrap up if it’s cold)
Big Agnes sleeping bag (15 degree rated)
Laptop bag with chargers and backup portable battery
Luci Llight
Hiking boots
Stool
Cooking pot, cup, utensil, propane
Towel
Portable grill (for throwing a steak or freshly caught fish on top of some coals)
25ft of paracord (usually for additional hammock straps as needed)
Day pack for hiking
Tire repair kit
Compressor
Fishing gear
Jumpmaster knife
Hatchet
Air mattress
Air pillow
Raingear (top and bottom)
Leatherman
SpotGen3 GPS (My Mom likes to know I made it to camp alive)
Headlamp
3-liter expandable water blivit
Swimsuit
2 pairs of pants
3 pairs of socks
3 pairs of underwear
3 t-shirts
1 pair of shorts
Duct tape
Electrical tape
Sweatshirt
Baseball hat
Riding jacket
Lambykins
Military side pack (for all fishing gear)
Winter hat (my Mom knitted)
Currently 10 days into this trip with 8 nights of camping in numerous weather conditions and I have remained quite comfortable. Another barometer of success is when someone walks by my campsite as I am laying in my hammock reading a book and they comment “WOW, you fit ALL that on your motorcycle?”
I just smile and reply with a “yup.” I am now in northern California and will start hitting possibly more wet and cold weather so I will see how my gear continues to stack up against the elements as I travel further north with no real itinerary. The main objective of this trip is to slow down, enjoy the moment, be present, and meet up with old and new friends along the ride.
Let me know if there is a piece of gear you feel I am missing or that you hold close during your long-distance motorcycle trips. I am always interested in improving my packing and living conditions while on the motorcycle.
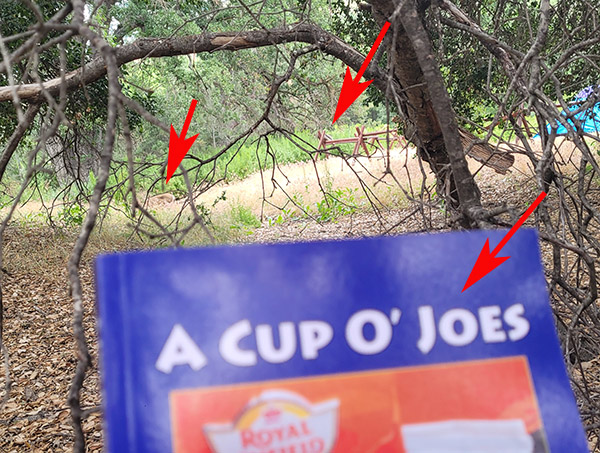
Hey, a quick photo from this trip…there are two Joes, a deer, and two wild turkeys in the picture below.
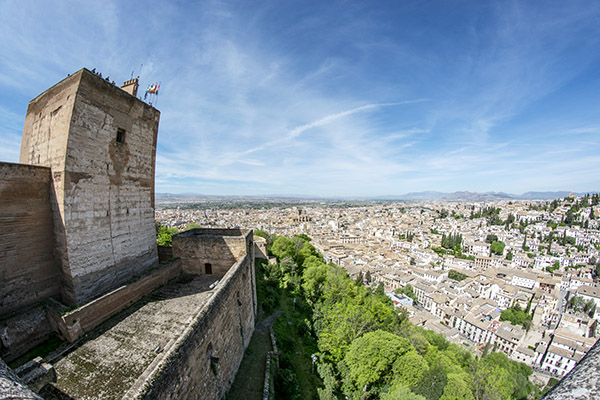
It doesn’t get more Spanish than the Alhambra. Until this visit if anyone had mentioned Alhambra I would have thought of our Alhambra here in California, but this was the real deal: The original Alhambra in Granada, Spain.
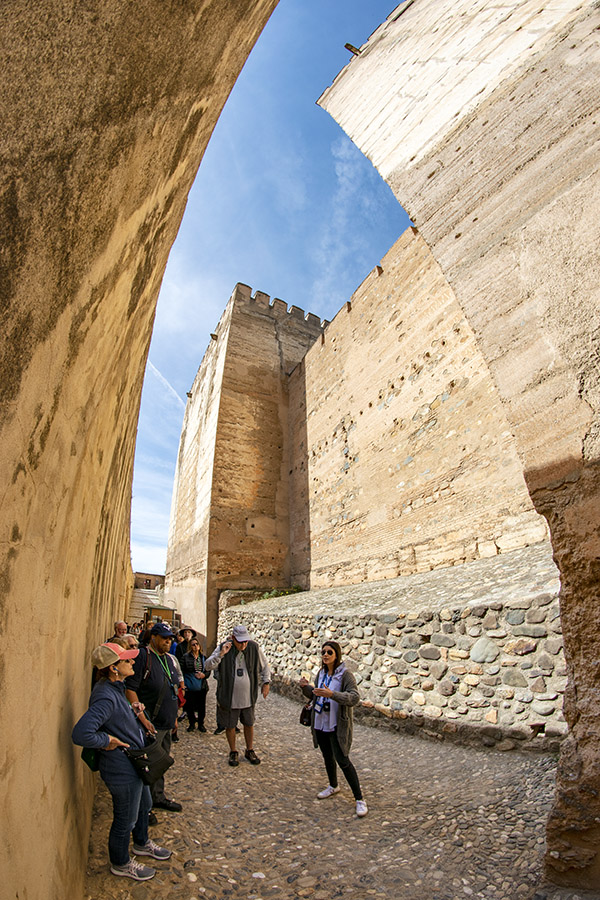
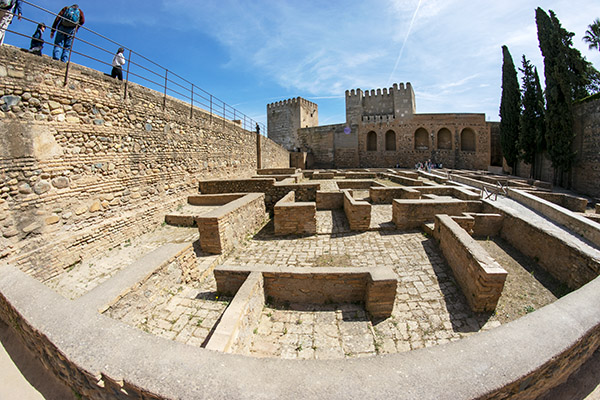
Walking the streets in and around the original Alhambra fortress. The red comes from iron in the clay brick construction. The walls aren’t really curved; the curvature here is from my Rokinon 8mm lens. It’s manual everything (f-stop, shutter speed, and focus) when mounted on my Nikon D3300 digital camera.
Alhambra translates from Arabic as “the red fortress.” The Moors controlled the Iberian peninsula from the early 8th to the 15th centuries, and many Spanish words and names include the syllable “al” (Alava, Alvarez, etc.). “Al” in Arabic means “the.” “Al” became “el” in Spanish; “al” remains the first syllable many Spanish words.
The foundations of an earlier structure show the area was first fortified in the 8th century by Visigoths (Germanic people who were part of the Roman Empire). The Arabs arrived next, and they hung around for 800 years. Our visit to the Iberian peninsula was a bit shorter (we were there for 15 days).
A wide angle photo of the Alcazaba (the Citadel) and its interior. This is the oldest part of the Alhambra.
The Alhambra’s ownership changed many times. Moorish rule ended in 1492 when the Emirate of Granada surrendered to King Ferdinand II and Queen Isabella (she financed Christopher Columbus’s expedition to America). Ferdinand II and Isabella only lived in the Alhambra for a tumultuous few months. While there, old Ferdinand and Isabella expelled Spain’s Jews unless they converted to Christianity, and that started the horror known as the Spanish Inquisition. I didn’t know this when we visited the Alhambra; I learned it while writing this blog. I suppose that’s good; I might not have enjoyed the Alhambra as much if I knew this while I was there.
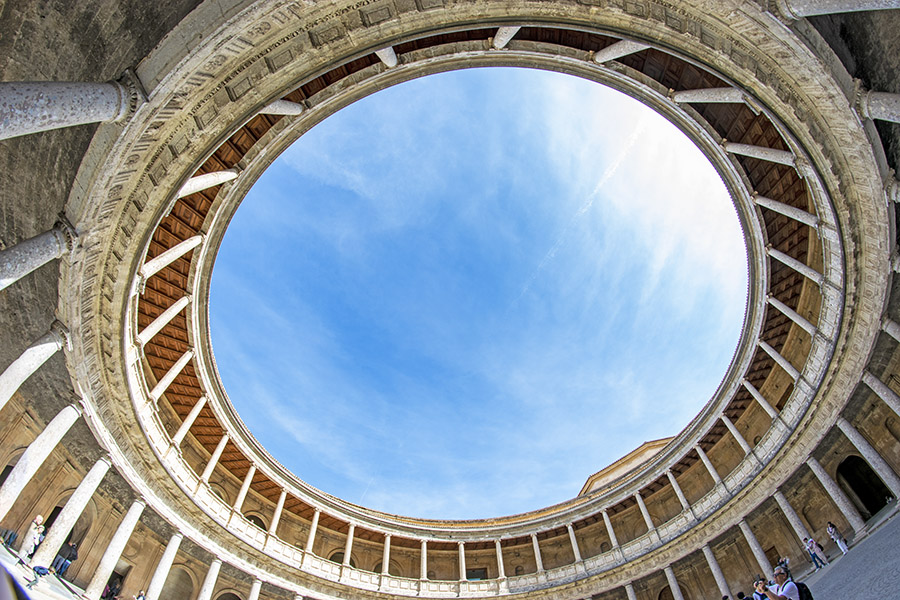
Inside the Palace of Charles V’s courtyard, an Italian-inspired building commissioned in 1527.
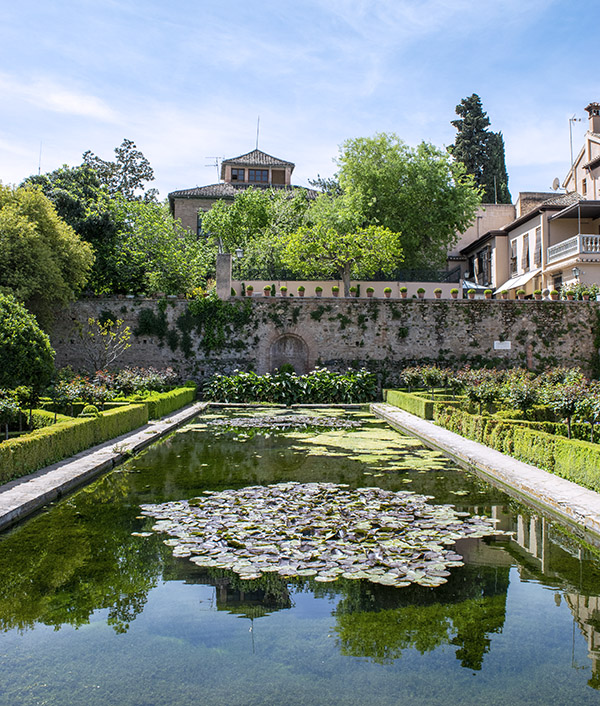
We walked the grounds of the Alhambra most of the morning. There were the fortress and palace buildings described above, the inevitable souvenir and trinket shops, and stunning gardens and courtyards.
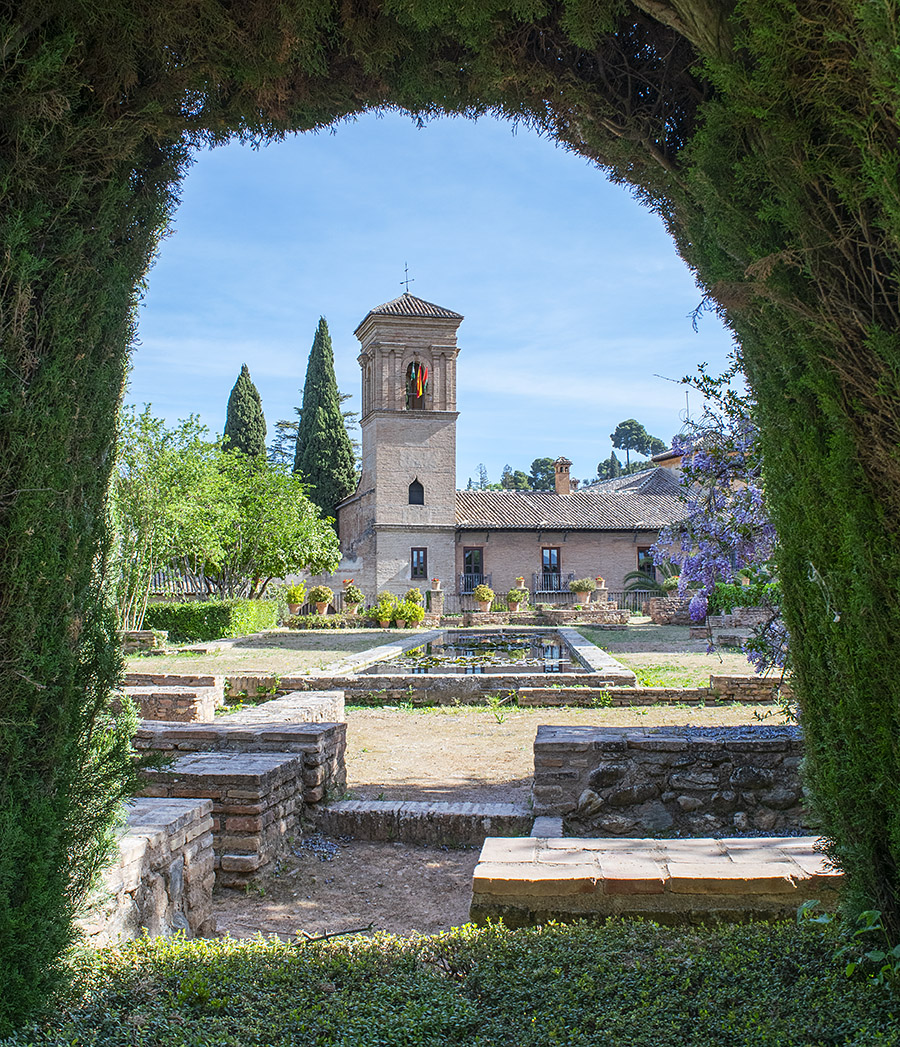
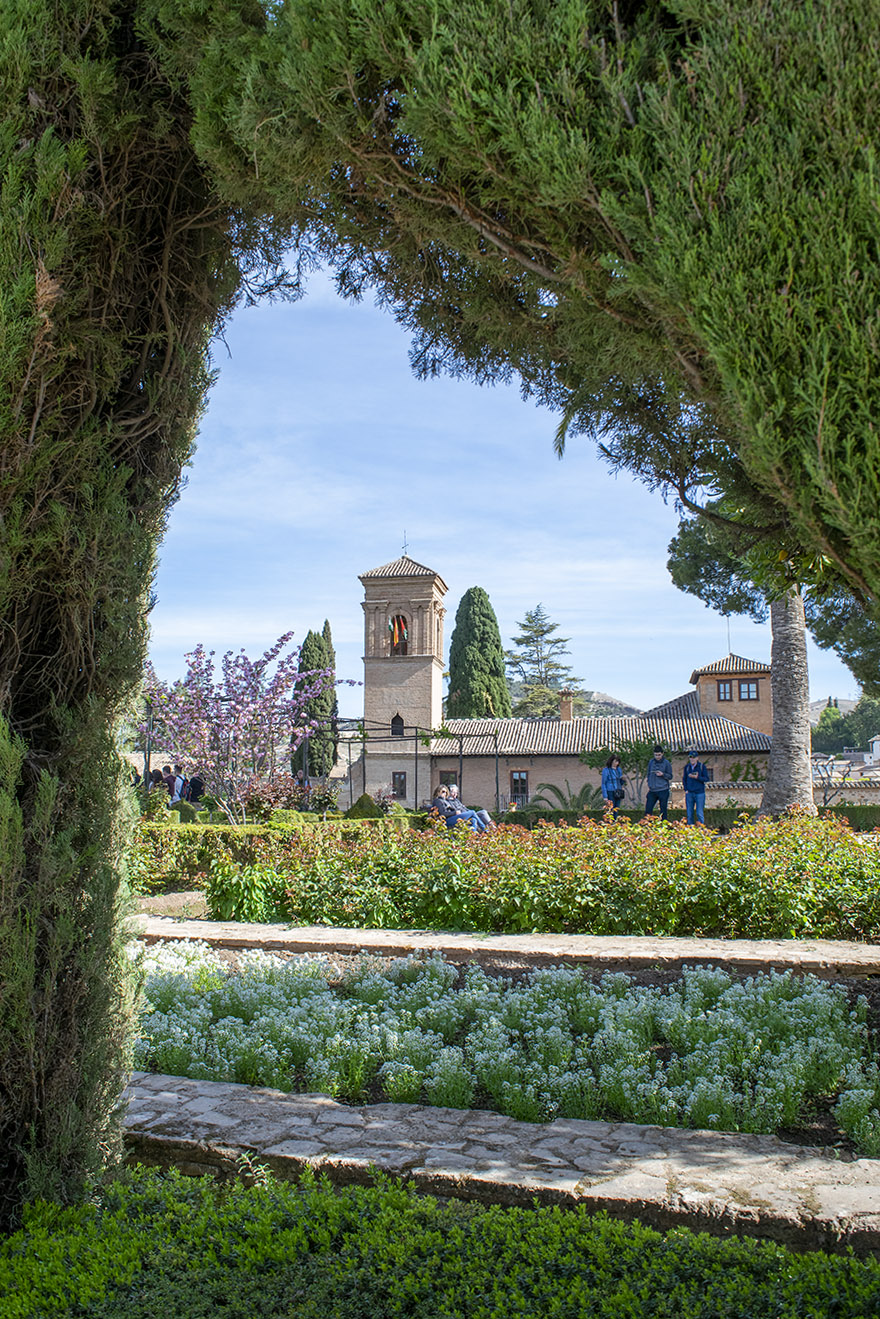
One of several pools and gardens in the Alhambra. It was almost too much to take in on a single visit. I think I just decided a return is necessary.A magnicently-framed photo of the Convent of St. Francis, also known as the Palacio del Convento de San Francisco. It was built over a Moorish building. Today, it is a hotel. I shot this photo with the Nikon kit 15-55mm lens, which is not a high end lens. The original photo doesn’t show the rich greens you see here (they were all very dark), but because I shot in RAW, Photoshop’s auto adjustment really made the picture come alive. The is the same structure and vantage point you see in the photo at the top of this blog.
After taking in the courtyards we entered the fortress area. The photo ops were phenomenal.
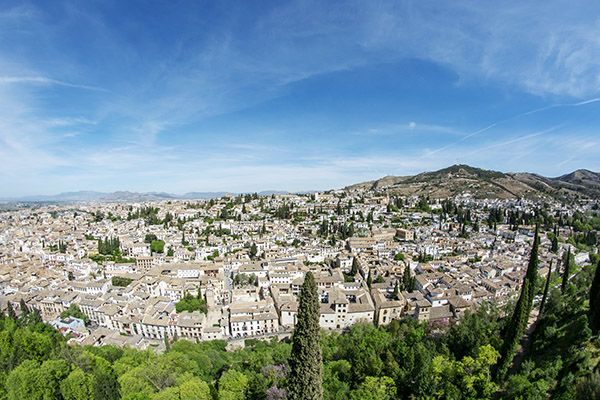
The view from the Alhambra overlooking Granada.Another view of Granada from the Alhambra.
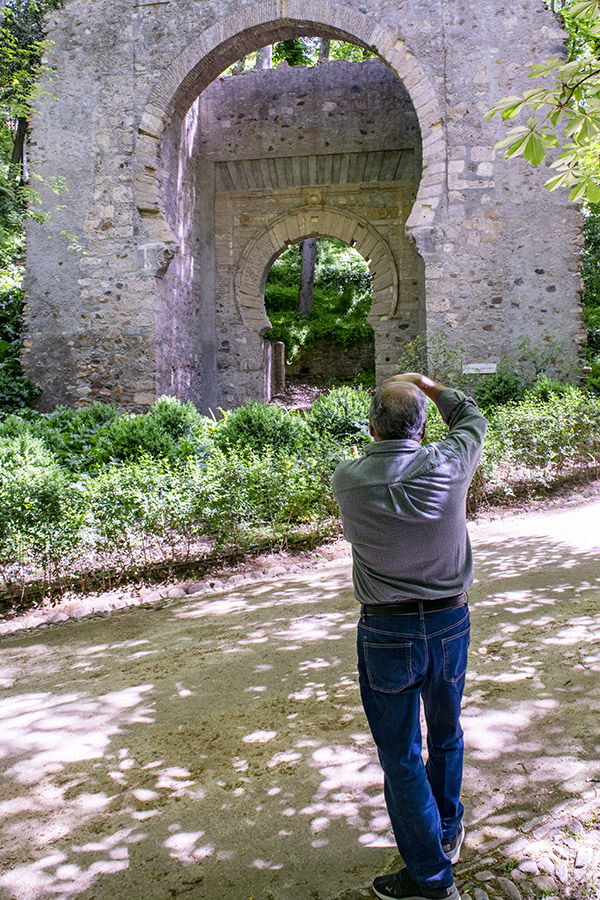
There’s a beautiful pathway that leads from the Alhambra to Granada. It has good shade, it was cool, and the walk was all downhill.
Fellow traveler Ibrahim seizing the moment. Ibrahim showed several of his photos to me from this and previous adventures; he is an exceptionally talented photographer.Walking into Grenada from the Alhambra. The day was magnificent; the weather was perfect.
Granada is located at the base of Spain’s Sierra Nevada Mountains. It’s history and occupations parallel those of the Alhambra. The surrounding area is believed to have been populated since at least 5500 B.C. Nobody is certain what “Granada” means in either Spanish or Arabic. The city is the capital of the Spanish province of Granada.
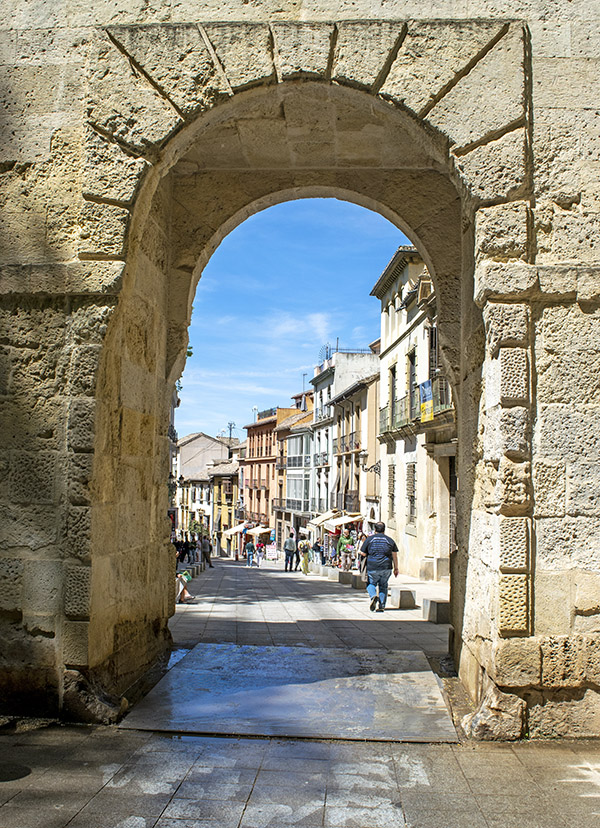
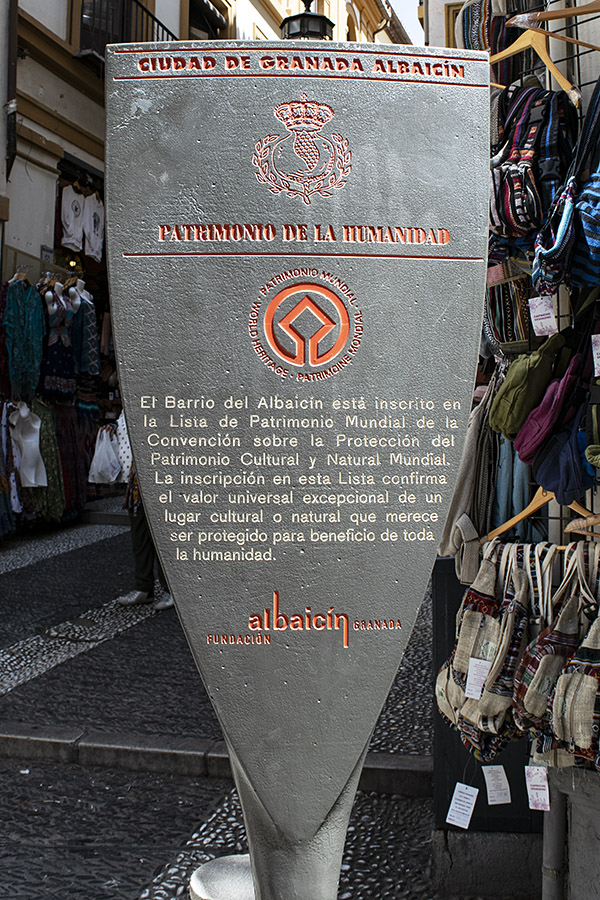
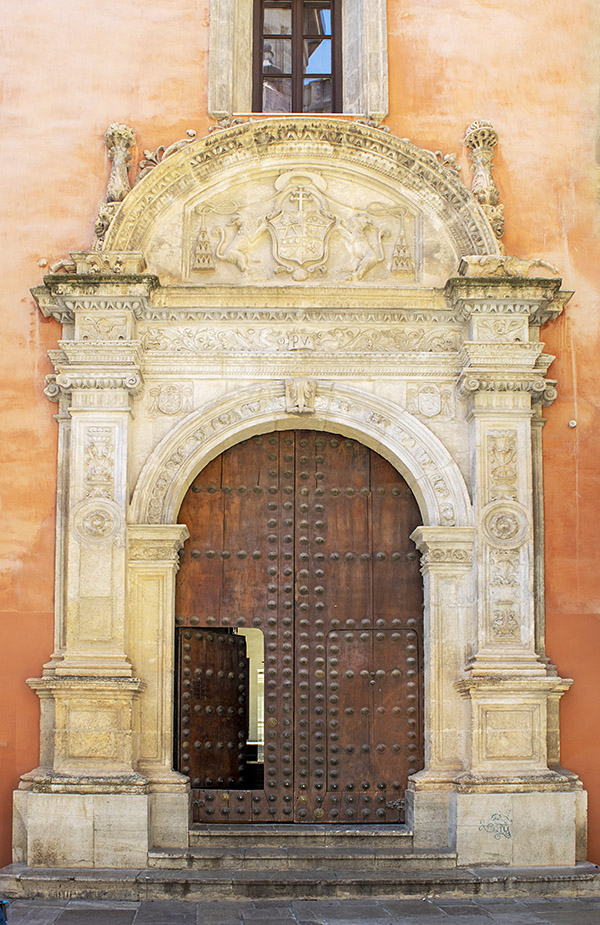
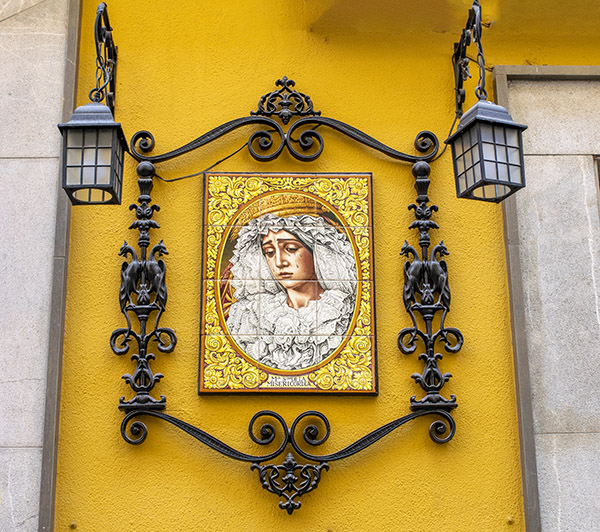
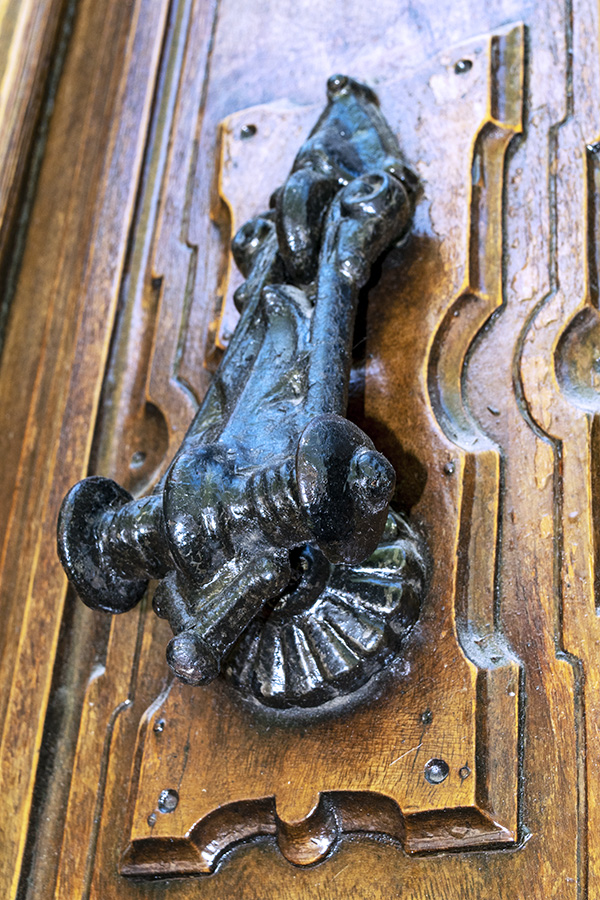
A Granada sign explaining the Albaicin area, an historic area that retains its medieval look and streets.One of many photogenic doorways in Granada.Exterior artwork that demanded a photo.As always, an ornate Spanish knocker.Decorative borders for sale in a Granada shop.
Granada’s city center has a beautiful town square, bordered at one end by the Santa Iglesia Catedral Metropolitana de la Encarnación de Granada. We stopped to take it all in after we enjoyed a lunch in one of Granada’s many sidewalk cafe restaurants. The first hit of empanadas there was free, but our initial empenada serving was a seafood medley with little octopuses (octopi?) we didn’t like. Our waiter picked up on that, took them away, and returned with chicken empanadas. Lunch was great.
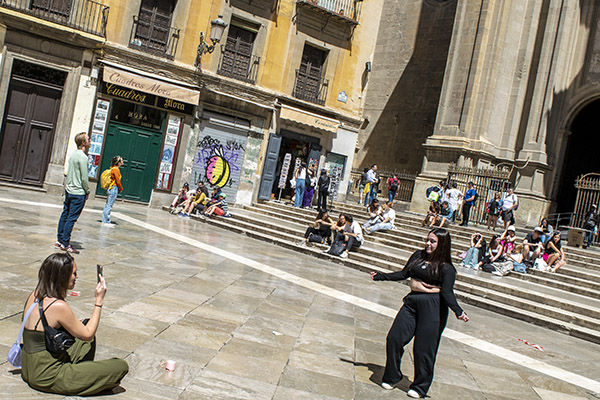
Anything for a few likes, I guess. These young gals staged an impromptu belly dance video in front of the Santa Iglesia Catedral Metropolitana de la Encarnación de Granada.
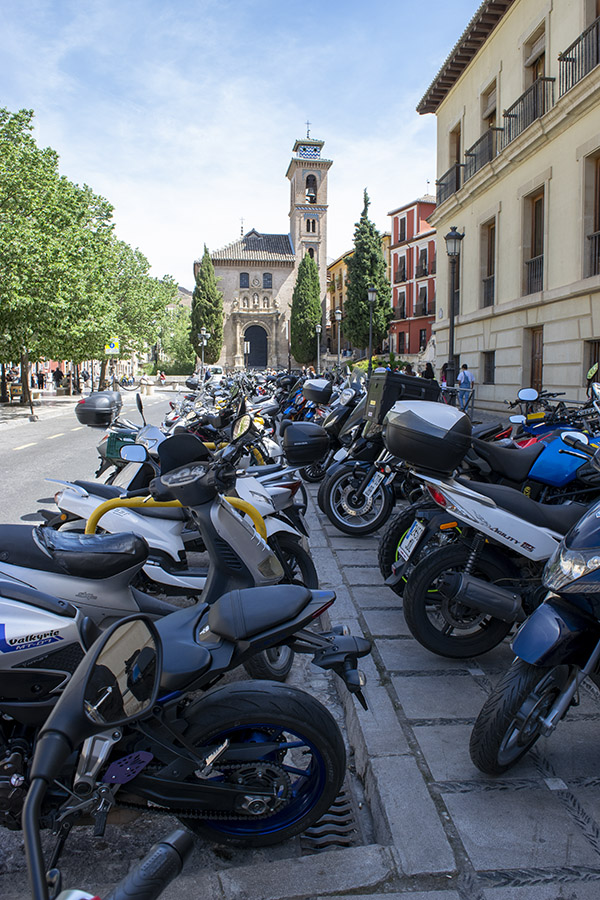
As was the case in every city we visited in Spain and Portugal, two-wheeled transportation is part of the culture. Our tour was by bus and high speed rail and it was great, but I missed being on a motorcycle. The traffic didn’t look too crazy and on previous motoadventures I made it through China and Colombia. I think I could handle Spain and Portugal on a motorcycle. Maybe next time.
A strong motoculture….my kind of place.
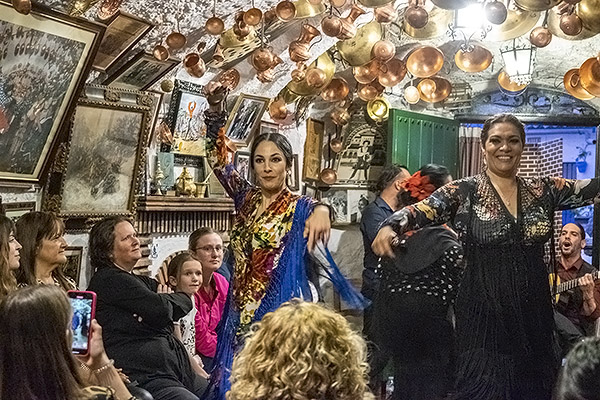
Granada was great. That evening, we had a wild taxi ride to the top of a mountain to watch the Flamenco dancers. That’s coming up next, so stay tuned.
Watch for our next blog on the Iberian adventure!
Here are links to more Spain and Portugal articles:
Highway 12, also known as Utah State Route 12, is an awe-inspiring scenic byway in southern Utah that holds the prestigious title of being an “All-American Road.” Stretching approximately 124 miles, this route captivates travelers with its breathtaking landscapes and unforgettable views.
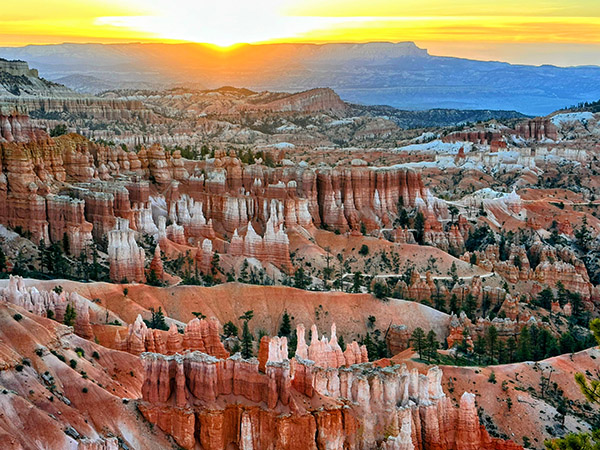
Starting near Panguitch, my journey along Highway 12 began with mounting excitement as the first red arches came into view. I took a short detour off of Route 12 to immerse myself in the famous hoodoos and trails of Bryce Canyon National Park. Lucky enough to secure a campsite at Sunset Campground, I made quick work of setting up my camp and heading out for a long afternoon hike. The next morning I witnessed a magnificent sunrise casting a warm glow over the canyon, illuminating the striking hoodoos and crimson rocks, a memory I won’t forget! A one-night stay in Bryce leaves one unsatisfied and longing for more time to explore her magnificent trails.
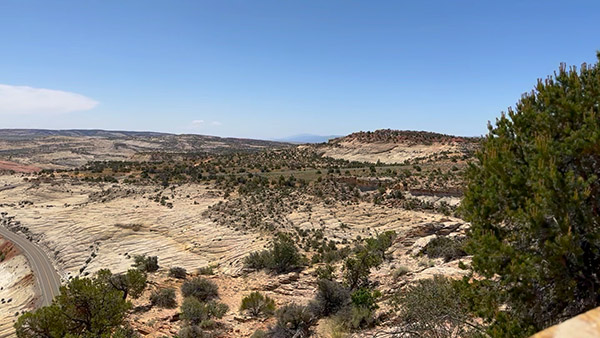
Continuing my adventure the following morning, I eagerly resumed my route on Highway 12, heading towards my favorite section of the road, high above the captivating Grand Staircase-Escalante National Monument. This expansive and remote region boasts rugged canyons, vibrant cliffs, and extraordinary geological formations. The landscape and its impossible rock formations treated me to endless twisties, creating a sense of otherworldliness. My Triumph Tiger 900 GT Pro was as happy as I was as I relaxed into the ride and allowed her to remind me again what her three cylinders can do. Both of us were in sync as we leaned into curve after curve and blasted down to the bottom of the canyon.
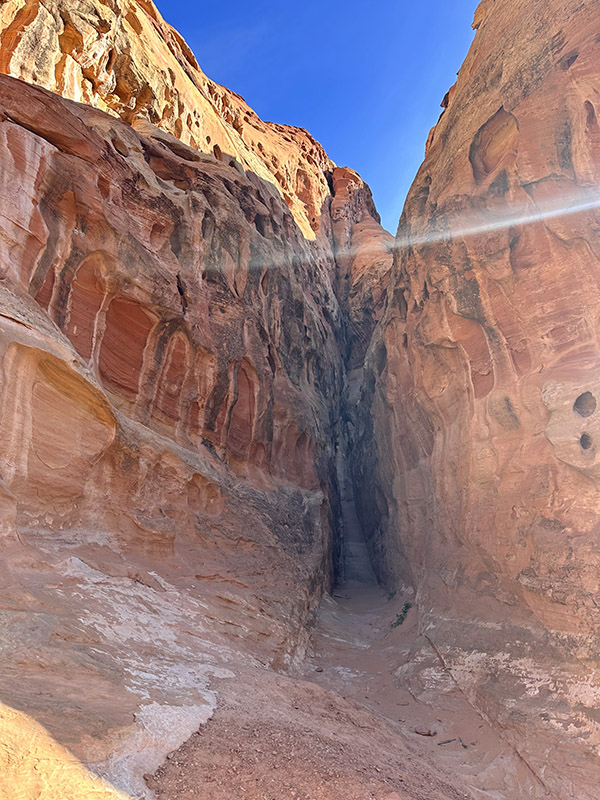
For those with extra time, I highly recommend exploring nearby slot canyons such as Peek-a-Boo and Spooky Gulch, which offer outstanding hiking experiences.
Don’t miss the enchanting Calf Creek Falls nestled at the bottom of a lush canyon. A short hike leads to a captivating waterfall. While leaving Calf Creek be sure to watch for a dirt road on the left with a sign for coffee. Take that turn and savor a cup of Joe with a view that will leave you speechless.
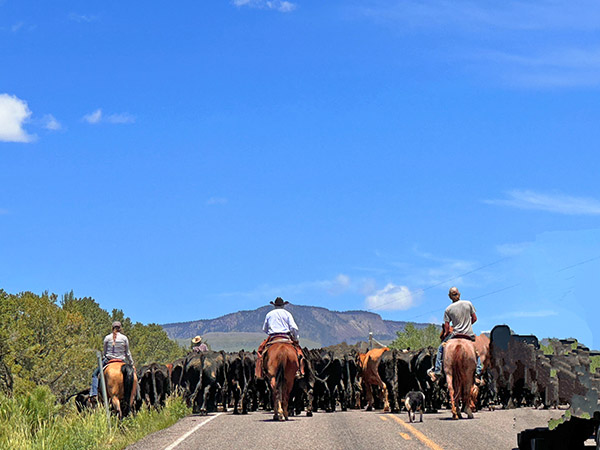
As I reluctantly approached the tiny town of Boulder, Utah, I realized I had made remarkable progress through the twisties. I was unexpectedly greeted by an old-school cattle round-up, complete with cowgirls and boys herding a large herd down Highway 12! After a brief turnaround, I found solace in my favorite restaurant, the Burr Trail Grill. Their farm-fresh ingredients delighted my taste buds, whether it was their fresh arugula salad topped with local goat cheese or their beastly-sized burgers that proved a challenge to conquer.
Resuming my journey on Highway 12, I found myself in an unexpected predicament. The cattle herd’s progress was slow and I crawled along clutching endlessly as I felt my left hand about to begin a serious complaint! Amidst the frustration, two memorable moments emerged. First, a passerby exclaimed, “Dude, you have the sweetest bike and setup!” We shared a laugh as he realized I was indeed “dudeless.” Second, after navigating my way to the front of the line, I convinced the lead cowboy to move the herd slightly to the right, allowing me to pass. Maneuvering my bike through the cows became a comical adventure, with prayers that the sound of my motor wouldn’t startle them. Experiencing this traditional cattle drive in 2023 felt like a slice of Americana and added yet another reason to love Utah.
Leaving the cattle behind I ascended Boulder Mountain, where endless views revealed the back of Capitol Reef on the right and scenic meadows with clusters of aspen, fir, and spruce trees on the left. Surprisingly, the mountain still boasted more snow than I expected in June. Camping, fishing, and wildlife viewing opportunities abound in this mountainous region, with numerous sites available. I’ve spent nights here savoring the breathtaking vista overlooking Capitol Reef and the sprawling valley floor.
As I arrived in Torrey, Utah, the end of Highway 12, I couldn’t help but lament the route’s brevity. With just 125 miles of captivating beauty, I yearned to turn around and experience it all over again. However, the call of the canyon beckoned me for a rewarding hike, followed by a well-deserved whisky to bring an end to a truly perfect ride.
Highway 12, Utah—truly a magical journey that captures the heart and leaves an indelible mark on the soul.
Never miss an ExNotes blog:
Help us keep the content coming: Please click on the popup ads!
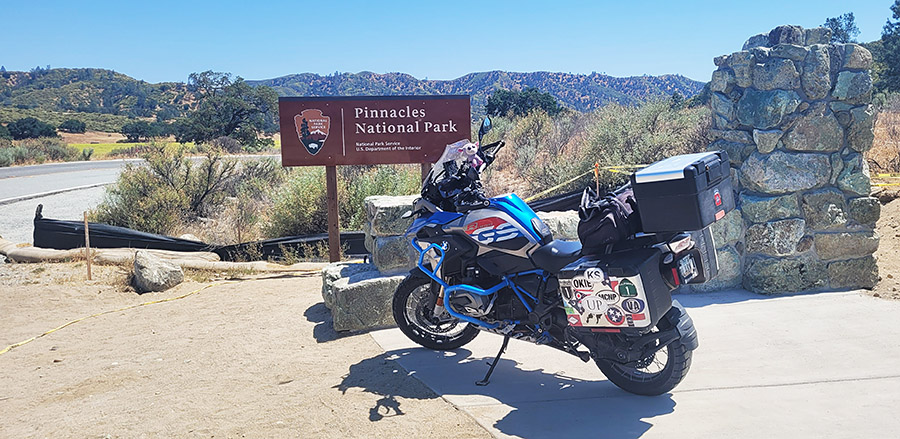
Pinnacles National Park is the 50th National Park I visited. I believe there are 63 National Parks total (National Park Service keeps adding them yearly, so…). As with all the parks it is rare to be disappointed with a visit to any of them. In fact, I have visited some of the parks numerous times just to be sure to fully embrace each part of them as many are quite large.
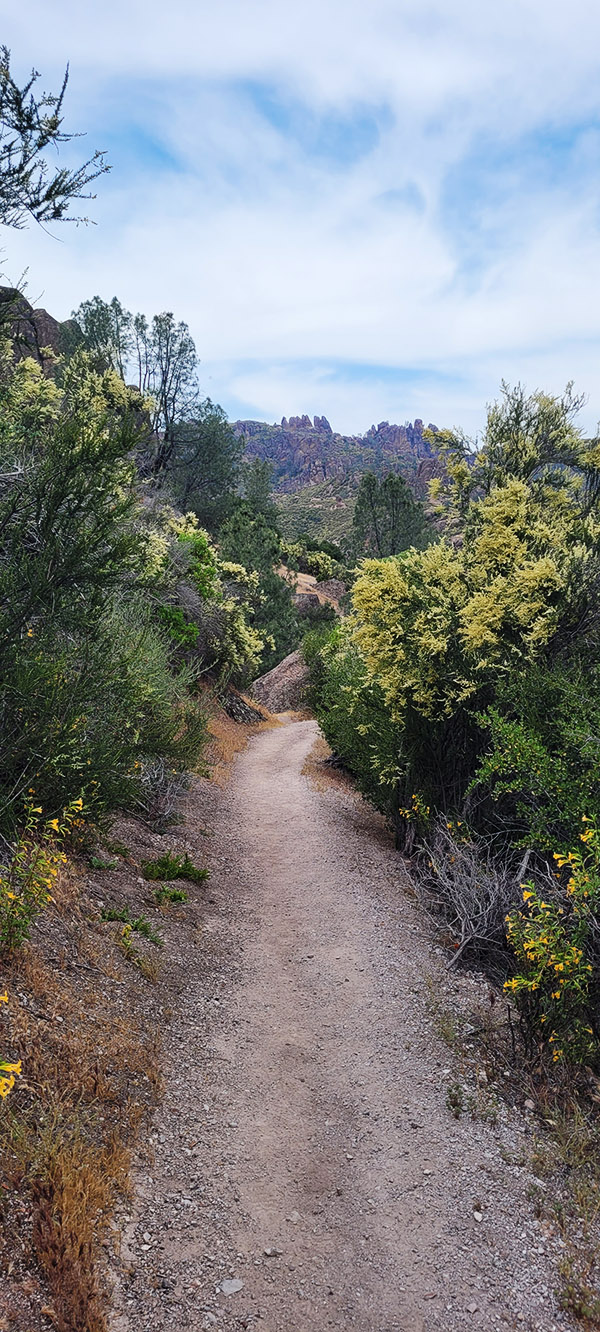
Pinnacles National Park is one of the lesser visited National Parks, which I find refreshing since there are fewer tourists than other National Parks, like Yellowstone and Yosemite where the crowds can be almost overwhelming and detract from the experience. For Pinnacles I had reserved two nights camping so once I arrived late in the day, I could knock out a shorter hike and complete a long hike on the spare day. The longer hike I chose was to summit the highest peak in the park, Chalone Peak, which reaches 3,304 feet in elevation. That isn’t that bad because there is only a 2,034-foot elevation gain from the base. This is a 9-mile trail that snakes through beautiful hills. Every turn provided an incredible panoramic view of the fields below and the mountains that stretched to the sky.
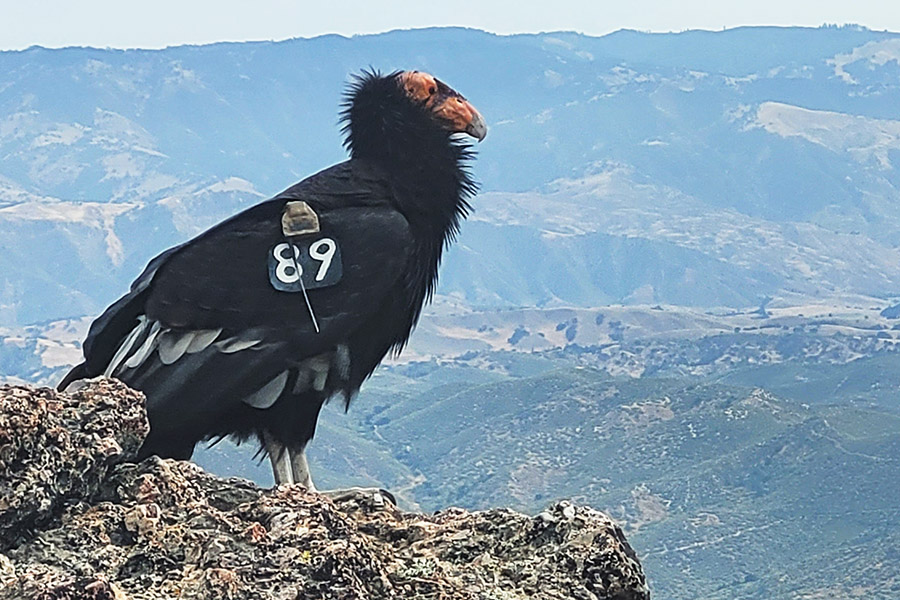
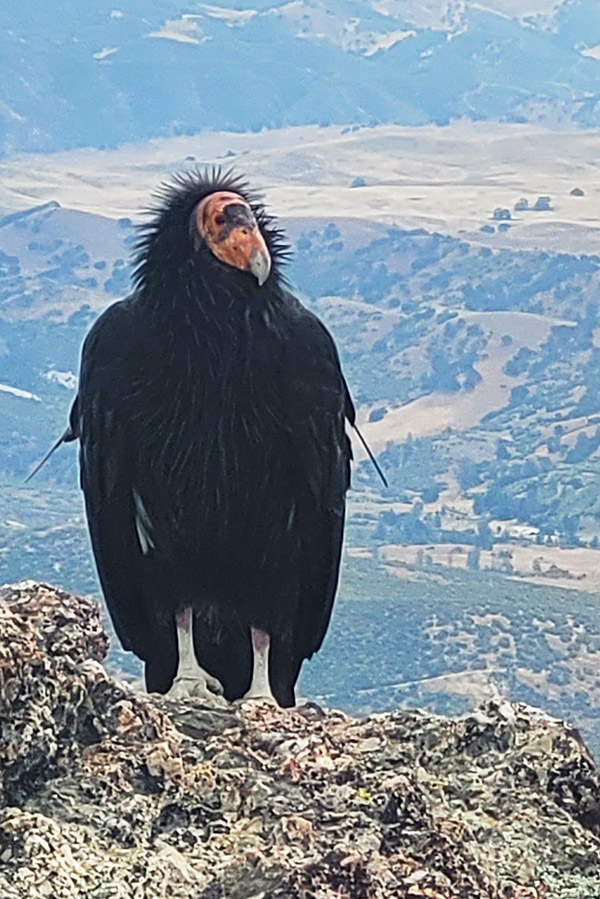
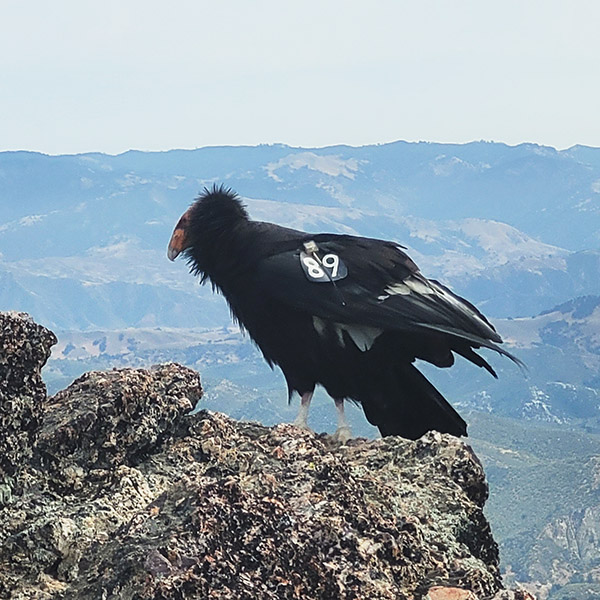
Once summitting the peak, it was time to rehydrate and fuel up with lunch for the hike back. As I sat down, I heard what sounded like someone vomiting. Looking to my left I saw I was sitting about 25 feet from a California condor. It was tagged with No. 89. The National Park Service tags these rare birds to track and follow them at a level not seen since Facebook started tracking me. Having researched No. 89, I learned this guy was born in captivity in Idaho in 2011. There are under 600 of these massive birds remaining in the world. To have the rare opportunity to see one was magical, but to be able to sit next to one for 30 minutes as I ate lunch was something spiritual, equivalent to petting the gray whales in Baja.
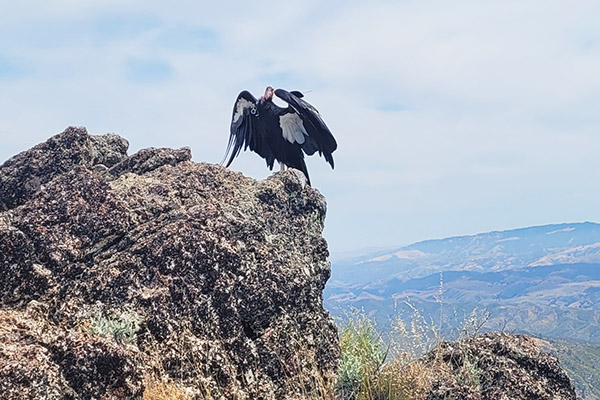
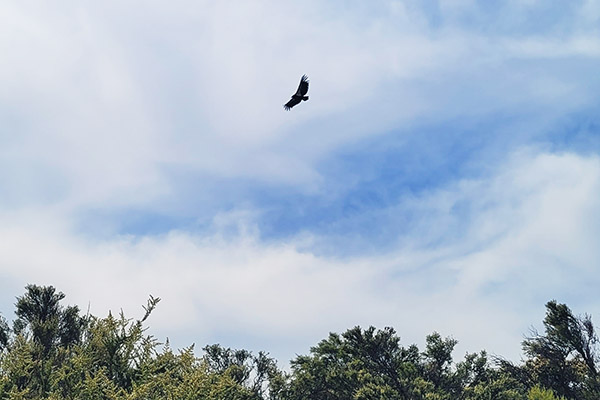
As I sat eating my lunch the condor and I constantly exchanged gazes. Every so often it would spread its wings to show off its true size. Not only did it not seem bothered by me, it seemed to enjoy my company (I mean, who doesn’t?). After about 30 minutes I began wrapping up lunch and as I packed up, No. 89 silently turned away, spread its wings, and leapt off the rock like a hang glider sailing down about 100 feet and then turning upward it flew off into the distance.
This magical encounter reinvigorated me for the 4.5-mile hike to the base of the mountain. I had a solid buzz from the encounter for the remainder of the day. Just like all the close encounters I have had in nature, that buzz never seems to fade and it has me looking forward to National Park Number 51.
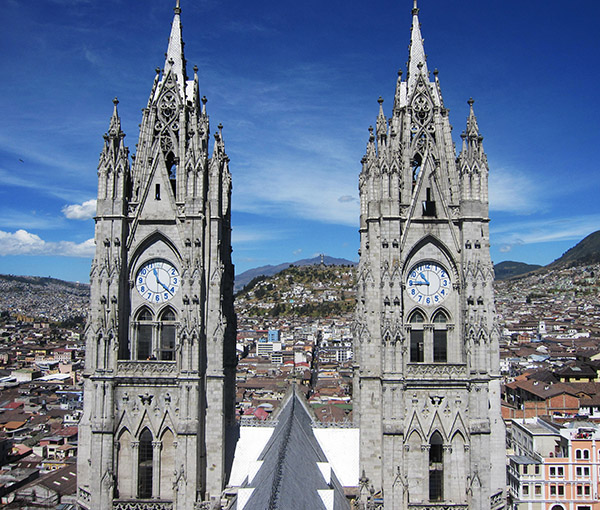
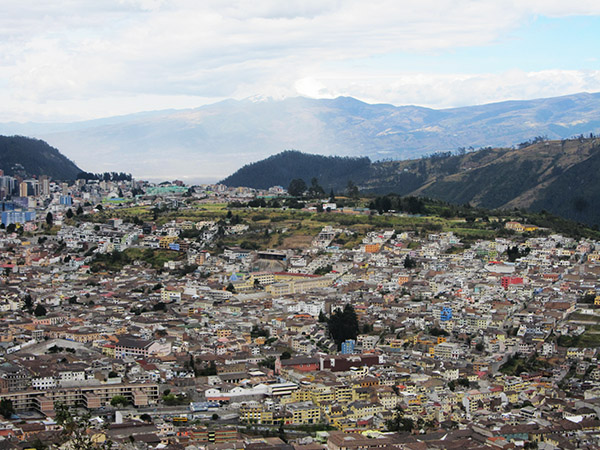
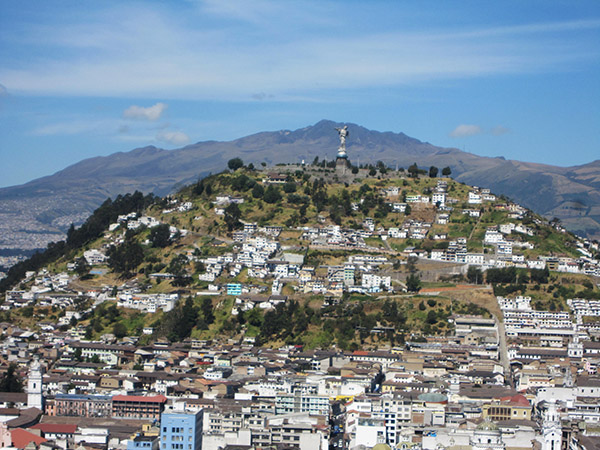
As the plane was race tracking to land in Quito, the capitol of Ecuador, I could see how large the city was and was reassured in the coin toss that had me choose this country. This would be my third country to call home for the foreseeable future.
Having been in Panama and Nicaragua with such little luggage it was important to keep my packing to a minimum. This wasn’t very difficult as the countries I had been visiting were tropical and very warm. I was certain Ecuador would be the same, as Quito was on the equator. Where could be warmer than the equator. Well, it turns out a lot of places could be much warmer? Quito was indeed on the equator but is also nestled in the Andean foothills at an elevation of around 10,000 feet above sea level. To add to that it was August, so technically it was winter there (although the ambient temperature doesn’t fluctuate very much).
Quito is a beautiful city with even more beautiful people. As the cab dropped me off, I was still over a mile from the Aparthotel I had booked for the next month. The issue was it was Sunday and the roads all going into Mariscal Foch (the city center) were closed and open only for bicyclists. Since I had been running almost daily in Nicaragua and had dropped some weight, I slapped one backpack on my back and one on my front and thought I’d just get a nice run in as I made my way towards my Aparthotel. This would help warm me up, too, since I was only in shorts and a t-shirt. That was another bad idea. I quickly learned that running at 10,000 feet elevation wiped me out quickly. I think I made it 4 minutes before my hands were on my knees and the packs were sliding off my back. This I am certain was quite a scene for the locals who were casually riding their bicycles up and down the main street staring at me as I felt like I was about to die.
Once arriving successfully to the Aparthotel I first confirmed the wi-fi to assure this location was suitable for my day job. The connectivity worked great, but there was just one hitch. The wi-fi knocked you offline every 60 minutes. To me this was a simple fix of logging off it before each conference call so that it wouldn’t force me off mid-stream during the calls. That was easy enough and worked perfectly without any problems.
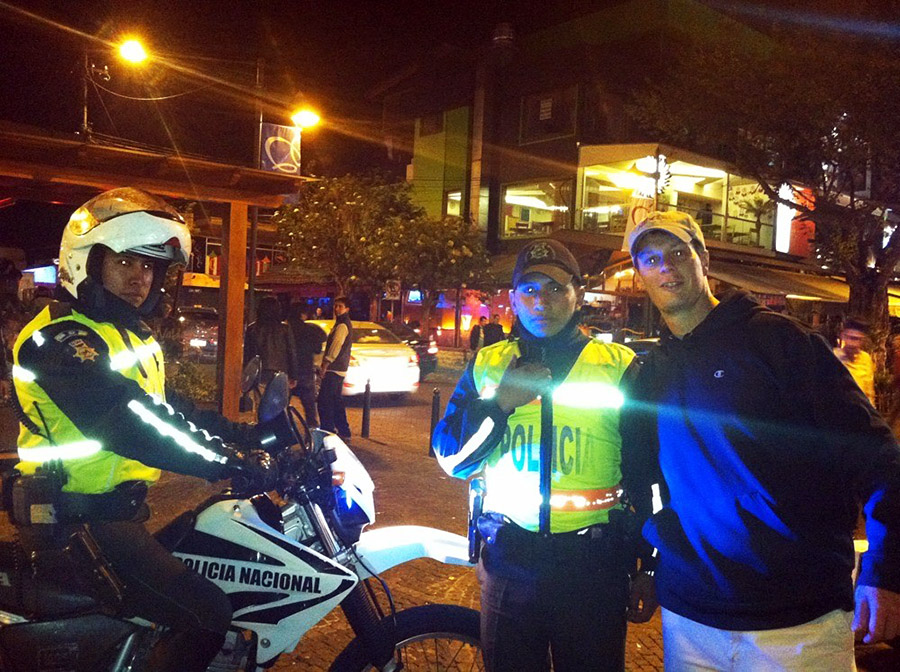
That photo at the top of this blog? Every Friday night the police held a formation in the central square (Marisol Foch) and I would chat with the moto cops. It was fun.
Once settled in Quito, a wave of relief fell over me knowing that I could relax and focus fully on work for the next month. That was important as there had just been a reorganization and I had a new manager. Three months into traveling through Central and now South America and still no one knew I was anywhere but Boston, nor did they ask. I was fine with that and made it a point to keep it quiet, but not because I wasn’t performing. I was performing and at an elevated level, but I thought someone might be upset it they knew I was doing this and would put the kybosh on it. I wasn’t about to let that happen, so I took steps (to include disabling my social media accounts to ensure my secret wouldn’t get out). I had a peer who was trustworthy so I let him know just in case there was a volcanic eruption or political uprising so they could let my manager know that “Mike may not make it to work today.” Of course, the chances of that were slim so it was time to settle into a productive routine. I knew Ecuador might be my new home for longer than I had planned, and I had no problem with that at all.
Help us keep the content coming: Please click on the popup ads!
 There are several routes of the Camino de Santiago, including the Camino Frances (French Way), which is the most popular, and the Camino Portugués (Portuguese Way), which starts in Lisbon or begins in Porto for a two-week shorter Camino. The Camino de Santiago is a long-distance walk or hike that typically takes 30-40 days to complete, depending on the route and the pace of the individual pilgrim.
 Highway 50, stretching from West Sacramento, California, to Ocean City, Maryland, is a scenic route that earned its moniker from a 1986 Life magazine article that described it as desolate and isolated. The section of Highway 50 referred to as the Loneliest Road is in Nevada. This road winds through vast stretches of remote desert landscapes, featuring rugged mountains and expansive plains that contribute to its reputation.
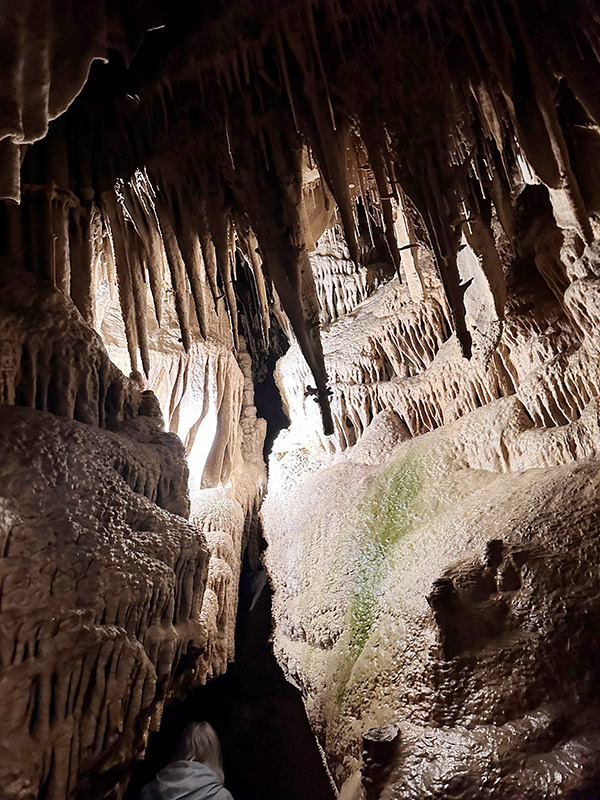


 Having been in Panama and Nicaragua with such little luggage it was important to keep my packing to a minimum. This wasn’t very difficult as the countries I had been visiting were tropical and very warm. I was certain Ecuador would be the same, as Quito was on the equator. Where could be warmer than the equator. Well, it turns out a lot of places could be much warmer? Quito was indeed on the equator but is also nestled in the Andean foothills at an elevation of around 10,000 feet above sea level. To add to that it was August, so technically it was winter there (although the ambient temperature doesn’t fluctuate very much).