By Joe Gresh
I probably shouldn’t badmouth them because they seem to have the business model sewn up and are industry giants, but Partzilla sucks. I’ve ordered quite a few ZRX parts from them and several things they do annoy me. First, I get CT to order everything because it just works out better. Next, many parts you take the time to look up on their parts diagrams are not priced unless you go through the hassle of signing in to their website. Comparison shopping is difficult. The worst is when the page shows the part as available and in reality they don’t have it. This happened to me with the reed valve gaskets. The site said available (which is not the same thing as in stock) but I’ve been waiting about 3 weeks. CT emailed Partzilla about the situation and got a semi-snarky email in return. Is it better to lose a sale or lose a customer?
I get my Kawasaki parts from Southwest Suzuki Kawasaki in Alamogordo now. It’s actually faster than Partzilla and they give me a little discount if the part is outrageous (like those float needles). I go see Dave or Taylor at Southwest with part numbers I get off the Internet and the stuff is there within a week. Maybe the massive vertical integration of the ‘Zilla monster has reached an evolutionary dead end. I’m done with them, no matter that they’ve bought the first three pages of results on Google.
Rant over.
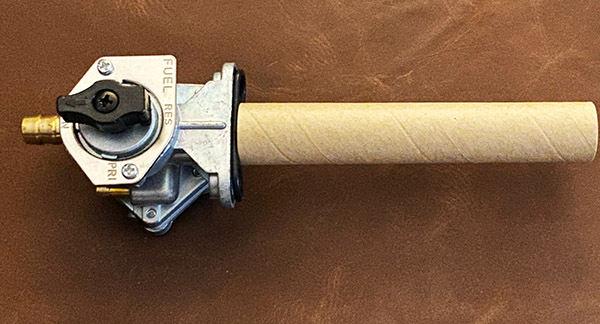
My Chinese petcock showed up and it looks exactly like the original Kawasaki petcock and fit perfectly. Unfortunately, when I tried to connect the old fuel line it had a pinhole leak right where the line expands from 5/16-inch to 3/8-inch. I don’t know why Kawasaki went with the oddball molded fuel line. A 5/16-inch line will provide plenty of fuel to the 1100cc Kawasaki engine.
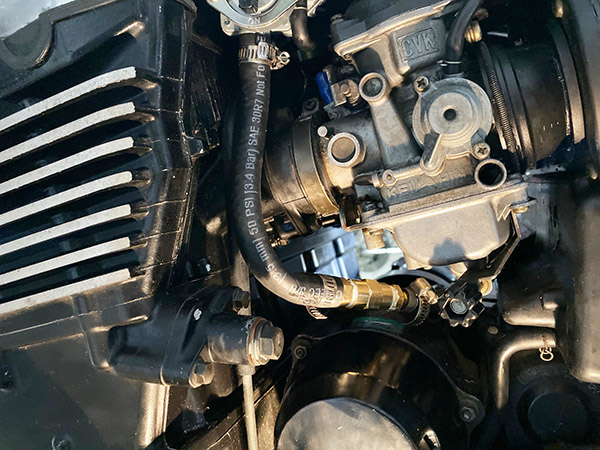
This is horrible but there are reasons why it is horrible. First, the OEM Kawasaki fuel line would need to be ordered and I don’t want to wait for it. Second, The original line connects to a plastic T-fitting between the No. 2 and No. 3 carburetors. Knowing my luck with old plastic fittings, I feared that replacing the hose entirely would lead to a broken T-fitting, which would mean pulling those damn carbs again. Then there’s the wait for a new T-fitting. I decided to let sleeping T-fittings lie and added a 3/8-inch to 5/16-inch hose barb adaptor complete with an ugly pipe connection between the two. Then I ran a new 3/8-inch line to the petcock. I mean to fix this mess later on but it works and doesn’t leak.
I gave up on getting the gaskets for the reed valves and made two block-off plates to seal the air intake to the exhaust ports. Then I spun up a little aluminum plug to seal the hole in the airbox where the reeds connected. I didn’t take photos of this part because I was in a hurry to hear the bike run.
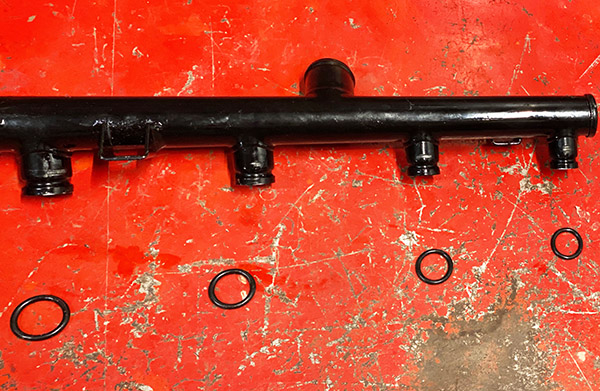
I installed the rest of the radiator plumbing and started to fill the Kawasaki radiator with coolant and found the slippery green stuff running out the bottom as fast as I put it in. The front log manifold was pissing coolant, which was odd because I had replaced the four O-rings with new Kawasaki parts. This log manifold is behind the header pipes and not easy to access. Off came the pipe and the O-rings looked like they were deformed a bit.
My mistake was lubing the O-rings on the pipe manifold. This made them too slippery and when the pipe was pushed into position the rings slid out of the pipe O-ring grooves. I gave the rings a through examination and decided to clean all traces of lube from the pipe and O-rings. I shoved the thing back together, reconnected the hoses and it leaked as much as it did last time.
I pulled the log manifold for the third time and cussing up a storm. I tossed the new Kawasaki O-rings and dug some Harbor Freight O-rings out of an assorted kit I bought years ago. I was so frustrated I managed to cross thread one of the bolts that hold the manifold onto the engine block. Back off comes the manifold. For the fourth time. Remember, I’m doing all this behind the header pipes and I can barely get my fingers between the pipes.
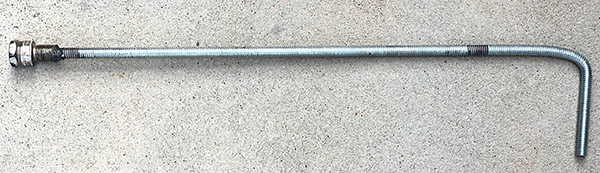
I managed to get a tap started into the cross-threaded hole and using the tip of a finger to hold the tap and needle nose pliers to turn it, I ran the tap into the hole and straightened out the cross-threaded bit. Amazingly, the hole holds tension and I got the manifold back in place and the hoses connected. The manifold didn’t leak.
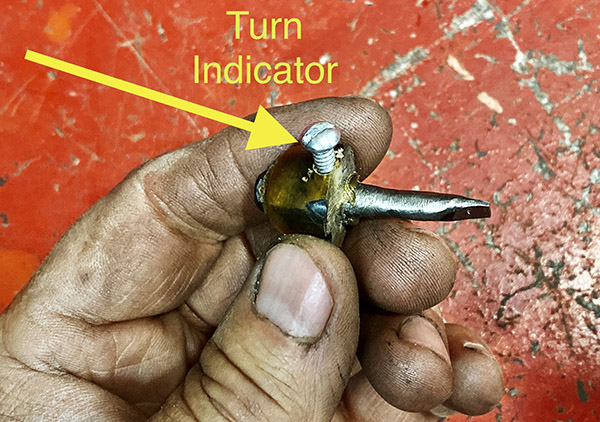
With the radiator full of coolant I started the bike. It smoked quite a bit but after a few minutes the smoke eased off. I had set the idle screws at 1-1/2 turns out but the bike seemed rich. The idle mixture screws are accessible with the carbs on the bike but you need a special, shorty screwdriver to turn them. I made one out of bits and pieces. Make sure you have some sort of identifier so you can count the turns by feel. I used a small screw as my tactile-pointer and reset the screws to 1 turn out.
I tossed the seat on the bike and went for celebratory tacos at the Alomar Diner in Tularosa. The bike ran fair if a little rich. After I ate the tacos the bike wouldn’t start. What with everything having been messed with in the preceding weeks I wasn’t sure where to begin. So I kept cranking. And Cranking. And cranking.
Then I started smelling gas so I held the throttle wide open and cranked some more. The bike started making sounds like it wanted to start. I kept cranking. The Kawasaki sputtered to life stinking of fuel. I rode the bike home and it was running rich. I calculated my fuel mileage as 36 miles to a gallon. The ZRX1100 fuel tank vent was whistling like a teapot on boil and gave a gush of pressure when I opened the gas cap. This led me to believe there was a problem with venting.
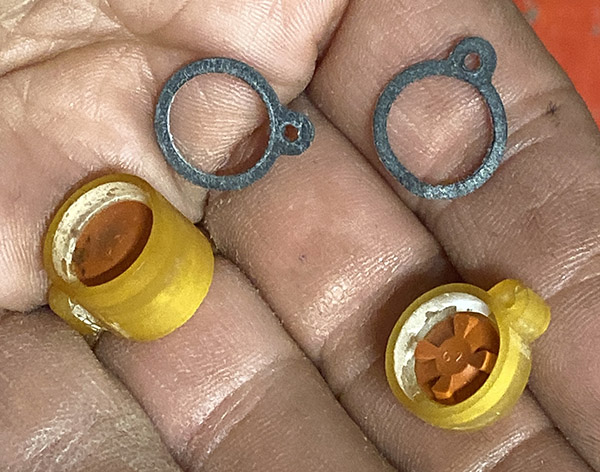
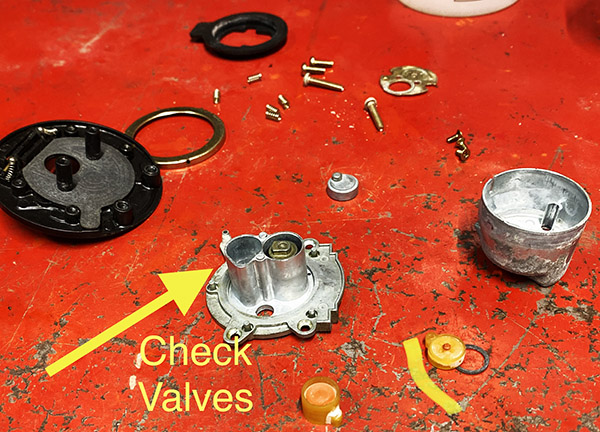
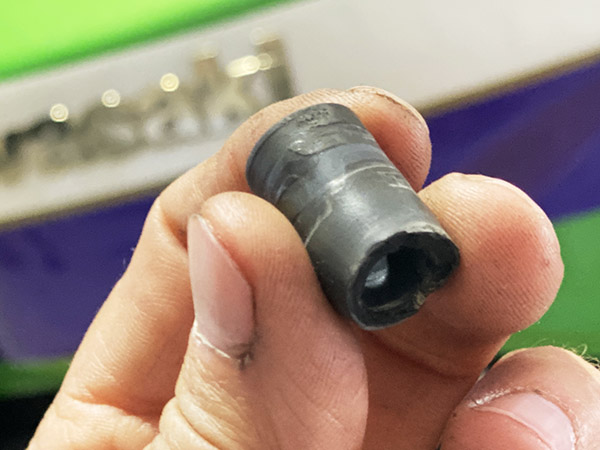
Inside the ZRX gas cap is some sort of check valve assembly. It consists of two little red rubber valves and I couldn’t figure out how tank pressure was supposed to vent out. The ZRX has a vacuum operated petcock and with only a little pressure the shutoff diaphragm can be overridden. It’s a fine line. Naturally, removing the source of the problem is easier than making it work as intended so I removed the check valves and the bike whistled no more.
The bike was running much better and if anything was now lean-ish off idle. I did a 200-mile test loop through the mountains and the old ZRX1100 returned 53 miles to a gallon.
The Rex is running pretty well right now. I hate to do it but I’m going to buy four more Kawasaki O-rings for that coolant manifold and try again. Even though they aren’t leaking I don’t trust the Harbor Freight O-rings for longevity. I’ll order a new OEM fuel hose and I might take a stab at installing it. I also want a new fan switch O-ring for the radiator. I’m also going to set the idle mixture screws to 1-1/4 turns to see if it helps the off-idle lean spot, The ZRX stumbles a bit off the start. Once all this is sorted, watch for a ride report on the ZRX1100 in a future ExNotes blog.
See the earlier ZRX stories (and other Resurrection stories) here.