12 Tips for Hot Weather Riding

I visited Chiriaco Summit and the Patton Museum last week (we’ll have a blog on it soon) and it was awesome.  But wow, was it ever hot.  As in 111 degrees when we left, and that’s not an unusually warm day out there in the Sonoran Desert.  The next town over is called Thermal, and a little further north there’s this place called Death Valley.  Death Valley recorded a whopping 131 degrees three weeks ago.  Sensing a pattern?

Looks like the Mojave, doesn’t it? Nope. That’s Joe Gresh in the Gobi Desert. Gresh and I rode across it after coming down off the Tibetan Plateau. It was a bit warm out there.

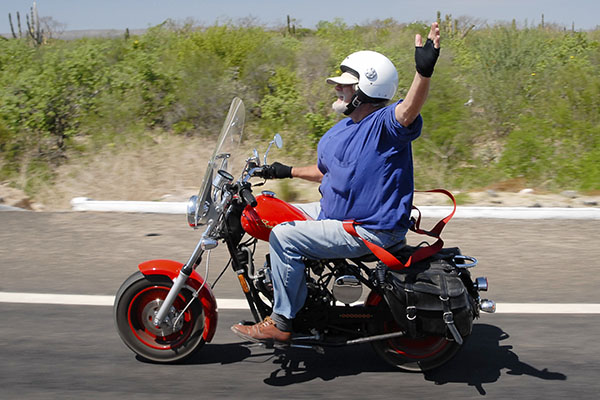
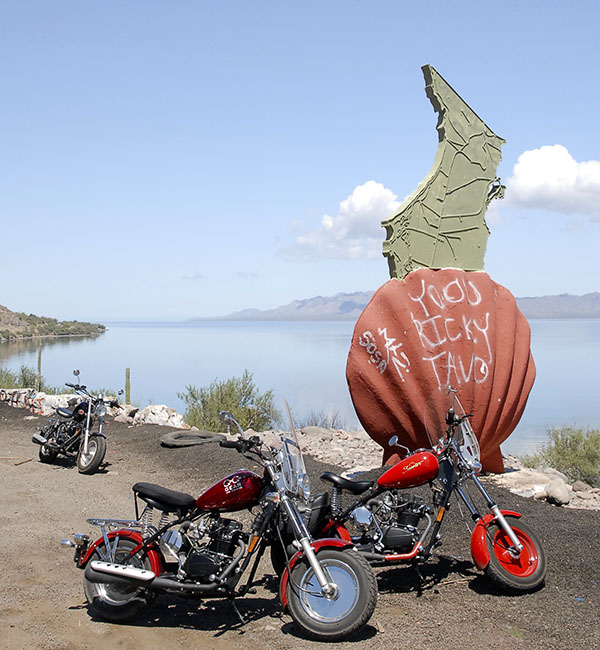
Yeah, it gets warm in these parts, and in other parts of the world as well.  Hot weather is not ideal riding weather, to say the least, but sometimes we find ourselves riding in shake and bake conditions. I’ve done it. I rode a 150cc scooter all the way down to Cabo and back in Baja’s hottest month of the year (September, when it was well over a hundred degrees every day).  It was humid down there, too, once we crossed over to the Sea of Cortez side of the peninsula.  We were literally entering the tropics as we crossed the Tropic of Cancer.  Whoa, that was rough riding!

Simon Gandolfi, suspenders flying in the breeze, riding my Mustang replica bike south of the Tropic of Cancer in Baja California Sur. It was one of the hottest rides I ever experienced.

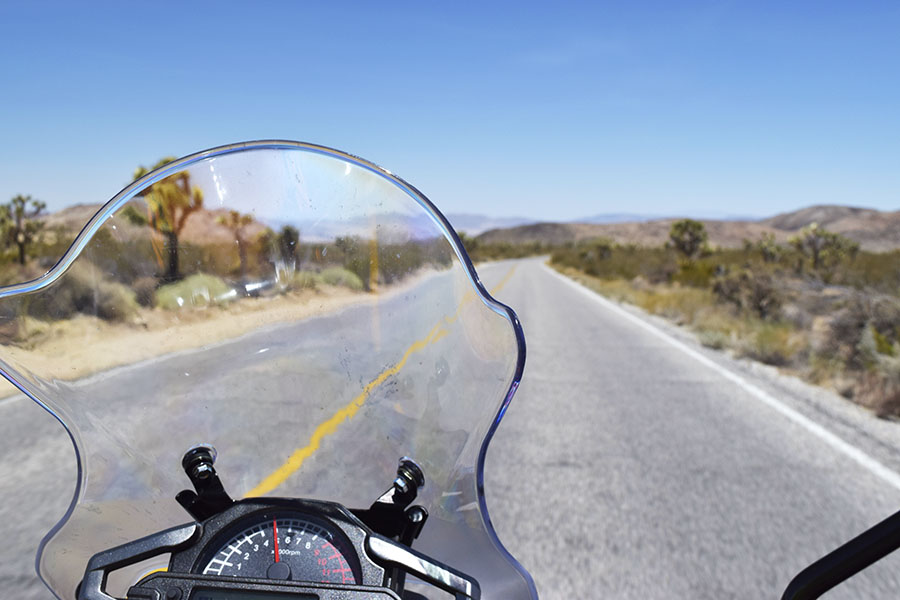
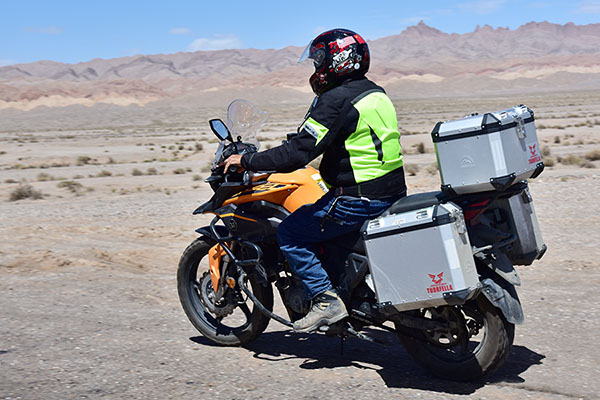
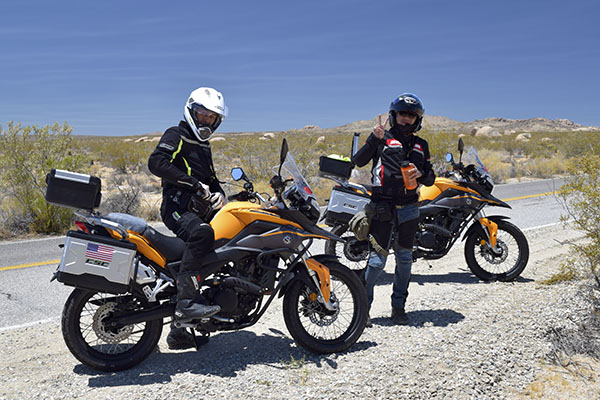
When we did the Western America Adventure Ride with CSC and the guys from Zongshen, we rode through the same corridors described earlier above, riding across California and the Mojave Desert, through Joshua Tree, and on into Arizona with temps approaching 110 degrees.  That was brutal riding.

King Kong and Mr. Zuo in Joshua Tree National Park. That was another brutally hot day.  Higher higher temps were still in front of us when we later rolled through Amboy, California. This picture became the cover photo for 5000 Miles At 8000 RPM.  You should buy a copy or three (they make great gifts).

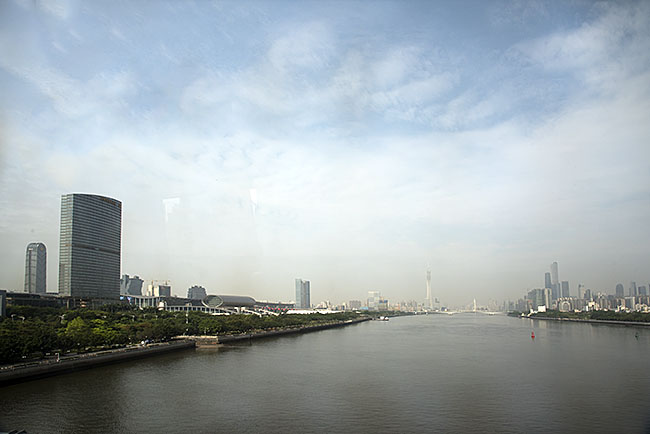
The ride across China that Joe Gresh and I did had similar challenges.  It started out hot, then it got cold as we rode into the Tibetan Plateau, and then it became brutally hot and humid as we descended into central China and rode east to Qingdao.  That was a 38-day ride, and I’d guess it was well over 100 degrees for at least 30 of those 38 days.

The risk, of course, is heat stroke, and it’s often not the kind of thing you can feel coming on.   You’ll think you’re okay one minute, and the next you’re waking up in an emergency room wondering what happened.  If you start to feel a headache while riding in hot weather, you are already perilously close to heat stroke.  You need to stop, drink copious amounts of water, and get some shade.   The better approach, though, is to not let yourself get anywhere near that condition, and that’s what this article is all about.

It almost seems like heresy to say it, but my first bit of advice about riding in hot weather is:  Don’t.  Given the choice, postpone the ride.  But let’s assume that this is not an option, as was the case for each of the rides mentioned above.  Okay, then…here’s my guidance on the topic.

12 Hot Weather Riding Tips

One: Don’t ride naked.  I’m not trying to be funny here, and I’m not implying you might be the kind of person who would go down the road wearing nothing at all (although there is that story about Gresh riding around with only a bathrobe).  Nope, what I’m talking about is not shucking your safety gear.  You have to wear it.  All of it.  ATGATT.  All the gear, all the time.  You can’t peel it off just because it’s hot.  It’s saved my life.

My Viking Cycles mesh jacket and the mighty Enfield.

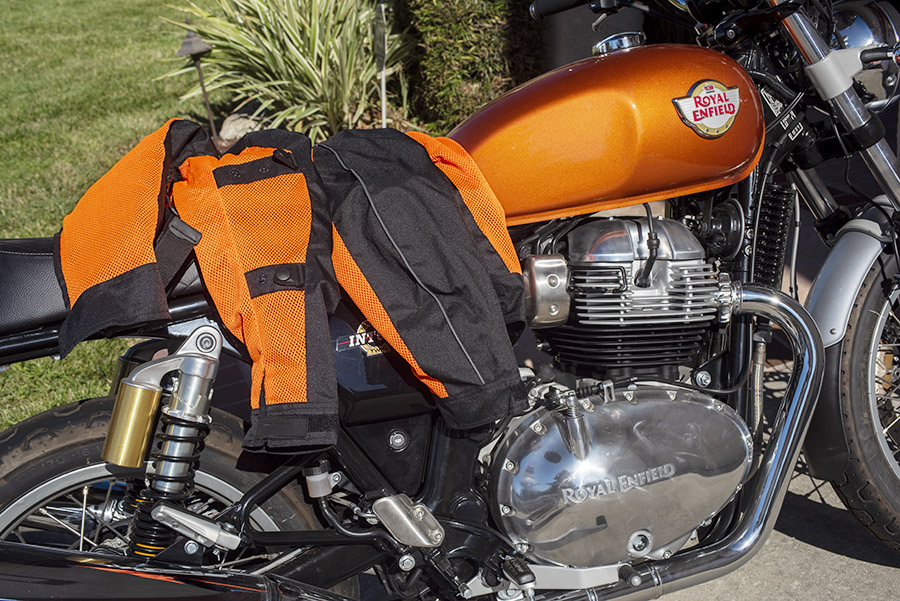
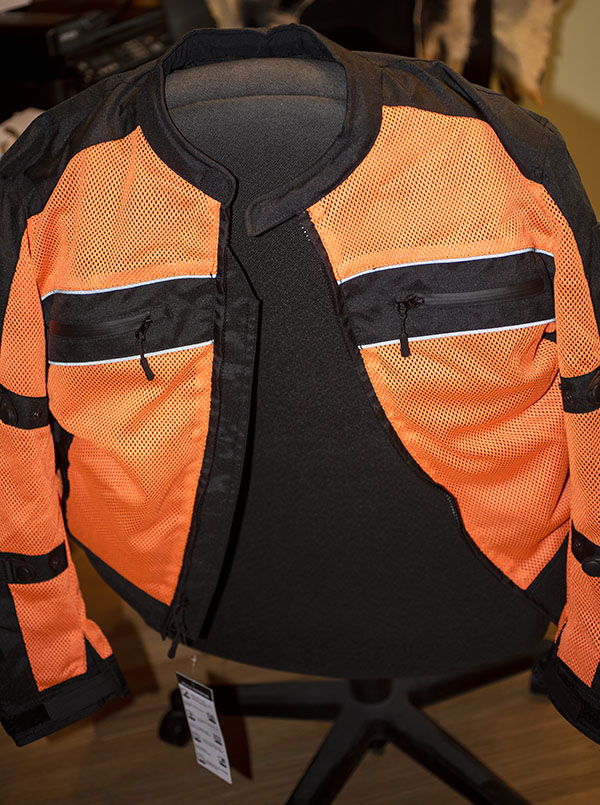
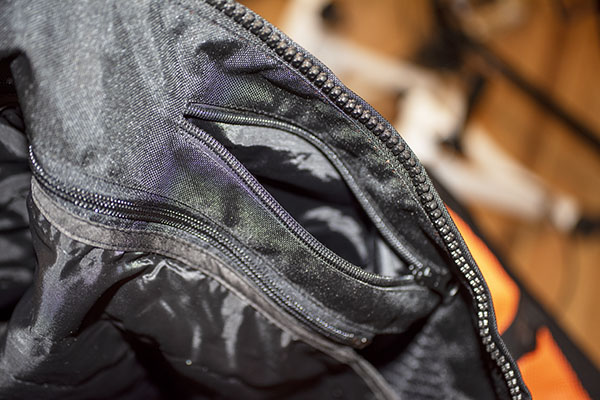
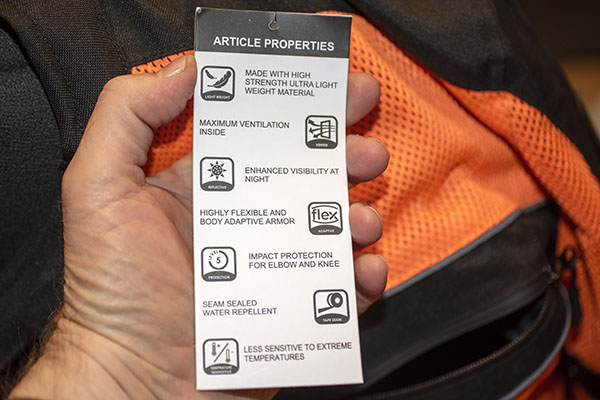
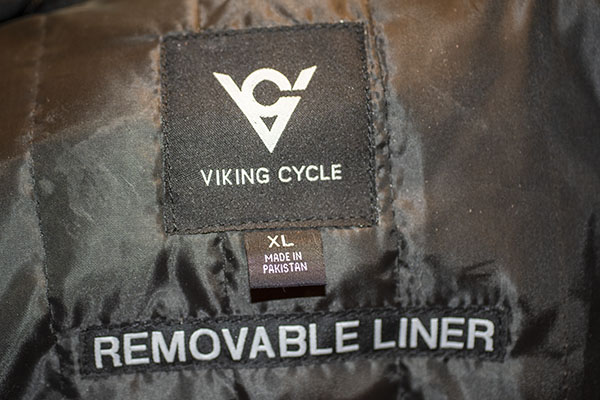
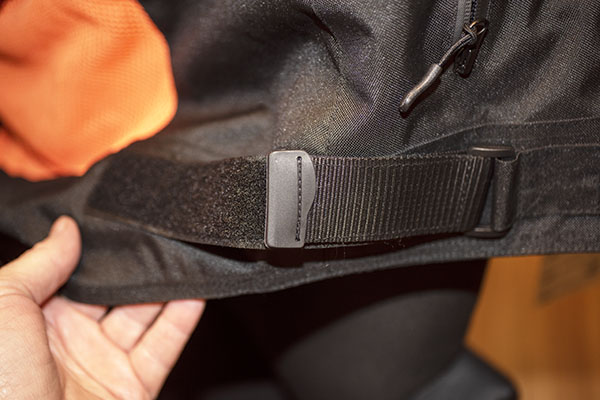
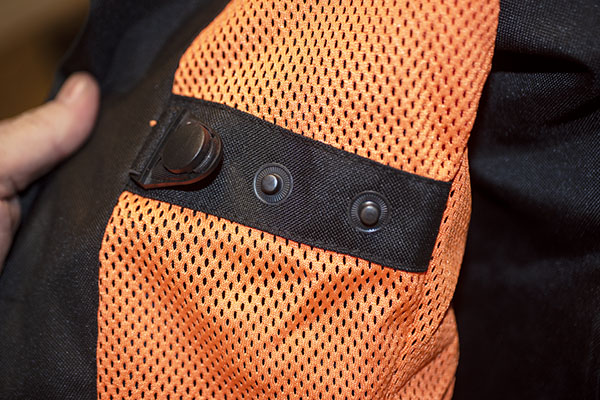
Two: Wear a good mesh jacket.   These are available from several sources.  I have a Viking Cycles jacket I’m wearing these days and it works well.  I wore a Joe Rocket mesh jacket on the ride across China and it made a big difference.  You can get them from Viking Cycles, CSC Motorcycles, British Motorcycle Gear, and other sources.  Trust me on this…you need a ventilated jacket for riding in hot weather.  EDIT:  We’re getting interesting comments advising not wearing a mesh jacket in hot weather.  Make sure you read the comments below, and for those of you who responded, thanks very much!

Three: Use a cooling vest.  These things actually work, but they’re not as easy to use as it sounds.  They don’t work for long, but they work.  The idea is you soak them, and then wear them under a jacket.  The airflow causes the water in the vest to evaporate and that cools the vest and you.  I’ve found that on really hot days these vests need to be remoistened about every thirty minutes, but you should be stopping that often anyway (more on that later).  It’s the remoistening part that I don’t like.  It seems like they take forever to soak up water when you remoisten them.  I’ve found it easer to just get my clothes wet (see the next point below).

Four: Go soak your head (and everything else).  Don’t laugh; I’ve done this.  On the Baja ride I mentioned above, it was so unbearably hot that we took to pouring water down the inside of our riding jackets and inside our helmets at every stop.  We became rolling evaporative coolers.  It helped.

Five: Change your riding hours.  On the really hot days, I like to hit the road at 0:Dark:30.  Get out and get a hundred or so miles in before it gets unbearably hot.  You’d need good lighting on your bike to do this (I generally don’t like to ride at night, but I’ll make an exception when I know it’s going to be hot).   This is difficult to do when riding in a group because it’s hard to get everybody moving that early.  If it was just me and Gresh or Welker, we’d leave way early and get in a couple of hours of riding (or more) before the sun comes up.

We knew it was going to be brutally hot riding through Joshua Tree and the Mojave Desert, so we left just before sunup on the first day of the Western America Adventure Ride.

Six: Drink a lot of water.  The problem with riding in high temperatures is you don’t realize how much water you lose through perspiration.  My advice is to stop every 30 minutes and drink a bottled water.  Like I said above, most of us ain’t spring chickens, and you might be wondering if this means you’re going to be stopping a lot to pee.  Hey, it’s a common old guy problem, but it won’t be in hot weather.  Drink a lot of water; you’ll lose it through perspiration as you ride.

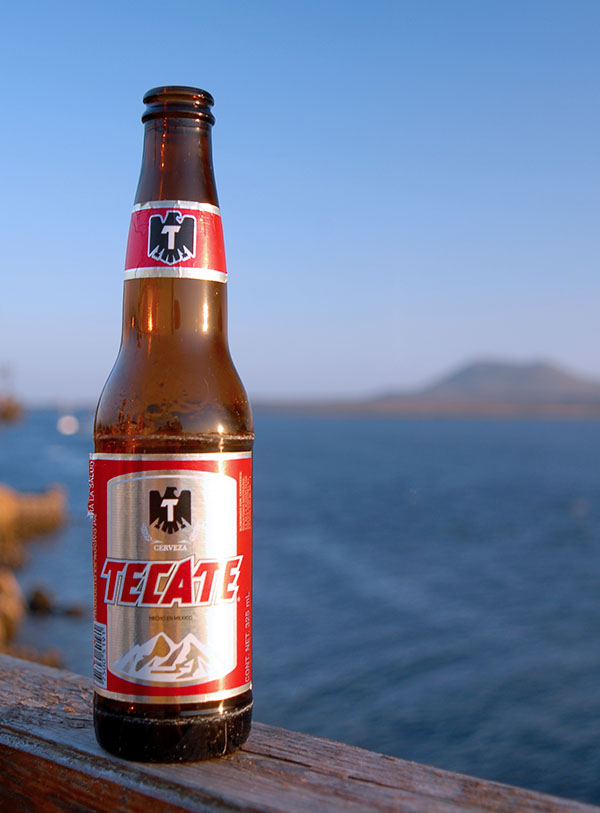
Seven: Avoid alcoholic beverages.  Alcohol will cause you to dehydrate more rapidly, and that’s the opposite of what we’re trying to do here.  You shouldn’t be consuming alcohol on a motorcycle ride anyway.  Drinking any kind of alcohol while riding in hot weather is just stupid.  Where I found you really have to watch this is when riding in a large group (there will be one or two riders who have to have that beer or two at lunch).

Beer is good, especially when it’s a Tecate at the Old Mill in Baja overlooking Bahia San Quintin. But save it for the end of the day, when the bikes are parked for the night.

Eight: Stop regularly to cool off.  Find a bit of shade or someplace air conditioned, and get off the bike to cool down.   When I ride in hot weather, I usually stop to cool off and rehydrate every 30 minutes or so.

Stopping to cool off at the Tropic of Cancer. Wow, it was hot and humid down there!  We were off standing in the shade, drinking bottled water.

Nine: Keep your tires at recommended pressures.  Another thing you definitely don’t want on a hot day is underinflated tires.  Tires flex with every rotation, and flexing causes the tires to heat.  Throw in high road surface temperatures with underinflated tires, and you’re flirting with a blowout.  This is especially important to remember if you’re one of those guys or gals who deflate their tires for dirt riding.  Don’t forget to pump them back up when you get back on the asphalt.

Ten: Don’t speed.  Tar melts on hot days, and melted tar is slick.  Factor that into your riding when it gets toasty.

A meal fit for a king, but not for lunch. You wouldn’t want to ride in hot weather immediately after this Baja seafood extravaganza.

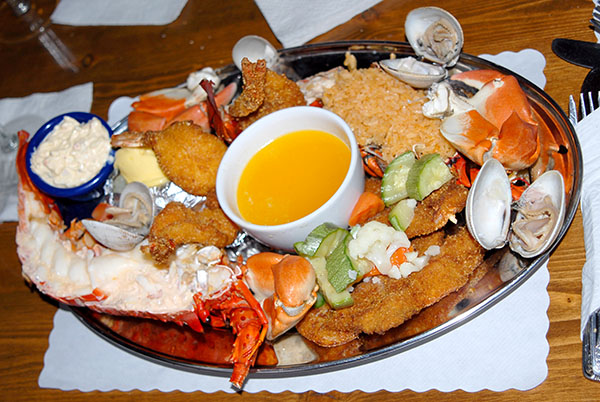
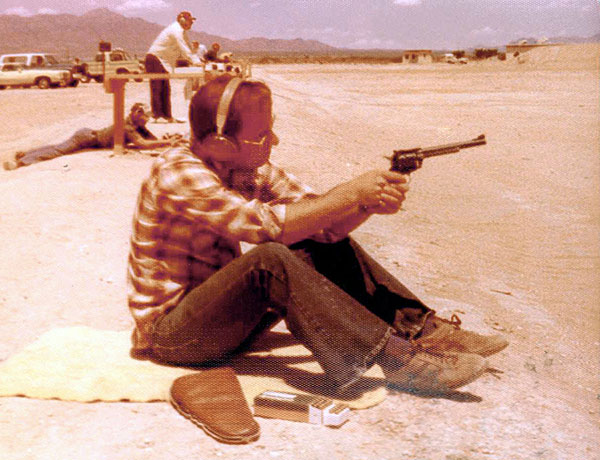
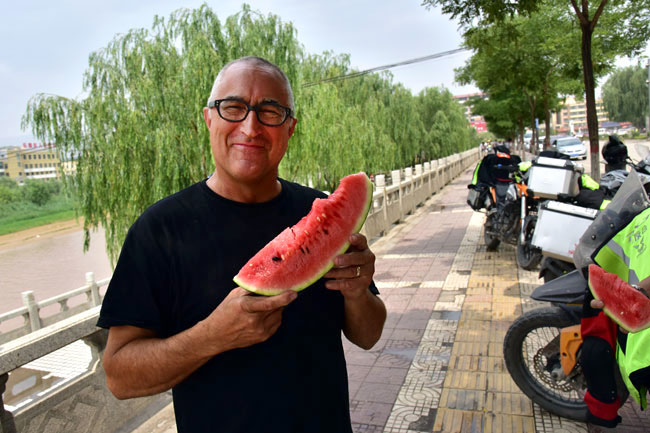
Eleven: Eat light.  Don’t over indulge.  Heavy meals put a strain on your digestive system and your heart, and that can elevate your body temperature.  When I was involved in testing munitions out in the Mojave on hot days (where it was sometimes over 120 degrees), we always brought along melons for lunch and nothing else.  We didn’t need to keep them cool.  They were a great treat, they seemed to make it a little cooler on those horrifically hot days, and they help to keep you hydrated.  Good buddy Sergeant Zuo seemed to know all about that in China, too.  We were riding through Ledu in central China one ferociously hot day when our favorite Chinese NCO stopped the group, disappeared, and returned with a couple of watermelons.  That was a welcome respite and a marvelous treat.  We ate a lot of watermelon in China.

Gresh taking a break in Ledu, China. That’s the Yellow River (China’s Mother River) behind Uncle Joe.

Twelve:  Lighten up on the low sodium schtick.  A lot of us older guys try to watch our sodium intake.  When I was in the Army, they actually gave us salt tabs on really hot days when we were in the field, the theory being that we needed the sodium because we were losing so much through perspiration.  I later heard the Army reversed that practice, but the fact is you lose a lot of minerals through perspiration.  I don’t worry about my sodium intake when riding on hot days.


So there you have it.   You know, most folks who ride motorcycles these days…well, how can I say this delicately?  We aren’t spring chickens anymore.  Motorcycling tends to be a thing mostly enjoyed by full-figured senior citizens, and we have to take care of ourselves, especially when we venture out on hot days.

If you other ideas about hot weather riding, let us know in the Comments section.  We love hearing from you.

Product Review: Xtreme Power 14-inch Electric, Wet/Dry Concrete Saw

Recently we added a paver patio to Tinfiny Ranch’s ever-growing suite of stone and concrete structure. The pavers we used weren’t exactly made for paving. They were that pressure molded, popcorn cement stuff, like a two-cell block but these were all solid. I have a great assortment of 4x8x16 blocks and less, but still plenty of 8x8x16 blocks. I got them at a surplus materials auction for only 20 dollars. No one else bid on them because they are kind of an odd block.

The only catch was you had to move them. The blocks are not that heavy individually but the repetition of loading several hundred of them into The Bomber, a 1990 4X4 GMC Suburban (last year of the solid front axle!) had me questioning the wisdom of bidding so high.

When I bought the blocks I had no immediate plans for them, it was just too good of a deal to pass up. It took three trips to load and move the blocks from the auction yard back home. I made a neat, orderly pile up in the higher reaches of Tinfiny Ranch. The blocks sat there a couple years, not bothering anyone.

During that time I built a retaining wall and leveled the back yard, then I poured a decorative concrete slab around the side and back of the little shack we call home. When I got to the section where the septic tank was buried I had to stop pouring concrete. At this stage of the construction process those $20, auction concrete blocks started to look like a canny deal. Unlike real pavers these blocks were 4 to 8 inches thick. That means I needed a way to cut the blocks to fit the odd shapes mandated by my out-of-square building techniques. I purposely make my home projects cockeyed. It makes them easy to identify if they are ever stolen, like the VIN number on your motorcycle.

Which is, even I have to admit, a really long introduction to this concrete saw review.

I didn’t plan to buy Xtreme Power’s 14-inch electric, concrete wet-saw because I already had a 12-inch Hitachi concrete saw. It’s kind of funny in a sad, losing-my-mind sort of way but it had been so long since I used the Hitachi I forgot what size it was and bought a new 14-inch, wet-cutting, diamond blade for it. Naturally the 14-inch blade wouldn’t fit into the 12-inch saw. Side by side the 14-inch saw is much larger than the 12-inch. It just goes to show you how a couple inches can make a big difference.

My wife CT, constantly bucking for wife of the century, suggested I check the prices on a new 14-inch saw to fit the blade I had instead of buying yet another 12-inch blade to fit the saw I had. There were other, mitigating circumstances that I didn’t let CT know about. One of them was the fact that the Hitachi was never made to be used wet. It was a dry saw. My Pop welded in a threaded bung for a garden hose and for years we used it plugged into 120 volts while standing in water. We did this because we were construction workers and simply not very bright.

It was only a hundred bucks more to buy a whole new saw rather than eat the sunk costs of the 14-inch diamond blade and buy another 12-inch diamond blade. A big plus is that the Xtreme Power saw is built from the factory to be used wet. All gripping surfaces are electrically isolated and the power cord has one of those super-sensitive GFI-type circuit breakers to prevent idiots like me from electrocuting themselves.

Spinning a 14-inch blade through concrete is not an easy thing to do. It takes lots of power and with a 15-amp rating the Extreme Power saw uses just about all the current your standard household receptacle will supply. You won’t be running this saw on a 100-foot extension cord.

Concrete saws rotate the opposite direction from wood cutting circular saws. Meaning if the saw binds it jumps forward instead of kicking back. Even if it doesn’t bind you have to restrain the saw rather than push it forwards. It’s a handful to keep the thing going in the direction you want.

Xtreme Power’s 14-inch saw was not without its faults. The saw came with a strange water connection than won’t fit any US-spec water hose. I had to replace the stock fitting but the step-down in size from garden hose to saw fitting was huge. I made a spooky looking plastic adaptor to accommodate the size issue.

Once connected to water I opened the hose bib and the small hoses promptly blew off and squirted water into the inner reaches my nice new 14-inch Xtreme Power saw. This didn’t bother me, as the manufacturer must have anticipated a wet saw getting wet. Xtreme Power uses water supply hoses that are a soft silicone type of material; so soft they won’t stay on the hose barbs. A few wraps of bailing wire around the hoses secured them and left a nice, sharp barb to cut my hand on should I ever relax my vigilance in the future.

My water supply problems were not over yet. In use those super soft hoses manage to kink easily, stopping the water flow to the blade. It’s easy to tell when the water stops because clouds of cement dust billow from the blade housing. There you are, trying to steer a heavy, bucking saw while holding the water supply hose in a position that won’t cause it to kink. I’m amazed I didn’t sever both my feet with the damn thing. New, stiffer hoses will be installed before I use the 14-incher again.

Ignoring the water hose problem for the moment this saw cuts concrete like butter. I can make a foot-long, 4-inch deep concrete cut in about a minute. There’s no dust but a slurry of concrete mud slinging out the back of the machine means you won’t be carving the Thanksgiving turkey with this thing.

Being a wet cutting saw the blade housing has to cover a large percentage of the blade to prevent the user from being splattered with mud. This housing makes seeing where the blade is cutting nearly impossible. You have to kind of wing it. There’s a notch on the shoe to use as a guide. I had good luck eyeballing the line using the edge of the shoe and the edge of the material as a guide.

Which brings us to another problem with using a 14-inch blade to cut 4-inches of concrete: You may luck out and make a straight cut from the side the saw is on but that big blade has other ideas and will wander outboard leaving behind a tapered cut as the blade flexes. A multitude of passes with shallower cuts would be a better idea but I needed to move on so I chopped the pavers in one pass. Precision is not my bag when it comes to stone work.

Out of the box, the Xtreme Power saw is not ready to work. You’ll need to redo the water hose system before attempting any cuts. I was cutting really thick blocks so for regular pavers the blade wandering issue probably won’t be a problem. This saw is big and heavy but it has to be because of the size blade it swings. Xtreme thoughtfully included a set of wheels that would come in handy if you were cutting many feet of expansion joints or grooving an area for non-skid. I’d like to rig a handlebar system so the saw could be used as a walk-behind unit.

I can’t comment on longevity. I’ve used the saw two days in total. Amazon has them for $200 with free shipping. That’s a little more expensive than renting a saw for two days but probably less than renting a saw for a week. The blade is not included. You’ll have to buy that separately, which is how I got into this mess in the first place.


You’ll find more Product Reviews here, and if you like Gresh’s writing (and who doesn’t?), here’s a link to more Joe!

A .257 Bob Triple A French Walnut Kimber

I like fancy walnut.  I won’t buy a gun unless it has exceptional wood and it’s in chambered in a round I already shoot (I don’t want to buy new dies and components, and with the exception of .22 Long Rifle, I only shoot what I reload).  On rare occasions I’ll come across a rifle with wood so exceptional, though, that I’ll set aside my caliber rule. This is a story of one such rifle: A Kimber 84 Classic Select chambered in .257 Roberts.

The Kimber “Select” designation means the rifle has been selected for the figure in its stock, but I’d seen any number of Select Kimbers with mediocre wood.   That’s not the case here, though.   The two photos directly below were straight from the Gunbroker.com ad, and I’d never seen one as beautiful as the auction photos indicated.

I knew I wanted the rifle, but I was a bit skeptical because I’d talked to a guy at the range with a .257 Roberts Kimber.   When I asked him how it shot, he just looked down and shook his head.  “With that pencil weight barrel, it’s hard to hold 3 inches,” he said.   “Good enough for deer, I guess.”

But still, that wood.  When I saw those photos above online, I called the store behind the Gunbroker ad.  “Is it really as nice as the pictures?” I asked.

“We were stunned when we opened the box,” the guy at the other end said, “so the answer is yes.  We’ve never seen one like it.”

That cut it for me.  The rifle had a “buy now” price posted on Gunbroker, and that’s what I did.  The time to buy something exceptional is when you see it.  I suspect if I had let the auction for the Kimber run its course, the bidding would have taken the price well north of the buy now number.

I was a little leery of the .257 Roberts cartridge having had zero experience with it, but everything I read about it was good.  Ned Roberts (a gun writer and wildcat cartridge developer in the 1920s) necked down the 7mm Mauser round to .25 caliber (the actual bullet diameter is 0.257 inch).  Remington added legitimacy to the cartridge by offering it in 1934.  Folks say it’s perfect for hunting everything from groundhogs to deer.  All that sounded great, but I remembered that guy with his .257 Bob at the gun club.  I need not have worried, though.  You’ll see why in a minute.

So how did the Kimber shoot?  In a word, it was fantastic.  How about sub-half-minute groups the first time out?

The secret sauce for the Kimber is 36.5 grains of IMR 4320 propellant under the 100-grain Sierra jacketed softpoint bullet (their No. 1620 bullet).  My Lyman manual lists a propellant range for that bullet of 36.0 to 40.0 grains.  I had three loads prepared that went up to 38.0 grains, but I found the 38.0-grain load too hot (the bolt was difficult to open).  You should always start low and work up, and I had just proven that.  Every rifle is different (even when they are identical), and 38.0 grains was too hot in my rifle.  The 36.5-grain load was the Goldilocks load:  It was just right.


More beautiful wood and secret sauce reloading recipes?   You can read them right here!

Squeeze Me: KLR250 Refresh, Reflash and Rehash Part 3

The KLR250 refurbishment has been going slowly but in addition to that I’m not getting much done otherwise. It’s the heat. Temperatures at Tinfiny Ranch have been hovering around 100 degrees or more and under these conditions it’s all I can do to press paper firebricks.

I did manage to order a brake caliper kit from England. The Widow Maker’s front brake gave me lots of problems at Daytona this year. The caliper was mightily stuck and the master cylinder was odd feeling. I managed to get the brake working well enough for Bike Week and replaced the master cylinder in a previous R, R & R episode but I didn’t trust my half-assed Florida Man repairs on the caliper.

The Brakemasters rebuild kit was very complete and was inexpensive to boot. The Widowmaker’s original rubber parts lasted through 20 years of neglect so the new stuff has a steep hill to climb. The only part I didn’t care for was the new bleeder nipple. The replacement nipple did not want to thread in easily. I could have forced it and remolded the aluminum caliper threads but instead used the old nipple, which threaded in by hand.

As expected, the caliper job went well. Old motorcycles with single-piston calipers are a breeze to repair. The hardest part was fitting the dust seal into the caliper body and then fitting the piston. I didn’t remember how I did the trick last March and was getting frustrated. Thank goodness for YouTube; I pulled up a quick search on caliper dust boot installation and there was a guy showing me how to do the deal.

I think in March I used a beer can to make an expander sleeve for the piston and then slid the piston into the (already installed in the caliper) boot. It just wasn’t working this time. Maybe fresh rubber is stronger than 20-year-old rubber. YouTube man fitted the boot to the piston first (the opposite of what I was doing) and let a short length of rubber hang off the back. That hanging bit was then pushed and prodded into its groove on the caliper. Once the dust boot is in the groove the piston can be slid into the caliper all the way until the piston groove catches the other end of the boot. With all the talk of grooves this sounds confusing but that’s why YouTube videos are so nice. YouTube Man’s method worked great and the caliper is now ready for reinstallation.

If it cools off a little I’ll tackle the fork seals and re-grease the steering head bearings next. And keep making firebricks, of course.


More on the KLR250 and other moto-resurrection stuff is on the ExNotes Resurrections page!

I Got Mine: Viking Cycle’s Ironside Mesh Jacket

You already read about Joe Gresh’s Viking Cycles jacket. I received my Viking jacket around the same time Gresh received his. Like Joe’s jacket, mine is vented, and that’s entirely appropriate for the extreme heat we are having here in So Cal.  It flows a lot of air, and once moving, riding in hot weather is tolerable.  And you have to love the orange on this jacket.  Orange is the fastest color; if you don’t believe me, just ask good buddy Orlando.  That’s Orlando and Velma in RAZ (you know, the Rachel Autonomous Zone, where ketchup bottles are assigned to specific tables).  Those two never miss an opportunity to pose with an orange motorcycle.

The Viking is a good-looking jacket, with plenty of pockets.   There are two chest pockets, two belly pockets, and a pocket suitable for cell phones or eyeglasses just inside the zipper.

The inside pocket…suitable for shades, or maybe a cell phone.  The zippers all appear to be of good quality, too.

About those belly pockets…they are sized perfectly for holding a lot of different things.  Baseball hats, cell phones, Yoo-Hoo boxes, and more.

My jacket came with a spec card, and rather than try to describe the specs myself, I’ll let the card do the talking.

The jacket had a desiccant pouch in one of the pockets.  I always wonder what prompts warnings on things.  Take a look:

Don’t eat the desiccant.  Seriously?  You know the good folks who make these things put that warning on the desiccant because somebody did.  Even with warnings, though, people still do the things the warnings warn them not to do.  You know, folks who urinate on the electric fence because they just have to find out for themselves.  Some of those people vote, too.  But I digress. Back to the main attraction, and that’s my review of the Viking Cycles jacket.  It’s made in Pakistan.  That’s okay by me.

Like most motorcycle jackets, the Viking Cycles jacket has a beltline adjustment strap and straps for adjusting sleeve flop.  The jacket also has a removable liner, and mine has the pocket tether and hook Gresh already mentioned in his review, presumably for a spare key.

As Joe Gresh commented in his jacket review, the Viking jacket’s price is surprisingly low at $49.99.  I’ve had lots of motorcycle jackets over the last few decades; this price is way lower than anything I’ve had before, even considering employee discounts and inflation.  I believe the Viking Cycles jacket is of comparable quality to most other jackets I’ve had, and better than most.  Time will tell, but so far, things are looking good.


Read our Product Reviews here!

Turnbull Guns

My Dad was a world-class trapshooter and he owned more than a few exotic shotguns when I was a kid.  I didn’t know much about them but the names and the quality of those trap guns impressed me even as a little guy.  Ljutic, Parker, Winchester, Perazzi, L.C. Smith, and others were stacked in every corner of our little place in New Jersey, and the colors, the wood, and the engraving stuck in my mind.  Of particular interest to me were the fine walnut and the exotic colors.  Dad explained that the swirling grays, browns, and blues on the receiver were done with an exotic color case hardening process that used bone charcoal laid on the parts at high temperature.   It’s magical stuff.  I didn’t understand all of it then and I don’t pretend to understand all of it now, but I sure like the way those guns looked.

Fast forward 50 years or so, and I learned of a company in New York called Turnbull Manufacturing.   Doug Turnbull runs it and the focus originally was on firearms restoration.   As part of that, Turnbull researched the history and lost art of color case hardening so he could include it as part of the restoration process.   Turnbull’s work was stunning, and it didn’t take long until a few firearms manufacturers and gun distributors realized it would make a highly-marketable feature on limited runs of new guns.

The Turnbull 1917 Smith and Wesson

A 1917 Smith and Wesson, part of a limited run offered more than a decade ago with Turnbull color case hardening. The photo doesn’t do the gun justice; it’s beautiful.

15 years ago Smith and Wesson introduced a reissue of its World War I Model 1917 for a very short time, and as part of that deal, the new Smith included Turnbull color case hardening on the frame.  I saw one of the Turnbull 1917 revolvers at a local Bass Pro and it sat in the display case for months.  Where I live, the rage is all plastic guns that wannabe gangbangers hold sideways like they see in movies released by folks whose entire knowledge of guns could fit on the head of a pin (with room left over for the Gettysburg Address), so the re-release of the Turnbull 1917 Smith stayed in the Bass Pro display case for a long time.   It was a thousand dollar handgun that Bass Pro had marked down to $695, and it still hadn’t moved.

A few weeks later I stopped at Bass Pro and the 1917 was still there.  I asked the kid behind the counter what they would take for it; he read the price tag and told me $695.  Would you consider less, I asked.  I’d have to ask the manager, he said, looking at me and not moving.  Why don’t you do that, I answered.  He finally realized his job was to sell stuff and I was a real live customer, so he took off in search of whoever the boss was.

“We’ll take 30 off,” Junior said when he returned.

“Is that percent, or dollars?”

He smiled.  “Dollars.”  It was still a hell of a deal and I pulled the trigger (pardon the pun; some of these almost suggest themselves).

All that, and it shoots, too! The fixed sights are right on the money with 185-grain jacketed hollow points over 7.0 grains of Unique.

I love my 1917 and I love shooting it.  It’s accurate.  It looks cool, it hits where I want it to hit, and it’s a .45.  It makes me feel like Indiana Jones.  And there’s one more cool thing…this gun carries well.  Indiana Jones has nothing on me.  That Cairo guy cloaked in black twirling the big sword?  Bring him on.

Turnbull’s 1895 Marlin

Next up?  That would be my 1895 Marlin in .45-70.   Turnbull did a series of these, too.  That Marlin 1895 with Turnbull’s color case hardening hit home for me as soon as I saw photos of it.  I had to have one.

One of a limited number of Turnbull finished Marlin 1895 rifles in .45 70 Government. In addition to the color case hardening on the metal bits, Turnbull also refinished the stock and fore end to match the colors on rifles that left the Marlin plant a century ago.

Back in the late 1800s and early 1900s, factory Marlin lever guns were color case hardened.  I am a big fan of .45 70 Marlins (as a quick review of Tales of the Gun will show you), and an 1895 with the Turnbull treatment was irresistible.

Turnbull did a magnificent job on these.   It’s more than just color case hardening on the receiver.  Other bits and pieces received the Turnbull treatment, and Turnbull refinished the stocks with a red stain like Marlins had a hundred years ago.   The Turnbull Marlins are very limited production items, and Turnbull had photos of each Marlin they offered with this treatment.  The photos you see here are the actual rifle I selected.

Color case hardening is like highly-figured exhibition grade walnut. It looks alive, it changes subtly under varying light conditions, and it is mesmerizing.

I’d like to be able to say a got a hell of deal on this one, and in a sense I did:  I paid list price for the Turnbull 1895, and that was still a good deal.  To make it even better, shortly after I purchased the rifle Turnbull bumped the price significantly.  Got in under the wire on that one, I did.

The Turnbull Ruger Super Blackhawk

But wait:  There’s more!  I’ve been a Ruger fan for years.  That particular affliction started with a Super Blackhawk I bought when I was in the Army in the 1970s.  I shot it in International Handgun Metallic Silhouette matches back in the day, and I still shoot it.  Rugers are great guns and they last forever.

Yours truly on the Fort Bliss Rifle and Pistol Club firing line in 1976. The game was metallic silhouette and the Ruger Super Blackhawk was perfect for it.

You can guess where this story is going:  Turnbull teamed with Talo (a Ruger distributor) a couple of years ago to add Turnbull color case hardening to a limited run of Ruger Super Blackhawks.   Wow!  .44 Magnum, a Super Blackhawk, and Turnbull color case hardening.  It’s like these guys knew me personally.  I kept an eye on Gunbroker.com and when one of the gun outfits advertised these guns at something like 30% below list…well, you know how that wave crashed on shore.  It’s an awesome handgun and I had it on the range out at the West End Gun Club just last week.

A Turnbull-finished Ruger Super Blackhawk. You can still find these brand new on Gunbroker.com, but when they’re gone, they’re gone. This is a gun that will only go up in value.
The Turnbull color case hardening treatment just flat out works on a Ruger Super Blackhawk. No two guns are exactly alike.
A view of the right side of my Super Blackhawk. I shoot a light .44 Magnum load in mine, as I’m not trying to knock over metallic silhouette rams at 200 meters these days. But if I wanted to, I still could.

If you want to learn more about Turnbull, their guns, and their services, you might want to poke around a bit on the Turnbull site.  The photography and the info there make it worth a visit.


More Tales of the Gun stories?  You bet!

The Canton Fair

The Canton Fair:  I’d heard of it many times, and it has been billed as the world’s largest motorcycle trade show.   I don’t know if that latter statement is true, but the Canton Fair is certainly China’s largest motorcycle trade show, and China is one of the world’s dominant motorcycle producers.  Biggest or not, I had an opportunity to attend the Canton Fair in 2017, and who could say no to something like that?

Inside the Canton Fair’s motorcycle exhibit area.

So, after a midnight departure from Los Angeles International and 15 hours in a center seat on a Boeing 777, I arrived in Guangzhou at around 8:30 p.m. either that day, the next day, or the day before (I can never get the time change thing right).  Those 15 hours in the big Boeing flew by (literally and figuratively) quickly, clearing Chinese Customs and Immigration in Guangzhou was efficient, finding a cab was easy, and before I knew it, my Chinese Mario Andretti cab driver was shepherding me through the rain-slicked streets of late night Guangzhou.  I’ve spent a lot of time in China and it felt good to be back.   A lot of folks hate China these days.  I’m not one of them.  I’ve had too many good times and I have too many good friends in China.

Receptionists at the Paco Hotel somewhere in Guangzhou.

I stayed at the Paco Hotel, only a couple of miles from the Canton Fair.  A hotel right next to the Fair was a cool $1000 a night, so that was a nonstarter. The Paco had what I thought was a good buffet and I ate heartily on all but my last day in Guangzhou.  On that last day, a cockroach the size of a small bird ran across a tray of noodles just as I was reaching in, and that killed my appetite for the Paco buffet.  I guess I’m lucky it happened on the last day.

Here’s a shot taken while I was on the bridge crossing the Pearl River. The oval building on the left bank is part of the Canton Fair complex. That tower you can barely see in the distant haze is Guangzhou’s radio tower, which is a cool quarter of a mile high. For a few years, it held the title of the world’s tallest structure.

The next morning, my first full day in China, it was off to the Canton Fair.  I had no idea what was in store for me.  Think big, think big crowds, and think “I have no idea what I’m doing or where I’m going but I’m following the crowd,” and you’ll start to get a feel for what getting into the Canton Fair was like for me that first day.  My leg was killing me (an old motorcycle injury), it was hot and humid (hey, it’s China) and it took a good two hours from the time I left the hotel until I was actually inside seeing new motorcycles.  There’s the Guangzhou traffic. It’s normally heavy, but as we got closer to the fair (after crossing the Pearl River, which bisects Guangzhou), things really got thick.  And there were the crowds.

The crowd entering the Canton Fair. There were a lot of people.

There was a press of humanity trying to get into the fair once I was off the bus. I walked along with a heavy crowd for a good mile, with my sciatic nerve on fire every inch of the way. Getting into the fair was a process, and it started with guessing which crowd to follow.  I got lucky; I guessed right.   I had to buy a pass, and I opted to get the 100 RMB buyer’s badge. 100 RMB is about $16, and that allowed me to enter the Canton Fair all week (as opposed to paying 30 RMB for a spectator’s pass every day).  But I couldn’t just buy the badge. Lines, lines, and more lines.  And for every one of them, I had to guess at which one to follow.  I had to go through a metal detector after standing in one long line. Then I had to stand in another long line to fill out an admission application form. Then it was another long line for a photo. Then it was another long line to take the photos to the folks who made the badges. Then it was another long line to pay for the badge. Then it was another long line to get the badge. And while all this was going on, the crowds were deep and pushy. But they were friendly.

Oddly, I didn’t bump into anybody from the United States.  I met several interesting people from other countries. One guy pushed up into me and asked where I was from.  When I told him, he told me he was from Iran. Wow. Iran. An American, and an Iranian, literally pushed into each other.  He asked me what I thought about what Mr. Trump had done in Syria a few days ago (The Donald had lobbed a missile in).  Hmmmm. This could get interesting, I thought.  “You know, Don doesn’t call me as often as he used to,” I told my new friend, “and even if he had called this weekend, I was on a 15-hour flight to get here, so I would have  missed the call.”  My new buddy stared at me for a couple of seconds and then he started laughing.  I did, too.  He took a selfie of the two of us. Me. Working for world peace, one Iranian at a time. My photo is probably in the ayatollah’s database now, but hey, you do what you gotta do.

Badges? We don’t need no stinking badges!

Things were moving along. I had my photo, I had my badge, and there was one last line:  The line to get inside and actually start seeing motorcycles.  And then it started raining. On us. Standing in line.  Outside.  Hey, if it was easy, everybody would be doing it.

Inside, much to my surprise, I still wasn’t in the motorcycle part of the Canton Fair.  The complex is immense, and I had to ask around a bit to find my way to the motorcycle area.  I finally made it, though, and the Zongshen booth was the first one I saw. It was one of many and I knew several of the guys from Zongshen, so we visited a bit.

The Zongshen booth. Recognize that bike?

Zongshen, as one of the Big 4 Chinese motorcycle manufacturers, has a lot going on and they have a lot of interesting products.  They make motorcycles, they make workhorse trikes, and they make a lot more.

Zongshen’s 500cc diesel trike. Gresh fell in love with these when we saw one in Zongshen’s R&D area in Chongqing.

There were a lot of motorcycle manufacturers showing their new products at the Canton Fair.  I enjoyed seeing them all.

Tien Ma. Never heard of them, like most of the manufacturers I saw displaying motorcycles at the Canton Fair. Lifan (the booth behind this one) is one of China’s Big 4 motorcycle manufacturers.
XGJao, another one I never heard of. One of their sales guys was named Elvis.
Loncin, another one of China’s Big 4.

My buyer’s badge gave me status. There are motorcycle parts suppliers at the Canton Fair, and when they see a buyer’s badge, they’re on it.  They all wanted my business card and they all wanted me to have theirs.  That’s another bunch of databases I wormed my way into, I guess.  I still get four or five emails every day from manufacturers trying to sell me stuff.   I could have made a killing on N95 masks.   And I can buy digital watches for 88 cents each if I buy a thousand or more.  Who knew?  And the exhibitors?  They all seemed to hire attractive young women who wanted me to buy their motorcycle stuff.

Motorcycle component supplier booths at the Canton Fair.
A young lady selling motorcycle batteries.

More than a few of the bikes and trikes were interesting.  Some had names that were funny as hell.  And some were styled to fit regional preferences.  Take a look.

Now, I ask you: Who wouldn’t want a Yamasaki? It might go nicely with your Kawazuki.
Monkey bikes, miniature versions of the real thing.
Appropriately named, of course.
Behold:  The mighty Zarang. Check out this CG-engined trike cargo hauler sold in Afghanistan. If I was marketing this thing, the music would be Zarang Me, sung to the tune of Johnny Cash’s Hang Me.  “Zarang me, Zarang me, they ought to take a rope and hang me…”
The Zarang’s lighting and hornage. Think about that poor alternator!

The Canton Fair has a restaurant row that must have 100 restaurants, ranging from exotic Middle Eastern foods to all kinds of Chinese food to Papa John’s pizza. I had Chinese food every day (it’s a “when in Rome” kind of thing for me).  The beef dumpling soup was a whopping 25 RMB (that’s $3.96 in US dollars), and it was delicious.

The Canton Fair’s restaurant row.

There are people here from the Middle East, Australia, South America, Africa, and  other places.  Yesterday while I was enjoying my now-standard lunch of beef-and-onion dumplings, an older fellow asked if he could sit at my table (the seating is very crowded because there are so many people here).  “Sure,” I said.  His English was a little rough, but he reached into his bag and pulled out a piece of flatbread.  He broke it in two and offered half to me.  Not wanting to be rude, I accepted it. I asked my new friend where he was from and his business.  He was a construction guy from Lebanon. My guess is that piece of flatbread was from Lebanon.  Imagine that…a guy from California at a motorcycle show breaking bread (literally) with a construction guy from Lebanon.   A small world indeed, and I was living it, one flatbread bite at a time.

Beef dumpling soup, best paid for with true money.

I had another interesting experience one day at lunch when I attempted to pay.  I peeled off some the Chinese currency I had and the young lady at the cash register examined it closely.  “Not true money,” she exclaimed, in English, and loudly.  Other folks around the cash registers looked at me.  “Not true money,” she said again, the volume up another notch or two.  And then, just in case I was hard of hearing: “NOT TRUE MONEY!!!”

So there I was, attempting to pass counterfeit currency in the Canton Fair, with what seemed like fifty thousand Asian faces taking in the drama unfolding before them:  An American (me) trying to pay for his soup with counterfeit money.  I had visions of rotting in a Chinese prison.  Maybe worse (they have capital punishment over there, you know).   I fished out more bills and handed them to Miss NOT TRUE MONEY, and her focus immediately shifted from prosecution to sorting.  She studied each bill, giving some back to me and keeping others.  The line behind me continued to grow.  Weirdly, nobody seemed to mind my attempted criminal behavior or the delay it had induced.

Miss NOT TRUE MONEY was finally satisfied with the cash she selected, and the soup, as always, was delicious. When I left the restaurant area, there was a young guy selling ice cream outside.  I found an ice cream bar that looked good and paid him, using some of the bills Miss NOT TRUE MONEY had rejected.  He looked at each one suspiciously, but he ultimately accepted them.  That ice cream was delicious, too.  I admit:  It was kind of a rush, committing a felony in a foreign land.  I’m only writing about it now because I think the statute of limitations ran out.

When I returned to the hotel, I hit the ATM around the corner to get more (and hopefully, more true) cash.  When I reached into the ATM hood, my hand started burning.  Something either stung or bit me.  I had an immediate and big welt on the back of my hand that hurt like hell, and within an hour, the entire back of my hand turned black. Maybe it was a murder hornet before they gained fame here in the US.  My Mom would have told me it was God punishing me for passing that counterfeit money.  Whatever it was, it sure hurt.  It was gone by the next day, but wow, my experience with all things related to Chinese currency was not pleasant.

I had been sticking to the motorcycle exhibits during my time at the Canton Fair, but I took a different entrance one morning.  Silly me:  I thought the Canton Fair was only motorcycles.  Nope, it’s everything.  There are a lot of exhibits marketing to the construction industry.  China was still building furiously, and they evidently supply construction materials to a lot of the world.  I imagine Lowe’s and Home Depot have been here more than a few times.  Here are a few shots as I walked through these areas.

Surprisingly, I didn’t meet a single US person in the motorcycle area during my several days at the Canton Fair.  There were lots of folks from Asia, and more than a few from the Middle East, South America, and Europe.  But no Americans (other than me).  Go figure.

The Canton Fair was canceled this year due to the Covid 19 pandemic, but it’s going to be back.   If you ever have a chance to roll through Guangzhou in April, the Canton Fair needs to be on your bucket list.  It’s a cool thing to see.


Help us continue to bring more content to you:  Please click on the popup ads!


Never miss an ExNotes blog:

The Not-So-Free Press

Long time readers know that we try to avoid political topics here at ExhaustNotes.us. There’s no percentage in it as the best you can hope for is losing half your audience. Oh sure, we could tear off the bandages and let fly with the anti-pros and pro-cons as good as the next guys. But with Berk leaning right and me not-leaning-right the result would be a complete loss of all of our readers. No, the free press I’m referring to in this click-bait title is my four-brick, paper brick maker that I got for Christmas last year.

This brick thing happened because I’m a subscriber to the Sunday edition of The New York Times. The Sunday Times is a left-biased but mostly true news source that is so big you can read the thing all week long. The NYT puzzle page is legendary and it takes me forever to do the crossword…in ink. And what happens after you read the huge quantity of great writing contained within? Boom! Into the trash goes all that fine newsprint. I felt guilty throwing those efforts into the landfill. It doesn’t have to be this way. I’ve started recycling The New York Times into home heating blocks for the coming winter. If this works out well I may start a commune. We’ll wear flowers in our hair and stink. I’ll call it The Gresh Utopian Society, or Gus, for short.

After shredding all that mostly true but left-biased information I toss the confetti into an empty cat litter bucket. Any bucket will work but the cat litter bucket seems appropriate for America’s political mood. Next I pour water over the top of the paper and add a bit of bleach to keep the odor and mold to a tolerable level. You’ll need to let the paper soak for a week or more for it to break it down into an oatmeal-consistency mush. I give the mush a stir every few days just to let it know I’m thinking of it.

The paper brick mold is a simple machine with four perforated compartments for mush and a close-fitting plunger to squeeze the water from the mush and compress the block. My example was a little too close fitting as it was nearly impossible to get the plunger into the mold. A quick session with a grinder and pliers made the plunger more plungerable, if I can use that word.

Once you’ve filled the mold with your paper mush a heavy weight on the plunger will supply steady pressure and solidify your firebricks. Drying time is about a week out here in arid New Mexico. If you tried this in Florida or the Pacific Northwest the bricks may never dry. Yes, this is a time-consuming process but look on the bright side. If you find one let me know.

The finished paper brick is surprisingly lightweight. It takes two NYT Sunday editions to make about six bricks (depending on what President Trump has said or done the week the paper came out). I have just started building my winter stockpile so I can’t really say if this is a good idea or a total waste of time. As they say, the truth is in the burning and if the bricks ever dry out completely I’ll write a follow up report on how long the paper bricks stay aflame on the next slow news day.

Stranded in Baja, Hearst Castle, and more…

Every once in a while we do a blog that covers a bunch of topics, and this is one of those times.

Good buddy Mike Huber and his friend Bobbie motorcycled Mexico (Baja, to be specific, almost another country all by itself), and he most recently published an excellent story about being stranded down there by the Covid 19 pandemic.  It’s not often that we recommend another blog, but hey, Mike’s writing is outstanding and it’s a great story.  Take a look; it’s very good.

My favorite motorcycle magazine (that would be Motorcycle Classics) sends out marketing emails on a regular basis, and in those emails they include links to past (and sometimes recent) articles.  I write for MC, and the most recent email that slipped into my inbox included a link to my Destinations piece on Hearst Castle.   You might want to read that story; I love Hearst Castle.  It’s closed for the pandemic, but the pandemic won’t last forever.  Hearst Castle will be there when it’s over.

We’re having a heat wave (both here in the Peoples Republik of Kalifornia and at Tinfiny Ranch).   That prompted us to start a piece on riding in extreme heat.   My first recommendation would be:  Don’t.   But things don’t always work out the way you want them to.  I once rode the length of Baja on a Mustang replicas with several friends, and due to a lack of research on my part we did the ride in Baja’s hottest month (and that’s September).  You can read about the 150cc Baja ride through Hell here.  Do you have any advice for riding in high temperatures?  Please share them with us (info@exhaustnotes.us) and we’ll include your recommendations here on the blog.

We have more motorcycle, gun and other stuff coming up, including info on Ruger’s new Custom Shop and their Super GP100 .357 Mag revolver, favored loads in the Henry .45 70 Single Shot, a piece on Turnbull’s iconic color case hardening and restoration services, a stunning (and tack-driving) Kimber with exhibition grade French walnut, the wrap-up of our ride through the Andes Mountains in Colombia, the Canton Fair, and for you fans of The Ten Commandments, making bricks without hay and mortar.  And a whole lot more.

Stay tuned, folks.

California State Railroad Museum

Sacramento is a cool town.  I’ve lived in California for more than 40 years now, but until recently, I’d never visited Sacramento other than for quick “in and out” business trips.  All that changed last year, when we spent a weekend in town to take in the Capitol, the restaurants, Old Town, the American River, and more.  That “and more” part included a real gem:  The California State Railroad Museum.

There are only about 45 steam locomotives built before 1880 still in existence here in the United States.  The California State Railroad Museum has eight of them.  The one you see below is the Virginia and Truckee Railroad No. 12 Genoa.  It was a wood-burning locomotive that was shipped by the Baldwin Locomotive Company of Philadelphia in 1873.   This was a popular steam locomotive configuration back in the day.  In its day, more than half the locomotives in the United States were of this design.

The locomotive below is an unusual one, and a configuration that I had never heard of or seen before:  It’s the Southern Pacific’s No. 4294 cab forward articulated locomotive.  This one has the engineer’s cab on the front of the locomotive.  You’ve got to look at it for a moment to realize what’s going on.

It’s easy to see why this locomotive weighs a cool one million pounds.

The photo below is the Virginia and Truckee Railroad’s No. 13, originally ordered in October of 1872 and delivered in 1873.  Somewhere along the trajectory of its life the railroad changed it to No. 15 (you know, 13 being an unlucky number).   This one was once torn down to the bones for salvage, but the team at the California Railroad Museum resurrected it to the  condition you see here using period photographs as their guide.   It’s brilliantly displaced with a mirror underneath so you can catch all the details.

Here’s another cool old steam locomotive, also designated as No. 12. It’s the North Pacific Coast Railroad’s called the Sonoma.  This one ran in service from the 1870s all the way to 1938, and then in 1939 it was restyled to look like the Central Pacific’s Jupiter (one of the two locomotives that met at Promontory Point upon completion of the Transcontinental Railroad; see Golden Spike National Historic Site) at the Golden Gate International Exposition in San Francisco.  It was later restored to its original condition and colors, and ultimately donated to the California State Railroad Museum.

Here’s the inside of a mail carrier.  This is cool stuff.

The museum also had a cool cutaway of a diesel locomotive, a configuration we’ve all seen.  A few years ago I had a consulting gig at a locomotive manufacturer in Idaho, and I was surprised to learn that “diesel” locomotives are hybrids.  The diesel engine turns a generator, which keeps a huge battery bank charged.  The batteries power electric motors located at the wheels, which drive the locomotive.  You could see all that in this cutaway locomotive.

The California State Railroad Museum had several cars on display that you could enter.  The one below is a dining car.  Back in the day, the railroads had their own fancy china with each railroad’s logo in the dishes.  It was pretty cool.  The guy you see on the left is one of the museum’s docents.

Here’s the kitchen in that same dining car.  Many of the old “diners” (popular roadside restaurants in the eastern US) started their lives as dining cars.  When they reached the end of their service as rolling rail cars, they were moved to highway locations and became restaurants.  Then the architectural style caught on and new restaurants were constructed to resemble dining cars.

In the early days in the American West and elsewhere, the snowdrifts could get quite deep across the tracks.  We saw this dramatic photo of one actually in service, and then we saw the real thing.

The California State Railroad Museum has a pretty cool Lionel train exhibit, too, including a wall full of collectibles.  One was the Pennsylvania Railroad GG-1 electric locomotive.  The Pennsy mainline ran about a half mile away from where I grew up, and when I was a kid, we used to spend a lot of time playing around those tracks and watching the trains fly by.  I remember seeing the GG-1 locomotives and they were really something.  The GG-1 was a sort of an art deco design from the 1930s, and they were still in service when I was a youngster in the ’50s and ’60s.  The Lionel version is a real collectible.  My buddy Steve has one that is new in the box.

I thoroughly enjoyed my time at the California State Railroad Museum.   If you’re a gearhead or a history buff, I think you will, too. While we were in Sacramento, we stayed at a hotel right at the base of the drawbridge that brings you into the downtown area (see the photo at the top of this blog), and the museum was within walking distance.  You can easily spend a half a day or more in the California State Railroad Museum.  It’s worth a visit.


All of the photos in this blog were shot handheld with available light (no flash), and Nikon’s 16-35 lens on a Nikon D810.  It’s a heavy rig and it’s tough lugging it around, but it sure does a good job.


Want more rail stuff?  Hey, we’re here for you!  Check these out:

Golden Spike National Historic Site
Old No. 463
The Nevada Northern
The Chattanooga Choo Choo