The apple doesn’t fall far…

Years ago I wrote a book about police and military motorcycles, and while I was writing it, good buddy Mike found a photograph in the New Brunswick Police Department archives of Ralph Dowgin, a New Jersey State Trooper.  The photo is awesome, and Paladin Press (my publisher) instantly knew it would be the cover:

The Trooper on the cover of my book was Ralph Dowgin, who later rose to high rank in the New Jersey State Police.  Coincidentally, the Dowgin family lived one town over from us in New Jersey when I was a kid.   My Dad knew Ralph Dowgin and spoke of him in reverential tones, so when Mike found the Dowgin photo it was extra special to me.

Yesterday, while on Facebook, another photo popped up that had my immediate and complete attention.  Check this out, and then let me tell you the story behind it:

You might be thinking:  Okay, it’s a picture of a guy on a vintage Honda Scrambler, but what’s your point?

Let me tell you:  The man on that Honda Scrambler is Gerry Dowgin.  The photo on the top of this blog has Ralph Dowgin on the cover of my book, and the photo below it has Gerry Dowgin on the cover of Vintage Japanese Motorcycle Magazine.   Gerry is Ralph Dowgin’s son!

Gerry is about four years older than me, so we didn’t know each other growing up, but he knew my cousin Sandy and we knew a lot of the same people in central Jersey.  I just wrapped up a nice telephone conversation with Gerry.  He invited me to ride with him when I’m back in New Jersey, and I invited him to ride with me when he’s out in California.  What a small world we live in!

Good times, folks, and I’m really looking forward to meeting Gerry in person!

Baja Sportbike Touring in 2004

My good buddy Bryan sent an email to me earlier today asking if I still had the photos from our 2004 Baja ride posted anywhere.  Wow.  2004.  That trip was 16 years ago this month.  Where does the time go?

Anyway, by way of background, there were three of us on that ride:  Yours truly, my good buddy Marty (who you’ve seen in other spots here on the ExNotes blog), and another good buddy, Bryan.   This was to be an unusual trip, as we did it on sports bikes.  Marty had his K1200RS BMW (which, by the way, he still has), Bryan was on his VFR 750 Honda, and I was on my TL1000S Suzuki (which was probably the fastest motorcycle I’ve ever owned).  I used to have a site called MotoFoto.cc and I had this trip posted there, but that site came down when I started the CSC blog.  This trip was on the old MotoFoto site, and when Bryan asked about it, I thought I’d post it here.   So here you go…the original web post from 2004!


This trip was a quick, 1550-mile, 4-day motorcycle tour from Los Angeles  to Mulege in the Baja peninsula in January 2004.  Mulege is about 700 miles south of the border.   I shot all of the photographs on this page with the Sony Mavica CD400. It was digital photography state of the art, sort of, back in the day.

This was my fifth or sixth trip into the Baja’s interior, and I have to tell you that it just keeps getting better. The roads are fantastic, the scenery is awesome, and, well, read on.

We stuck to Mexico’s Transpeninsular Highway (Highway 1). Here’s a typical restaurant in one of the northern Baja agricultural towns. Bryan and Marty are getting ready to continue south into the Baja. Picking the good restaurants was easy…we just looked for the ones with lots of cars parked out front.
Bryan and Joe, stopped at a deserted Baja structure. Most of the Baja peninsula is very desolate.
The roads in Baja are awesome, with long, flat, high-speed straights, and lots of twisties through the mountains. It gets really desolate and interesting south of El Rosario.
We stopped for gas in Catavina, but the town’s generator was shut down for maintenance (as it is nearly every day). Marty is getting his BMW filled up the old-fashioned way. This was an adventure…real Indiana Jones stuff.

We were on our way to Guerrero Negro to see the whales.  The riding was fabulous, as it always is in Baja.  The TL1000S was an admittedly poor choice for touring, but it was fun.

The roads in Baja are awesome.  There’s a long stretch before the Pemex station about 20 miles north of Guerrero Negro, and the road runs straight as an arrow to the horizon for a good 30 miles.  I ran the Suzuki at 145 miles per hour for nearly the entire stretch as the sun descended.  It was a glorious ride until I ran out of gas, and when I did, it was as if someone had shut the ignition off on the Suzuki.  No sputtering, no surging, just a sudden shutdown.  I was carrying an extra gallon of fuel on the TL, and that got me to the gas station.

Marty and Joe, just before getting on the bus to see the whales.
This is Victor, who talked to us about the whales on our way out to Scammon’s Lagoon. Bryan shot this photo.
Another one of Bryan’s photos, showing the boats we used for watching the whales.
One of the many whales we saw on this tour.  I shot these photos, as mentioned above, with the Sony Mavica camera.  It was not really too good for this kind of photography because of the delay between pressing the shutter button and the camera reacting.

On the way in to Guerrero Negro, I had been telling Bryan and Marty about this fabulous fish taco truck.  They were probably tired of hearing me rave about fish tacos by the time we arrived, but when we did, wow, Tony did not disappoint us.

The real McCoy.  Wow, are they ever good…Antonio’s has been selling fish tacos in Guerrero Negro for 11 years (and that was in 2004). I stop there every time I go by.
Antonio, taco chef extraordinaire…circa 2004.
Bryan is a convert. So is Marty.  In fact, they both wanted to stop on the way back through Guerrero Negro just to get another fish taco.
One of the many roadside shrines erected in memory of someone who died along this route. You see these every few miles along the Transpeninsular Highway.

After Guerrero Negro, the whales, and Tony’s fish tacos, we continued south and then east, crossing the peninsula toward the Sea of Cortez.  San Ignacio lies about halfway along that stretch.  It’s a great place to stop and grab a few photos.

The mission in San Ignacio. This building is over 300 years old. San Ignacio is a small town just off the Transpeninsular Highway. If you are ever driving this route, you have to stop in San Ignacio to see the mission. It is one of the Baja peninsula’s most interesting areas, and every one I have ever taken there has fallen in love with the place.
The entrance to the San Ignacio mission.
A macro shot of the door to the San Ignacio mission.
The Virgin of Guadalupe, at the San Ignacio mission.

From there, it was on to Santa Rosalia and then Mulege on the Sea of Cortez. Mulege is a fun town, and the tiny Las Casitas hotel is just outstanding. The rooms were great, and the margaritas and dinners were off the charts.

We stayed at the Las Casitas hotel in Mulege, which is a hopping spot.

After we checked into the Las Casitas, we followed the road all the way to the Sea of Cortez just to check the place out.  It was a cool place.  It was a dirt road and the TL1000S was a handful, but it was cool.

Bryan and Marty on the Sea of Cortez. We had just driven several miles down a very rough dirt road to get to this spot. It was worth the effort.
Checking our route for the next day with the Sea of Cortez in the background.
The river running through Mulege. The date palms were introduced by the Jesuits hundreds of years ago. Mulege is one of several oases in Baja. It is an incredibly scenic spot.
Joe and Bryan, taking in the Mulege scenery.
The mission in Mulege. This building served as a prison at one point during its life. Life was so good there, though, that the convicts were released during the day to go to work and none ever tried to escape.
Another shot of the Mulege mission.
Joe and Bryan, with the first of many margaritas and Negra Modelos in the Las Casitas restaurant. The first of many. Actually, the first of too many.
Marty and Bryan enjoying their dinner in Las Casitas.
A painting in the Las Casitas bar.

On our way back north, we stopped in Santa Rosalia because I wanted the guys to see it and we hadn’t really spent any time there on the way south. Santa Rosalia is a bustling fishing town on the Sea of Cortez.

Santa Rosalia has a French heritage, and all the buildings are constructed of wood. It is a colorful little town.
Here’s a shot of the stained glass windows in Santa Rosalia’s interesting, Georg Eiffel-designed church. The little Sony did a pretty good job here, with the meter set to the spot-metering mode. Like all of the shots on this page, this is a hand-held photograph.
Another of the stained glass windows in the Santa Rosalia church.

We had a pretty rough drive on our third night in Baja. All of the books I’ve read advise not driving at night in Baja, and for good reason.  We rode 130 miles on a moonless night to get to Catavina.  Riding at night in Baja is not an experience I recommend. The roads are not lit and it’s amazing how dark it gets out there. Then, just to make things more interesting, the white lines marking the road’s edge disappeared about 20 miles before Catavina on those winding mountain and desert roads. Throw in stray cattle and blind corners, and, well, you get the idea.  We made it to Catavina safely and stayed in the La Pinta Hotel.

We stayed in Catavina on our last night in Baja at the La Pinta Hotel.  We were tired and sore from riding edgy sports bikes for three days. The photo above shows us getting ready to depart just as the sun was rising, with 400 miles to go.

It would have been nice to take more photos as we continued on through Tecate, but we were tired and just after crossing the border we were caught in a rainstorm near San Diego. We waited in a McDonald’s, so that’s about it for our Baja photos from this trip.


Want to  know more about Baja?  Hey check out these pages!

Epic Motorcycle Rides
Baja
Berk’s Works


Want to read more about Baja?  Here you go!


Thinking of riding Baja yourself?  You’ll need to get insurance, and BajaBound is the best there is!

Henry’s home, and an interview with Dan

California’s 10 days are up, and Henry is in the house!

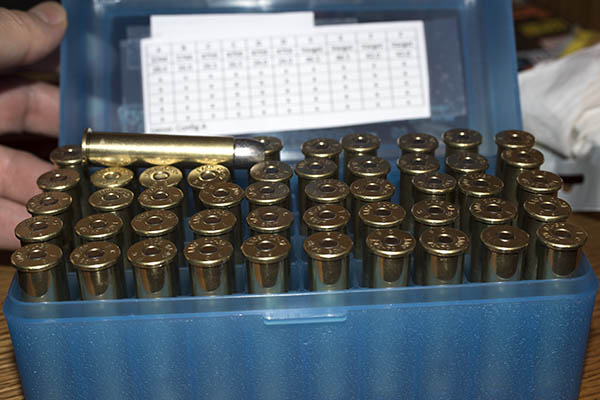
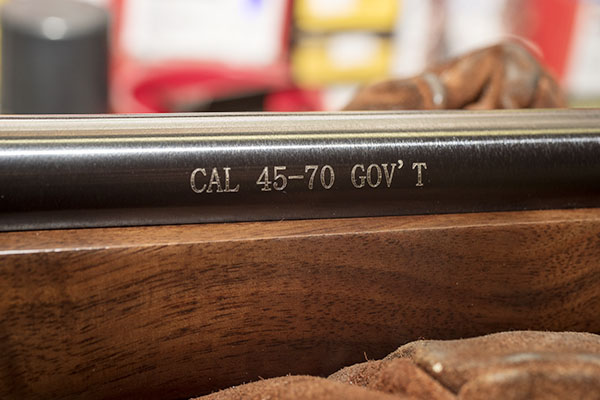
Henry, of course, is my new brass-framed .45 70 Single Shot from the rifle manufacturer of the same name.  I haven’t shot it yet, but I’m ready.  Eager, too.  This is going to be fun.

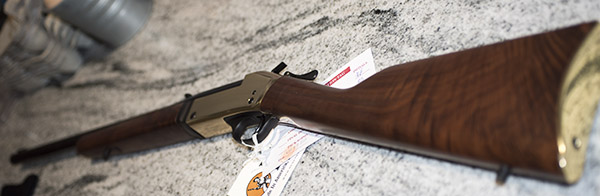
To continue the story and as promised, a few days ago I interviewed Daniel Clayton-Luce, Henry’s Director of Communications.  As you know from reading our earlier blogs, I am impressed with Henry and I purchased one of their new Single Shot rifles. I picked up my Single Shot yesterday (practicing all the required social distancing rules, of course), and wow, it is one fine firearm.  Take a look.

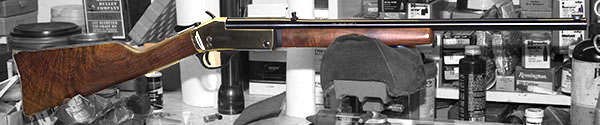
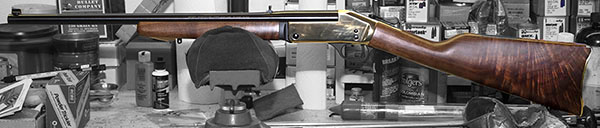
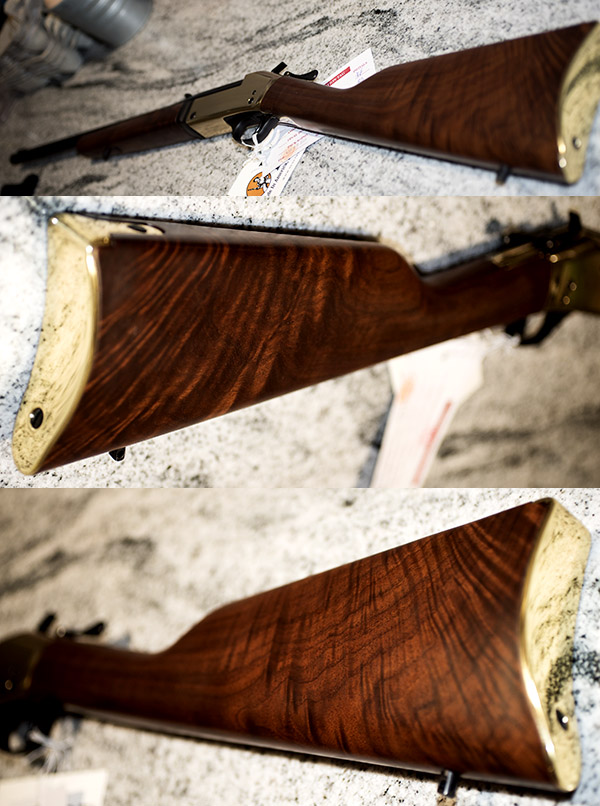
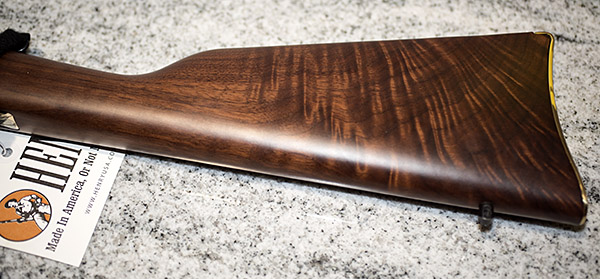
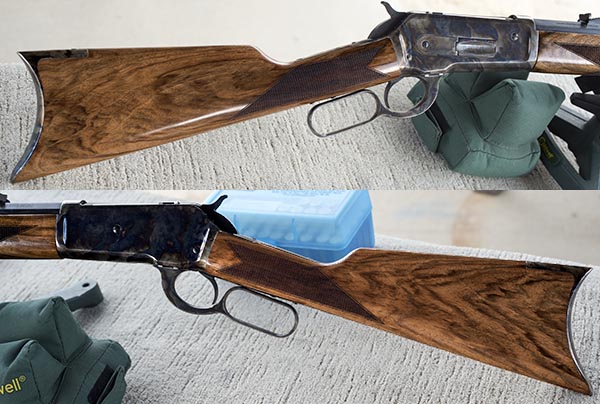
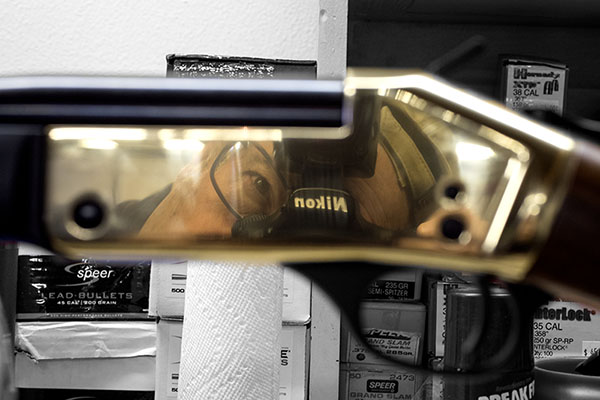
With me, it’s always been about the wood.   I’ll get better photos when I’m basking in the grand and glorious sunshine at the West End Gun Club (and I’m not sure just yet when that will be), but here are a few teaser shots.

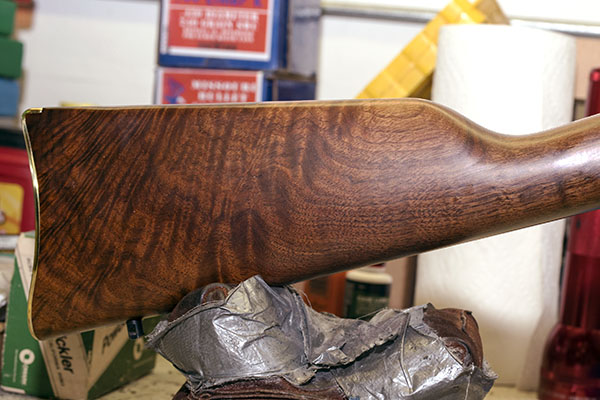
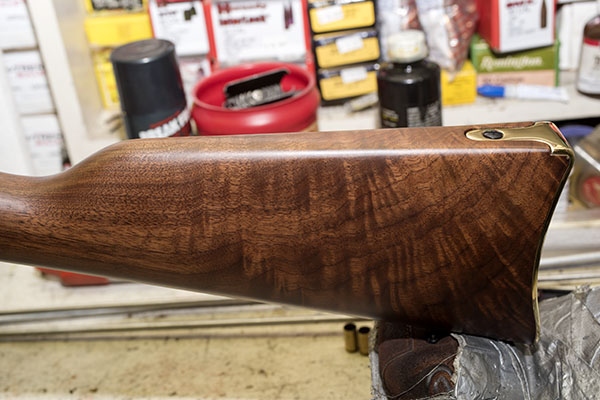
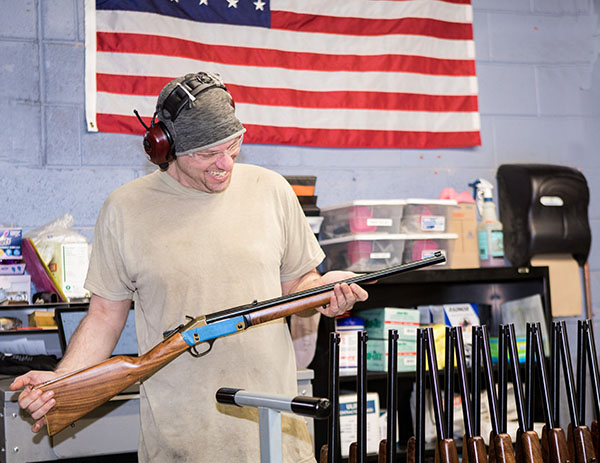
Like I said above, I haven’t shot the Henry yet.  But my first impressions are very, very good.  The wood is stellar (both the stock and the fore end), the wood-to-metal fit is way better than what I’m used to seeing on production guns, the action feels crisp and tight, and the brass frame and buttplate are classy.  The trigger is a little heavy, but it is breaking-glass crisp, and the rifle shoulders well.  The quality is off the charts.  It’s that good.

So, about that interview with good buddy Dan from Henry USA…let’s get to it.  My first questions were these: What prompted Henry to enter the single shot rifle market, and did Henry do so by purchasing the old Harrington and Richardson design and production equipment?

Dan explained to me that the new Henry Single Shot is a Henry through and through, it has no relation to the H&R design, and I would absolutely notice a difference in quality between it and the H&R guns. He sure was right. I am a collector and admirer of fine rifles (I’ve focused primarily on Ruger No. 1 and Ruger No. 3 rifles), and I think I know a bit about what goes into a good rifle. For me, the Ruger No. 1 has been the gold standard, especially the earlier ones made in the late 1960s and 1970s. I’m here to tell you that the new Henry is equal to those rifles, and perhaps even better. The fit, the finish, the wood, the bluing, and the overall feel of my Henry is absolutely top notch. Surprisingly, the new Henry brass-framed .45 70 (at an MSRP of a little over $600) is less than half the cost of a new Ruger No. 1. I am impressed. Dan told me that Henry decided to enter the single shot market with a premium offering, and after examining my new rifle, I can tell you that “premium” is the right adjective. My Henry Single Shot is stunning.

I told Dan that I thought entering the single shot rifle market had to be a risky venture (H&R went out of business, Ruger’s No. 1 sales have declined significantly, and the rage today seems to be black plastic Rambo wannabee guns). Dan told me that bringing the Henry Single Shot to market wasn’t as dicey a proposition as it might appear. Henry USA felt there was a strong desire in many shooters to get back to the basics, and shooting doesn’t get more basic than only having one shot. You need to make that one shot count, Dan said, and there’s an inherent challenge that makes a successful hunt with a single shot rifle more rewarding. It forces you to slow down, take your time with each shot, and think about the fundamentals. Dan didn’t have to convince me. I knew exactly what he was talking about.  My first rifle was a single shot and I’ve been addicted to them ever since.

Dan told me the Henry Single Shot is doing well. Sales are good, and the rifle is a flexible platform (it is easy to introduce new calibers). In viewing the Henry USA website, I saw that the Single Shot is offered in .223, .243, .30 30, .308 Winchester, .357 Magnum, .44 Magnum, and .45 70.  They have shotgun versions, too, in .410, 20 gauge, and 12 gauge. I suggested that Henry consider adding .22 Hornet to the mix (the .22 Hornet is a classic cartridge and it is one of my favorites, as you know from our earlier blogs on the Ruger No. 3 and my vintage Winchester Model 43). Dan said they would take a look at that and I immediately put my oar in the water…I told Dan when they bring out a .22 Hornet I want the first one off the production line (with fancy walnut, of course).

I asked Dan if they were going to offer replacement barrels to allow changing from one caliber to another. There are no plans to do so, he told me, and I can see the logic in that. Henry offers two models of the Single Shot rifle, one with a brass frame and one with a steel frame. The brass frame models are offered in chamberings that operate at lower pressure (.45 70, .357 Magnum, and .44 Magnum). If the barrels were interchangeable, there’s a risk someone might mount the barrel for a higher-pressure cartridge (e.g., .308 Winchester) on a brass frame. I get it.

I asked about folks using Henry rifles in competition, and Dan told me they are popular in both SASS (Single Action Shooting Society) and cowboy silhouette. There are no kits on the market for slicking the actions on a Henry lever gun (as exist for Marlin rifles), but the Henry rifles still have a good presence in these events.

Henry’s website says that Henry is the leading lever action manufacturer. Dan said that’s true, both from the perspective of quantity of rifles and sales revenue. That’s impressive. Marlin and Winchester have been around for more than 150 years, and Henry has already surpassed them,

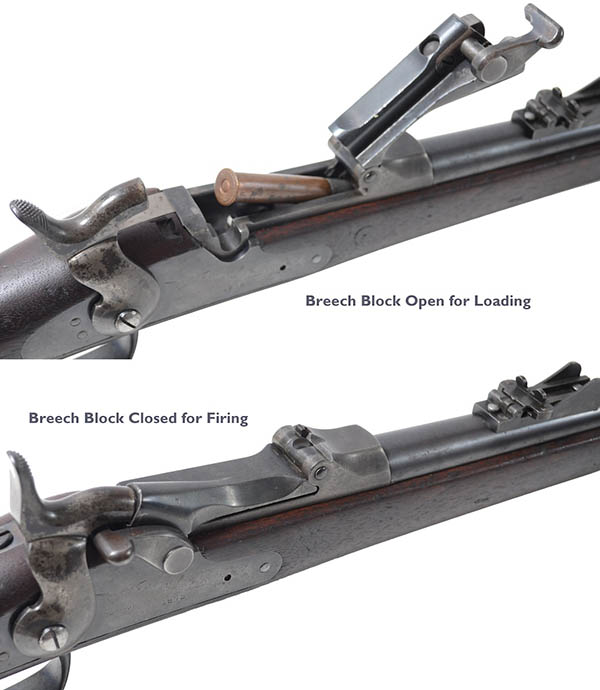
My next question was on takedown and cleaning. I’ve owned Marlin and Winchester lever guns, and the difference in disassembling the two for cleaning is significant. On the Marlin, you only have to remove one screw (the lever pivot screw), and then the lever, the bolt, and the ejector are easily removed to provide access to the breech. Disassembling a Winchester is much more complex. Dan told me the Henry lever guns are like Marlins in that regard. That’s a good thing. On that same topic, I spent some time looking at Henry’s web-based maintenance videos. As a guy who’s done a few of those for CSC Motorcycles (I know what it takes to make a good video), I was impressed. The Henry videos are excellent.  They cover disassembly, reassembly, sight adjustment, cleaning, and more. This is good stuff.

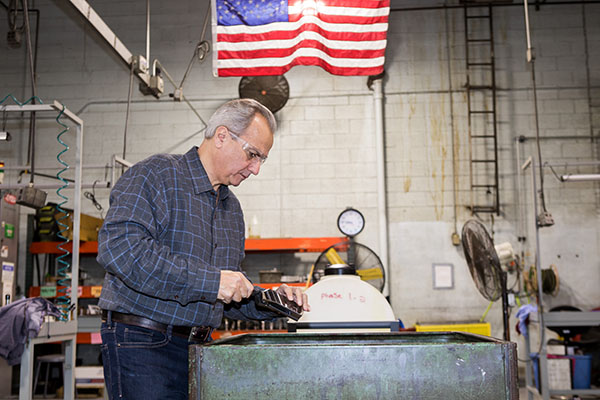
Anthony Imperato is Henry’s President and CEO (that’s Mr. Imperato you see in the photo above). In the video on the Henry website he comes across as a cool guy, so I asked the question: What’s he really like? Dan told me that Anthony is a personable, good-natured, hands-on leader and a genuine nice guy. He’s a shooter, too. That was good to hear. When I work with the best motorcycle companies (like CSC or Janus), it’s always good to see that the top people are riders as well as business leaders. Dan told me that the overwhelming majority of the nearly 500 employees at Henry are shooters and hunters. It sounds like a team I would like to join. If I was younger and looking for a place to make a difference, I’d send a resume to Henry.

Henry USA started as a small manufacturing operation in Brooklyn, New York.  Henry outgrew the Brooklyn facility and moved manufacturing to Bayonne, New Jersey.  In 2016, Henry opened a second plant in Rice Lake, Wisconsin to manufacture the Single Shot.  Henry has grown to nearly 500 employees and they now offer a wide range of rifles, shotguns, and accessories.  Take it from me, folks:  Henry is the real deal, a genuine Made-In-America success story.

I asked Dan about the make/buy mix on their guns, and he told me 100% of the parts in a Henry are made in the U.S. The walnut comes from Missouri and is finished in North Carolina. There must be something about the soil and the water in Missouri; all the best wood from custom riflesmiths comes from Missouri. And North Carolina has a long heritage of making high end furniture, so it’s a natural fit for those good Southerners to craft the Missouri walnut for Henry. Henry uses a spray varnish on all but their modern version of the original Henry rifle (those rifles have an oil finish).  I examined my Henry carefully, and the finish is flawless.  I’m pretty picky about that sort of thing, having finished a few rifles myself.  These folks have it wired.   Henry does its own machining, too, including the barrels.

Dan and I spoke about their different models for a bit, and I asked which one is the most popular. The best-selling of all the Henry rifles is their H001, the .22 lever action rifle. In the Single Shot series, it’s the .45 70 (I guess great minds work alike). Dan told me every Henry has a lifetime warranty that follows the gun. New, used, or inherited, Henry stands behind the rifle for life. That says a lot. Henry tests every rifle for safety and functionality. They don’t test for accuracy, but they don’t need to. I know from firing good buddy TK’s beautiful brass-framed .44 Mag Henry lever gun that they are very accurate. When TK let me shoot his .44, I put five slugs through a hole you could cover with a quarter. In fact, it was that morning on the range a few years ago with TK that first planted the Henry seed in my mind.

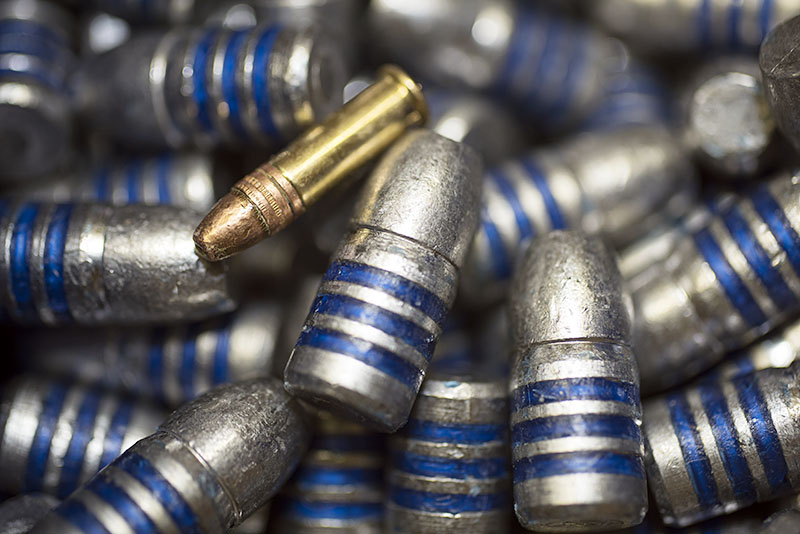
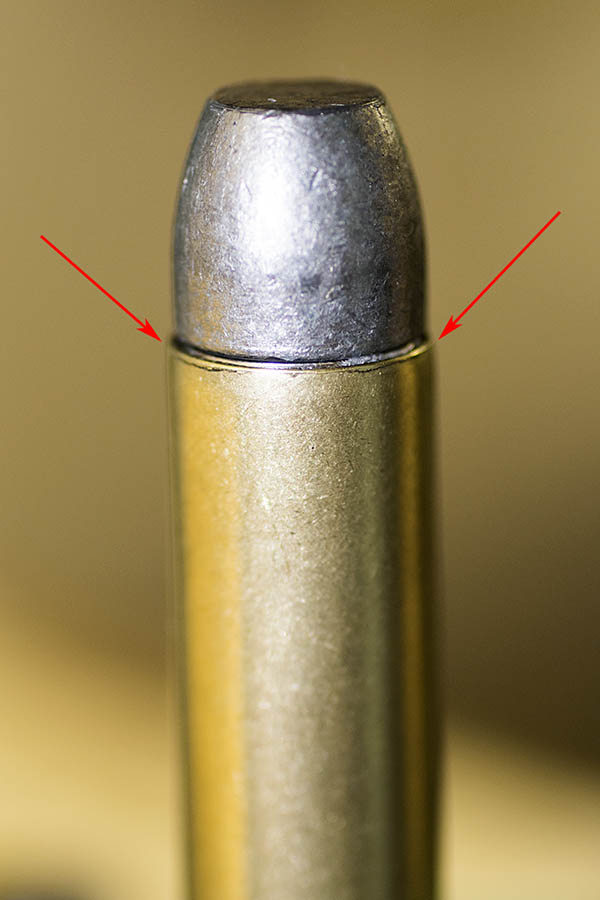
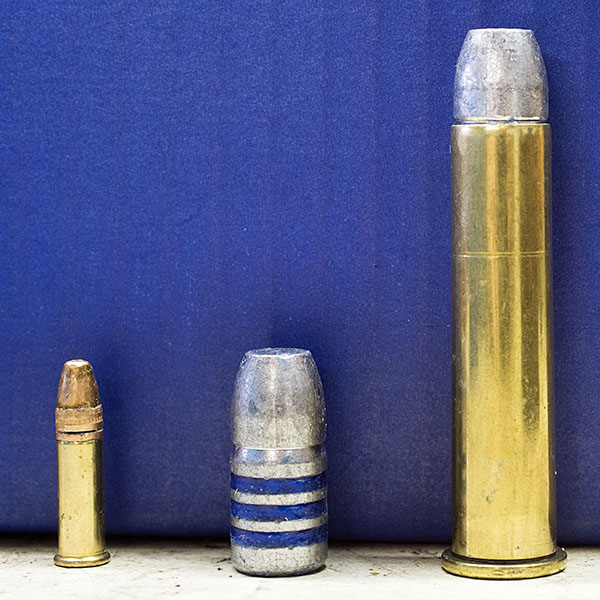
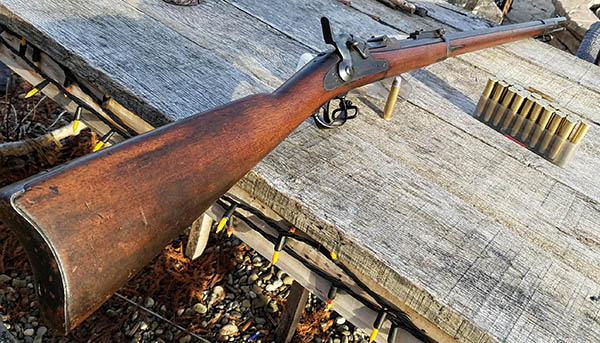
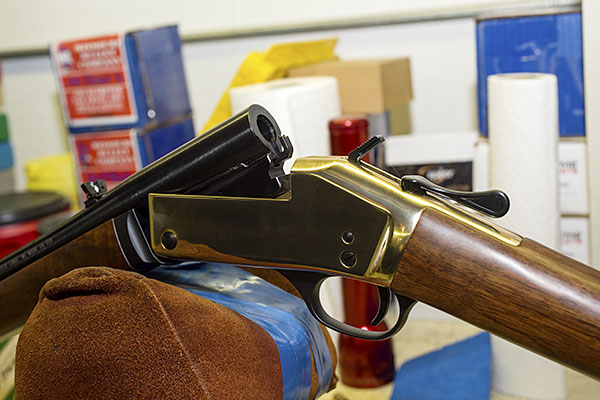
I was going to ask Dan why someone would buy a Henry instead of a Marlin, a Winchester, or a Ruger, but I already knew the answer.  It’s for all the reasons you see above.  Good walnut, classy looks, a good trigger, real craftsmanship, a great price, accuracy, a lifetime warranty, and it’s all made right here in the USA.  It just doesn’t get any better than this.  The Henry .45 70 Single Shot is a beautiful and handy carbine that looks and feels the way a gun should.  It’s 7 pounds and .45 70 chambering will make for a bit of kick on the bench with the 405-grain Missouri bullets, but that’s okay.   On a hunt, I’ve never felt the recoil or even heard the gun fire when the hammer drops.  That’s what intense concentration does; you folks who have experienced it already know that.  The look?  Henry nailed it.  There’s something about polished brass, blue steel, and fancy walnut that simply feels right on a fine firearm, and Henry has made this a fine firearm indeed.


Stay tuned to the ExhaustNotes blog for the .45 70 Henry range test.  Sign up here and never miss an ExhaustNotes blog!


Check out our earlier Henry Single Shot stories here:

Developing a Henry .45 70 Load:  Part 2
Developing A Henry .45 70 Load:  Part 1
The Henry Is In California
Henry Rifles:  Made in America Or Not Made At All


Want more gun stuff?  Hey, just click here!


Would you like to know more about Henry USA?  Here you go, folks!

A Joe Gresh burnout…

Joe Gresh recently returned from Daytona and while he was there he rode an Indian FTR 1200 Rally.    Joe created one of his outstanding videos and we’re sharing it here on the ExNotes blog.

Joe does a pretty mean burnout, as I learned one day in Port Orford, Oregon. That’s a story for another time, and no, I didn’t capture it on video. But it’s a hell of a story.  Maybe one for another time.

Locked out abroad: Mike in Baja

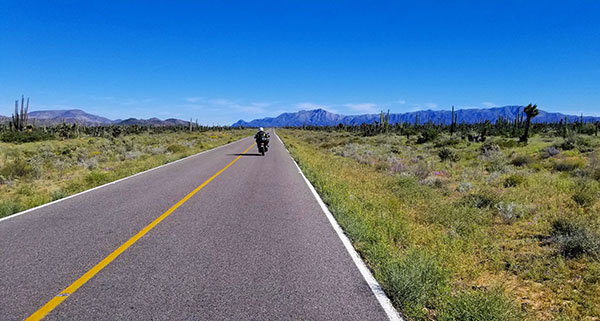
You guys and gals will remember my good buddy Mike, whom I met on one of the CSC Baja runs a couple of years ago.   It was a chance meeting…we stopped to buy bottled gas from one of the roadside entrepreneurs in Catavina and I noticed one of the bikes had a set of jump wings on the tail box.  We had been on the road a few days already and I wondered why I hadn’t noticed the Airborne insignia before, and then I realized it was because I hadn’t noticed the bike was a BMW GS, not a CSC RX3 (that’s how much the bikes look alike, I guess).  I looked around and there was Mike (a new face in the crowd), waiting for fuel just like the rest of us.  You meet the coolest people in Baja, and you meet the coolest people on motorcycles.  I liked Mike immediately.

Mike is a former US Army Paratrooper (my kind of Amigo), an adventure rider, a good friend, and one hell of a guy.  You’ve seen him here on the ExNotes blog before.  Mike lives on his motorcycle (a big BMW GS) and travels all over, working as an untethered project manager and writing regularly.  It’s a cool (and an enviable) lifestyle.

I received an email from Mike yesterday offering this guest blog, and I wanted to share it with you.


Joe,

Thought this would make for an interesting story for your blog. I know its been an interesting story for us! Let me know what ya think. Few colorful pics for it as well.

Hope you are doing well. I am sure you are fully prepared. 🙂

Mike

PS. Be cool if we could get Chris Hansen to read the blog “take a seat over there, would you like some lemonade” HAHAHA


Locked OUT Abroad- Mexico- Extended Stay

My girlfriend, Bobbie Surber and I both work remotely, so in late February we thought a 4-6 week adventure moto trip through Baja would be a great way to kick off spring. We could get some great riding in, explore camping along the beautiful beaches, and really just clear out the cobwebs from any winter blues and lack of activity we had been experiencing.

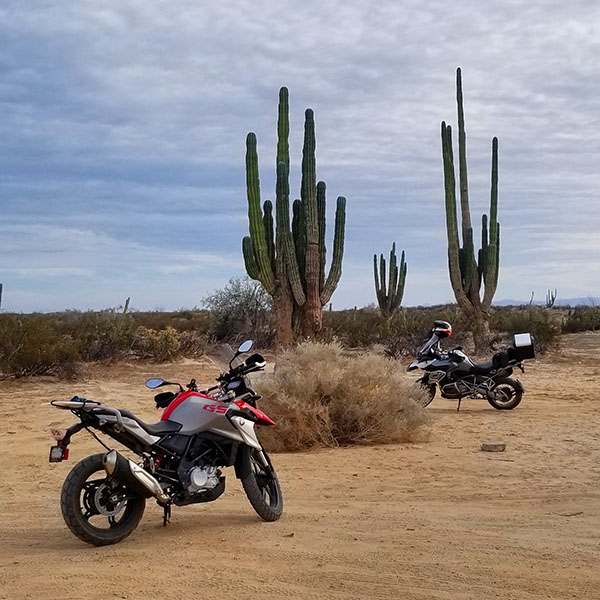
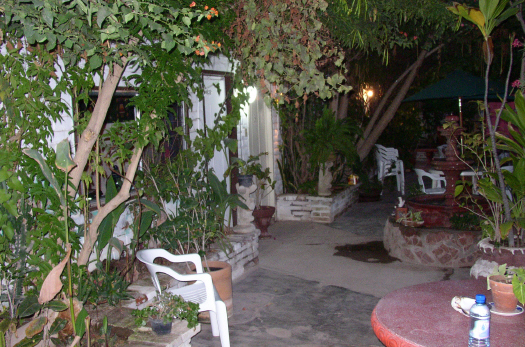
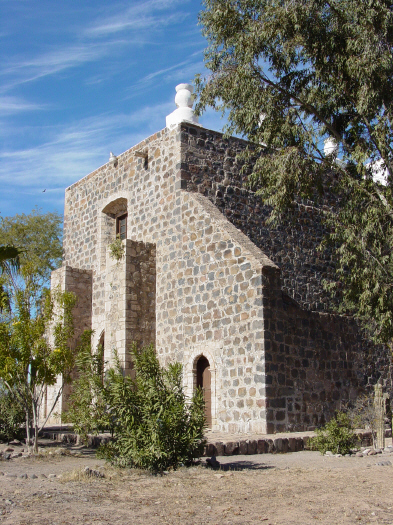
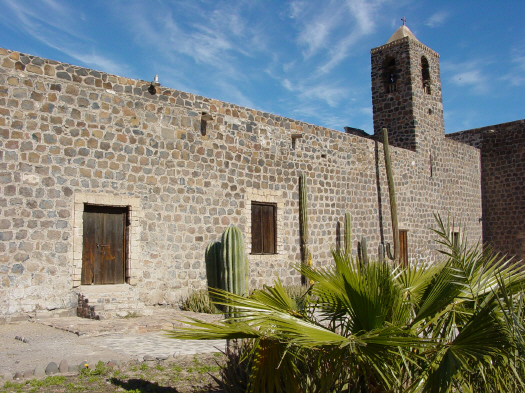
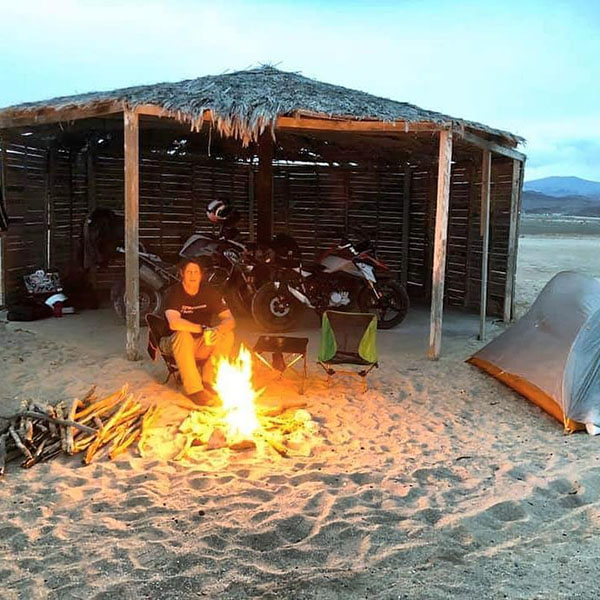
The trip started out great in San Felipe in a wonderful off grid solar AirBnb casita, with a lovely host (we only travel Saturday and Sunday as we are heads down working Mon-Fri in AirBnBs). We continued camping, riding, and staying in AirBnBs all through Guerro Negro, Muleje, La Ventana, Todo Santos, and Loreto. We were spending a week in each location to fully absorb the unique cities, people, and culture while soaking up the incredible desert roads, ocean views, and all while meeting new riders that will become lifelong friends along the way.

As we had just arrived in Loreto on March 15th we really began to notice the COVID-19 virus was really starting to ramp up in the United States to the point travel alerts were being issued globally and we began to see fellow travelers from Canada and the EU being requested to return home by their countries.

In Loreto, we were still a solid 3-day ride away from the US Border when on March 19th a Level 4 travel advisory was issued to either return to the United States or hunker in place for an indefinite period. At the same time people in America were hoarding toilet paper and individual states were beginning to “shut down” one by one. We took this quite seriously and given what information was being provided at the time a team decision had to be made by us. It was a long 2-3 days of going back and forth in open dialogue between both of us on different ideas, plans, and solutions. None of which either of us were thrilled with.

We both agreed returning to the United States was not a wise decision, however, we did not want to stay a 3 day drive away from a border crossing in the event there was a health emergency for either of us. We decided to reach out to our 1st Baja AirBnB host in San Felipe and she graciously offered her casita up for us to hunker down in which would place us within a 2 hour drive from the US Border should there be an emergency where one or both of us may need to return home. This seemed like a perfect staging area. The virus seemed to be less in the Baja, perhaps due to lack of testing, but nonetheless it was a peninsula so geographically it made sense that the impacts would be less. There was also an abundance of supplies (to include toilet paper, which I am still confused as hell on why there was a run on that particular item).

So now to our current state of affairs. We are in self-quarantine in San Felipe with our new AirBnB friend, Victoria and are continually evaluating the situation in the United States looking for a safe opportunity to return home, and are quite frightful for the new reality we are returning to. Confident in both our analytical and decision making abilities I am looking forward to writing Part II of this, hopefully sooner than later.


Mike, that’s an awesome input and we sure appreciate hearing from you.  Thanks very much.  Your photos and descriptions made me realize just how much I miss Baja.  Sue and I would have been down there this month had it not been for this CV19 business.  As soon as we return to normal, I’m headed south and we’ll be down there.  Ride safe, take care, and thanks again!

Social Distancing, Daytona style…

Our very own Joe Gresh was in Daytona last week, except the Daytona show did not go on.  The formal show, anyway.  What others do or don’t do would never put the binders on a Joe Gresh adventure, and he published the story of his visit and the mighty Indian FTR 1200 Rally on Motorcycle.com.  It’s typical Joe G, which is to say it’s great, and you can read it here:

Social Distancing with Indian’s New FTR1200 Rally

Nicely done, Joe!

Developing a .45 70 Henry Load: Part 2

The new Henry Single Shot, brass frame .45 70 rifle. Henry makes a beautiful rifle.

I’m using the time before I pick up my new Henry rifle to prepare the reloaded ammunition I want to test for accuracy.  You will recall that in an earlier blog we discussed the three .45 70 load levels shown in modern reloading manuals.  As I mentioned in that earlier blog, I use the loads intended for the 1873 Trapdoor Springfield.  Those loads were powerful enough to take down all kinds of critters back in the 1800s, and in developing loads for other .45 70 rifles, I’ve found these to be fun to shoot and accurate.

Missouri 405-grain cast .45 70 bullets. These have proven to be very accurate in other .45 70 rifles.  I’m trying these and two other bullets in the Henry.  The .22 Long Rifle cartridge you see here didn’t come with the Missouri bullets; I added it to give you an idea of just what a monster the .45 70 cartridge is.

My loads are based primarily on the components I have on hand and loads I’ve known to work well in the past.  Powders include SR 4759, IMR 4198, IMR 3031, 5744, Varget, and Trail Boss.  Bullets include the Remington 405-grain jacketed soft point, the Hornady 300-grain jacketed hollow point, and the Missouri 405-grain cast roundnose.

A photo showing some of the components to be used in this test. When loading, I would never have all of this stuff on the reloading bench, and in particular, I would never have more than one powder on the bench at the same time. The risk of mixing powders is too great. If you have more than one powder container on the bench, it’s very easy to pour the remaining powder in the dispenser into the wrong container (don’t ask me how I know this). When that happens, the only prudent thing to do is throw the mixed powder on the front lawn (it makes good fertilizer).

I like all of the bullets I listed above, but I particularly like the Missouri bullets.  The Missouri cast bullets seem to always be available, they are relatively inexpensive, and they are accurate.   I’m expecting to see great accuracy from these in the Henry, as they shoot well in the Ruger and the Marlin.  The 405-grain Missouri bullets are accurate in the Chiappa 1886, too, but that rifle’s stock design and buttplate make the recoil painful when shooting the heavier Missouri bullets.

Here are the .45 70 loads I will test in the Henry:

When testing for accuracy, it helps to keep things organized.  I’ll bring this table to the range with me and record my results as soon I retrieve the targets. All loads will be fired using open sights at 50 yards.

For a more in-depth reloading process overview, I invite you to review our earlier series on loading .45 ACP ammunition.  The .45 70 reloading process is very similar to loading handgun ammo.  That’s because the .45 70 is nearly a straight-walled cartridge, so the steps are the same.  This is what is involved in reloading .45 70 ammo:

The reloading process. It looks complicated, but it’s very intuitive. Most folks who reload find it as enjoyable as shooting.

I use mostly RCBS or Lee reloading dies for all of the cartridges I load.  Both are good companies, and both offer superior customer service (if you ever need it, which has only occurred a couple of times for me).  I’ve been reloading .45 70 ammo for close to 50 years now, and I’ve been using the same set of RCBS dies the entire time.

A three-die RCBS set. The first die (on the left) deprimes and resizes the fired case to its original diameter. The case has to be lubricated for this step, or else it will stick in the die.  The second die is called the expander die.  It expands the upper portion of the cartridge case and, if adjusted to do so, adds a flare to the case mouth.   The third die (on the right) is the bullet seating and crimping die.  It can be adjusted to change the depth to which the bullet is seated, and to add a crimp if you wish to do so.

The expander die (the one in the center of the above three dies) is the one that flares the case mouth.  It contains a threaded insert with a step in it to apply the bell mouth to the case.

In this photo, the case expander has been removed from the die to show the diametral step. It is this step that adds a flare to the case mouth.

This is what the case mouth should look like after it has been flared.  You don’t want to overdo this step.  You just want to get enough of a flare to allow the bullet to get started in the case.

A .45 70 case with a flared mouth. We add the flare to allow the bullet to enter the case with no shaving of the bullet.

After the case has the flare applied, it’s time to clean the primer pockets and then prime each case.  I use another RCBS tool to clean any combustion residue from the primer pocket (see our earlier tutorial on loading .45 ACP ammo), and then I use a Lee priming tool to seat the primers.

The Lee priming tool. This is another tool I’ve been using for five decades. It’s a much better way to prime cartridge cases.
A CCI 200 large rifle primer in place, ready to be seated in a cartridge case. The .45 70 cartridge requires a Lee No. 8 shellholder, shown in place in this photo.
A .45 70 case in the Lee priming tool. Compressing the handle (shown to the right of the priming tool barrel) forces the primer into the case. You do this one at a time for each case.
A freshly primed .45 70 cartridge case.

After all the cases have been cleaned, flared, and primed, it’s time to add propellant.  I use my RCBS scale along with a powder dispenser to add the right amount of powder to each case.  To get the correct amount of powder, I always consult a load manual.  I’m showing you different charge weights in this blog, but DO NOT rely on what I’m telling you (or what you read on the Internet from other people) for this information.  Always consult a reloading manual.  Several reloading manuals are available; I prefer the Lyman manual and it’s the one I use most often.  Most of the other manuals are either from bullet manufacturers or propellant manufacturers, so they list only their components.  The Lyman manuals are not restricted to a single brand of bullets or powders, as Lyman does not manufacture bullets or powders.   Lyman does a good job, I think.

My RCBS powder scale, the reloading tray, and ten .45 70 cases waiting for their propellant charges.

When I load different test loads as I’m describing in this blog, I’ll charge and complete each group separately.  Typically, that’s ten cartridges in a group.

Once the cases have been charged with propellant, it’s time to seat and crimp the bullet.  I typically use a light crimp for the .45 70.  Crimping involves bending the flared case mouth into a crimping groove (sometimes called a cannelure) on the bullet.  You crimp a cartridge for three reasons: To prevent the bullet from being forced further into the cartridge case if it is fed into the chamber automatically (as occurs with, say, a 9mm or .45 ACP cartridge), to prevent the bullet from backing out of the case due to the recoil of other cartridges (as might occur in a revolver or a rifle magazine), and to hold the bullet in place when the primer first fires (this allows the flame front to build to a consistent pressure in cartridge prior to driving the bullet down the bore).   It’s that last reason that I’m most interested in here.  It should make for a more accurate cartridge.  Theoretically, neither of the first two reasons is a consideration for a single shot rifle.

A Missouri bullet on top of a charged .45 70 case, ready to be run into the bullet seating die in the RCBS Rockchucker press.

Seating the bullet and crimping it is a bit of a dance.  You have to get the bullet seated to the right depth, and then you have to apply the crimp.  We use the third and final die in a three-die set to accomplish both.  I screw the bullet seating portion of the die fairly far into die initially and then I screw the die into the press to get the bullet seating depth where I want it.  In this case, I want the top of the brass case to be nearly even with the top of the bullet’s crimp groove.   Then I back the bullet seat all the way up in the die, and screw the die body into the press such that it forms the crimp (there’s a tapered decreased diameter in the die insider diameter that forms crimp).  Once I have the crimp where I want it (and the amount of crimp I want), I then screw the bullet seater all the way such that it contacts the bullet.  I then make sure everything is jake on the next round (you know, the same crimp and the same cartridge overall length), I make any required small adjustments, and then I lock everything down with the die’s two locknuts and load the remaining cases.

Adjustments on the seating and crimping die. The small-diameter threaded shaft controls fine adjustment of the bullet seating depth. Turning the main die body into or out of the press controls coarse bullet seating depth and crimp. The two locknuts (denoted by the arrows on the left) lock the bullet seating shaft and the die body in place.
The Missouri bullet nearly fully seated in the case, but not yet crimped. I’ll seat the bullet just a bit deeper, and in the last few thousandths of an inch on the press stroke, the upper edge of the cartridge case will be crimped by the die around the bullet.
A seated and crimped Missouri bullet in a .45 70 brass case. When I bellmouth the cases, I only open them up just enough to allow the bullet to start into the case. When I crimp, I only crimp a little bit. This minimizes working of the brass around the case mouth. Loading at the Trapdoor Springfield levels as I do, and using this minimal amount of opening and then crimping the brass, results in long case life. These cases were purchased in the 1970s and I’m still using them.
A completed round. This .45 70 cartridge is ready chamber and fire.  It’s a big cartridge.

After I’ve done all of the above, I immediately label the packaged, reloaded ammo so that I know what I have.  I can’t rely on my memory and do this later; I always perform the labeling operation as soon as the reloading operations are complete.

A box of 50 .45 70 cartridges labeled and ready to take to the range. I always label my loads as soon as I finish them.
Because these are cartridges loaded differently for accuracy testing in the new Henry rifle, I included a map inside the cartridge container to identify how each group has been loaded.
Ready to go to the range. Reloaded cartridges are less expensive than factory ammunition, and I will be able to find which combination of components performs with the greatest accuracy in my new Henry rifle. With factory ammo, you pay more and you get what you get in terms of accuracy.

There you have it.   I have all the .45 70 ammunition I want to test loaded, boxed, labeled, and ready to go to the range.  Now all I have to do is take possession of my new Henry, head out to the West End Gun Club, and see what works best.  You’ll get to see it, too, right here on the ExNotes blog.


Check out our earlier Henry Single Shot stories here:

Developing A Henry .45 70 Load:  Part 1
The Henry Is In California
Henry Rifles:  Made in America Or Not Made At All

And check out our other Tales of Gun Stories here.

Developing a Henry .45 70 Load: Part 1

The new Henry Single Shot. Mine has exceptionally fancy walnut. I am a soft touch when fancy walnut is involved.

I’m about a week away from having sufficiently cooled (at least in the Peoples Republik of Kalifornia’s eyes), which is another way of saying I have 7 days left until my 10-day waiting period is over, and then I’ll be able to pick up my new Henry .45 70 Single Shot.  (“Single Shot” is capitalized because it’s a proper noun; it’s Henry’s official name for this rifle.)

Another view showing the entire Henry Single Shot rifle. I’ll get better photos when I get to the range; I shot these photos at the dealer.

I am loading a series of cartridges to test for accuracy in the new Henry and I’m going to tell you about the loads, but before I get into that I want to tell you about the three levels of reloads you find in the .45 70 reloading manuals.  I’ll post about the different loads (and reloading those rounds) in the next blog.

A Sense of Scale: A .22 Long Rifle cartridge, a 405-grain Missouri cast .45 70 bullet (just the bullet is bigger in both length and diameter than an entire .22 cartridge), and a reloaded .45 70 cartridge.

.45 70 History

I’ve been a student of the .45 70 for close to 50 years, and the cartridge is nearly 150 years old.  One of the best sources of information on the early .45 70 rifles is Jack Behn’s touchstone reference shown below.

One of the best references on early .45 70 rifles is Jack Behn’s excellent 1956 book. It was published by the Gun Room Press, an imprint owned by the now defunct Rutgers Gun Store. When I picked up my 1973 Colin D. MacManus 1911 .45 auto, it was from the Rutgers Gun Store in Highland Park, New Jersey.

At the end of the Civil War, the Army knew it needed a breechloading rifle (one that loaded from the rear with metallic cartridges).  This resulted in development of the 1873 Springfield rifle and the .45 70 500 cartridge, so designated because it fired a 500-grain, .458-inch diameter lead cartridge propelled by 70 grains of black powder.  That was later changed to a 405-grain lead cartridge because soldiers complained that recoil with the 500-grain projectile was excessive.

An 1873 Trapdoor Springfield rifle.

That .45 70 Trapdoor Springfield remained in service from 1873 through the Spanish American War and our wars against the Plains Indians.  It was also the rifle most frequently used by buffalo hunters to nearly exterminate the American bison, which was really little more than an extension of the war against the Indians (it’s not widely known, but the dominant reason the U.S. Government encouraged eradication of the American bison was because it was the principal source of food, shelter, and clothing for the Indians).

The Trapdoor action.  New in its day, it is antiquated today.  It is a weaker action than are those used in modern single shot and lever action rifles, and it therefore is loaded to lower chamber pressures.

Trapdoor Springfield .45 70 Loads

The “Trapdoor” designation for the 1873 Springfield refers to the action design.   The Springfield’s action had a hinged element that rotated forward to allow loading a cartridge, which was then closed and locked in place prior to firing a round.   It was state of the art in  1873, but it was inherently weak and limited the pressures to which ammunition could be loaded.  But it was enough.  The Springfield action could withstand pressures up to around 17,000 psi, sufficient to launch a 405-grain projectile at velocities a little north of 1400 feet per second.  It was more than enough to kill a man, and in fact, it was enough to kill a buffalo.

Winchester and Marlin .45 70 Loads

The .45 70 cartridge had a lot going for it, and in 1886, Winchester introduced a .45 70 lever action repeater (their Model 1886).  Marlin had previously introduced a .45 70 lever action repeater in 1881.  The Winchester and Marlin rifles had two advantages:  They could fire repeatedly by operating the lever action and squeezing the trigger, and the lever gun actions were stronger (so they could be loaded to higher pressures with resulting higher velocities).  I don’t know that any of the ammo companies loaded the cartridge to the higher pressures the Winchester and Marlin rifles could handle back in those days (probably out of a fear that the ammo might be used in the weaker Springfield action), but folks who reload today and who have either a Marlin or a Winchester can load their ammunition to the higher levels allowed by the lever gun receivers.

The reloading manuals show that the Model 1895 Marlin and Model 1886 Winchester lever actions can handle chamber pressures in the 27,000 psi range.   That’s enough to drive a 405-grain bullet out at about 1700 feet per second.  That’s a smoking hot load.

This is a Chiappa reproduction of the 1886 Winchester rifle, chambered in .45 70. This is a lever action rifle.
The 1886 Chiappa reproduction. The curved metal buttplate is a faithful reproduction of the original Winchester design, and it is punishing when the hammer drops. Nice wood, huh?
A modern Marlin 1895. When I saw this one on the rack, I knew I had to have it. I’ve owned the rifle about 25 years now. It’s very accurate, and it regularly shoots into an inch with open sights at 50 yards.

Ruger No. 1 and No. 3 .45 70 Loads

The next step in the .45 70 evolutionary chain?  That would be the single shot rifles offered by Ruger starting in the 1970s.  Ruger had two:  Their No. 1 rifle and the No. 3.  Both use the same action, and it’s strong.  In the Ruger rifles, you can load .45 70 ammunition to nearly the same velocities and the same pressures as a .458 Winchester Magnum, which is to say, crazy levels (at least in terms of recoil).   Ruger rifles chambered in .45 70 can handle pressures approaching 40,000 psi, with 405-grain bullet velocities north of 2,000 feet per second.  I’ve done this.  It’s no fun.

A Ruger No. 1 falling block rifle. This is the rare 26-inch barreled version with figured Circassian walnut. Ruger only made a limited number of these variants and most of them have very plain wood. It’s pretty, but the Marlin shown above is more accurate.

.45 70 Loads:  The Bottom Line

The upshot of all this?  There are three levels to which you can reload .45 70 ammunition:  The Trapdoor Springfield level, the 1886 Winchester/Marlin level, and the Ruger level.  When you see this in a reloading manual, you’ll see three sets of reloading data, designated separately as explained in this blog.

What does all this mean in the real world?  Your mileage may vary, but for me, I never venture into the Marlin/Winchester and Ruger .45 70 reloading levels.   There’s just too much recoil, and you don’t need to go there for accuracy.  I would argue further that you don’t need to go there for lethality (the .45 70 in 1873 Trapdoor Springfields killed a lot of buffalo).  I stick to the Springfield levels for all of my rifles (even though I could go higher), and that’s how I’m going to load for the new Henry rifle, too.


More Tales of the Gun here, including detailed info on each of the rifles shown above!

Book Review: Undaunted Courage

So we’re stuck at home by government direction, common sense, and maybe fear. Are you bored yet?  You need not be. We still have the Internet, we still have Amazon.com, and we can still read. Which I do. A lot.

The latest book for me was Undaunted Courage, by Stephen Ambrose, and it’s good. It was a little slow getting started (that’s the only criticism I have), but once the Lewis and Clark Corps of Discovery was underway, Undaunted Courage was a real page turner.

You know, my interest in the Lewis and Clark expedition (which is what Undaunted Courage is all about) was ignited on a visit to New Orleans 12 years ago.  Susie and I stayed in the French Quarter of that American jewel of a city, and we started each day with breakfast just across the street from  Jackson Square. There was a museum there and it focused on the Louisiana Purchase, something I had a very foggy memory of from maybe the fifth grade.

The Louisiana Purchase story basically goes like this: Thomas Jefferson wanted to buy New Orleans from Napolean Bonaparte because the US needed a port where the Mississippi met the ocean. Napolean needed cash for his war with the British and in response to Jefferson’s overture, he offered to sell us not just New Orleans, but the entire Louisiana Territory. Jefferson didn’t have the money, so he borrowed it from England so he could pay Napolean and then Napolean had the money he needed to fight England.  Who’s on first?

Think about what these men of the Lewis and Clark Expedition did and what they faced.  They entered and explored an unknown world with dangers beyond imagination: Indians, grizzlies, disease, weather, starvation, distance…you name it.  It is a hell of a story

Jackson Square in New Orleans’ French Quarter, looking across the square at the magnificent St. Louis Cathedral. The building on the left (as you face the church) is the Cabildo, where the Louisiana Purchase was signed. The building on the right is the Presbytere, a museum of the Mardi Gras. The statue in the center is Andrew Jackson.  This photo appeared in the Southwest Airlines inflight magazine; the good folks at Southwest gave me a T-shirt as payment.  I am a skilled negotiator.
Coffee and beignets in New Orlean’s magnificent Café du Monde. Sue and I started each morning with this breakfast. It was from this location that I shot the photo of Jackson Square above.
A stained glass window in the St. Louis Cathedral. We love New Orleans. It is an American treasure.

Anyway, once we owned the Louisiana Territory, Jefferson wondered: What’s out there? No one really knew. That was one of the key reasons Jefferson funded the Lewis and Clark expedition. That, and Jefferson wanted our boys to find a northwest passage (a way to get from the Atlantic to the Pacific by water). That waterway didn’t exist (and that’s what Lewis and Clark discovered), but their struggles and the story of the expedition is, like I said above, a real page turner. What made it even more interesting was that, like many of the good folks who read the ExhaustNotes blog, I’ve ridden my motorcycle through many of the regions Lewis and Clark explored. This is good reading, folks.

An interesting component to this story is that all of the enlisted men on the Lewis and Clark expedition contracted venereal disease (specifically, syphilis and gonorrhea). It seems the Native Americans had no qualms about sharing their wives as a form of bartering for trinkets and tools (hey, it is what it is), and that’s how these diseases were transmitted.  That touched a nerve with me.  As a young Army officer in Korea, venereal disease was a problem that plagued us constantly. The Army tracked this sort of thing and my artillery battery ran a VD rate over 100% (I think the exact number was something like 112%). When I first saw that statistic I knew it had to be wrong (I didn’t have VD), and I said so. The guy who presented the statistics patiently explained that some of the guys in our battery had more than one venereal disease in the 30-day reporting period, and that’s why the number exceeded 100%.  Wow.

Another interesting fact:  Lewis carried an air rifle on this trip, along with several other flintlock rifles and handguns.  I didn’t know air rifles even existed back then, but apparently they did, and Lewis used his to put meat on the table.

Trust me on this:  Undaunted Courage is a superbly written book.  I think you’ll enjoy it.

A note from Sergeant Zuo

Sergeant Zuo on our 2016 ride across China, somewhere along the Silk Road.

I recently wrote to my good buddy Sergeant Zuo, who led our 2016 ride across China.  Zuo lives in Lanzhou, a huge refining center we visited on the China ride.  He and I became great friends on that 38-day adventure.  Zuo is a former Chinese Army senior NCO and in an earlier life I was a lowly lieutenant in the US Army.  But hey, a lieutenant outranks even a senior noncommissioned officer, and every morning (even though we served in different armies), he’d snap to attention and salute me.  And I would then return the salute.  It was cool and it added to the good nature and relaxed camaraderie we all felt on the China adventure.  Zuo is that rare natural leader you sometimes encounter when groups gather and he was perfect for the China ride.  He made what could have a been a scary undertaking into a grand adventure.  I would follow him anywhere, and I imagine the troops in the Army units he led felt the same way.

Sergeant Zuo along Qinghai Lake, one of the largest salt water lakes on the planet.  We were about a third of the way into our ride when I took this photo.

Zuo owns an RX3 (he was one of the very first people to buy an RX3 in China) and it is his daily driver.  He doesn’t speak English and I don’t speak Chinese, but that had no impact on us.  We spoke RX3 and riding, I guess, and we formed an immediate bond.  A good motorcycle can do that, you know.

Sergeant Zuo on the ferry ride to Qingdao.  Qingdao was our final destination on the China ride.

Our trip started in Chongqing, we rode to northwest China (the Tibetan Plateau and the Gobi Desert), then back to central China, and finally over to Beijing and then Qingdao.  Qingdao was a name that stuck in my mind.  Nearly 50 years ago I was on a US Army missile site in Korea and our primary target line pointed straight across the Yellow Sea at Qingdao.  And now, here we were at the end of our China ride five decades later in that very same city.

Zuo, Gresh, I, and a dozen others rode our motorcycles right onto the beach at Qingdao, stripped down, and went swimming in the Yellow Sea’s cool waters.  Damn, that felt good.  After fighting the oppressive heat and humidity of a damp Chinese summer, I could have spent all day in that cool ocean water. Back in the day I was ready to launch missiles at bad guys coming from Qingdao; 50 years later I swam in the Yellow Sea with Zuo at that very same spot to wrap up the grandest adventure of my life.

Our route on the ride across China.

With that as a backdrop, here’s the note from my good buddy Zuo:

Joe(大舅):

谢谢您给我的信。

从网络里看到新型冠状病毒(CV-19)在美国蔓延,这个可怕的家伙成了人类共同的敌人,但是我们应该相信,它是会被战胜的!

我们这里的疫情虽然得到控制和缓解,但是疫情警戒还没有结束。

J,我很好,谢谢您。

阅读您和二舅的博客是我生活中的最大乐趣,看到你们快乐的玩很是高兴。因为你一直相信在大洋彼岸有一个和你惺惺相惜的好朋友一直在关注这您们,是吗?

等到疫情结束,如果能和您一起摩旅那将是我最幸福的等待。

非常想念您——我的良师益友。

代为向您的爱人问好。

祝愿您和二舅一切安好。

—— 左振义 2020年3月20日 于中国.兰州

Yeah, I know, you don’t speak Chinese.  That’s not a problem; we’ll just turn to Google’s translation site:

Joe (big uncle):

Thank you for your letter.

Seeing the spread of the new coronavirus (CV-19) in the United States from the Internet, this terrible guy has become a common enemy of humanity, but we should believe that it will be defeated!  Although the epidemic situation here has been controlled and alleviated, the epidemic alert has not ended.

J, I’m fine, thank you.

Reading your and Erji’s blog is the biggest joy in my life, and it’s great to see you playing happily. Because you have always believed that there is a good friend who cares about you on the other side of the ocean, has you been paying attention to you.

When the epidemic is over, it will be my happiest waiting if I can travel with you.

I miss you so much–my mentor.

Say hello to your friend.

I wish you and Erji all the best.

—- Zuo Zhenyi in Lanzhou, China, March 20, 2020

About that “Erji” business…the Chinese quickly gave Gresh and me Chinese names.  I was Dajiu (big uncle), and Joe was Erji (little uncle).   After that initial christening, those were our names for the entire trip.  It was cool.

You know, when this CV19 business is over, it would be grand to get Zuo over here for a US and Baja ride.  It’s something to look forward to, and I promise you it’s going to happen.


Edit:  Just in case you haven’t seen these videos, here you go.  The first is Gresh’s China Ride video, the second is the one released by Zongshen.  They’re both great.