The Rimfire Series: A .22 Colt Trooper Mk III

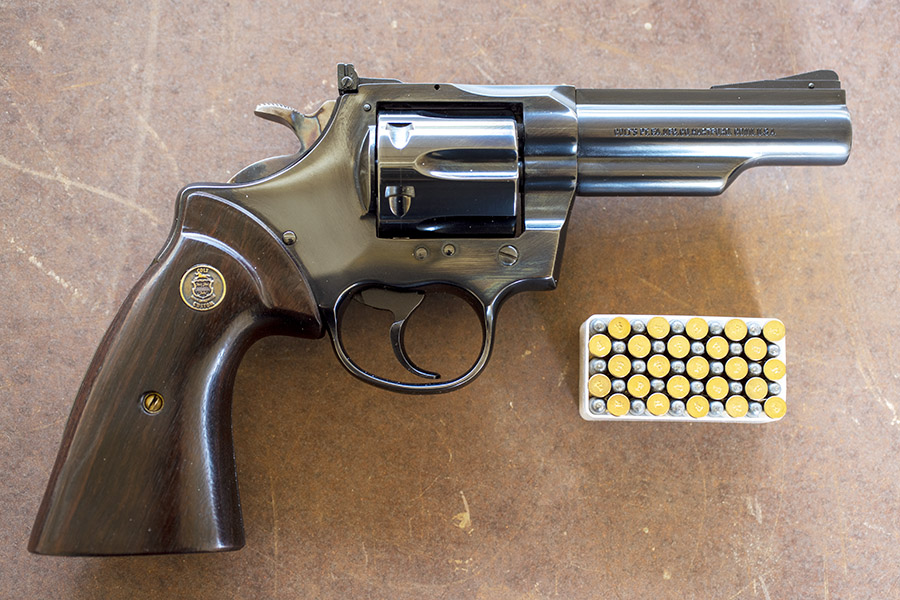
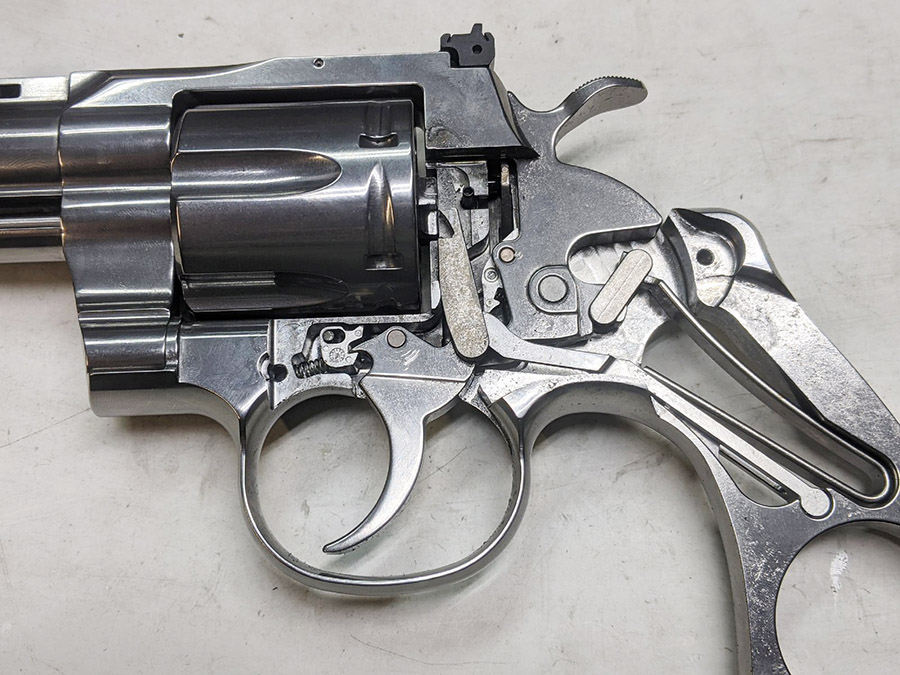
Take a look at this:  A Colt Trooper Mk III chambered in .22 Long Rifle, an interesting and extremely accurate revolver.  I picked it up maybe 30 years ago in a local gun store.  The revolver was in their display case on the lower shelf and I almost didn’t see it.  I wasn’t in the market, but when I saw the Trooper it grabbed my attention.  It was marked $225, I offered $200, the guy on the other side of the counter said okay, and the Trooper was mine.

Deep bluing, crisp lockwork, and color case hardening on the hammer. It makes for a good-looking revolver. This one wears custom handgrips.

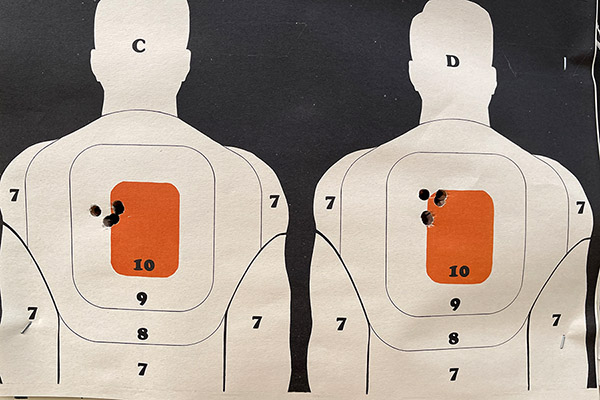
I didn’t realize it at the time, but the little Trooper is a phenomenally accurate handgun, maybe one of the most accurate I’ve ever shot.   It groups as well as a Model 41 Smith and Wesson, a target handgun with maybe twice the sight radius.

The Trooper is based on a Colt that was originally a .38 Special, then it was chambered for the .357 Magnum, then it was redesigned as the Trooper Mk III, and then it was offered in .22.  That was a thing back in the ’60s and ’70s, you know, offering full-sized revolvers but in .22, and it was a good thing.   These are awesome target guns, relatively inexpensive to shoot, and just plain fun.  And heavy.  The Trooper kept the same external envelope (i.e., the exterior dimensions) as the far-more-powerful .357 Magnum Trooper, and that means there’s a lot more steel in the barrel and the cylinder.

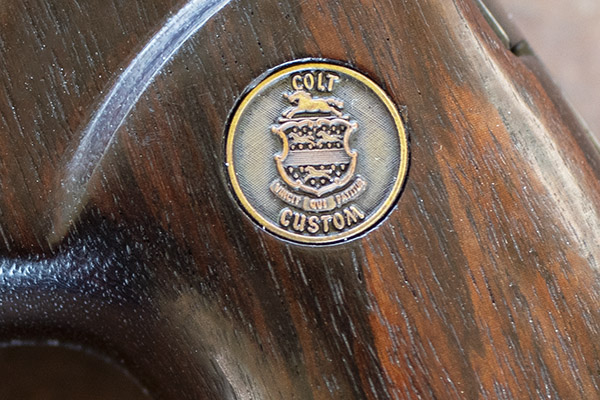
I bought my Trooper used, but it is in as new condition.  It came with the original lighter colored (and checkered) walnut grips, but I saw the grips you see the revolver wearing in these photos about 15 years ago and I had to have them.  The smooth grips look good and the medallions imply the gun went throught the Colt Custom Shop (it did not), but truth be told, the original grips offer a better hold and they fit the revolver better.

The grips say Colt Custom, but my Trooper was a regular production gun. The build standards were way higher back in the day.

One of these days I’ll get around to hogging out the interior of the custom grips and fitting them to the Trooper with AcraGlas, but that’s a project for the future.  Or, I may put the original grips back on the gun (they’re around here somewhere).

The Troopers were available with a 4-inch barrel (like mine), a 6-inch barrel, or an 8-inch barrel, and they could be had with a high polish blue (like mine), a high-polish nickel, or a brushed nickel finish.  If I knew then what I know now I would have purchased a matching blue steel Trooper Mk III in .357 Magnum.  They were around $200 back in the day, and like my .22, the .357 would have been a sound investment.  These guns go for five to eight times that amount today.  You could argue that they make for a good investment, but that implies flipping the gun to realize the profit, and that’s not going to happen.  I’ll keep this one forever.

You know, it’s hard to find new guns built to these same standards as regular service guns were 30 or more years ago.  When I look at the deep bluing on my Trooper, that’s pretty obvious.  The new Colt Python is one that rivals the Trooper for build quality, but it’s the exception.


Join our Milsurp Target Shooting group!


Click on the popup ads and help us keep the lights on!

Never miss an ExNotes blog!


Need targets?  Order them the way we do and have them delivered to your door!


Check out our Tales of the Gun page!

Replacing The Fuel Pump On a Jeep YJ

Brumby, my 1992 Jeep YJ, was a stinky ride whenever I filled the gas tank. It was so bad I tried to fill it less than 3/4 full to keep odors down. That worked for a while but the problem became worse as time stayed on its ever-forward push towards entropy. The thing got so bad raw fuel (is there any other kind?) would slosh out on rough roads.

In addition, the in-tank electric fuel pump kept getting noisier and noisier. If I let the tank drop below ½ it made a real racket that you could here over the flapping canvas roof and the squeaking suspension. These two issues combined left me with a usable tank capacity of between 1/2 and 3/4, or about 37 miles in layman’s terms. I knew I had to drop the tank and have a look at the situation.

The Jeep YJ tank is behind the rear axle and attached to a steel skid plate. After unhooking the fuel fill hoses, no easy feat, you have to use a floor jack to let the tank down. I siphoned out as much fuel as I could to make the tank lighter. Once you’ve got the tank lowered and a bit of clearance you can disconnect the rest of the fuel lines. Being fuel injected there are three lines: pressure, return and a small vent that goes to the charcoal canister I think.

The big leak was at the fuel pump flange. The YJ’s tank is an aftermarket, rotocast plastic unit. This pump-to-tank area warps with age. There is no metal flange cast into the tank top to insure a flat gasket surface. Look for this feature on your next Jeep YJ gas tank purchase.

Removing the fuel pump assembly revealed that the replacement pump was not an exact replacement. The new fuel pump’s electrical connections were reversed but there was plenty of slack in the wires to reach. The bottom pickup of the new pump didn’t quite fit into the pickup screen correctly so I messed around with the extra rubber bushings that came with the new fuel pump until I got something that worked.

I managed to get the fuel pump installed into the new assembly in only a few hours. Remind me next time to spring for the complete pump assembly. When I reinstalled the pump assembly I used a new gasket and a steel backing plate that came with the gasket. Copious quantities of black RTV silicone filled the dips and voids of the warped plastic tank top.

I cleaned and re-painted the gas tank skidpan and attached the tank straps to the pan. Now the whole assembly is situated on the floor jack, rolled into position and jacked up into place only pausing long enough to connect the new rubber fuel lines (also from Amazon!).

Some YJ owners cut out the floor to replace the fuel pump. That’s a good idea but it isn’t very hard to drop the tank. For roadside emergency repairs a hatch cut into the floor would make replacing the pump a half-hour job instead of the two days it took me. I think I’ll do the hatch next time.

Brumby is running fine with its new fuel pump and I can fill the tank without fuel sloshing out onto the hot exhaust pipe. My fuel mileage has improved slightly without the constant loss of gasoline from the leaky tank. The old pump looked like original equipment and lasted 29 years. Stay tuned to ExhaustNotes for a follow up report when the new fuel pump quits.


More ExhaustNotes product reviews are here!


Guns, motorcycles, bicycles, product reviews, travel stories, and more!  Subscribe here for free!

BajaBound Insurance Saver Package

This press release from BajaBound came in recently and we want to share it with you:

BIG NEWS! Baja Bound is very excited to announce our new Baja Saver Mexican auto insurance policy! The Baja Saver is a heavily discounted policy for travel in Baja California, Baja California Sur and Sonora that is available for six month or annual coverage. The Baja Saver offers up to a 60% discount compared to full territory Mexican insurance policies! Check out all of the Baja Saver features here:

https://www.bajabound.com/bajasaver.php

Since the essential travel orders are still in place we are rolling this out as a great option for expats and folks commuting across the border for work. We look forward to getting back to everything we love about Baja and hope to see you south of the border soon!

¡Viva Baja!

We always use BajaBound Insurance whenever we visit Mexico, and we’ve found it to be the best.

I’ve spoken with several folks who are in Baja, and although there is an essential travel order in place, it’s not enforced.  Folks tell me that they can easily cross the border in both directions.  Baja John tells me that life is Baja is much the same as it is here in the US, with folks social distancing, restaurants offering outdoor dining and socially-distanced tables, and people wearing masks.  John mentioned that on a couple of recent holidays, there were roadblocks north of San Felipe and Ensenada and if you couldn’t prove Baja residence, you would have to turn around, but the roadblocks were only present during the holidays.

Gresh and I have been talking about venturing into Baja in another two or three months.  I am looking forward to it.  In the meantime, if you want to vicariously relive a few of our adventures in beautiful Baja, check out our Baja and Epic Rides pages!

You Writing A Book?

Sometimes people ask me about writing a book.  It’s easier to get a book published than you might think.  Basically, there are three approaches.   You can go with a vanity publisher (not a good idea, in my opinion), you can go with one of the big publishing houses (tough to do, and I’ve found this doesn’t work very well for reasons I’ll explain below), or you can self-publish through Amazon.com or any of several other publishing outfits (this it not vanity publishing, and the self-publishing approach offers several advantages).

Vanity Publishing

The idea of a vanity publisher is that you pay a company to publish your book. You have to do all the marketing, and you have to print a minimum number of copies, so this gets expensive fast.  I’ve never done this and everything I’ve heard about these outfits is strongly negative. My advice would be to not go this route.  Yeah, doing so will allow you to say that you wrote a book and had it published, but that little bit of bragging rights will probably cost you $10,000 and it’s not likely you’ll ever recover it.  I’ve never taken this approach, and I’ve heard from others that it doesn’t work out economically for the author.  You will have a lot of copies of your book, most likely taking up space in your garage.

A Traditional Publishing House

You can market your concept to a publishing house and have them publish and market it and pay you a royalty on copies sold.  This has been the traditional publishing route for more than a couple of centuries in the US.  The first several books I wrote went this route.

The traditional publishing route is okay and if you play your cards right (which is to say, you are a skilled negotiator), you can secure a healthy advance against royalties.  But it’s an approach with disadvantages that far outweigh the advantages:

    • You have to market your book idea to several publishers, hoping that one or more will be interested.  Most publishers aren’t going to be interested these days.  The big publishing house printed book market is down big time, and it’s likely it will stay that way.  When’s the last time you saw a crowd at a bookstore?
    • For most of us, the income is meager.  You would need a miracle to get a publisher to agree to give you even 10% of the published book price as a royalty.
    • You give up rights to your book.  If you are not happy with publisher, you’re stuck.
    • You will have to market your book because the publishers generally do a poor marketing job (it will be one of many hundreds or thousands of their titles).  Nah, wait a second, that’s not accurate.  Publishers generally do a terrible job marketing your book.  I realized this pretty quickly, and it was really brought home for me when I wrote a book about cost reduction.  The CEO of a Fortune 500 aerospace company contacted me and asked about ordering copies for every manager in his organization.  I thought I had gone to heaven when I heard that, and I quickly alerted the publisher’s marketing arm.  I mean, the sale was already made…all they had to do was take the order.  It was a big publisher (Wiley), and you’d think they would have jumped on the opportunity.   They did exactly…nothing.  Several weeks later the aerospace CEO called me to ask again, and I was horrified and embarassed that no one from Wiley had called to close the deal.  They ultimately did, but I had to keep my boot firmly up their butt until the order came through.  Bastards.

I’ve written 15 books, and I went the traditional route with established publishing houses on the first 9.  I’d never go this way again.  My good buddy Simon Gandolfi put it best when I asked him about publishers and, in particular, using an agent to promote your work.  “Most publishers are incompetent crooks,” he said,  and then he added “and most literary agents are competent crooks.”

Self-Publishing

About 10 years ago I was on a press junket promoting Lake Tahoe as a motorcycle destination (good buddy J Brandon was one of the organizers).  I rode up there on my KLR 650 Kawasaki. It was a good time and good riding (the roads in the Sierra Nevadas around Tahoe are some of the best in the world, and I got a couple of magazine stories out of the deal), but the thing that really made the trip worthwhile for me was meeting Carla King (that’s Carla in the photo at the top of this blog).  Carla rode a KLR 650, so I knew she was a smart person.  I had read Carla King’s book about her Ural ride around America (American Borders), and this was the first time I actually met her.

Our Tahoe group stopped for lunch on one of the organized rides at Walker Burger (it’s on Highway 395), and Carla and I talked shop.  I told her the story about Wiley and how terrible their marketing department was, and she told me I was wasting my time if I wasn’t self-publishing.

I never heard of self-publishing until I met Carla, so I took one of her classes and I never looked back.  My next seven books I self-published through Amazon using the tools Carla shared with me, and I made more money with them than I have on any of the other books I previously wrote.

Self-publishing has a lot of advantages:

    • It doesn’t cost you anything.  Your books are only printed when people order them in the quantity they are ordered.  You don’t pay anything.
    • Within limits, you set the price and the royalty you want on your book.
    • You get a substantial discount when you order the books for yourself, or copies of your books if you want to sell them yourself.  I don’t too this too often, but if a dealer wants to order copies of, say, 5000 Miles At 8000 RPM, I buy the books, the dealer pays me, and Amazon ships direct to the dealer.  I make good money on those books.
    • You select the physical size of the book you wish to publish. Amazon has half a dozen or so different sizes (that is to say, the book’s length and width), and they provide Word formats already prepared that you can download in the different book sizes. You add the text and the illustrations.  Basically, they give you a free, downloadable Word template, and you just add your work.
    • Amazon is hooked up with Kindle (actually, you use a Kindle site for both Amazon and Kindle formats for your book), and you can also easily offer your book in an e-book format.  I thought this was kind of silly, until I saw that a good half of my book sales were in the Kindle format.
    • Your book is listed on Amazon.com essentially as soon as you upload the manuscript and the book cover. People can then find and order your book on Amazon like any other book.
    • The income is way better than going with a big publishing house.
    • Your book becomes instantly available essentially all over the world.

Carla offers self-publishing training and has written extensively on the topic (see www.CarlaKing.com and www.selfpubbootcamp.com).  I attended one of her seminars several years ago and it was a very worthwhile experience for me.  If you have thoughts about writing a book, you might consider doing the same.

Hasty Conclusions: Qiilu 7-Inch Universal Motorcycle Headlight

I’ve been watching these cheap, cheerful, Chinese 7-inch headlamps sold through Amazon for quite a while. There are about twenty different sellers selling twenty different brand names of the same basic headlight. Normally priced around 25 to 30 dollars, this Qiilu brand light popped up on sale for 8 dollars and there was a coupon you could apply to the sale at checkout. It was a crazy good deal. When all was said and done Qiilu paid me 35 cents to receive their headlight. Ok, it wasn’t that good of a deal, but the light was like 7 dollars with shipping included.

This headlight, like all of them on Amazon, comes with LED turn indicators or daytime running lights built into the outer edges of the lens. The entire LED cluster is removable but I plan on leaving them in and not connecting the wires. By the way, the light came with no wiring instruction so it’s kind of hit or miss. I only need the 3-wire main H-4 bulb for my project.

“What project is that?” You may well ask and I’ll tell you. The 2008 Husqvarna SMR 510 comes stock with the worst headlight ever installed on a motorcycle. It’s a 35w/35w incandescent type that has a strange socket more like a taillight bulb than a headlight. Replacement bulbs are easy to get online but impossible to find at any auto or motorcycle shop. And you’ll need to order a lot of them online as the stock bulbs only last about 250 miles before falling to pieces. The plastic reflector housing is slowly melting under the 35-watt bulb so increasing the wattage is out of the question.

I don’t know what went wrong with the reflector design but the Husky casts a gloomy glow not more than 30 feet ahead. Many a night I would ride home at 25 miles per hour, even then outrunning my lighting. As a stopgap I bolted on a large LED spotlight for off road use and it lights up things pretty well but is totally illegal for highway use as it blinds oncoming drivers the way I have it adjusted.

Enter the Qiilu. I’m removing the Husky headlight complete and replacing it with the Qiilu. The Qiilu uses standard bulbs found in any auto store so even if the bulbs continue to blow out I can re-light the sucker just about at will. The Qiilu reflector is twice as large as the stock Husky unit and uses a halogen bulb so I’m hoping for improved light pattern and strength.

But enough about my problems and me: How much headlight do you get for 8 dollars anyway?

Turns out quite a bit. The Qiilu is mostly plastic except for the metal trim ring. The thing weighs nothing. The reflector and lens looks pretty nice. The light came with some universal mounting brackets and stainless steel, button-head fasteners that are worth 8 bucks all by themselves. I probably won’t use the brackets as I plan on fabricating a couple ears and re-using the Husky’s rubber band style headlight mounts. Any vibration I can muffle might make the bulbs last longer.

The Qiilu comes standard with a 35-watt bulb that is supposed to be yellow colored. I don’t see it but maybe a night it would. I’ll replace the bulb with a white 35-watt halogen that will cost more than the entire headlight.

The housing has a large opening in the back and I hope to stuff a lot of the loose, exposed wiring behind the stock headlight into the new housing. I may change the sheet-metal screws holding the rim to the housing to machine screws for a more secure attachment.

Look, this isn’t a super high quality lamp, but then I’m not a high quality person. It’s cheaply made but seems to have all the right parts in all the right places. The housing is not metal so will probably break if you hit a tree. The thing is, the Husqvarna headlight the Qiilu is replacing is even worse. I expect a rock hitting the Qiilu square in the lens will crack the thing but maybe not. For 8 dollars it’s worth a try and beats the heck out of no light at all.


More ExhaustNotes product reviews are here!

A TJ Trigger for My New Python

As I mentioned in a recent blog, good buddy TJ (of TJ’s Custom Gunworks) reworked the trigger on my Colt Python.  The original single action trigger had a lot of creep, it was heavy, and what surprised me most of all was that it actually cocked the hammer another few degrees before it released.   I was getting a little double action when firing single action.

That bothered me enough to call my contact at Colt Manufacturing, and I think he was surprised when heard about it, too.   He checked with his engineering department, and the word came back:  They had to do that to meet the California and Massachusetts drop test requirements.  I checked the California regulation and it requires dropping a loaded, cocked revolver from a height of 1 meter six times on a concrete surface without the gun firing inadvertently.   Think about that.  Dropping a loaded and cocked revolver, a .357 Magnum, onto a concrete floor.  Six times.

Me?  I’m going with an alternative approach.  I’m not going to drop my loaded, cocked, .357 Magnum revolver on a concrete surface even once.  It’s kind of a common sense approach, one that the politicians in California and Massachusetts apparently think we can’t be trusted to take.

A loaded revolver.   Cocked.  Dropped.  Six times.  Onto a concrete floor.  What were they thinking?

I’m not one to to argue Darwinism versus Divine Creation (we don’t do politics or religion here on ExNotes), but here’s a thought.  Maybe someone who drops a cocked, loaded, .357 Magnum revolver on a concrete surface six times, well, maybe Darwin was on to something.  Maybe that person needs to be culled from the gene pool.  Before you get your shorts in a knot, though, remember my preface:  It’s just a thought.

Anyway, back to the main attraction, and that’s the trigger job TJ did on the new Python.  TJ took photos of the Python’s internals (the complete parts interface is shown above in the large photo).  The photo below shows what was causing the trigger creep and the hammer movement during a single action trigger pull:

That’s the hammer on the left, and the trigger on the right.  You’ll notice that the hammer’s sear area (denoted by the red arrows) is kind of rough and it contains a hooked ledge of sorts.  That’s what was rotating the hammer back a few more degrees when the trigger was actuated in the single action mode.

TJ modified the sear to eliminate the hooked ledge and create the angles and surface finish the Python trigger-to-hammer interface deserves.  That’s what you see below.

Before he improved the sear interface, the Python’s double action trigger pull was 9 1/2 lbs; it is now 9 lbs.  The single action trigger pull was a very creepy 5 1/2 lbs; now there is no perceptible trigger or hammer movement before the hammer is released and the trigger breaks at a very clean 2 1/4 lbs.   The upgrade completely changes the character of the new Python.  I can’t imaging anyone buying a Python and not wanting to have the trigger cleaned up in this manner.  TJ is the guy to do it.

The next big question is:  Did the new trigger a make a difference in how the Python performed?  Hey, you tell me.  Here are two 5-shot groups shot at 50 feet with the improved trigger:

Those two groups were shot with my go-to .38 Special target load (a 148-grain wadcutter and 2.7 grains of Bullseye prepared on my Star reloader).  The group on the left measures 0.680 inches; the one on the right measures 0.830 inches.  Some of the .357 Magnum loads performed just as well.   I’ll share all my Python load testing results in a near-term future blog.  I didn’t adjust the sights during my load testing because I’d be moving them with each new load; I’ll zero the gun when I’ve selected the load I want for the Python.  I am a happy camper; these are phenomenally good results.

You might be wondering about now why you’d need a trigger job on a $1500 handgun.  Folks, this isn’t Colt’s fault.  They’re doing what they have to in order to meet a requirement imposed by people who don’t understand what they are doing.  Don’t get upset with Colt.  Do the right thing and vote.

If you have a Python and you’re not happy with the trigger, take a look at TJ’s Custom Gunworks and drop TJ a note.  Trust me on this:  You’ll be glad you did.


More Tales of the Gun!


Never miss an ExNotes blog!


More gun porn?  Check this out!

An Urban Camo SIG 239 (and a quick Python update)

When I recently visited good buddy and custom gunsmith TJ of TJ’s Custom Gunworks to discuss a trigger job on my new Colt Python, I noticed a custom SIG P220 in .45 ACP in his shop.   The SIG had a very unusual finish.  The trigger work was incredible, with as crisp a single action trigger pull as any I have ever felt.  I’m hoping the Python’s will be as good after  TJ works his magic on it (jumping ahead, it is, and that will be in a future blog). I asked TJ about the SIG, and in particular, if I could share it with our blog readers.   Here’s what TJ told me:

I haven’t taken photos of my urban camo P220 yet; I’ll do that over the weekend.  Here are some photos of his little brother, the P239, in .40 S&W.

The camo finish is a 6-layer process. I did a full LEVEL 1 package on it, and since it was already DAO (Joe’s note:  That’s double action only) I did a full bob on the hammer, slightly lifted the slide catch, melted the edges and corners, satin polished the barrel and extractor, applied orange DayGlo on the front sight, installed camo Duracoat on the Hogue rubber grips, and I fitted my TJ hex head grip screws. I can email you more details of what I did if you need it over the weekend.

These are the photos TJ sent.   The first one is the 239 SIG as TJ acquired it, the next one is one of the steps in the camo application process, and the last two or three are the finished gun.

This TJ-customized SIG 239 sure is impressive.  It’s in a powerful chambering, it’s compact, all of TJ’s customs are super reliable, and the gun just has a cool look.  Whoever ends up owning it is going to have one hell of a handgun.   TJ tells me he’s going to be listing the gun you see here on Gunbroker in the near future (at a price that seemed to me to be way too low).

If you’ve ever thought about having a custom handgun built to your specifications, TJ is the guy you want to talk to.  One of the gun magazines described TJ’s work as “duty jewelry you can wear.”  That sounds accurate.  You don’t have to be here to use his services; most of TJ’s work is for folks in other states.  Take a few minutes and check out the photos of prior TJ custom handguns  on the TJ’s Custom Gunworks website.


Never miss an ExNotes blog!


A quick note:  The Python is back from TJ now and the trigger is superb.  The double action went from 9 1/2 to 9 lbs and it is much smoother.  The single action trigger went from 5 1/2 lbs (with a lot of creep) to a what I would call a breaking glass, creep-free 2 1/4 lbs.  It feels better and I am seeing an immediate improvement on target.  If you own a Colt Python, trust me on this:  You need a TJ trigger job on yours.  It completely changes the character of the revolver.  Watch for an upcoming blog on the new Python with its improved trigger.


Help us keep the lights on:   Please visit our popup ads and our sponsors!


Favorite Baja Hotels: Bahia San Quintin’s The Old Mill

Ah, the Negro Modelo flows freely at the Old Mill Hotel.  But I’m getting ahead of myself.  I’ll start by simply saying if I’m going to spend the night in Bahia San Quintin, it’s a sure thing it will be at the Old Mill Hotel, another one of my all-time favorite Baja hotels.  In fact, as I write this, I’m thinking it’s worth a Baja ride just to stay at the Old Mill in Bahia San Quintin.  I usually take a full day to get down there, even though the map says you can do it in a little over four hours.  I’ve done that, but then the question is:  Why?    I think it’s best to take things at a more relaxed pace and enjoy the ride south as you enter through either Tiajuana or Tecate (Tecate is a much nicer town and the ride to Ensenada from there is a much nicer ride).

The route south. The last 100 miles or so before reaching San Quintin is an agricultural region. The road becomes much more desolate a few miles south of San Quintin.

San Quintin is a good 200 miles south of the border, near the southern end of the agricultural fields that put much of our produce on the table.  Susie and I once got got in a farm worker labor riot in San Quintin, but that was an isolated incident and all’s cool now.

Bahia San Quintin is the bay on the Pacific Ocean west of the Transpeninsular Highway (that’s Mexico Highway 1, which runs the length of the Baja peninsula).  To get to the Old Mill Hotel, watch for the sign on Highway 1 (it’s the one you see in the big photo above), and turn west toward the Pacific.

A satellite view of Bahia San Quintin.

Once you turn off the Transpeninsular Highway, it’s about a four-mile ride to get to the hotel, and it’s a much better ride than it used to be.  I don’t mind telling you that I used to be completely intimidated by that road (it was a dirt road that was either powder-like soft sand or a mud bath, depending on the weather, and it was hell on a motorcycle), but the road is paved now and it’s a pleasant ride to the bay.

Good buddies Dave and Paul on a ride about 15 years ago, before the road to Bahia San Quintin was paved.

As you approach the end of the road, you’ll see another sign on your left for the Old Mill Hotel.   Make a right turn, ride a hundred yards, and then a left will put you there.  The hotel is sort of shaped like a U, with comfortable rooms on either side of a parking lot that is frequently filled with motorcycles.  As you might guess, the Old Mill is located on the site of what used to be an old mill, and there’s still milling equipment left around the area.  It’s a pretty interesting place.

The Old Mill Hotel parking lot is usually filled with motorcycles. I’ve always been able to get a room there, but it wouldn’t hurt to make reservations with the number at the bottom of this blog.
Sometimes you can park right in front of your room, although security has never been an issue for me at the Old Mill Hotel.

The office is on your left as soon as you enter the hotel area, and they are nice folks.  They usually offer a complimentary beer when you check in (and if they forget to offer, just ask), which usually leads to quite a few more.  It’s a great way to start your visit to a great place.

Lovely Lucy, who provided the beer, worked the hotel office, and served us dinner in the Eucalipto.
Senor Gresh demonstrating the correct method for initiating a visit to the Old Mill Hotel.

If you walk west just past the hotel parking lot, you’ll be standing on the edge of Bahia San Quintin.  It’s a cool area.

At the edge of Bahia San Quintin. One night at the end of a great day, we heard something exhale loudly just off this dock a few feet into the Bay. It was dark; we couldn’t see it. “That is a whale,” good buddy Dave correctly determined. Bahia San Quintin is a fun place.

Motorcycle travel through Baja is not without its risks, the principal one being that you’ll weigh more when you get home than you did when you left.  Nowhere is this more true than in Bahia San Quintin.  When you stay at the Old Mill Hotel, there are three outstanding restaurants just a few feet from your door.  The first is a relatively new one, the Eucalipto, headed by Javier, a world class chef from Mexico City.  The Eucalipto is part of the Old Mill Hotel (it shares a wall with the hotel office).  I’d say it’s one of best in Baja, and it’s open for dinner and for breakfast (handy when you are leaving the next morning).

A fine Eucalipto dinner. Chef Javier will not disappoint.
An amazing Eucalipto stuffed tomato salad.
Dinner in the Eucalipto. Or maybe it was breakfast. Both were excellent.

The Molino Viejo (the Old Mill) is a larger restaurant next to the Old Mill Hotel. It’s has a bar and live entertainment, and widescreen televisions for sports and other events.  The food is outstanding.   Just turn left on the boardwalk at the end of the hotel parking lot.  I’ve had many a fine meal here.

Another awesome restaurant next door to the Old Mill Hotel.

Don Eddie’s is a third dining option.  Turn to your right when you walk to the bay, and it’s right there.  It’s not as hopping as the Eucalipto or the Molin0 Viejo, but the food is absolutely outstanding.

A seafood platter at Don Eddie’s. Like I said above, there’s a serious weight gain risk associated with riding Baja.

Once when I was leading one of the CSC Motorcycles tours and we stayed at the Old Mill, Don Eddie himself told me that if we wanted breakfast there, just let him know how many and he’d have a buffet set up for us the next morning.  I think there were about 15 of us on that ride.  I took the suggestion and it was beyond amazing, with a variety of Mexican breakfast delights and quantities that were astounding.   When it came time to settle up, Don Eddie gave me a number that was embarassingly low.  I doubled it, divided it by the number of guys in our group, and it was still cheap.

The last time I stayed at the Old Mill Hotel I recall it was about $40 for a room.   You can see more at their website (HotelOldMill.com) and the email address is Oldmillbaja@gmail.com

They are reachable by phone at 01 (616) 165-6030, and they have a US number 185-5690-9272.


More Mexico?  Hey, it’s right here!


Headed into Mexico?   Make you insure with the best!


Never miss an ExNotes blog!  Subscribe for free!


Want to read all about it?  Pick up your own copy of Moto Baja!

British Vertical Twin Wannabees: Royal Enfield vs Triumph vs Kawasaki

I think most motorcycle videos are silly, including the ones I’ve done (and I’ve done a few).  It’s a personal preference…videos (compared to the written word and good photography) dumb down whatever they cover, and I would much rather read a good article with great photos than watch a video.  But on occasion I’ll stumble across a video I enjoy.  I recently encountered a couple that hit home for me.  One compares the Royal Enfield 650 to the Kawasaki W800, and the other compares the Enfield to a Triumph Bonneville.

Back in the day (the 1960s), British vertical twins ruled the roost, and of those the Triumph Bonneville was the king.   My father rode a 1966 Triumph Bonneville, and I’ve owned a number of Triumphs from the ’60s and ’70s.  They were (and still are) awesome motorcycles.  It just makes sense to me that ’60s-era British vertical twins are a platform deserving of the sincerest form of flattery (i.e., copying), and apparently, the modern incarnations from Kawasaki, Royal Enfield, and Triumph do exactly that.  Well, maybe not exactly, but enough to let you imagine you’re Steve McQueen.

These videos are fun to watch.  The narrators are funny as hell and there are some great quotes.  One was, “I’m not even going to try to keep up with you on the way back…you just take care of yourself and watch out for buffalo.”  That quote reminded me of Gresh’s video when he entered a corner a bit too hot on a Harley Sportster and famously said, “It handles pretty well when it’s out of control.”

The video editing and imaging in these two videos are superior (way better, in my opinion, than what you see from the self-proclaimed videomeisters here in the US).   And the tech content is light years ahead of the typical vlogger tripe clogging up our bandwidth.

Enjoy, my friends.

Here’s a fun fact:  All three of these bikes (the Royal Enfield Interceptor, the Kawasaki W800, and the Triumph Bonneville) purport to copy British vertical twins, yet none of these bikes are British.  The Enfield is made in India, the Kawasaki is made in Japan, and the Triumph is made in Thailand.

I ride a Royal Enfield 650.  I like my Enfield, and for the money, the Enfield has to be one of the best buys ever in motorcycling.  Gresh and I already did a road test of the Enfield in Baja, and you can read our reports on it here.  One of these days in the near future I’ll do a road test my current Enfield and tell you what it’s like to own one of these grand machines, but I’ve got another road test I’m going to post first.  That’s on the 250cc CSC RX3, 5 years in.  Good buddy Sergeant Zuo over in Lanzhou has 50,000 miles on his RX3 and it’s still going strong.

I am enjoying my Enfield, and I just found a bunch of Enfield accessories available online through Amazon.  I’ll poke around on there a bit later today.

Stay tuned, folks.  More good stuff is coming your way.


Sign up for your free ExNotes subscription!

Book and Movie Review: Charlie Wilson’s War

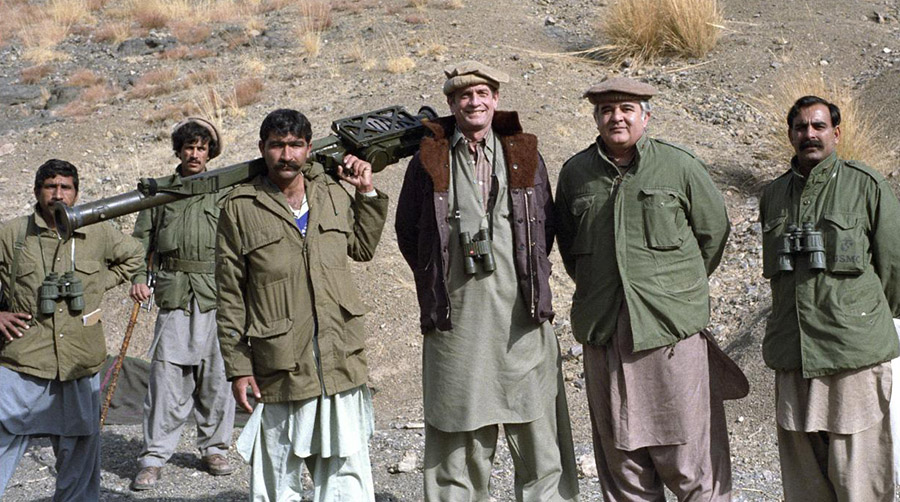
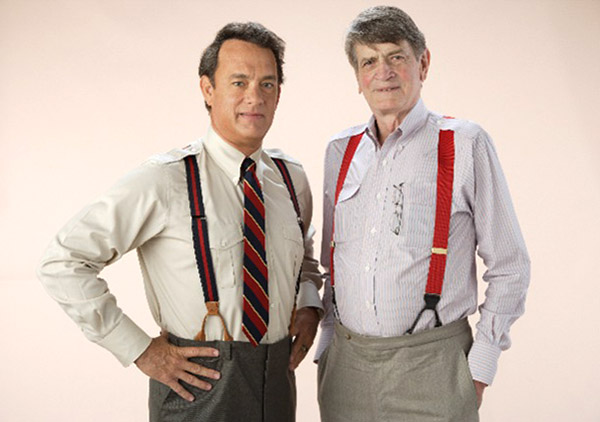
I met Charlie Wilson a couple of times when I was an engineer in the munitions business, so Charlie Wilson’s War had a special attraction for me when it was first published.  Charlie Wilson was a US Congressman from Texas, and to say he was larger than life would be a huge understatement.  Tall, good-looking, a booming voice, a warm personality, and his trademark navy blue suits, white shirts, and suspenders made Mr. Wilson both awe-inspiring and approachable.  Larger than life, as I’ve already said.  Charlie Wilson was someone who was instantly likeable. I’ve never met anyone like him.

We made ammunition, mines, and cluster bombs in those days, and in the 1980s our business was (if you’ll pardon the pun) booming.  My specialties were cluster bombs and mines; we had a sister division that designed and manufactured 30mm A-10 and 25mm Bushmaster ammo.   Congressman Wilson’s interest in us was in the ammo side of the business, and as a relatively high-rolling young dude I was able to attend the meetings when he was in town.  Charlie’s efforts were focused on arming the Afghan rebels trying to kick the Russians out of Afghanistan and back to the Motherland, and what they desparately needed was something that could knock down the Hind helicopter.  That’s where we came in.  The Hind was an armored helicopter (a flying tank, essentially), and we made 30mm ammo that could knock out Soviet tanks (which it did in droves during Operation Desert Storm, our war that would follow a decade later).

President Reagan didn’t want to give the Afghan rebels the shoulder-fired anti-aircraft Stinger missile, as he was concerned about those weapons falling into the wrong hands.  But he was okay with providing purpose-built, shoulder-fired weapons that would use A-10 ammo.   Now, I know what you are probably thinking:  The A-10 30mm round has more muzzle energy than a World War II 75mm Howitzer round, and there’s no way anyone could fire one of those from the shoulder.

Well, hold that thought.  The 30mm anti-Hind rifle was shoulder fired, but not in the sense we would ordinarily think of a shoulder-fired weapon.  The deal was you backed up to a rock or a tree, put the butt of the rifle against it, and then sort of got underneath it.  Like I said above, that’s where we came in.  We provided the ammo.

Ultimately, the program outlined above was cancelled and President Reagan okayed selling Stingers to the Afghan rebels.  Before the Russian chopper pilots could learn (but instantly and intrinsically came to understand) the words to Patsy Cline’s hit tune,  Stingers were doing what they were designed to do.  The Stingers were astonishingly effective, and within a few days of their arrival, the Soviets realized they were in Deep Geshitski (as they say back in Mother Russia).  It wasn’t too long before they rolled back across the bridge to the Soviet Union.  Come to think of it, not too long after that the entire Evil Empire collapsed.  Charlie Wilson was one of the guys who made it happen.

I don’t mind telling you that I was in awe of Charlie Wilson, and when the book (Charlie Wilson’s War) came out, I bought and read it immediately.  Then it was made into a movie with the same name (Charlie Wilson’s War), and we similarly saw it immediately.  Tom Hanks (one of the all time greats, in my opinion) was good in the lead role, but as Lloyd Benson might say, he was no Charlie Wilson.  Mr. Wilson could have played himself.  He had the right kind of personality and magnetism for it.

The good news is that Charlie Wilson’s War is still in print (it’s one of the best books I’ve ever read), and the even better news is that if you’re an Amazon Prime subscriber, Charlie Wilson’s War is running on that platform right now.  Trust me on this:  It’s one you want to see.


Want to see our blog on the might A-10 Warthog?  You can do so here.


Learn about The Gatling Gun, from its civil war inception right through to current applications in modern weapon systems!


Never miss an ExNotes blog!  Subscribe for free!


More gun stuff?  Hey, it’s right here!