The Model 60, Betty, and Getting Hammered

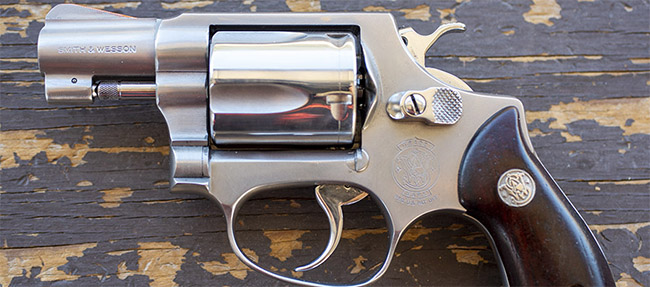
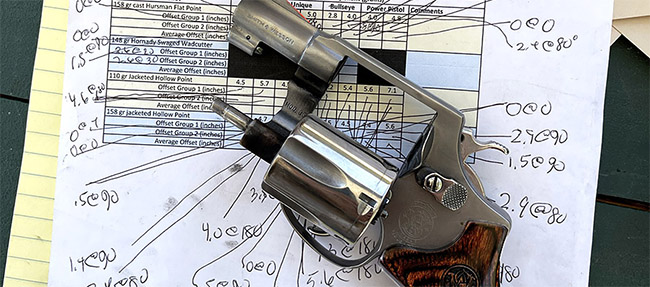
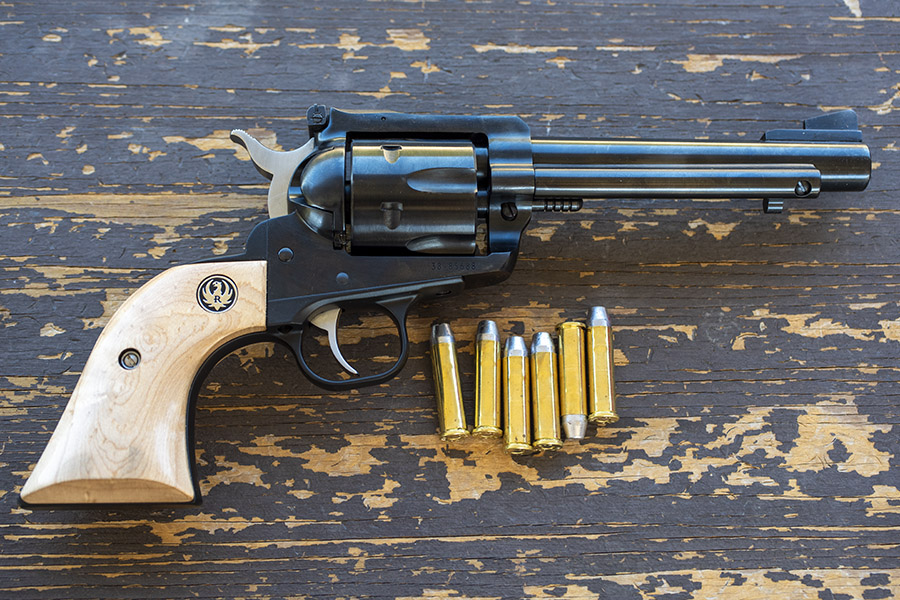
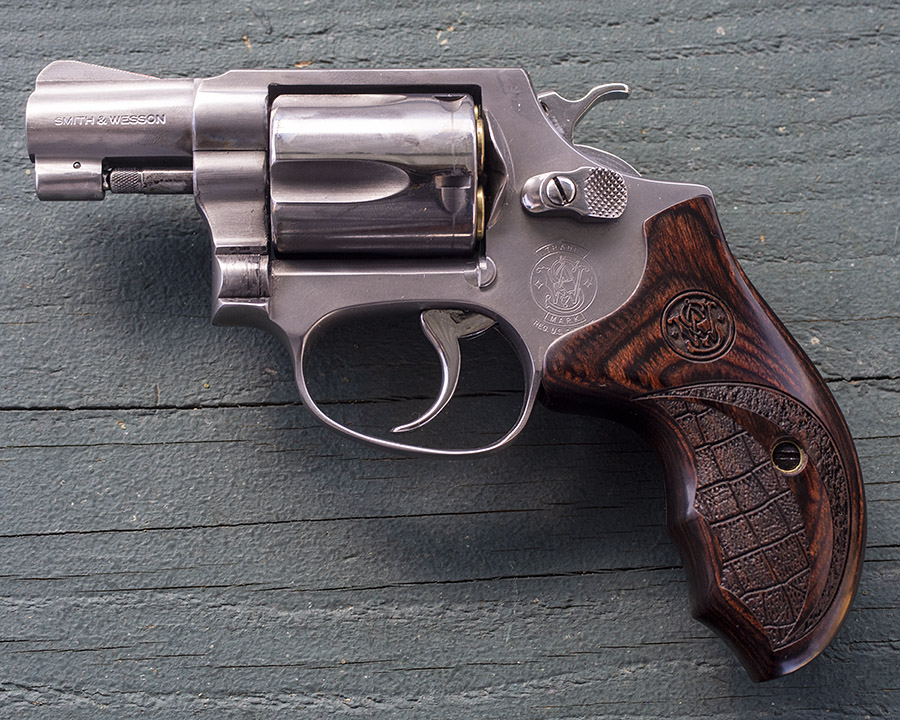
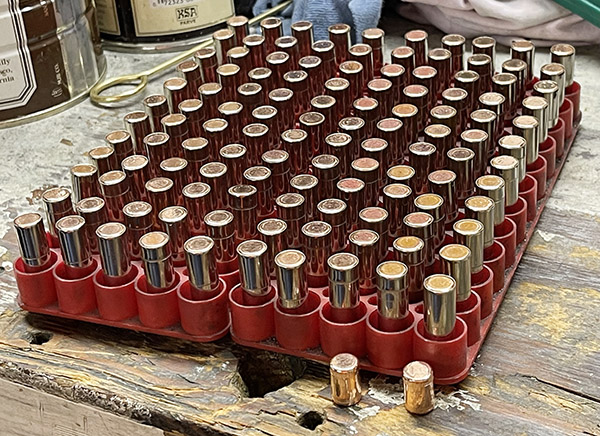
That’s a Model 60 Smith and Wesson snubbie you see in the big photo above, and Betty and Boris you see in the photo below.  You’ve read about the Model 60 before here on the ExhaustNotes blog.  One thing about the Model 60 I wasn’t excited about is that it had a tendency to misfire occasionally when firing double action (it always fired single action, but when shooting double action, I would get one or two misfires in every box of ammo).

I know I was supposed to shoot Boris (the zombie), but Betty is the real troublemaker here and it was easier to get a better sight picture on her.  Sorry about that, Betty.  Sometimes it’s fun to mix it up a bit and shoot zombie targets.

When shooting double action, the hammer fall is a little less than it is when firing single action, and that little bit of energy loss makes a dfference in ignition reliability.  I tried replacing the hammer spring on the Model 60 (thinking the spring had fatigued like it did on my Rock Island Compact), but I still had the double action misfiring problem.  Hmmm.  It was time for a bit of online research.

The Model 60’s hammer spring. Removing it requires the same high-tech tool I used to disassemble the Rock Island Armory Compact 1911. You don’t have to remove the sideplate on a Model 60 to remove and replace the hammer spring.

I’ve read that there are differences in primer manufacturers that can make a difference in ignition sensitivity, with CCI primers being the hardest to light and Federal being the easiest.   These days, it’s a stroke of good fortune to find any kind of primers.  I have CCI primers (with components, halitosis is better than no breath at all).  I had tried Winchester primers in the Model 60 in the past and they had the same propensity to occasionally double action misfire.

.38 Special wadcutter ammo loaded on my Star. Those are 148 grain Xtreme wadcutter bullets in the foreground. They’re called wadcutters because they punch a clean hole in the target. These particular bullets are orientation insensitive; you can load them in the cartridge case facing up or facing down (they are the same on both ends).

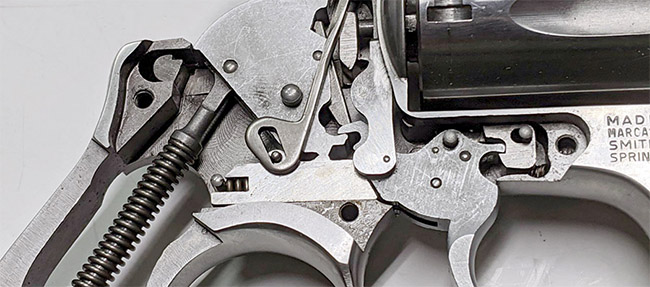
My research tumbled me onto something I kind of already knew but more or less forgot:  Primer seating makes a difference.  It’s typically not an issue for most guns, but on those with little hammers (like the Model 60 snubnose), it matters more.  From what I read, you can’t just seat your primers to a consistent depth and call it good.  There’s variability in the primer height and there’s variability in the primer hole depth.  There’s also variability induced by the carbon residue from the last shot if you’re reloading fired cases.  The conventional wisdom is that you need to have the primer anvil in firm contact with the bottom of the primer cavity, maybe even with a little bit of crush on the primer cup material.  A little bit of primer crush affects primer output less (i.e., it’s better, or so I’ve read), than not having the primer fully seated.  If a primer is not fully seated, the first strike may or may not light the primer.  If the primer is not seated, a lot of the hammer’s energy is consumed finishing the primer seating operation.  After the primer gets seated the rest of the way by the firing pin, the hammer may not have enough energy left to ignite the primer.  It all makes sense to me.

Primers need to be fully seated, which usually means the primer face should be 0.005 to 0.006 inch below flush.

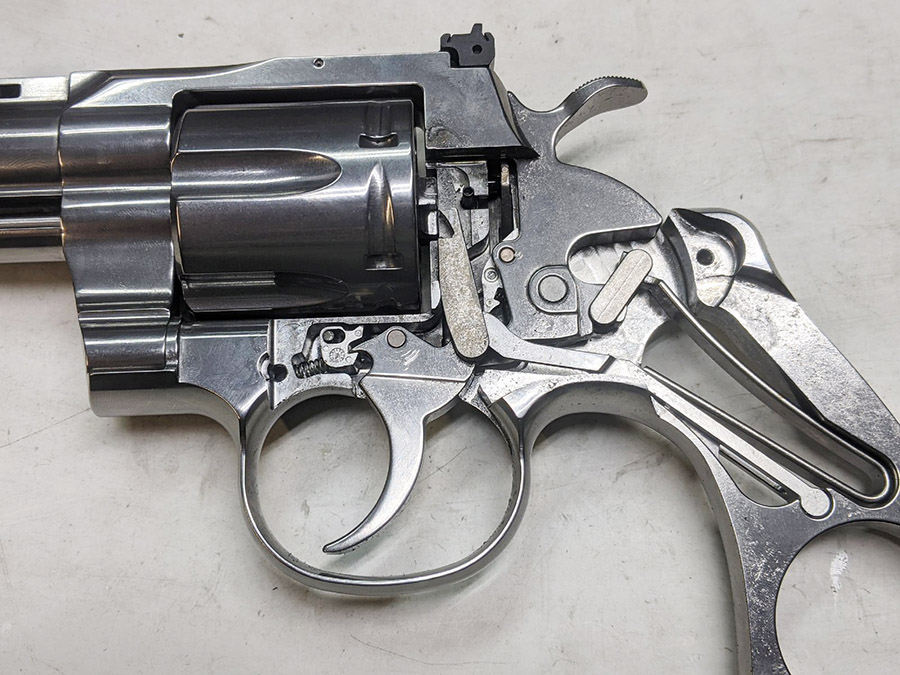
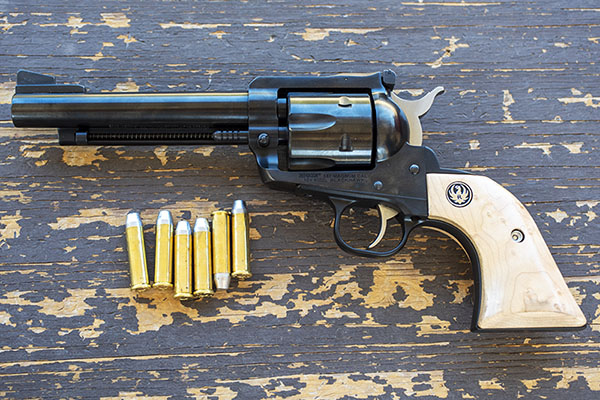
The more I thought about the above, the more I convinced myself the Model 60’s occasional misfires were a primer seating issue.   The reason I think that’s what I had going on is because when I had a misfire, the cartridge that misfired always fired on the second strike.  That’s consistent with the primer-not-fully-seated hypothesis.  If it was just a matter of insufficient firing pin energy, the primer wouldn’t fire on the second strike, either.  The issue is more pronounced on a little snubby like the Model 60 because it has such a tiny hammer and hammer spring.  There’s not a lot of energy there like there is on a Colt Python or a Ruger Blackhawk (those handguns have much bigger hammers and hammer springs).

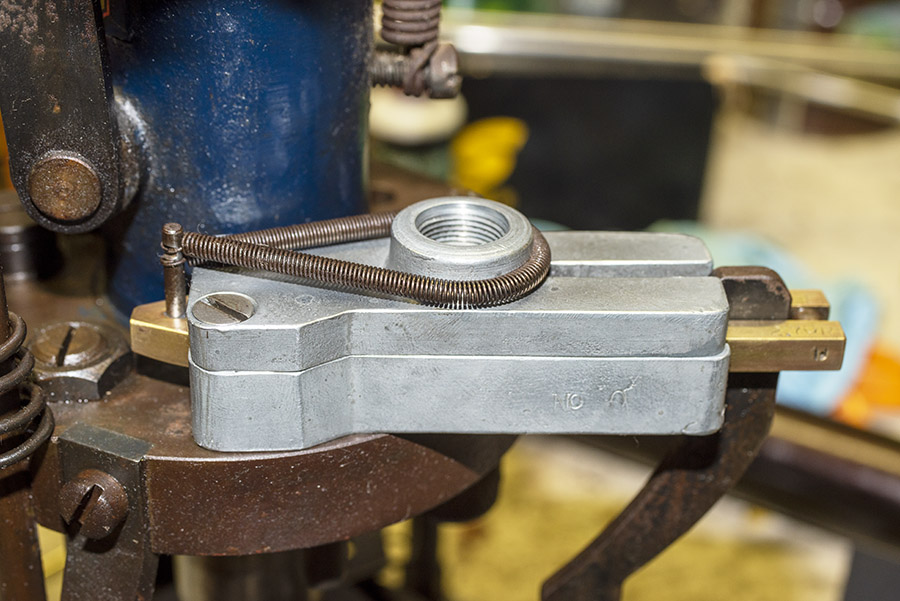
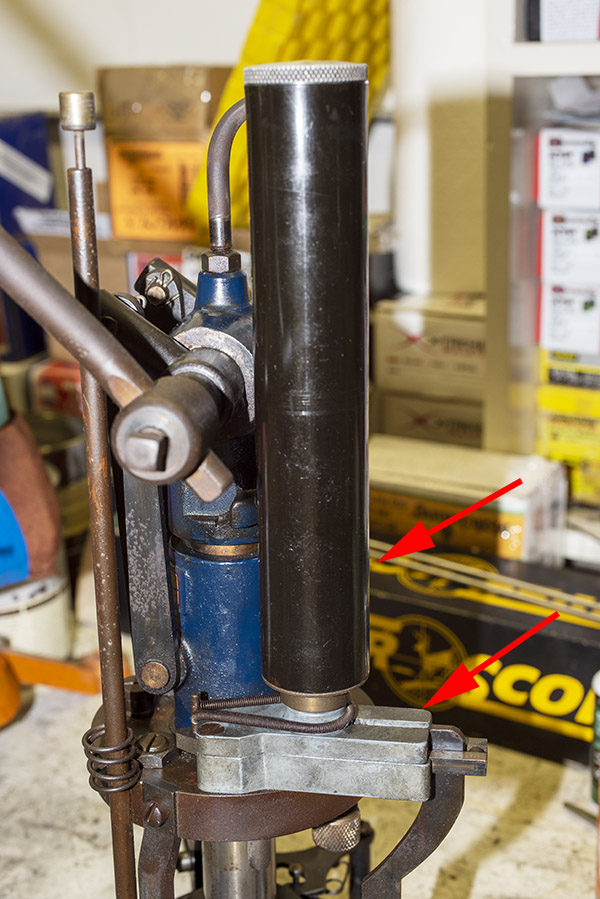
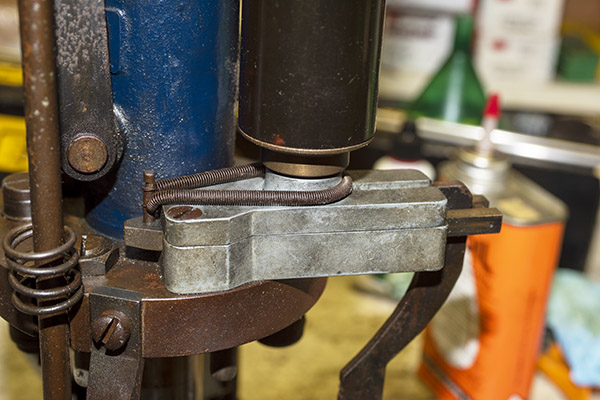
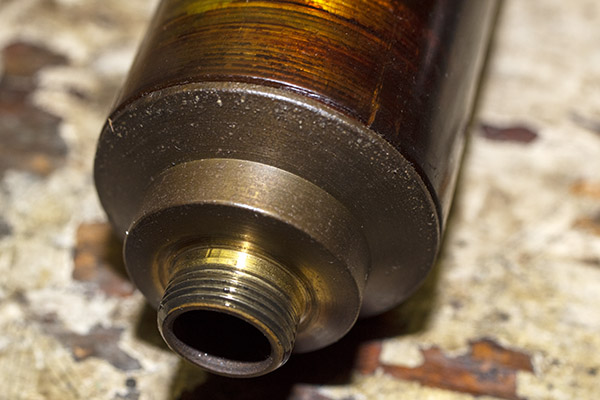
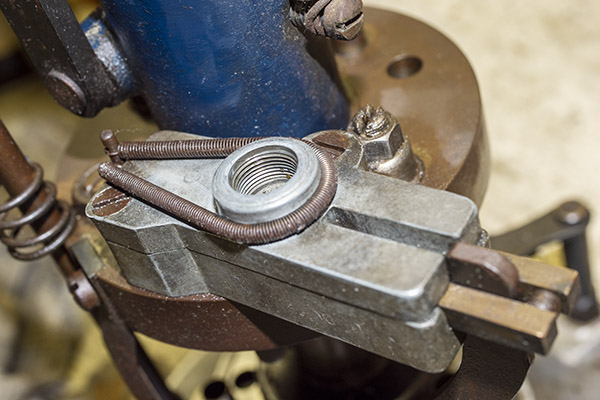
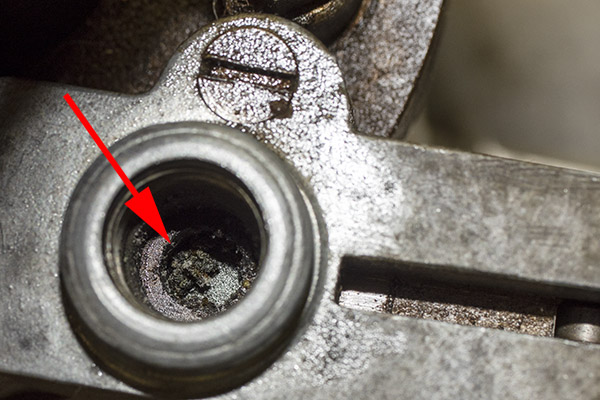
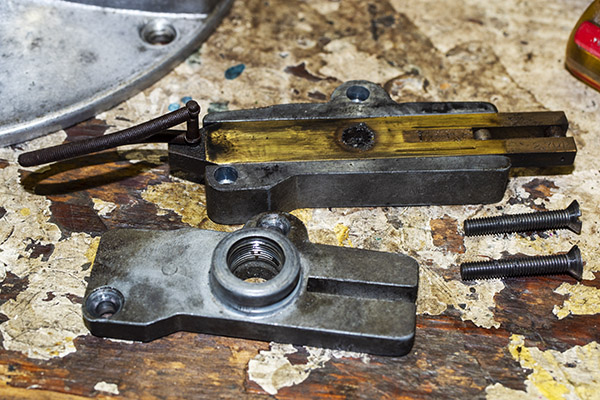
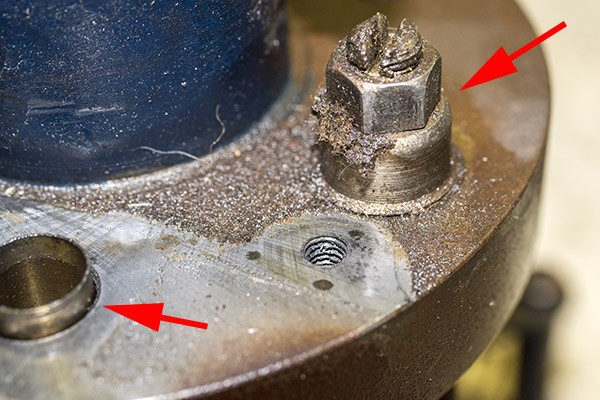
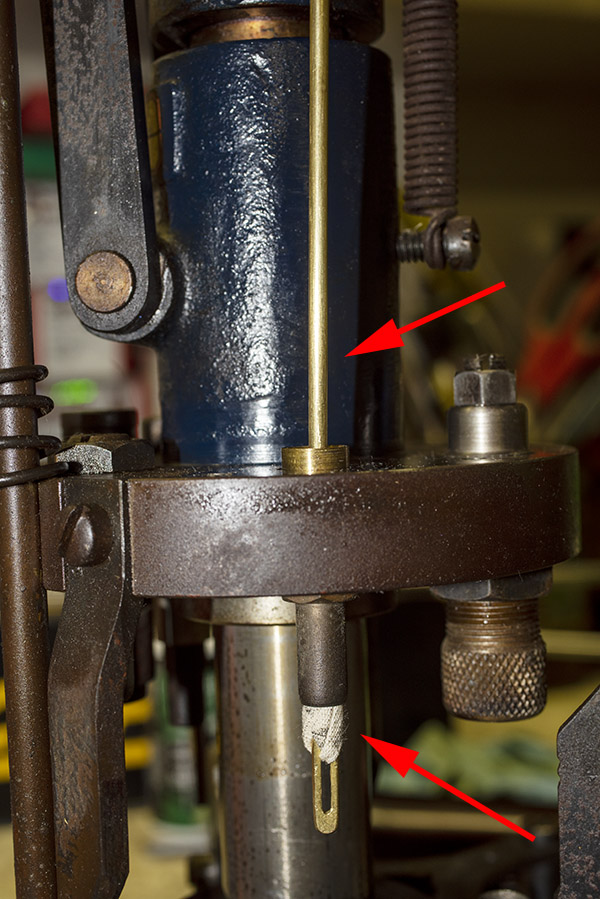
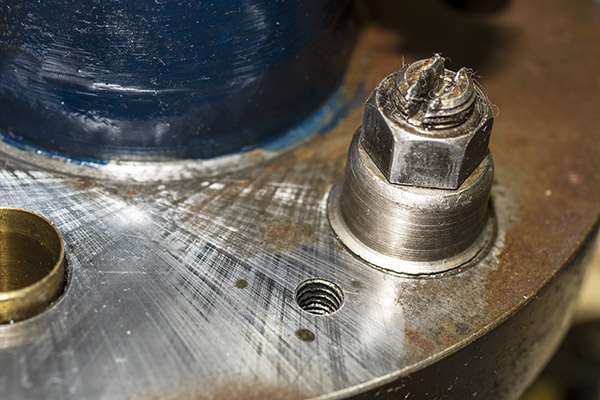
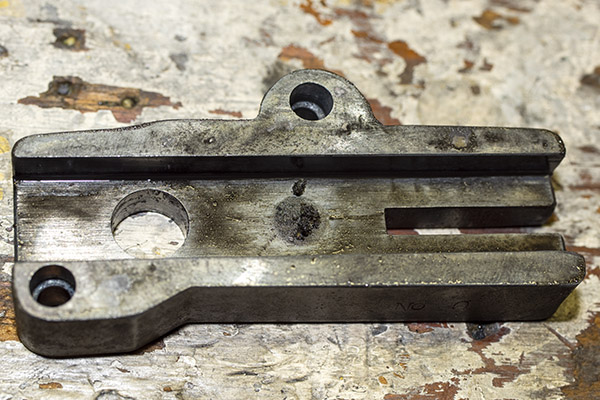
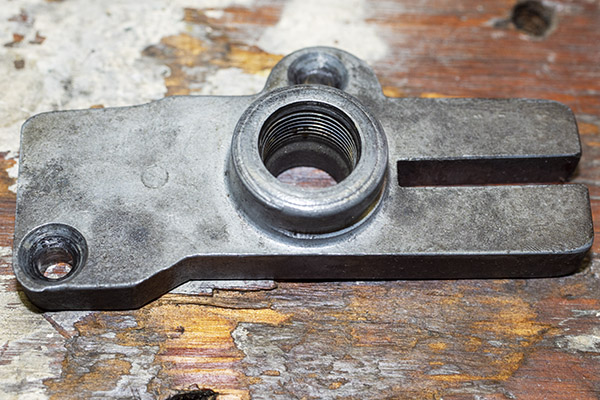
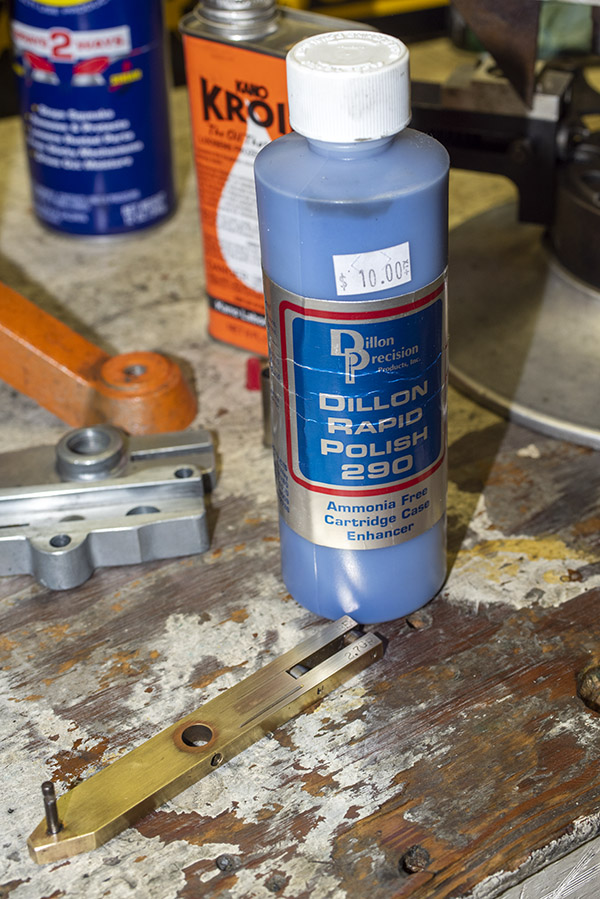
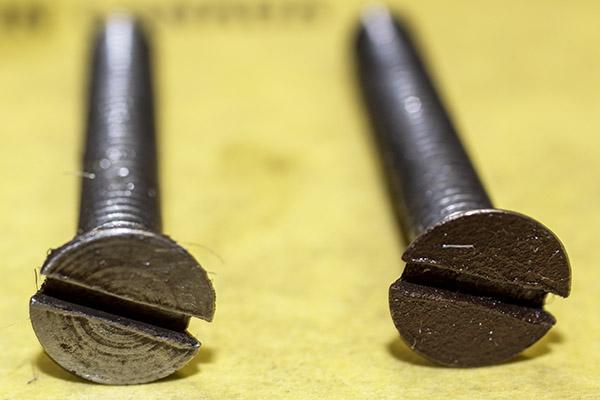
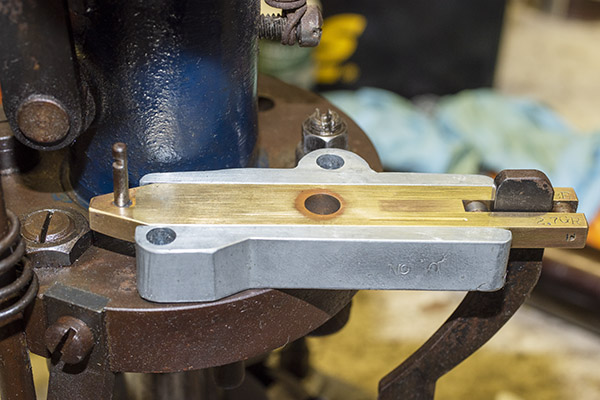
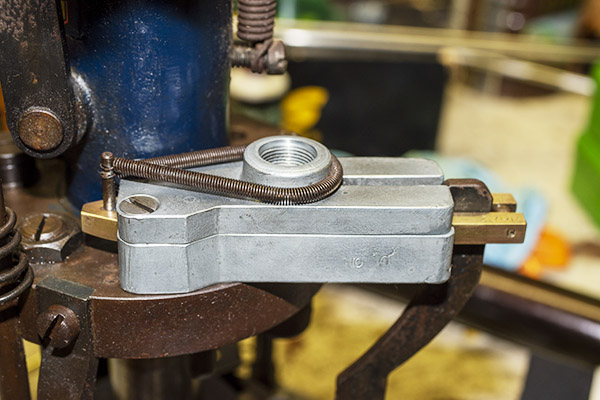
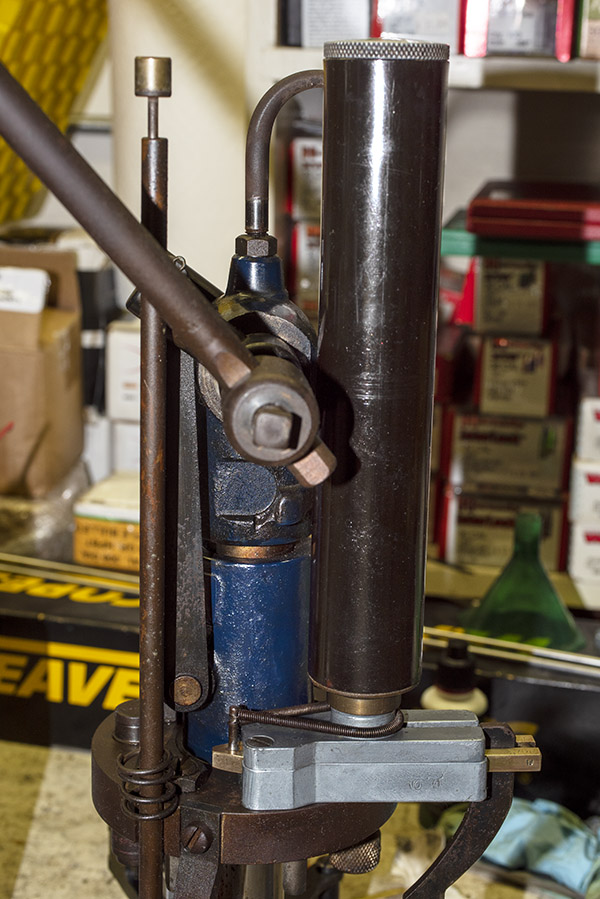
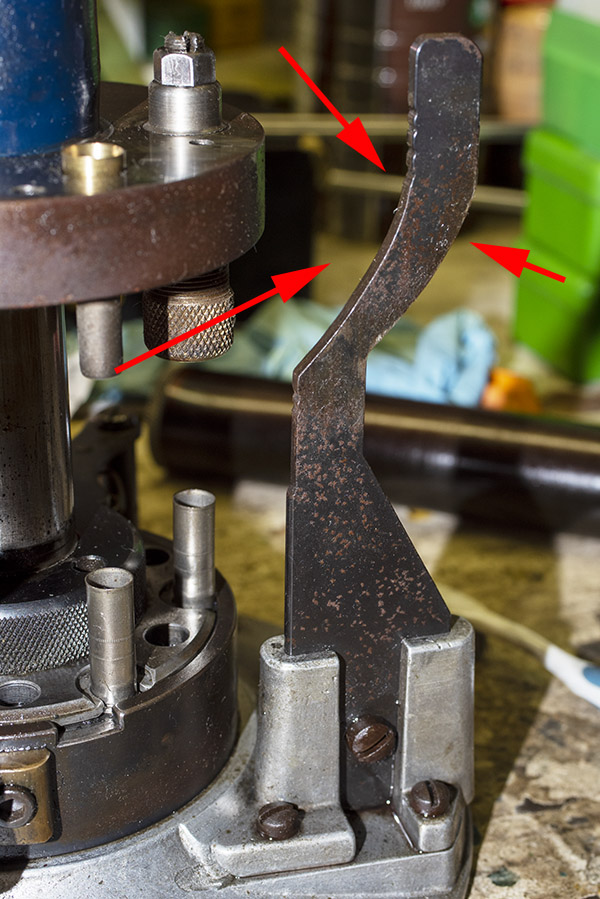
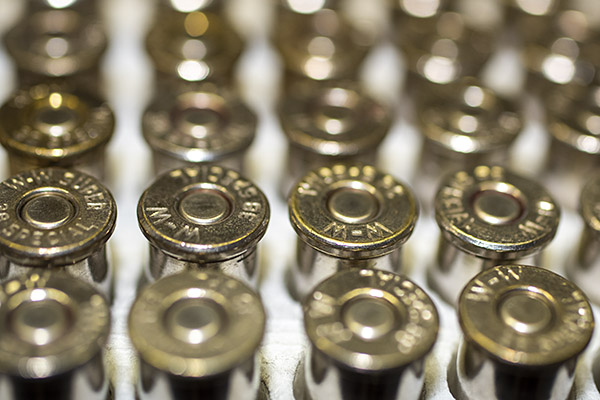
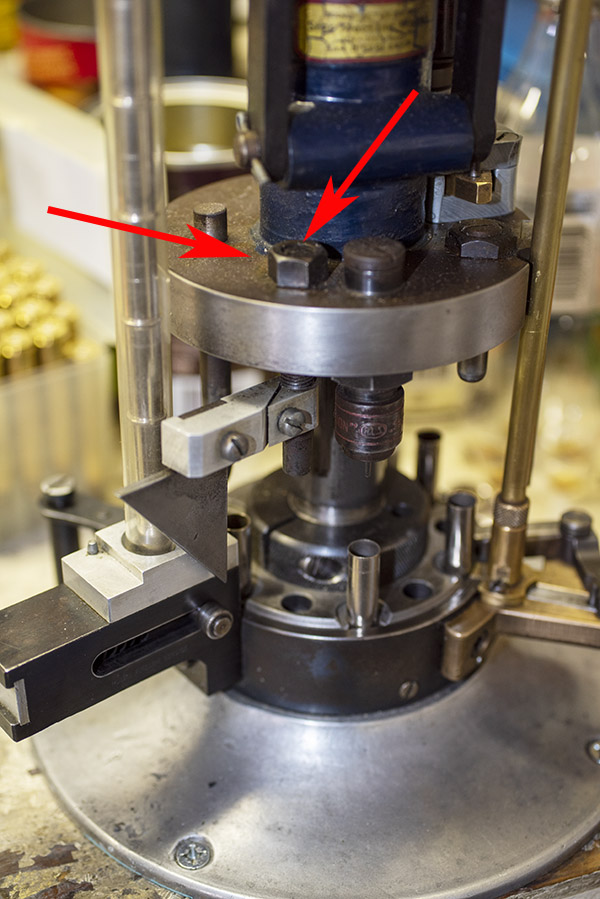
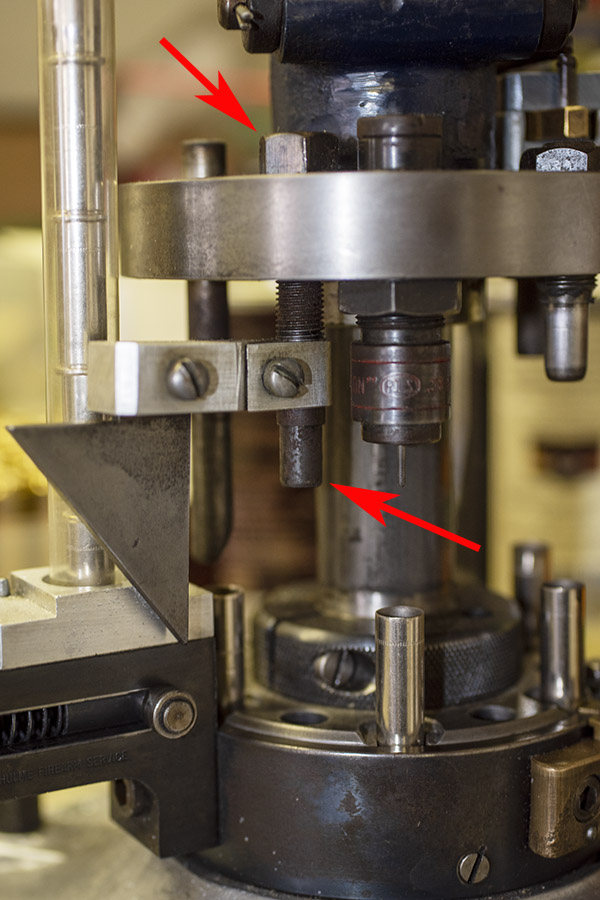
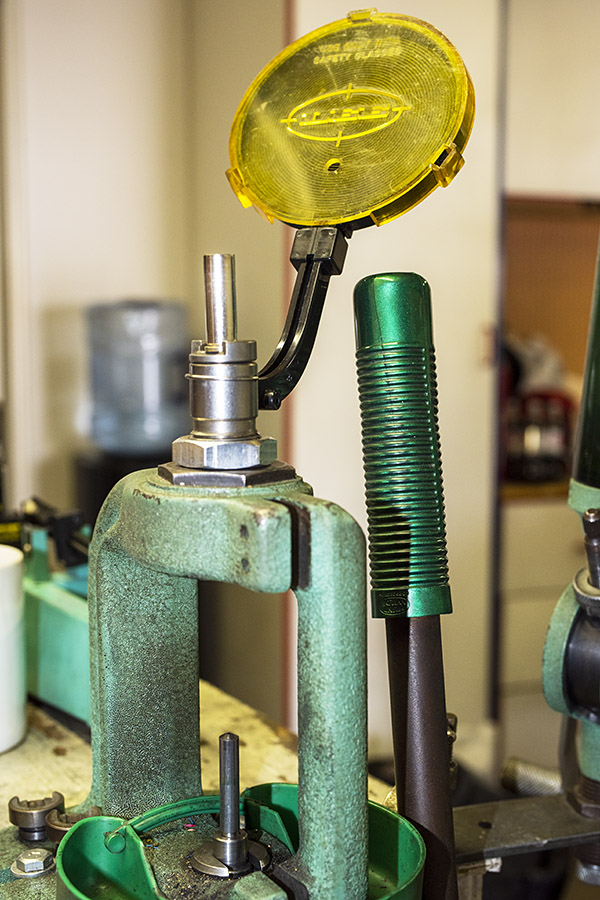
I loaded a box of 38 Special ammo on my Star reloader (I love that machine) and examined the primer seating depth.  They were below flush with the rear of the cartridge, but not by much.  I can fix that, I knew.  The Star has an adjustment for primer seating depth, as explained in the photos below.

Lowering the primer seating adjustment shaft is accomplished by loosening a locknut and turning the shaft in a bit more.
The Star’s primer seating shaft. It operates a lever on the press downstroke that pushes the primer up to seat it in the cartridge case.  Adjust the shaft down, and the gizmo seating the primer pushes it into the cartridge case deeper.

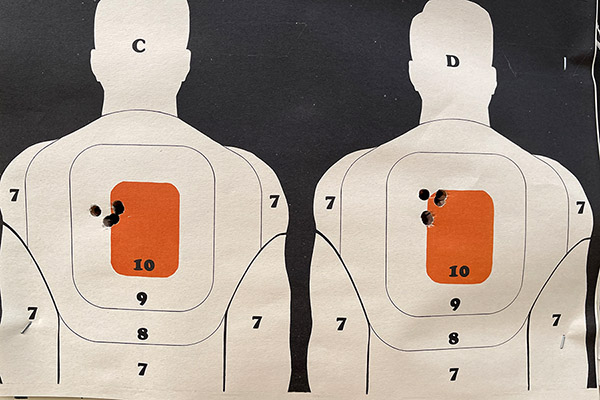
After adjusting the Star to seat the primers deeper, I loaded another box of .38 Special wadcutter ammo.  You can guess where this story is going.  I double action fired a box of ammo I loaded before I made the adjustment, and I had two misfires.  That’s about how the Model 60 has always performed.  Then I shot the second 50 cartridges using ammo that I reloaded after making the primer seating depth adjustment, and every round fired.  There were zero misfires.  My Model 60 double action misfire issue was primer seating.   What do you know.  Live and learn.

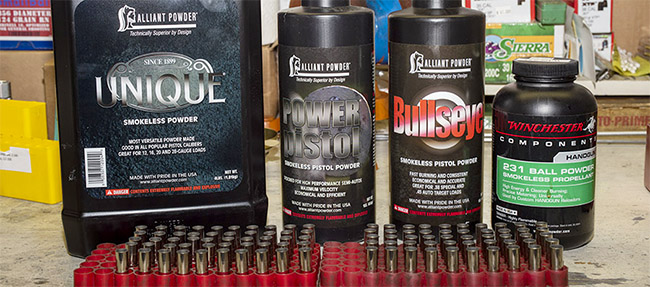
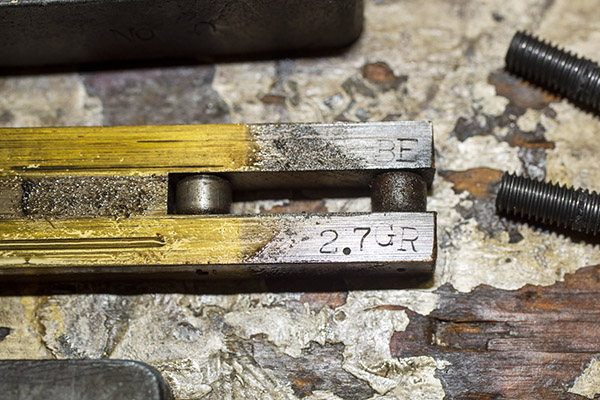
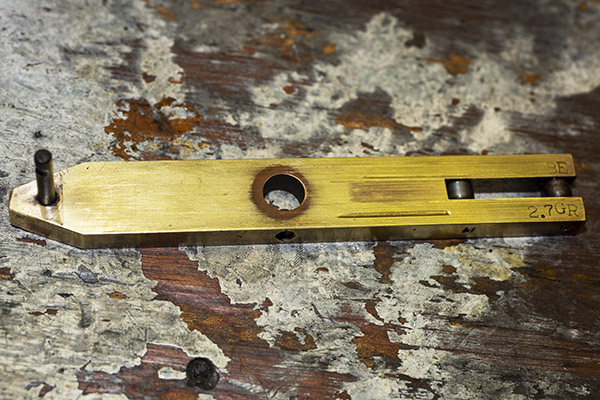
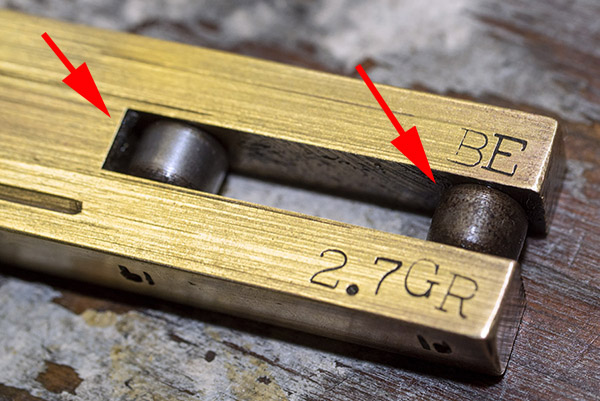
All this is interesting, but I usually don’t shoot wadcutter ammo loaded on the Star in the Model 60.  My Star reloader is configured to load the classic .38 Special target load: 2.7 grains of Bullseye and a 148 grain wadcutter bullet.  The powder weight is not adjustable without buying a new powder throw bar for the Star, and I don’t want to do that.  The Star will remain dedicated to .38 Special wadcutter ammo.

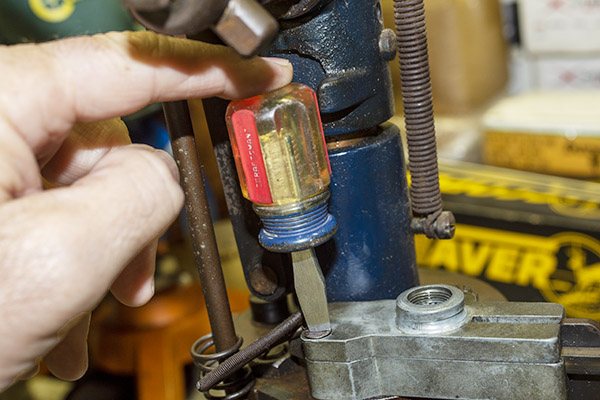
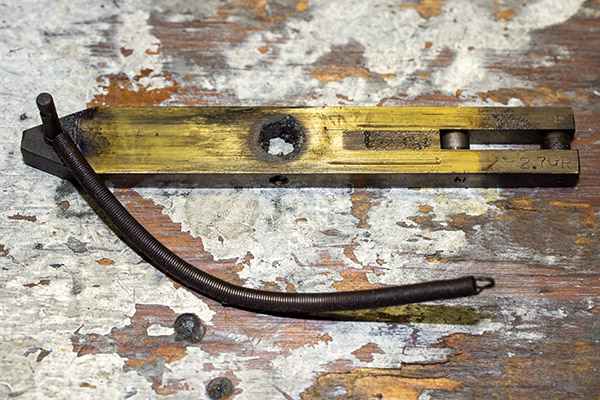
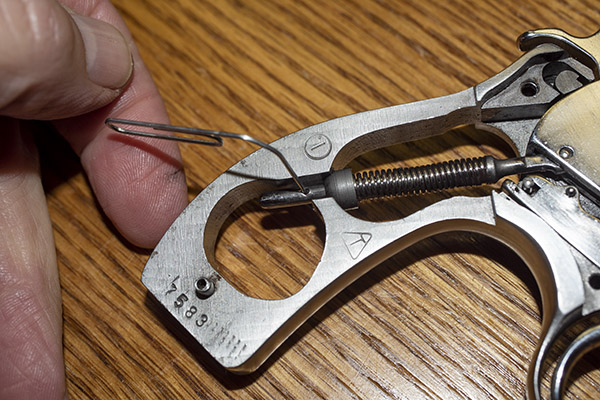
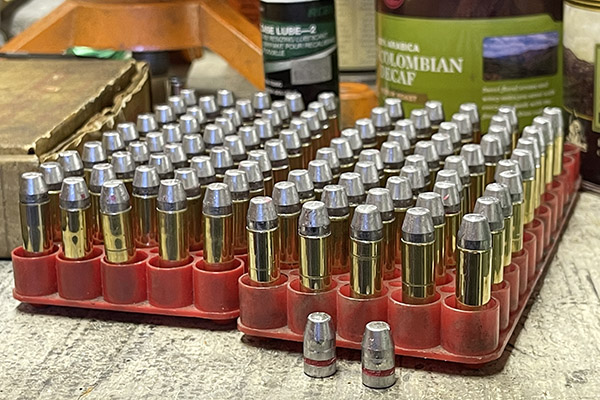
For the Model 60, I found that a good accuracy load (and a heavier load better suited for defensive purposes) is 3.5 grains of WW 231 propellant and a 158 grain cast flatpoint (also known as a truncated cone) bullet.  That combination shoots to point of aim at 50 feet in the Model 60.  I reload that ammo on my single stage RCBS Rockchucker press.  For primer seating on the Rockchucker, I use an old Lee priming tool (they called it the AutoPrime II) I’ve had for 40 years (it’s shown in the photo below).  Unfortunately, Lee no longer offers this system and they don’t have anything that offers both automatic primer feeding and primer seating on the press upstroke.   That’s a pity, because it’s a good approach and allows for much more positive primer seating.

A good primer seating system no longer offered: The Lee auto primer. It is 40 years old and still works well.  A mini-ram replaces the shell holder in the Rockchucker ram, and the primer seating operation occurs up north.
Freshly-reloaded .38 Special ammo with ballistics similar to the old FBI load…a 158 grain cast flatpoint bullet and 3.5 grains of WW 231.

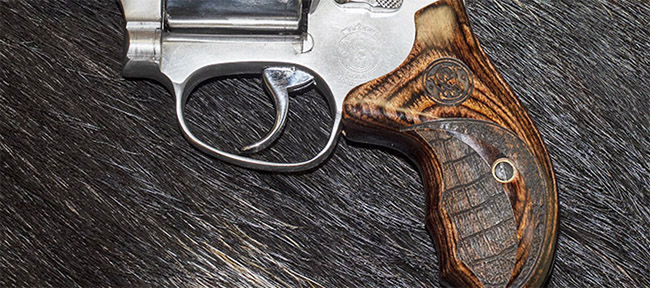
A couple of final notes…when doing this kind of testing, I always make sure the revolver is clean and properly lubricated.  My preference is BreakFree cleaner and lubricant.  It does a stellar job.  And if you’re wondering about the grips on the Model 60, they from Altamont.  Those grips turn the Model 60 into a more manageable and less punishing handgun.  I like them.

You know, one of the things I enjoy with this reloading hobby is just how much there is to learn.  I’ve been reloading for about 50 years now, and I’m still learning (and sometimes relearning) new things.  When you roll your own, you’re in charge and you can tune a load for better accuracy, better reliability, and lower cost.  Reloading is a cool hobby, and it’s as much fun as the shooting itself.


Click on our pop up ads!


Never miss an ExNotes blog…sign up for a free subscription:


More gun and reloading stories are here!


More Model 60 articles!

A TJ Tune For My Model 60
A TJ Roscoe
New Shoes For The Model 60
A Model 60 Load Development Plan
Model 60 Load Testing

A TJ Trigger for My New Python

As I mentioned in a recent blog, good buddy TJ (of TJ’s Custom Gunworks) reworked the trigger on my Colt Python.  The original single action trigger had a lot of creep, it was heavy, and what surprised me most of all was that it actually cocked the hammer another few degrees before it released.   I was getting a little double action when firing single action.

That bothered me enough to call my contact at Colt Manufacturing, and I think he was surprised when heard about it, too.   He checked with his engineering department, and the word came back:  They had to do that to meet the California and Massachusetts drop test requirements.  I checked the California regulation and it requires dropping a loaded, cocked revolver from a height of 1 meter six times on a concrete surface without the gun firing inadvertently.   Think about that.  Dropping a loaded and cocked revolver, a .357 Magnum, onto a concrete floor.  Six times.

Me?  I’m going with an alternative approach.  I’m not going to drop my loaded, cocked, .357 Magnum revolver on a concrete surface even once.  It’s kind of a common sense approach, one that the politicians in California and Massachusetts apparently think we can’t be trusted to take.

A loaded revolver.   Cocked.  Dropped.  Six times.  Onto a concrete floor.  What were they thinking?

I’m not one to to argue Darwinism versus Divine Creation (we don’t do politics or religion here on ExNotes), but here’s a thought.  Maybe someone who drops a cocked, loaded, .357 Magnum revolver on a concrete surface six times, well, maybe Darwin was on to something.  Maybe that person needs to be culled from the gene pool.  Before you get your shorts in a knot, though, remember my preface:  It’s just a thought.

Anyway, back to the main attraction, and that’s the trigger job TJ did on the new Python.  TJ took photos of the Python’s internals (the complete parts interface is shown above in the large photo).  The photo below shows what was causing the trigger creep and the hammer movement during a single action trigger pull:

That’s the hammer on the left, and the trigger on the right.  You’ll notice that the hammer’s sear area (denoted by the red arrows) is kind of rough and it contains a hooked ledge of sorts.  That’s what was rotating the hammer back a few more degrees when the trigger was actuated in the single action mode.

TJ modified the sear to eliminate the hooked ledge and create the angles and surface finish the Python trigger-to-hammer interface deserves.  That’s what you see below.

Before he improved the sear interface, the Python’s double action trigger pull was 9 1/2 lbs; it is now 9 lbs.  The single action trigger pull was a very creepy 5 1/2 lbs; now there is no perceptible trigger or hammer movement before the hammer is released and the trigger breaks at a very clean 2 1/4 lbs.   The upgrade completely changes the character of the new Python.  I can’t imaging anyone buying a Python and not wanting to have the trigger cleaned up in this manner.  TJ is the guy to do it.

The next big question is:  Did the new trigger a make a difference in how the Python performed?  Hey, you tell me.  Here are two 5-shot groups shot at 50 feet with the improved trigger:

Those two groups were shot with my go-to .38 Special target load (a 148-grain wadcutter and 2.7 grains of Bullseye prepared on my Star reloader).  The group on the left measures 0.680 inches; the one on the right measures 0.830 inches.  Some of the .357 Magnum loads performed just as well.   I’ll share all my Python load testing results in a near-term future blog.  I didn’t adjust the sights during my load testing because I’d be moving them with each new load; I’ll zero the gun when I’ve selected the load I want for the Python.  I am a happy camper; these are phenomenally good results.

You might be wondering about now why you’d need a trigger job on a $1500 handgun.  Folks, this isn’t Colt’s fault.  They’re doing what they have to in order to meet a requirement imposed by people who don’t understand what they are doing.  Don’t get upset with Colt.  Do the right thing and vote.

If you have a Python and you’re not happy with the trigger, take a look at TJ’s Custom Gunworks and drop TJ a note.  Trust me on this:  You’ll be glad you did.


More Tales of the Gun!


Never miss an ExNotes blog!


More gun porn?  Check this out!

The Star Powder Dispenser

I’m going at the Star resurrection slowly, methodically, and piecemeal.  I suppose I could completely disassemble the thing, clean, degrease, and polish all the bits and pieces, and then reassemble it all.  But I’m a little bit scared I might not remember how it all goes back together, and I don’t want to spread everything out and make my workbench unusable during this resurrection.  Nope, slow and easy is the path forward for me. I’m doing it one bite at a time and I am enjoying the meal.

The Star Powder Dispenser

The first bite is the powder dispenser.  It’s the deal that automatically dispenses the right amount of propellant each time the Star’s lever is pulled.  It consists of a powder hopper subassembly (the upper arrow)  and the dispensing mechanism (the lower arrow), as you see in the photo below.

Here’s another photo of the dispensing mechanism.  It mounts to the Star’s upper plate (Star calls this upper plate the tool head).

Powder Dispenser Disassembly

Here’s the bottom of the powder hopper.  It’s brass and it mounts by threading into the powder dispensing subassembly.  The silo that holds the powder is plastic, and I think when it was new the plastic was probably clear.  It’s occluded with age.  That’s okay.  So have I.

This is the powder dispensing mechanism with the powder hopper removed.

Looking inside the powder dispensing mechanism, there were still a few grains of powder left inside from the last time this reloading equipment was used.  I’m guessing that was quite a while ago. My Nikon camera and Sigma macro lens do  a wonderful job for this kind of photography.

Incidentally, speaking of the last time this device was used…several of our readers suggested that the number etched onto the Star reloader’s base was a social security number.  Before identity theft became the problem it is today, it was common for folks to etch their social security number on things to prevent theft.  One of our blog readers located the man whose social security number was located on this Star reloader.  That owner was born in 1926 and died in 2009.   To my surprise, there’s a social security death index where you can find this information.  Who knew?

Back to the job at hand: The powder dispensing mechanism is secured to the tool head with two slotted screws.  I had applied a bit of Kroil to these screws a day earlier and they unscrewed easily.  Kroil is good stuff.

With the two screws removed, the photo below shows what the powder dispenser mechanism looked like.  There’s a lower housing, an upper cover, a spring, the two attach screws, and the powder slide.  It was all pretty funky when I disassembled it, but I took care of that.

The powder slide is what actually meters (determines the amount) of powder dropped into each cartridge.  When the tool head is up (before you actuate the lever), powder drops into a cavity in the slide.   When the tool head is lowered (when you actuate the lever), the powder slide is pushed to the left, the cavity containing the powder moves over the powder spout, and the powder drops through the spout into the cartridge case.

Cleaning Things Up

The tube sticking up through the tool head in the photo below is the powder spout.  It’s what the left arrow points to.  The right arrow points to the bullet seating and crimping die.  There was a lot of crud on the die.

The spout was funky, so I ran a patch through it with a cleaning rod.

The bullet seating and crimping die is the last of the three reloading dies.  It was super funky.  It’s the die that seat the bullet and crimps the cartridge case.

Here’s the “after” photo.  I went to work on the die with WD 40 and a toothbrush.

This is the powder dispenser lower housing.  It’s funky, too, but just wait.

The photo below shows the powder slide, and it says exactly what I hoped it would say.  Note the “BE” on the upper tine, and the “2.7 GR” on the lower tine.  That means this powder slide is designed to throw 2.7 grains of Bullseye powder, and that’s a good thing.  That powder and that charge, along with a 148-grain lead wadcutter bullet, is the accuracy load in .38 Special.  I got lucky; this is exactly what I wanted to see.  Note the two rollers between the tines.  I’ll explain what they do a little further along in this blog.  And yeah, I know, this is another funky piece.  But wait; you’ll see.

More funkiness…the powder dispensing mechanism cover.

Here’s another shot of the powder slide and its spring.  This is the “before” picture.  And that hole in the center?  It’s the feature that determines how much powder goes into each cartridge.  If you want a different charge on a Star reloader, you need to buy a different power slide.   Like I said, I got lucky.  This one was set up for 2.7 grains of Bullseye.  It’s just what I wanted.

I wiped the powder slide off and, being that it was brass, I wanted to get rid of all the oxidation and then polish it.  I was thinking it would be cool if I had some Brasso, but since I’m no longer in the Army I don’t have any.  Then I remembered:  I have Dillon Rapid Polish brass polish that I use with my Franklin Arsenal brass tumbler, and it does the same thing.  I put a little on a rag and used it to polish the powder slide.

Here’s another shot (the “after” photo) of the powder slide.

Note the rollers on the left end of the powder slide.  This thing is like a Ducati:  It has desmodromic valve actuation.   I’ll explain that a little bit further down.

Next up would be the powder dispenser mounting screws.  I went to work on them with a Scotchbrite pad and they cleaned up nicely.

Here’s the powder dispenser base and the powder on the tool head.

And here’s the powder dispenser cover, the spring, and the mounting screws reassembled.  I used a Scotchbrite pad to clean up the powder dispenser housing and powder dispenser cover, too.  They look good.

And finally, here’s the powder hopper reinstalled on the powder dispenser.

Desmo Dispenser Actuation

You might be wondering how the powder dispenser works.  It’s really quite clever.  When the Star reloader lever is actuated, the tool head moves up and down on the main shaft, bringing the powder dispenser with it.  As that occurs, the powder slide translates back and forth as it moves along the curved cam you see in the photo below.

Remember those two rollers in the powder slide?

They follow the vertical cam path shown two photos up.  The inner roller rolls along the cam as the tool head moves down, and the outer roller rolls along the cam as the tool head is returned to the up position.  This is desmodromic actuation, just like Ducati uses on the their motorcycle intake and exhaust valves.  They’re driven open by a cam, and they’re driven closed by a cam.  Star could have just used pins instead of rollers, but they went with rollers (a more expensive and more reliable approach, I think).  When the tool head moves down, the powder slide takes 2.7 grains of Bullseye powder, shifts it over the powder spout, and gravity does the rest.  Take a look.

This is all very cool stuff, and if you get the feeling I’m having a good time bringing the Star back to life, you’re a very perceptive person.  If you’re just tuning in to this adventure and you want to see our earlier blogs on the Star reloader resurrection, you can find them here.

Next up?   That’s going to be the primer feed mechanism.   Stay tuned!


Sign up here for all the ExNotes blogs!  It’s free!

A Bullseye Birdseye Blackhawk

By Joe Berk

Good buddy Greg and I (along with about a gazillion other people) are  long term Ruger Blackhawk fans, and last week we were on the range with a new .357 Magnum Blackhawk Greg recently acquired.  It’s one of a limited run offered by Talo, a distributor specializing in custom guns from a variety of manufacturers.

Greg’s Blackhawk has a 5 1/2-inch barrel (standard New Model .357 Blackhawks have either a 4 5/8-inch or 6 1/2-inch barrel) and really cool birdseye maple grips (most Blackhawks these days have black plastic grips).   The birdseye maple grips contrast well with the Ruger’s deep bluing, and that 5 1/2-inch barrel just flat works on a single action revolver.  At 40 ounces (one ounce heavier than a 1911 Government Model .45 auto), the Ruger balances well and feels right.  Greg’s birdseye Blackhawk is beautiful, it groups well, and it has a superb trigger.  This particular offering from Talo includes an extra cylinder chambered in 9mm, so Greg can use .357 Magnum, .38 Special, or 9mm ammo (I guess he won’t be running out any time soon).

Greg loads the same .357 Magnum ammunition that I do (a 158-grain cast lead bullet with 7.0 grains of Unique), which is the “go to” accuracy recipe in .357 Magnum.  It sure shoots well.  A target load that is superbly accurate in a Blackhawk is the .38 Special with a 148-grain wadcutter bullet and 2.7 grains of Bullseye propellant (that’s been a preferred .38 Special accuracy load for decades).

Ruger makes a beautiful revolver, and this Talo birdseye Blackhawk’s limited production run almost guarantees these will be investment grade guns.  Most dealers are sold out, but if you poke around a bit on Gunbroker.com, you may still find one.


Help us keep bringing these articles to you.  Please click on the popup ads!


Like our gun posts?  Hey, there’s a lot more on Tales of the Gun!


Never miss an ExNotes blog!  Sign up here for a free subscription: