
This blog outlines the development plan I’m using for my new-to-me Model 60 Smith and Wesson revolver. You might recall that I bought this revolver not too long ago and I had my good buddy and master pistolsmith TJ (of TJ’s Custom Gunworks) go through the gun, get everything perfect, do the trigger, and add a bit of tasteful polishing.
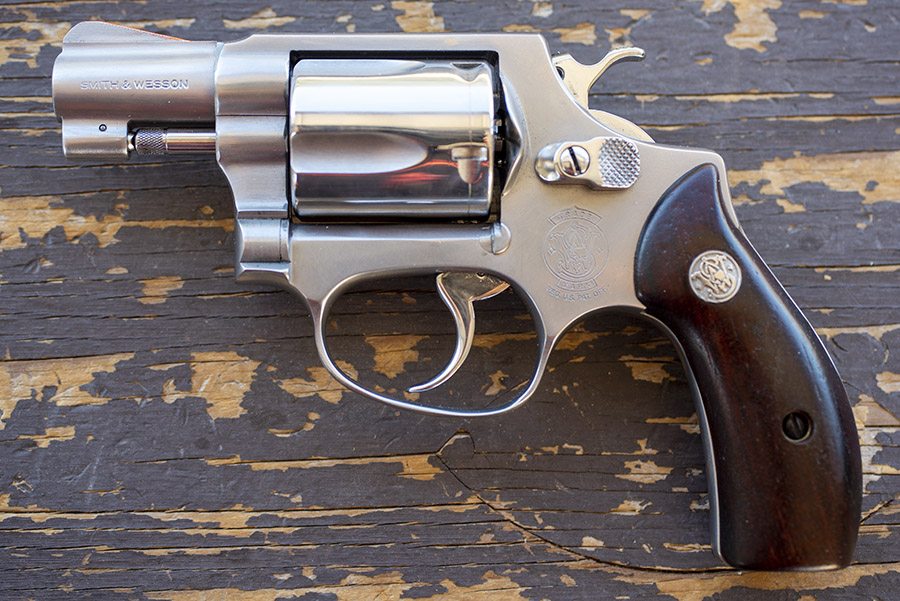
TJ did a hell of a job, I recently qualified with the Model 60 for my concealed carry permit, and now I want to find the most accurate load for this handgun. To me this means two things: The smallest group size and where the revolver hits with respect to the point of aim. I’m not concerned with velocity. All the velocity in the world doesn’t mean a thing if you can’t hit your target.
When I develop a load, I generally do a bit of research on the Internet to see what others have found to be an accurate load, I see what components I have on hand (bullets and powders), and I consult my reloading manuals. I never take loads off Internet forums as gospel unless I confirm their safety in my load manuals or they come directly from the manufacturer’s websites (there is just so much inaccurate information on the Internet), and I never load at the manual’s max without working up to that level. My approach is to load a few rounds at the minimum level and a few a bit below the max level with each bullet and powder combination to get a quick feel for further load development. Or, I might find a combination in the initial tests that is so good I don’t need to do any further testing.
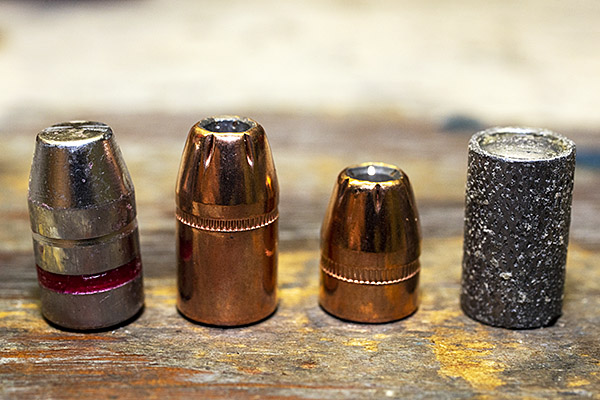
These days, I’m governed by what I have on hand, as the component suppliers are out of nearly everything. For me and this test series, that means four bullets:
-
-
- A 158-grain cast flatpoint bullet from a local caster
- Hornady’s 158-grain jacketed hollowpoint
- Hornady’s 110-grain jacketed hollowpoint
- Hornady’s 148-grain swaged wadcutter
-
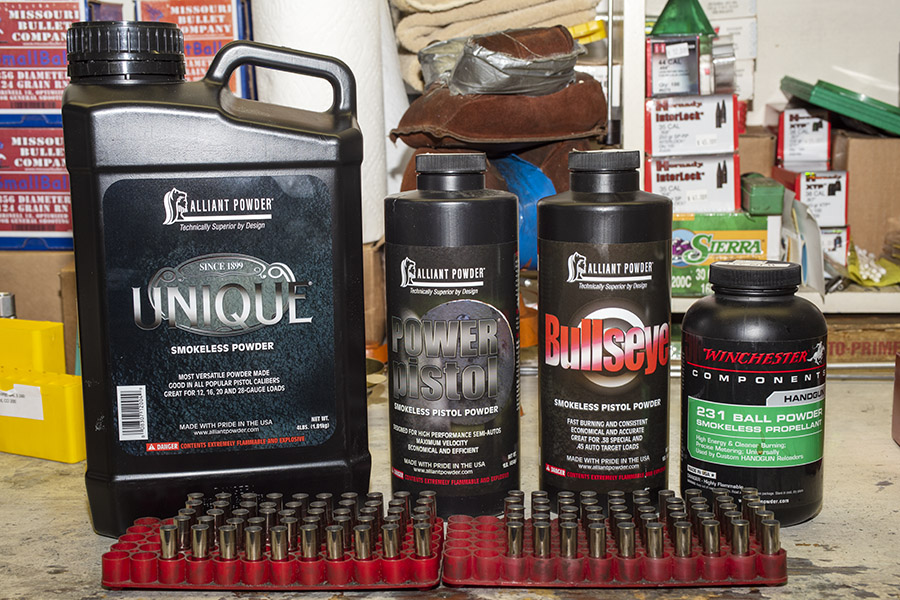
All are shown in the photo above. My powders include Winchester 231, Unique, Bullseye, and Power Pistol (as seen in the featured photo at the top of this blog).
Here’s what the test plan looks like:
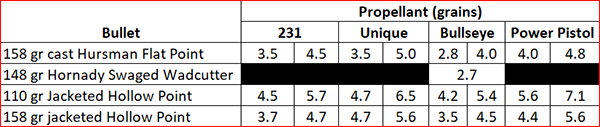
I’m going to test at 50 feet and fire two groups of three shots each for each combination. That will keep the total number of rounds fired to a manageable 150 rounds. It’s a quick look at what works and what doesn’t.
You might notice that I’m only going to test one load with the 148-grain wadcutter bullet. That’s because it’s been the known accuracy load for years, and it’s also because it’s what I have my Star progressive reloading press set up to make. Stated differently, I’m not going to change this load because it’s my standard wadcutter load, and the Model 60 will either do okay with it or it won’t. I already know this load shoots significantly to the right of my point of aim in the Model 60, but I’m including it here because I have the ammo and it’s easy to include in this test series.
That’s the plan. I’m reloading the ammo as you read this, and I’ll have it tested most likely next week. Watch the ExNotes blog for results in the near future.
More Tales of the Gun!
Never miss an ExNotes blog! Sign up here: