Three Favorite Sedona Hikes

By Bobbie Surber

Arizona’s Sedona area offers fantastic hiking.  This blog describes three of my favorites.
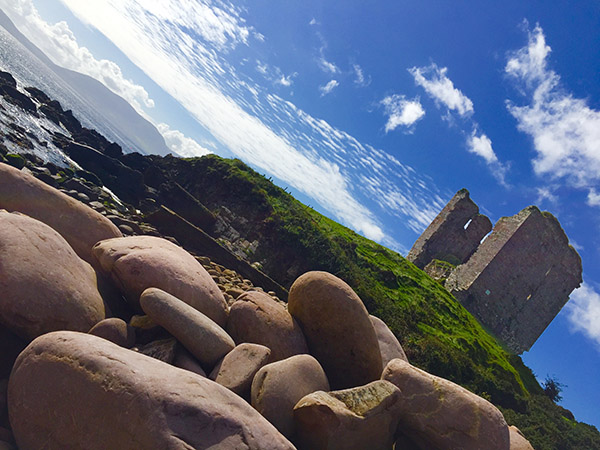
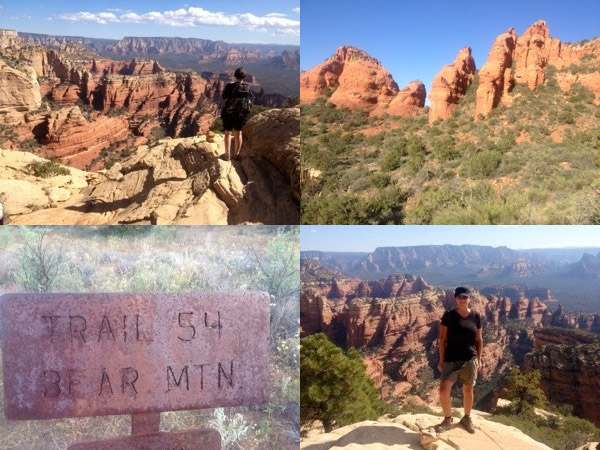
Bear Mountain Trail

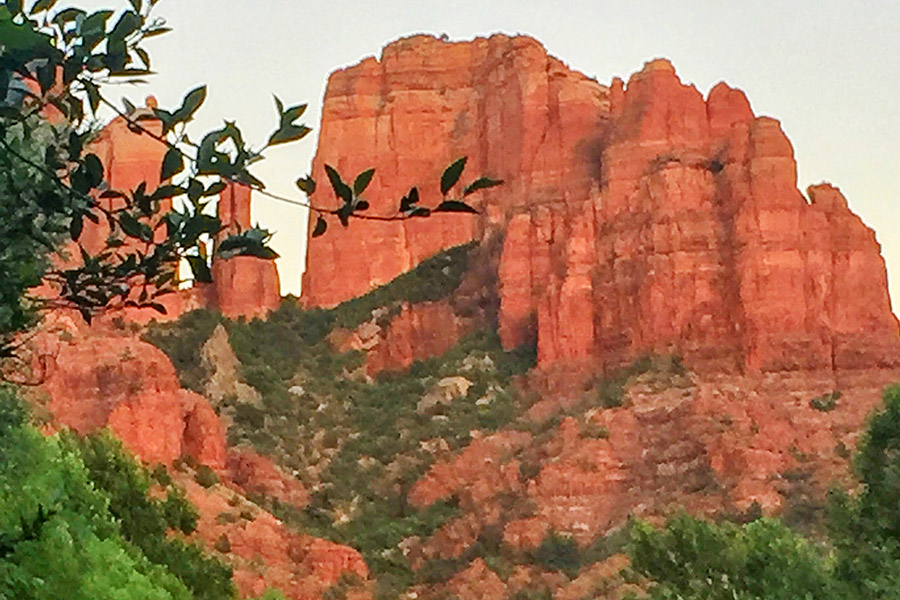
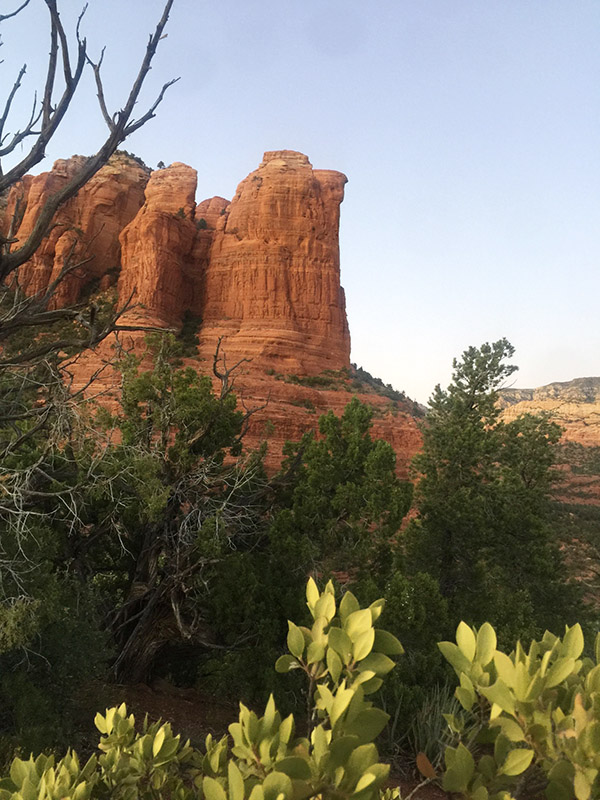
Bear Mountain provides fantastic red rock views. The start of the trail is at about 4600 feet in elevation from the parking lot. At the final summit, the elevation reaches 6150 feet.  At the summit of Bear Mountain, you can see the San Francisco Peaks in Flagstaff, views of Bell Rock in the Village of Oak Creek, Verde Valley, peaks of Sycamore Canyon, and all West Sedona.

Bear Mountain hiking trails. From top left, going clockwise: Bear Mountain Canyon views, start of the Bear Mountain Trail, the Bear Mountain trailhead, and me atop Bear Mountain.

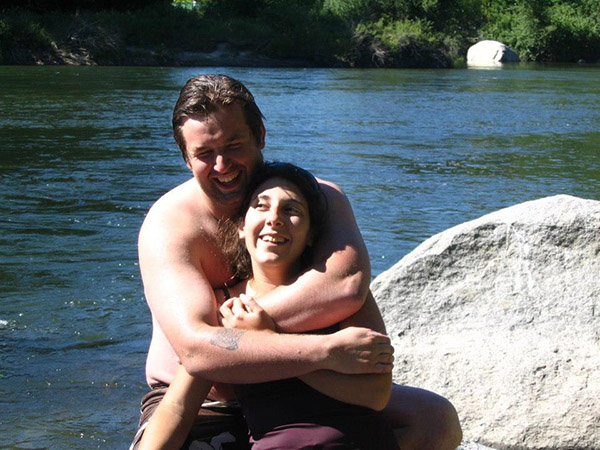
A warm spring day found me on the Bear Mountain Trail with a new friend I met during a Sedona Meet Up Hiking event. Linda is from New Jersey and is an avid outdoorswoman, hiker, and yoga devotee. I enjoyed Linda’s company as we marveled at the views and shared about our lives, family, and career paths.

I was happy that the Bear Mountain Trail DID NOT kick me in the behind. A challenging hike with an 1800 ft gain over the course of 3 levels of summits. This is a designated wilderness area, so there aren’t any trail markers once you enter the designated area. Watch for trail markings carefully and pay attention, as you will encounter several false summits before reaching the peak. Views along the way revealed stunning red rock slot canyons and an area resembling a mini Grand Canyon. This is a steep trail with some rock scrambling. Please pay attention to the trail, as it is easy to get off track. 2 liters of water is the minimum recommended for this strenuous hike, more on a hot day. A hat and walking poles are also very helpful.

This hike is advanced and difficult. You should be prepared with proper footwear, water, food, and layers of clothes.

Sugarloaf to Lizard Head to Chuck Wagon to Brins Mesa, returning via Jordan Trail

Sunday morning started with a chill in the air and an overcast sky. I postponed getting out of bed and decided on another cup of coffee; my favorite, extra dark roast made strong enough to curl your hair worked its magic as I continued to procrastinate a few moments longer with a leisurely read of the Sunday paper. My hiking shoes waited anxiously beside my bed for the impending long hike. Not sure if it was the regret of a wasted Sunday or the sudden clearing of the clouds, whatever it was, I surrendered, dumped the remainder of my brew, got the hiking shoes on, and headed out the front door.

Coffee Pot Rock.

My goal was to try out Day 1 of a planned 3-day hike in Sedona and the Village of Oak Creek. I headed to the Sugarloaf Trailhead catching the Andante trail over to Chimney Rock Saddle to connect to the Lizard Head trail. This is where I was momentarily lost. OK, not momentarily lost… but I could not locate the %&# trail for about an hour! Man, talk about the embarrassment of getting lost in my backyard!

After bushwhacking and following a new chain-link fence, I found Lizard Head and started the ascent. Within a half hour, I was high up on the side of the mountain, and sure, I was too high for this trail. Thank goodness for cell phones and a call to my friend Doug, the master of all things related to Sedona trails, who knew exactly where I was and assured me I only needed to butt-scoot down the rocks about 100 ft and begin my descent to the bottom of the trail. He was dead on!

The Brins Mesa marker.

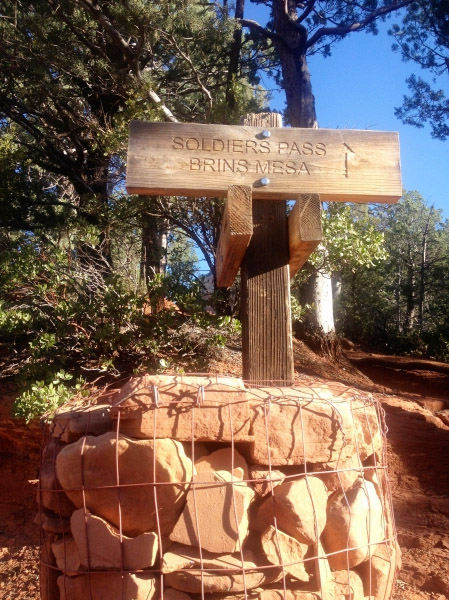
Besides my inability to navigate easy-to-locate trails in my backyard, I did not care for this section due to road noise off Dry Creek Rd. This, however, was short-lived as Lizard Head connected to Chuck Wagon trailhead with a lovely new picnic area, maps, and toilets. A fast rest and lunch, and I was back on the Chuck Wagon trail heading to the Brins Mesa trail. Chuck Wagon trail meanders through open vistas and dry gullies with views over Boynton and Secret Canyon. A wonderfully easy trail with outstanding red rock views. By 3 pm, I was at the trailhead of Brins Mesa with the much-needed forest to cool me off. Brins Mesa is always my favorite. Not sure why; perhaps it is the rebirth after the fire of 2006 or the feeling of others that have walked this Mesa for hundreds of years. Whatever the reason, I had a surge of endorphins firing off in my brain, and I was in complete bliss despite a longer-than-expected day of hiking and a start of a dreaded blister on my little toe.

After an enjoyable day of hiking, one might think that nothing could top it. However, heading to the Oak Creek Brewery from the Jordan trailhead for a delicious hotdog and refreshing beer further elevated my experience in Red Rock Country. Spending a Sunday in this manner gives a new meaning to Sunday Funday!

This 12-mile hike is moderate difficulty. Bring plenty of water.

West Fork Trail in Oak Creek Canyon

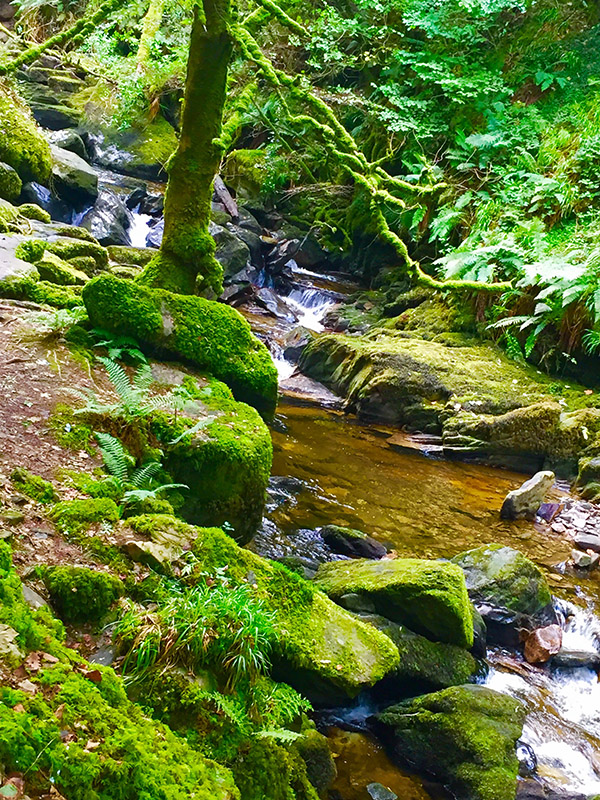
The West Fork Trail is a moderate hiking trail known for its picturesque views of the red rock canyons and the crystal-clear waters of Oak Creek. The out-and-back trail follows the creek for about 6.4 miles and takes around 2 to 4 hours to complete. It is suitable for hikers of all levels, including families with children. Hikers should wear appropriate gear and bring plenty of water and snacks. You will make numerous water crossings and find that water shoes make the trail more manageable; check the weather forecast for storms and potential flooding.

On the West Fork Trail.

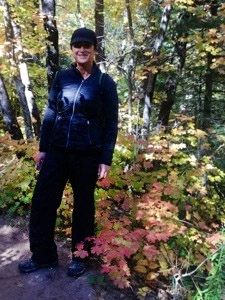
My morning could not have been more perfect. Hot coffee served bedside, the sun shining brightly, two soft-boiled eggs just the way I like them, and an 8 am date with Elaine to hike the Oak Creek Canyon.

West Fork leaves, and the West Fork trailhead.

What I did not expect was to hit the famed West Fork Trail at the perfect date and time to see our Arizona fall leaves at the most glorious time of year. The morning light was enchanting as it filtered into the canyon, backlighting the trees and setting the red rock cliffs glowing with burnt orange with soft buttery yellows and rust red. Childhood joy resurfaced as we worked our way back and forth across Oak Creek; with each turn along the trail, nature revealed yet another excellent view of the Canyon.

West Fork Trail scenes.

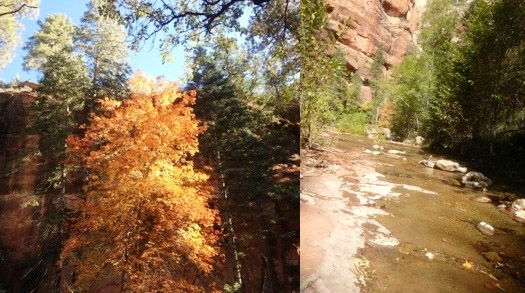
It is difficult to describe this trail’s beauty in the fall. The experience goes beyond language; one must turn inward and fully immerse themselves in the earth’s magic beneath their feet. The power of the running creek and the ever-changing red rocks add to the enchantment of the surroundings, creating a truly indescribable experience. The company was as wonderful as the views along this hike.  It was so nice to have some Elaine time and, for a moment, remember what it is like to be removed far from our hectic busy lives and reacquaint with an old friend in an enchanted setting such as this.

Be prepared to face water crossings.


Sedona and the surrounding areas have an abundance of hiking opportunities. Thirty-seven years of living in this Red Rock paradise, and I still have hikes on my list yet to be explored. If you are planning a trip to Sedona, consider using All-Trails and stopping by the Forest Service office for up-to-date restrictions and trail conditions.  If hiking is what gets your mojo on, then Sedona will not disappoint!

Spain and Portugal

By Joe Berk

Never heard of Antoni Gaudi, the man who designed Barcelona’s La Sagrada Família Basilica?  Don’t feel bad; I had never heard of him, either.  His work is the wildest architecture I’ve ever seen…think Dr. Suess meets George Lucas, except this guy predates both.

How about scooter-borne motor officers?  Scooters and small motorcycles make way more sense than the gigondo police bikes we use here in the US.  The photo below shows a Policia moto cop we watched roll up on criminal activity (0utside a cathedral, no less), and the bad guys simply evaporated.

Enjoy majestic cathedrals and stained glass?  Hey, there’s a lot of that coming your way, too. We were in so many cathedrals I had to check the itinerary just to get my photos organized.

Did I mention the Flamenco dancers?  Here’s another teaser.

Take my word on this:  If you enjoy photography and motorcycling, fine dining, good wine, beautiful people, and the good life, Spain and Portugal are tough to beat.

Sue and I just returned from a couple of weeks over there and it was awesome.  I left the big Nikon at home and carried a much lighter D3300 Nikon (the same one I used on the China, Colombia, and Baja rides), and life was a lot easier.  The photos are about as good as those I get with the boat anchor D810 and I minimized the wear and tear on me (I’m so spring chicken, you know).  I took three lenses with me:  the 18-55 kit lens that came with the camera, an inexpensive and lightweight Rokinon 8mm fisheye (using it required manual everything, as it doesn’t interface with the D3300’s auto focusing and metering capabilities), and a very sharp Nikon 35mm f1.8.  Even though the 35mm Nikon lens was the best in the bag, I never put it on the camera.  I used the 18-55mm for the bulk of my shots (it was easy to use and I think it did a good job) and the 8mm fisheye for just a few (like that big photo in the Gaudi basilica at the top of this blog).

There’s more content in the ExNotes queue on our visit to the Iberian Peninsula, with a little bit of moto content in each.

Stay tuned, my friends.

Moto Fishing

By Mike Huber

Having grown up in Maine, I used to love fishing.  I lived just off the Kennebec River, so it was only a short walk through some pines to Maine’s largest river where I had miles of it to myself.  After leaving Maine for the Army, my fishing fell by the wayside.  Until recently, that is.

Last month in Sedona I met a friend of a friend and invited him to go camping with us along a lake in southern Arizona.  Even though he was from the east coast he brought his fishing gear and purchased a 1-day license.  One of his objectives is to fish in every state in the USA, a pretty formidable goal in my opinion. Almost as soon as I processed his story it hit me: Why am I not fishing as I camp throughout the United States on my BMW GS1200?  The next day I made a trip to Walmart (which I rarely do) and bought a $10 collapsible fishing rod (one that fits in my BMW’s panniers), swivels, and a few lures (including a red and white Daredevil).  The Daredevil always worked for me as a kid.

Due to an unusually wet winter in Arizona, the lakes are above their normal capacity. This made the Daredevil more of a hindrance as it kept getting caught on the weeds just under water.  After losing four lures I blasted to a local supply store and picked up a couple of spinners that would stay on top of the water and prevent (or at least minimize) my losses. I was now four deep in lost lures and was starting to feel like I do during my golf game in terms of losing balls in the water hazards. Maybe having a new angle with this top floating lure would renew my confidence and allow me to catch something (or at least not lose another $5 lure).

As sunset approached, I thought it was about time for a beer.  A nice cold IPA would surely ease the frustration of losing lures earlier in the evening.  Well, the IPA must have drawn the fish because within 15 minutes I caught a solid 18-inch striped bass. With this being the first fish I caught in several decades I wanted to tell you about what a fight it put up and all the time and effort it took to land this beast, but I won’t embellish my fish story.  The scene did, however, turn comical as another fishing boat approached.  They had been out all day and they had only caught one fish.  When they asked how long mine took, I picked up my half-empty IPA and said, “almost one beer.  We all laughed. Beer usually isn’t a time metric.

After cleaning the fish I realized that catching a fish wasn’t really part of my plan.  I was just passing the time. I now had to come up with a way to cook this monster.  Luckily, I was in a campground and earlier in the day had chatted up the hosts. It turned out they were from Maine, not too far from where I grew up.  They happily let me borrow some aluminum foil.  I figured this would be all I would need to cook over the grill.  Pouring the remainder of my beer into the foil and over the fish made for great flavoring. Once having the fish “properly seasoned” I threw it on the grill for about 5 minutes per side, removed it from the fire, and enjoyed it along with a pack of spicey Shin Ramen.  This was the perfect meal to enjoy while sitting around a glowing campfire and taking in the sun’s final rays over the Four Peaks Mountains.

The past two weekends I have returned to moto camp and fish with similar results.  This summer I will travel the west coast and spend time motorcycling, camping, and fishing as I meander up to British Columbia.  This renewed hobby will greatly compliment my finely honed skills of laying in my hammock, messing around with the campfire, and drinking cold beer in each region I travel though. There are few activities that can get your adrenaline rushing in an instant; the jolt from a fish on the line is one. I look forward to that rush as frequently as possible in my future travels.

A Walk Along The Famous Dingle Way: Part II

By Bobbie Surber

The Dingle Way is a 112-mile-long walking trail that circles the Dingle Peninsula in County Kerry, Ireland. The trail takes walkers through diverse landscapes, including rugged coastlines, sandy beaches, rolling hills, and picturesque villages. Along the way, walkers can enjoy stunning views of the Atlantic Ocean and ancient archaeological sites and historic landmarks, such as the Gallarus Oratory, a well-preserved early Christian church dating back to the 7th or 8th century.  I previously wrote about the first part of this trip; you can read that blog here.  This blog completes the trip.

Day 3: Inch Strand to Dingle

After a filling Irish breakfast at Inch Strand, I embarked on my journey, following trails and secondary roads that provided stunning bay views. As I turned inland towards Annascaul, I continued along more secondary roads that eventually led me to a rocky beach and castle. The scenery along the way was breathtaking, and I frequently stopped to soak in the beauty of my surroundings. Leaving the beach behind, it was just a few miles to Lispole before arriving at the day’s final destination in the town of Dingle. As I approached the village, I was struck by how small and easy it was to navigate on foot. Music could be heard at every turn, and the town was bustling with activity. The shops were fantastic; it was a great place to restock and prepare for the remainder of the trail.

Dick Mack’s for whiskey tasting.

One of the highlights of my stay in Dingle was visiting Dick Mack’s Pub. As a whiskey lover, I was thrilled to discover that the pub was known for its extensive Irish whiskey collection. The bartenders were incredibly knowledgeable and passionate about the spirits, and I spent a delightful evening sampling various types of whiskey and learning about their unique flavors, meeting locals, and developing the start of some new friendships.

For those interested in live music, Dingle is a great destination. Just pop your head into any pub, and you’ll likely find Ireland’s version of Nashville, with hundreds of talented musicians on every corner. One of my favorite spots was the Courthouse Pub, a tiny establishment with an impossibly low ceiling, friendly staff, and some of the best music in Dingle.

 Day 4: Dingle to Dunquin

This was the hardest day of the trail so far, with a 14-mile trek that started by departing Dingle and heading to Ventry. The first four miles were relatively easy, except that the surface was entirely hard, making it quite taxing. In Ventry, I found a small post office with a combination grocery store, and I took a nice break to restock and meet some very kind local ladies hosting a fundraiser for hospice care. The locals had baked their best desserts for the event and invited me to join in, and I couldn’t resist the temptation of the delicious treats.

One of Day 4’s views.

As soon as I left Ventry, I was treated to a beautiful long beach walk to the other side of the bay. Schoolchildren were busy cleaning the beach, and locals walked along the shore, enjoying some sunshine. Next up was a bit of road walking along Sledge Drive, with dramatic sea views before turning to Mount Eagle. The climb was tough, taking several hours through sheep pastures and offering dramatic sea views.

A view of the Atlantic long the Trail.
Another dramatic coast view.

The trail was wet, uneven, and a real thigh workout, but the day was as lovely and magical as possible. It’s hard to describe the uniqueness of walking through a new land – the way the vista unfolds before you, the smell of the earth, the local bakery, the scent of livestock, and the chance to witness the locals going about their daily lives. You experience a level of intimacy that cannot be duplicated by any other mode of transportation other than your own two feet.

An ancient beehive dwelling.
Beehive dwelling ruins.

Besides the breathtaking views and walking along ancient stone walls, I saw many Beehive ruins and ancient dwellings from the 9th century. About when I thought I couldn’t go uphill anymore, the trail took a steep decline down to the road and the start of the entry to Dunquin. I stopped for coffee and continued another two miles on the hard road to the Youth Hostel and the exceptionally kind host who took great care of her guests. Another great day!

A castle along the Dingle Way Trail.
A scene on the Trail.
More ruins along the Dingle Way Trail.

Day 5, 6, and 7: Dunquin to Ballydavid and Kilcummin

The following day, my friend Patrick generously offered to drive me back to the trailhead for my hike over the pass of Mt. Brandon. Despite the less-than-ideal weather conditions and concerns from locals about my solo hike, I assured them that I would turn back if the fog worsened. Nonetheless, as I gazed upon the climb ahead of me, I couldn’t help but feel a moment of nervousness.

The hike to the top of Mt. Brandon was a challenging 3.5-mile ascent, with no switchbacks and only soggy, boggy, and uneven terrain underfoot. The descent was equally difficult, with even less stable footing. It wasn’t until I reached the 6-mile mark that I could finally walk on a dirt, mud-filled road and breathe a sigh of relief.

Nephew Brandon and his wife.

This day was significant to me, as I had set out to summit Mt. Brandon in honor of my nephew. Despite the thick fog that prevented me from reaching the peak, I made it to the saddle, with the peak looming above me. Looking back at the mountain while standing on that muddy road, I witnessed a moment of awe-inspiring magic. The fog slowly crept down the mountain, lifting to the heavens and spreading its fingers across the valley floor. It felt like a blessing, a gift I didn’t deserve but received nonetheless.

At that moment, I realized that reaching the peak wasn’t as important as the day of remembrance I had dedicated to my nephew. I knew Brandon would have been proud, and I felt grateful for the time I had shared with him. I had promised to honor his love for the outdoors, his welcoming spirit toward everyone he met, and his devotion to his family.  The day had been physically and emotionally draining, but it was a perfect day I will never forget. To my dear Brandon, the boy who will forever live in my heart, I raise a glass and say, Sláinte.

Entering the town of Brandon, I stumbled into a bar and enjoyed a delicious meal of homemade soup and bread with a pint of Guinness and a shot of Green Spot to revive and celebrate my hard passage. The café was warm and welcoming, and the owners were friendly and eager to chat about the beauty and challenges of the trail.

Following a satisfying lunch, I continued my journey, passing through more rolling hills, herds of sheep, and farmland until I reached the charming village of Kilcummin. As I approached, I was treated again to awe-inspiring views of the Dingle Peninsula and the vast expanse of the Atlantic Ocean. Fortunately, I found the perfect B&B, a lovely farmhouse in the countryside’s heart. The hosts were warm and welcoming, and I enjoyed a peaceful and restful night’s sleep after a long day of hiking.

Day 8: Kilcummin to Tralee

The week had passed quickly, and I was both sad and excited to confront my final day on the Dingle Way. The day brought plenty of sunshine and was a relatively easy one, with just over 8 miles of walking to the town of Tralee. The trail took us through more picturesque countryside, with fields of sheep and cows grazing lazily in the sunshine.

John the Baptist well.

Passing through the village of Castlemaine, which is famous for its links to the legendary outlaw, Daniel O’Connell. O’Connell was a lawyer and politician who fought for Catholic emancipation in Ireland in the 19th century, and he was a hero to many Irish people. Castlemaine is also home to a small museum dedicated to the area’s history.

Another scenic spot along the Trail.

Approaching Tralee, you could see the town’s famous landmark, the Rose of Tralee statue, dedicated to the same name’s song. The statue depicts a young woman holding a rose, and it is a popular spot for tourists to take photos. What a wonderful end to the Dingle Way trail with an afternoon exploring Tralee by spending time exploring the town’s shops, restaurants, and museums. Tralee is a bustling town with a rich history and worth much time exploring.

Conclusion

The Dingle Way is a truly magical experience, offering breathtaking views, fascinating history, and the chance to connect profoundly with the natural world. From the windswept beaches of Inch Strand to the rolling hills of Kilcummin, the pure joy to be found in the town of Dingle, the trail takes you on a journey through some of Ireland’s most stunning landscapes.

An Irish sunset.

Along the way, I met countless friendly locals who took me instantly in as one of their own with legendary hospitality that is well deserved and a balm to the heart of an American. Take your time to enjoy delicious food and drink. Lean into the culture and history of the Dingle Peninsula. The trail is sometimes challenging, but the rewards and friendships made along the way are more than worth it.

I can’t wait to go back and do it all over again!

The Wayback Machine: How Many Miles Can You Ride In A Day?

By Joe Berk

How many miles can you ride in a day?

About 30 years ago I cranked 1070 miles in one day on a Harley Softail coming home from Mexico (and that was on an older Softail without the rubber mounted engine…it’s the one you see in the photo above).  I was younger and I could ride, as they say, like the wind.  A couple of weeks ago, I did a 250-mile day ride on my Enfield and it about wiped me out.

Gresh and I were talking about this recently, and I thought I would share my thoughts on how many miles you can plan on covering in a day.  Maybe it will influence your planning.  Maybe not.  We get paid the same either way.

1: Age

Like I said above, big miles used to be no big deal for me.  That’s not the case any more.  After substantial scientific study and close observation of my geezer buddies over many decades, I developed a graph showing the relationship between age and how many miles you can reasonably ride in a day.

Like it or not, when we get older, it gets harder to rack up big miles.  Serious scientific study went into the above, so if you want to debate our conclusions, bring facts.  We want to hear them.

2: Weather

Weather plays a big role in how many miles you can ride in a single day, and here at ExNotes we rely heavily on our weather rock before leaving on any ride.  You’ve probably heard about weather rocks.  We sell weather rocks here on ExNotes and they are conveniently sized to fit into a tank bag.  They work like this…you hang the rock from any available support (you have to supply your own string and support).  Here’s how to interpret your weather rock:

    • If the rock is wet, it means it’s raining and you should reduce however many miles you had planned to ride by half.
    • If the rock is swinging, it means it’s windy that day, and you should reduce your miles by maybe a third.
    • If the rock is hot to the touch, it means the temperature is elevated, and you should reduce your miles by maybe a third.  Maybe even more.
    • If the rock is cold, it means it’s cold, and you probably can ride as long as you dress appropriately.  If the rock is really, really cold, though, maybe you should stay home.  If there’s ice on the rock, you definitely should stay home.

ExNotes offers weather rocks in brand-specific models:

    • If you ride a Harley, we offer chrome weather rocks for $395, chrome with conchos and black leather fringe weather rocks for $495, and chrome, conchos, fringe, and matching do rag weather rocks for $595 (freight and setup fees not included).
    • If you ride a BMW, we offer the GS weather rock with an electronically adjustable center of gravity, BMW logos, and a one-year Starbucks gift certificate for $1995.
    • If you ride a Ducati, you probably don’t need a weather rock (Ducati riders generally only ride their motorcycles short distances on clear days, anyway, although if you insist, we can provide a red rock for you personally autographed by the former famous racer of your choice, or we can put several rocks in a bag you can shake to sound like a Ducati clutch).  Ducati rocks are free, or at least that’s what we tell you (we’ll recover the cost on your first valve adjustment and let you think you got the rock for free).
    • If you ride a Chinese motorcycle, we sell an ExNotes weather rock decal for $2 and you can put it on your own rock.

3: Roads

The kind of roads you plan to ride make a huge difference.  If it’s all freeway, you’ll be bored but you can rack up huge miles.  If it’s surface streets (and a lot of us do everything we can to stay off the freeway), you won’t cover as many miles unless you’re riding in Baja, where you can run 140mph+ on the long straights south of Valle de Los Cirios.  If it’s in the mountains, it will be less, unless you’re posting about your skills on Facebook, where the folks who post are world class riders (to hear them tell it).  The same holds true for riding in the dirt.  You just won’t cover as many miles.

4: Headcount

This is the big one, folks.  Maybe I should have listed it first.  If I’m riding by myself or with one of my motorcycle buddies in Baja, I can easily do over 500 miles a day.  Throw in more people, and…well, read on, my friends.

The number of riders in your group has a profound impact on how many miles you can ride in a day.   In the math world, we would say that the miles per day are inversely proportional to the number of riders in your group.

As a starting point (and after extensive research and mathematical modeling), the technical staff here at ExNotes developed Formula A:

A)  Miles per Day = (M)/(N)

where:

M = Miles you want to ride
N = Number of riders in your group

What the above means is that as the number of riders in your group increases, the number of miles you can cover in a day decreases.  That’s because with more riders you’ll start later in the morning, you’ll be stopping more often, and you’ll take more time at each stop.  That is, unless you’re riding with me.  Then Formula A reduces to Formula B:

B)  Miles per Day = M

where:

M = Miles you want to ride

The B in Formula B stands for Berk because basically I’ll leave you behind if you’re not ready when I am.  You can catch up with me later.  You might think I’m joking. I’m not.

Formula A varies a little depending on what kind of riders you have in your group, and especially if you have a Rupert.  Rupert is the guy who takes 20 minutes putting his motorcycle gear back on after every stop.  I once rode with a Rupert who could take 20 minutes just putting his gloves on.  He got better when we threatened to cut a few of his fingers off.

5: Your Motorcycle

There are several motorcycle factors that play a huge role in how many miles you can ride in a day.  In the old days, a motorcycle was a motorcycle and we did it all with a single bike (touring, off-road, canyon carving, adventure riding, etc.).  Today, you gotta get specific:

    • ADV-style bikes are actually pretty comfortable and the ergonomics make sense.  500-mile days are easy.  My KLR 650 was one of the best touring bikes I ever owned.   It had phenomenal ergos.
    • Standard motorcycles are also relatively comfortable and you can probably do 500 miles in a day, but you’ll feel it, especially if your bike does not have a windshield.  My Enfield 650 Interceptor is a good bike, but it’s the one that wiped me out on that recent 250-mile ride.
    • Cruisers look cool in motorcycle ads and they complement do rags and tattoos nicely, but they are less comfortable on long rides.  I’ve found I can reasonably do 350-mile days on a cruiser without needing to see a chiropractor.  Go much beyond that and you’ll feel it.
    • Sportbikes generally cut into big miles, but a lot depends on your age. Good buddy Marty and I rode sportbikes on the 2005 Three Flags Classic (I was on a Triumph Daytona) and we did big mile days on that ride. But I was 20 years younger then and I bent a lot easier.  I wouldn’t want to do it again.
    • Classic bikes generally require shorter daily riding distances, particularly if they are British and equipped with electricals manufactured by Lucas (as in Lucas, the Prince of Darkness).  I think a mid-’60s Triumph Bonneville is the most beautiful motorcycle ever created, but I wouldn’t want to ride Baja on one.

Beyond the style issues outlined above, there are other motorcycle factors to consider:

    • Bigger motors generally mean more miles in a day, but bigger motorcycles can slow you down if they suck up too much fuel.  One year at the International Motorcycle Show, Yamaha’s bikes all had labels that showed, among other things, fuel economy.  The VMax, as noted by Yamaha, averaged 27 miles per gallon.  You’d be making a lot more fuel stops on that one.  27 miles per gallon.  I can’t make up stuff this good.
    • Daily mileage is independent of displacement at 400cc and above (as long as fuel economy is not VMax nutty).  Below 400cc, it gets harder (I think) to crank big miles.  On my 250cc RX3, 500 miles is a big day for me.  But my good buddy Rob once did a 1000-mile Baby Butt on his RX3, so I guess anything is possible.
    • Seats can make a big difference.  I’ve never found any motorcycle seat to be really comfortable, but I have found a few to be god-awful (my Enfield is working hard to earn that title).  If you want to really improve a motorcycle seat so you can up your miles, get a sheepskin cover (I’ve found those to be quite comfortable).  There are other options like inflatable seats or custom made seats, but my advice is don’t waste your money.  A guy showed up with an inflatable seat cover on a group ride once and it slowed us considerably.  It kept blowing off his bike and we had to stop and look for it each time that happened.
    • Fuel tank capacity doesn’t make much difference.  My KLR could go 250 miles on a tank; my TL1000S would start blinking at 105 miles.  You’d think you could ride a lot further with a bigger tank, but I found I need to stop and stretch roughly every hour or two, and if I do that at gas stations, tank capacity doesn’t matter.

What do you think?

So there you have it:  Our thoughts on a complex topic.

We know there are keyboard commandos out there who will take exception to our carefully constructed and presented thoughts.  If you disagree, let’s hear it.  We appreciate all comments, dumbass and otherwise.  Please leave your thoughts here on the blog for others to see.  Don’t waste your time leaving comments on Facebook (all the cool people leave their comments here…only losers post comments on Facebook).  You’ll be a faster rider, you’ll be thinner, and you’ll look better if you post your comments here.  And don’t worry about spelling, punctuation, grammar, or capitalization (believe it or not, it will help our readers assess the validity of your thinking).

Like they say, your mileage may vary, and we’re looking forward to your comments.  If they’re particularly inane, so much the better. We await your inputs.


Some of our more interesting rides?  Right here, folks!


Never miss an ExNotes blog: 


Check out our MotoBooks!

The Rimfire Series: A 1974 10/22 Mannlicher

By Joe Berk

Sometimes picking the featured photo for each of our blogs is a challenge.  Do you select a photo that captures the essence of the story, or do you feature a photo that highlights what you like most?  A Mannlicher rifle almost requires a full length photo of the rifle as the lead, but for me and this rifle it was the wood.  That’s why I went with the photo above.   Here’s a photo showing the entire rifle…a Ruger 10/22 Mannlicher.

Fancy walnut gets me every time.

Introduced in 1964, the standard model Ruger 10/22 semi-automatic rifle has been in production continuously ever since.  During that time, there have been more variations than you can shake a stick at.  Walnut, birch, plastic, folding, Circassian stocks.  Takedown models.  Target models.  Mannlichers, standards, and compact models.  Bull barrels, regular, short, and long barrels.  .22 Long Rifle, .22 Magnum, and .17 caliber rifles.  All kinds of commemoratives.  With production exceeding 5 million rifles, more Ruger 10/22s have been manufactured than any other .22 rifle (the highest production for any rifle in any caliber, though, is the AK-47, with total production quantities unknown but estimated to exceed 100 million).   The 10/22 has a unique rotary magazine design, the rifle is relatively inexpensive, and a 10/22 simple to maintain.  I’ve bought and sold several and I still have three or four stashed in the safe.  I’ve shot the hell out of a few but I never wore one out.  Reliability and longevity are two of any Ruger’s most endearing (and enduring) qualities.

A view of the left side. The rifle has good figure on both sides.

One of my favorite 10/22 configurations is the Mannlicher, which has a full length stock.  This is an early one manufactured in 1974.   You can make a career out of collecting 10/22s, and there have been several variants of the 10/22 Mannlicher.  I’m not a serious enough collector to go after all of them.  This particular rifle caught my eye because of the walnut.  I’m a sucker for any rifle with highly figured walnut, and good wood is not something you see too often on an inexpensive rifle like the 10/22.

Ruger’s recent run of Mannlicher 10/22s featured a laminated stock. There’s one on Gunbroker.com with a “buy now” price of $895. Hope springs eternal.

I paid way too much for my Mannlicher 10/22 several years ago, but that’s okay.  Another way of looking at it is that I bought it too soon.  Prices pretty much always go up on guns.  This one has already caught up to what I paid.

The 10/22 10-shot rotary magazine, a box of old Federal .22 Long Rifle cartridges, and my Mannlicher.
Close enough for government work and open sights.

A Ruger 10/22 rifle can be surprisingly accurate.  I wanted to get out and shoot at 50 yards, but the West End Gun Club is still inaccessible (the stream across the access road is running too high).  So I took the Mannlicher to the Magnum Range (an indoor range) a couple of weeks ago.  The distance was only 50 feet, but sometimes halitosis is better than no breath at all.  I used my range bag as a half-assed bench rest and I managed to shoot a few  decent groups using the Ruger’s open sights.

A simple rear sight. The plate can be adjusted up or down for elevation; the sight can be drifted left or right for windage. This one is pretty much right on the money as is.
The Mannlicher’s front sight…a simple gold bead.  The metal cap at the tip of the stock is a traditional Mannlicher touch.
Another photo of the metal forearm cap on my 10/22 Mannlicher.
The Mannlicher forward sling swivel is another nice touch. Instead of a screw in single attachment point beneath the forearm, a Mannlicher forward sling attachment straddles the stock as you see here.

The Mannlicher style reaches back to the 1880s.  Prussian military officers designed a rifle that featured a full length “Stutzen” stock with a metal cap at the end and a carbine (or short) length.  This evolved into a sporting rifle in 1903 (Ernest Hemingway hunted with one).  The slim profile, compact size, and full length stock came to be known as the Mannlicher style.  I first saw a Mannlicher-style rifle on a limited run, used Model 70 Winchester at the Donn Heath gun shop in Fort Worth, Texas.  That Model 70 was under $200 and I wish I had the foresight to buy it.  It handled beautifully and it just felt right.  Today, those Model 70 Mannlichers are in the stratosphere.

Ernest Hemingway’s Mannlicher.  He took it on his first African Safari.  In 1997, Hemingway’s Mannlicher sold for $6,325.  It would bring considerably more today.
The Winchester Model 70 Mannlicher. These rifles go for $4,000 to $5,000 today.

My 10/22 is an easily handling rifle that fits me well.  I don’t shoot it that often, but every time I do, I enjoy it.  I’m hoping that West End will open again soon so I can put the Mannlicher to work on the 50-yard range.

My 10/22 Mannlicher. It’s not for sale.

This old Ruger 10/22 has a couple of nice features.  One is the pistol grip cap.  It’s plastic, but it still looks good and this one is in good shape.

Another cool touch is the fancier black plastic butt plate.  Other base model 10/22s have a simpler and cheaper butt plate.  This one looks good.

So there you have it…the latest installment in our Rimfire Series.  There’s more coming, so stay tuned.


Never miss an ExNotes blog:


If you would like to see our earlier blogs on .22 rifles and handguns, here’s a set of links.

A Tale of Two .22s (a CZ Model 452 and a Remington Model 504)

A .22 Colt Trooper Mk III

¡Siluetas Metálicas!

First Person Shooter

A 200th Year Ruger .22

A Tale of Two Springfields

The Wayback Machine: Seven Favorite Baja Destinations

Baja is a motorcycling paradise and I have a bunch of favorite destinations there.  Seven of them, to be precise, although truth be told, I like everything in Baja except for Tijuana and maybe La Paz and Loreto.  That said, my favorites are:

      • Tecate
      • San Quintin
      • Cataviña
      • Guerrero Negro
      • San Ignacio
      • Santa Rosalia
      • Concepcion Bay

Here’s where they are on a map:

So what’s so great about these places?  Read on, my friends.

Tecate

Tecate is the gateway to the middle of northern Baja, and it’s the easiest point of entry. Both Tijuana and Mexicali are too big and too complicated, and the Mexican Customs guys are too official in those bigger cities.  Tecate is a friendly place.  The last time I picked up a tourist visa in Tecate, the Customs officer tried to sell me salsa he and his family made as a side gig.  That’s what the place is like.  I love it.


Help us bring more content to you:  Please click on the popup ads!


If you’re into fine dining (not as in expensive dining, but just great food), it’s hard to go wrong anywhere in Baja.  Tecate has some of the best, from street taco vendors to Malinalli’s to Amore’s.  I could spend a week just in Tecate.  It’s that good.

Uncle Joe Gresh with street tacos in Tecate. Wow, were they ever good.
The buffet at Malinalli’s is regional, awesome, and inexpensive. It’s a hidden treasure.
Dos Joes’ motos on an Enfield expedition that took us through Tecate.
The Tecate brewery dominate the Tecate skyline and is visible from just about anywhere in town. A can of ice cold Tecate with sea salt around the rim and a bit of lime juice…life doesn’t get any better.

San Quintin

San Quintin is 186.4 miles south of the border on Baja’s Pacific coast.  It’s usually a quiet ag town that has a lot of things going for it, including interesting hotels, good food, and Bahia San Quintin.  The Old Mill hotel and its associated restaurant, Eucalipto, is my personal favorite.  The hotel is about 4 miles west of the Transpeninsular Highway, and what used to be a harrowing soft sand ride to it is now easy peasy…the road is paved and riding there is no longer a test of your soft sand riding skills.  The Eucalipto restaurant is second to none.

What could be better than an ice cold Tecate overlooking Bahia San Quintin after a day’s riding in Baja? We once saw a California gray whale from this very spot.

A man, a motorcycle, and Mexico….the sign on the Transpenisular Highway pointing toward Bahia San Quintin and the Old Mill Hotel. The bike? That’s the 650cc Royal Enfield, perfect for riding Baja. But then just about any motorcycle is perfect for riding Baja.
Bahia San Quintin at dawn. It’s an awesome spot.
Uncle Joe enjoying breakfast in the Old Mill’s Eucalipto. It is an exquisite restaurant.

You’ll notice at the top of my scribblings about San Quintin I said it is usually a quiet town.  The one exception for us was when there was a labor riot and we were caught in it.  The Mexican infantryman about 80 miles north of San Quintin told me the road was closed, but his English matched my Spanish (neither are worth a caca), and without me understanding what I was riding into, he let me proceed.  It’s not an experience I would care to repeat.  But it’s the only event of its type I ever experienced in Old Mexico, and I’d go back in a heartbeat.

The Cataviña Boulder Fields

Ah, Cataviña.  Rolling down the Transpeninsular Highway, about 15 miles before you hit the wide spot in the road that is Cataviña you enter the boulder fields.  Other-worldly is not too strong a description, and if the place wasn’t so far south of the border it would probably be used more often by Hollywood in visits to other planets.  The boulders are nearly white, they are huge, and the juxtaposition of their bulk with the bright blue sky punctuated by Cardon cactus.

Pastel geology. The area really is as beautiful as the photos depict it to be.

I get a funny feeling every time I enter this part of Baja. Not funny as in bad, but funny as in I feel like I’m where I belong.  I once rolled through this region in the early morning hours with my daughter and she told me “you know, it’s weird, Dad.  I feel like I’m home.”  She understood (as in completely understood) the magic that is Baja.

I like the area and its stark scenery so much that one of my photos became the cover of Moto Baja!  I grabbed that shot from the saddle at about 30 mph on a CSC 150 Mustang replica, which I subsequently rode all the way down to Cabo San Lucas (that story is here).

You should buy a copy or three. They make great gifts.

Every time I roll through Cataviña with other riders, the dinner conversation invariably turns to how the boulders formed.   When I was teaching at Cal Poly Pomona, I asked one of my colleagues in the Geology Department.  He know the area as soon as I mentioned it.  The answer?  Wind erosion.

Guerrero Negro

The Black Warrior.  The town is named after a ship that went down just off its coast.    It’s a salt mining town exactly halfway down the peninsula, and it’s your ticket in for whale watching and the best fish tacos in Baja (and that’s saying something).  I’ve had a lot of great times in Guerrero Negro.  It’s about 500 miles south of the border.  You can see the giant steel eagle marking the 28th Parallel (the line separating Baja from Baja Sur) a good 20 miles out, and from there, it’s a right turn for the three mile ride west into town.  Malarrimo’s is the best known hotel and whale watching tour, but there are several are they are all equally good.  It you can’t get a room at Malarrimo’s, try the Hotel Don Gus.

CSC RX3 motorcycles at the Hotel Don Gus. We used to do annual Baja tours with CSC…those were fun times and great trips, and introduced a lot of folks to the beauty of Baja.
What it’s all about…getting up close and personal with the California gray whales. They are in town from January through March.
Tony, taco chef extraordinaire. You might think I’m exaggerating. I’m not.
It’s worth the 500-miles trek to Guerrero Negro just to savor Tony’s fish tacos. You might think I’m exaggerating. But like I said above…I’m not.
Man does not live by fish tacos alone, so for breakfast or dinner, it’s either the restaurant at Malaririmo’s or the San Remedio, a block north of the main drag into town. You won’t be disappointed at either.
Sue’s photo of a Guerrero Negro osprey enjoying some sushi.

After you leave Guerrero Negro and continue south, the Transpeninsular Highway turns southeast to take you diagonally across the Baja peninsula. About 70 miles down the road (which is about half the distance to the eastern shores of Baja and the Sea of Cortez along Mexico Highway 1) you’ll see the turn for San Ignacio.  It’s another one of Baja’s gems.

San Ignacio

San Ignacio is an oasis in the middle of the desert that forms much of Baja.  The Jesuits introduced date farming to the region hundreds of years ago, and it’s still here in a big way.  Leave Guerrero Negro, head southeast on Mexico Highway 1, and 70 miles later you run into a Mexican Army checkpoint, a series of switchbacks through a lava field, and when you see the date palms, turn right.

An oasis is usually formed by a volcano, and when a volcano is done discussing politics, it forms a lake. That’s the San Ignacio volcano and its lake, visible on the left as you ride into town.
The San Ignacio church, built as a mission in the 1700s, dominates the center of San Ignacio. It’s a beautiful spot, one of the most photogenic in all of Baja.
Another photo of the San Ignacio Mission. You’ll want to grab some photos in San Ignacio.
Dates? Nope, not on that trip, but dates are one of the things San Ignacio is known for. I’ll bet they are delicious.

San Ignacio has a town square that’s right out of central casting, there’s a little restaurant that serves the best chile rellenos in all of Mexico (I’m not exaggerating), and the place just has a laid back, relaxing feel about it.

Santa Rosalia

You know, this town is another one of Baja’s best kept secrets.  As you travel south on Highway 1, San Ignacio is the first town you encounter after traveling diagonally across the peninsula.  Folks dismiss it because it’s an industrial town, but they do so in ignorance.  There’s a lot of cool stuff in this place.

The ride into Santa Rosalia a few years ago with novelist Simon Gandolfi, Arlene Battishill, J Brandon, John Welker, and yours truly. That’s a dead fish I’m holding.  We did a round trip to Cabo San Lucas on 150cc Mustang replicas, just to say that we could.

One of the things that’s unique about Santa Rosalia is the all-wooden architecture.  The town was originally built by a French mining company (Boleo) and they built it they way they did in France.  Like the Hotel Frances, which sits high on a mesa overlooking the town and the Sea of Cortez.  I love staying there.

The Hotel Frances. It used to be a brothel.

There’s a cool mining musuem a block or two away from the Frances, and it’s worth a visit, too.

The mining museum in Santa Rosalia.

There are many cool things in Santa Rosalia, and one of the best is the Georg Eiffel church.  It was designed by the same guy guy who did the Eiffel town.

Santa Rosalia’s church. It’s an unexpected delight.  And I’m not even Catholic.
Inside Santa Rosalia’s Georg Eiffel church.
Stained glass. Photos ops abound in Santa Rosalia.

I’ve heard people dismiss Santa Rosalia as a gritty, industrial place not worth a stop.   Trust me on this:  They’re wrong.  It’s one of my favorite Baja spots.

Bahía Concepción

Concepción Bay is easily the most scenic spot in Baja.  It’s just south of Mulege (another delightful little town, and the subject of an upcoming ExNotes blog).  Bahía Concepción runs for maybe 20 miles along the eastern edge of the Baja peninsula.  I’ve seen whales from the highway while riding along its edge, the beaches are magnificent, and the photo ops just don’t stop.  The contrast between the mountains and Cardon cactus on one side and the pelicans diving into bright green water is view from the saddle you won’t soon forget.

On one of many rides along Bahía Concepción, good buddy Joe Lee and yours truly rode our Triumph Triples. This is a favorite shot of mine.
Besides “wow,” what can I say?
World-famous novelist and motorcycle adventurer Simon Gandolfi andn yours truly on 150cc scooters. We were on our way back from Cabo San Lucas when we stopped for this Bahía Concepción photo.  Hardtail 150cc scooters.  Up and down the length of Baja.  I think about that ride every time I see a GS parked at a Starbuck’s.

So there you have it:  My take on seven favorite spots in Baja?  How about you?  Do you have any favorite Baja destinations?  Let us know here in the comments sction!


More on Baja?  You bet!


Headed into Baja?  Insure with the best:

The Rimfire Series: An Early Ruger Single-Six

By Joe Berk

If you like old guns and family heirlooms, you’ll enjoy this blog.  The Ruger Single-Six you see here was my Dad’s gun.  This revolver’s 4-digit, no-prefix serial number puts its date of manufacture at 1954, which means it is just a little bit younger than me.  Ruger introduced the Single-Six in 1953 and they only made 49 of these revolvers that year, so mine is a first year of production revolver.  That’s cool.

Dad kept the Single-Six loaded in a drawer near his bed.  I don’t remember him ever shooting it.  He kept it there just in case.  Storing any gun in a holster is not a good idea (the leather retains moisture) and it had a light coating of surface rust in a few spots when Dad passed.  A bit of 0000 steel wool and oil took the rust off and the gun is in remarkable condition.


Don’t forget to take care of us:  Please click on the popup ads!


You probably noticed the custom walnut grips on this vintage Ruger.  Dad was an excellent stockmaker (his work was on high end shotguns), but the stocks on his personal trap guns were usually kluged-up affairs with adhesive padding on the comb and glued-on spacers to get the fit he wanted.  Dad didn’t care about appearance on his competition guns; all he wanted was a good fit so he could smoke clay pigeons.  The work he did on his friends’ shotguns…that was another story.  Those were stunning.  Those other guys weren’t great shots; they cared more about looks.  Dad was all about breaking pigeons on his guns, bringing home trophies, and bringing home cash (the monetary awards, especially for live pigeon shoots, were significant).   We always had walnut blanks and remnants in Dad’s workshop, and one day when he didn’t have anything else to do he crafted the custom grips you see here.  The wood-to-metal fit and the oil finish is perfect on these.

The right side of my 1954 Ruger Single-Six.
A perfect wood-to-metal finish. They don’t come from Ruger like this.

I wish new Rugers had grips that looked and fit like that.  They don’t.  You may recall the blog I did last year about a new Ruger .357 Magnum Blackhawk.  It’s grip-to-frame fit was atrocious.

A current production Ruger Blackhawk. Somewhere along the line, Ruger lost its attention to detail. These ugly gaps can’t be unseen.

As an original Single-Six, this Ruger is what is referred to as an Old Model.  It doesn’t have the transfer bar safety, and what that means is that if you drop it with the hammer over a loaded chamber, it can fire.  Call me old fashioned; I’ve got my own safety approach to this problem:  Don’t drop the gun.   But that’s just me.

The Old Model Ruger revolvers are elegant.  They are also referred to as three screw Rugers (because they have three screws on the right side; the newer model has two pins instead).  The hammer cocking in the Old Model Rugers is similar to a Colt Single Action Army.  There are four clocks, and that’s cool, too (especially for old guys like me).

The old three-screw configuration.

These old Ruger six shooters are also called flat gates because of the flat gate that opens for loading.  The flat gate feature that didn’t stay on Rugers long.  Ruger went to a contoured loading gate early in their history.  It’s just something that sets this revolver apart.

The flat gate on my Ruger Single-Six.
A better view of the Ruger’s flat loading gate.

The early Rugers had recessed chambers.  I haven’t owned a new Single-Six in decades and I don’t remember if the newer ones do or not.  It’s a classy feature.

Recessed chambers. Back in the day, everything was better.  I know it’s dirty; I took this photo after the range session and before I cleaned it.

You probably noticed the gold inlay in this Ruger’s lettering.  Back in the day, kits to do this at home were popular.  I guess it holds up well; this was done quite a few years ago.  You can still get these gold inlay kits from MidwayUSA.com.

Look for the Forster gold inlay kit on Midwayusa.com.
Fixed sights and gold inlay. These old guns are awesome.

I grabbed an old box of .22 Long Rifle ammo and headed to the range a few days ago.

$8.96 for 550 rounds. We didn’t know how good we had it.
Federal hollow point ammo. You can’t have these in New Jersey or San Francisco (they outlawed hollow point ammo). Sarcasm alert: That’s why their crime rates are so low.
An ammo comparison. From left to right, it’s the Federal .22 Long Rifle hollow points featured in this article, one of my 9mm reloads, and a .357 Magnum hollowpoint.

I ran my targets out to 50 feet at my indoor range and had at it, shooting off hand with a two-hand hold.  As always, the Single-Six did not disappoint.  It has fixed sights, but they are spot on.

I held at 6:00 on the orange bullseye. If I had used a rest, the group would have been much smaller.  For an offhand group, I’m happy.

When first introduced in 1953, the cost of the Single-Six was $57.50.  I grabbed this photo from my old 1956 edition of the Stoeger Shooter’s Bible.  The Single-Six had gone up to $63.25 by 1956.

They don’t do covers like this today: The 1956 Shooter’s Bible.
The ad for Ruger’s Single-Six in 1956. Ruger’s Standard .22 automatic pistol was only $37.50 back then.  The Single-Six was a more expensive handgun.

If you enjoyed this Rimfire Series story, keep an eye on us.  Our next Rimfire Series story will be on a very cool Ruger 10/22 Mannlicher rifle from 1974, one with exceptional walnut.

The same ammo and an old Mannlicher 10/22. Watch ExNotes for the story. It will be the next featured in our Rimfire Series.

If you want to make sure you don’t miss the upcoming 10/22 story, please subscribe to the ExNotes blog:


If you would like to see our earlier blogs on .22 rifles and handguns, here’s a set of links.

A Tale of Two .22s (a CZ Model 452 and a Remington Model 504)

A .22 Colt Trooper Mk III

¡Siluetas Metálicas!

First Person Shooter

A 200th Year Ruger .22

A Tale of Two Springfields

Pandas!

By Joe Berk

The big photo above is shows three very real pandas.  I took it in Chengdu when Gresh and I rode across China.  It’s a little blurry because I was shooting through inch-thick super-smudgy glass.  The photo is for attention only.  This blog is about a different kind of panda.


Help us bring more to you:  Please click on the popup ads!


When I was a pup back in the 1970s, I bought a Seiko chronograph watch in the Kunsan AFB Base Exchange.  The Seiko model number was 6138-8020, and it was $67.  I could have bought a Rolex there, too, but I remember thinking who spends $300 on wristwatch?  Nope, it would be the Seiko for me.

A Seiko 6138-8020 recently advertised on Ebay for close to $2,000.

The Seiko 6138 was an automatic (i.e., self-winding) watch.  It became known as the Panda due to its two black subdials on its white face.  I liked the Seiko a lot.  I was a jogger in those days, and I used the Seiko every day to time my 3-mile runs.  Life was good but I went on to other things.  After the Army I worked in the aerospace industry, and like most engineers I went the digital route (I wore a Casio calculator watch).  When Ebay became a thing I went on a decluttering craze and the Seiko went down the road.   I got $80 for it and I thought I was pretty clever.  Then I watched the price of a 6138 go through the roof.  That may be why I collect watches now.  I’m still trying to make up for that mistake.

I’ve missed my Panda over the years, and I started looking around to see what was available.  There are several.  In my opinion, Breitling makes the best (and best looking) Panda.   Their Premier model is an awesome automatic watch, but who spends $7,299 on a watch?

Breitling’s Premier chronograph.  It’s a Holy Grail kind of a watch.

The Hamilton automatic American Classic is another great looking Panda.  That answers the mail for me, too, but it’s a little bit rich for my blood.  The Hamilton goes for $1,541.

Hamilton makes a Panda chronograph.  Nice, but a little bit pricey.

Seiko has a solar-powered Panda watch in their Prospex line that looks pretty good to me.  It’s a $700 watch.  If you shop around, you can find them for about $500.  That’s not bad, but Seiko also makes that watch with a red and blue face and a red and blue bezel (informally known as the Pepsi), and one of these days I’ll probably pull the trigger on one of those.  So, I took a pass on the Seiko Panda.

Seiko’s Prospex Panda.   This is a very good-looking watch.

Bulova recently got into the Panda shtick as well, with a set of different colors on their Lunar Pilot watch:

The Bulova Lunar Pilot Panda. Nice, and incredibly accurate.

The Bulova is $895.  It’s nice, but a few years ago I bought the black dial Bulova that emulates the watch astronaut Dave Scott wore to the moon.  With a Lunar Pilot already in the collection, I wanted something else.

I’d been thinking about this Panda thing for a couple of years now, and looking at watches from time to time on the Internet, and you know where this is going.  The Internet is insidious, and the marketing emails starting coming in.  Amazon sent one on the Orient Panda and it was $188.  Seiko and Orient are both owned by Epson (yep, the printer company), and I know Orient to be a good watch (I’ve written before about my Orient moonie automatic watch).  Here’s the Orient Panda:

The Orient Panda. I like its looks.

The Orient had great reviews on Amazon, and I liked the look.  One thing I’ve learned the hard way is that it’s hard to judge a watch’s appeal by a photo.  Some that look great in a picture are totally unappealing in person, and vice versa.  But for $188, I’m willing to take a chance.  When the watch arrives (it’s a non-US model and it’s shipping directly from Japan), I’ll let you know how it looks.  I like the metal bracelet; I may spring for a black leather (with white stitching) band (like the Breitling’s) somewhere down the road.

A few general observations on the above watches.  You may have noticed that the bezel rings are different between the Orient Panda and the others.  The Orient has equally-spaced marks that show how many seconds have elapsed when the stopwatch is activated.  All the other Panda watches have what is known as a tachymeter bezel.  The idea behind it is that you can use the tachymeter for determining rate.  If you activate the tachymeter when passing a mile marker and then stop it at the next mile marker, it will tell you your actual speed (as long as you are going faster than 60 mph).  If you are on a production line, you can activate the stop watch when starting one item and stop the watch when the item is completed.   Let’s say it takes 9 seconds to complete one item.  The stop watch’s second hand will point to how many items can be completed in an hour (in this case, 400).   The tachymeter is a cool feature but I have never used it, so the fact that it is not on the Orient is okay by me.

I’ve mentioned automatic and solar powered watches.  An automatic watch is a mechanical, self-winding watch.  For some collectors, there’s a panache associated with a mechanical watch.  I feel that way, and I have automatic watches.  The downsides of an automatic watch are that if you don’t wear them for a few days they stop and then you have to reset them, and they are less accurate (typical automatic watch accuracy is about ±25 seconds per day.  Some are better than others.  If you’re a fanatic about time, you’ll probably reset an automatic watch about once a week.  For watch geeks that’s okay.  We like playing with our watches.

Solar powered watches are essentially quartz watches that are powered by the sun instead of needing a battery.  The downside is the watch has to be in the light (either sunlight or artificial light) a little bit each day to keep running.  The upsides are that if you don’t wear a solar powered watch but keep it where the light hits it, it keeps running, and solar powered (and quartz regulated) watches are phenomenally accurate (to the tune of a few seconds per month).  I have solar powered watches that I haven’t worn for a year or more, and they accurate to within a few seconds of the time.gov website.  That’s pretty cool.

Back to that ride into Chengdu to see the real pandas…you can read all about it in Riding China.  Here’s a short video of Joe Gresh and yours truly slogging through Chengdu traffic on Zongshen RX1 motorcycles.


Never miss an ExNotes blog:


More watch, motorcycle, tool, and other product reviews are here!

The Wayback Machine: ’66 Triumph TT Special

The Triumph TT Special:  Made from 1963 to 1967, in my opinion it made for the ultimate street bike back in the 1960s.  I always wanted one.  It’s an itch I never scratched, and that may be a good thing.  I like to remember it the way I remember it:  The ultimate motorcycle.  I’ve owned a few bikes between then and now that were undoubtedly more powerful, so a TT Special ride today might seem disappointing (and I don’t want to facilitate bursting that bubble).  No, the dream is how I want to remember this motorcycle.


So, some of this is from a blog I did for CSC several years ago, and some of it is new. It’s all centered on one of my all-time dream bikes, the Triumph ’66 TT Special.

A ’66 Triumph TT Special. Love those colors!

Some background:  In the mid-60s, the ultimate street bike was a Triumph TT Special.  The regular Bonneville was a pretty hot number back then, but it came with mufflers, lights, a horn, and all the stuff it needed to be street legal. Those bikes were pegged at 52 horsepower, and although that sounds almost laughable now (as does thinking of a 650 as a big bike), I can tell you from personal experience it was muey rapido. I don’t believe there were any vehicles on the street in those days (on two wheels or four) that were faster than a Triumph Bonneville. And there was especially nothing that was faster than the Triumph TT Special. It took the hot rod twin-carb Bonneville and made it even faster. And cooler looking.  The Triumph TT Special will always hold a special place in my heart.


Don’t forget to click on the popup ads!


I had a spare hour a couple of years ago (yeah, that’s about how it happens), and that’s when I stopped in Bert’s.   My good buddy Ron had a Triumph TT Special on display.  I wondered what most folks thought when they saw the TT Special in Ron’s showroom. Bert’s sells to a mostly younger crowd (you know the type…kids who just got a licenses and go for 170-mph sports bikes), and my guess is they didn’t really “get” the TT Special. I sure did. Like I said, back in the mid-60s the Triumph Bonneville ruled the streets, and the TT Special would absolutely smoke a standard Bonneville.

Back in those days the Triumph factory rated the TT Special at 54 horsepower (as opposed to the standard Bonneville’s 52), but let me tell you there was way more than just 2 horsepower separating these machines. The TT Special was essentially the starting point for a desert racer or flat tracker. They were racing motorcycles. The TT Special was never intended to be a street bike, but some of them ended up on the street. If you rode a TT Special…well, you just couldn’t get any cooler than that.

A ’65 Bonneville TT Special, in the blue and silver colors of that year. This is a beautiful motorcyle on display in the Owens Collection in Diamond Bar, California.

I only knew one guy back then who owned a TT Special (Jimmy something-or-other), and he did what guys did when they owned a TT Special.  He made it street legal, and that effort consisted of a small Bates headlamp, a tail light, and a single rear view mirror.

The first time Jimmy was pulled over in New Jersey the reason was obvious:  He was a young guy on a Triumph TT Special.  Back in those days, that constituted probable cause.  After the officer checked the bike carefully, he gave Jimmy a ticket for not having a horn. It was what we called a “fix it” ticket, because all you had to do was correct the infraction and the ticket was dismissed. Jimmy didn’t want to spend the money (and add the weight) that went with wiring, a switch, and an electronic horn, so he bought a bicycle bulb horn. You know, the kind that attached to the handlebars and had a black bulb on one end and a little trumpet on the other.  It honked when you squeezed the bulb.  Ol’ Jimmy (old now, I guess, if he is even still around) went to the police station, honked his horn, and the police officer dismissed the citation. With a good laugh. It was a good story 50+ years ago and it’s still a good story today.  Simpler times, I guess.

I love the ’66 white and orange color combo, too.  My Dad had a ’66 T120R Bonneville back then (that’s the standard street version of the Bonneville), and it was a dream come true for me.  Those colors (white, with an orange competition stripe framed by gold pinstripes) really worked.  1966 was the first year Triumph went to their smaller fuel tank, and it somehow made the Bonneville even cooler.

My father, an upholsterer by trade, reupholstered his Bonneville with a matching white Naugahyde seat.  Dad put a set of longitudinal pleats on the seat in orange to match those on the tank, and each was bordered by gold piping.  The overall effect was amazing.  It looked like the bike ran under a set of white, gold, and orange paint sprayers.  The effect was electric.  That bike really stood out in 1966, and it continues to stand out in my mind.  In fact, while I was at CSC, that color combo (with Steve Seidner’s concurrence) found its way into one of the new San Gabriel color combos.  Some dreams do come true, I guess!


A Cup O’ Joes includes a few of our Dream Bikes.  You can pick up a copy here.


Never miss an ExNotes blog: