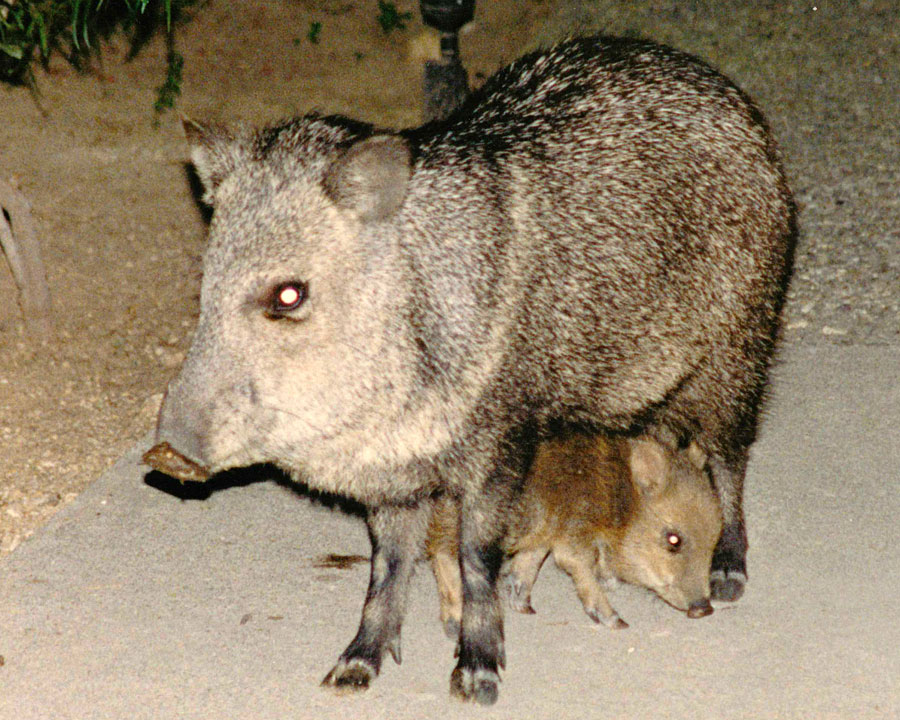
Reading good buddy Airborne Mike’s javelina story brought back memories. I’ve been chasing pigs for more than 50 years and I only ever got three. Two were captured simultaneously via film (the two you see above); the other was nailed in Arizona and brought home for consumption. Yeah, I’m a Jewish kid who ate pork. Don’t tell anyone.
I’d been on javelina hunting trips numerous times when I lived in west Texas, and on every one of those trips, we never even saw a javelina (we could have just as easily described those expeditions as T-rex hunts, because we saw about as many of them). Good buddy Jose commented on Mike’s previous post that javelina make for good eating, but I’ve never had the pleasure and if offered, I’d politely decline. Although they definitely look piggish, javelina are actually not in the pig family. I’m told they are rodents. No thanks. I’ll forego rat tacos.
Help us bring more stories to you: Please click on the popup ads!
About that Mama Javelina and baby photo you see above: All those javelina hunting expeditions when we didn’t see a single javelina? Well, we stayed on an Arizona guest ranch one year (not hunting anything except good times) and there were javelinas out the gazoo. We heard them snorting and grunting up a storm outside our cabin one night, so I went outside with my manual focus Minolta 35mm film camera and took a bunch of flash photos, moving the focus ring a little bit each time because I couldn’t see to focus in the dark. I got lucky with one of them. I didn’t know there was a baby javelina in the mix until I got the prints. The mama and her baby were only about six feet away (I was using the Minolta’s standard 50mm lens). A guy who saw that photo told me I was lucky Mother Javelina didn’t go after me.
I’ve been on three wild pig hunts (not javelina, but actual wild pigs). On the first one, we spent three days rooting around in northern California and we didn’t see a single pig. Our guide pointed out what he claimed was pig poop, but hell, it could have been any kind of poop. What do I know from pig poop?
On a second northern California wild pig expedition, we were skunked again. Not one pig and not one pig sighting. Not even pig poop this time. All I came home with was the worst case of poison oak I ever had. The itching was intense raised to an exponent, and nothing seemed to work except consuming large amounts of Budweiser, which I did for the three days it took to get over it. After that episode, I stayed away from hunting pigs for the next 30 years. Then, I got the bug again.
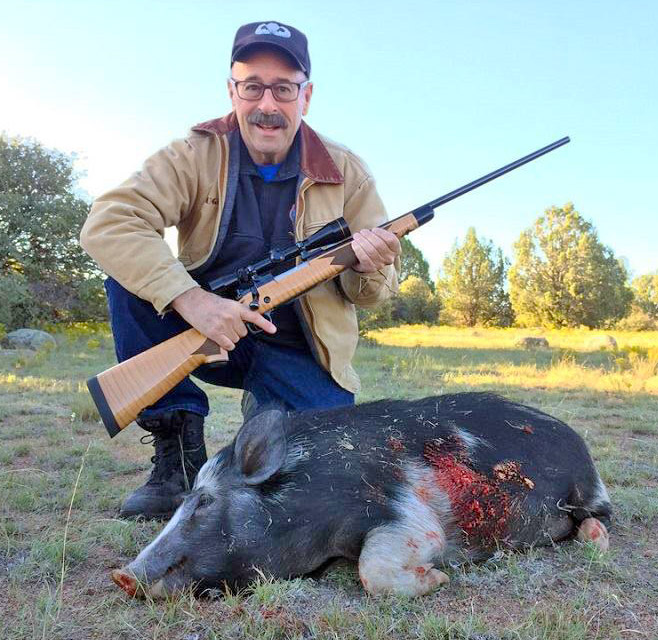
My pig and I, taken near Kingman, Arizona. That rifle (a maple-stocked SuperGrade Model 70 Winchester in .30 06) will shoot quarter inch groups at 100 yards.
About five years ago good buddy Paul and I hunted wild pig in Arizona and we both scored. Our guide told me mine weighed about 130 pounds; Paul’s was a monster at well over 200 pounds. I got an education on that trip. The butcher asked us about the cuts we wanted, but I really had no idea (it was my Jewish ignorance about all things of the porcine persuasion). I let the butcher recommend what to do. When we reached the end of the list, I realized we hadn’t added bacon to the list and I asked about it. “There’s no bacon on wild boar,” he patiently explained while looking at the top of my head (I think maybe he was looking for a yarmulke, or maybe where I had my horns removed). “Bacon is belly fat, and wild pigs don’t have any.” Hmmm. Whaddaya know.
That butcher’s guidance about wild pigs lacking fat had further implications. The meat had absolutely no flavor. Zip. Nada. Zilch. No fat, no flavor. I made a lot of chili with that meat over the next year (cumin, red chili flakes, and Anaheim chiles bring their own flavors). But one of the “cuts” was sausage and that was good because it included a little fat. I found a recipe for and made a wild mushroom and pork sausage barley casserole. It was outstanding, so much so it has me thinking about going pig hunting again.
I know what you’re thinking: This is going to be a blog either for or against conservatives.
Nope. It’s not. We don’t do politics here on ExhaustNotes. This story is about a Ruger No. 1 that shot far to the right and how I fixed it. If you want politics, watch the news or pick up a newspaper and take in what passes for journalism these days.
This is ExhaustNotes. We’re pure. All we care about are good stories and you clicking on the popup ads.
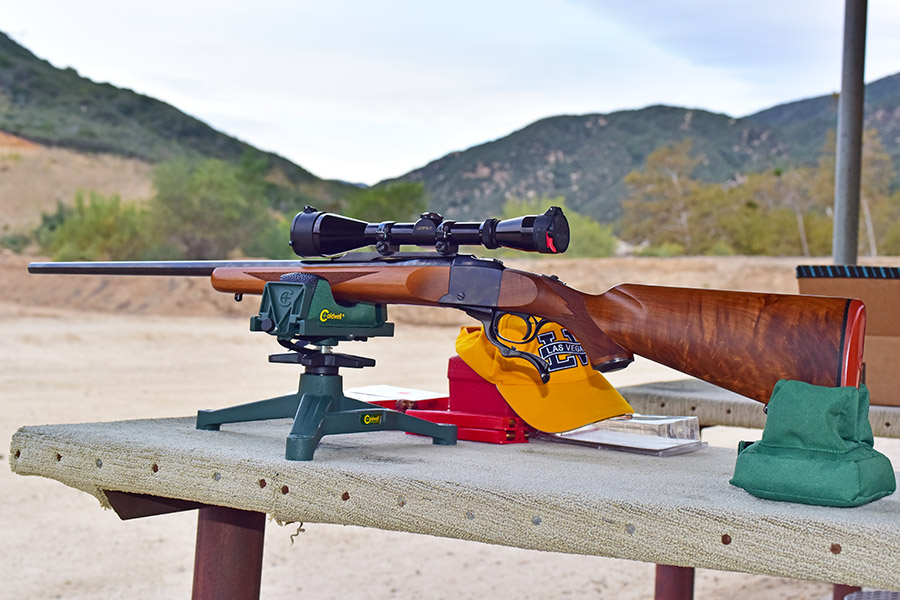
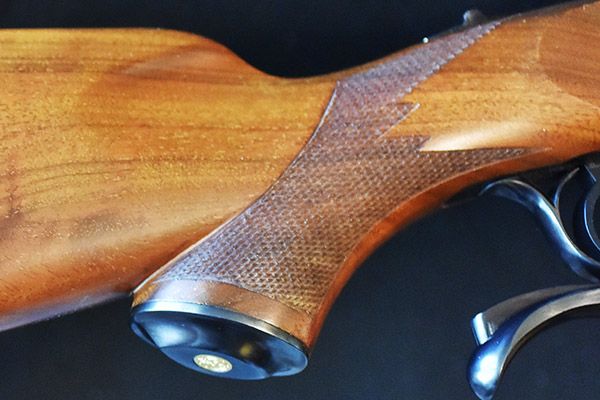
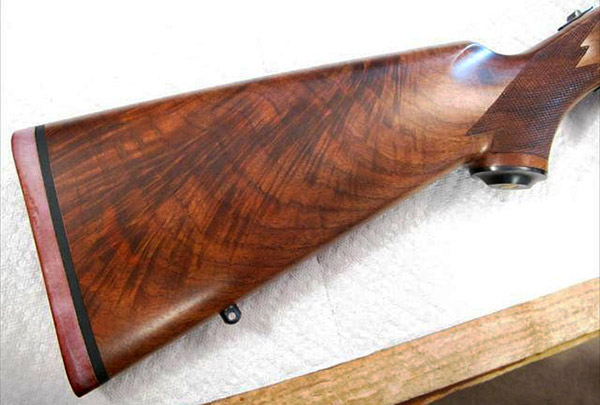
One of my good buddies bought a very slightly used Ruger No. 1 several years ago (it appeared to be unused) after hearing me rave about how classy these rifles are. It’s the one you see in the photo at the top of this blog. This Ruger No. 1 is particularly desirable. It is chambered in .22 250 (a wonderful cartridge), it has fantastic wood, it is an early production model (the serial number dates it to 1971), it has the early style checkering pattern, it has a red pad, and it is a pre-warning gun. My buddy and I both bought Ruger No. 1 rifles that day. His was the .22 250 you see here, and I bought one chambered in .22 Hornet.
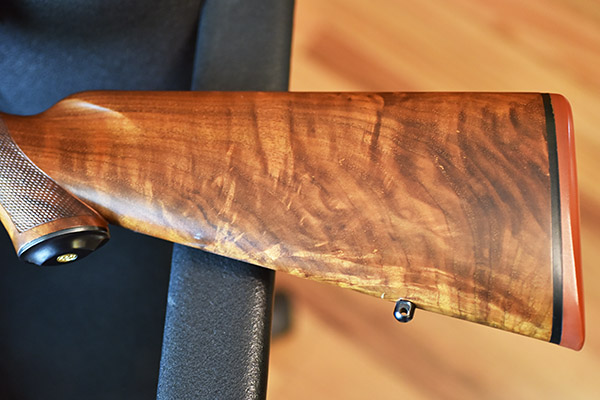
Highly-figured walnut, a red ped, and old style checkering…it doesn’t get any better than this.
Both the .22 250 and the .22 hornet are stellar cartridges, but the .22 250 holds a special place in my heart. The first Ruger No. 1 I ever saw was in a sporting goods store in Bound Brook, New Jersey, and it was chambered in .22 250. The Ruger No. 1 had only recently been introduced, and my father really wanted the one we saw that day. Like all Ruger No. 1 rifles it was elegant, and as a varmint hunter Dad was in love with the .22 250. We didn’t get it, but seeing how excited Dad was left me with a lifelong appreciation for any Ruger No. 1 and the .22 250 cartridge.
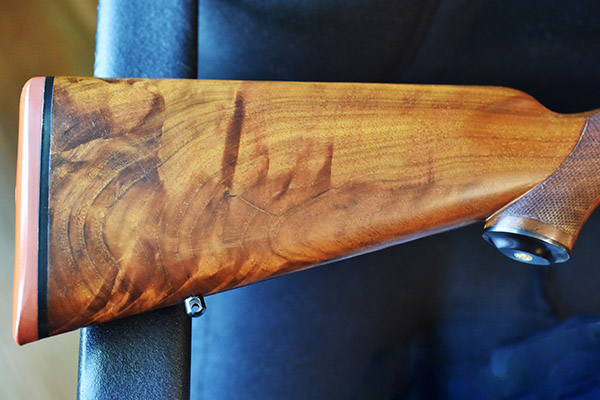
The flip side.A close up of the original Ruger No. 1 checkering pattern.
So my friend bought the .22 250 (as I mentioned above) but on our first trip to the range his .22 250 was a disappointment. It shot way to the right at 50 yards, even with the scope’s adjustment all the way to the left. It was a frustrating day for him. My buddy removed the scope rings and found that one of them had been bubba’d (the victim of incompetent gunsmithing). It had been crudely filed in an apparent attempt to get the rifle on target. Bubba (the guy who did the work) didn’t understand what he was doing (or how Ruger’s ring design worked) because the material he had removed didn’t shift the scope alignment with the bore (if ignorance is bliss, Bubba was indeed a happy guy). My friend bought a new set of Ruger scope rings and remounted the scope. It made no difference; the rifle still shot far to the right. I was starting to understand why the rifle looked like new. Whoever owned it before encountered the rifle’s bias to the right, couldn’t fix it, and gave up on it.
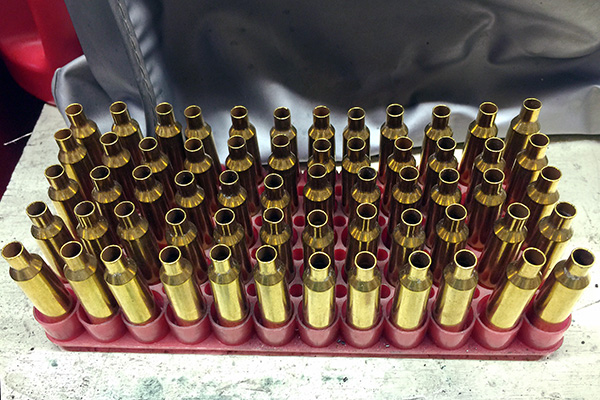
Resized, polished, and trimmed .22-250 brass waiting for powder and bullets. This is a great cartridge.
At that point, my friend lost interest in the rifle, too, and I picked it up from him. It made for an interesting project. I put a different scope on the rifle (a Leupold I had used on other rifles), but the problem was not the scope. The rifle still shot way to the right.
Help us bring more content to you: Please click on the popup ads!
In the past when I had encountered this problem, it had always been due to poor forearm bedding. I closely examined the Ruger and determined that the rear of the forearm had clearance between the forearm and the receiver on the right side, but it was contacting the receiver on the left side. That would push the barrel to the right, and it could cause the strong rightward bias this rifle exhibited. You’d be surprised; it doesn’t take much pressure on a rifle barrel to push the point of impact significantly off center. I removed the forearm, delicately sanded it at the rear to have the same forearm-to-receiver clearance on both sides, and remounted it. At the next range session, I saw that my efforts had no impact. The rifle still printed far to the right and the group size was running 2 ½ to 3 inches at 100 yards. It was terrible.
A closeup photo showing intimate contact between the rear of the forearm and the front of the receiver on the left side. On the right, there was clearance. This could have been the cause of the problem, but it wasn’t.
I next tried shimming the scope. Using thin metal shims, I angled the scope enough in its rings to get its range of adjustment on target. But I still had to have the scope cranked all the way to the left, and the rifle still grouped poorly. The scope shims were a Mickey Mouse, Bandaid approach. I knew this wasn’t the solution.
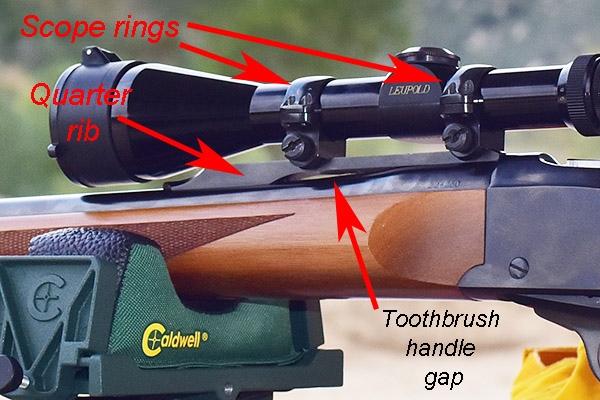
Sometimes when you can’t find the answer to a problem, the best thing to do is ignore it for a while. I put the rifle in the safe and forgot about it for a few weeks. Then one day when I was driving back from one of our adventures, my mind drifted back to the Ruger. The Ruger No. 1 has a very slick quarter rib at the top rear of the barrel. The scope rings attach to it, and the scope mounts in those rings. I wondered: What if that rib was mounted at an angle to the barrel’s bore? The solution, I thought, might be a new quarter rib.
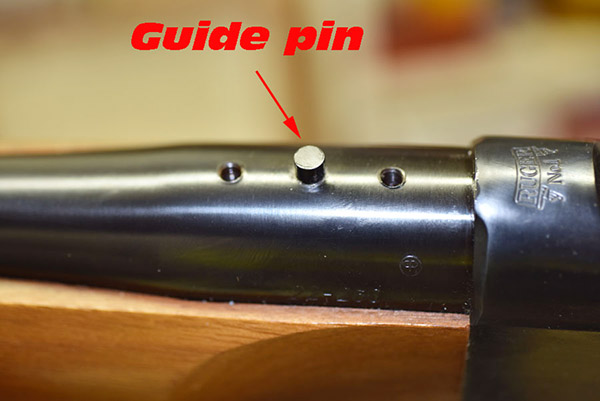
I called Ruger’s customer service (a marvelously responsive organization) and told them about my problem and that I thought I needed a new quarter rib. A few days later, I had one. At that point, things became even more interesting. The older Ruger No. 1 rifles (including my .22 250) had quarter ribs that mounted with two Allen-head screws, and the barrel had a pin that fit into a hole in the quarter rib. The quarter rib Ruger had just sent to me had two holes for the mounting screws, but no hole for the pin on the barrel. I thought about that and it made sense; the barrel pin was a belt-and-suspenders feature and it was unnecessary. Ruger made the right engineering decision to eliminate it. I thought I could just drill a hole in the new quarter rib or I could pull the pin from the barrel. I would soon learn that neither one of these solutions was going to happen.
My first step was to remove the Ruger’s quarter rib. That’s when the fun began. As I mentioned earlier, the quarter rib is secured to the barrel with two Allenhead screws. The problem I immediately ran into was that the Allen socket is very small, and those screws were originally installed with a lot of torque. I put a small Allen wrench on each screw and both wouldn’t budge. I had an Allen socket head and a ratchet that would give me more leverage, but the screws were so secure I was afraid I would round out their Allen sockets trying to remove them. I was getting nowhere with the little Allen wrench. In for a penny, in for a pound, I thought. I mounted the Allen socket on my ratchet and, with great trepidation, starting putting more torque on each screw. It worked. Both screws came out with their Allen heads intact. They hadn’t been Loctited; they were just torqued by a madman (or a madwomen), or more likely, somebody at Ruger with a power tool.
The Ruger No. 1 scope mounting system.
Okay, the screws were out, so I thought I could now remove the quarter rib. “Thought” is the operative word in that sentence. That quarter rib wasn’t going anywhere. It was wedged onto the barrel like it was welded. There is a small gap between the bottom of the quarter rib and the top of the barrel (you can see it in the photo above), but I didn’t want to stick a screwdriver in there to pry the quarter rib off. It would have scarred the barrel or the quarter rib or both. I needed something softer that wouldn’t mar the barrel or the quarter rib.
If you’re like me, you save old toothbrushes and use them when cleaning your guns. I thought I could use one of mine. Its plastic handle wouldn’t damage anything. The toothbrush handle was too thick to fit in the gap, so I filed it down to create a wedge. That got the handle in between the quarter rib and the barrel, but the quarter rib wasn’t going anyplace. I worked on it for 20 minutes until I broke the toothbrush handle in two. So I filed down another toothbrush handle. Three modified toothbrushes and an hour later, the Ruger’s quarter rib came off.
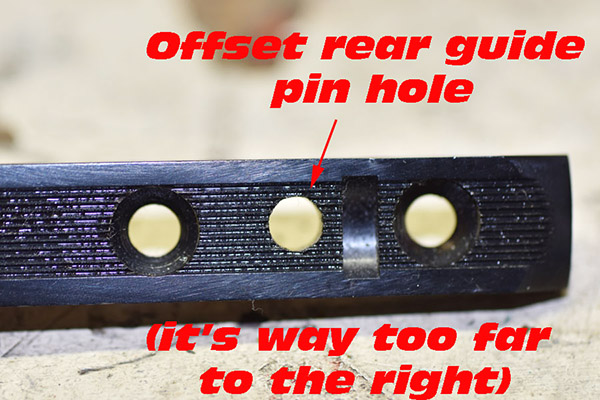
My initial thought was that what had made the rib so hard to remove was that its rear was interfering with the front of the receiver. That was sort of the issue, but it wasn’t induced by the quarter rib’s length or the receiver’s dimensions. I looked closely at the quarter rib and then I was really surprised. The hole for the barrel pin was off center. By a lot. Wow, I thought. That would certainly push the barrel to one side. It was what had been causing the rifle to shoot way to the right. It was a subtle anomaly. Who would have thought this had been the problem?
Whoa…something slipped while this part was being machined!
I was surprised that Ruger was able to assemble the rifle, but then I remembered what I had thought about earlier. Ruger probably used a powered screwdriver when installing the quarter rib’s Allen screws, and the technician who assembled the rifle probably did not notice the increased torque required to install the screws. The conversion of screw torque to linear force is extreme; I once participated in a fatality investigation where an operator sheared a munitions safety pin screwing on a submunition parachute without realizing what he had done (and the device detonated). But I digress; back to the Ruger story.
Older Ruger No. 1 rifles used a guide pin on the barrel. This was an unnecessary feature and it was later eliminated.
I examined the barrel pin (the pin that fit into the barrel to help locate the quarter rib). It was a press fit in the barrel, and it was obvious it wasn’t going any place. I thought about trying to pull it out with a pair of visegrips, but again, I didn’t want to bubba up this beautiful rifle. That meant I wasn’t going to use the new quarter rib Ruger had sent to me. When I tried to put the old quarter rib back on the barrel, the misalignment between the barrel rib hole and the screw holes was obvious. After thinking about this a bit (and realizing the barrel pin was unnecessary), I concluded that the best fix would be to simply enlarge the offset rib hole so that it allowed clearance between the barrel pin and the quarter rib hole.
I took a small circular file to the quarter rib hole and got nowhere fast. The quarter rib had been hardened to about two million on the Rockwell C scale. To enlarge the hole, I would have to grind it. I mounted a small rotary stone on my Dremel tool and went to work like a demented dentist. It took a while, but I finally enlarged the hole enough so that the quarter rib and its mounting screws could be installed and removed from the barrel easily. I used cold blue to blue the quarter rib’s hole inside diameter (where I had removed material), remounted the quarter rib, reinstalled the Ruger scope rings, remounted the scope, and headed to the West End Gun Club.
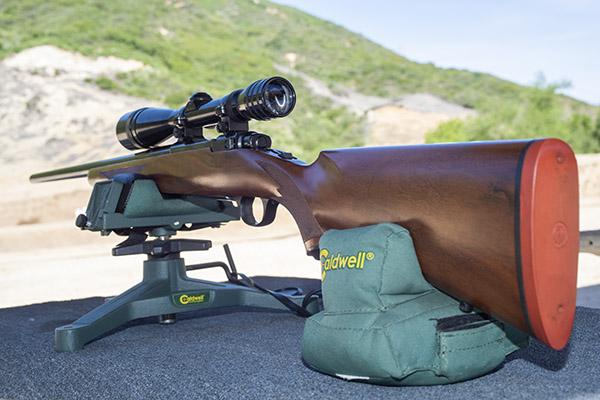
Three-shot groups at 100 yards. This is a very accurate rifle.
The trip to the range was extremely satisfying. The rifle’s extreme right bias completely disappeared, and after a few adjustment shots, the holes on the target were in the black. More surprisingly, the Ruger’s groups shrank dramatically. The No. 1 had been a 2 ½ to 3 minute of angle shooter before I corrected the quarter rib mounting issue; now it was a sub-MOA rifle. Life was (and still is) good. I love my Ruger No. 1 rifles, and I especially love this .22 250. I have two other Rugers chambered in .22 250. One is an unfired 200th year No. 1 with even better walnut (see below). The other is a tang safety Model 77 with the heavy varmint barrel (also see below). I could be talked into selling these two rifles, but not the .22 250 featured in this blog. I’m keeping that one for the duration.
My other .22 250 No. 1. It’s unfired. Nice wood, wouldn’t you say?A Model 77V tang safety. It’s a pre-warning, heavy barreled .22 250 that is extremely accurate.
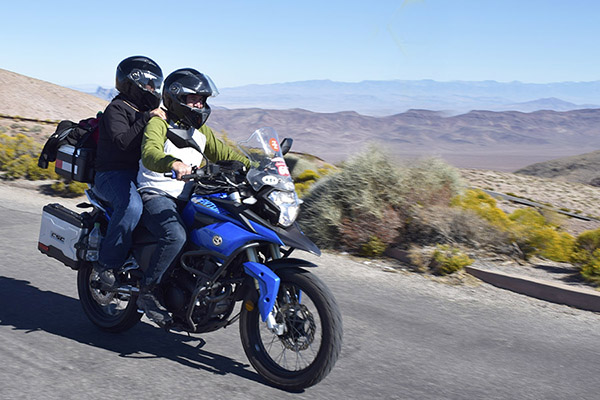
It’s been a little while since we posted a phavorite photo (thanks for the series suggestion, Peter), so I thought we were due. Usually the pics in our Phavorite Photo series are pics I took, but I can’t take credit for the photo you see above. Susie was with me when we visited Zongshen to negotiate CSC’s first RX3 order, and during those meetings, Zongshen asked about sending Chinese folks over to ride with us in the United States. The idea was Zongshen would provide the motorcycles and pay all expenses for a dozen or so riders if we would plan and lead the ride. During our meeting, good buddy Thomas Fan asked if I had any destination suggestions (Fan is Zonghsen’s marketing director; in the photo above he’s the first guy seated on my left). Boy, did I ever. I had a bunch of photos on my laptop from my rides to US National Parks, Baja, and more. I pulled up the photos, told tall tales about each, and our Chinese hosts were mesmerized. Sue had the presence of mind to grab my Nikon and snap the photo you see above. It became an immediate favorite.
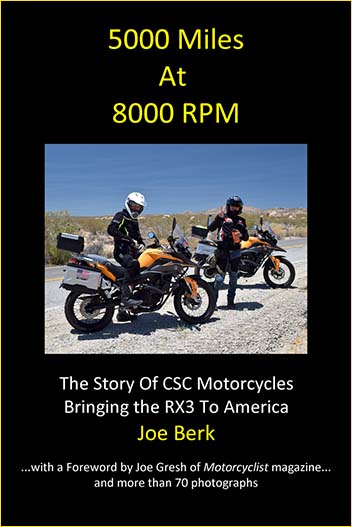
Zongshen came through on their promise, and we had a hell of an adventure. We rode from southern California to Sturgis, cut across the country headed west to the Pacific Coast, and then followed the coast back down to So Cal. It was a 5,000-mile ride we dubbed the Western America Adventure Ride. Folks in the US who had purchased RX3 motorcycles joined us on portions of the ride. It was where I first met Joe Gresh (Motorcyclist magazine sent Joe and he wrote a wonderful story). The Western America Adventure Ride was a key part of our CSC marketing strategy and it worked. You can read all about in 5000 Miles At 8000 RPM. Buy the book; don’t wait for the movie.
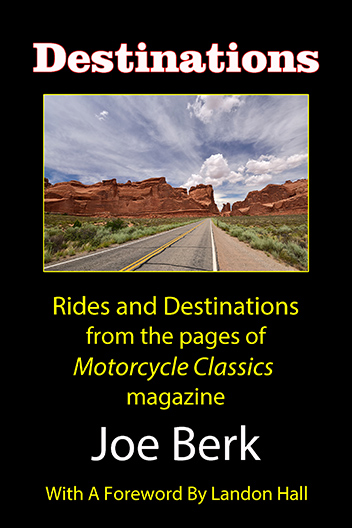
About those destinations: What Fan didn’t know when he asked if I had any suggestions was that I write the “Destinations” column for Motorcycle Classics magazine. We did a book on that, too. You should buy a copy. If you buy a thousand copies, I’ll ride my Royal Enfield to your place and sign every one of them.
Earlier Phavorite Photos? You bet! Click on each to get their story.
One of the advantages of living in Arizona most of the year is that you can ride every day, comfortably (I added “comfortably” because I know there is some guy or gal in Maine riding year-round in sub-arctic temps with snow). We in Arizona can enjoy our passion for camping in all four seasons because of the extreme elevation changes, which allow moving to different climates with a one or two hour drive.
Arizona has an endless amount of camping areas, both dispersed and in formal campgrounds. I thought highlighting two ends of the spectrum in would be a great way to convey the vast diversity Arizona offers.
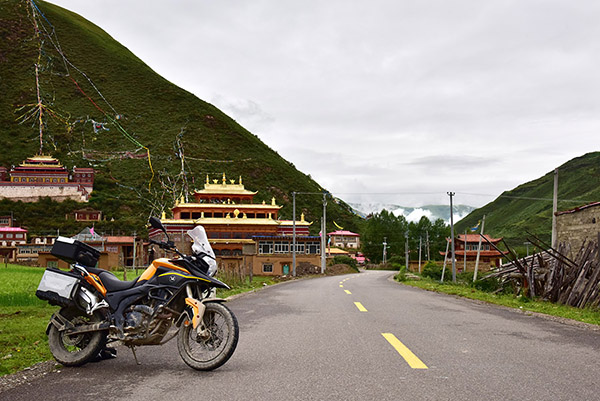
Forest Road 300: Mogollon Rim
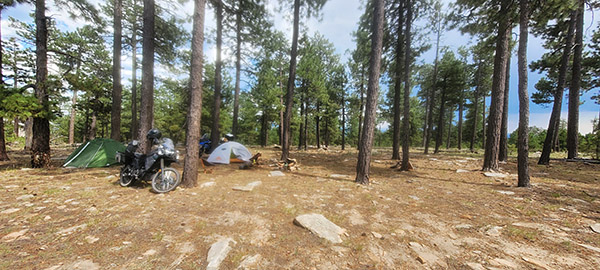
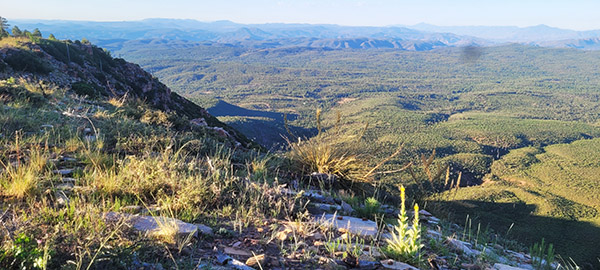
Forest Road 300 begins in the west off Arizona State Road 260 and ends 42 miles later near Payson’s Arizona State Road 87. The Mogollon Rim is home to the largest ponderosa forest on earth. Although there are maintained campgrounds along this road, I prefer to disperse camp. This provides one with the rare opportunity of awaking to an overlook in which you can see for over a hundred miles. This spectacular view is something that a formal campsite cannot provide. The road for the most part is in decent shape (excessive rains this year may have changed this however) and can be completed without a 4-wheel drive vehicle.
When traversing the 7,000+ ft elevation of the Mogollon Rim I will usually just ride down the many side roads until I come upon a campsite that isn’t too crowded or exposed, which I can then call home for the evening. One of the main risks as you are indeed so exposed is that of lightning strike. You may be able to find a perfect cliffside dispersed campsite but be aware that weather changes frequently and it is never okay to set up camp outside the tree line in this area. In fact, as you scout out your site it is wise to look up at the trees. If you see many that have been damaged from previous lightning strikes, this is not a location in which you want to camp.
Another benefit to this area is the cooler weather at these elevations, which makes for a perfect Arizona summer trip. The temperatures can be easily 20 degrees cooler than it is in Payson, which sits at 5,000 feet. The refreshing temperatures and light breezes in the summer make this a perfect location for spending an evening around a campfire with friends while you enjoy the endless views.
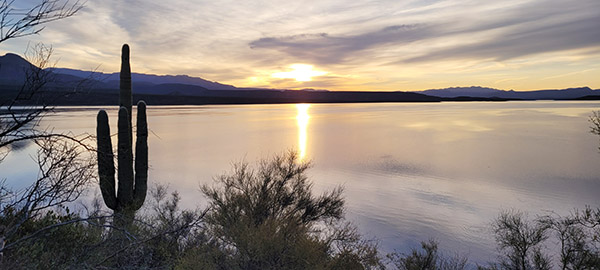
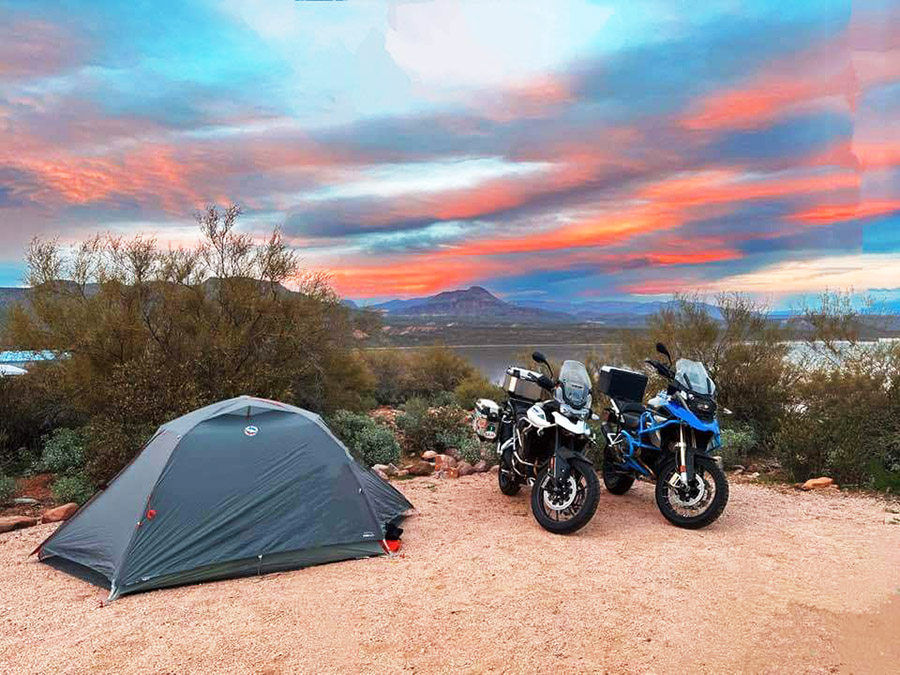
Lake Roosevelt: Cholla Campground
I was hesitant to write about this location as it is my go-to happy place in winter and probably one of my favorite campgrounds in the southwest. In winter it can be a cold drive if you are in northern Arizona until you drop into Payson, where the temperatures quickly gain 15 to 20 degrees and provide reassurance you’ll experience a perfect lakeside camping night (lakeside camping is a rare treat in Arizona).
Cholla Campground is part of the National Park Service so if you have a Senior or Veterans pass the fee is only $12 ($24 without the pass). The site provides water, showers, toilets, and a beautiful lakeside view with an abundance of wildlife. Having an elevation of just over 2,000 feet assures that on most nights, even in winter, it doesn’t get uncomfortably cold.
Another advantage to this campground is there are “tent only” loops so you can distance yourself from those noisy generators and the RV crowd if you choose to. Choosing these loops provides a quiet night as you watch eagles fly by in the evening with their dinner in their talons while you cook a steak over hot coals while having a 360-degree view of the best sunsets.
Arizona is a much more diverse region than most people think it is. This unique state isn’t all cactus and barren desert, and the above two locations highlight this diversity. Motorcycle camping in Arizona can be a year-round pastime without being smothered in heat or waking up with a frozen water bottle (both still seem to happen to me all too frequently).
What are your favorite camp locations in your home state?
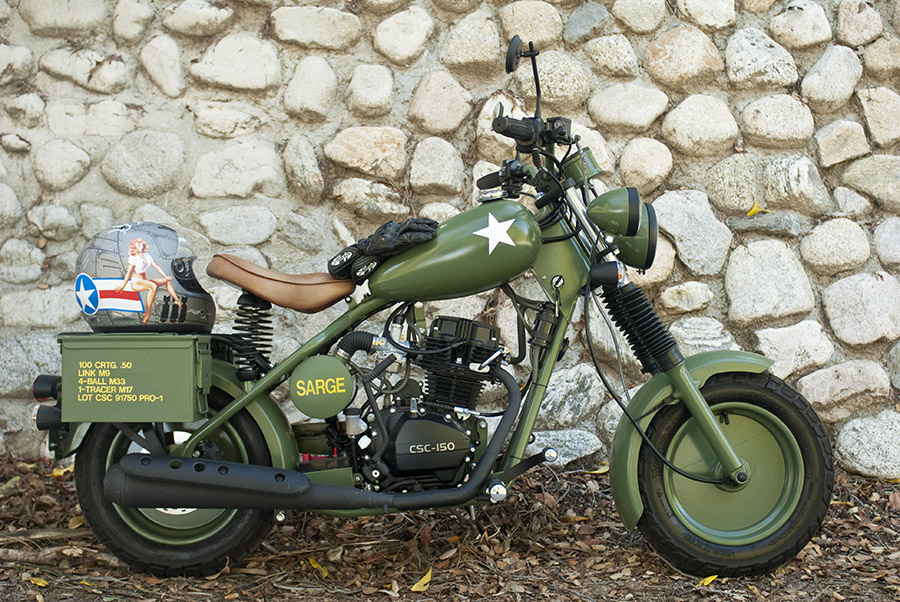
This Wayback Machine post goes back to a blog I wrote for CSC Motorcycles in December 2014. The nine years between then and now has been quite a blur. A bit of background…CSC was transitioning from production of its Mustang replica bikes to importing the about-to-be-released Zongshen RX3. Susie and I went to Chongqing to help finalize the deal, and this was a blog I wrote while I was in that city.
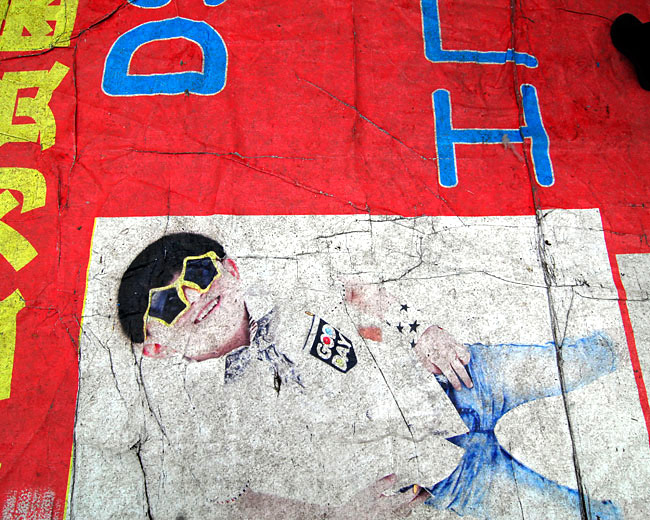
I guess I’ll start by telling you that riding my CSC-150 Baja Blaster, Steve Seidner’s resurrection of the venerable vintage Mustang, has been good practice for me and this visit to Chongqing. When you ride a CSC motorcycle, you collect stares wherever you go (we call it the rock star syndrome, and we even had a CSC custom in the early days we named the Rock Star). The photo at the top of this blog is Steve’s personal CSC-150, the Sarge, and it draws stares wherever it goes. That’s sure been the situation with Susie and me here in Chongqing. Susie and I are the only non-Chinese folks everywhere we’ve been, starting with our getting on the airplane in Beijing, and people are naturally curious. It’s like riding the CSC…we’re drawing the stares. Like the title of this blog says, we’re well off the tourist trail on this trip.
The view from our 21st floor hotel room…it stays misty in this mystical city!
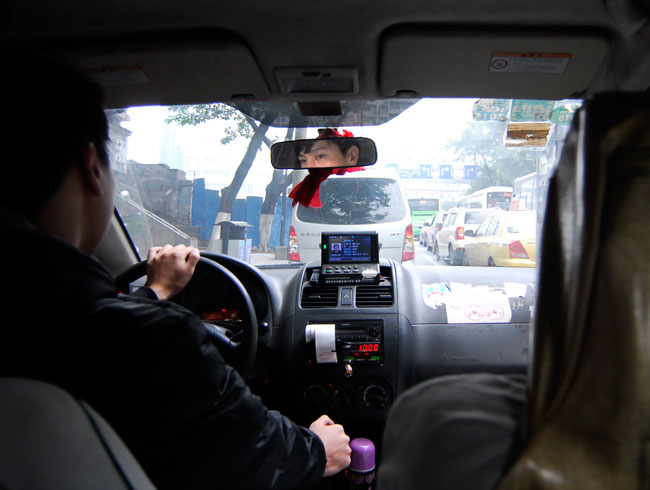
After a great breakfast this morning (see the blog below), we asked about the things to see and do in Chongqing, and our sights this morning settled firmly on a cable car ride across the Yangtze River. We started by grabbing a cab…
I hope this guy knows where we want to go, I thought to myself as we got in his cab…
It’s strange…the cabbie spoke no English, so the guy at the hotel had to explain what we wanted. Then he gave us a card so that when wanted to return, we could show it to the next cab driver. Another sign of not being in Kansas anymore.
You know what to do: Please click on the popup ads!
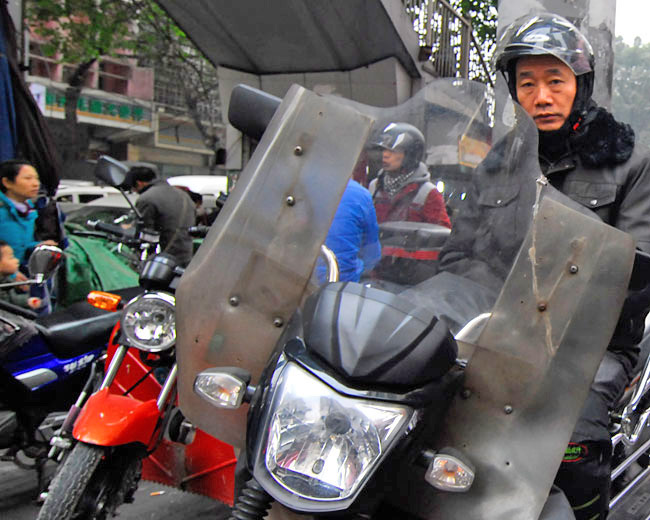
It’s a bit on the cold side over here, but riders ride and the Chinese are no exception to that rule. These folks use their motorcycles as transportation, as trucks, as cabs, and more.
This guy would make a good KLR rider…looks like this bike gets washed about as often as my KLR!
If you take a close look at the photo above, you’ll notice something that’s pretty common here in Chongqing…a set of handwarmers. These are no-fooling-around, guaranteed-to-keep-your-paws-toasty, sure-fire handwarmers, folks! They go way beyond the heated grips that BMW brags about (and that we’ll be offering as options on the Cyclone, by the way). I’ll show you a few more motorcycle photos; be sure to check out the handwarmers on many of these bikes.
Here’s another shot…a Chinese scooter equipped with what has to be the ultimate luggage rack…
The world’s ultimate luggage rack?
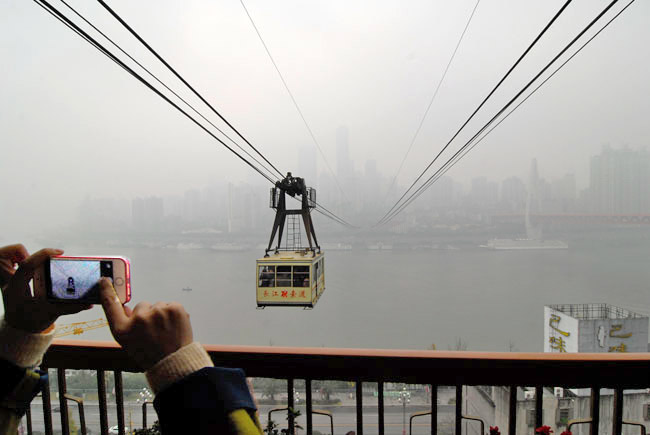
The Yangtze River cable car ride was awesome. It’s about 4,000 feet across the river, and we were packed into that little box like sardines. Going up to the cable car in the elevator gave a hint of what was to come…we were squeezed in with folks I’ve never met before, and I was already more intimate with them than I had been on most of my high school dates. I guess that’s just a natural consequence of being in a city with 34 million inhabitants.
A scene vaguely reminiscent of a James Bond movie…that’s downtown Chongqing in the mist
In the photo above, just to the right of us is where the Yangtze and the Jialing rivers meet. It’s the downtown area that you’ll see in the following photos. 34 million people live here. I’m pretty sure we met about half of them this morning.
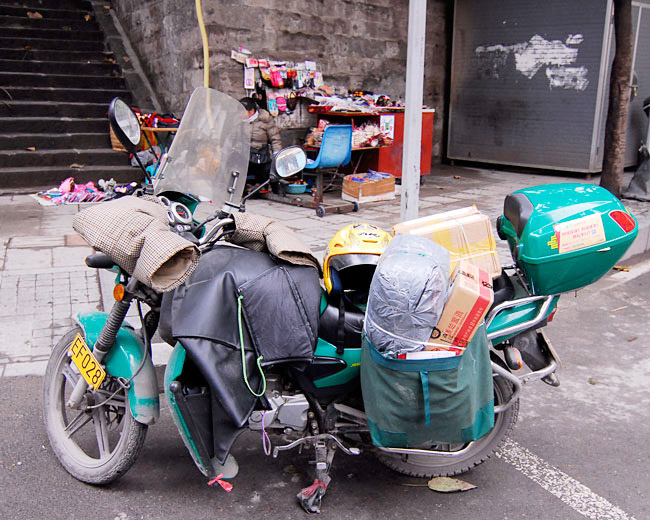
First, a photo of a Chinese postal service motorcycle. They paint their postal service vehicles green. Zongshen is a big supplier of motorcycles to the Chinese postal service. Check out the handwarmers on this rig!
A postal service motorcycle in downtown Chongqing…check out the handwarmers and the parcels
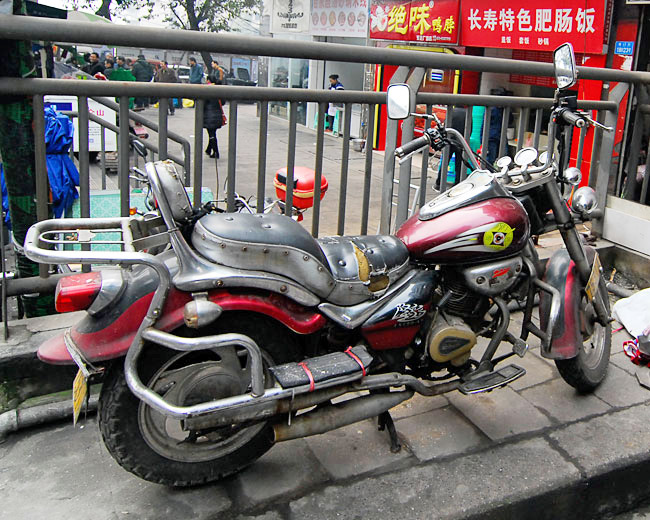
Here’s another bike we spotted while walking downtown.
Live to ride…ride to live…and loud pipes save lives.
There were a lot of people out and about. There were so many people on the sidewalks we were starting to get a little claustrophobic. It’s way worse than New York City. You won’t get a sense of that in the photos that follow, mostly because I waited until there were brief instances when the crowds parted to give me a less-obstructed photo.
Fresh fruit delivered the old-fashioned way.Another fruit transporter.
I grabbed a few more scenes on our walk downtown.
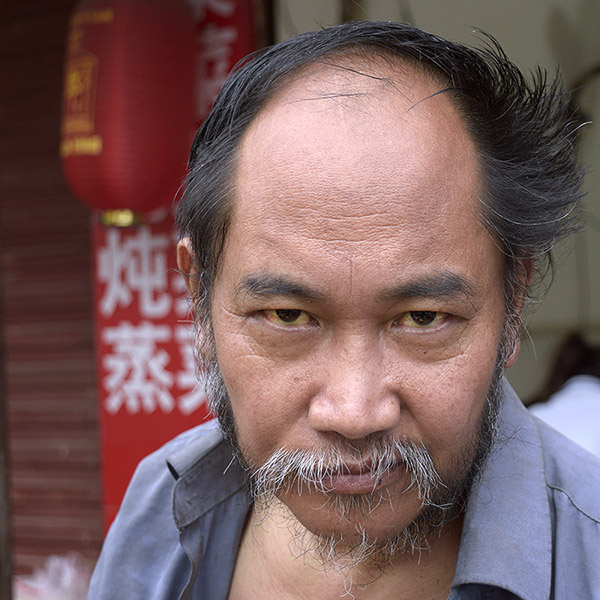
This fellow was making and selling necklace pendants from animal teeth…those are skulls on the ground in front.
Sidewalk art.Colors abound in downtown Chongqing.
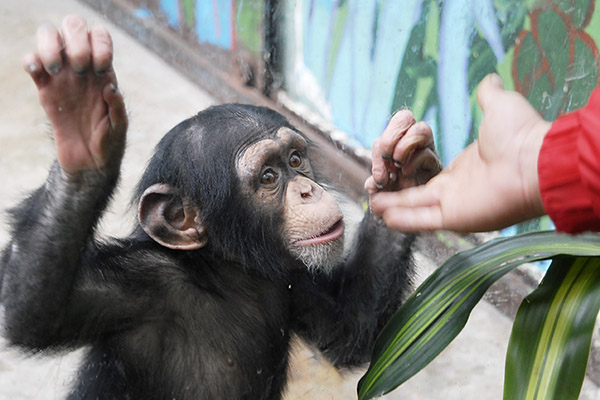
Here’s a cool shot of a youngster who wasn’t too sure about this old guy in an Indiana Jones hat taking his photograph…they don’t see too many people like Susie and me in this neighborhood.
Why is this guy taking my picture?
And of course, the food vendors. We did a lot of walking and bumping into people (literally; the sidewalks were jam packed…it was wall-to-wall humanity). It made me a little hungry. Check out the food photos.
Feeling hungry?
Top Ramen?I’ll bet it tastes good.
Oranges being delivered the hard way.
Chongqing used to be known in the West as Chun King. The way the Chinese pronounce it, it almost sounds like Chun King. When I was a kid, my Mom used to buy Chinese noodles and the name of the company on the can was Chun King. Little did I know that it was a real place and one day more than a half century later I’d be visiting it!
People…lots of people…and motorcycles…lots of motorcycles!
Another Chinese rider in downtown Chongqing.
Just another photo or two, folks. The Chinese use these three-wheel vehicles that I guess are cars, but they are based on a tricycle design. I had not encountered this particular model before, so I grabbed a photo…
A three-wheeler…it’s a cool concept!
I looked inside of one of the three wheelers and it actually looked pretty nice in there. They are used as taxis. Maybe we’ll grab a ride in one before we leave Chongqing.
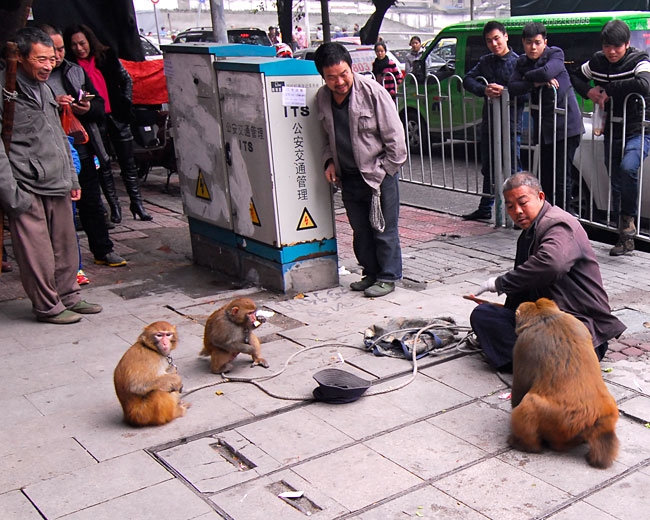
I told Susie that I was getting a bit tired (we’re still fighting the time change). I think I said I wanted to stop monkeying around and head back to the hotel. That’s when she pointed this scene out to me…
Monkeying around in downtown Chongqing…
I think that’s probably enough for now. Tomorrow’s the first day of this visit with the good folks from Zongshen. I’ve been following all the stuff on the forums and in your emails to me, and I’ll address many of the things you’ve written about. I won’t be able to post all of it here, but keep an eye on the blog and maybe I’ll get a photo or two of the factory. I’m pumped, and I’m looking forward to our discussions tomorrow.
That was quite a visit. I’d been to Chongqing once before, but that was an in-and-out trip, and on the visit described above, Sue and I poked around the city a bit. I loved it. It was one of the most beautiful and exotic places I’d ever been. It was fun because we were in a place most Americans don’t get to visit, I made great friends in China, and it was cool being in on the ground floor of the effort to bring the RX3 to America. I know there are a lot of people out there who hate China and who think anything that comes from China is of low quality. I’m not one of those people and I make no apologies for it.
The RX3 was a watershed motorcycle. It was the only small displacement adventure touring bike in America until BMW, Kawasaki, and others tried copying the RX3. The RX3 was still the better motorcycle, and I had a lot of fun on mine.
If you’d like to know more about the RX3 and CSC Motorcycles bringing the bike to the US, pick up a copy of 5000 Miles at 8000 RPM. I’ve been told it’s a good read.


 Arizona has an endless amount of camping areas, both dispersed and in formal campgrounds. I thought highlighting two ends of the spectrum in would be a great way to convey the vast diversity Arizona offers.