
By Joe Berk
I know what you’re thinking: This is going to be a blog either for or against conservatives.
Nope. It’s not. We don’t do politics here on ExhaustNotes. This story is about a Ruger No. 1 that shot far to the right and how I fixed it. If you want politics, watch the news or pick up a newspaper and take in what passes for journalism these days.
This is ExhaustNotes. We’re pure. All we care about are good stories and you clicking on the popup ads.
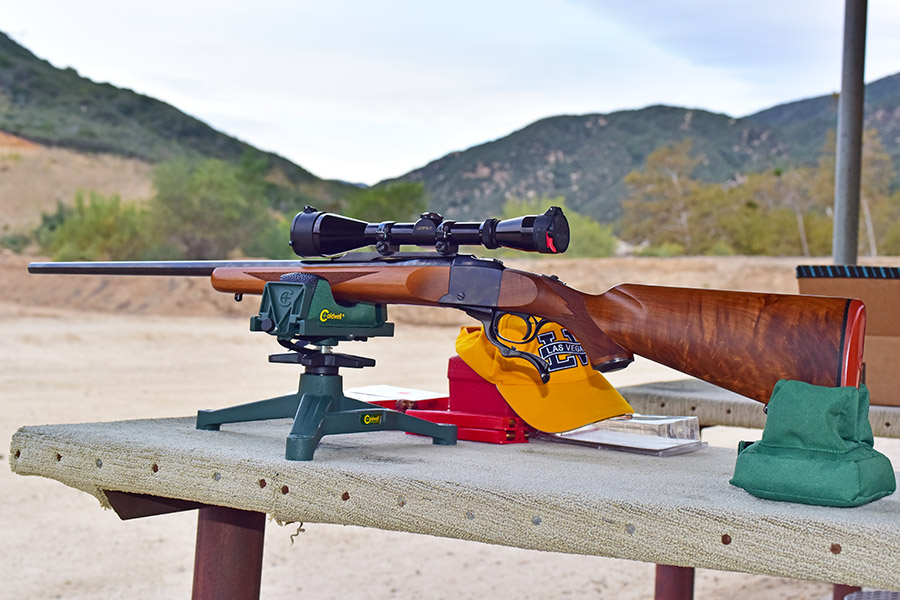
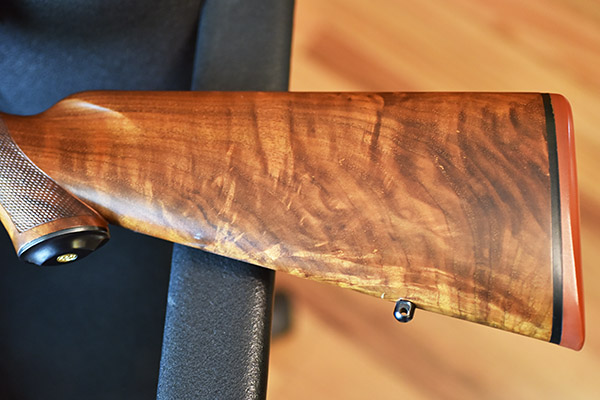
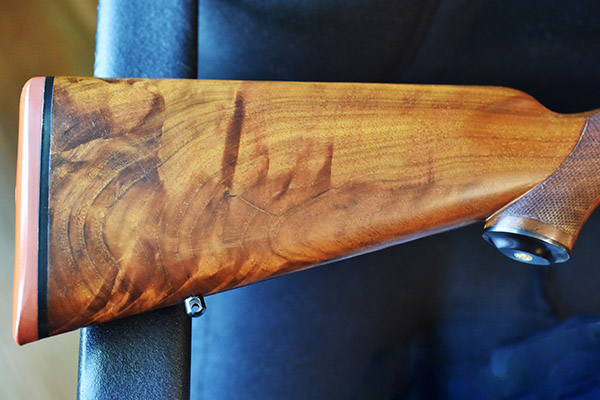
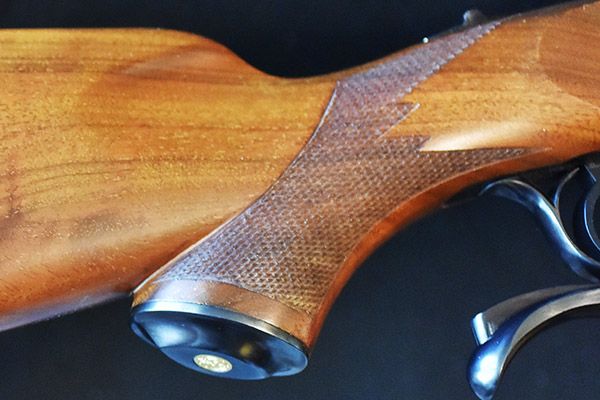
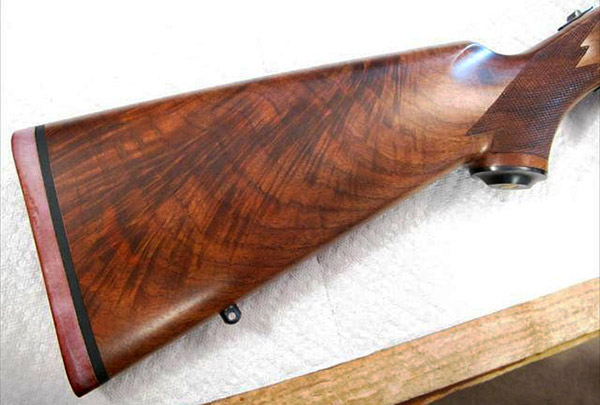
One of my good buddies bought a very slightly used Ruger No. 1 several years ago (it appeared to be unused) after hearing me rave about how classy these rifles are. It’s the one you see in the photo at the top of this blog. This Ruger No. 1 is particularly desirable. It is chambered in .22 250 (a wonderful cartridge), it has fantastic wood, it is an early production model (the serial number dates it to 1971), it has the early style checkering pattern, it has a red pad, and it is a pre-warning gun. My buddy and I both bought Ruger No. 1 rifles that day. His was the .22 250 you see here, and I bought one chambered in .22 Hornet.
Both the .22 250 and the .22 hornet are stellar cartridges, but the .22 250 holds a special place in my heart. The first Ruger No. 1 I ever saw was in a sporting goods store in Bound Brook, New Jersey, and it was chambered in .22 250. The Ruger No. 1 had only recently been introduced, and my father really wanted the one we saw that day. Like all Ruger No. 1 rifles it was elegant, and as a varmint hunter Dad was in love with the .22 250. We didn’t get it, but seeing how excited Dad was left me with a lifelong appreciation for any Ruger No. 1 and the .22 250 cartridge.
So my friend bought the .22 250 (as I mentioned above) but on our first trip to the range his .22 250 was a disappointment. It shot way to the right at 50 yards, even with the scope’s adjustment all the way to the left. It was a frustrating day for him. My buddy removed the scope rings and found that one of them had been bubba’d (the victim of incompetent gunsmithing). It had been crudely filed in an apparent attempt to get the rifle on target. Bubba (the guy who did the work) didn’t understand what he was doing (or how Ruger’s ring design worked) because the material he had removed didn’t shift the scope alignment with the bore (if ignorance is bliss, Bubba was indeed a happy guy). My friend bought a new set of Ruger scope rings and remounted the scope. It made no difference; the rifle still shot far to the right. I was starting to understand why the rifle looked like new. Whoever owned it before encountered the rifle’s bias to the right, couldn’t fix it, and gave up on it.
At that point, my friend lost interest in the rifle, too, and I picked it up from him. It made for an interesting project. I put a different scope on the rifle (a Leupold I had used on other rifles), but the problem was not the scope. The rifle still shot way to the right.
Help us bring more content to you: Please click on the popup ads!
In the past when I had encountered this problem, it had always been due to poor forearm bedding. I closely examined the Ruger and determined that the rear of the forearm had clearance between the forearm and the receiver on the right side, but it was contacting the receiver on the left side. That would push the barrel to the right, and it could cause the strong rightward bias this rifle exhibited. You’d be surprised; it doesn’t take much pressure on a rifle barrel to push the point of impact significantly off center. I removed the forearm, delicately sanded it at the rear to have the same forearm-to-receiver clearance on both sides, and remounted it. At the next range session, I saw that my efforts had no impact. The rifle still printed far to the right and the group size was running 2 ½ to 3 inches at 100 yards. It was terrible.

I next tried shimming the scope. Using thin metal shims, I angled the scope enough in its rings to get its range of adjustment on target. But I still had to have the scope cranked all the way to the left, and the rifle still grouped poorly. The scope shims were a Mickey Mouse, Bandaid approach. I knew this wasn’t the solution.
Sometimes when you can’t find the answer to a problem, the best thing to do is ignore it for a while. I put the rifle in the safe and forgot about it for a few weeks. Then one day when I was driving back from one of our adventures, my mind drifted back to the Ruger. The Ruger No. 1 has a very slick quarter rib at the top rear of the barrel. The scope rings attach to it, and the scope mounts in those rings. I wondered: What if that rib was mounted at an angle to the barrel’s bore? The solution, I thought, might be a new quarter rib.
I called Ruger’s customer service (a marvelously responsive organization) and told them about my problem and that I thought I needed a new quarter rib. A few days later, I had one. At that point, things became even more interesting. The older Ruger No. 1 rifles (including my .22 250) had quarter ribs that mounted with two Allen-head screws, and the barrel had a pin that fit into a hole in the quarter rib. The quarter rib Ruger had just sent to me had two holes for the mounting screws, but no hole for the pin on the barrel. I thought about that and it made sense; the barrel pin was a belt-and-suspenders feature and it was unnecessary. Ruger made the right engineering decision to eliminate it. I thought I could just drill a hole in the new quarter rib or I could pull the pin from the barrel. I would soon learn that neither one of these solutions was going to happen.
My first step was to remove the Ruger’s quarter rib. That’s when the fun began. As I mentioned earlier, the quarter rib is secured to the barrel with two Allenhead screws. The problem I immediately ran into was that the Allen socket is very small, and those screws were originally installed with a lot of torque. I put a small Allen wrench on each screw and both wouldn’t budge. I had an Allen socket head and a ratchet that would give me more leverage, but the screws were so secure I was afraid I would round out their Allen sockets trying to remove them. I was getting nowhere with the little Allen wrench. In for a penny, in for a pound, I thought. I mounted the Allen socket on my ratchet and, with great trepidation, starting putting more torque on each screw. It worked. Both screws came out with their Allen heads intact. They hadn’t been Loctited; they were just torqued by a madman (or a madwomen), or more likely, somebody at Ruger with a power tool.
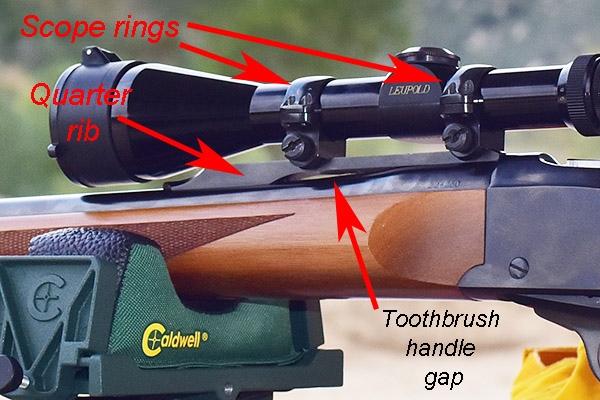
Okay, the screws were out, so I thought I could now remove the quarter rib. “Thought” is the operative word in that sentence. That quarter rib wasn’t going anywhere. It was wedged onto the barrel like it was welded. There is a small gap between the bottom of the quarter rib and the top of the barrel (you can see it in the photo above), but I didn’t want to stick a screwdriver in there to pry the quarter rib off. It would have scarred the barrel or the quarter rib or both. I needed something softer that wouldn’t mar the barrel or the quarter rib.
If you’re like me, you save old toothbrushes and use them when cleaning your guns. I thought I could use one of mine. Its plastic handle wouldn’t damage anything. The toothbrush handle was too thick to fit in the gap, so I filed it down to create a wedge. That got the handle in between the quarter rib and the barrel, but the quarter rib wasn’t going anyplace. I worked on it for 20 minutes until I broke the toothbrush handle in two. So I filed down another toothbrush handle. Three modified toothbrushes and an hour later, the Ruger’s quarter rib came off.
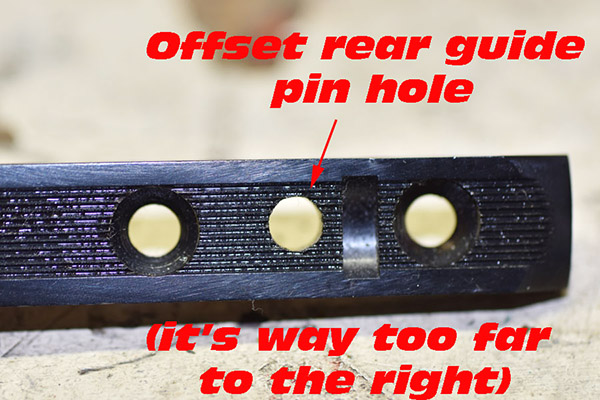
My initial thought was that what had made the rib so hard to remove was that its rear was interfering with the front of the receiver. That was sort of the issue, but it wasn’t induced by the quarter rib’s length or the receiver’s dimensions. I looked closely at the quarter rib and then I was really surprised. The hole for the barrel pin was off center. By a lot. Wow, I thought. That would certainly push the barrel to one side. It was what had been causing the rifle to shoot way to the right. It was a subtle anomaly. Who would have thought this had been the problem?
I was surprised that Ruger was able to assemble the rifle, but then I remembered what I had thought about earlier. Ruger probably used a powered screwdriver when installing the quarter rib’s Allen screws, and the technician who assembled the rifle probably did not notice the increased torque required to install the screws. The conversion of screw torque to linear force is extreme; I once participated in a fatality investigation where an operator sheared a munitions safety pin screwing on a submunition parachute without realizing what he had done (and the device detonated). But I digress; back to the Ruger story.
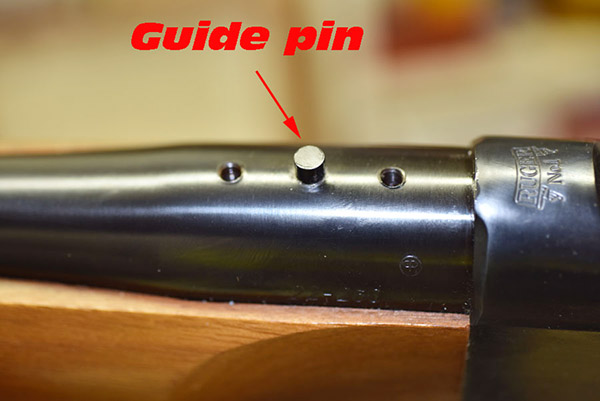
I examined the barrel pin (the pin that fit into the barrel to help locate the quarter rib). It was a press fit in the barrel, and it was obvious it wasn’t going any place. I thought about trying to pull it out with a pair of visegrips, but again, I didn’t want to bubba up this beautiful rifle. That meant I wasn’t going to use the new quarter rib Ruger had sent to me. When I tried to put the old quarter rib back on the barrel, the misalignment between the barrel rib hole and the screw holes was obvious. After thinking about this a bit (and realizing the barrel pin was unnecessary), I concluded that the best fix would be to simply enlarge the offset rib hole so that it allowed clearance between the barrel pin and the quarter rib hole.
I took a small circular file to the quarter rib hole and got nowhere fast. The quarter rib had been hardened to about two million on the Rockwell C scale. To enlarge the hole, I would have to grind it. I mounted a small rotary stone on my Dremel tool and went to work like a demented dentist. It took a while, but I finally enlarged the hole enough so that the quarter rib and its mounting screws could be installed and removed from the barrel easily. I used cold blue to blue the quarter rib’s hole inside diameter (where I had removed material), remounted the quarter rib, reinstalled the Ruger scope rings, remounted the scope, and headed to the West End Gun Club.

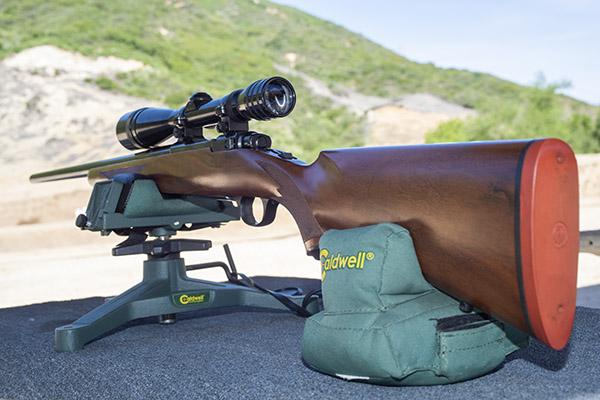
The trip to the range was extremely satisfying. The rifle’s extreme right bias completely disappeared, and after a few adjustment shots, the holes on the target were in the black. More surprisingly, the Ruger’s groups shrank dramatically. The No. 1 had been a 2 ½ to 3 minute of angle shooter before I corrected the quarter rib mounting issue; now it was a sub-MOA rifle. Life was (and still is) good. I love my Ruger No. 1 rifles, and I especially love this .22 250. I have two other Rugers chambered in .22 250. One is an unfired 200th year No. 1 with even better walnut (see below). The other is a tang safety Model 77 with the heavy varmint barrel (also see below). I could be talked into selling these two rifles, but not the .22 250 featured in this blog. I’m keeping that one for the duration.
More Tales of the Gun!
Never miss an ExNotes blog:
So Joe I just had an auto body friend work on my van and it had very stubborn screws I couldn’t get out. He tried and got them right out. An older guy that taught him told him on stubborn screws to first tighten them till you just feel them budge. Then unscrew them. Seems like tightening them breaks the adhesion and then they can unscrew. He said he does it all the time on cars.
Great article figuring out the sighting problem Joe.
Thanks, Rob.
What’s pre-warning?
And people hunt varmints with whatever one calls these rifle Vice things and sandbag looking stuff?
“Oh please mr gopher, can you sit in front of the black rings?” Lol.
As to the article itself. Very interesting . You really did a great investigative job and adjustment /repair.
But I suppose stuffing some .22 bird shot in my mossberg palomino to take out bird feeder raiding squirrels isn’t something I can simply do without all this fancy target gear .
Oh well. Life is a bitch if not unduly complicated .
Around 1977 Ruger started adding a warning on the barrel to read the instructions. No doubt something some lawyer thought was a good idea.
oh! lol pre 77 !
i would have never guessed.
I bet the person who assembled the gun at the factory noticed the increased torque on those screws but figured once the screws were set all was good. Unless it was that person’s first day on the job.
Hard to say. I’ve seen people do some pretty scary things unknowingly with power tools.
Very spiffy No. 1A and interesting report.
Thank you. It is something I had no seen before; I thought other No. 1 aficionados might enjoy hearing about it.