The 5 Stupidest Ideas in Motorcycling

We don’t do many listicals here at ExhaustNotes.us. Editorial policy frowns on the cheap, easy list as a lazy man’s way to get attention. However, that doesn’t mean we are completely immune to the meth-like attraction of lists. The thing is, click-bait lists are nearly impossible to get right. Whatever harebrained idea you’ve thought of to generate more clicks, and hopefully shares, will be blown out of the water in the comments section by people much, much smarter than you. And that’s ok, that’s why listicals are so popular.  It’s a way to piss people off and generate interest.

Number 1: ABS Brakes

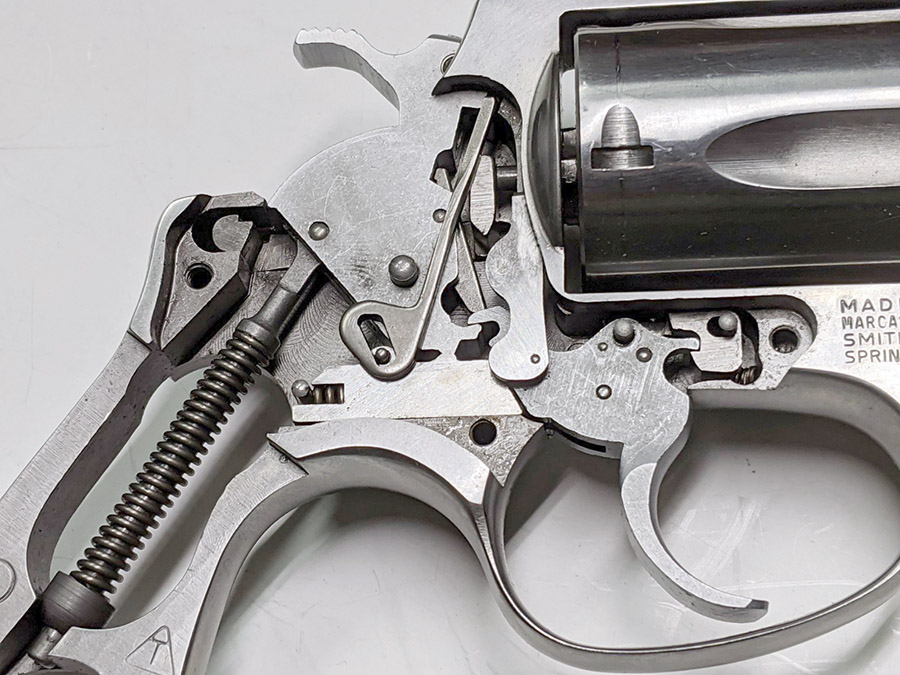
I don’t know which lawyer came up with the idea, but it had to be a lawyer. Full-time Antilock Brake Systems are the single most dangerous feature on modern motorcycles. Just a month ago my buddy forgot to disarm his BMW’s antilock system after a trailside nap. (The BMW system defaults to “on” whenever you shut off the bike.) After we started riding again the trail turned steeply downhill. The steepness of the descent meant that rain washed away any fine sands and left behind large rocks and boulders. His BMW rolled and rolled.  All attempts at braking were futile and so naturally he crashed. The bike was basically freewheeling down a rocky hill. At least his BMW had the option to opt out of ABS.

There’s no sicker feeling than panic stomping on the brakes and nothing happens. Any motorcycle that even slightly hints at off road capability should come with a means of disabling the ABS. For that matter practically every street bike has been known to travel a dirt road or two so really all motorcycles should come with the ability to disarm the ABS. These aren’t cars we’re talking about here. Many occasions call for a motorcycle rider to lock up the rear wheel and sometimes (like on that rocky downhill) lock up the front wheel.

Number 2: Keyless Ignitions

Those electronic key fobs are a stupid solution to a problem nobody had. What is wrong with a plain old key? You know, the kind you can have a duplicate made almost anywhere? The stupid electronic-proximity widgets are huge, like the size of a Krispy Kreme doughnut. They are bulky in your pocket and you’ve got to keep a good battery in them just to start your bike! God help you if you ever lose the thing. It will require a dealer’s services and several hundred dollars to program your new Kreme.

Most times I’ve ridden a bike that came with a clunky electronic key fob I ended up leaving the thing in the saddlebag or hidden on the bike somewhere. This defeats the purpose of having any sort of lock on your motorcycle at all but I’d rather have the bike stolen than carry that stupid key fob. I suspect the real reason for the electronic key fob is to allow constant surveillance at the factory level. Didn’t make that latest payment? No problem we’ll disable your ride until you cough up the cash, Highway Rebel!

Number 3: Helmet Communicators

These silly devices allow passenger to operator conversation or communication between groups of riders. Precisely the thing you’re trying to get away from when you ride a motorcycle. Look, if I want to know what you’re thinking, which I don’t, I’ll wave you to a stop and we will discuss it hand to hand. The advertisements for these Zen-terrupters tout range and clarity as if those are aspirational goals. I might buy a set if the manufacturer promised me the damn things would never work.

Some of you find pleasure in the constant road-chatter. Not me, I want you to keep your thoughts to yourself and I’ll do the same. Some of you think that communication devices are a good way to warn back markers about road conditions. That assumes anyone will actually believe you after that last bone-headed move you pulled leaving the Waffle House. Then I’m told they are good for keeping the group together so that stragglers won’t get lost. Has it ever occurred to these pro-communication, Chatty Cathy’s that the stragglers want to get lost? That maybe they are sick of your yapping about fence posts, tar snakes and how you want everyone to stop because you have to pee. Aren’t you old enough to go to the bathroom alone?

Some of my most memorable group-ride dinnertime discussions have been a result of the group breaking up, missing turns, getting lost and arriving at the restaurant with wild stories to tell. That won’t happen if everyone has had the exact same experience. “Did you see the size of that buck?” is met with a flat-toned chorus, “Yes, we all heard over the radio and saw the buck.” rather than “No, but the hitch hikers we picked up when we made that wrong turn robbed us at gunpoint and then Phil ran off with the redhead.” Remember, the best part of riding in a group is being alone.

Number 4: Entertainment Systems

This includes stupid Bluetooth, interconnecting phone features, stupid music systems and stupid, play-pretty graphics that distract a motorcyclist from the main job at hand: staying alive. Riding a motorcycle is dangerous enough without the rider fiddling around with the dash display on his motorcycle. Engine RPM and velocity, along with distance traveled is all the data you need to correctly operate a motorcycle. Page after page of bright, TFT-BS will only make you worry about the minor fluctuations any mechanical device goes through in the normal prosecution of its job.

No one ever cared about their tire pressures until those TPS systems polluted the instrument panels of America. Now it’s like everyone is running Moto GP and 1 psi really matters. Stop it! And if your idea of a fun motorcycle ride is playing with the stereo and poking your thumb at 45 different handlebar buttons maybe you should quit changing the display settings and just stay at home with your younger brother’s Nintendo. The one your parents made him put down in the basement so the noise won’t bother your mom’s overly sensitive ears. Doesn’t it seem like the older she gets the more sound annoys her?

Number 5: One-Piece Riding Suits on the Street

I know some riders swear by one-piece suits but don’t take their opinion on the subject, take mine. I had a one-piece leather suit 43 years ago and the trauma from that experience still haunts me. Many a night I wake up in a cold sweat having to use the restroom but mentally stuck inside a one-piece suit. I can see road racers wearing one piece suits for the extra protection they afford during high-speed get-offs. If you’re riding your street bike anything like a Moto GP star you should probably not be riding on the street. Sure, they look great in website road test photos but those guys are only riding the bike for 15 minutes at a time. As soon as the camera stops clicking they peel that crap off toot-sweet.

For normal, everyday riding a one-piece suit is incredibly inconvenient. There are only a few things more disgusting than using a filthy, urine-soaked gas station toilet and one of them is using a filthy, urine-soaked gas station toilet while wearing a one-piece riding suit. Once you wiggle out of the top and drop your drawers you’ll soon realize that there is not enough space between the lip of the toilet and the urine-soaked floor for all that material. It’s like trying to corral your parachute in France after you’ve landed behind enemy lines on June 6th, 1944. Ok, I have no idea what that’s really like but you kind of sit there holding the bag: Practice hovering if you simply must mimic Marc Marquez on your Honda Blah.

I have more stupid motorcycle things, many more, but 5 is a good number to stop at. I mean, I may have to test some of these stupid motorcycle ideas and I don’t want to use up all my outrage in one story.


More Joe Gresh is here!


Joe Gresh Enfield and Baja impressions are here!

A TJ tune for my Model 60

I had trouble selecting a title for this blog.  The other contender was 50 Shades of Gray to go with the big photo you see above.  I wish I could say I took that photo, but the credit goes to good buddy and master gunsmith TJ.  TJ is the best pistolsmith there is, and one of the things that makes working with him so enjoyable is his photography.  When TJ works a custom gun project, he photodocuments it to keep you appraised of what’s going on, and a couple of the photos you see here are the ones he sent to me on my Model 60 project.   But I’m getting ahead of myself.  Let me back up a bit.

If you follow the blog (and you all do, right?), you’ve been watching the Star reloader resurrection project I’m working.  That’s coming along nicely, and I’m already making .38 Special ammo on my resurrected reloader.   This story started with my noticing an ad in my gun club newsletter for a Model 60 at a killer price.  I’m normally not a snubnose kind of guy, but hey, a deal’s a deal and I like the idea of a snubnose .38.  Maybe I watched too many cop shows in the ’50s and ’60s.  You know.  Cannon, Kojak, Hawaii 5-0, 77 Sunset Strip, Dragnet…you get the idea.  All those guys carried snubbies.

Anyway, the Model 60 was a good deal, but swinging the cylinder out to the side was a bit dicey…sometimes it wanted to stick.  The seller told me about that but I didn’t see it as a problem.  I saw it as an opportunity to do another project with good buddy TJ, and that’s what I’m doing.  TJ is doing his Level 1 action job for me (polishing all the internals and lightening both the double and single action trigger pulls), and I’m having him also put a mirror finish on the cylinder, the ejector rod, the cylinder release, the trigger, and the hammer.  It will make for a nice, subtle contrast with the brushed stainless finish on the rest of the gun.  That leaves only the grips, and I’m doing something about those, too.  TJ put into words what I was thinking, and that was that the stock grips (the ones you see above) are butt ugly (pardon the gun pun).

Back in the day Smith used to offer uncheckered rosewood grips, and that’s what I really wanted.  They don’t sell those any more, though, and I mentioned to TJ that I should have bought a set back in the ’70s.  You know,  just in case.  “Try E-Bay,” TJ said, and I did.  I hit paydirt almost immediately, and the grips you see below are on their way to me now.  Rosewood.  Smooth.  Just what I wanted.

The finish on my inbound grips may be a little funky, but that’s another opportunity, too.  It’s TruOil time, folks.  TruOil and a little patience will have these grips looking literally better than they did when they left the S&W factory in Springfield.

The Star reloader is operational now (I’ll show you more on the Star resurrection in upcoming blogs, and I’ll include a video that shows it making finished ammo).  I’ll have the Model 60 back in a few days, so I went ahead and loaded a box of ammo with the outstandingly accurate 158-grain cast bullets I get from my good buddy Roy.  It took only a few minutes on the Star (it would take closer to an hour on a single-stage press).  For a machine that’s probably older than I am, the Star sure does a good job.

When I take my custom snubbie .38 to the range, I’ll grab a few photos and share a range report with you here on the ExNotes blog.  Stay tuned, my friends, and keep your powder dry.


More Tales of the Gun!


Enter your email address for a free subscription to ExNotes!

The $100 Hamburger…

The $100 hamburger:  It’s aviation slang for any hamburger that requires flying in to a local airport for a burger. I first heard the term from good buddy Margit Chiriaco Rusche when researching the story on the General Patton Memorial Museum.  You see, there’s still an airport at Chiriaco Summit, left over from General George Patton’s Desert Training Center.  Margit told me about pilots flying in for the mythical $100 hamburger at the Chiriaco Summit Café, and I knew I had to have one as soon as she mentioned it.  The Café doesn’t actually charge a hundred bucks (it was only $15.66 with a giant iced tea, fries, and a side of chili); the $100 figure pertains to what it would cost a pilot to fly your own plane to Chiriaco Summit, enjoy the General Patton Burger, and fly out.

Even though bloggers like Gresh and me are rolling in dough, we don’t have our own airplanes.  But we have the next best thing.  Gresh has his Kawasaki Z1 900, and I have my Royal Enfield Interceptor.

Good buddy Marty (a dude with whom I’ve been riding for more than 20 years) told me he needed to get out for a ride and I suggested the Patton Museum.  It’s a 250-mile round trip for us, and the trip (along with the General Patton Burger, which is what you see in the big photo above) would be just what the doctor ordered.  I’d have my own hundred dollar burger, and at a pretty good price, too.  Two tanks of gas (one to get there and one to get home) set me back $16, and it was $18 (including tip) for the General Patton Burger.  I had my hundred dollar burger at a steep discount.  And it was great.

I’ll confess…it had been a while since I rode the Enfield.  In fact, it’s been a while since I’d been on any ride.  I didn’t sleep too much the night before (pre-ride jitters, I guess) and I was up early.   I pushed the Enfield out to the curb and my riding amigos showed up a short time later.  There would be four of us on this ride (me, Marty, and good buddies Joe and Doug).   Marty’s a BMW guy; Joe and Doug both ride Triumph Tigers.

As motorcycle rides go, we had great weather and a boring road.  It was 125 miles on the 210 and 10 freeways to get to the Patton Museum and the same distance back.   Oh, I know, there were other roads and we could have diverted through Joshua Tree National Park, but like I said, I hadn’t ridden in a while and boring roads were what I wanted.

The Patton Museum was a hoot, as it always is.  I had my super fast 28mm Nikon lens (which is ideal for a lot of things), and I shot more than a few photos that day.  You can have a lot of fun with a camera, a fast lens, a motorcycle, and good friends.  A fast 28mm lens is good for indoor available light (no flash) photography, and I grabbed several photos inside the Patton Museum.

It was a bit strange looking at the photos of the World War II general officers, including the one immediately above.  I realized that all of us (Marty, Joe, Doug, and I) are older than any of the generals were during World War II.  War is a young man’s game, I guess.  Or maybe we’re just really old.

You can see our earlier pieces on the Patton Museum here and here.  It’s one of my favorite spots.  If you want to know more about Chiriaco Summit, the Chiriaco family, and the General Patton Memorial Museum’s origins, I highly recommend picking up a copy of Mary Gordon’s Chiriaco SummitIt is an excellent read.

We rode the same roads home as the ride in, except it was anything but boring on the return leg.  We rode into very stiff winds through the Palm Springs corridor on the westward trek home, and the wind made for a spirited ride on my lighter, windshieldless Enfield Interceptor.  My more detailed impressions of the Enfield 650 will be a topic for a future blog, so stay tuned!


Never miss an ExNotes blog!  Sign up for free here:

The Star’s Hulme Case Feed Mechanism

The Star story just keeps getting better.  I not only picked up the reloader for free…I also got a free Hulme case feed mechanism.  I didn’t realize what I had until I started learning more about these marvelous old machines.

You may remember that we posted a blog a month or so ago about the Los Angeles Sheriffs Department Pistol Team.  It was a cool old video (it was from the 1930s), but I didn’t realize just how cool it was until I spoke with my buddy Paul about the Star reloader I’m resurrecting.  Paul mentioned that the LASD video had a segment about reloading .38 Special ammo, and as soon as he said it, I remembered the scene.   You’re certainly welcome to watch the entire video again, but my advice would be to jump to the 13:57 mark to see the Star reloader in action:

Man, those guys are busy, I thought as I watched them reloading .38 Special ammo in the video above.   It’s almost as if you need three hands (or two people) to operate the Star.  For every cycle, you need to:

      • Insert a case in the shell plate.
      • Insert a bullet in the case that’s just been charged with powder.
      • Pull the main lever down.
      • Pull the main lever up.
      • Index the shell plate one position counterclockwise.

Then I realized:  The guys in that video above were placing the empty .38 Special cases directly into the shell plate.   My Star doesn’t work that way.  It has a case feed mechanism.  Instead of inserting the empty case directly into the shell plate, you insert the case into the case feed mechanism.  Why do that, I wondered, when you can insert the case directly into the shell plate?

Then it hit me:  My Star had the optional Hulme case feeder.  It was missing a couple of parts (the empty case magazine and the support for that magazine), but those parts would be easy to replace or make myself.  That way, I wouldn’t have to insert an empty case into the Star every time I pulled the lever.  I could just load up 25 or 30 cases at a time, and the Hulme case feed mechanism would take care of the rest.  That would simplify the number of actions I’d have to do each cycle. Woo hoo!

Here’s another YouTube I found that explains how the Hulme case feed mechanism works.

It’s all very clever.  I started this part of the Star resurrection by cleaning up the Hulme case feed mechanism on my press.

Here’s what it looked like before I disassembled it for a more thorough cleaning.  Notice the rusty cam angle at the top of the photo below.

Here’s another photo of the rusty cam.  It’s the piece that drives the Hulme case feeder to the rear when the tool head is lowered (which occurs when the main lever is pulled down).

The Hulme case feed mechanism attaches to the Star base with a single Allen bolt.  Stars originally did not have that hole in the base, but the Hulme case feed mechanism was such a popular option that Star included a drilled and tapped hole (for the Hulme device) on all their presses sometime around 1959.  I learned this from good buddy Bruce at Star Machine Works in New Jersey.

I removed it and then cleaned the case feed mechanism with Kroil, WD 40, and Scotchbrite.

Then I went to work on the cam and its mounting bracket with Kroil and Scotchbrite.  After that, I remounted the Hulme case feed mechanism.  Here’s what the case feed mechanism looks like in operation:

So, I had the case feed mechanism cleaned and it was operational.  But I still needed to feed in a single case every cycle.  I didn’t want that; I wanted the cases to feed automatically.  It was time to channel my inner Bubba.  All I needed was a tube in which to stack empty .38 Special cases above the case feeder, and a means to secure that tube.  Hulme originally offered the componentry to do that, and my good buddy Bruce at Star Machine Works (the company that restores these magnificent old reloaders) offers the parts, but I hadn’t spent anything on my Star, and I wanted to keep it that way just for the sake of living up to my cheap SOB reputation.  I wondered:  WWJGD (what would Joe Gresh do)?  I noodled a few ideas around, and then went to the closet for a coat hanger.  I already had a clear plastic tube from one of my Lee reloading presses.

Like we say in French: Voilà!

The Star and its Hulme case feed mechanism works, and it works well. Take a look!

We’re getting pretty close to being done with the Star resurrection project, but there are still a few more things I want to show you.  Stay tuned; you’ll see them right here on the ExNotes blog!


Subscribe for free!


Read the entire Star resurrection story here, along with our resurrections of other cool old machines!

Dream Bike: Ossa Pioneer

The styling of the 250cc Ossa Pioneer is what attracted me to the bike in the first place. I loved the old-fashioned, pin-striped black panels over the orange base. It was like some sort of cheerful, horse drawn funeral wagon. That cool rear fender extension gave the bike a flat track look that I have been a sucker for since forever.

The Spanish built Ossa’s bodywork was fiberglass, the original miracle plastic that many manufacturers used back in the late 1960s and 1970s. Unfortunately, modern alcohol laced fuel plays hell with fiberglass so the use of the miracle plastic has faded. Rotocast, alcohol resistant, poly-some-such-crap has taken its place. The new stuff is not without its problems as I’ve had fuel tanks that were exposed to sunlight crumble into dust. (Don’t leave your weed whacker in the back of a pickup truck for 6 months.) I’m assuming that problem has been fixed because the IMS rotocast tank on the Husky has held up fine for 5 years.

The Ossa was similar in construction to a Bultaco but where there were four or five Bultacos running around the town where I grew up there were no Ossas. So maybe rarity has something to do with my fascination with the brand.

The cycle magazines of that era praised the Ossa for its handling and generally good off road manners. One road tester stuck a spare plug in the Ossa’s fiberglass rear fender storage area and then complained when the loose plug beat a hole in the compartment…after riding trails. Even as a young whippersnapper I knew you couldn’t let stuff bounce around on a dirt bike. I felt the Ossa name was sullied for no good reason and if it was me that did something so stupid (and I have) I would have kept quiet about the situation.

I saw a Pioneer race motocross out at Haney Town a long time ago. Tuned softer than a MX engine, the Ossa grunted around the track fairly well. The rider was talented in the art of crossing-up and wasted valuable energy and time showboating over each jump. Still, it had the desired effect. I wanted an Ossa bad.

Ossa prices are still very reasonable as they are still not popular. A couple grand should get a fairly clean runner and that’s some cheap vintage dirt riding my brothers. The bikes are easy to fix and I’m sure you could order any part need from some hole-in–the–wall bike shop over in Spain. Just remember to use non-ethanol fuel or your gas tank will turn mushy inside.

Later Pioneers, called Super Pioneers, were styled in a more modern fashion and don’t tug at my heart like the old ones. I guess it’s a little odd to want a motorcycle that you’ve never ridden and only seen one running many years ago at a motocross race. Stranger still is my defense of the Pioneer’s rear fender compartment, but that’s the way love works. It sinks its hooks into you and the pain never subsides. You never forget your first Ossa and one of these days I’ll have my very own Ossa Pioneer.


More Dream Bikes are here!

Subscribe here for free:

The Star Primer Feed Mechanism

The next steps in bringing the Star progressive reloader back to life focused on the primer feed mechanism.  That subsystem consists of the primer follower rod (the upper red arrow in the photo below), the primer magazine (the middle arrow in the photo below), the primer pickup and feed mechanism (the lower red arrow in the photo below), and the primer seating device (which is under the base of the reloader, as you’ll see further along in this blog).

In looking at the primer feed mechanism, the primer magazine , and the primer follower rod, I could see they were mighty funky and thoroughly oxidized.  I wondered if they were all made of brass.  The tip of the primer follower rod obviously was (see the photo below), and probably the feed mechanism base was, but the magazine tube and other parts were so corroded I couldn’t tell.

Then I realized I had another question.  See the spring in the photo below?  That one through me for a loop.  I couldn’t see that it served any function, and all the online references I found for Star reloaders did not show it.   So I sent an email to my good buddy Bruce over at Star Machine Works (the outfit that restores and sells parts for Star equipment).

Bruce responded quickly.  Here’s what he told me:

Hi Joe,

The spring is a hitch hiker on your machine. Nothing to do with a Star.

Bruce

A hitch hiker.  That got a laugh.

The primer pickup and feed mechanism (shown below) is what takes primers from the primer magazine and pushes them below the empty case.  That L-shaped lever on the right?  It’s the primer slide angle lever (shown by the lower arrow).  It’s actuated when the primer feed cam (shown by the middle arrow) descends as the tool head is lowered on each stroke.  The lever in turn actuates the primer slide in the feed mechanism (shown by the lower arrow), and that’s what picks up a primer from the magazine and positions it underneath the empty case.

With the primer now in position beneath a .38 Special case, it needs a way to be inserted into the case.  The Star has a clever way of doing this that takes advantage of the fact that there’s a shaft in the tool head that descends with the tool head when the main lever is pulled.  When the main lever is actuated and the tool head descends, the shaft fits through a hole in the shell plate and extends into the base of the reloader.  The tip of the shaft pushes one end of a pivoted lever down, and that then pushes the other end of the lever up.  That end actuates a plunger that seats the primer into the empty case.  Here’s what the lever looks like underneath the reloader.

Like I said, it’s all quite clever.  The guy that designed the Star was a mechanical genius.

Here’s a photo of the primer follower rod.  It sits on top of a stack of primers in the primer magazine.  Its weight pushes the primers down each time one is transferred from the primer magazine by the primer slide.

The knurled knob below allows you to grasp the primer magazine to remove the tube from the primer feed mechanism.  It doesn’t unscrew; it’s just a tight slip fit into the feed mechanism.

When I removed the primer magazine, I could see that the tube was made of brass.  There were still a couple of primers in it.  I doubt they would fire; they were probably soaked in oil.

When I removed the primer slide angle lever screw, the primer slide was pushed out by its spring.  As I was disassembling the primer feed mechanism, I found that the primer slide still held a primer.  These parts were pretty funky.  In a working reloader, you don’t want any oil in this area.  It will contaminate the primers and make them inert (we only want “ert” primers when reloading ammo).

Check out the funk on the primer slide angle lever.  This machine had been rode hard and put away wet, I think.  My spraying it down with WD 40 to clean didn’t help in that regard.  But it sure helped to clean up the Star.

I then unscrewed the two screws holding the primer magazine socket to the primer feed mechanism housing.  Here are the parts in all their glorious funkiness.

The primer feed mechanism base is attached to the steel floor base with two large Allen bolts.

I removed the Allen bolts and then took the primer feed mechanism base off the machine.  It had two pins to locate it on the Star reloader’s base.

Here’s another exploded view photo of the primer feed mechanism and its components.

The photo below shows the reloader’s steel base and where the primer feed mechanism attaches.  The upper two arrows point to the Allen bolt attach points.  The lower two arrows point to the locating holes (this is where the two pins mentioned above fit).  The arrow in the middle points to the hole for the primer slide spring.  The rectangular slot is where the primer slide enters the reloader base to position a new primer beneath a .38 Special case.

The steel base is a blued steel part.  It’s just like the bluing on a gun.  This is a pretty cool feature.  There’s a fair amount of corrosion and discoloration on my Star, but it’s part of the machine’s charm.  I hit it with some OOOO steel wool and Kroil, but I’m not going to reblue it.  I like its patina.

I next turned my attention to the primer magazine (the long tube I pointed out earlier).  When I withdrew the primer magazine from its slot, I could see the lower end of the tube was brass, but I still wasn’t sure about the entire tube.  I went to work on the tube with Scotchbrite and that did the trick. Hello, Beautiful!

I worked on all of the primer feed mechanism’s brass pieces with Scotchbrite.   The brass finish came up nicely.  This project is coming together fabulously well.

After cleaning and polishing everything, I reassembled it all.  I could have polished everything to a mirror finish, but you know the drill:  This is a resurrection, not a restoration.  Like I said above, I like the patina look.  This machine might be older than me, and I sure don’t look like new.  We match, the Star and I do.  Old.  Funky.  The ultimate in personalized patina.  That’s us.

In the photo below, you can see the primer cam to the right of the brass magazine tube.  It’s the part that actuates the primer angle lever.   You’ll get to see it all in a short video in just a minute.  People like videos, Gresh tells me.  We aim to please.

It’s beautiful, isn’t it?

So how does it all work?  Gloriously well, thank you.  Take a look:

Next up?  It’s going to be the case feed mechanism, and that will be the topic for our next Star blog.

I’ll share with you that the blogging part of this Star resurrection business is lagging behind the actual resurrection.  Yep, I actually have the Star running already, and it’s running well.   You’ll see how I got there in future blogs, and those blogs will be right here in the not too distant future.  But I don’t mind jumping ahead a tiny bit to tell you that I picked up my Model 60 Smith and Wesson yesterday morning and I fired the first few rounds I made on the Star through it.  They worked just like they were supposed to, as did the Model 60.  That’s a story for a future blog.

Stay tuned, my friends!


Hey, here are the Star resurrection blogs so far, along with our other Resurrection projects!

Art’s 1911 Art

You probably remember good buddy Arthur Benjamins’ guest post on the Smith and Wesson Model 29.  Arthur is an artist who recently created a beautiful painting highlighting the iconic 1911 .45 auto (a frequent topic here on ExNotes).   He volunteered to do a guest column for the blog and we were quick to say yes.   Enjoy, my friends.


Looks That Could Kill

The lady’s expression was thoughtful and disapproving. She stood arms crossed with a stance that parents would adopt with their young child who hadn’t properly screwed back the top on the peanut butter jar. If my junior school teacher had given me that same glare, I would have been guilty of shouting out the correct answer before raising my hand.

The subject of the lady’s gaze was my latest painting on show at the Arizona Fine Art Expo – my image graphically depicted of one of the USA’s legendary man made objects.  2.5 lbs of steel which could fit inside a coat pocket – The famous Colt .45 Automatic Pistol.

When Colt started production in 1911, no one would have guessed the impact it would have on the USA and the industrial world. It would be further immortalized in films, songs, books – and like the AR15, it would find its way into history and folklore. This was no ephemeral object.  From an engineering point of view, the venerable Colt .45 pistol is a true work of art, and of the 2.7 million produced from 1911 onwards, all wartime specimens now command premium prices.

A Legend Comes to Life Again

One of the other artists offered to bring in his own for reference details, and the following morning he thrust a mint condition 1911 in a small cardboard box into my thirsty hands.

Thanking the good Lord for the USA’s freedom and Second Amendment, the mere possession of this object would have automatically produced a 5-year custodial sentence in the UK – a once-proud country in which I had lived for four decades and where I had sadly experienced firsthand the contrived and rapid deterioration of the firearms law and the victimization of the British shooting sports members.

However, I wanted to depict this highly developed, three-dimensional jigsaw puzzle and convey its iconic status. The voice of action imagery contributes highly towards a visual impact, but that was not what I was looking for. I chose a harmonious and nestling triumvirate in red, white and blue along with similarly hued starred and swirling banners on a field of noble silver.

The great Andy Warhol would have smiled enigmatically at my painting, and have said something cryptic to me. He would have used three individual images himself and have colored them similarly but my own selective abstraction had steered me away from his own repetitious trademark productions.

However, I gladly accepted his spiritual input which he would have welcomed as it was not widely known that as his own portfolio grew, he was forever running out of ideas, turning to others for renewed inspiration.

Beautiful Memories

At the Expo, it was amazing just how many viewers lamented having gotten rid of their beloved Colt .45 many years ago or wished they had owned one in a time when were considered as surplus and you could barely give them away. I encountered several moist eyes and stories of proud ownership. I was one of those myself years ago, but the UK handgun legislation in 1997 ended all that.

One of the Vietnam vets at the Expo’s American Healing Arts Foundation openly carried a customized 1911 on his hip. It remains one of the ‘carry’ favorites for a great many Americans who refuse to accept anything else.

Feeling I really needed to give the lady more input, I gently approached and said that the last ten years had seen a great upswing of women who had taken up the shooting sport to become proud and responsible gun owners.

“Mm-mm,” she mused, giving me a difficult look. Her brow had furrowed when she returned to the painting. She looked back at me, “We have friends,” she spat, “And THEY have a gun!”  With that, she turned on her heels and disappeared from view.

“Only ONE?” I smiled, and with that I straightened Nineteen Eleven on my easel, adjusted the label and awaited further memories from discerning visitors.

You just can’t win ‘m all.


Title: “NINETEEN ELEVEN”
Size: 29” x 32” x 2”
Medium: Acrylic paint on wood.
Value: $5950

For all inquiries, please contact Arthur directly.


More Tales of the Gun stories are here!

The Star Powder Dispenser

I’m going at the Star resurrection slowly, methodically, and piecemeal.  I suppose I could completely disassemble the thing, clean, degrease, and polish all the bits and pieces, and then reassemble it all.  But I’m a little bit scared I might not remember how it all goes back together, and I don’t want to spread everything out and make my workbench unusable during this resurrection.  Nope, slow and easy is the path forward for me. I’m doing it one bite at a time and I am enjoying the meal.

The Star Powder Dispenser

The first bite is the powder dispenser.  It’s the deal that automatically dispenses the right amount of propellant each time the Star’s lever is pulled.  It consists of a powder hopper subassembly (the upper arrow)  and the dispensing mechanism (the lower arrow), as you see in the photo below.

Here’s another photo of the dispensing mechanism.  It mounts to the Star’s upper plate (Star calls this upper plate the tool head).

Powder Dispenser Disassembly

Here’s the bottom of the powder hopper.  It’s brass and it mounts by threading into the powder dispensing subassembly.  The silo that holds the powder is plastic, and I think when it was new the plastic was probably clear.  It’s occluded with age.  That’s okay.  So have I.

This is the powder dispensing mechanism with the powder hopper removed.

Looking inside the powder dispensing mechanism, there were still a few grains of powder left inside from the last time this reloading equipment was used.  I’m guessing that was quite a while ago. My Nikon camera and Sigma macro lens do  a wonderful job for this kind of photography.

Incidentally, speaking of the last time this device was used…several of our readers suggested that the number etched onto the Star reloader’s base was a social security number.  Before identity theft became the problem it is today, it was common for folks to etch their social security number on things to prevent theft.  One of our blog readers located the man whose social security number was located on this Star reloader.  That owner was born in 1926 and died in 2009.   To my surprise, there’s a social security death index where you can find this information.  Who knew?

Back to the job at hand: The powder dispensing mechanism is secured to the tool head with two slotted screws.  I had applied a bit of Kroil to these screws a day earlier and they unscrewed easily.  Kroil is good stuff.

With the two screws removed, the photo below shows what the powder dispenser mechanism looked like.  There’s a lower housing, an upper cover, a spring, the two attach screws, and the powder slide.  It was all pretty funky when I disassembled it, but I took care of that.

The powder slide is what actually meters (determines the amount) of powder dropped into each cartridge.  When the tool head is up (before you actuate the lever), powder drops into a cavity in the slide.   When the tool head is lowered (when you actuate the lever), the powder slide is pushed to the left, the cavity containing the powder moves over the powder spout, and the powder drops through the spout into the cartridge case.

Cleaning Things Up

The tube sticking up through the tool head in the photo below is the powder spout.  It’s what the left arrow points to.  The right arrow points to the bullet seating and crimping die.  There was a lot of crud on the die.

The spout was funky, so I ran a patch through it with a cleaning rod.

The bullet seating and crimping die is the last of the three reloading dies.  It was super funky.  It’s the die that seat the bullet and crimps the cartridge case.

Here’s the “after” photo.  I went to work on the die with WD 40 and a toothbrush.

This is the powder dispenser lower housing.  It’s funky, too, but just wait.

The photo below shows the powder slide, and it says exactly what I hoped it would say.  Note the “BE” on the upper tine, and the “2.7 GR” on the lower tine.  That means this powder slide is designed to throw 2.7 grains of Bullseye powder, and that’s a good thing.  That powder and that charge, along with a 148-grain lead wadcutter bullet, is the accuracy load in .38 Special.  I got lucky; this is exactly what I wanted to see.  Note the two rollers between the tines.  I’ll explain what they do a little further along in this blog.  And yeah, I know, this is another funky piece.  But wait; you’ll see.

More funkiness…the powder dispensing mechanism cover.

Here’s another shot of the powder slide and its spring.  This is the “before” picture.  And that hole in the center?  It’s the feature that determines how much powder goes into each cartridge.  If you want a different charge on a Star reloader, you need to buy a different power slide.   Like I said, I got lucky.  This one was set up for 2.7 grains of Bullseye.  It’s just what I wanted.

I wiped the powder slide off and, being that it was brass, I wanted to get rid of all the oxidation and then polish it.  I was thinking it would be cool if I had some Brasso, but since I’m no longer in the Army I don’t have any.  Then I remembered:  I have Dillon Rapid Polish brass polish that I use with my Franklin Arsenal brass tumbler, and it does the same thing.  I put a little on a rag and used it to polish the powder slide.

Here’s another shot (the “after” photo) of the powder slide.

Note the rollers on the left end of the powder slide.  This thing is like a Ducati:  It has desmodromic valve actuation.   I’ll explain that a little bit further down.

Next up would be the powder dispenser mounting screws.  I went to work on them with a Scotchbrite pad and they cleaned up nicely.

Here’s the powder dispenser base and the powder on the tool head.

And here’s the powder dispenser cover, the spring, and the mounting screws reassembled.  I used a Scotchbrite pad to clean up the powder dispenser housing and powder dispenser cover, too.  They look good.

And finally, here’s the powder hopper reinstalled on the powder dispenser.

Desmo Dispenser Actuation

You might be wondering how the powder dispenser works.  It’s really quite clever.  When the Star reloader lever is actuated, the tool head moves up and down on the main shaft, bringing the powder dispenser with it.  As that occurs, the powder slide translates back and forth as it moves along the curved cam you see in the photo below.

Remember those two rollers in the powder slide?

They follow the vertical cam path shown two photos up.  The inner roller rolls along the cam as the tool head moves down, and the outer roller rolls along the cam as the tool head is returned to the up position.  This is desmodromic actuation, just like Ducati uses on the their motorcycle intake and exhaust valves.  They’re driven open by a cam, and they’re driven closed by a cam.  Star could have just used pins instead of rollers, but they went with rollers (a more expensive and more reliable approach, I think).  When the tool head moves down, the powder slide takes 2.7 grains of Bullseye powder, shifts it over the powder spout, and gravity does the rest.  Take a look.

This is all very cool stuff, and if you get the feeling I’m having a good time bringing the Star back to life, you’re a very perceptive person.  If you’re just tuning in to this adventure and you want to see our earlier blogs on the Star reloader resurrection, you can find them here.

Next up?   That’s going to be the primer feed mechanism.   Stay tuned!


Sign up here for all the ExNotes blogs!  It’s free!

More than a machine: A Janus Motorcycle

Sometimes a motorcycle is so beautiful, so perfect, it just stops you in your tracks.  The red Janus Gryffin in these photos does that for me.

Our good buddies at Janus Motorcycles make stunning motorcycles.  I rode their olive green Gryffin across northern Baja and it was a perfect machine, one I thought could not be topped.  Then I saw this red Gryffin that my good friend Richard posted on Facebook.  Folks, this is how a motorcycle is supposed to look.  This machine is more than a motorcycle. It evokes emotion. It’s art.

The motorcycle you see here is Gryffin No. 69 and it is magnificent.  Janus GM Richard tells us that “No special detail was left untouched…from the red painted side panels, red wheel pinstripes, and black handlebars, this Gryffin just hits different.”  Indeed it does.

For more information on Janus Motorcycles, check them out at JanusMotorcycles.com.  If you’d like to read about our Baja ride with the Janus boys, give a click here.


Subscribe for free!

Cleaning the Star: A First Pass

As a first step in bringing the Star progressive reloader back to life, I washed it down with WD 40 and squirted some Kroil penetrating oil on it, but before I did that, I shot a few photos with my Nikon and its macro Sigma lens.  These are better photos than the ones in the previous blog shot with my cell phone.  With apologies in advance for this bit of redundancy, I’ll start with the “before” photos.

The Star Reloading Machine

Here’s the Star label.  They were originally manufactured in San Diego.  I didn’t know that.

Star Reloader Parts and Subassemblies

This is a side view of the Star showing the powder container and the powder dispensing mechanism.  There’s a lot of dust and dirt on the Star.  No rat poop like Gresh’s MGB GT, thankfully.

This is the base plate.  It still has several cartridge cases in the baseplate shell holder.

Here’s another “before” photo of the base plate.  The doodad on the left is the case feed mechanism.  The mechanism on the right is the primer feed.

This is the decapping and resizing die.  It’s a bit rusty.  I’m thinking it’s probably a carbide die, which means the cases don’t have to be lubed for the resizing operation.

The photo above is a macro “before” shot of the powder dispensing mechanism.

The photo below is a “before” shot of the head of the reloader.   It’s the piece that reciprocates up and down with each manual lever stroke.

A shot from the top of the reloader, showing the top of one of the reloading dies.

Cleaning the Star Reloader

Moving on to the cleaning operation, these are the things I’m using initially:  WD 40, Kroil (a penetrating oil), a toothbrush, and an oily rag.  This is the initial cleaning just to see what’s going on.  A deeper scrub of each subassembly will follow in subsequent blogs.

I gave the entire press a spritz with WD 40.

Here’s a better photo of the original Star decal.  I’m not going to do a full-blown concours style restoration of the Star and I don’t want to bring the reloader back to as new condition.  I like the patina and my intent is to get it working again, displaying the aging that has naturally occurred on an old piece of equipment like this.  It’s a resurrection, not a restoration.

The bottom of the press is starting to look better already.

The powder container unscrews from the powder dispensing mechanism.

Here’s a photo of the powder container’s aluminum lid.

Here’s one of the lid’s underside.  Note the breather hole.   There won’t be any vapor lock on this puppy.

This is the powder dispensing mechanism after the powder container has been removed.

I have a new good buddy named Bruce Williams who restores and sells parts for these vintage Star reloading machines, and I asked him if he could tell me the date this Star reloader was manufactured based on the serial number I found etched into the machine’s base (see the photo below).

Bruce explained that Star never put a serial number on their reloaders, but many police departments, schools, commercial reloaders, clubs, and other organizations who owned Star reloaders applied a property tag number.  I wonder who this machine belonged to.  It has a history and I’d sure love to know it.

The .38 Special

As I was cleaning the Star, I found I could rotate the shell plate into position so that I could remove one of the several cartridge cases it held.  The shell plate rotation is sticky, but I’ll clear that up when I do a detailed cleaning of the shell plate area (a topic for another blog, to be sure).  The case was a .38 Special, which told me that’s what this machine had been set up to reload.  That’s good. I shoot .38 Special ammo in a couple of guns.

Before 9mm handguns became the rage in the 1980s, the .38 Special revolver was used by most police agencies and pistol competitors. As you can imagine, a lot of departments, schools, and clubs went through a bunch of .38 Special ammo back in the day.  In those days, the .38 Special was probably second only to the .22 Long Rifle cartridge in terms of quantity sold, and the .38 Special used to be the most commonly reloaded cartridge in the world.  It’s been eclipsed by the 9mm, but it’s still a great cartridge and there are still a lot of folks shooting .38 Special.  I’m one of them.

The Model 60 Smith and Wesson

As I explained in our first blog on the Star, a friend of mine gave it to me when I started the Peoples Republik of Kalifornia transfer process for a snubnosed .38 Special revolver I recently scored (I got a killer deal).  It’s a stainless steel Model 60 Smith and Wesson Chief’s Special, and it’s a honey.  We’ll have a blog on the Model 60 sometime in the near future, and if all goes well, I’ll use reloaded .38 Special ammunition crafted on the resurrected Star.

The Powder Dispenser

The Star’s powder dispenser looked pretty funky, and I could see it still held a few grains of powder when I peeked into the cavity that throws the charge.  I applied a few drops of Kroil to the screw heads so it could soak in overnight.  The powder dispenser will be one of the first subassemblies I disassemble and clean.  Kroil is a penetrating oil; it will creep into the threads so that the screws can be removed without burring the slots.  The powder dispenser will be the topic for our next Star blog.

I didn’t recognize what this was (in the photo below) when I first saw it, and it was thoroughly coated in crud.  Then I realized…it’s the bullet seating and crimping die.  I’ll explain more about this in a subsequent blog, too.

Here’s a close look at the brass slider in the powder dispenser.  It’s marked “2.7 GR.”  I’m hoping that’s for 2.7 brains of Bullseye propellant, which is the go to accuracy load (along with a 148 grain wadcutter bullet) in the .38 Special cartridge.  I’ll learn more when I disassemble the powder dispenser.  I’m itching to get into it.

Here’s one last look at the powder dispenser, with the powder chamber mounted above it.   In the next blog, I’ll explain how this subassembly works to dispense powder.

That’s it for now, my friends.   More to follow, so stay tuned.


You can follow the entire Star progressive reloader story on our Resurrections page.

Never miss an ExNotes blog…subscribe for free here: