Becoming Vulcan Part 3: Yeswelder Cut-55DS Pro Plasma Cutter Review

By Joe Gresh

Anyone who wants to become Vulcan must learn how to cut metal. There are many methods available like bandsaws, oxyacetylene torch, abrasive wheels, hacksaws and the old reliable, bend-it-back-and-forth-until-it-breaks. One of the relatively newer methods (in relation to the age of the Universe) is a machine called the plasma cutter.

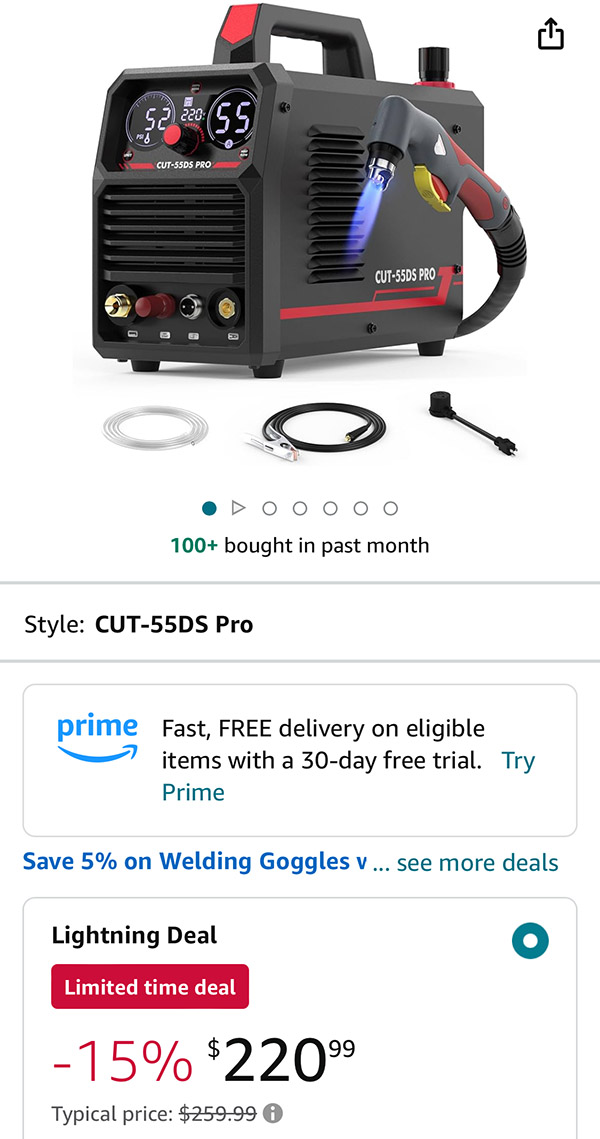
Plasma cutters used to be very expensive. The plasma machine we use at school cost around 4000 dollars and is rated at 60 amps. The global economy (AKA China) has driven down the cost of plasma cutters dramatically. The Yeswelder cutter in this story cost me under 200 dollars and is rated 55 amps. Shipping was free.

In use, a plasma cutter works much like an oxyacetylene cutting torch. The big difference is that you don’t need any fuel: no acetylene gas to buy or bottles to rent. The only thing burning in a plasma cutting system is the material you are cutting through.

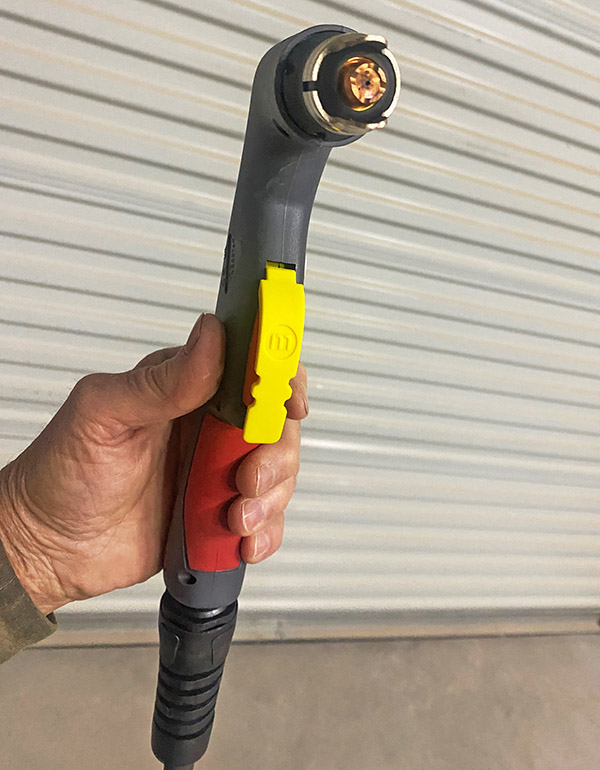
The plasma cutter uses regular compressed air and a bunch of ions and magical stuff inside the cutting head to create a super-hot, narrow stream of plasma. It’s sort of like having your own pocket-sized northern lights shooting out of the torch to cut material.

Unlike oxyacetylene, there is no waiting for the material to heat up. With a plasma cutter you set the torch near the material and pull the trigger. A jet of plasma shoots out of the torch and you can start cutting immediately. The plasma cutter cuts at about the same speed as an oxy cutter so you can move right along.

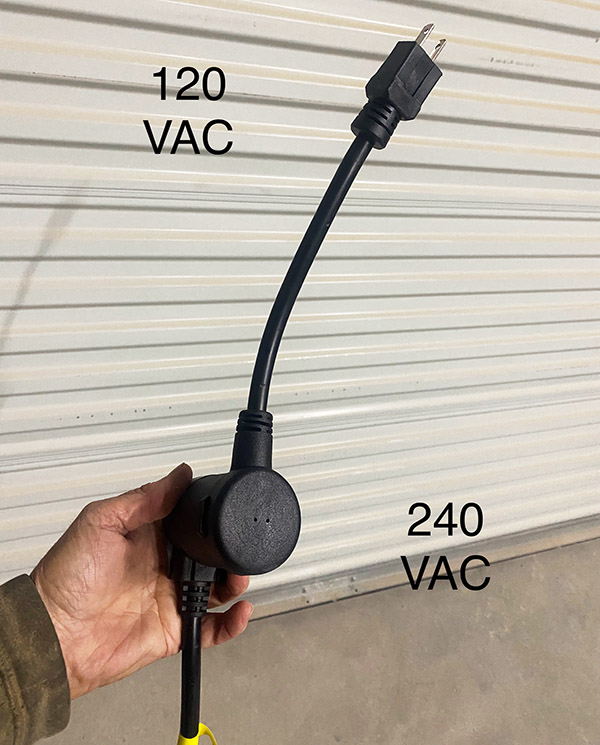
The 55 DS Pro Yeswelder plasma cutter will operate using 120 or 240 volts AC using the included adaptor. The machine auto selects for the voltage you are plugged into. At 120VAC input the machine will only go to 30 amps. You’ll need 240 VAC to access all 55 amps of metal slashing power

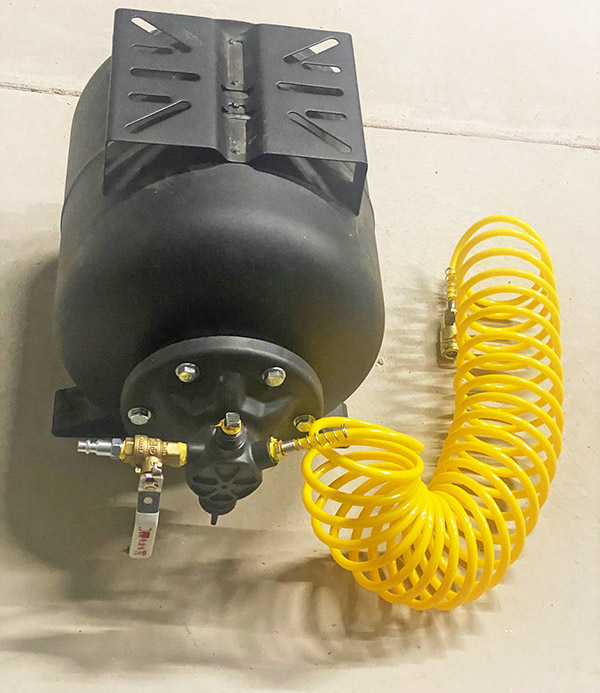
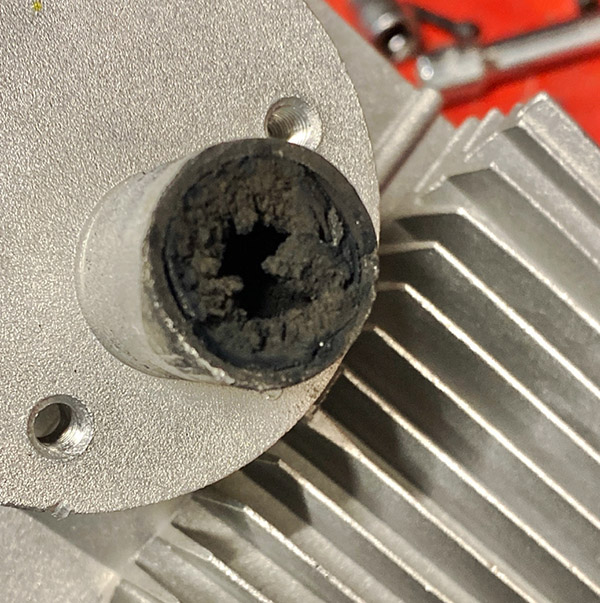
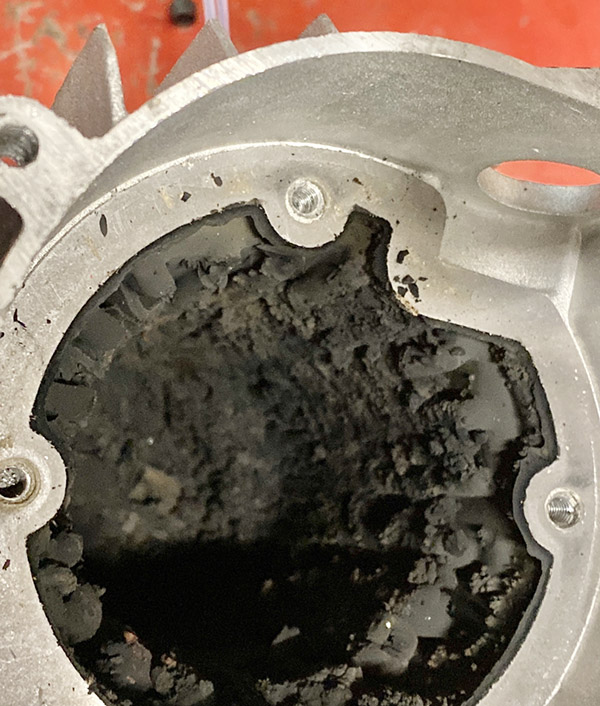
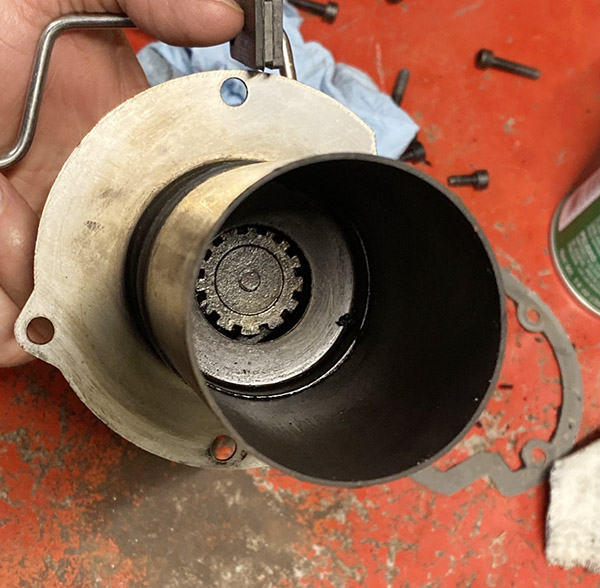
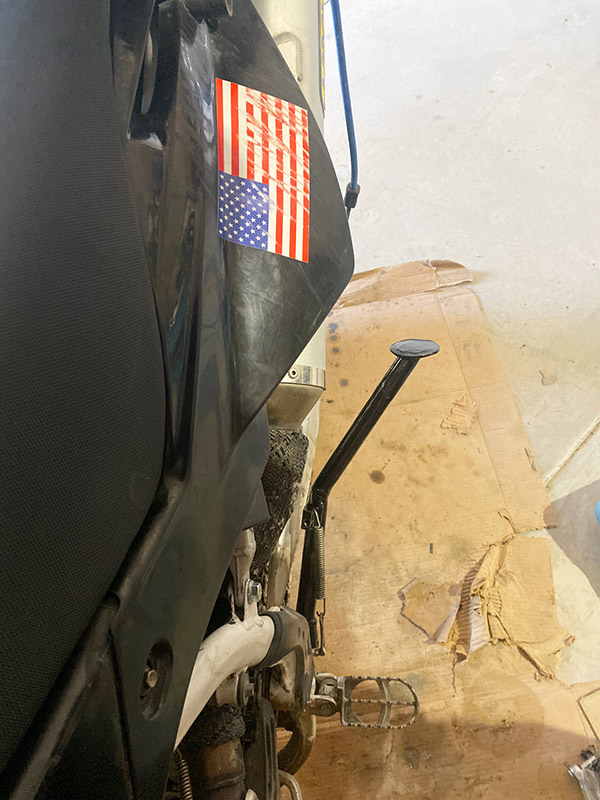
My air compressor is too small for the plasma cutter and is located too far away from where I cut so there’s a long air hose involved; with a long hose line pressure drops fast. I made a remote air tank out of a defunct water pump to give me a little more cut time and eliminate the line drop. I can cut 6 to 10 inches before I have to wait for the compressor to catch up. If you’re going to be doing a lot of continuous cutting with a plasma cutter you’ll need a decent sized air compressor.

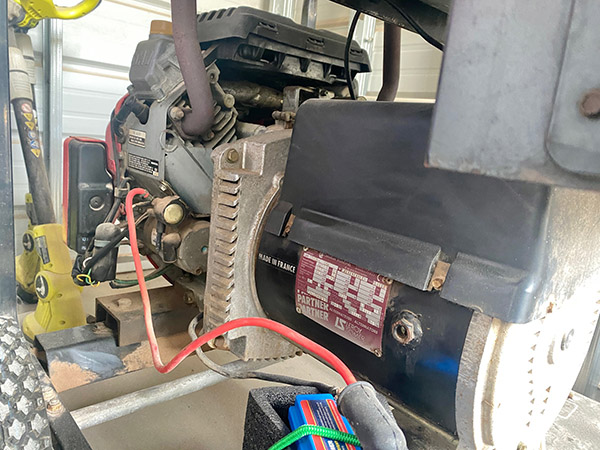
With the compressor and the plasma cutter operating simultaneously, my smallish off-grid inverter struggles and spits out a low voltage alarm when the compressor starts. To get around this problem I use a fossil fuel powered 10KW Honda generator. The big V-twin Honda doesn’t even notice when I cut with the plasma torch and the air compressor kicks in.

Most everything you need to get started is included with the Yeswelder Cut-55. You’ll need to provide the air compressor and connect an air hose to the built in pressure regulator/filter on the back of the Yeswelder. Unless you cut through the torch hose or spill a Big Gulp container of Pepsi Cola inside the cutter, normal consumables are only the bits inside the torch that churn out ions.

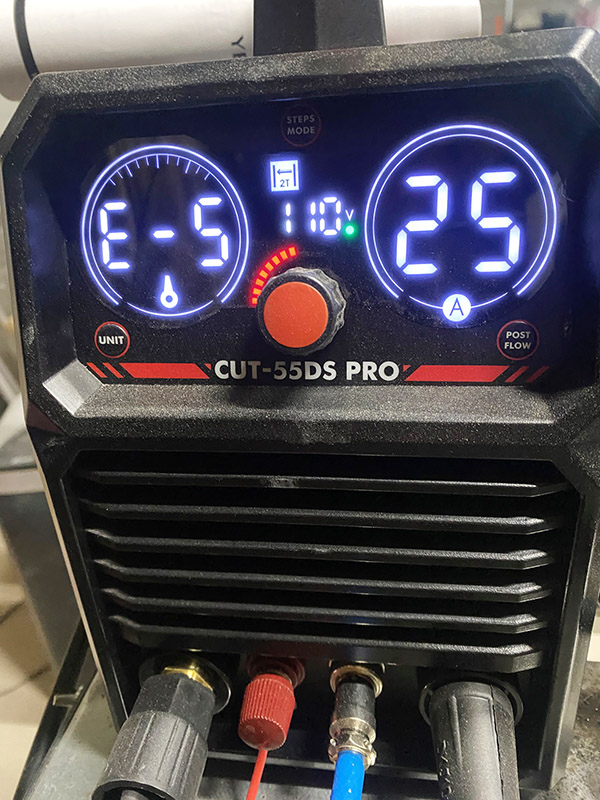
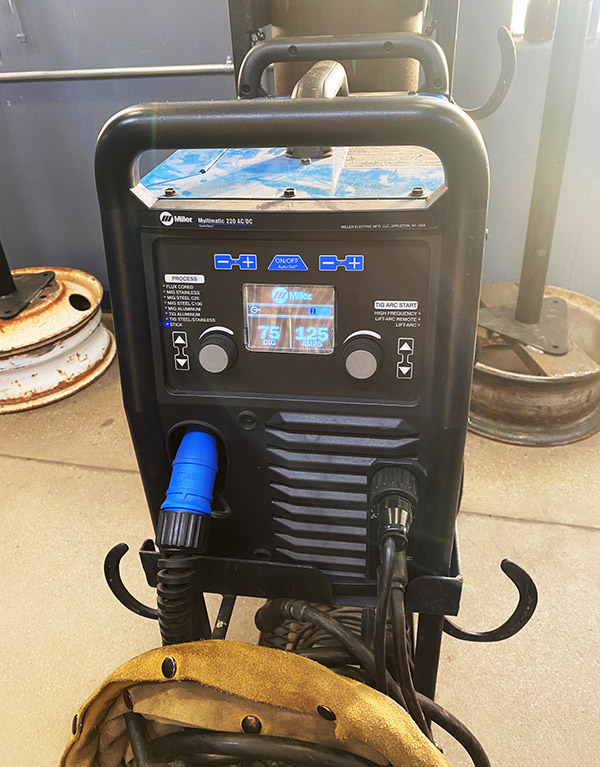
The controls are pretty simple on the Yeswelder Cut-55. There is an amp setting, an air pressure setting, 2T or 4T trigger actuation (on-off with squeeze and release or squeeze on, release, torch stays on, second trigger pull turns off) an indicator for input voltage and not much else. It’s a simple machine to operate.

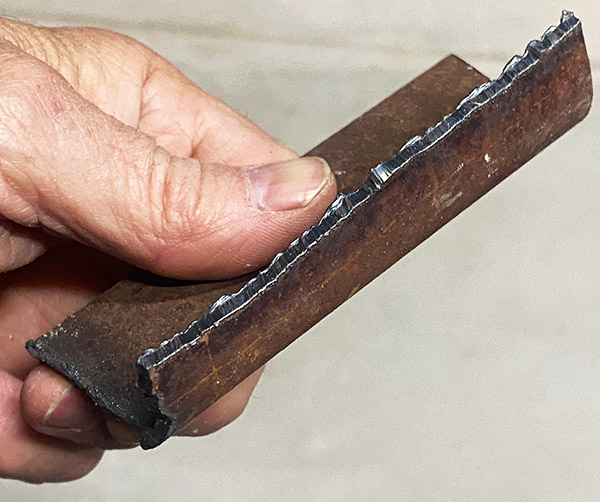
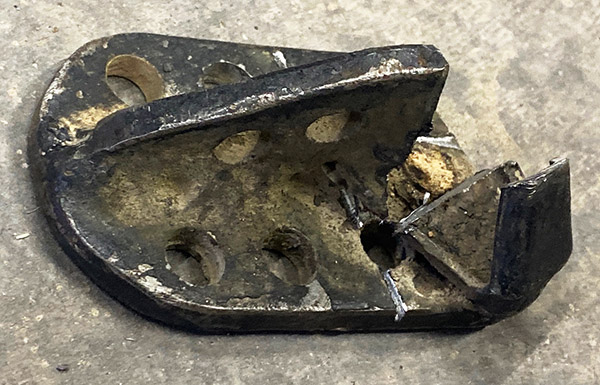
I haven’t used the machine very much; it cut through 1/8-inch steel like a hot jet of plasma through 1/8-inch steel. There’s not as much slag as with oxy cutting so clean up is easier. It should handle ¼-inch steel without a problem and I don’t work with anything thicker.

The prices on these Chinese plasma cutters are so much lower than the old line companies something must be sacrificed. I’m guessing in a full time metal shop the cheapo versions wouldn’t last long but for guys like me or you who just want to cut out a metal silhouette of a buffalo once in a while the Yeswelder looks like the goods. I give it a 5-star rating on the Hacksaw Chi-Com scale. That being said I have only one caveat: The thing may go up in a ball of exploding ions tomorrow. If it does quit I’ll be sure to report it in a follow up story.


Never miss an ExNotes blog:


Don’t forget: Visit our advertisers!


ExNotes Product Test: Easyberg Wheel Balancer

By Joe Gresh

I usually use two jack stands with a long piece of ½” rod through the wheel bearings to balance a motorcycle tire. It works ok but there is a bit of drag on the bearings that makes balancing a sticky affair. You can get the wheel close but minor amounts of weight (like ½ ounce) won’t have much effect.

Since I got the Harbor Freight tire machine I’ve been happily changing tires as needed. I’ve done around eight tire changes and I’ve got the system somewhat down. The only thing I was missing was a dedicated tire balance stand. This is where the Easyberg (no relation to Joe Berg) tire balancer comes in.

An Amazon search will return about two dozen motorcycle tire balancers, and most of them look exactly the same. The Easyberg was the cheapest at the time I bought it, but prices sway back and forth depending on which seller is having a sale or coupon deal. I paid $36 for the balancer and there is no way I could build one as nice for that amount of money.

My Easyberg came unassembled. It was Easybarrak to assemble the thing, requiring only an open end wrench and a hex wrench. A tiny screwdriver was needed to tighten the bubble level.

Once assembled, the Easyberg I received was slightly tweaked. The axle did not run parallel to the base making the tire sit crooked in the stand. The Easyfoil material is thin enough that I could tweak it straight. Any warpage of the base due to the tweaking process can be taken out by the four, adjustable feet. I used a four-foot level on top of the axle to check the bubble and it was fairly accurate. I’m not sure being perfectly level is all that critical, but I set it up that way.

Using the balancer is Easyberg as pie. You slide the axle through the wheel and snug up the centering cones using the supplied Allen wrench to lock the cones into position. This next step is where the Easyberk…I mean berg, is better than jack stands. The four ball bearings supporting the axle spin much Easyburger than the bearings found in your motorcycle wheel; this free movement allows a finer balance. ¼ ounce of weight will cause the wheel to move.

I give the Easyberg four stars (out of five) subtracting one star due to the thing being crooked. Otherwise it’s Easilyberk worth the $36. I’m now fully set up to change motorcycle tires. At the speeds I run, usually less than 100 MPH this balancer does a good enough job and my limited riding skills can’t detect any wheel vibration at highway speeds.


Never miss an ExNotes blog:


Don’t forget: Visit our advertisers!


Becoming Vulcan: My Journey Into The Modern Welding Landscape Part 2 (School Is In Session)

By Joe Gresh

You can learn only so much from watching Utube videos. To get proficient at welding you have to actually weld, and weld a lot. This is where New Mexico State University comes in handy. I signed up to be an Aggie for Welding 102 with Mr. Hurt in the hope my shabby attempts at welding could be improved.

Welding 102 is the NMSU starter course, ground zero. For the first few classes we dwelt on safety stuff and spent the time gathering the needed tools of the trade. Steel toe boots were required and I couldn’t find a pair cheaper than $200. I had most of the other stuff: welding helmet, fire resistant shirt, chipping hammer, pliers, safety glasses, welding gloves and a wire brush. It’s a lot of gear and if you’re starting from scratch you’ll be $300 or more into the deal before striking a bead.

Welding 102 is not cheap either. The course runs $500 and is two days a week, 1 1/2 hours each class. I’m not sure how long a semester lasts but I plan on going until they tell me to stop. Most of the cost of welding 102 is materials. NMSU provides all the steel, gas, welding rods and other consumables. It’s fair: I can burn up $20 worth of rod in one sitting.

Arc welding (or MMA, Manual Metal Arc) is the first type of welding we are learning. It requires the least expensive equipment and the fewest bits and pieces. You have a buzz box, the rod, and the material to be welded. The first thing we did was run 6-inch beads on a 3/8-inch plate of mild steel. You started at the top and ran a bead across then started a second bead just below the first bead and overlapping onto the first bead a little. We used 6010 rods, which is a fast freeze metal. The rod makes coarse ripples as you move along, freezing only a fraction of an inch behind the molten puddle.

I had a hard time with 6010. After I finished filling my plate with beads Mr. Hurt said I needed to work on my bead width consistency. So I turned the plate 90 degrees and started again, bead after bead. I still sucked. Turning the plate once again I laid beads over the other two layers of metal. My plate was getting heavy and was warping like a taco.

Mr. Hurt opened the welding shop on a Saturday for us uncoordinated kids who need more practice. I welded on my 6-inch square plate of mild steel from 9:00 a.m. until 1:00 p.m. and the thing was approaching ¾ of an inch thick when Mr. Hurt said that it was enough. I could never weld that many hours with the Vevor 130 welder I bought on Amazon.

Through all the practice I was getting better at seeing the welding process. I still couldn’t see where I was going but I could see the puddle, puddle width and was getting the tiniest bit more consistent.

7018 is the next rod we are tackling. It’s the same process: cover a 6×6 steel plate with beads overlapping beads. The 7018 was easier to control and the beads have a more uniform appearance. 7018 is more liquid (slower cooling?) than 6010 so the ripples between the puddles are less pronounced and not as coarse. 7018 is a low-hydrogen rod, whatever that means.  It is kept in a 250-degree oven so that the flux doesn’t absorb hydrogen from the atmosphere.

Each student has their own welding booth complete with a table, smoke extractor and arc shielding curtains to keep from flashing other kids. A blind welder isn’t much use to anyone.

Our class of 13-ish started out with two women but they both dropped out after the third class. I don’t know why. There is no gender-based physical limitation to be a welder. Eyesight and a steady hand are more important than brute strength. There is one other geezer in our class; the rest is made up of younger guys looking to get into welding as a trade. I just want to know how to use the machines I bought.

The university provides Miller equipment and these things are beasts. They will do arc, wire feed with gas and TIG welding. You can run them 24 hours a day. They don’t overheat or shut down. If you were running a welding shop this is the way to go.

I feel like I’ve made some progress with my welding. That long Saturday session really helped. Welding 4 hours straight will calm your nerves right down. I’m still nowhere close to being Vulcan. There are a many more types of welding to learn. NMSU has three more welding courses, each more advanced than the previous. If you manage to complete them all you will be Vulcan at the end. Live long and prosper, my brothers.


Never miss an ExNotes blog:


Don’t forget: Visit our advertisers!


ZRX1100 Carburetor Cleaning: The Second Time’s The Charm

By Joe Gresh

The first time I cleaned the carburetors on the Kawasaki ZRX1100 everything went well except for the part about removing and installing the carbs back on the engine. The ZRX had sat for 9 years and it wasn’t running all that well when I parked it. The first carb cleaning saw new float needles installed and a general poking and cleaning of all jets and orifices.

The bike started up okay and ran fairly well, if a bit ragged at low RPM. This I chalked up to the four carbs needing synchronization. I didn’t have a carb sync tool so I just ran it like it was. It ran pretty good for 7000-8000 miles but became harder to start and really rough at any RPM below 2500. I put up with it because I dreaded removing the carbs again.

The old, original fuel hose started leaking where I had installed an inline fuel filter. No matter what clamp I used it leaked. Giving it a through examination I discovered the hose itself was rotten and the inner liner split. I pulled the hose off and sealed my fate. It was impossible to reach the hose connection buried between the carbs to install a new hose. Things had finally gotten so bad I had to fix the situation.

Removing the carbs was as dreadful as I remembered it to be. There’s not a lot of room between the air box and the intake rubbers so it was a bear (like an Ossa!) to remove the bank of four constant velocities.

Once on the bench the Kawasaki ZRX1100 carbs are pretty easy to work on. I ordered new carb kits and new fuel pipes that go between the carbs to supply fuel. The old pipes weren’t leaking but I didn’t want to go through this ordeal only to have them start leaking.

To install the new fuel pipes you have to un-rack the carbs and split them into individual units. The old pipes looked pretty crusty and I can see them puking fuel because I disturbed them once too often. I also wanted fresh plastic to replace the 24-year-old pipes. While I was at it I bought factory coolant hoses to replace the silicone ones that leaked when it was cold. The new hoses fit much better and should last the rest of my life. All in, I spent three hundred bucks with Dave at Southwest Suzuki/Kawasaki out on Highway 70.

Two of the pilot jets were clogged solid. I had just cleaned them a few months or 8000 miles ago. Possibly the rotten fuel line sent debris down stream and clogged the jets. In addition there are supposed to be tiny washers between the o-ring and the tension spring on the pilot jet adjusting screws. Three were missing and I must have lost them the last time I took the carbs apart. Without the little washers the tension spring digs into the o-ring shredding the thing. Any pieces of o-ring go right into the tiny idle transition holes on the floor of the venturi. So that’s on me. I swear, I never saw the things.

When I say the pilot jets were clogged I mean clogged. I soaked the pilot jets in Evaporust and tossed them into the ultrasonic cleaner: No joy. I had to use a single strand of copper from a fine strand electrical wire and work it for 20 minutes to get the things cleared.

The new Parts Unlimited carb kits came with all the stuff I needed, even those tiny idle mixture screw washers. I usually don’t use the jets out of kits because the quality is so suspect. In this case I decided to use them to be sure the pilots were clear enough. Besides, it couldn’t run any worse. I rechecked the float levels, one was a millimeter off, and assembled the entire mess.

The next day it occurred to me that I had installed the new jets without making sure they were actually drilled all the way through or that a bit of machining swarf hadn’t been left inside. So I took the float bowls off and ran copper wire through all four pilot jets and the main jets. It was good for my peace of mind. I also sprung for an OEM Kawasaki fuel line at a reasonable $12.

Because they are so hard to remove I try to be sure the carbs are not leaking by bench testing the floats and needles. This will save you a lot of work in the event something isn’t right. There’s nothing more depressing that fighting the carbs back into place only to have the things leak when you turn the petcock to On.

As you may have heard I was banned from the ZRX owner’s forum because I posted an ExhaustNotes light bulb review. It didn’t sit well with the members that were selling light bulbs. My new ZRX hangout is on Facebook called Banned ZRX members, or something like that. A lot of the same guys who were on the other site ended up there due to disagreements with the admin. Anyway, these ZRX guys suggested a thin piece of material between the air box and the rubber intakes to make replacing the carbs easier.

I had some thin sheet metal from a filing cabinet and used it to make two carb slider thingies. The sliders are held onto the engine by small bungee cords. I put a 90-degree bend in the sliders so they wouldn’t slip down in use. Those ZRX guys know their stuff, as it was a breeze to slide the carbs into position then remove the sheet metal. That’s half of a hard job made easy.

The Kawasaki ZRX1100 has a lot going for it in the maintenance department. The valves are easy to set clearances. The carbs use three simple, spring-loaded adjustment screws for synchronization, and there are no lock nuts to cause changes when tightened. The procedure is simplicity: You adjust the left set of two outside carbs, then adjust the right set of outside carbs, then adjust both sets of carbs to each other using a middle adjusting screw. It actually takes longer to write the carb sync procedure than to do it.

With all four idle circuits functioning correctly the ZRX starts up first push of the button. The bike pulls smoothly from idle all the way to redline. Having the carbs synced makes for a smooth transition coming off a stop and I don’t think the bike has ever run as good as it does now. I’ll be heading to Utah in June for the Rat Fink convention. It will be a lot more fun with the bike running like Kawasaki intended.


Never miss an ExNotes blog:


Don’t forget: Visit our advertisers!


ExNotes Product Review:  Carb Tune Carburetor Synchronizer

By Joe Gresh

A long time ago I had a carburetor synchronizer that used mercury to measure engine vacuum. The synchronizer had four plastic tubes about twenty inches long, each tube was about a quarter-inch in diameter. On top of the rig were four rubber tubes that connected to your intake ports using the little hose barbs molded into the motorcycle’s intake manifolds. This machine worked well, the heavy mercury kind of dampened the vacuum pulses so you could get an accurate reading.

One problem with the mercury gauges was that sometimes, if you revved the engine too much, mercury would get sucked into the engine. The mercury never seemed to hurt an engine but it would pop and miss a bit, then toxic smelling fumes would come out the exhaust pipes for a while. The cure for this problem was to not rev up the engine with the mercury sticks connected.

My mercury gauges went under water in one of the floods that were common in the Florida Keys. Who knows where the mercury that was inside the gauges ended up. Probably in my fish sandwich 6 months later.

Another type of vacuum gauge uses four needle-and-dial mechanical gauges to measure the vacuum. These gauges would jump all over the place reacting to each vacuum pulse. The mechanical type came with plastic clamps that you would fit over each vacuum hose. By adjusting the pinching action on each hose you could slow down the needle reaction enough to be able to read the dials. I didn’t like this type so I threw them away after they sat on my shelf 27 years.

The Carb Tune vacuum gauge uses steel rods and springs inside plastic tubes. They are mostly like mercury gauges except the rods replace the mercury. There are clones of the Carb Tune available (maybe the Carb Tune is a clone of some other brand) but the clones are near enough in price that I sprung the ten bucks extra for the brand name unit.

The Carb Tune need a little work before you can use it. Included in the set is a blue plastic tube with a tiny hole through it that serves the same purpose as those hose clamper deals on the dial gauges. You have to cut the tube into four pieces and then cut each vacuum hose about 100mm from the end to insert the plastic tube into the hose. It’s no big deal but I wonder why Carb Tune didn’t go ahead and complete this final assembly step.

Once put together the gauges work great. The Carb Tunee is very stable and easy to read. Get all four rods even across the top and your carbs are synched. The third rod was stuck on my set but a light tap freed it up to move in the tube.

Normally the actual number of the gauge doesn’t matter; you are going for even-ness. If you had a bad cylinder or your valves were way out of adjustment it might show up on the vacuum gauge so that’s another good use for the Carb Tune.

I rate the Carb Tune gauges 5 stars even if it is a little expensive for what you get. I’m guessing the things are made in China and probably cost Carb Tune a couple bucks a copy. Still, that’s the capitalist system and I was a willing participant for many years so it would be hypocritical of me to bitch about it now.


Never miss an ExNotes blog:


Don’t forget: Visit our advertisers!


ExNotes Long Term Test: Vevor Diesel Heater

By Joe Gresh 

Towards the end of last year’s heating season the Vevor 12-volt, 5kw diesel heater started shutting down and giving an error code. The big blue, start/stop button on the front of the machine blinks the code number between pauses. I counted an error No. 8, which the owner’s manual said was a problem with the temperature sensor. This was a little disappointing because I had only run 10 gallons of diesel through the heater. (It runs a long time on a gallon, like 8 hours) I didn’t mess with it at the time as it was warming up and I was busy doing other vital, yet unimportant tasks.

Fast-forward to winter, 2024 and it’s cold again so I figured I’d better fix the heater. I looked up a new temperature sensor for $4 on Amazon and after waiting a few weeks the thing came all the way from China. Installing the new temperature sensor changed nothing. The heater kept shutting down with an error code No. 8.

Utube Academy provided some more ideas, one of which was the fuel pump was not functioning good enough to keep the fire going.  I bought a new fuel pump on Amazon for $18 and installed it. After bleeding the air out of the pump the heater turned on for a few minutes and then shut down showing error code No. 8 again.

Another Utube suggestion was that the glow plug was bad, failing to ignite the diesel fuel. While looking up the glow plug @ $19 I found a complete new heater for $90 with free delivery. I stuck the new heater in the shopping cart and it showed up a few days later.

The new heater was almost an exact duplicate of the Vevor unit and in fact it had a more advanced keypad display instead of a blue button. The replacement unit swapped out easily and in no time I had heat in the shed.

A few more weeks passed and the new glow plug showed up. Taking the unit apart to gain access to the plug was easy and I pulled the wires off of the glow plug so I could put a socket on the thing. That wasn’t a good idea. Turns out the wires are non-removable and you need a special 12mm slotted deep socket to unscrew the plug. When I pulled the wires off I actually broke the glow plug ceramic. The special socket for the plug was helpfully included in the box with the new glow plug. Unfortunately, I didn’t realize this before destroying the old glow plug. That’s just how I roll.

None of this mattered because once I started taking the heater apart I noticed the exhaust port was almost plugged with diesel soot.

It was so clogged I had to take the fuel feed pipe and the combustion chamber apart to clean out all the soot.

The gaskets tore when I dismantled the fuel feed and the combustion chamber so I had to order new gaskets from Amazon @$16. If you’re keeping count I now had almost as much in parts as a heater costs.

These Chinese diesel heaters are pretty simple to work on and after cleaning the combustion chamber and exhaust pipe it was only a few minutes to put the whole thing back together. I rigged it up for a test run and the heater put out plenty of hot air and ran for as long as I wanted to hear it run. It seems to be fixed but I don’t understand why it sooted up so soon. Maybe there was another issue that I have inadvertently fixed while swapping out parts? Maybe not. Keep clicking on ExhaustNotes and I’ll report on this situation as it develops.


Never miss an ExNotes blog:


Don’t forget: Visit our advertisers!


ExNotes Product Review: Generic Chinese Starter Relay

By Joe Gresh

There is a Facebook group called The Dull Men’s Club and somehow it ended up on my newsfeed. A few of my FB friends are members of the Dull Men’s Club and scrolling through the page it occurs to me that most of the stuff I write about would be perfect for the club. My life has become an endless series of tiny battles to keep motorcycles running. You may think I tinker with the bikes to have something to write about but no, my clunker motorcycles really are a pain to keep running.

The Husqvarna SMR510 in particular requires 5 or 6 hours of fettling for each hour of riding. You may recall the story I wrote about the bike’s kickstand (classic Dull Men’s Club content) and how the bike wouldn’t start. I took the bodywork off and tightened connections, I unplugged and cleaned multi-pin connectors and gave the headlight wiring a re-org to gain a little room behind that crowded area. The bike was starting ok after the work I did.

I took the Husky on a test ride through the mountains stopping frequently and it started fine at least seven times. I figured I had the problem licked and when I got home after a few hundred miles I tried the starter one last time. The Husky wouldn’t start. It wouldn’t start after I let it cool down. It wouldn’t start the next day. Again, I jumped the battery positive directly to the starter terminal and the bike roared into life. I knew the battery was okay so I did what I normally do when I don’t know what the problem is: I bought parts.

The starter relay on the Husky is an odd one to me but apparently the part is used on a lot of ATV’s, small engines and Chinese motorcycles. I looked on a Husqvarna parts site and the relay was $43, plus shipping. On Amazon a duplicate Chinese relay was $7, shipping included. If you’ve followed my moto-journo career at all I imagine there is not a lot of suspense as to which relay I bought.

Even to my naturally cheap psyche the $7 relay seemed too good to be true. So I bought two of them just in case the first one didn’t live up to expectations. Kind of like the old “We’re gonna need a bigger truck” punch line but with relays. The clone relay looked exactly the same as the Husky part except the molded, rubber band mounting bushing was clocked 90 degrees off. I pulled the rubber from the original part and it fit onto the clone perfectly. Things were looking good.

This relay is sort of nifty as it has a main fuse and a spare fuse piggybacked onto the starter relay making for a nice, lightweight, compact…thing. The stock Husky relay had a 20-amp main fuse. The generic unit came with a 30-amp fuse. I pulled on the 30-amp fuse to replace it. And I pulled. I pulled harder. I grabbed the fuse with a pair of Leatherman pliers and gave the fuse a mighty tug.

The relay flew apart; parts went everywhere as the plastic bit holding the main fuse broke away from the body of the relay. The tangs of the 30-amp fuse were still embedded in the fuse holder. I gathered the bits and tried to reassemble the relay but it was too far gone. Good thing I bought a second generic relay.

The fuse in the second relay was as tight as the first one so I decided to use the opportunity to upgrade the Husqvarna’s power supply by 10 amps and left the 30-amp fuse in place. It may never blow without melting the wiring harness. I’ll deal with that situation when it arises.

A: Plunger, B: Plunger spring, C: coil, D: start contacts, E: spark shield, F: coil bracket

I took the broken relay apart to see what was in the little black box and it was just like a normal starter relay but in reduced dimensions. I suspect the plunger contact on the OEM relay is not making good contact but there is no easy way to dismantle the relay without destroying the thing.

It’s been five days and I’ve started the Husky each day without a problem. Of course, this proves nothing and I’ll have to bang the bike on some trails to see if the starting issue has really been fixed. One positive outcome from all this jerking around is that I understand the relay wiring now and if it won’t start again I plan to bypass the stock Husky starter circuit and install an entirely new, stand-alone starter circuit/ main fuse with a second push button and relay.  It will be a perfect story for The Dull Men’s Club.


Never miss an ExNotes blog:


Don’t forget: Click on those ads and visit our advertisers!


ExNotes Product Review: Harbor Freight 30-Inch, 5-Drawer Mechanic’s Cart

By Joe Gresh

The Harbor Freight/US General 5-drawer tool cart has been on my radar for many years. It always seemed like a pretty good deal at $189 and if you bought the thing when it wasn’t on sale (every few weeks) the price would go up to $269. Paying full price at Harbor Freight is to be avoided at all costs and HF’s unrelenting cycle of blowouts, parking lot sales and clearances has trained their customers to wait them out. This particular mechanic’s cart sale was a Black Friday thing and I debated picking one up but managed to tamp down the urge.

I thought I was in the clear until HF declared an extension to Black Friday, at which point I gave in and went down to their store to pick up one of the damn things. This wasn’t a spur of the moment deal. I have a homemade rollaway box full of tools I rarely use but can’t get rid of and another really cheap top and bottom combination setup also filled with odd bits and lathe tools.

My previous mechanic’s cart is a cut down rolling file cabinet, the type used in offices by the type of secretary born sometime in the 1950s. The file cabinet thing was never great, but it made a good workbench to repair the Husqvarna’s transmission. After that transmission job the cart slowly became covered in tools making it hard to dig through the junk to find a 10mm socket. It became a poorly organized catchall.

The US General 5-drawer cart comes to you mostly assembled. You have to put together the wheels and the lower shelf, along with the uprights and some corners for the top box. The instructions are good enough except for the part about lifting the box up onto the legs. The manual says to not attempt this alone. I’m always alone and the box was heavy and too bulky. I got the thing off the ground but accuracy was suffering and I was worried about scratching the paint or pinching my fingers.

Taking the drawers out to lighten the box was one option. Plan B was to lay the box on its side and slide the frame into position as the frame weighed much less than the box.  Now I had the cart on the ground, so I lifted the thing upright pivoting on the wheels. It was still a strain but easier than lifting the entire box. You get a lot of steel for $189 at HF. After the thing was upright, I tightened all the bolts that hold it together.

The 5-drawer box is really nice. The paint (five colors to choose from; I got KTM orange) looks thick and applied well. The box comes with drawer liners in each drawer and in the bottom shelf.

The wheels appear heavy duty and are probably overkill. HF included a nice, extra-mile feature by providing the swivel casters with grease fittings for the ball bearings in the swivel part. Also included on the two casters are brakes so if you’re working on an incline the box won’t roll away.

The drawers use two methods to secure them from sliding open under transport. The first is a latch on the front of each drawer that you must slide to the side in order to open the drawer. I’m not sure I like these latches. I want the drawers to open without the added finger motions. I may disable these latches.

The second method of drawer retention includes two, spring-loaded lock bars that slide down onto the backside of the drawers when the top of the box is closed. The box comes with four round-Coke-machine type keys so you can lock your stuff if you work in a shop full of shifty characters.

For such a low price the 5-drawer box doesn’t seem cheap at all. I think it’s Harbor Freight’s best toolbox value. Two gas charged struts are used to hold the top in the open position and the unit came with a handy side shelf to store your unguents and the various toxic chemicals that mechanics use in their daily course of events.

My particular 5-drawer had a slight flaw: one of the drawer slides was not in its track correctly and was binding. I had to remove the drawer and slot the slide into the track after which the drawer worked fine. I’m not sure that I didn’t cause the problem when I set the box on the side and lifted the cart upright with all the bolts loose. Maybe it flexed and popped out. With everything tight the box feels sturdy without any wobble.

I give the US General 5-drawer mechanic’s cart high marks and can recommend it if its size suits your needs. Now I’ve got to sort out that mess of jumbled tools and organize my new toolbox, a process that has already begun.


Never miss an ExNotes blog:


Don’t forget: Visit our advertisers!


ExNotes Moto-mods:  Kawasaki ZRX1100 Petcock

By Joe Gresh 

I should have listened to the guys who knew.  They told me the vacuum operated fuel petcock on the ZRX1100 was a source of problems and that I should convert it to a standard on-off-reserve manually operated type. In my defense the new vacuum petcock lasted six months or so before the ZRX became hard to start after sitting idle for longish periods of time.

The vacuum petcock stopped sealing and the ZRX’s last line of defense was the float needle in the carburetors. In an ideal world these needles should stop the flow of gas and you wouldn’t even need a fuel shut off valve. We don’t live in an ideal world, however.

I tested my bad-petcock theory by removing the fuel line. A steady stream of fuel poured out of the hose. There is no “Off” position on the standard Kawasaki petcock so I drained the gas tank and set about converting the petcock to manual.

In practical terms the bike was starting hard because it was flooded. Constant velocity carbs, like the ones fitted to the ZRX, are a little harder to clear a flooded condition. Normally you’d hold the throttle wide open to get a lot of air flowing through the cylinder, thus blowing out the excess fuel. With CV type carbs opening the throttle only opens a set of butterfly valves. The actual throttle slides are independent of the twist grip and require engine vacuum to operate. Add low-vacuum cranking speed that struggles to raise the throttle slides and a flooded engine that doesn’t want to start and you’ve got a sticky wicket.

I bought this generic fuel petcock on Amazon for around $10 and figured if it didn’t work I wasn’t out much money. The hole centers lined up and the valve bolted into the Kawasaki tank without issue.

The new petcock came with these tiny plastic fuel filters fitted to the main tank standpipe and the reserve opening at the bottom of the tank. I got rid of these as they looked sort of restrictive and I planned on installing an inline filter on the bike to simplify the hose connections.

The original style vacuum petcock had a 3/8” hose barb that mated to a 5/16” barb on the carburetors. This mismatch required the factory to specify an unusual molded hose that was 3/8” on one end and 5/16” on the other. The new, manual petcock had a ¼” hose barb. These universal inline filters have both ¼” and 5/16” barbs to fit a wider range of machines. I trimmed off the 1/4″ barb on one side of the filter and had a nifty filter that fit both the petcock size and the carburetor size.

I know what you’re thinking, which is that the new petcock at ¼” won’t pass enough fuel. Maybe you’d be right if I drag raced or rode extended periods at high speed. At 50 miles per gallon the thrifty ZRX1100 gets plenty of fuel through the smaller line. I did a few full-throttle passes at an undisclosed test location and the bike did not want for fuel.

The new petcock hose barb exited 90 degrees rearward compared to the stock petcock, which exited down. This orientation required the fuel hose to run straight back and over the carburetor before turning down and routing under the bank of four carbs. The extra length made for kind of a loose hose so I used a couple rubber-covered clamps to secure the hose and tuck it in out of the way.

The new petcock makes starting easier but the Kawasaki ZRX is still reluctant to cold start. Which is odd because the bike always started on the first push. Maybe it’s just the fact that winter is here at the ranch and I’m starting the ex-Florida bike colder than usual. This is the first New Mexico winter for the ZRX and it takes three or four pushes on the button to get the bike to light off, a great improvement over the 25 or so with the old, leaky petcock. I never got around to adjusting the ZRX carbs; I just cleaned them and stuck them back on the bike as I had a long trip planned and wanted to get some shakedown miles on the bike. Maybe a carb sync is in order.

I’ll try adjusting my starting ritual to see if I can come up with a protocol that will save some wear and tear on the Kawasaki starter motor. Keep your eyes glued to ExhaustNotes.us for important updates as they become available.


Never miss an ExNotes blog:


Don’t forget: Visit our advertisers!


Getting Your Kicks: ExNotes Motorcycle Mods

By Joe Gresh

I bought the 2008 Husqvarna SMR510 in 2009. I forget the exact mileage on the bike but it was around 800-ish, I think. The Husky was essentially a new motorcycle and the bike sat very tall for a guy with stubby legs.  The seat height wasn’t my biggest problem though, the real issue was the diabolical kickstand the manufacturer cursed the Husky with.

The stand was both too short and angled wrong so that when deployed its contact point was only a few inches left of the centerline of the motorcycle. On the stand, the bike would lean way over, unloading the rear suspension to the point the rear wheel was nearly off the ground. This meant the bike fell over a lot. The slightest breeze would pivot the bike onto the stand and knock the Husky onto its left side.

That’s not all that was wrong with the Husky’s kickstand. The foot of the stand was only a millimeter or two wider than the 7/8-inch steel tube the stand was made from. Parking the Husqvarna on anything other than solid concrete was an iffy proposition. If the bike was on sand or dirt the stand would punch through the ground and the bike would fall over. I learned that in the dirt you had to lean the thing against a tree if you wanted to park.

One of the first things I did to the bike was add a gigantic chunk of steel to the bottom of the stand in order to spread the load a bit on soft terrain. I angled the new foot outboard, effectively moving the contact point an inch further from the centerline. The new foot also moved the contact point forward a bit to help even out the fore-aft balance. It kind of worked. The bike fell over less but it still fell over.

The SMR510’s high seat was a pain to climb onto so I decided to raise the rear shock bolt about ½-inch which lowered the back of the bike a full inch. Now I could reach both feet to the ground on tippy-toes or one foot flat. The lowering also improved the kickstand angle and stability although it caused trickle-down issues.

The Husky is blessed with an ultra plush rear suspension. The bike is a Cadillac on rough dirt trails. With the shortened ride height the bike leaned less on the stand in fact it was almost too vertical. Now when I got on the bike the rear would sag pushing against the stand causing the bike to lean hard right. To get the stand folded up I had to lean the bike much further to the right like a 45-degree angle so that the arc of the stand-swing would clear the ground. Even if I wasn’t sitting on the Husky to fold the stand up I had to hold the bike well over center. I dropped it a few more times.

Things stayed like this for many years. My method of mounting the SMR510 was to first fold the stand up then swing my leg over the back of the seat, scratching the rear fender with my boot and settle down into the saddle as the suspension sagged and my feet hit the ground. It was an ok system when I was younger and more flexible.

Unfortunately frailty creeps up on all of us over time. The last few years it became harder to swing my leg high up over the rear of the Husky. The pack I keep strapped to the rear fender made the situation worse. I had to change my methodology and begin a more right-angle frontal assault, high-kicking my leg over the seat like a hurdler or John Cleese at the Ministry of Funny Walks.

You can guess how well that worked: to get on the Husky I had to flip the stand up, hold the bars with one hand, step back far enough to give my leg clearance and kick as high as I could while stepping forward into the bike. Most of the time it worked but if you didn’t get your foot high enough it would smack into the seat and push the bike over. The Husky falls well and all, but still. Getting off the bike was no easy feat either. In fact, I dropped the Husky more dismounting the motorcycle than mounting, although it was a close run thing, percentage-wise.

It got to where I didn’t want to ride the Husqvarna because I dreaded getting on or off of the bike. It all came to a head a few weeks ago when the Mud Chuckers and I did a 140-mile pavement loop with a 40-mile dirt section in the middle. We pulled into the café at Mayhill for a lunch stop but the place looked closed. Neither of us actually checked the door because we didn’t want to go through the trouble of climbing off our bikes.

The parking lot at the Mayhill Café has a slight slope to it and I rolled the bike backwards to leave. The Husky wouldn’t start. Nothing. No clicking. The instrument panel and fuel pump energized so I figured something was wrong with the starter motor circuit. I made the fatal error of positioning the kickstand side downhill. I slid my butt off the seat and started to drag my tired leg over the top of the seat Normally not a big problem. The added distance created by the parking lot falling away meant my leg needed to go even higher to clear the seat and the bike began to topple over onto me. I was bunny hopping with the one leg on the ground and the other leg still not clear of the seat. Events rapidly overtook my hop-speed and the bike fell over. Luckily I was still wearing my helmet because when I fell backwards I smacked my new helmet on the asphalt pretty hard. I think I would have cracked my head open otherwise.

As I was lying on the ground with the Husky on my leg I cursed a torrent of bad words, some of them even I didn’t know the meaning of. It was like I was speaking in foul-tongues except the Holy Spirit was not the one doing the talking. We got the bike off of me and picked it up. I told Mike, “I’m not riding that @#@ing motorcycle again until I fix that #$@@-%ing kickstand.”  We push started the bike and I rode home. So I guess I did ride it again after all.

The starting problem turned out to be a loose connection at the start relay but to be sure I took all the bodywork off and disconnected all the multi-pin plugs on the wiring harness and gave them each a shot of silicone. I relocated the horn to gain a bit more wiring room behind the headlight and changed the old, crumbling air filter for a new one. The Husqvarna was running fine. Except for that diabolical kickstand.

The main problem with the kickstand is that when deployed it is too close to the centerline of the wheels. The reason for this is the kickstand-mounting lug on the frame is angled wrong. Instead of the stand swinging out it sort of swings down. All of the Husky’s kickstand issues stem from this one critical design flaw.

I don’t want to mess with the Husky’s frame so I decided to hacksaw a wedge out of the stand (below the return spring mount) and closed the wedge so that the stand would project about 4 inches further outboard.  I welded the join as best I could not being able to see the weld or the seam.

Moving the foot outboard made the bike lean over too far so I borrowed a few inches of tubing from an old Yamaha handlebar to extend the length of the stand.

I made a plug to insert into the tubing where the old stand and the handlebar piece join, a couple holes drilled into the tubing allowed me to butt-weld the insert and weld the thin tubing together without burning through.

I made a new, lighter foot and cut a new angle on the end of the stand to suit

And it is wonderful. Parking the bike is so easy when it doesn’t fall over from the slightest breeze. My new mounting technique (with the stand in the down position) is to put my left foot on the peg, grab the bars, stand on the foot peg, swing my leg easily over the rear pack, settle down into the seat and with my left foot, swing the stand up. Easy-Peasy. It sounds like I should have been able to do this all along but the geometry just didn’t work that way.

Putting up with the old kickstand for 14 years shows how a bad idea can keep loyal followers. It took that hard fall In Mayhill to jar me into action. There is no free lunch, however. The new stand angle awkwardly juts out from the side of the bike and will most likely break when I crash on that side. I’m hoping my shoddy welding will be like a fuse and it will break at the join before something important breaks.

The kickstand mod has made me fall in love with the Husqvarna again. It’s such a light, powerful bike you feel like there’s not much you can’t do with it. Now that I can easily get on and off the bike those feelings of dread are distant memories.

I’ll see you on the trails.


More motoliterature from Dos Joes?   You bet!


Never miss an ExNotes blog:


Don’t forget:  Visit our advertisers!