Getting Your Kicks: ExNotes Motorcycle Mods

By Joe Gresh

I bought the 2008 Husqvarna SMR510 in 2009. I forget the exact mileage on the bike but it was around 800-ish, I think. The Husky was essentially a new motorcycle and the bike sat very tall for a guy with stubby legs.  The seat height wasn’t my biggest problem though, the real issue was the diabolical kickstand the manufacturer cursed the Husky with.

The stand was both too short and angled wrong so that when deployed its contact point was only a few inches left of the centerline of the motorcycle. On the stand, the bike would lean way over, unloading the rear suspension to the point the rear wheel was nearly off the ground. This meant the bike fell over a lot. The slightest breeze would pivot the bike onto the stand and knock the Husky onto its left side.

That’s not all that was wrong with the Husky’s kickstand. The foot of the stand was only a millimeter or two wider than the 7/8-inch steel tube the stand was made from. Parking the Husqvarna on anything other than solid concrete was an iffy proposition. If the bike was on sand or dirt the stand would punch through the ground and the bike would fall over. I learned that in the dirt you had to lean the thing against a tree if you wanted to park.

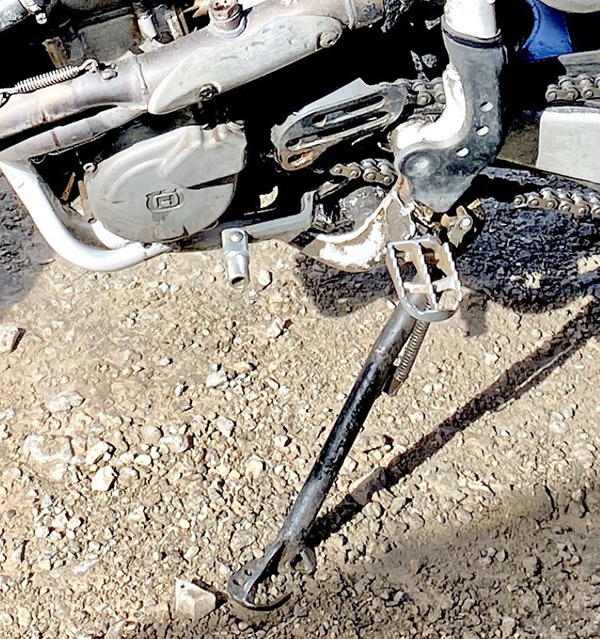
One of the first things I did to the bike was add a gigantic chunk of steel to the bottom of the stand in order to spread the load a bit on soft terrain. I angled the new foot outboard, effectively moving the contact point an inch further from the centerline. The new foot also moved the contact point forward a bit to help even out the fore-aft balance. It kind of worked. The bike fell over less but it still fell over.

The SMR510’s high seat was a pain to climb onto so I decided to raise the rear shock bolt about ½-inch which lowered the back of the bike a full inch. Now I could reach both feet to the ground on tippy-toes or one foot flat. The lowering also improved the kickstand angle and stability although it caused trickle-down issues.

The Husky is blessed with an ultra plush rear suspension. The bike is a Cadillac on rough dirt trails. With the shortened ride height the bike leaned less on the stand in fact it was almost too vertical. Now when I got on the bike the rear would sag pushing against the stand causing the bike to lean hard right. To get the stand folded up I had to lean the bike much further to the right like a 45-degree angle so that the arc of the stand-swing would clear the ground. Even if I wasn’t sitting on the Husky to fold the stand up I had to hold the bike well over center. I dropped it a few more times.

Things stayed like this for many years. My method of mounting the SMR510 was to first fold the stand up then swing my leg over the back of the seat, scratching the rear fender with my boot and settle down into the saddle as the suspension sagged and my feet hit the ground. It was an ok system when I was younger and more flexible.

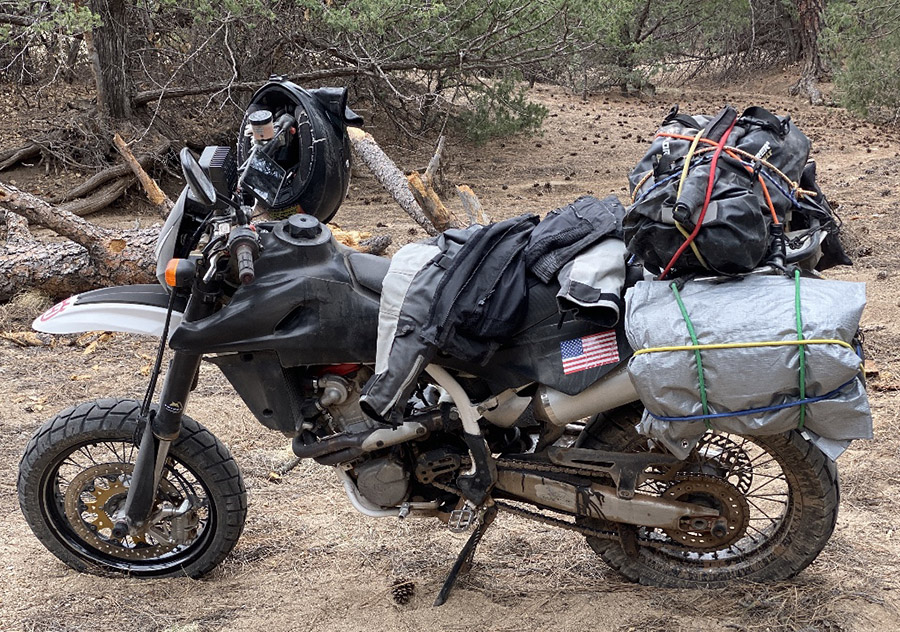
Unfortunately frailty creeps up on all of us over time. The last few years it became harder to swing my leg high up over the rear of the Husky. The pack I keep strapped to the rear fender made the situation worse. I had to change my methodology and begin a more right-angle frontal assault, high-kicking my leg over the seat like a hurdler or John Cleese at the Ministry of Funny Walks.

You can guess how well that worked: to get on the Husky I had to flip the stand up, hold the bars with one hand, step back far enough to give my leg clearance and kick as high as I could while stepping forward into the bike. Most of the time it worked but if you didn’t get your foot high enough it would smack into the seat and push the bike over. The Husky falls well and all, but still. Getting off the bike was no easy feat either. In fact, I dropped the Husky more dismounting the motorcycle than mounting, although it was a close run thing, percentage-wise.

It got to where I didn’t want to ride the Husqvarna because I dreaded getting on or off of the bike. It all came to a head a few weeks ago when the Mud Chuckers and I did a 140-mile pavement loop with a 40-mile dirt section in the middle. We pulled into the café at Mayhill for a lunch stop but the place looked closed. Neither of us actually checked the door because we didn’t want to go through the trouble of climbing off our bikes.

The parking lot at the Mayhill Café has a slight slope to it and I rolled the bike backwards to leave. The Husky wouldn’t start. Nothing. No clicking. The instrument panel and fuel pump energized so I figured something was wrong with the starter motor circuit. I made the fatal error of positioning the kickstand side downhill. I slid my butt off the seat and started to drag my tired leg over the top of the seat Normally not a big problem. The added distance created by the parking lot falling away meant my leg needed to go even higher to clear the seat and the bike began to topple over onto me. I was bunny hopping with the one leg on the ground and the other leg still not clear of the seat. Events rapidly overtook my hop-speed and the bike fell over. Luckily I was still wearing my helmet because when I fell backwards I smacked my new helmet on the asphalt pretty hard. I think I would have cracked my head open otherwise.

As I was lying on the ground with the Husky on my leg I cursed a torrent of bad words, some of them even I didn’t know the meaning of. It was like I was speaking in foul-tongues except the Holy Spirit was not the one doing the talking. We got the bike off of me and picked it up. I told Mike, “I’m not riding that @#@ing motorcycle again until I fix that #$@@-%ing kickstand.”  We push started the bike and I rode home. So I guess I did ride it again after all.

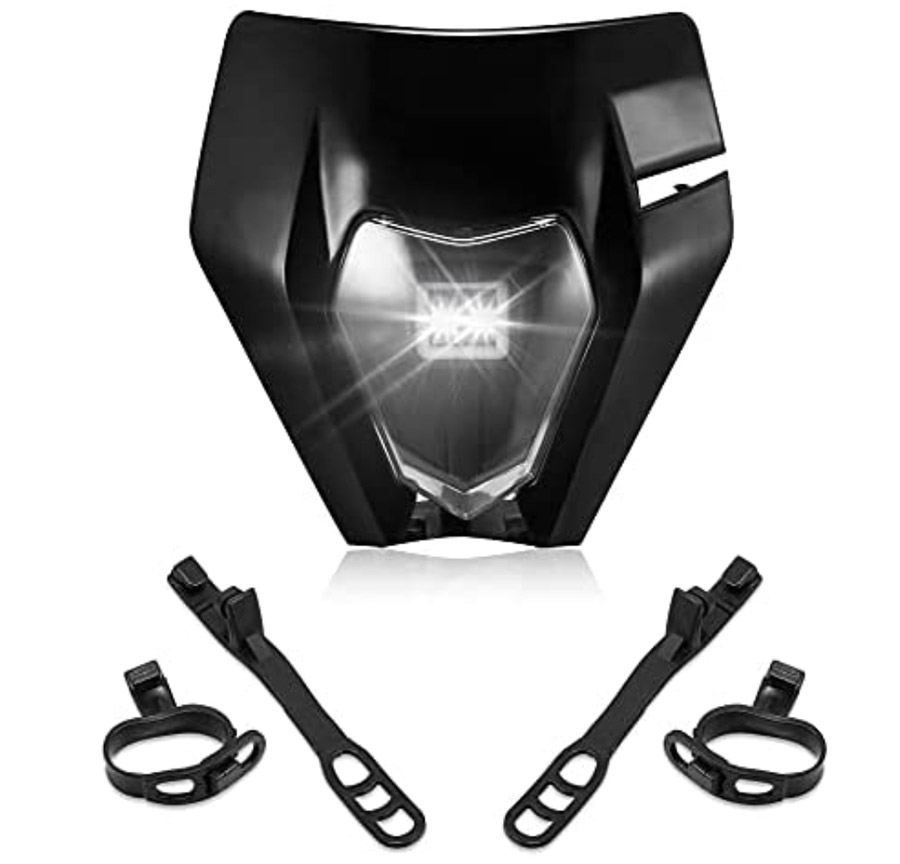
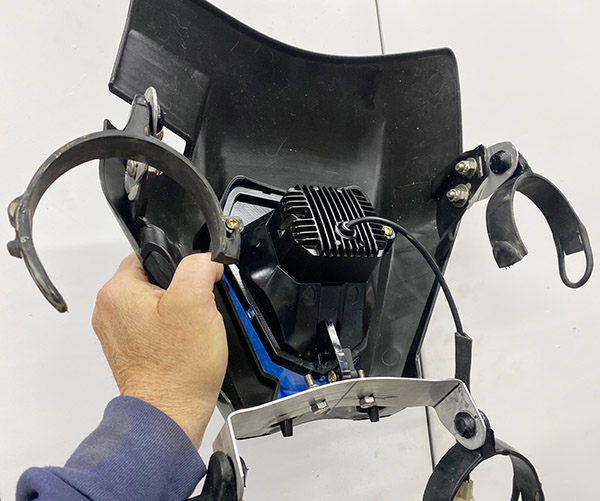
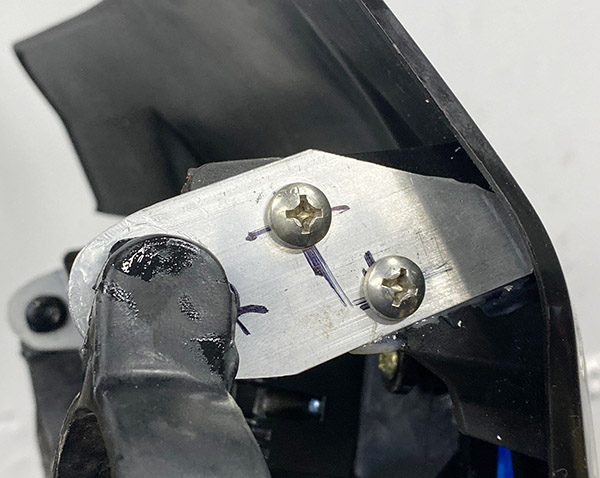
The starting problem turned out to be a loose connection at the start relay but to be sure I took all the bodywork off and disconnected all the multi-pin plugs on the wiring harness and gave them each a shot of silicone. I relocated the horn to gain a bit more wiring room behind the headlight and changed the old, crumbling air filter for a new one. The Husqvarna was running fine. Except for that diabolical kickstand.

The main problem with the kickstand is that when deployed it is too close to the centerline of the wheels. The reason for this is the kickstand-mounting lug on the frame is angled wrong. Instead of the stand swinging out it sort of swings down. All of the Husky’s kickstand issues stem from this one critical design flaw.

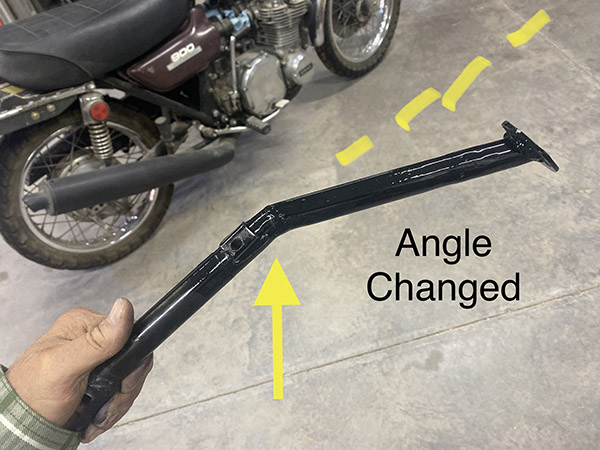
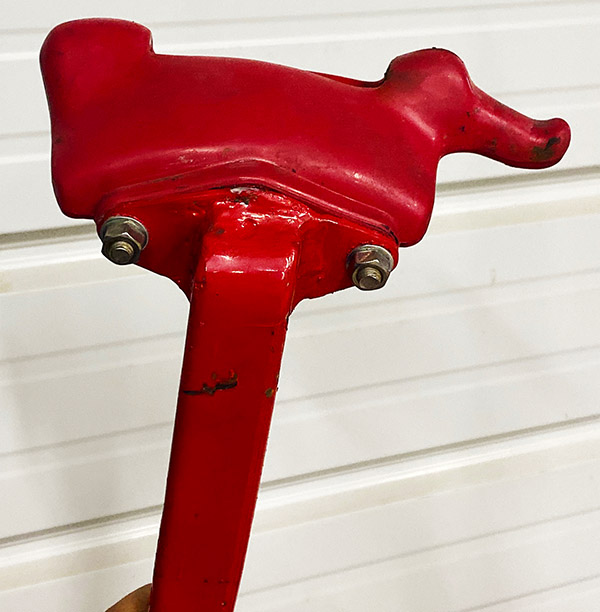
I don’t want to mess with the Husky’s frame so I decided to hacksaw a wedge out of the stand (below the return spring mount) and closed the wedge so that the stand would project about 4 inches further outboard.  I welded the join as best I could not being able to see the weld or the seam.

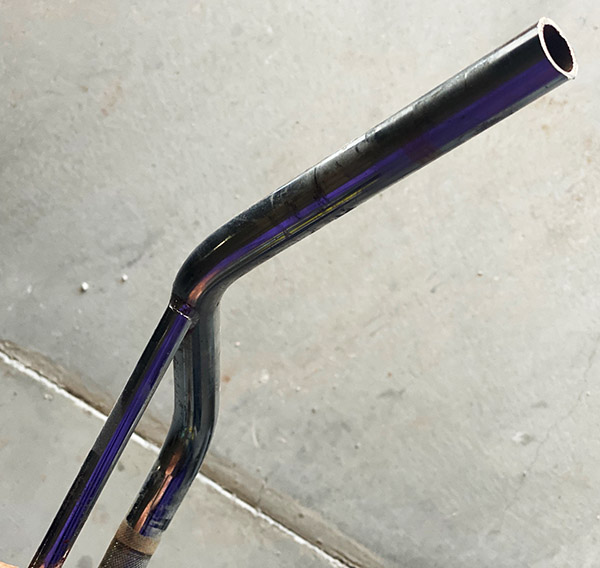
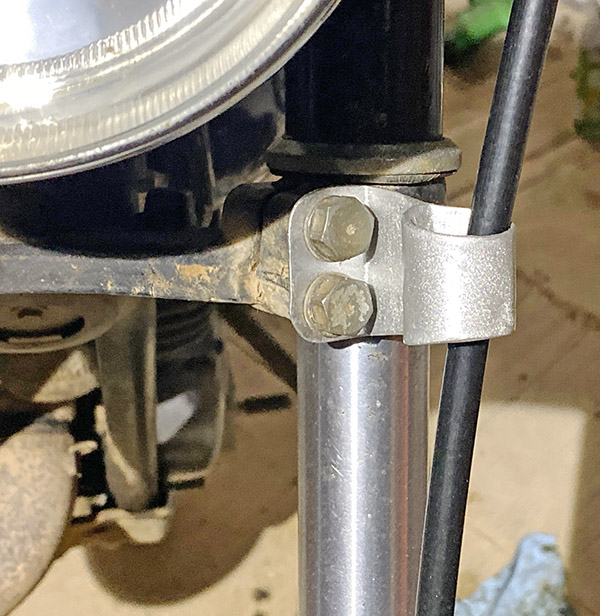
Moving the foot outboard made the bike lean over too far so I borrowed a few inches of tubing from an old Yamaha handlebar to extend the length of the stand.

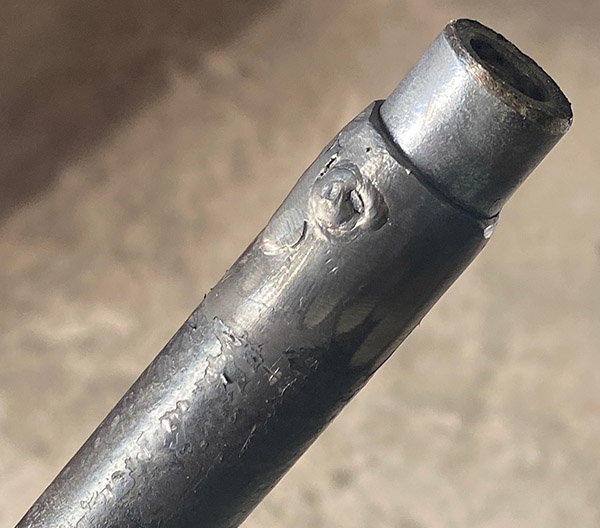
I made a plug to insert into the tubing where the old stand and the handlebar piece join, a couple holes drilled into the tubing allowed me to butt-weld the insert and weld the thin tubing together without burning through.

I made a new, lighter foot and cut a new angle on the end of the stand to suit

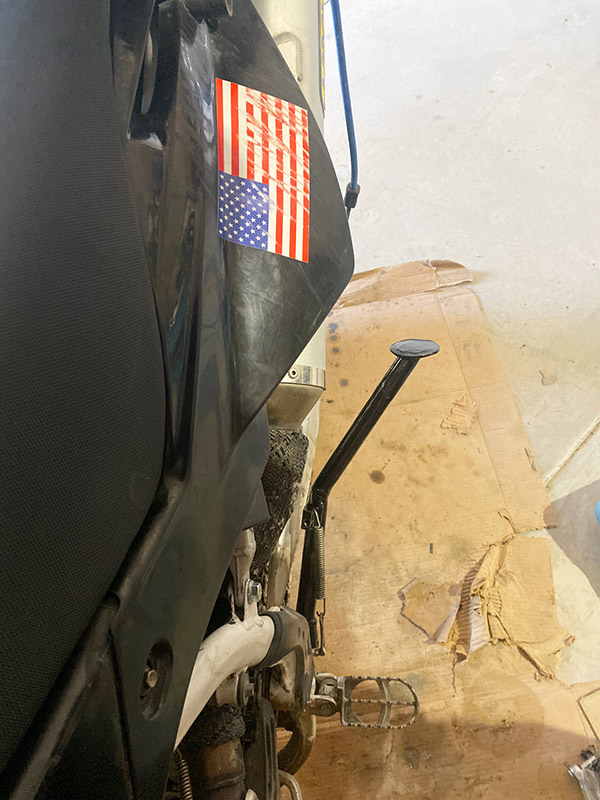
And it is wonderful. Parking the bike is so easy when it doesn’t fall over from the slightest breeze. My new mounting technique (with the stand in the down position) is to put my left foot on the peg, grab the bars, stand on the foot peg, swing my leg easily over the rear pack, settle down into the seat and with my left foot, swing the stand up. Easy-Peasy. It sounds like I should have been able to do this all along but the geometry just didn’t work that way.

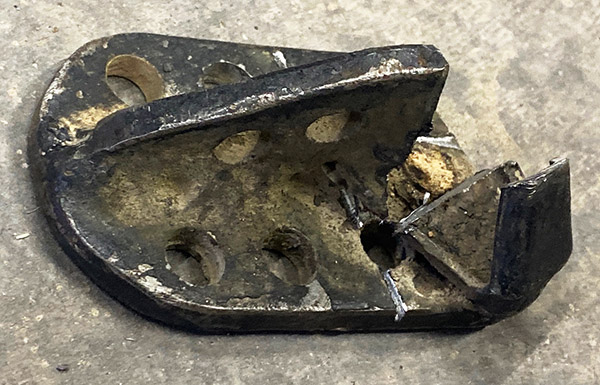
Putting up with the old kickstand for 14 years shows how a bad idea can keep loyal followers. It took that hard fall In Mayhill to jar me into action. There is no free lunch, however. The new stand angle awkwardly juts out from the side of the bike and will most likely break when I crash on that side. I’m hoping my shoddy welding will be like a fuse and it will break at the join before something important breaks.

The kickstand mod has made me fall in love with the Husqvarna again. It’s such a light, powerful bike you feel like there’s not much you can’t do with it. Now that I can easily get on and off the bike those feelings of dread are distant memories.

I’ll see you on the trails.


More motoliterature from Dos Joes?   You bet!


Never miss an ExNotes blog:


Don’t forget:  Visit our advertisers!


Potpourri Part 1

By Joe Gresh

Clutter tends to accumulate in our lives. The unfinished and the left-hanging gather dust motes and wind up in soggy cardboard boxes of odds and ends. So it is with ExhaustNotes stories: some of them just sort of fizzle out inconclusively yet what remains is not enough meat for a stand-alone follow-up story. In an attempt to close the books on a few articles and give our dear readers peace of mind here are a few loose ends, tied.

The Harbor Freight Tire Machine

I’ve used the Harbor Freight tire machine to change five motorcycle tires and can report a 100% success rate. These successes include installing stiff knobby tires on the wide Husqvarna rims. Five in a row without a leak is unheard of for me. I’ve pinched a tube 5 times in a row! My usual success rate is around 50%. While the tire changer makes the job easier it’s still a bit of a work out. The built-in bead breaker is a godsend for old, stuck on the rim beads and having the rim held securely at waist level is nice on my sore back.

Working the machine, I ended up mostly using regular tire irons instead of the plastic duck-on-a-lever contraption. I haven’t given up on the duck lever and it may be a case of user error. I plan on making the duck part pivot on the lever part to allow it to mate with the curve of the rim better. My experience with the HF tire changer has been positive even if I did have to do a few modifications to make the thing function. I feel like I no longer have to fear the Husky’s tires and am confident I can change them in a reasonable amount of time without too much damage. I’m not sure HF still carries the motorcycle tire adapter so if you want one you might have to check several stores to see if they have the thing in stock.

The Husqvarna 21” front wheel conversion

After spending several hundred dollars and several days labor on the failed Husky wheel conversion I’m happy to report the bike is now back to stock configuration and rideable. After grinding clean through the old caliper I had to buy a new 4-piston Brembo caliper. I also replaced the wheel bearings as the originals had suffered enough of my abuse pounding them out of the wheel hubs twice.

Since I have given up on the 21” wheel idea I bought a Continental TKC knobby in the Husky’s original tire size. The tire cost $140 from Amazon and the knobs are about as high as the worn out knobs of a real dirt tire. The TKC is the knobbiest 17” tire I could find that fit the rim. I’m hoping the TKC will provide a bit more grip off road.


Help us bring more content to you:  Please click on the popup ads!


My buddy Mike graduated from a 390 KTM and has bought a new 890 KTM and I’ll have to work the Husky a bit harder to stay up with his 100 horsepower dirt bike. I’ve also raised the Husky fork tubes up ½” inside the triple clamps, effectively steepening the rake a bit. The old street slick on front would push in the dirt making corners a sit on the gas tank type of deal. Loose gravel was like riding on marbles and mud would coat the old tire within one revolution making the bike feel like it was on ice. Maybe the deeper grooves between knobs will give the mud some place to squish. Anyway, the bike looks much more dirt ready if a bit silly with the tiny front wheel.

Yamaha RT1-B 21” front wheel conversion

After my not so shocking failure converting the Husky to a 21” front wheel I had a brand new 21” knobby tire just sitting in the shed. Mirroring the same poor tire choice issue as the 17” Husky, the 1971 Yamaha’s 3.25 X 19” front tire is an oddball. I have been running through my inventory of $10, new old stock Metzelers but those tires were approaching 30 or 40 years old and had weather checking on the sides. I was getting a bit of chunking on the side knobs also as the rubber was just plain old and breaking apart.

Luckily for me, the Yamaha 21” conversion went smoothly. I bought a 1975 Yamaha DT400 front wheel, which is nearly a drop in conversion. The actual size of the tall-ish Metzeler 19” is only about ¾” shorter than the new 21” tire. I thought the bigger wheel might rub the fender but there’s clearance. I like the low fender look on the old Yamaha so I might raise the fender a tiny bit for more mud room. It’s usable as is, I’ll just have to budget my mud riding.

The old, looping, brake cable guides were in the wrong spot for the new wheel. The brake cable on the new wheel is routed straight up from the wheel, in front of and parallel with the fork legs making the cable shorter and more direct as there is only one turn in the run. So I had to buy a new brake cable. I bent up a small piece of file cabinet to make an upper cable guide, for the bottom I used an off the shelf Adel clamp.

Old Yamaha Enduros are not known for having powerful brakes so I was surprised to see the 1975 conical hub had a ½” larger brake drum. The extra braking power provided by the 6” drum is counteracted by the larger diameter wheel so it’s kind of a wash in the braking department. At least I didn’t go backwards.

At the end of all this back and forth motion I have two motorcycles with new front tires and a warming trend on the way. Spring is right around the corner and Mike has a new 890 KTM that we need to get dirty. We have the whole state of New Mexico to explore. I’ll have some more potpourri for ExhaustnNotes as I continue to tie up those loose ends.


Never miss an ExNotes blog:

ExNotes Review: KooBee Fit-All Dirt Bike Headlight

My 2008 Husqvarna 510 came equipped from the factory with the worse headlight I’ve ever had on a motorcycle. What am I saying? It’s the worse headlight I’ve ever had on anything and that includes those old HO scale slot cars that had headlights actuated by the motor controller thingy.

Not only is the headlight dim: the most annoying thing is the way the Husky eats incandescent bulbs. I go through one bulb every 500 miles. The bulbs themselves are oddball scooter type and 35 watts barely casts a glow on the road. The lens is melting from the little bit of heat generated and the separate, small parking light bulb will no longer stay attached because the hole it fits into has melted into a large egg shape.

In an attempt to slow the destruction I installed a weak, low wattage LED bulb and that unit has managed to stay lit for 5000 miles. “Lit” is a relative term: the LED struggles to illuminate the leading edge of the Husky’s front fender. But it does stay on. It gets dark pretty early his time of year so I decided to take another shot at the headlight situation by buying an entirely new headlight.

The KooBee universal fit headlight comes with a halo-type parking light, a low beam and a high beam. The plastic lens is fitted into a plastic number plate faring that resembles the original Husky part. Included with the light were four of the rubber headlight mounts, the kind that go around the fork tube just like the originals the Husky came with. All in all the setup looks fairly well made for cheap plastic junk.

Fitting the light was a bit of an issue because the original headlight bucket was shallower and the whole unit fit closer to the fork tubes. The KooBee light fixture stuck out further and the mounting arms were too short. The light would have fit if I removed all the wiring, the horn, the speedometer and the anodizing on the fork tubes. Instead I made three aluminum extension arms to move the headlight a couple inches forward allowing the rat’s nest of wiring a little room to breathe. As it is I had to relocate the horn and rearrange the wiring to fit it all in.

The next problem was connecting the KooBee to the Husky’s headlight plug. The KooBee came with 4 loose wires in a pigtail with no plug or socket at all. Naturally, the Husky uses a strange 4-pin socket and plug, unlike the normal 3-pin type you see on most older motorcycles and cars. I lopped off the Husky plug and soldered the KooBee headlight wires to the Husky pigtail. I can unplug the headlight when it catches fire pretty fast now.

When it came time to fit the rubber mounts to the Husky forks the nice looking kit rubbers fell apart. The rubber looked ok and was molded well but it seemed like it was already partially decomposed. You could pull the things apart like Playdough Fun Factory clay. The kit rubbers were tossed into the trash bin and I used the original Husky rubbers, which still had life after 14 years.

With everything put back together I turned on the ignition and the halo/rim light was already brighter than my old LED on high beam. Firing the bike off lit the low beam and it was a huge improvement. I flicked the high beam on and got a nice bit of light. When I’m describing the light output you must take into consideration where I was starting from: near total darkness. The KooBee has an up-down adjuster screw but no side to side. For side adjustment you move the rubber bands that hold the light onto the forks. I haven’t tested the light at night because it’s too damn cold for that stuff right now. It almost doesn’t matter because it is what it is, there’s no putting a bigger bulb in the KooBee. If it goes out you replace the entire headlight. The KooBee was $45 on Amazon and if it stays on for a few thousand miles I’ll be happy.

I suspect the KooBee’s black plastic is sort of soft. I tried to wax the faring part so that bugs won’t stick but the wax seemed to take the gloss off. The stock Husky stuff dulled fast also. Maybe that’s just the way plastic body parts are. After it warms up a bit I’ll take a night ride to see how the KooBee works. I might need to adjust the thing but I know it’s much brighter than the stock light. Look for a mid-March KooBee follow up report here on ExhaustNotes.us.