ExNotes Product Review: Generic Chinese Starter Relay

By Joe Gresh

There is a Facebook group called The Dull Men’s Club and somehow it ended up on my newsfeed. A few of my FB friends are members of the Dull Men’s Club and scrolling through the page it occurs to me that most of the stuff I write about would be perfect for the club. My life has become an endless series of tiny battles to keep motorcycles running. You may think I tinker with the bikes to have something to write about but no, my clunker motorcycles really are a pain to keep running.

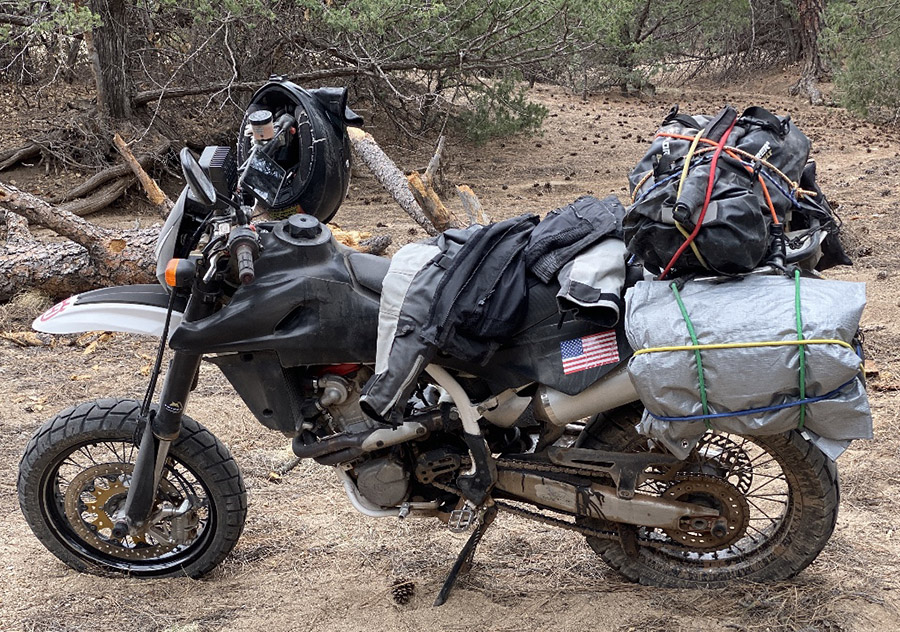
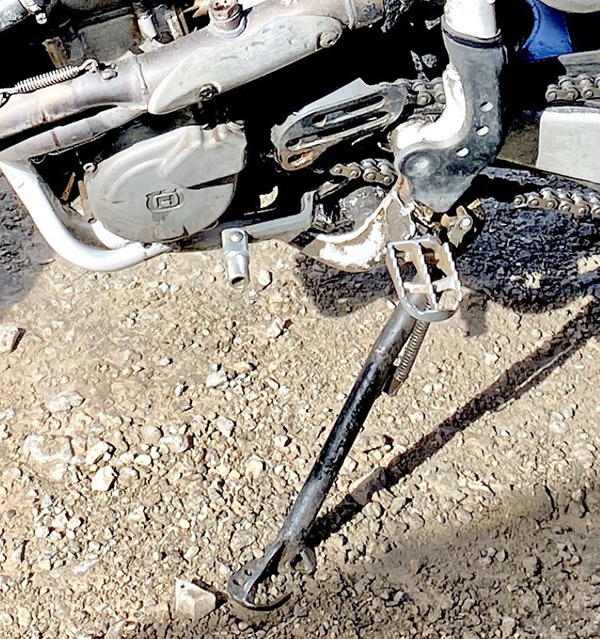
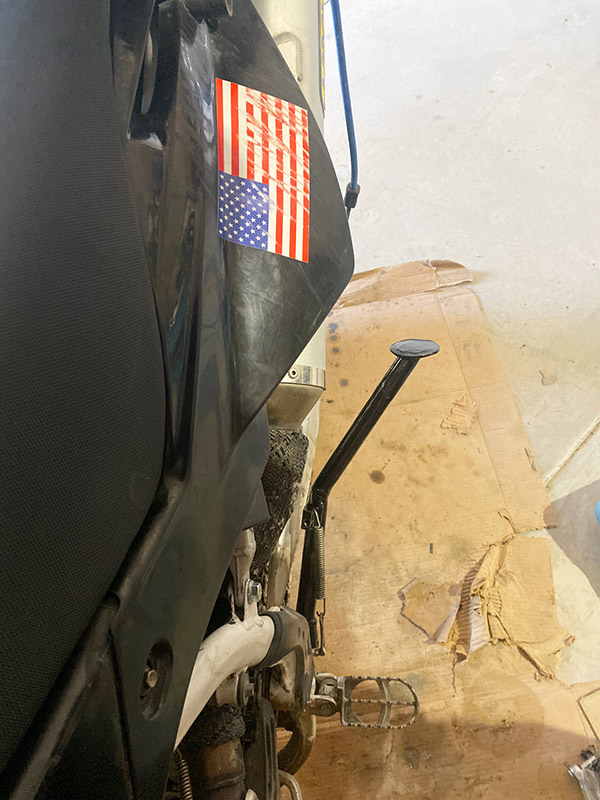
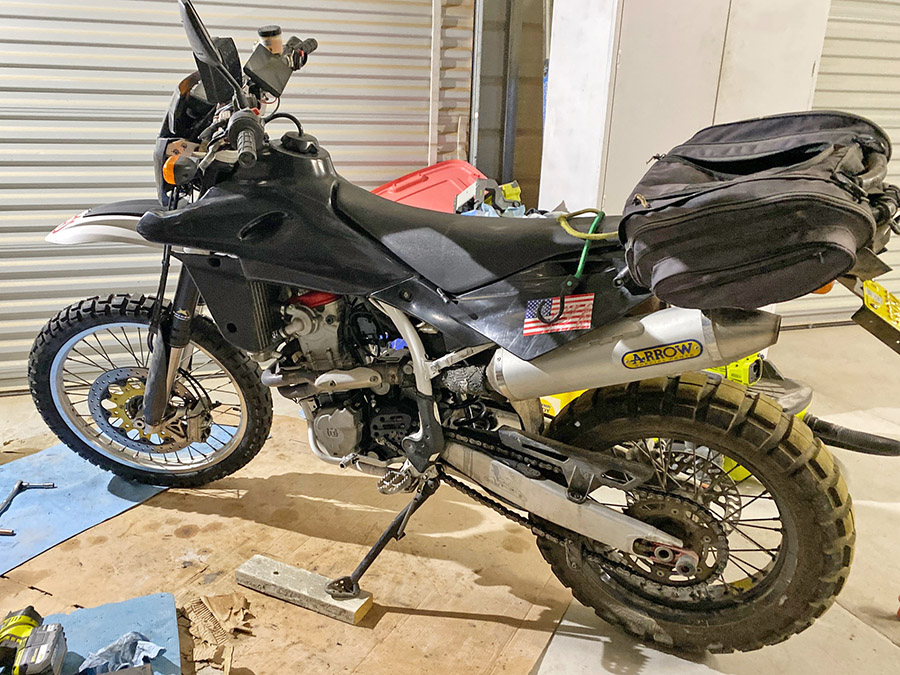
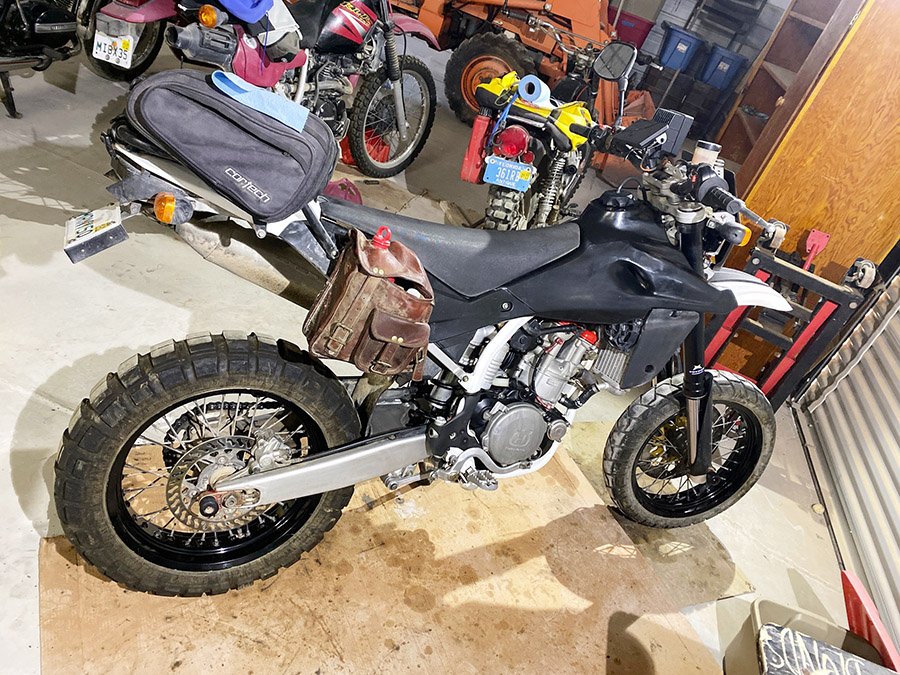
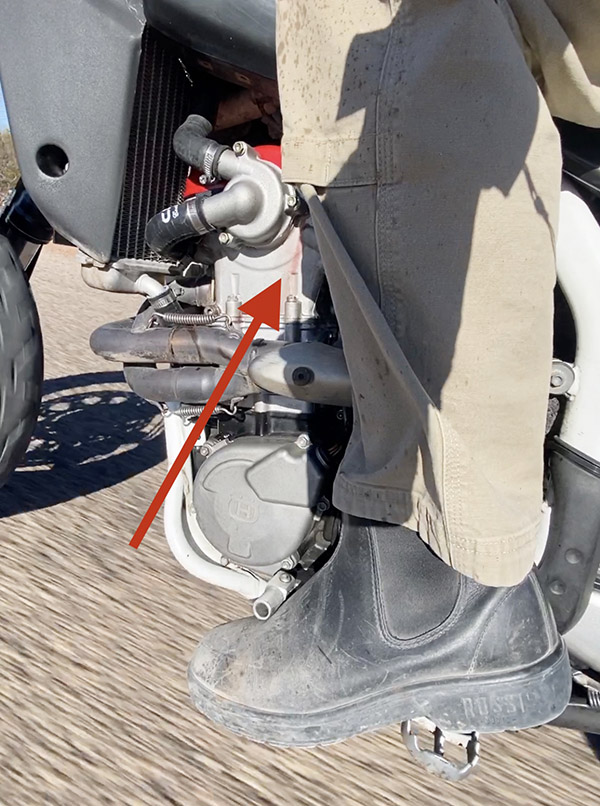
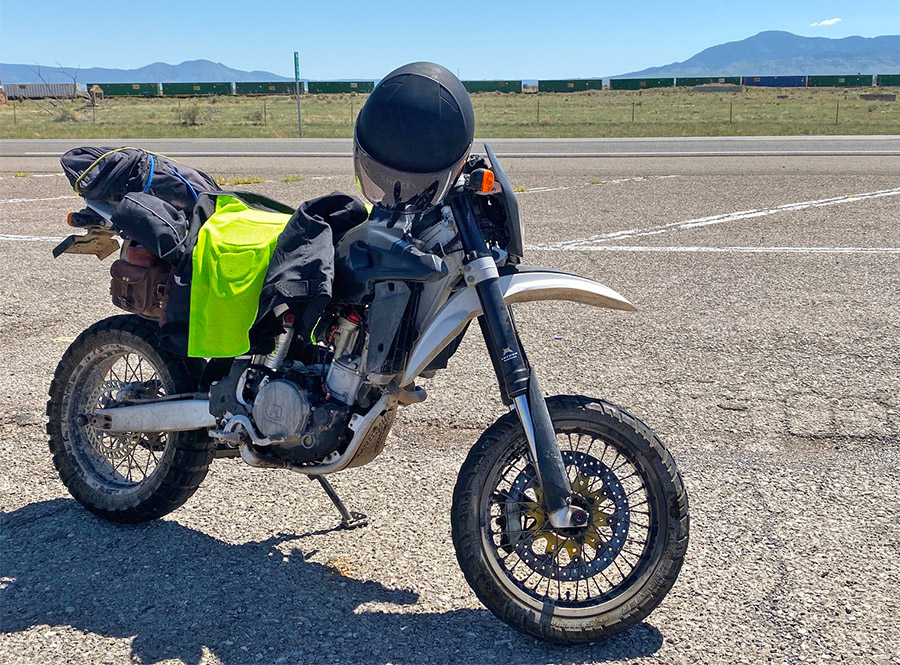
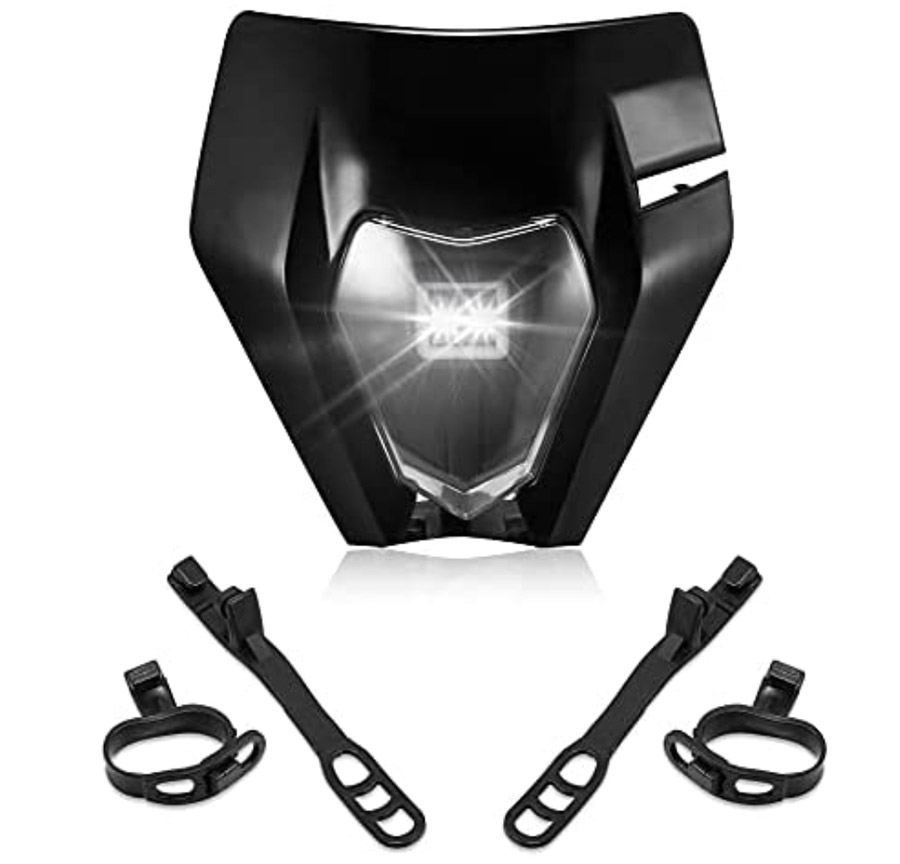
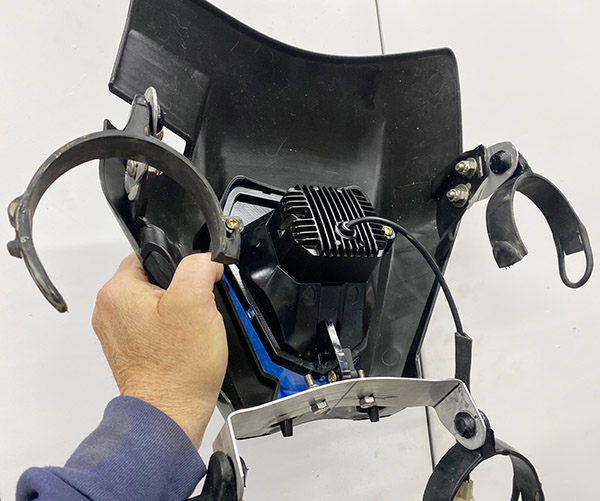
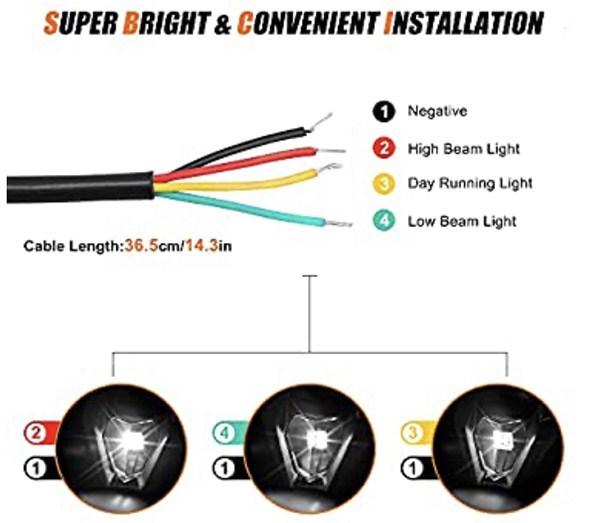
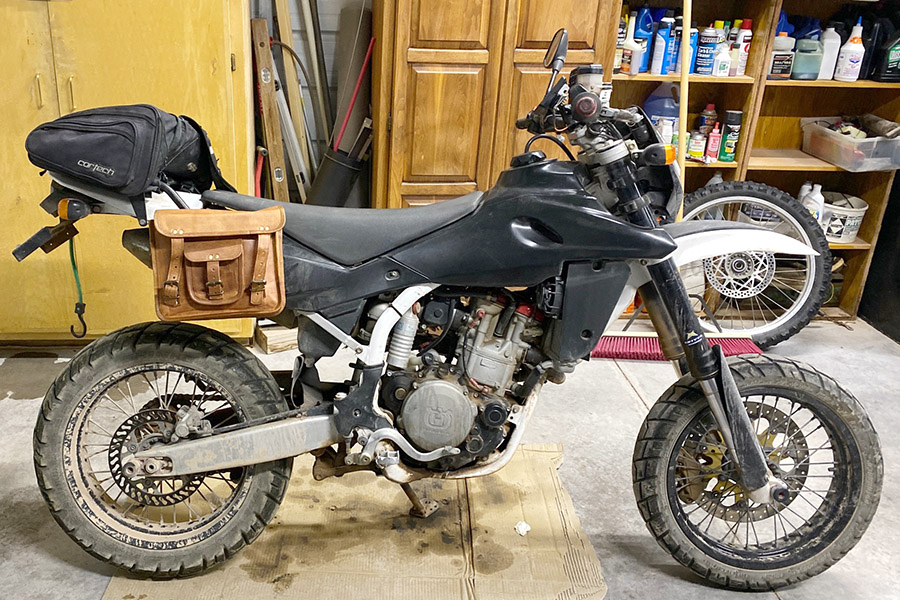
The Husqvarna SMR510 in particular requires 5 or 6 hours of fettling for each hour of riding. You may recall the story I wrote about the bike’s kickstand (classic Dull Men’s Club content) and how the bike wouldn’t start. I took the bodywork off and tightened connections, I unplugged and cleaned multi-pin connectors and gave the headlight wiring a re-org to gain a little room behind that crowded area. The bike was starting ok after the work I did.

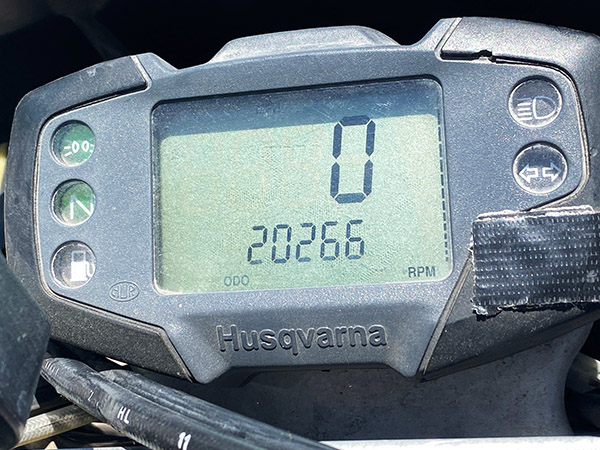
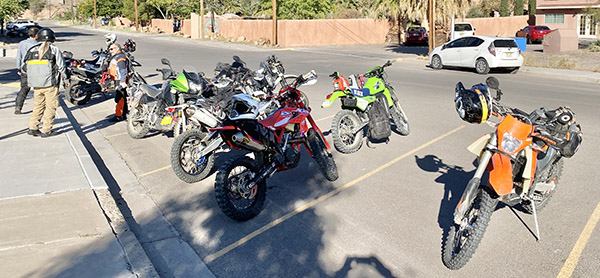
I took the Husky on a test ride through the mountains stopping frequently and it started fine at least seven times. I figured I had the problem licked and when I got home after a few hundred miles I tried the starter one last time. The Husky wouldn’t start. It wouldn’t start after I let it cool down. It wouldn’t start the next day. Again, I jumped the battery positive directly to the starter terminal and the bike roared into life. I knew the battery was okay so I did what I normally do when I don’t know what the problem is: I bought parts.

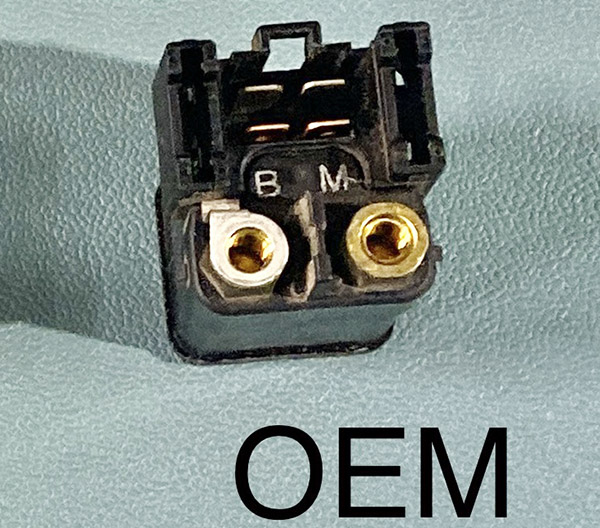
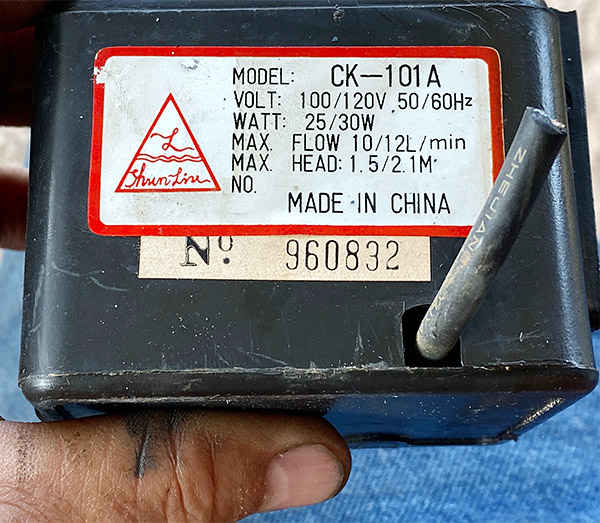
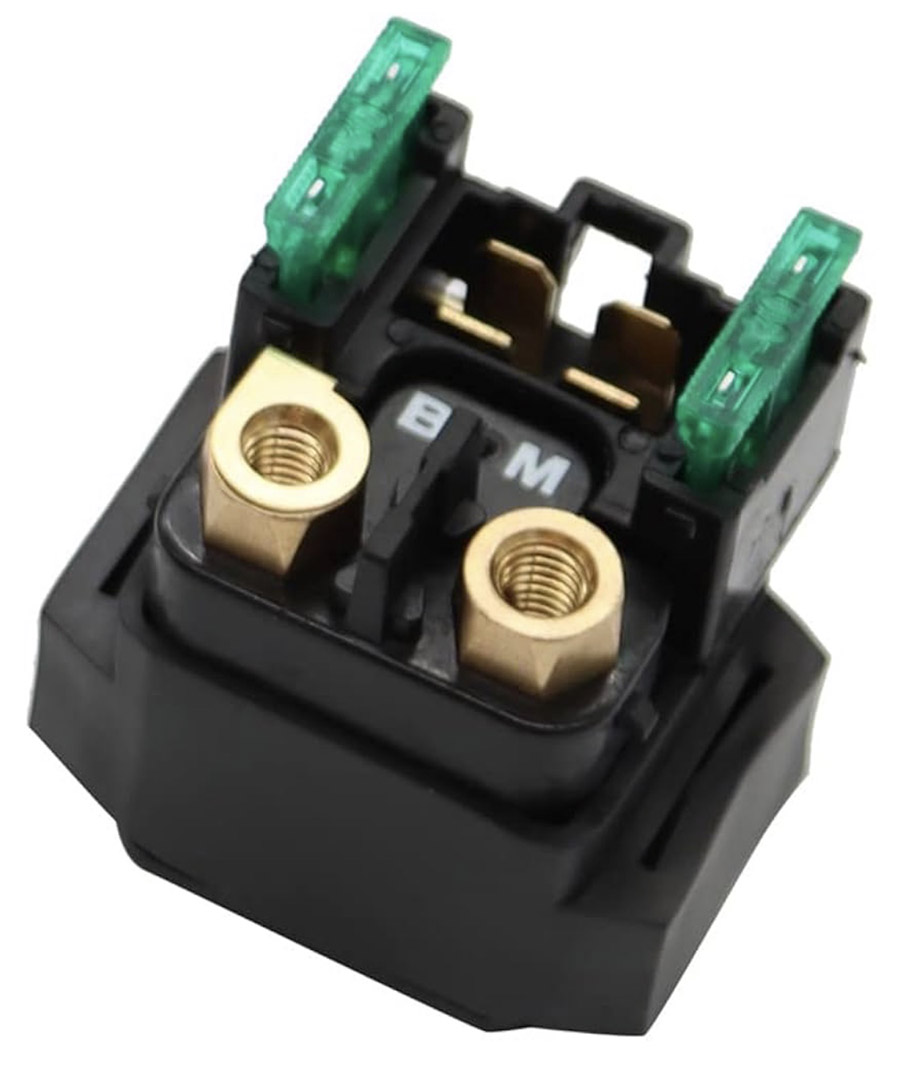
The starter relay on the Husky is an odd one to me but apparently the part is used on a lot of ATV’s, small engines and Chinese motorcycles. I looked on a Husqvarna parts site and the relay was $43, plus shipping. On Amazon a duplicate Chinese relay was $7, shipping included. If you’ve followed my moto-journo career at all I imagine there is not a lot of suspense as to which relay I bought.

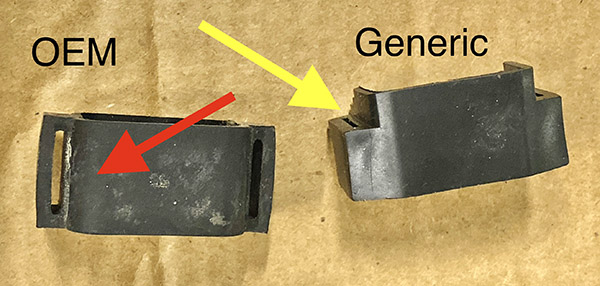
Even to my naturally cheap psyche the $7 relay seemed too good to be true. So I bought two of them just in case the first one didn’t live up to expectations. Kind of like the old “We’re gonna need a bigger truck” punch line but with relays. The clone relay looked exactly the same as the Husky part except the molded, rubber band mounting bushing was clocked 90 degrees off. I pulled the rubber from the original part and it fit onto the clone perfectly. Things were looking good.

This relay is sort of nifty as it has a main fuse and a spare fuse piggybacked onto the starter relay making for a nice, lightweight, compact…thing. The stock Husky relay had a 20-amp main fuse. The generic unit came with a 30-amp fuse. I pulled on the 30-amp fuse to replace it. And I pulled. I pulled harder. I grabbed the fuse with a pair of Leatherman pliers and gave the fuse a mighty tug.

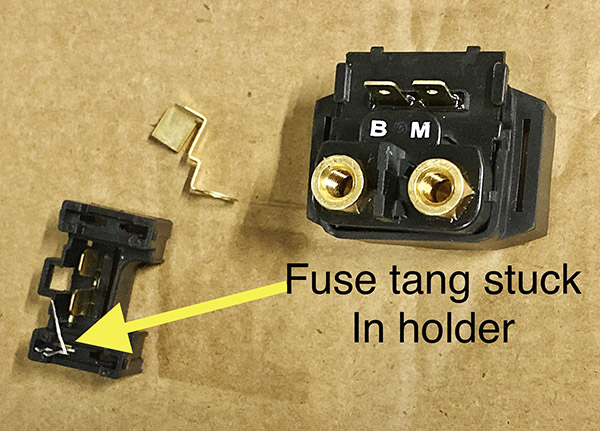
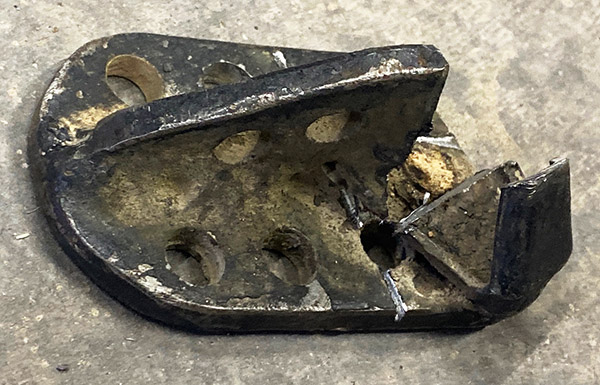
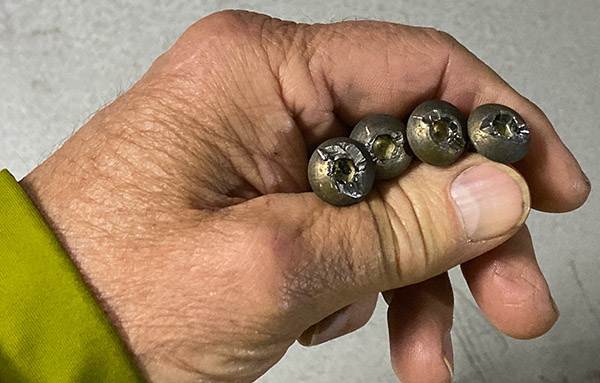
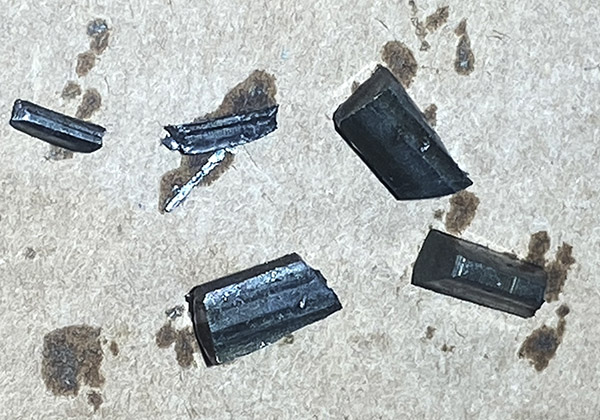
The relay flew apart; parts went everywhere as the plastic bit holding the main fuse broke away from the body of the relay. The tangs of the 30-amp fuse were still embedded in the fuse holder. I gathered the bits and tried to reassemble the relay but it was too far gone. Good thing I bought a second generic relay.

The fuse in the second relay was as tight as the first one so I decided to use the opportunity to upgrade the Husqvarna’s power supply by 10 amps and left the 30-amp fuse in place. It may never blow without melting the wiring harness. I’ll deal with that situation when it arises.

A: Plunger, B: Plunger spring, C: coil, D: start contacts, E: spark shield, F: coil bracket

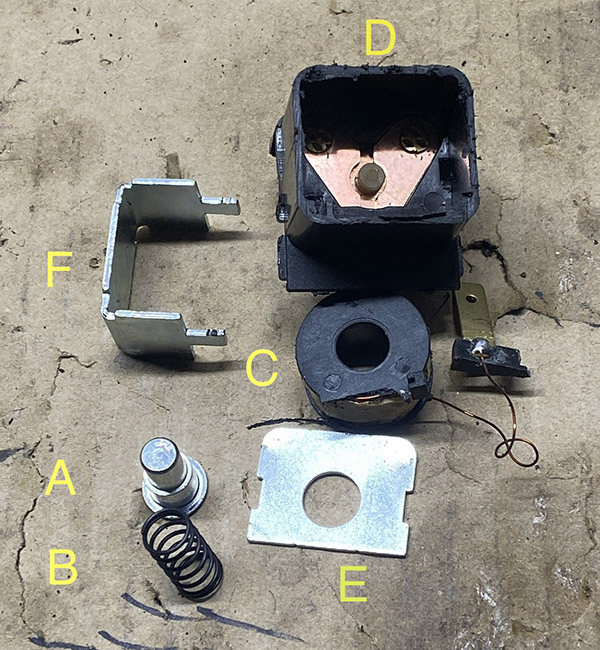
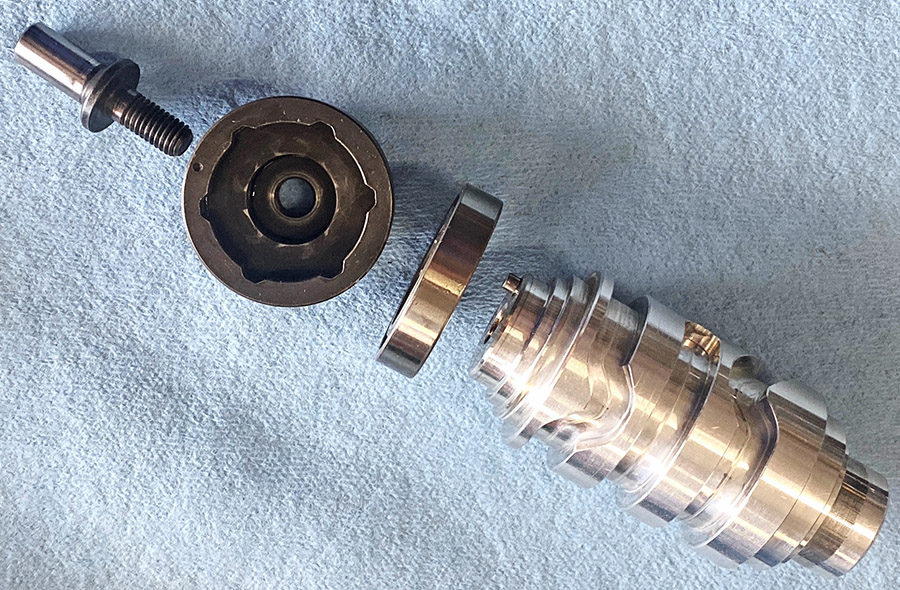
I took the broken relay apart to see what was in the little black box and it was just like a normal starter relay but in reduced dimensions. I suspect the plunger contact on the OEM relay is not making good contact but there is no easy way to dismantle the relay without destroying the thing.

It’s been five days and I’ve started the Husky each day without a problem. Of course, this proves nothing and I’ll have to bang the bike on some trails to see if the starting issue has really been fixed. One positive outcome from all this jerking around is that I understand the relay wiring now and if it won’t start again I plan to bypass the stock Husky starter circuit and install an entirely new, stand-alone starter circuit/ main fuse with a second push button and relay.  It will be a perfect story for The Dull Men’s Club.


Never miss an ExNotes blog:


Don’t forget: Click on those ads and visit our advertisers!


Getting Your Kicks: ExNotes Motorcycle Mods

By Joe Gresh

I bought the 2008 Husqvarna SMR510 in 2009. I forget the exact mileage on the bike but it was around 800-ish, I think. The Husky was essentially a new motorcycle and the bike sat very tall for a guy with stubby legs.  The seat height wasn’t my biggest problem though, the real issue was the diabolical kickstand the manufacturer cursed the Husky with.

The stand was both too short and angled wrong so that when deployed its contact point was only a few inches left of the centerline of the motorcycle. On the stand, the bike would lean way over, unloading the rear suspension to the point the rear wheel was nearly off the ground. This meant the bike fell over a lot. The slightest breeze would pivot the bike onto the stand and knock the Husky onto its left side.

That’s not all that was wrong with the Husky’s kickstand. The foot of the stand was only a millimeter or two wider than the 7/8-inch steel tube the stand was made from. Parking the Husqvarna on anything other than solid concrete was an iffy proposition. If the bike was on sand or dirt the stand would punch through the ground and the bike would fall over. I learned that in the dirt you had to lean the thing against a tree if you wanted to park.

One of the first things I did to the bike was add a gigantic chunk of steel to the bottom of the stand in order to spread the load a bit on soft terrain. I angled the new foot outboard, effectively moving the contact point an inch further from the centerline. The new foot also moved the contact point forward a bit to help even out the fore-aft balance. It kind of worked. The bike fell over less but it still fell over.

The SMR510’s high seat was a pain to climb onto so I decided to raise the rear shock bolt about ½-inch which lowered the back of the bike a full inch. Now I could reach both feet to the ground on tippy-toes or one foot flat. The lowering also improved the kickstand angle and stability although it caused trickle-down issues.

The Husky is blessed with an ultra plush rear suspension. The bike is a Cadillac on rough dirt trails. With the shortened ride height the bike leaned less on the stand in fact it was almost too vertical. Now when I got on the bike the rear would sag pushing against the stand causing the bike to lean hard right. To get the stand folded up I had to lean the bike much further to the right like a 45-degree angle so that the arc of the stand-swing would clear the ground. Even if I wasn’t sitting on the Husky to fold the stand up I had to hold the bike well over center. I dropped it a few more times.

Things stayed like this for many years. My method of mounting the SMR510 was to first fold the stand up then swing my leg over the back of the seat, scratching the rear fender with my boot and settle down into the saddle as the suspension sagged and my feet hit the ground. It was an ok system when I was younger and more flexible.

Unfortunately frailty creeps up on all of us over time. The last few years it became harder to swing my leg high up over the rear of the Husky. The pack I keep strapped to the rear fender made the situation worse. I had to change my methodology and begin a more right-angle frontal assault, high-kicking my leg over the seat like a hurdler or John Cleese at the Ministry of Funny Walks.

You can guess how well that worked: to get on the Husky I had to flip the stand up, hold the bars with one hand, step back far enough to give my leg clearance and kick as high as I could while stepping forward into the bike. Most of the time it worked but if you didn’t get your foot high enough it would smack into the seat and push the bike over. The Husky falls well and all, but still. Getting off the bike was no easy feat either. In fact, I dropped the Husky more dismounting the motorcycle than mounting, although it was a close run thing, percentage-wise.

It got to where I didn’t want to ride the Husqvarna because I dreaded getting on or off of the bike. It all came to a head a few weeks ago when the Mud Chuckers and I did a 140-mile pavement loop with a 40-mile dirt section in the middle. We pulled into the café at Mayhill for a lunch stop but the place looked closed. Neither of us actually checked the door because we didn’t want to go through the trouble of climbing off our bikes.

The parking lot at the Mayhill Café has a slight slope to it and I rolled the bike backwards to leave. The Husky wouldn’t start. Nothing. No clicking. The instrument panel and fuel pump energized so I figured something was wrong with the starter motor circuit. I made the fatal error of positioning the kickstand side downhill. I slid my butt off the seat and started to drag my tired leg over the top of the seat Normally not a big problem. The added distance created by the parking lot falling away meant my leg needed to go even higher to clear the seat and the bike began to topple over onto me. I was bunny hopping with the one leg on the ground and the other leg still not clear of the seat. Events rapidly overtook my hop-speed and the bike fell over. Luckily I was still wearing my helmet because when I fell backwards I smacked my new helmet on the asphalt pretty hard. I think I would have cracked my head open otherwise.

As I was lying on the ground with the Husky on my leg I cursed a torrent of bad words, some of them even I didn’t know the meaning of. It was like I was speaking in foul-tongues except the Holy Spirit was not the one doing the talking. We got the bike off of me and picked it up. I told Mike, “I’m not riding that @#@ing motorcycle again until I fix that #$@@-%ing kickstand.”  We push started the bike and I rode home. So I guess I did ride it again after all.

The starting problem turned out to be a loose connection at the start relay but to be sure I took all the bodywork off and disconnected all the multi-pin plugs on the wiring harness and gave them each a shot of silicone. I relocated the horn to gain a bit more wiring room behind the headlight and changed the old, crumbling air filter for a new one. The Husqvarna was running fine. Except for that diabolical kickstand.

The main problem with the kickstand is that when deployed it is too close to the centerline of the wheels. The reason for this is the kickstand-mounting lug on the frame is angled wrong. Instead of the stand swinging out it sort of swings down. All of the Husky’s kickstand issues stem from this one critical design flaw.

I don’t want to mess with the Husky’s frame so I decided to hacksaw a wedge out of the stand (below the return spring mount) and closed the wedge so that the stand would project about 4 inches further outboard.  I welded the join as best I could not being able to see the weld or the seam.

Moving the foot outboard made the bike lean over too far so I borrowed a few inches of tubing from an old Yamaha handlebar to extend the length of the stand.

I made a plug to insert into the tubing where the old stand and the handlebar piece join, a couple holes drilled into the tubing allowed me to butt-weld the insert and weld the thin tubing together without burning through.

I made a new, lighter foot and cut a new angle on the end of the stand to suit

And it is wonderful. Parking the bike is so easy when it doesn’t fall over from the slightest breeze. My new mounting technique (with the stand in the down position) is to put my left foot on the peg, grab the bars, stand on the foot peg, swing my leg easily over the rear pack, settle down into the seat and with my left foot, swing the stand up. Easy-Peasy. It sounds like I should have been able to do this all along but the geometry just didn’t work that way.

Putting up with the old kickstand for 14 years shows how a bad idea can keep loyal followers. It took that hard fall In Mayhill to jar me into action. There is no free lunch, however. The new stand angle awkwardly juts out from the side of the bike and will most likely break when I crash on that side. I’m hoping my shoddy welding will be like a fuse and it will break at the join before something important breaks.

The kickstand mod has made me fall in love with the Husqvarna again. It’s such a light, powerful bike you feel like there’s not much you can’t do with it. Now that I can easily get on and off the bike those feelings of dread are distant memories.

I’ll see you on the trails.


More motoliterature from Dos Joes?   You bet!


Never miss an ExNotes blog:


Don’t forget:  Visit our advertisers!


If You’re Gonna Be Stupid You’ve Got To Be Tough

By Joe Gresh

I recently hurt my back feeding a 5-pound log into our wood stove. It’s been cold here in New Mexico, like in the 20’s at night. In the morning CT likes to get a roaring fire going to take the chill off the Carriage House’s unheated living room. The place is only 600 square feet so burning two or three logs makes it nice and toasty for her as she gets ready to go to work. When I finally roll out of bed I enjoy the heat also.

It’s strange to me that I can lift thousands of pounds of concrete without any pain to speak of yet the slightest movement can cause such a heavy thud to my lower back. I was just doing my part to make CT’s life even more comfortable when I opened the stove door, reached in with the log and cried out with pain. It was pretty bad. I couldn’t walk or stand up. I doped myself up on Wal-Mart’s finest stomach-bleeding, generic painkillers and settled in for a day of agony.

One thing I’ve learned about my back in the 65 years I’ve owned it is that rest is no way to improve a sore back. To sit down or lie in bed may feel better at the moment but in the end it just makes it worse. You have to keep moving. Obviously concrete work was out of the question so after the pain killers kicked in I walked (slowly) up to the shed to tinker around with the Husqvarna.

The Carrizozo Mudchuckers, who I ride with on occasion, are transitioning to harder core off road motorcycles. One guy has a Honda XR350. Mudchucker Mike bought a Husaberg 400, which is basically a dirt bike with the bare minimum of lighting necessary to be street-legal. I figured if I was going to keep up with these full-on offroad bikes I needed to make the Husqvarna 510 less of a Supermotard and more like Husqvarna’s TE-type dirt bikes.

Even though it looks like a dirt bike the 510 Husky is rigged to be a street bike. It has slightly shorter suspension, wide, 17’ radial tires with a giant front disc brake that I am madly in love with. The bike can stop on a dime and return a dollar three eighty-five. You actually earn money every time you squeeze the front brake lever. Unfortunately that tiny doughnut front wheel is not so good in the dirt. Tire choices for serious off work are limited and I’ve found nothing that works even ok off road. In mud the tire loads up after just a few revolutions turning into a greasy slick. In sand it steers poorly and doesn’t dig in around corners well. About the only place it’s good is on ½ mile flat tracks.

I was pretty sure a 21-inch front wheel would work much better. There’s a reason almost every dirt bike comes with a 21-inch front wheel. First, you’ve got hundreds of tire choices. Every conceivable condition has a tire specifically designed for it. To me, a skinny 21-inch cuts through mud better and loads up less allowing more steering control. The same can be said for sandy conditions. The larger diameter wheel rolls over obstacles easier due to the less abrupt approach angle. Plus, a 21-inch front wheel just looks better on a dirt bike.

I bought a slightly bent, $100 21-inch TE Husqvarna front wheel complete from eBay a few years ago. It was one of those modifications I planned on doing and since my back was shot I figured, what better time? It’s good light duty work. The rim was pretty wobbly so I removed a bunch of spoke nipples and pounded on the thing with a sledgehammer. Those aluminum rims are stronger that you think. I managed to get the wheel a little straighter but it really needs a new rim.

The eBay TE hub looked exactly like the original hub on the 510 except the SMR axle was larger than the TE axle, probably due to the higher stresses asphalt puts on the long forks. The larger axle meant I had to swap the 17-inch wheel bearings into the 21-inch wheel hub. Along with the larger axle the SMR has a larger disc rotor so that part had to be swapped over to the 21-inch wheel also.

The disc rotor is secured to the hub by allen-head bolts and they were tight. I tried heat, I tried penetrating oil, and I tried an impact tool. Through all this monkey motion I managed to round out the hex in the rotor bolts and several allen sockets. Too easily, I fell back on my old reliable cold chisel to remove the rotor bolts. Needless to say the bolt are now unusable.

The old (smaller) rotor came off easily on the 21-inch wheel and it was then that I realized the TE rotor bolts were smaller. In fact, the TE rotor mounting-bosses were smaller than the SMR mounting bosses. The rotor bolt-hole centers were the same and the SMR rotor mated up to the TE hub. I used the smaller TE bolts as they were a countersunk type and self centered in the larger SMR rotor holes. I made a mental note to add spacers or drill and tap the TE hub for the larger SMR bolts at some undefined later date. Shoddy as it was, the 21-inch front wheel bolted into the SMR forks and seemed to fit perfectly. I spun the wheel: it was bent but not that bent.

The original 17-inch rim is so small and the disc rotor is so large that you have to remove the caliper to remove the wheel from the forks. And this is when things started to go pear-shaped. I bolted the caliper on and gave the 21-incher a spin. It didn’t spin well at all.

The spokes on the Husky SMR510 were always close to the caliper even with the stock setup. What I didn’t foresee was that the smaller wheel located the caliper very near the rim where the spokes were centered and farthest away from the spokes. With the 21-incher’s less-steep spoke angle and the caliper having moved closer to the hub in relation to the rim edge the spokes hit the caliper. They weren’t hitting hard, mind you, the wheel still spun. But they were hitting.

Not one to take a hint that something was critically wrong with the idea, I used a 4-inch grinder with a 60-grit flap wheel to knock the backside of the caliper down a bit. It was working. The spokes hit the caliper less each time I sanded the Brembo caliper. I was almost there. The spokes were barely brushing against the caliper and the wheel was spinning nicely. It needed just a bit more grinding. And then the brake fluid started leaking. I had sanded completely through the caliper into the piston chamber.

At that very moment the entire situation became clear to me. To make the 21-incher work I would need to use the small rotor that came with the used wheel. To use the small rotor I would need the lower fork leg from a TE because the radial caliper mounting bolts would be too far from center and the brake pads would miss the rotor. To use the lower fork leg I would need both sides because the TE has longer travel suspension. Finally, I would need the TE type caliper to clear the spokes. In a matter of seconds I realized that everything was wrong and that I was well and truly screwed.

I found a new Brembo caliper on eBay for 200 dollars and I bought a new set of wheel bearings just because pounding on them to remove them is not good once much less twice. I guess the Husqvarna is going to stay a Supermotard. I’m about 400 dollars and a couple days labor into this daisy chain of stupid decisions and I just want to make it stop. When the parts show up I’ll be putting the 17-incher back on the Husky and try to find a more aggressive tire.

Unless I find a complete set of TE forks, brakes and wheel on eBay…


Never miss an ExNotes blog:


How many popup ads did you click on today?

Grind Me A Pound Of Reverse: Part 4

Putting a motorcycle engine back together is much harder than taking it apart. Staring at the boxes of gears and cams the other day I found my memory beginning to fade, where did this spring go? I figured I better get on with the reassembly because if I waited any longer I wouldn’t remember who left their Husqvarna motorcycle in my shed. The nerve! Reluctantly, I set aside my ongoing concrete projects for a few days and began work on the Husky SMR510.

The crankcases and all internal parts were washed with mineral spirits turning the skin on my hands a nice shade of chalky white. After the mineral spirits a liberal application of Gunk engine degreaser was sprayed into all the nooks and crannies. Then a blast of good, Sunoco rainwater (filtered to 5 microns!) from the garden hose hopefully flushed out any stray bits of metal from the broken transmission. My little 18-volt Ryobi grass blower did a fair job of drying the pieces and laying the stuff out in the warm New Mexican sunshine finished the cleaning process.

Since the old transmission was the part that felled the Husqvarna and I was using a second-hand transmission, I dry fit the transmission and crankcase halves together. Once the gear shafts and shift forks were in their proper positions I spun the shift drum and is seemed like all 6 speeds were selectable.

I think I mentioned in a previous episode of Grind Me A Pound Of Reverse that I didn’t like the gear spacing on the second-hand transmission. The gears didn’t quite line up right. They were offset a couple thousandths of an inch to my eye. Anyway, I went ahead and gooped up the cases with Yamabond4 and with the crankshaft, balancer shaft and gearbox in place, slid the two cases together. They went together easily. Of course nothing is ever really easy, now is it?

I tried to spin the clutch shaft and the transmission was bound up tighter than a (sexual innuendo of your choice). Quickly, before the Yamabond4 had a chance to set I took the cases back apart and cleaned all the goop off the sealing surfaces. This situation needed more study, more than I was willing to give at the time so I gave up and went outside to dig a hole.

The next day I took a look at photos I had made during disassembly. I saw a spacer under the clutch basket and knew this same spacer was now inside the transmission. Turns out I had this spacer on the wrong side of the clutch shaft. This was also why the gears didn’t line up quite right. After relocating the spacer to outboard of the cases and reassembling the transmission, shift forks and then re-gooping the cases and tightening up the mess everything spun freely. This is what I mean by memory fading.

While its transmission might be fragile the Husqvarna has a well-engineered engine. Everything that spins rides on ball bearings; even the shift lever rides on needle bearings. This engine could run without oil for longer than you’d think. At 20,000 miles the valve train showed little wear, the cams were unmarred and the cam chain tensioners were in like-new condition. The whole layout is fairly simple and logical.

The big piston slips into a sleeveless aluminum cylinder bore coated with some sort of magic stuff that still showed hone marks. One area of concern is the base gasket. The gasket set I bought had a paper base gasket and the original was metal. From my experience the SMR510 engine has a lot of crankcase pressure. Hopefully the paper gasket works.

Installing the cylinder head was uneventful; the kit gasket looked like the same metal-sandwich material as the factory gasket. While I had the engine on the bench I checked the valve clearances. They wanted a bit of adjustment and in an amazing stroke of luck swapping the exhaust shims to the intake valves and the intake valve shims to the exhaust brought everything into spec. The fact that both left and right exhaust shims and both left and right intake shims were the same thickness speaks to even wear, careful machining and accurate valve installed-height during factory assembly.

There are a million bits to strapping the engine back into the frame. I put mostly new water hoses on because the kit I bought was missing a few. Since the swing arm was off I dismantled the rising-rate suspension linkage and greased the needle bearings. The forks on the Husky don’t turn sharp at all. To get a bit more steering angle I shortened the fork stops in an attempt to get an inch or two less turning radius. The fork tubes just kiss the plastic gas tank now so I’m maxed out. All in, it took the better part of a day to finish the engine install.

Starting the bike produced a few pops and farts until the fuel injection bled itself out and then the bike fired up! I leaned the Husky onto the side stand, lifting the rear wheel off the ground and ran through the transmission. All 6 gears were present and accounted for.

A quick test ride confirmed that even a stopped clock is right twice a day: I managed to get it back together and the bike runs just like before. Almost. The valve cover gasket is leaking so I’ll have to take a look at that. Total cost for the repair was around $400. My time, of course, was free. That’s $5600 less than a new Suzuki DR650, which was my Plan A when the Husky spit up its guts.

I think the reason for the Husqvarna transmission failing in the first place goes back to the SMR’s roots of being a dirt bike converted to street use. In the conversion process Husky’s engineers failed to put any kind of cushion in the drive train. You don’t really need cushion in the dirt because dirt is never all that grippy.

The crankshaft has a straight-cut gear to the clutch basket, the solid clutch basket has no cushioning springs, and then it’s direct to the transmission gears, to the countershaft sprocket and on to the rear wheel where there are no rubber cushions. The sprocket bolts solidly to the rear hub. Think about that big 500cc piston pounding the gearbox while the bike is on asphalt. The only give in the entire system is the rubber of the rear tire.

Maybe Berk is right: Maybe I just don’t know how to ride a 500cc single. (Note from Berk:  I said that?)  Seeing how the Husqvarna is built will change my riding style. I’ll let the engine rev a bit more and not lug the thing down to rattle on the gears. I’ll also try to stay on dirt roads whenever possible. Or, maybe it was a fluke. Only time and miles will tell.


Please keep hitting the popup ads!


Never miss an ExNotes blog:


More Resurrections!

Grind Me A Pound Of Reverse: Part 3

The Husqvarna is still in a million pieces but those pieces are improving. I received the new-used transmission from eBay and it looks to be in good condition. The seller included a few extra bits like a brace for the starter gears and a well-worn countershaft sprocket. The odd thing is, I bought the gears from a British eBay seller but the transmission was shipped from Latvia. Have I stumbled upon an international motorcycle theft ring that keeps a United Kingdom address for customer assurance but chops the stolen bikes in Latvia? Is it a way to get around the dreaded Value Added Tax?

The transmission fits into the crankcase well and looks exactly the same as the old gear cluster. I used the countershaft shim that came from Latvia but I don’t like the gear spacing so I might try the shim from the old countershaft shim. I’m using the Latvian shift forks and shift drum (the old ones don’t look bad but I suspect may be bent as the bike kept jumping from neutral into gear just pushing it around).

The flywheel puller I ordered that was supposed to fit my year Husqvarna missed it by a few millimeters. I was sent a 26mm but I measure the threaded puller boss at 28mm. Of course the puller would not thread on. I need to get the flywheel off to wash out the crank bearings and case. I have ordered a 28mm puller; hopefully it will fit.

My Harbor Freight parts washer hasn’t been cleaned since 1999 and had a ½-inch layer of greasy muck in the bottom. The goal is to not make the parts less polluted, not more. I scraped the gunk out and cleaned the parts washer. It was time, really. The solvent pump was not working and the plastic pump’s hose bard had broken just from sitting. I have looked online for a replacement pump but can’t find an exact fit. I don’t feel like modifying a different pump right now so I decided to wash the bits the old fashioned way: a stiff brush and bucket of mineral spirits.

As I clean the parts I stack them in order inside a nice, lidded, plastic box to keep dust and cat hair off of them until ready to reinstall. I use blue masking tape to keep the bolts for each component together. This saves you from having to figure out which bolt went where later on. Lots of junk came off the parts and I had to refresh the mineral spirit bucket frequently.

My buddy Deet thinks the world of Yamabond sealant so I ordered a small tube of Number 4 to seal the crankcase halves. I would have used Huskybond 3 but couldn’t find any for sale. My plan is to dry fit the crankcase halves together and test the shifting of the transmission, You need both sides to test the transmission properly otherwise the gears bind and push the shift fork shafts around. After I’m sure the thing shifts ok I’ll pull it apart and apply the sealer for final assembly.

I received the top end gasket set from eBay. It only took two days! I haven’t checked to see if they are the right ones but they look ok in the package, what could go wrong? The gasket set was pricy at $45 but is very complete with all the o-rings and rubber parts along with valve stem seals and the gaskets.

I’m not making rapid progress on the Husqvarna. I spend a lot of my time wondering at a blade of grass or being amazed by the sky revolving around above my head. Still, I’m more confident than ever that the Husky will tear up the trails once again. Now I just need that 28mm puller.


Like what you get in ExhaustNotes?  Help us out and hit those popup ads!


Never miss an ExNotes blog:

Grind Me A Pound Of Reverse: Part 2

In the first episode of Grind Me A Pound Of Reverse I contemplated buying a Suzuki DR650 and leaning the broken down Husqvarna SMR510 on the side of the shed to bleach in the harsh New Mexico sunlight. Suzuki DR650s are as stone axe simple as you can make a motorcycle today. They are air-cooled, carbureted, have zero electronic widgets (except for ignition) and cost around $6000 for a 2022 model. I’d have to sell a few of my clunkers to fund the DR but it’s the sensible thing to do.

The thing is, the Husky is such a fun bike to ride I thought I’d take a poke at fixing its transmission woes. The Husqvarna crankcase is a vertically split unit which is easier to manufacture but means the entire engine must be dismantled to access the gearbox. In my case this is not a big deal because when a gearbox explodes you have to clean out all the microscopic and not so microscopic bits of metal.

The SMR510 frame is wrapped tightly around its engine and a lot of stuff has to be dismantled to get the lump out into the open. With long-travel suspension causing wide variations in chain tension its best to keep the swing arm pivot as close to the countershaft sprocket as possible. On the SMR the pivot bolt goes through the back of the engine and that means the swing arm has to come off. In addition, the radiators, fuel injection body, EMS and other body parts must be removed also. It took me about 4 hours to finally free the Husky’s engine but I don’t work fast.

I have no shop manual for this bike so with the engine on the bench the first thing I did was rotate the engine to top dead center-compression stroke in order to find the cam timing marks. The Husky has a cam chain that spins an idler gear; the idler gear then spins the two overhead cams. Each cam has a small dot that lines up with the outside gasket surface of the head. The idler gear has three markings, the center mark is two dots and these dots line up with a mark on the cylinder head.

I also put an additional punch mark on the crankcase and alternator rotor to make finding top dead center less subjective. The Husky’s timing looks pretty easy to do so I’m sure I’ve got it all wrong and the valves will bend the first time I try to start the engine.

Next I removed the cam caps. The cam caps were secured by these allen-head bolts and they were so tight the heads rounded out on three of them. I had to use a flat chisel to knock the bolts loose so I’ll need to get replacements from the hardware store. The head bolts are 10mm allen-type and deeply recessed so once the cams were out of the way I had to cut a 10mm allen wrench to make a long reach socket. The head bolts didn’t round out.

One of the reasons the Husqvarna 510 engine doesn’t last long is the slipper piston. This type of piston is pretty much a racing piston and has so much cut away there is only a narrow skirt to take side loading and a limited surface area for an oil film. The valve train is state of the coil-spring art: long, skinny valves at a narrow angle to give an almost flat-top combustion chamber.

The Husky incorporates small finger-rocker followers to remove valve-stem side loading. The cam lobes swipe across the followers, not directly on the valves. This set up adds a bit of weight to the valve train but the Husky revs to 10,000 rpm without valve float so I’m not going to worry about weight. A nifty feature is the spring-metal separator clip that can be removed from the rocker arm shafts, which will allow the finger rocker to slide over giving access to the valve shims. This means you don’t have to remove the cams to adjust valve clearance.

Splitting the cases was a fairly straightforward operation except for the shift drum. I managed to get the thing apart but still haven’t figured out how the shift drum is held into the right crankcase half. I got pretty frustrated and gave it a few whacks but it didn’t budge. I’ll study the situation after I calm down.

This is what was causing the racket. A couple gears are missing teeth and who knows what other unseen damage to the cluster was done as the bits of hard metal flew around inside? The shift forks may be bent because the bike wouldn’t stay in neutral and kept going into gear when i pushed it around the shop. I decided to get a used gearbox and replace the entire transmission.

The 2008 Husky SMR510 is one of the last Husqvarna’s with a tangible connection to the original Swedish manufacturer. Employees from old Husqvarna operated the company that built my bike. They purchased the name and relocated manufacturing to Italy. Cold, icy Sweden or warm, sunny Italy, who wouldn’t move? Shortly after my bike was built Husqvarna was sold to BMW and the bikes became re-badged BMWs. This only lasted a few years until KTM bought Husqvarna from BMW and the bikes became re-badged KTMs.

So parts are sort of hard to find. I located this complete TE510 (the enduro version of my bike) transmission in England for $285. Shipping was expensive but it’s a long way to Old Blighty and probably one gear would cost $100 if I bought it new. Hopefully it will fit.

EBay also had a top end gasket set for fairly cheap so I have that kit on the way. The case halves are sealed with goop, no gasket needed. The side cover gasket and alternator gasket came away without tearing so being ever thrifty I can reuse those gaskets.

I’ll have to do a thorough job of cleaning out the transmission debris inside the engine and whenever this stuff arrives I’ll try to reassemble the mess. ExhaustNotes will have up to date information as this project moves forward. Even if the Husky manages to run again I still might buy that DR650.


You know what to do.   Share this post and please, do a friend a favor:  Hit those pop up ads!


Never miss an ExNotes blog:


Join our Facebook page.

Grind Me A Pound Of Reverse

September is one of the finer months for motorcycle riding in New Mexico. The daily monsoon rains begin to ease off in September. The trails remain slightly damp so dust isn’t bad and the Carrizozo Mud Chuckers and I can run a tight formation on New Mexico’s many dirt roads. The hot summer temperatures have faded away with the peek-a-boo, pre-fall weather allowing for cool morning rides and warm daytime riding.

These perfect days and these perfect times call for a long dirt loop from White Oaks to Claunch then south to Highway380. My morning Husqvarna ride to Carrizozo was glorious, just cool enough to create a little chill in my mesh jacket but not cool enough to cause discomfort. You know that feeling when everything is all right?

After a short gab session with the Mud Chuckers we gassed up at the Allsups station and headed north towards White Oaks. We traveled a half-mile when something started making a racket in the rear wheel of the Husqvarna. It sounded like I had run over a length of barbed wire and the wire was wrapped around the wheel. This happens more often than you would think in New Mexico. I pulled over but couldn’t see anything in the wheel so I started out again.

The noise was worse, like maybe the chain was jumping teeth on the sprocket. I turned into a convenient historical marker parking area and gave the chain a good look. Nothing seemed out of order. The Mud Chuckers had turned around and pulled into the historical marker lay-by. Mike asked me, “What’s the problem?” I told them I didn’t know but it sounds bad.

We tipped the bike onto its side stand and started the engine. Running through the gears made a hell of a racket, at times the engine would bind up and almost stall. Eddie said that at least it made it further than last time (referring to a past event when the Husky blew out a rubber plug and pumped most all the hot engine oil onto my right pant leg).

When I bought the Husqvarna 14 years ago I remember reading in the Husky Café forums about how the 510 engine was only good for 20,000 miles. I figured those were racing miles and I would not be pounding on the bike like most motocross or Supermoto racers. Turns out those Husky Café estimates were not far off.

It was still a perfect day. I called CT and asked her to come get me in the pickup. She asked if this was the same bike that broke down last time. “Yes,” I said, “except a little past where you picked me up before.” The Mud Chuckers chatted with me for a while and I sent them on their way. No sense in everyone missing out on a perfect riding day.

When we got the bike home I removed the oil drain plug and large chunks of gear teeth were attached to the drain plug magnet. This was not good news. I asked CT to cancel the Husky’s insurance because it will be a while before I get around to fixing the thing.

The Husky, having a vertically split crankcase, will require a complete teardown to clean out the debris and replace the broken transmission gear/gears. That’s if I can even find the parts. My Husky is from Italy, two generations removed from KTM, the new owner of Husqvarna. The closest thing to my bike is a SWM 500. SWM bought all the tooling and production rights from the remains of the Italian crew and that bike uses the same engine as my Husky; hopefully, the gearbox is the same.

My other bikes are a mess. Sometimes I want to sell all this junk and buy a brand new Suzuki DR650. I’ve got to get the Z1 carbs put back on the bike. They are mostly together; I just need two new fuel tees. The ZRX1100 needs just about everything as it has been sitting for 8 years now. The KLR250 runs crappy and its carb needs cleaning, but I’m not going to take it apart until I get the Z1 carbs back together.

The funny part about all this is that the only bikes I have left running are two 50-year-old Yamaha two-strokes. “It’s a Better Machine” indeed. And you know what? That’s just fine by me because nothing can spoil these perfect days.


Keep us afloat:  Hit those popup ads!


Never miss an ExNotes blog:

ExNotes Review: KooBee Fit-All Dirt Bike Headlight

My 2008 Husqvarna 510 came equipped from the factory with the worse headlight I’ve ever had on a motorcycle. What am I saying? It’s the worse headlight I’ve ever had on anything and that includes those old HO scale slot cars that had headlights actuated by the motor controller thingy.

Not only is the headlight dim: the most annoying thing is the way the Husky eats incandescent bulbs. I go through one bulb every 500 miles. The bulbs themselves are oddball scooter type and 35 watts barely casts a glow on the road. The lens is melting from the little bit of heat generated and the separate, small parking light bulb will no longer stay attached because the hole it fits into has melted into a large egg shape.

In an attempt to slow the destruction I installed a weak, low wattage LED bulb and that unit has managed to stay lit for 5000 miles. “Lit” is a relative term: the LED struggles to illuminate the leading edge of the Husky’s front fender. But it does stay on. It gets dark pretty early his time of year so I decided to take another shot at the headlight situation by buying an entirely new headlight.

The KooBee universal fit headlight comes with a halo-type parking light, a low beam and a high beam. The plastic lens is fitted into a plastic number plate faring that resembles the original Husky part. Included with the light were four of the rubber headlight mounts, the kind that go around the fork tube just like the originals the Husky came with. All in all the setup looks fairly well made for cheap plastic junk.

Fitting the light was a bit of an issue because the original headlight bucket was shallower and the whole unit fit closer to the fork tubes. The KooBee light fixture stuck out further and the mounting arms were too short. The light would have fit if I removed all the wiring, the horn, the speedometer and the anodizing on the fork tubes. Instead I made three aluminum extension arms to move the headlight a couple inches forward allowing the rat’s nest of wiring a little room to breathe. As it is I had to relocate the horn and rearrange the wiring to fit it all in.

The next problem was connecting the KooBee to the Husky’s headlight plug. The KooBee came with 4 loose wires in a pigtail with no plug or socket at all. Naturally, the Husky uses a strange 4-pin socket and plug, unlike the normal 3-pin type you see on most older motorcycles and cars. I lopped off the Husky plug and soldered the KooBee headlight wires to the Husky pigtail. I can unplug the headlight when it catches fire pretty fast now.

When it came time to fit the rubber mounts to the Husky forks the nice looking kit rubbers fell apart. The rubber looked ok and was molded well but it seemed like it was already partially decomposed. You could pull the things apart like Playdough Fun Factory clay. The kit rubbers were tossed into the trash bin and I used the original Husky rubbers, which still had life after 14 years.

With everything put back together I turned on the ignition and the halo/rim light was already brighter than my old LED on high beam. Firing the bike off lit the low beam and it was a huge improvement. I flicked the high beam on and got a nice bit of light. When I’m describing the light output you must take into consideration where I was starting from: near total darkness. The KooBee has an up-down adjuster screw but no side to side. For side adjustment you move the rubber bands that hold the light onto the forks. I haven’t tested the light at night because it’s too damn cold for that stuff right now. It almost doesn’t matter because it is what it is, there’s no putting a bigger bulb in the KooBee. If it goes out you replace the entire headlight. The KooBee was $45 on Amazon and if it stays on for a few thousand miles I’ll be happy.

I suspect the KooBee’s black plastic is sort of soft. I tried to wax the faring part so that bugs won’t stick but the wax seemed to take the gloss off. The stock Husky stuff dulled fast also. Maybe that’s just the way plastic body parts are. After it warms up a bit I’ll take a night ride to see how the KooBee works. I might need to adjust the thing but I know it’s much brighter than the stock light. Look for a mid-March KooBee follow up report here on ExhaustNotes.us.

The 2021 Rubber Chicken Ride

If you had asked me a week ago what the Rubber Chicken Ride is about I would have replied, “I have no clue, Bubba.” Held annually in Truth or Consequences, New Mexico the 2021 Rubber Chicken Ride resisted any defining characteristics and after three days participating I still have no clue what it was about.

There’s an entry fee, $50, that goes to the New Mexico Off Highway Vehicle Association, (NMOHVA). I guess it’s a like a fundraiser except a motorcycle ride breaks out while passing the collection plate.

I met up with the near legendary dirt-riding group, The Carrizozo Mud Chuckers at the Truth or Consequences Travel Lodge motel. The Travel Lodge is one of the few remaining old school types where the room doors open out directly onto the parking lot. I like this layout as you can hang out as a group tinkering with the bikes. It fosters community spirit and you can lock your bike to the uprights supporting the overhang. At the motel we met six other Rubber Chicken Riders none of who had any idea what was going on and all pushing 70 years old. That’s like 3 years older than the Chuckers.

This year’s Chicken was stripped to the bare bones due to Covid. No group dinners, no Show Us Your Scars competition, no organizing at all: just show up and ride. Part of the confusion was due to my not bothering to download the GPX files from the Rubber Chicken thread on ADVrider, which I knew nothing about until I was at the event. I probably couldn’t have figured out how to migrate the files to my GPS anyway. It annoys me that those old codgers can download files into their displays and I’m still using paper maps. I think of my GPS is kind of a last resort deal; I use it when I’m not sure how to get home.

That first day we tried to find the Rubber Chicken sign up area at Healing Waters Plaza, a place no one in Truth or Consequences seems to have heard of. Everyone we asked sent us to a different Healing Waters but they were hot springs, not the sign up staging area. The town was named Hot Springs in the past and has quite a few still around. Luckily, my Garmin knew about the palm-lined plaza and after riding past it several times we were able to find the pocket park along with a couple other Rubber Chicken Riders. Oddly, there was no water in sight.

The other riders we met at Healing Waters were as clueless as we were so we sat around and talked bikes for a while then the Chuckers and I decided to ride out to nearby Elephant Butte Dam to check out the scenery. After the dam tour we hit up the local Denny’s. You know how they say landing and take off are the most dangerous parts of flying, that’s how it is for me getting on or off the tall Husky 510. The Husky’s kickstand is so designed that once you’re on the bike you can’t tip it over far enough to retract the stand. This means I have to get on or off the bike with the kickstand up. Not a problem on a normal motorcycle, with the Husky it takes Baryshnikov-level flexibility to toss a leg over the high seat and rear luggage stores. I’m no Baryshnikov.

I got half way off the bike but my boot hung for a life-altering moment, still on one leg the bike started to topple over the far side. I pulled the bike back towards me but pulled a little too much. With my stubby, grounded-leg near the centerline of the wheel track the bike toppled over onto the near side taking me out in the process. In the Denny’s parking lot. In front of everyone.

Back at the Travel Lodge we grilled the other riders.  They resisted at first but stopped struggling as soon as they were evenly browned on both sides. The way it was supposed to work is you download route files and load them in your GPS before arriving, then at the plaza meet up with like-minded riders and off you go, a merry band of riders. It’s a great way to meet new riding buddies. There’s no NMOHVA sanctioned rides. This is the loosest possible group ride you can imagine. One of the riders had an old, Rubber Chicken event T-shirt. In a testimony to how damaged things have become since Covid all we got this year was a tiny NMOHVA sticker with a rubber chicken on it.

The second day there was a sign up table at the Healing Waters Plaza. Maybe 15 riders had gathered and we had a good gabfest with the boys and one girl. By now we pretty much had the event figured out so the Chuckers and I headed out to Chloride, an occupied-ghost town for one of the routes: the Chloride canyon loop. We didn’t have GPX files but the Chuckers had paper maps.

At the end of the road in Chloride the road turns hard left and becomes unpaved. It’s sort of rough and rocky being a dry streambed at the bottom of a steep canyon. After about a mile of this abuse we stopped to reassess our riding skills and time left in the day. For a route that 6 guys on dirt bikes had done just a day before there were no tire tracks except the ones we were making. I dreaded turning on the Garmin because I’ve never read the owner’s manual, it always leads to a bunch of button pushing and frustration instead of riding. The Garmin said the road went for 5.6 more miles then dead-ended.

We started doubting our direction. Maybe we are on the wrong route, those 70 year-old guys couldn’t have gone this way. None of us liked the idea of riding this rocky trail 5 miles and then turning around and riding it back. We chose an alternate route. Seeing as there were no official routes anyway we felt we could take liberties with the Rubber Chicken.

Our alternate route was a long, 60-mile stretch of fairly easy dirt bookended between 80 miles of pavement on either side. The route seemed to go on forever. We went over the continental divide twice, once on paved Highway 59, once on Dirt Road 150. The later it got the faster we went. Highway 152 was a marvelous twisty road that we could use as much of the side-tread of our knobbies as we dared. We arrived back at the Travel Lodge at 7 pm; 9 hours of riding over widely varying terrain made for excellent sleeping.

On the third day of the Rubber Chicken Ride, a Sunday, the other riders at the Travel Lodge had loaded up their bikes and gone home. The Mud Chuckers and I decided to leave the Rio Grande Valley and work our way one valley east to Tularosa Valley, our home turf. In retrospect, we didn’t get much for our $50 but it got us away from our usual dirt-riding spots and it supported the NMOHVA so it was money well spent. While I was telling this story to my wife, CT, it must have sounded like I was complaining. Maybe I did bitch a little. She said that volunteer organizations always need help and that maybe next year we should print a few maps, plan a Rubber Chicken route and set up a ride instead of waiting for others to do the hard work for us. That sounded an awful lot like a gauntlet being thrown down to me.


Subscribe to ExNotes!

Hasty Conclusions: Harshali Saddlebags

I’ve been working on Zed, my Kawasaki Z1, trying to get it ready for touring. I get the feeling that it will soon be safe to knock about the country again and if not, that the general population doesn’t give a damn whether they contract the virus or not. To that aim I purchased a pair of slick looking goatskin saddlebags from Amazon. I like to keep Bezos in the chips so I figured a pair of $33 Harshali bags all the way from Rajasthan would do the trick.

I didn’t want giant saddlebags, just something for tools and water maybe a snack so I thought the 11″ wide, 8″ tall, 3″ Harshali bags would be sufficient. Being male, I assumed 11-inches would be a fairly good-sized bag, you know? Turns out they looked pretty stupid on the Kawasaki. What looked stupid on the Kawasaki looks just right on the Husqvarna so that’s where the Harshali (one bag, right side) ended up.

The saddlebags look well made. The leather is as thick as a goat, I guess. The metal buckles seem sturdy and are a slightly tight fit for the straps. Like the long running joke in the British sitcom, Are You Being Served, I’m sure they will ride up with wear. One area I may reinforce is the frame strap-to-bag rivet. They seem sturdy enough for street riding but I bounce the Husqvarna of rocks and other hard objects. Two thin steel plates riveted with the leather sandwiched between might be the way to go.

The Harshali bags have several zipper compartments and dividers inside. Being only 3-inches deep these dividers seem pretty dumb but who am I to say. The saddlebag design looks like a lady’s purse missing the handle. That may actually be what they are but I’m secure enough to strap one on.

On the outside face of the bag there is a small pocket that would hold a pack of cigarettes if I smoked or a compact if I used face powder during a ride. It’s a good place for a couple-three candy bars or your bundle of sage.

The reviews on Amazon lead me to believe there may be two saddlebag factories in Rajasthan one building beautiful, sturdy bags and the other turning out stinky, ill-sewn, moldy trash. I got the good set. They smelled like leather the buckles and rivets were rust free.

I’m happy with the Harshali bags so far. Only time will tell if they hold up to the rough and tumble world of motorcycle touring. Which reminds me: I still need a set of bags for the Kawasaki. Bezos is laughing all the way to the bank.


Never miss an ExhaustNotes blog!  Sign up here for free:


Check out our other product reviews here!