Grind Me A Pound Of Reverse: Part 2

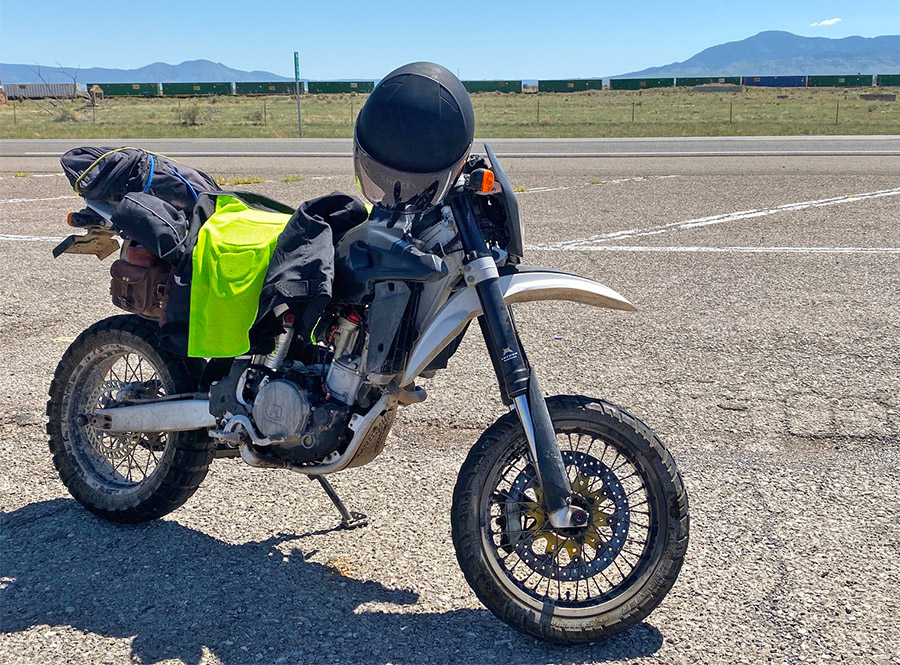
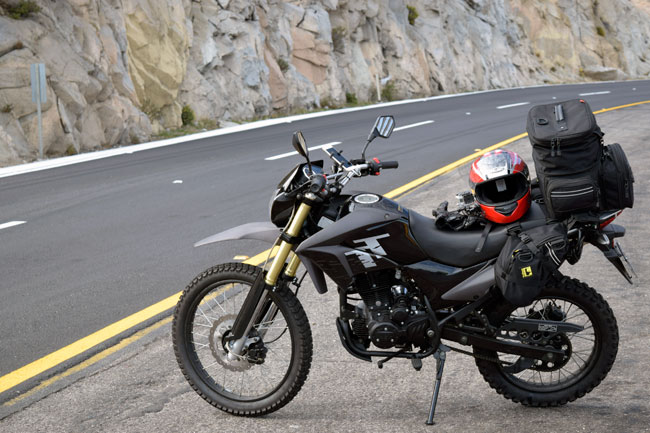
In the first episode of Grind Me A Pound Of Reverse I contemplated buying a Suzuki DR650 and leaning the broken down Husqvarna SMR510 on the side of the shed to bleach in the harsh New Mexico sunlight. Suzuki DR650s are as stone axe simple as you can make a motorcycle today. They are air-cooled, carbureted, have zero electronic widgets (except for ignition) and cost around $6000 for a 2022 model. I’d have to sell a few of my clunkers to fund the DR but it’s the sensible thing to do.

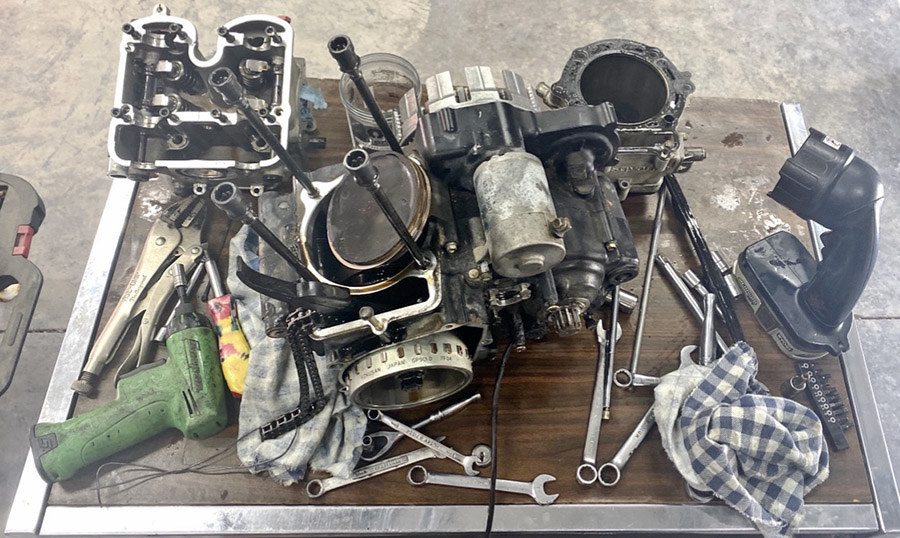
The thing is, the Husky is such a fun bike to ride I thought I’d take a poke at fixing its transmission woes. The Husqvarna crankcase is a vertically split unit which is easier to manufacture but means the entire engine must be dismantled to access the gearbox. In my case this is not a big deal because when a gearbox explodes you have to clean out all the microscopic and not so microscopic bits of metal.

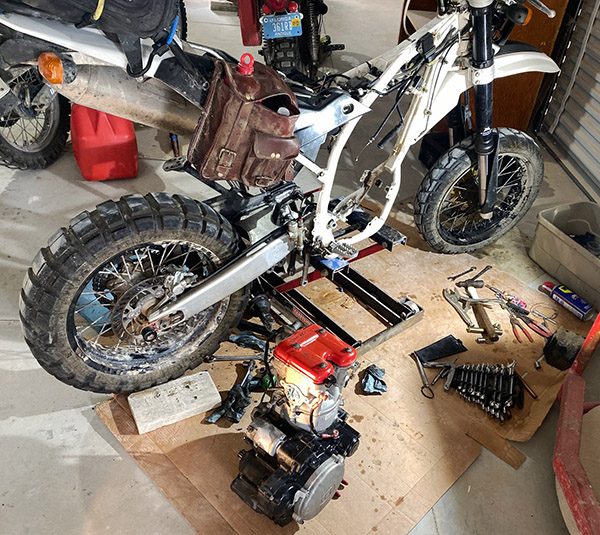
The SMR510 frame is wrapped tightly around its engine and a lot of stuff has to be dismantled to get the lump out into the open. With long-travel suspension causing wide variations in chain tension its best to keep the swing arm pivot as close to the countershaft sprocket as possible. On the SMR the pivot bolt goes through the back of the engine and that means the swing arm has to come off. In addition, the radiators, fuel injection body, EMS and other body parts must be removed also. It took me about 4 hours to finally free the Husky’s engine but I don’t work fast.

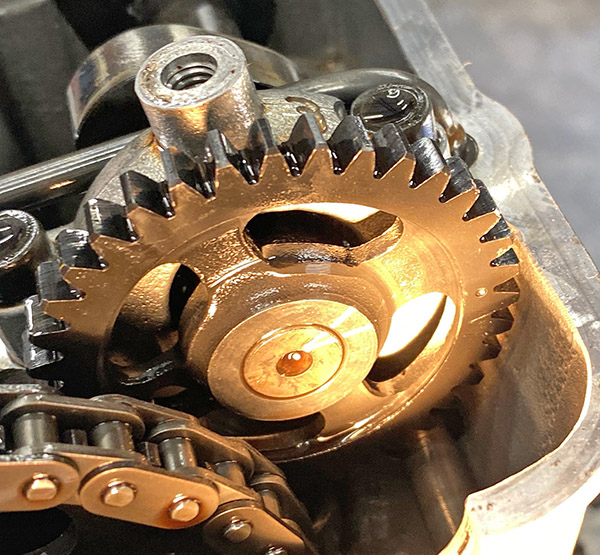
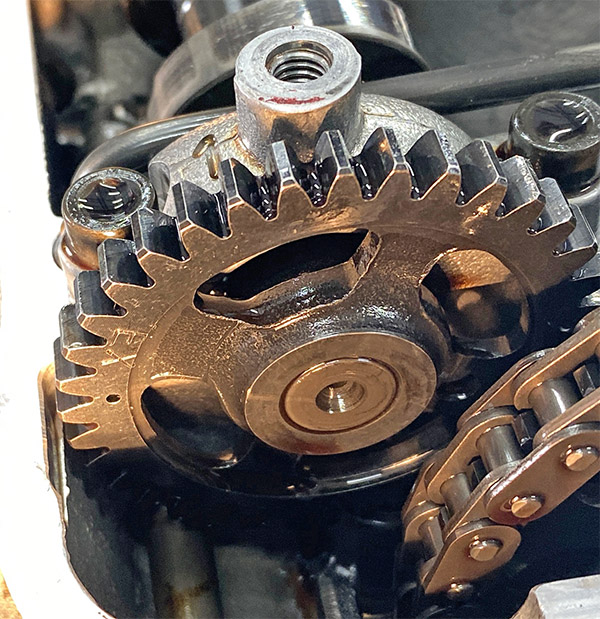
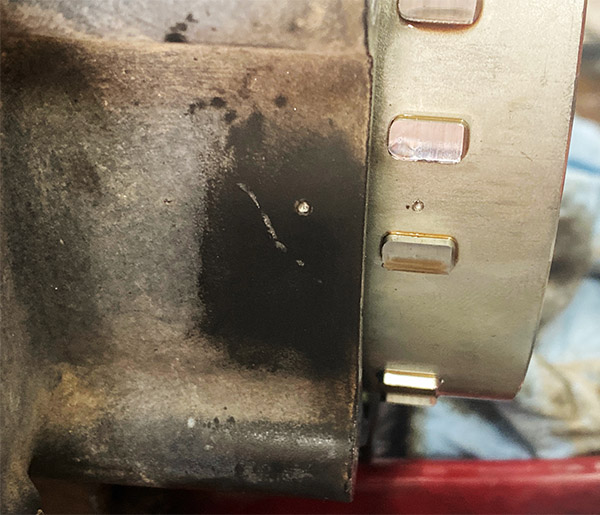
I have no shop manual for this bike so with the engine on the bench the first thing I did was rotate the engine to top dead center-compression stroke in order to find the cam timing marks. The Husky has a cam chain that spins an idler gear; the idler gear then spins the two overhead cams. Each cam has a small dot that lines up with the outside gasket surface of the head. The idler gear has three markings, the center mark is two dots and these dots line up with a mark on the cylinder head.

I also put an additional punch mark on the crankcase and alternator rotor to make finding top dead center less subjective. The Husky’s timing looks pretty easy to do so I’m sure I’ve got it all wrong and the valves will bend the first time I try to start the engine.

Next I removed the cam caps. The cam caps were secured by these allen-head bolts and they were so tight the heads rounded out on three of them. I had to use a flat chisel to knock the bolts loose so I’ll need to get replacements from the hardware store. The head bolts are 10mm allen-type and deeply recessed so once the cams were out of the way I had to cut a 10mm allen wrench to make a long reach socket. The head bolts didn’t round out.

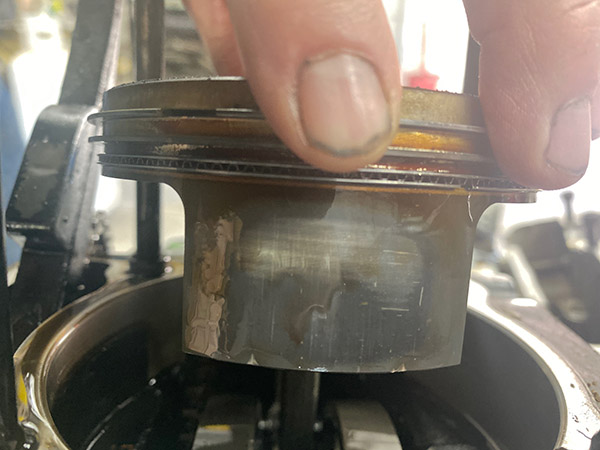
One of the reasons the Husqvarna 510 engine doesn’t last long is the slipper piston. This type of piston is pretty much a racing piston and has so much cut away there is only a narrow skirt to take side loading and a limited surface area for an oil film. The valve train is state of the coil-spring art: long, skinny valves at a narrow angle to give an almost flat-top combustion chamber.

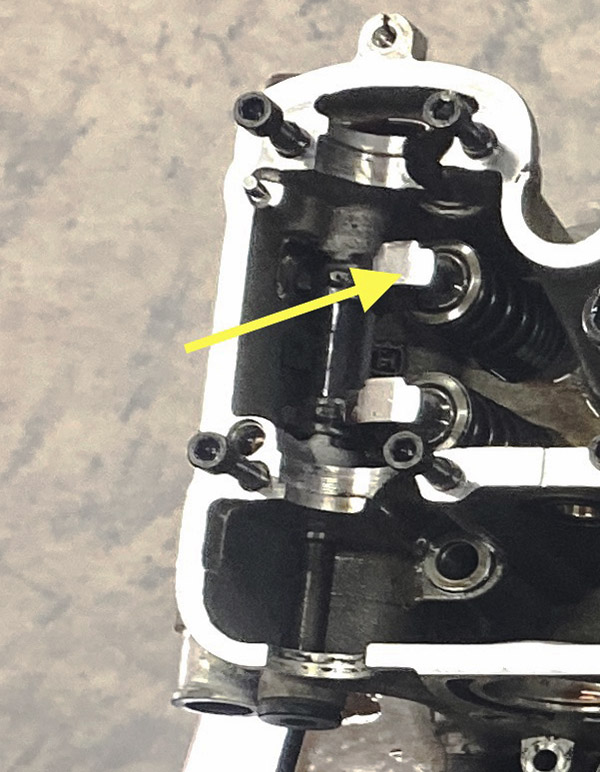
The Husky incorporates small finger-rocker followers to remove valve-stem side loading. The cam lobes swipe across the followers, not directly on the valves. This set up adds a bit of weight to the valve train but the Husky revs to 10,000 rpm without valve float so I’m not going to worry about weight. A nifty feature is the spring-metal separator clip that can be removed from the rocker arm shafts, which will allow the finger rocker to slide over giving access to the valve shims. This means you don’t have to remove the cams to adjust valve clearance.

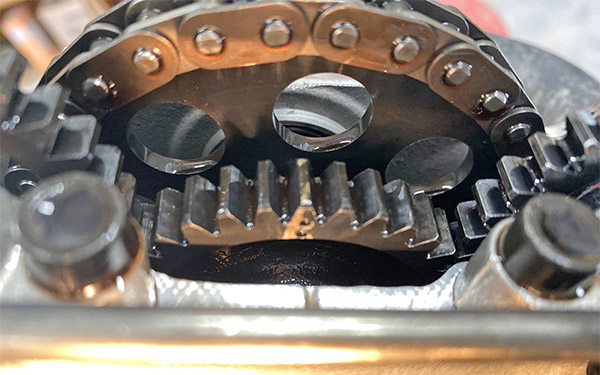
Splitting the cases was a fairly straightforward operation except for the shift drum. I managed to get the thing apart but still haven’t figured out how the shift drum is held into the right crankcase half. I got pretty frustrated and gave it a few whacks but it didn’t budge. I’ll study the situation after I calm down.

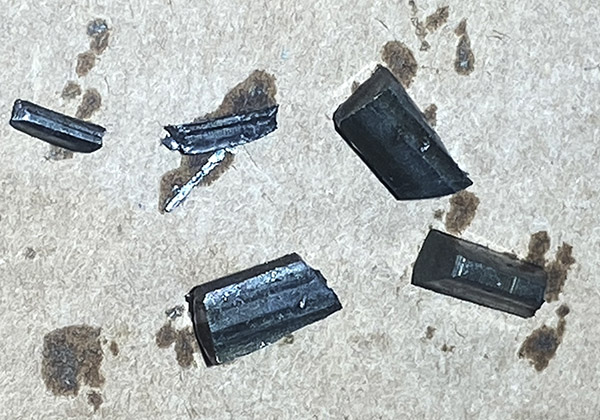
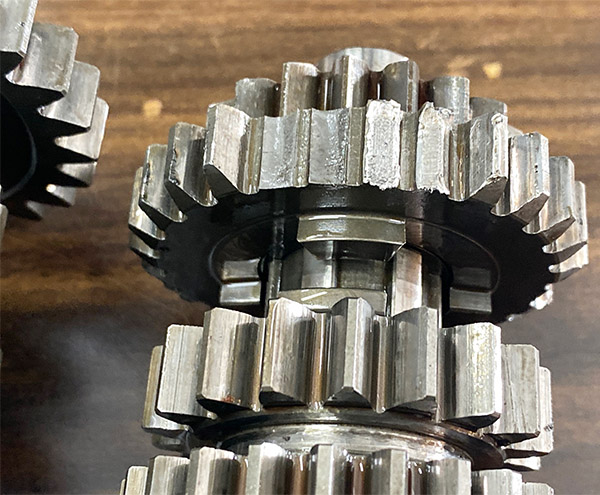
This is what was causing the racket. A couple gears are missing teeth and who knows what other unseen damage to the cluster was done as the bits of hard metal flew around inside? The shift forks may be bent because the bike wouldn’t stay in neutral and kept going into gear when i pushed it around the shop. I decided to get a used gearbox and replace the entire transmission.

The 2008 Husky SMR510 is one of the last Husqvarna’s with a tangible connection to the original Swedish manufacturer. Employees from old Husqvarna operated the company that built my bike. They purchased the name and relocated manufacturing to Italy. Cold, icy Sweden or warm, sunny Italy, who wouldn’t move? Shortly after my bike was built Husqvarna was sold to BMW and the bikes became re-badged BMWs. This only lasted a few years until KTM bought Husqvarna from BMW and the bikes became re-badged KTMs.

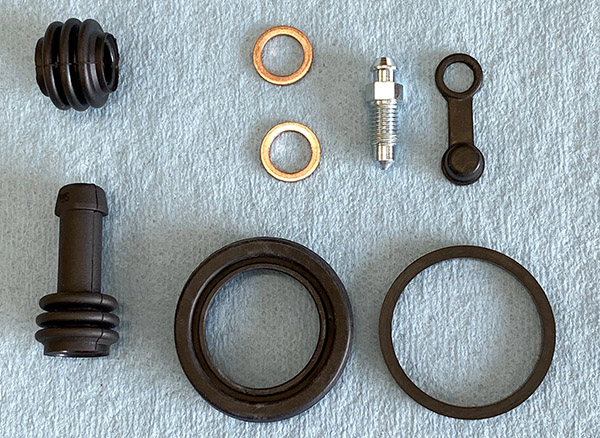
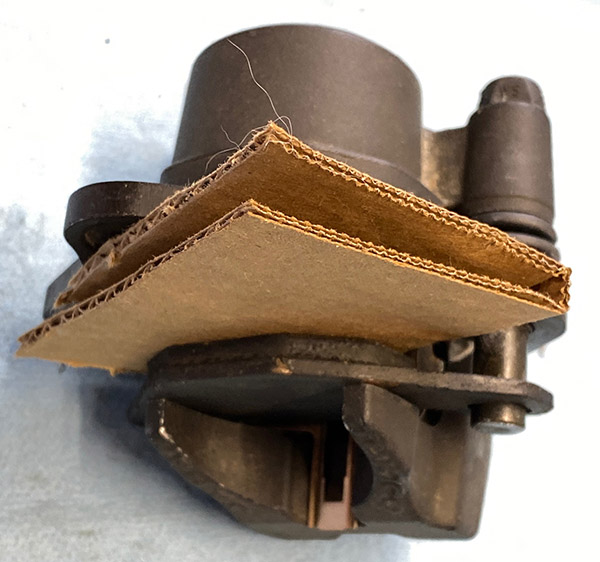
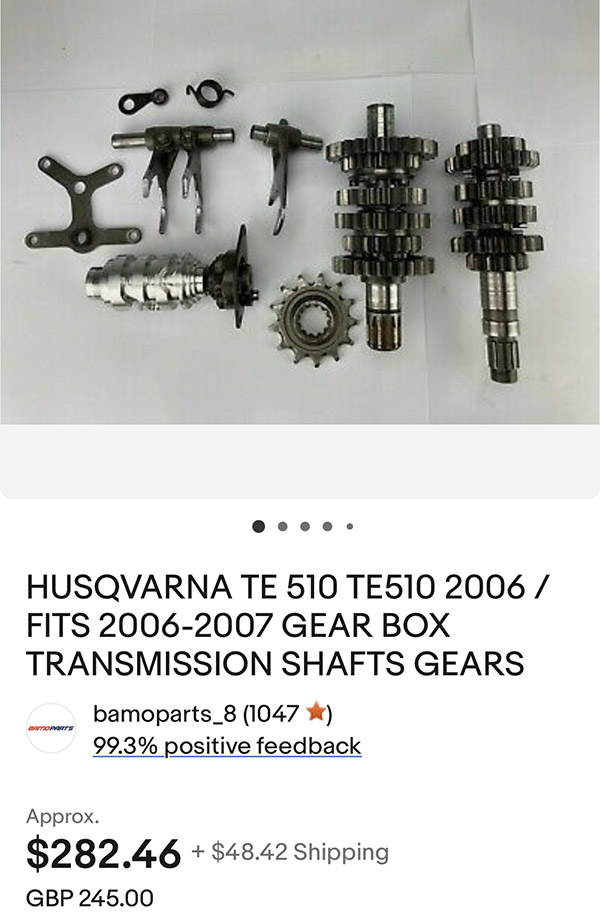
So parts are sort of hard to find. I located this complete TE510 (the enduro version of my bike) transmission in England for $285. Shipping was expensive but it’s a long way to Old Blighty and probably one gear would cost $100 if I bought it new. Hopefully it will fit.

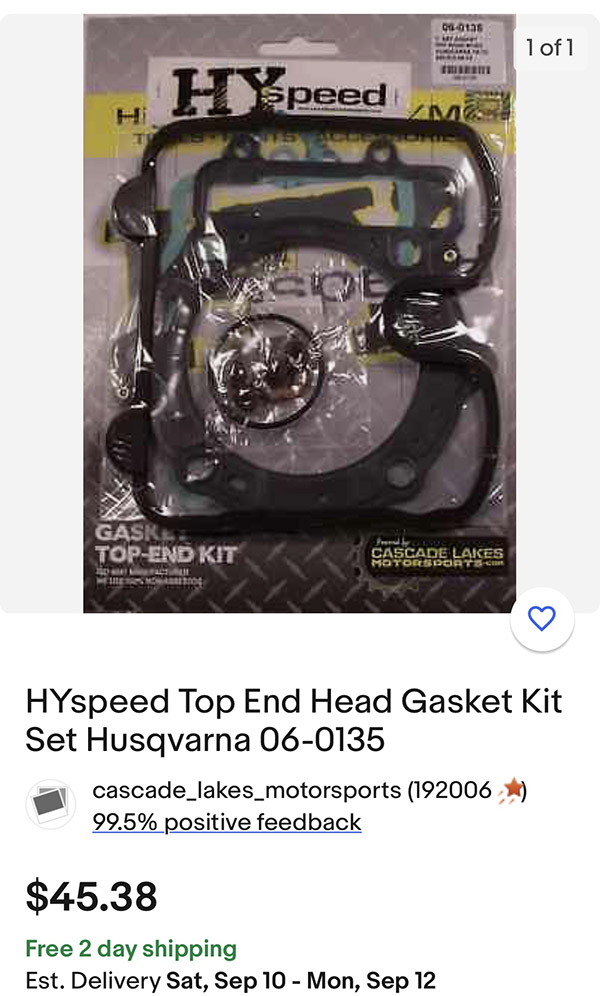
EBay also had a top end gasket set for fairly cheap so I have that kit on the way. The case halves are sealed with goop, no gasket needed. The side cover gasket and alternator gasket came away without tearing so being ever thrifty I can reuse those gaskets.

I’ll have to do a thorough job of cleaning out the transmission debris inside the engine and whenever this stuff arrives I’ll try to reassemble the mess. ExhaustNotes will have up to date information as this project moves forward. Even if the Husky manages to run again I still might buy that DR650.


You know what to do.   Share this post and please, do a friend a favor:  Hit those pop up ads!


Never miss an ExNotes blog:


Join our Facebook page.

Grind Me A Pound Of Reverse

September is one of the finer months for motorcycle riding in New Mexico. The daily monsoon rains begin to ease off in September. The trails remain slightly damp so dust isn’t bad and the Carrizozo Mud Chuckers and I can run a tight formation on New Mexico’s many dirt roads. The hot summer temperatures have faded away with the peek-a-boo, pre-fall weather allowing for cool morning rides and warm daytime riding.

These perfect days and these perfect times call for a long dirt loop from White Oaks to Claunch then south to Highway380. My morning Husqvarna ride to Carrizozo was glorious, just cool enough to create a little chill in my mesh jacket but not cool enough to cause discomfort. You know that feeling when everything is all right?

After a short gab session with the Mud Chuckers we gassed up at the Allsups station and headed north towards White Oaks. We traveled a half-mile when something started making a racket in the rear wheel of the Husqvarna. It sounded like I had run over a length of barbed wire and the wire was wrapped around the wheel. This happens more often than you would think in New Mexico. I pulled over but couldn’t see anything in the wheel so I started out again.

The noise was worse, like maybe the chain was jumping teeth on the sprocket. I turned into a convenient historical marker parking area and gave the chain a good look. Nothing seemed out of order. The Mud Chuckers had turned around and pulled into the historical marker lay-by. Mike asked me, “What’s the problem?” I told them I didn’t know but it sounds bad.

We tipped the bike onto its side stand and started the engine. Running through the gears made a hell of a racket, at times the engine would bind up and almost stall. Eddie said that at least it made it further than last time (referring to a past event when the Husky blew out a rubber plug and pumped most all the hot engine oil onto my right pant leg).

When I bought the Husqvarna 14 years ago I remember reading in the Husky Café forums about how the 510 engine was only good for 20,000 miles. I figured those were racing miles and I would not be pounding on the bike like most motocross or Supermoto racers. Turns out those Husky Café estimates were not far off.

It was still a perfect day. I called CT and asked her to come get me in the pickup. She asked if this was the same bike that broke down last time. “Yes,” I said, “except a little past where you picked me up before.” The Mud Chuckers chatted with me for a while and I sent them on their way. No sense in everyone missing out on a perfect riding day.

When we got the bike home I removed the oil drain plug and large chunks of gear teeth were attached to the drain plug magnet. This was not good news. I asked CT to cancel the Husky’s insurance because it will be a while before I get around to fixing the thing.

The Husky, having a vertically split crankcase, will require a complete teardown to clean out the debris and replace the broken transmission gear/gears. That’s if I can even find the parts. My Husky is from Italy, two generations removed from KTM, the new owner of Husqvarna. The closest thing to my bike is a SWM 500. SWM bought all the tooling and production rights from the remains of the Italian crew and that bike uses the same engine as my Husky; hopefully, the gearbox is the same.

My other bikes are a mess. Sometimes I want to sell all this junk and buy a brand new Suzuki DR650. I’ve got to get the Z1 carbs put back on the bike. They are mostly together; I just need two new fuel tees. The ZRX1100 needs just about everything as it has been sitting for 8 years now. The KLR250 runs crappy and its carb needs cleaning, but I’m not going to take it apart until I get the Z1 carbs back together.

The funny part about all this is that the only bikes I have left running are two 50-year-old Yamaha two-strokes. “It’s a Better Machine” indeed. And you know what? That’s just fine by me because nothing can spoil these perfect days.


Keep us afloat:  Hit those popup ads!


Never miss an ExNotes blog:

Squeeze Me: KLR250 Refresh, Reflash and Rehash Part 3

The KLR250 refurbishment has been going slowly but in addition to that I’m not getting much done otherwise. It’s the heat. Temperatures at Tinfiny Ranch have been hovering around 100 degrees or more and under these conditions it’s all I can do to press paper firebricks.

I did manage to order a brake caliper kit from England. The Widow Maker’s front brake gave me lots of problems at Daytona this year. The caliper was mightily stuck and the master cylinder was odd feeling. I managed to get the brake working well enough for Bike Week and replaced the master cylinder in a previous R, R & R episode but I didn’t trust my half-assed Florida Man repairs on the caliper.

The Brakemasters rebuild kit was very complete and was inexpensive to boot. The Widowmaker’s original rubber parts lasted through 20 years of neglect so the new stuff has a steep hill to climb. The only part I didn’t care for was the new bleeder nipple. The replacement nipple did not want to thread in easily. I could have forced it and remolded the aluminum caliper threads but instead used the old nipple, which threaded in by hand.

As expected, the caliper job went well. Old motorcycles with single-piston calipers are a breeze to repair. The hardest part was fitting the dust seal into the caliper body and then fitting the piston. I didn’t remember how I did the trick last March and was getting frustrated. Thank goodness for YouTube; I pulled up a quick search on caliper dust boot installation and there was a guy showing me how to do the deal.

I think in March I used a beer can to make an expander sleeve for the piston and then slid the piston into the (already installed in the caliper) boot. It just wasn’t working this time. Maybe fresh rubber is stronger than 20-year-old rubber. YouTube man fitted the boot to the piston first (the opposite of what I was doing) and let a short length of rubber hang off the back. That hanging bit was then pushed and prodded into its groove on the caliper. Once the dust boot is in the groove the piston can be slid into the caliper all the way until the piston groove catches the other end of the boot. With all the talk of grooves this sounds confusing but that’s why YouTube videos are so nice. YouTube Man’s method worked great and the caliper is now ready for reinstallation.

If it cools off a little I’ll tackle the fork seals and re-grease the steering head bearings next. And keep making firebricks, of course.


More on the KLR250 and other moto-resurrection stuff is on the ExNotes Resurrections page!

The Royal Enfield, the RX3, the TT 250, and more…

So you’ve probably noticed I haven’t been riding too much lately.   You know how it goes…it gets cold, you have other things going on in your life, you want to send some lead downrange, and on and on it goes.

I needed to break that pattern, and there’s no better way to do that than to buy a motorcycle.   Yeah, I know…I already have two motorcycles (what has to be the world’s most well-traveled RX3, and a pristine, low miles TT 250). I like CSC motorcycles.  But you may recall that Uncle Joe Gresh and I road tested two Enfields last year and I fell in love with the 650 Interceptor.

Down Mexico way…dinner at the San Remedio in Guerrero Negro. Life is good, folks.

I was primed to buy a Royal Enfield when I returned from Mexico, but the Enfield dealer in Glendale had done a God-awful job prepping the Bullet (I wouldn’t buy squat from those guys now), and the Enfield dealer in Brea was doing the normal bend-you-over-a-barrel, here-comes-the-setup-and-freight-charges routine.   Folks, I’ve worked in the industry, and I know what setup and freight costs actually are.  Trust me on this…they ain’t $1500.  So I didn’t buy an Enfield.

Then an amazing thing happened.  One of the few dealerships I trust picked up the Enfield line last week.  It’s Art Guilfoil’s Douglas Motorcycles in San Bernardino.  I asked Art what he could do for me on a new Enfield, I was shocked at how low the number was (don’t ask, because I won’t tell), and, well…

I think this is No. 42 or No. 43 or something. I’ve owned a lot of motorcycles. This is the latest. Sue is cool with it, too!

I’m picking up my new 650 Royal Enfield on Thursday, and to say I’m excited would be an understatement of immense proportions.  It was a tough call for me between the Enfield and the new CSC RX4, but truth be told, I love my RX3 and it checks all the boxes for what I want in an adventure touring motorcycle.  Arguably, the RX3 is the finest adventure touring motorcycle in the world if you’re going places other than the corner burger joint (for all the reasons I explained in my piece titled Why a 250?).  I know.  I’ve been to places other than the corner burger joint, and I’ve made most of those trips on an RX3.

So with my new Royal Enfield coming in, it begged the question:  What should I do with my RX3 and TT 250?  My first thought was that I’d sell them.   Then I got to thinking about the RX3.   I’ve done some miles on that thing, folks, and we’ve bonded.  Nope, I’m going to hang on to it.  Baja beckons, and all that.  The RX3 is perfect for poking around the peninsula.  And next, month, that’s where I’m headed.   Susie’s going with me, and we’ll share a Tequila or two with Baja John.  You can read about it here.

That leaves the TT 250.  Hey, I was involved in bringing the TT 250 to America, and it all started when I eyeballed the 150cc version on display in Zongshen headquarters.  It was a bit of an uphill struggle…you know, getting Zongshen to make a 250cc version, and then selling the idea in Azusa.  I got the powers that be to go along and then I was out of town when the prototypes arrived in California.   A couple of the CSC underlings didn’t like the bike, and I had to sell it in Azusa all over again.  But it worked out, and the TT 250 is one of CSC’s best selling motorcycles ever.  It should be…it is a hell of a bike for a stunningly low price.

My TT 250 on the road at La Rumarosa in Baja.

With the Enfield coming in, I thought I would sell my TT 250.   Hell, it’s pristine, but because I don’t ride it too much, the carb gummed up on me.  I thought maybe I’d bring it to CSC and have them make it perfect again, and then another serendipitous thing occurred.  A few days ago, a post popped up on Facebook (why do I spend so much time on that moronic site?) from Revzilla, and what do you know, it was about doing your own maintenance on a CSC motorcycle.  In this case, it was the San Gabriel (a wonderful name for a motorcycle if ever there was one), and the guys from Revzilla said the CSC shop manuals were wonderful.  I thought that was great for a lot of different reasons, including the fact that, along with help from Gerry Edwards and the guys in the shop, I wrote many of the CSC manuals.  Then I realized…hey, I wrote the TT 250 manual.  I can fix my own carburetor.  I looked up the carb stuff and this afternoon I took mine apart, I cleaned the low and high speed jets, and now my TT 250 is running great.  There’s something uniquely satisfying about fixing your own motorcycle, and the Revzilla boys were right:  Those CSC manuals are amazing.  So are the motorcycles.  And so is the 650 Enfield.   I know, because I took one on what had to be the longest demo ride ever…all the way to Baja and back!

More good times coming up, folks, on the Royal Enfield 650 Interceptor!