Yamaha RD350 Part 4: Stealing Moments

I’ve been on a tear lately. The shed floor is nearly done and I’m laying down some slabs, man. That doesn’t mean I haven’t managed to sneak in a little tinkering on the 1974 Yamaha Rd350. I mean, once the slab is poured and finished you’ve got to let it cure for a day. Green concrete is very fragile.

I wanted to drain the RD 350’s fluids before getting too far along. Which was kind of good because I discovered the oil tank wasn’t slotted into the rubber frame peg correctly. That meant taking out the battery to access the oil tank bolts.

It was no trouble at all to pull the tank, drain it and re-slot it onto the frame peg. The original feed hose drooped underneath the carburetors then rose over the clutch cover forming a trap. I didn’t like the looks of the trap so I shortened the feed hose a bit and routed it without a loop.

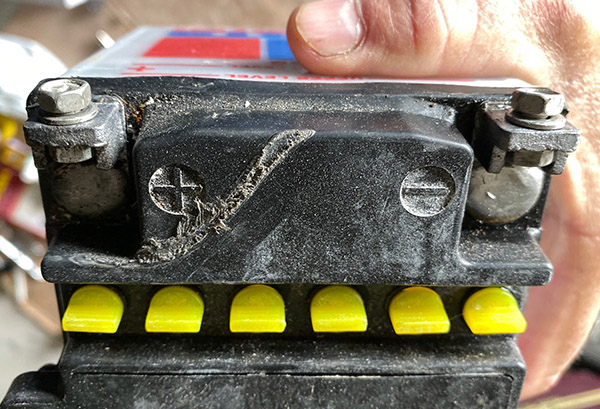
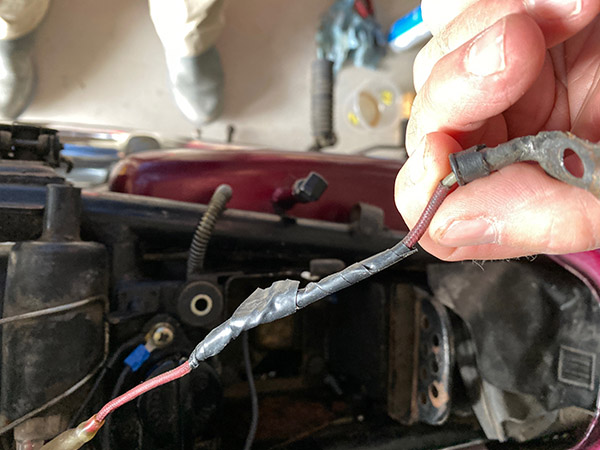
When I pulled out the battery to fix the oil tank I noticed the top of the battery had a melted spot. This melted spot corresponded with a melted positive wire to the battery. I suspect the battery is the wrong one. It looks too tall and there was a section of old inner tube covering the battery. I see no evidence of arcing on the seat pan but something melted the positive wire as it has been wrapped with electrical tape.

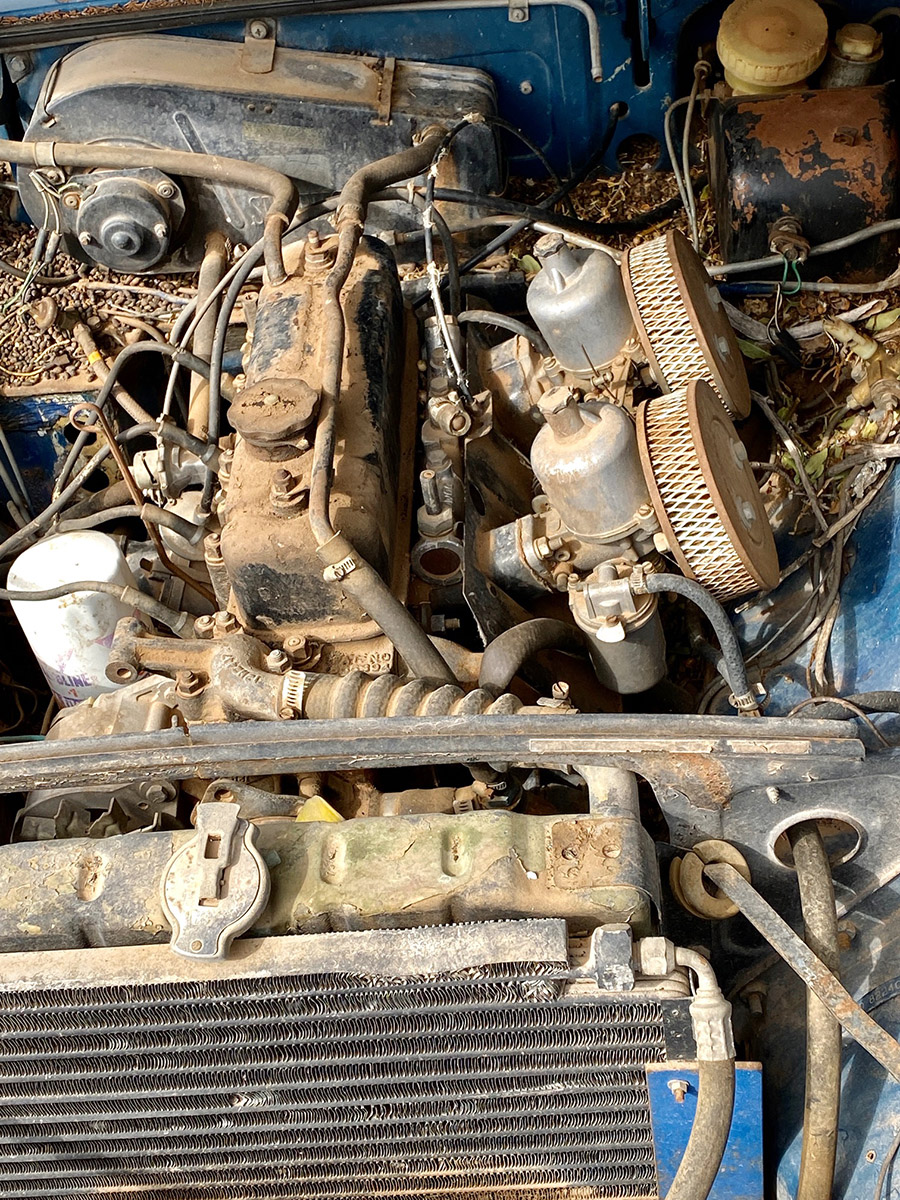
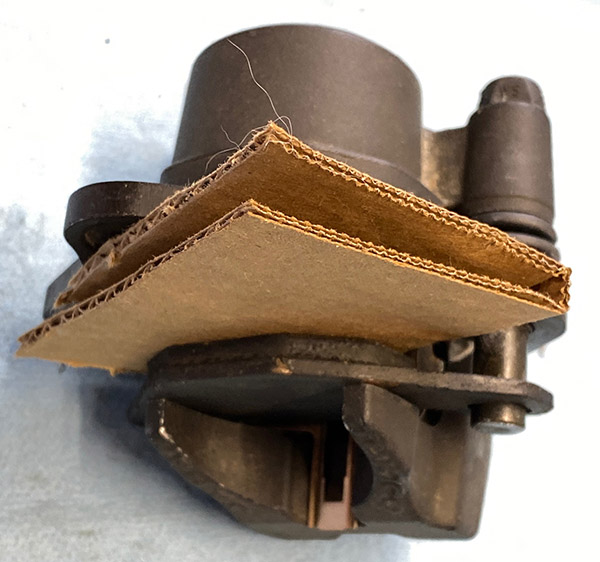
After refilling the oil tank I needed to bleed out any air in the feed line to the autolube pump. The pump area was shockingly clean. It looked like a new motorcycle inside.

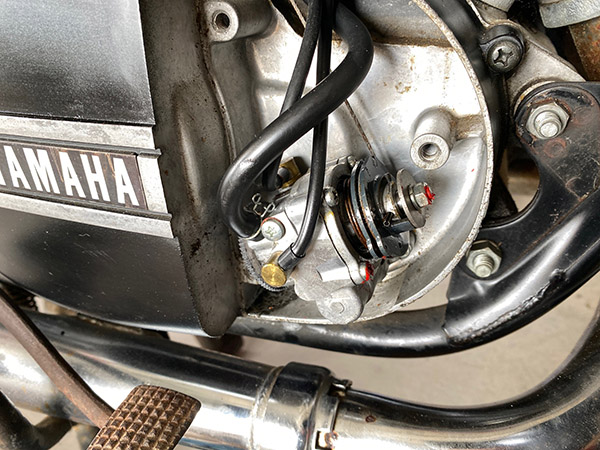
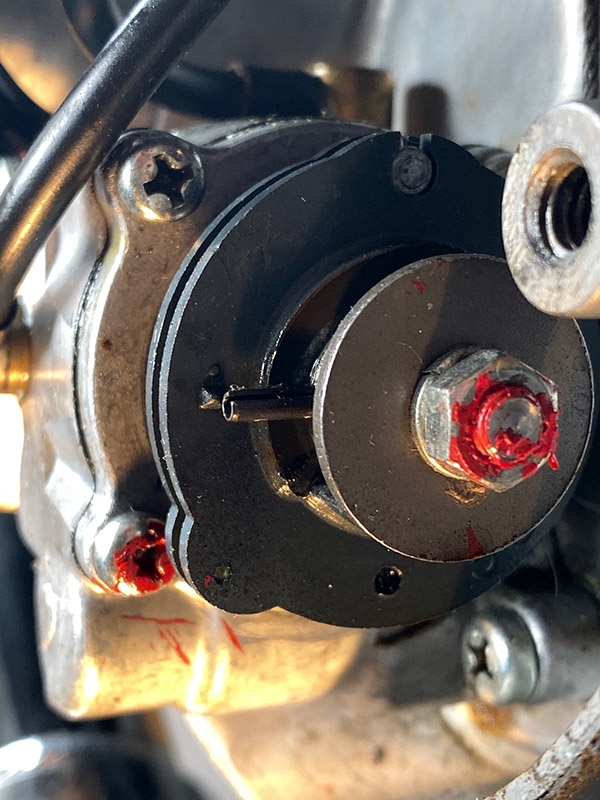
I sent Deet photos of the pump as I was well pleased and wanted to show the thing off. Zooming in on my photo Deet noticed that the autolube pump was not adjusted correctly. The pin and dot are supposed to line up at idle.

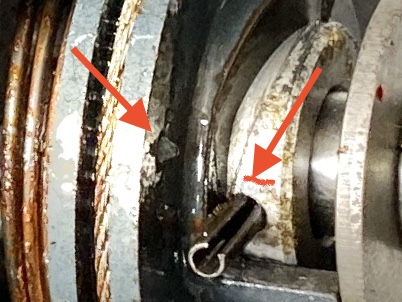
The oil pump cable was adjusted as loose as the lock nuts would allow. This RD is near perfect except where mechanics have fouled it up. Resetting the pump was quick and now the pin lines up with the mark at idle.

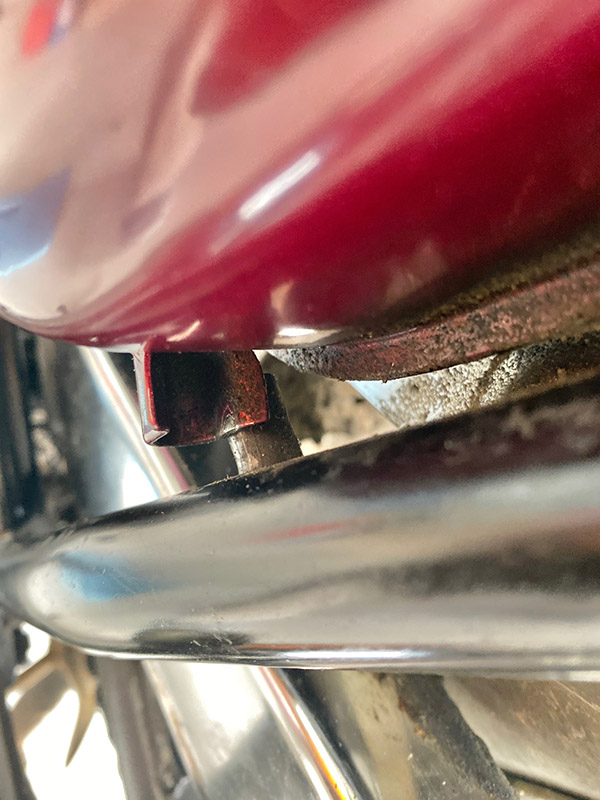
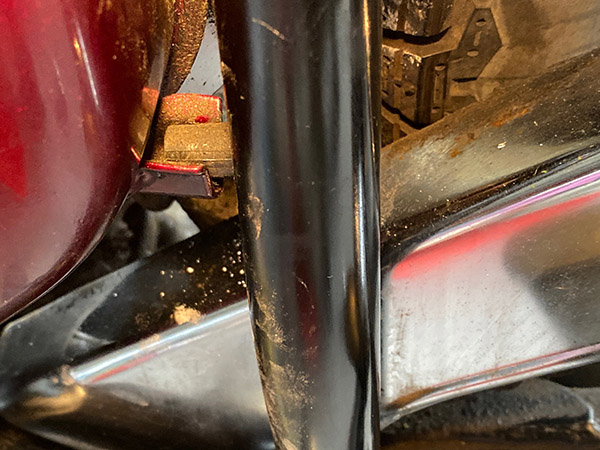
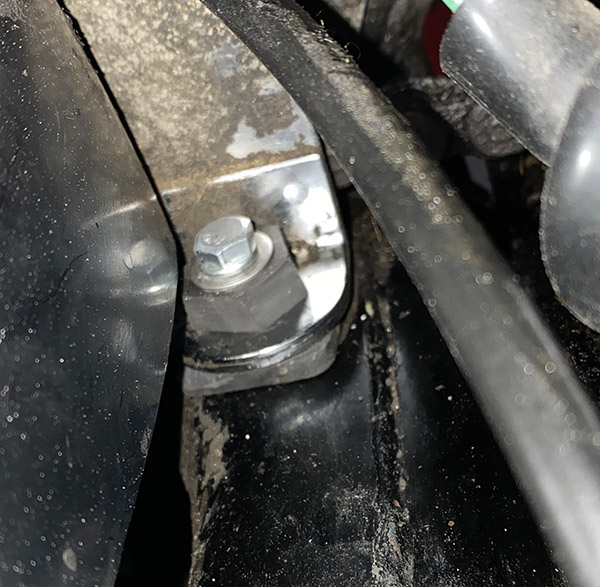
The chain guard was sort of floppy because the front mount was missing its bolt and the rubber bushing, along with the spacer. I cobbled one together from bits and pieces; it will work until I find the correct parts.

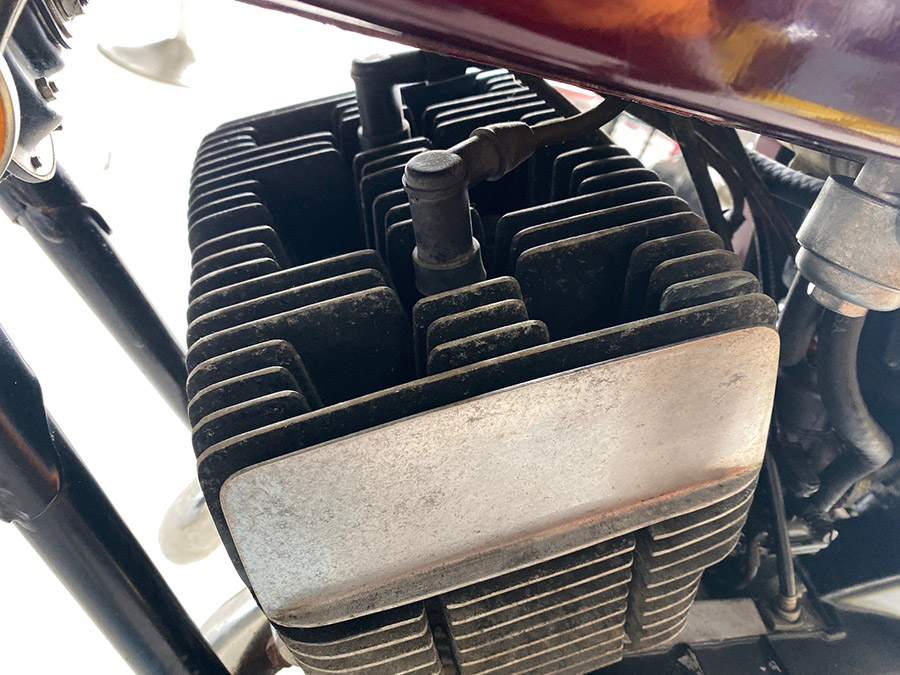
The more I mess with the RD350 the more amazed I am at how unmolested it is. All the case screws look perfect (except for the ignition and pump screws).  Opening things reveals factory fresh assembly. It’s almost too perfect: I’ve got to up my mechanical game to treat this motorcycle with the care it deserves.


More on the RD350 story and other Joe Gresh Resurrections is here!


Never miss an ExNotes blog…sign up here for free!

Resurrections: 1974 MGB-GT Part 1

Here at Exhaustnotes.us resurrection projects are leaps of faith. They feel good and inevitable, and promising. You know instinctively it’s the right thing to do and that everything will work out ok in the end. The Kawasaki Z1 was like that. I had no doubt that motorcycle would once again tear great, jagged, 8000 RPM holes through the atmosphere. It just had to, you know?

This 1974 MBG-GT is not that kind of resurrection. Nothing about this car feels inevitable, least of all my ambition to see it through to the end. I’m going into this project fully expecting to fail. “Life’s too short,” my buddy Burns said. “Make a hot tub or a planter out of the thing.” That’s sound advice spoken from the heart. The man is trying to save me from myself.

Anyone in the saving-souls business knows that people tend to bushwhack their own meandering path towards destruction. There’s not a lot well meaning friends can do to stop your sanity from hiking off into the woods. It’s a negative human trait offset by our ability to make music and microwave corndogs. And I still don’t know how to play the guitar.

Here’s the thing: I never wanted an easy life. My dreams are not of leisure. I don’t seek comfort. Fun is no fun to me. Put me on a beach towel in Tahiti and I’ll go stark raving mad. Instead, I choose to make a mess of things. I don’t want to hear the MGB-GT run. I have to hear it run. It’s laid fallow for 5 years that I know of and probably 10 more besides. The little British car parked next to the needle bush has mocked me long enough. I’ll have my revenge.

If you’re expecting a short series on the MGB-GT stop reading now. The car has serious rat infestation issues. Most of the interior is chewed up. There must be 50 pounds of rat guano inside the cabin and engine room. I’m going to take this slowly and spend the absolute minimum amount of cash at each stage.

There will be no grinders shooting sparks, no photogenic noir-arc welding and no artificial deadlines to create artificial tension in the story. This job will be stress free and I reserve the right to walk away any time I choose. The MGB will always take a back seat (get it?) to other projects.

The first thing I plan to do is to get rid of this spiny plant. The thing has incredibly sharp 2-inch long needles that will flatten a tire or stick into your leg bone. After that cleaning out the rat-poo engine room so that I can see what I’m up against. Cleaning rat poo in New Mexico is not as simple as hooking up a shop vac and sucking up the stuff.

Here in New Mexico we get several cases of Hantavirus every year. The virus can lay dormant in rat droppings and infect people when disturbed, so no vacuuming. Instead you spray the mounds of poo with a strong solution of bleach to kill the virus (if it can be considered alive). Next you don gloves and an N-100 mask and shovel the wet bleach-glop into a suitable container.

This part of resurrection is no walk in the park. If you manage to stay alive through this step another shot of bleach on the remaining rat droppings should make it fairly safe to use the shop vac. Follow up the final vacuuming with a pressure washer and engine cleaner. And then you can begin. I’ll start by disconnecting all the chewed electrical circuits and…and…well, you’ll see in the next installment of Resurrections: MGB-GT Part 2.


Gresh’s resurrections reside here!

Squeeze Me: KLR250 Refresh, Reflash and Rehash Part 3

The KLR250 refurbishment has been going slowly but in addition to that I’m not getting much done otherwise. It’s the heat. Temperatures at Tinfiny Ranch have been hovering around 100 degrees or more and under these conditions it’s all I can do to press paper firebricks.

I did manage to order a brake caliper kit from England. The Widow Maker’s front brake gave me lots of problems at Daytona this year. The caliper was mightily stuck and the master cylinder was odd feeling. I managed to get the brake working well enough for Bike Week and replaced the master cylinder in a previous R, R & R episode but I didn’t trust my half-assed Florida Man repairs on the caliper.

The Brakemasters rebuild kit was very complete and was inexpensive to boot. The Widowmaker’s original rubber parts lasted through 20 years of neglect so the new stuff has a steep hill to climb. The only part I didn’t care for was the new bleeder nipple. The replacement nipple did not want to thread in easily. I could have forced it and remolded the aluminum caliper threads but instead used the old nipple, which threaded in by hand.

As expected, the caliper job went well. Old motorcycles with single-piston calipers are a breeze to repair. The hardest part was fitting the dust seal into the caliper body and then fitting the piston. I didn’t remember how I did the trick last March and was getting frustrated. Thank goodness for YouTube; I pulled up a quick search on caliper dust boot installation and there was a guy showing me how to do the deal.

I think in March I used a beer can to make an expander sleeve for the piston and then slid the piston into the (already installed in the caliper) boot. It just wasn’t working this time. Maybe fresh rubber is stronger than 20-year-old rubber. YouTube man fitted the boot to the piston first (the opposite of what I was doing) and let a short length of rubber hang off the back. That hanging bit was then pushed and prodded into its groove on the caliper. Once the dust boot is in the groove the piston can be slid into the caliper all the way until the piston groove catches the other end of the boot. With all the talk of grooves this sounds confusing but that’s why YouTube videos are so nice. YouTube Man’s method worked great and the caliper is now ready for reinstallation.

If it cools off a little I’ll tackle the fork seals and re-grease the steering head bearings next. And keep making firebricks, of course.


More on the KLR250 and other moto-resurrection stuff is on the ExNotes Resurrections page!