

By Joe Gresh
Clutter tends to accumulate in our lives. The unfinished and the left-hanging gather dust motes and wind up in soggy cardboard boxes of odds and ends. So it is with ExhaustNotes stories: some of them just sort of fizzle out inconclusively yet what remains is not enough meat for a stand-alone follow-up story. In an attempt to close the books on a few articles and give our dear readers peace of mind here are a few loose ends, tied.
The Harbor Freight Tire Machine
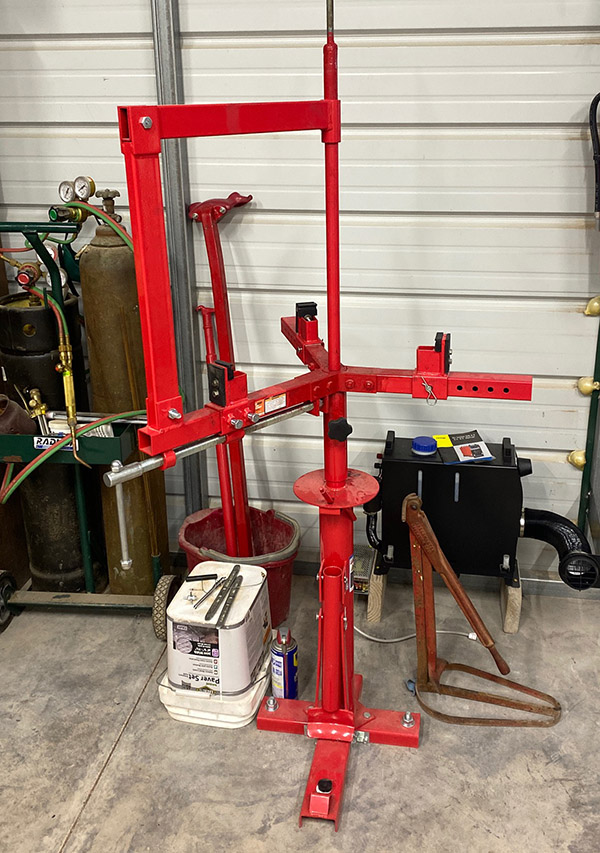
I’ve used the Harbor Freight tire machine to change five motorcycle tires and can report a 100% success rate. These successes include installing stiff knobby tires on the wide Husqvarna rims. Five in a row without a leak is unheard of for me. I’ve pinched a tube 5 times in a row! My usual success rate is around 50%. While the tire changer makes the job easier it’s still a bit of a work out. The built-in bead breaker is a godsend for old, stuck on the rim beads and having the rim held securely at waist level is nice on my sore back.
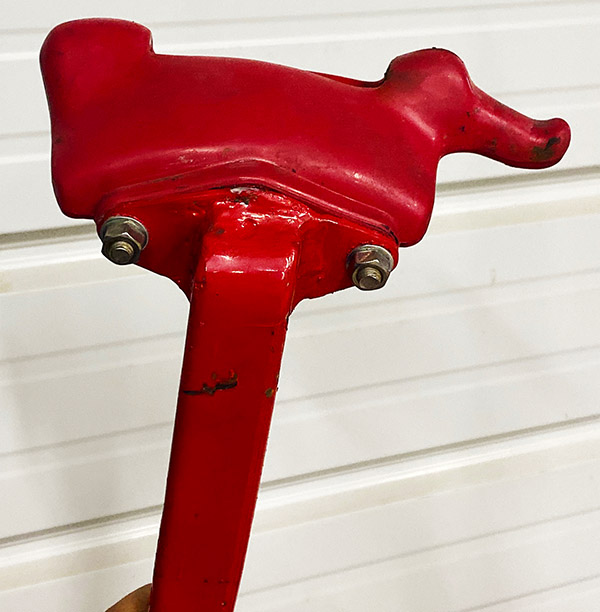
Working the machine, I ended up mostly using regular tire irons instead of the plastic duck-on-a-lever contraption. I haven’t given up on the duck lever and it may be a case of user error. I plan on making the duck part pivot on the lever part to allow it to mate with the curve of the rim better. My experience with the HF tire changer has been positive even if I did have to do a few modifications to make the thing function. I feel like I no longer have to fear the Husky’s tires and am confident I can change them in a reasonable amount of time without too much damage. I’m not sure HF still carries the motorcycle tire adapter so if you want one you might have to check several stores to see if they have the thing in stock.
The Husqvarna 21” front wheel conversion
After spending several hundred dollars and several days labor on the failed Husky wheel conversion I’m happy to report the bike is now back to stock configuration and rideable. After grinding clean through the old caliper I had to buy a new 4-piston Brembo caliper. I also replaced the wheel bearings as the originals had suffered enough of my abuse pounding them out of the wheel hubs twice.

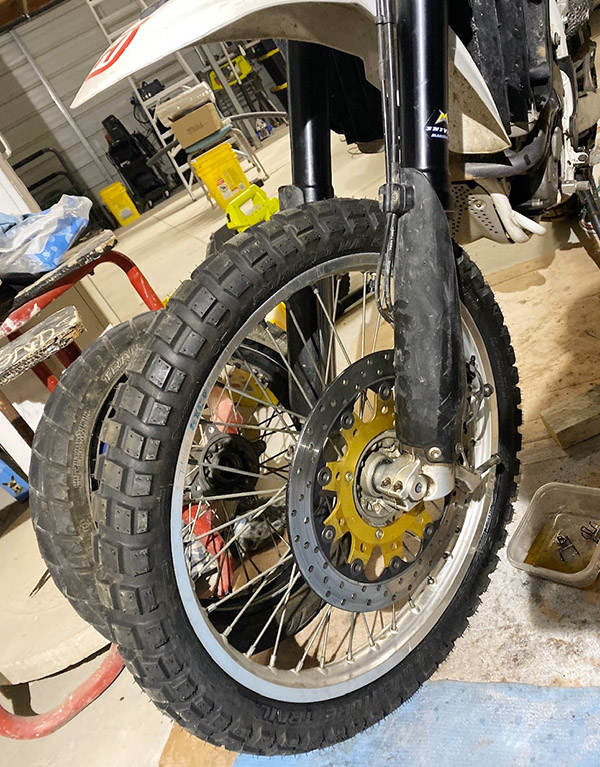
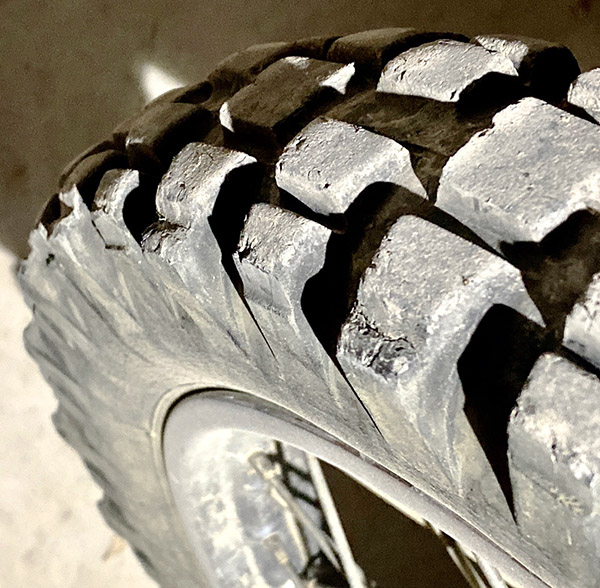
Since I have given up on the 21” wheel idea I bought a Continental TKC knobby in the Husky’s original tire size. The tire cost $140 from Amazon and the knobs are about as high as the worn out knobs of a real dirt tire. The TKC is the knobbiest 17” tire I could find that fit the rim. I’m hoping the TKC will provide a bit more grip off road.
Help us bring more content to you: Please click on the popup ads!
My buddy Mike graduated from a 390 KTM and has bought a new 890 KTM and I’ll have to work the Husky a bit harder to stay up with his 100 horsepower dirt bike. I’ve also raised the Husky fork tubes up ½” inside the triple clamps, effectively steepening the rake a bit. The old street slick on front would push in the dirt making corners a sit on the gas tank type of deal. Loose gravel was like riding on marbles and mud would coat the old tire within one revolution making the bike feel like it was on ice. Maybe the deeper grooves between knobs will give the mud some place to squish. Anyway, the bike looks much more dirt ready if a bit silly with the tiny front wheel.
Yamaha RT1-B 21” front wheel conversion
After my not so shocking failure converting the Husky to a 21” front wheel I had a brand new 21” knobby tire just sitting in the shed. Mirroring the same poor tire choice issue as the 17” Husky, the 1971 Yamaha’s 3.25 X 19” front tire is an oddball. I have been running through my inventory of $10, new old stock Metzelers but those tires were approaching 30 or 40 years old and had weather checking on the sides. I was getting a bit of chunking on the side knobs also as the rubber was just plain old and breaking apart.
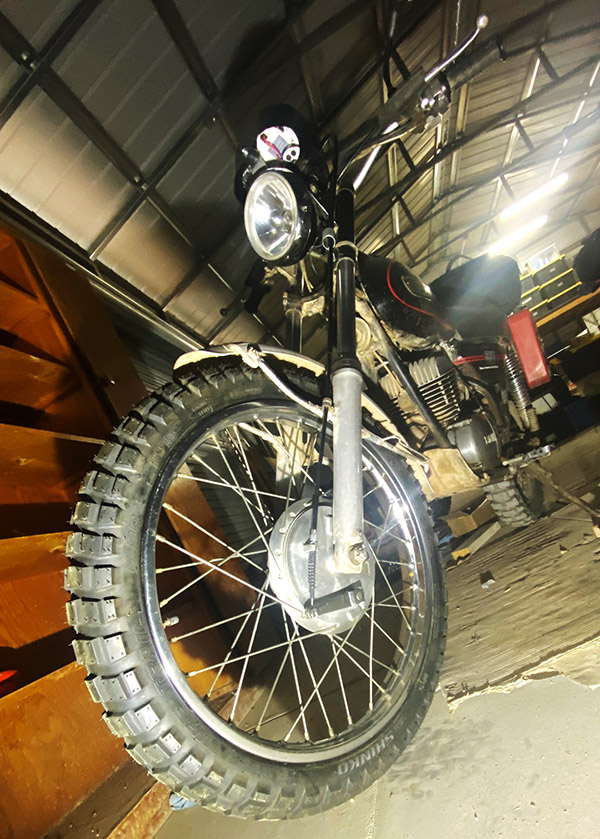
Luckily for me, the Yamaha 21” conversion went smoothly. I bought a 1975 Yamaha DT400 front wheel, which is nearly a drop in conversion. The actual size of the tall-ish Metzeler 19” is only about ¾” shorter than the new 21” tire. I thought the bigger wheel might rub the fender but there’s clearance. I like the low fender look on the old Yamaha so I might raise the fender a tiny bit for more mud room. It’s usable as is, I’ll just have to budget my mud riding.
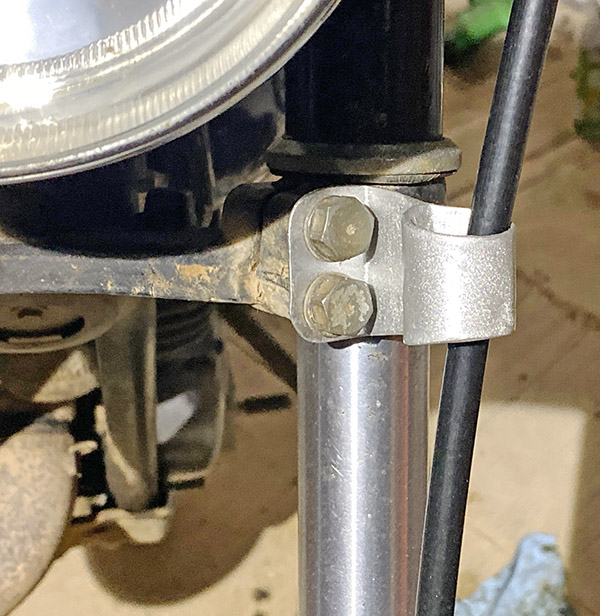
The old, looping, brake cable guides were in the wrong spot for the new wheel. The brake cable on the new wheel is routed straight up from the wheel, in front of and parallel with the fork legs making the cable shorter and more direct as there is only one turn in the run. So I had to buy a new brake cable. I bent up a small piece of file cabinet to make an upper cable guide, for the bottom I used an off the shelf Adel clamp.
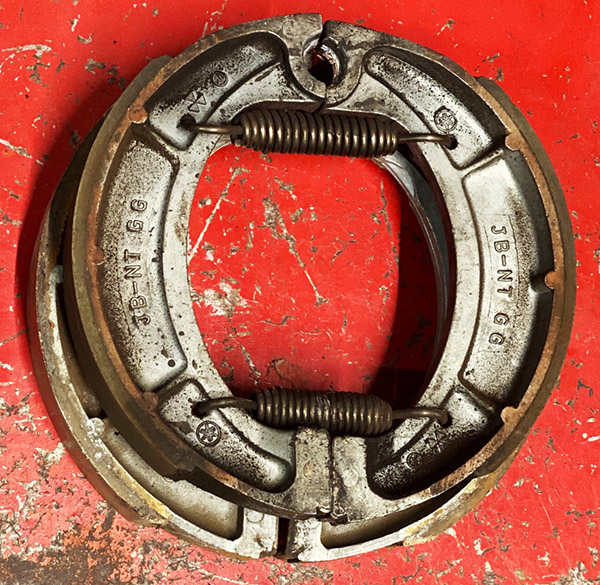
Old Yamaha Enduros are not known for having powerful brakes so I was surprised to see the 1975 conical hub had a ½” larger brake drum. The extra braking power provided by the 6” drum is counteracted by the larger diameter wheel so it’s kind of a wash in the braking department. At least I didn’t go backwards.
At the end of all this back and forth motion I have two motorcycles with new front tires and a warming trend on the way. Spring is right around the corner and Mike has a new 890 KTM that we need to get dirty. We have the whole state of New Mexico to explore. I’ll have some more potpourri for ExhaustnNotes as I continue to tie up those loose ends.
Never miss an ExNotes blog:
All good Joe🏍️
I have the same HF tire machine. I removed the whole top part and just use the vice part with levers, and of course the bead breaker. I have also added a heavy wire around the base so that I can attach tie-downs to act as a second pair of hands holding the tire levers in place.
Marcus,
Another good thing to do is to weld the arms to the center piece. No matter how tight I made the arm bolts the arm would move. Welding made it nice and stable.
I nut and bolted mine to stabilize it. Welding is better. Also, I tied a small plastic bucket under the arms to hold the tire irons, no bending over and they’re always within reach. For rim protectors I used strips cut out of a Clorox bottle, they’re tough as can be. Though my last set I cut out of a quart bottle of Valvoline brake fluid. That plastic is as tough as nails.
Marcus,
I bought some rim protectors on Amazon. I think they are too soft but we will see next time. The cut up plastic bottles seem more my style.
Agree that I need to get the tools off the floor. I was thinking about a cart with wheels to hold the irons, bars, tire lube and misc small bits like stems and weights. Kind of a tire changing center. I have to bend over to reach the tools sitting on a bucket.
I’ve yet to use the machine on a car tire. I suspect it will work pretty good and the duck tool will be more useful.
My style too. I used the cut up plastic for a few years then I figured I’d buy real rim protectors but found them too thick. I used them not even once then went back to the plastic bottle pieces. Just don’t let them slip into the tire. I’ve done dozens of motorcycle tires (you get real popular once your riding friends find out you have a tire machine) but I haven’t tried car tires as my motorcycle wheel balancer won’t work on them.
The same thing happened to me when I had a pickup truck.
I’ve been thinking about getting the car tire Bubble balancer and figuring a way to make to work on motorcycles. The axle he is too small on bikes. Maybe a way to hang the wheel.
I static balance street bike tires with a couple jack stands and a piece of rod. It’s ok but not super accurate.
HF sells a motorcycle tire balance for $50. At least that’s what I paid. I had to beef it up but it works well. I paid $79 bucks for the tire machine.
Interesting .