ZRX RX: An ExNotes Resurrextion, Part 3

By Joe Gresh

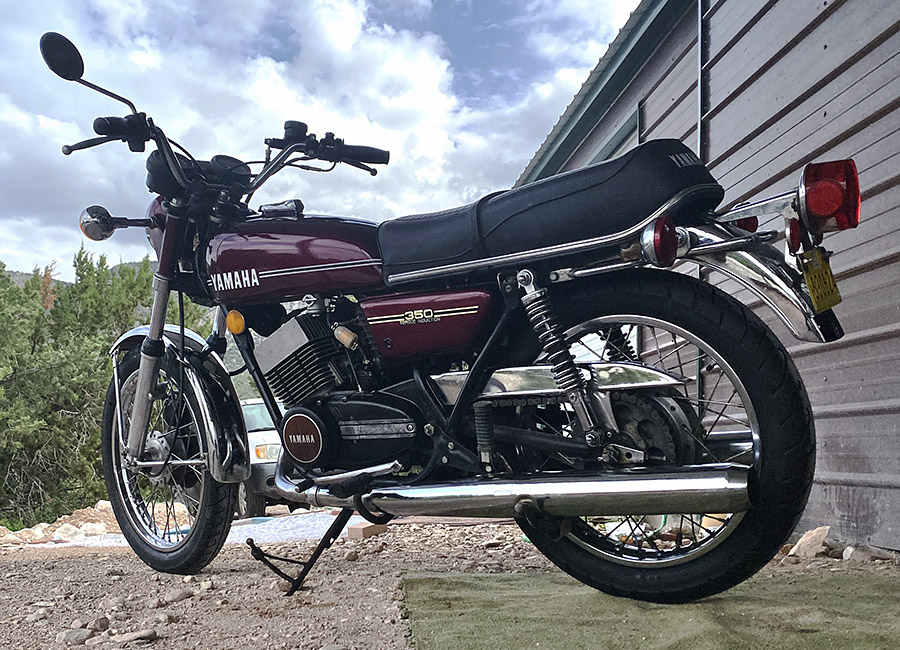
Labor rates at motorcycle shops are well over $100 an hour and that fact got me thinking about the value of old motorcycles. Take my 1999 ZRX1100: The basic bike is sound but there are many minor issues that add up to a lot more money than the motorcycle is worth. If you took the bike to a shop, that is.

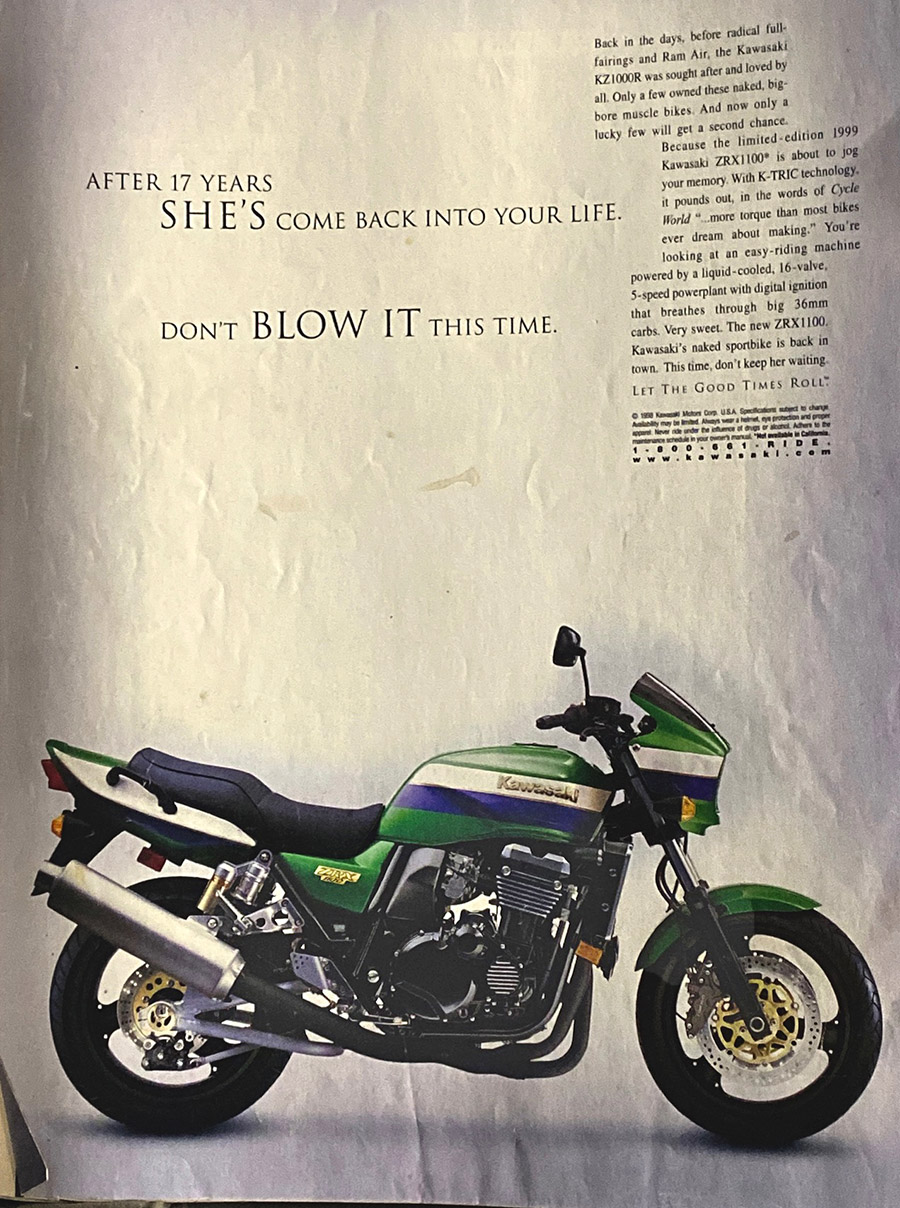
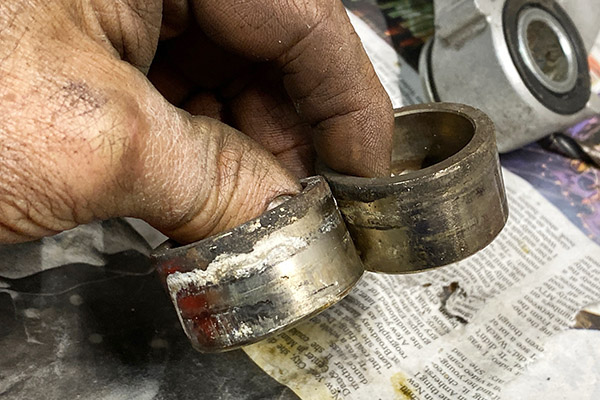
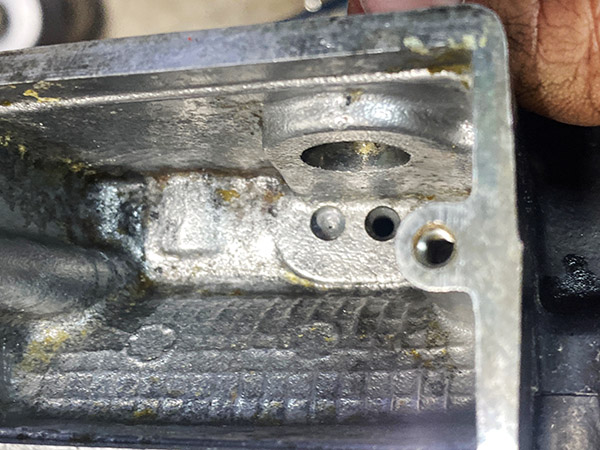
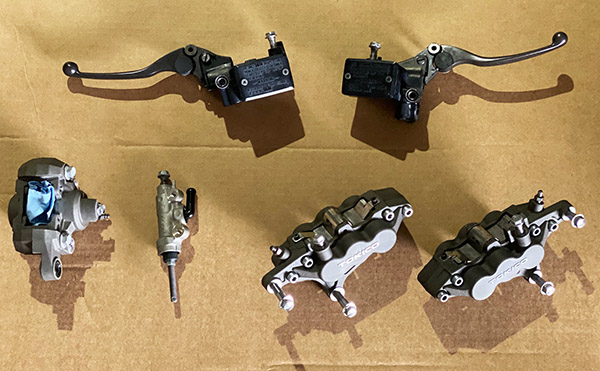
Fixing a bike yourself means you can take more risks. You can reuse iffy parts that a dealer mechanic cannot. The brake system on the Rex was in sad shape. All the calipers were stuck and the master cylinders were stuck, too. If I worked for a shop as a motorcycle mechanic I’d tell the customer they need all new parts. I couldn’t take the risk of my rebuilt caliper failing or coming back for a leak.

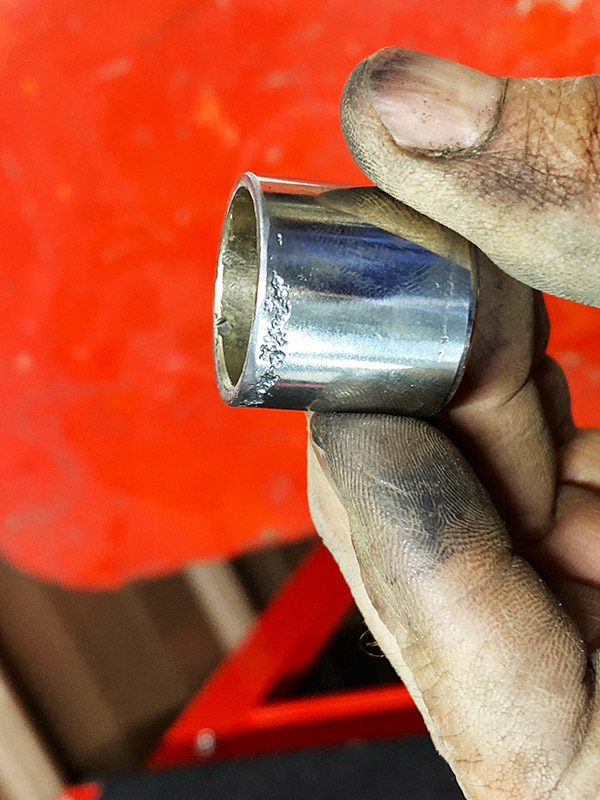
The bores in a brake caliper are not super critical as the sealing is done mostly on the piston walls. Unfortunately, my caliper pistons were not in great shape. I polished them as much as I could and cleaned up the bores. New o-rings and dust seals will hopefully keep them from leaking.

The master cylinder bore is much more critical because it forms the sealing surface for the piston and seals. Luckily the bores on the clutch and both brake caliper master cylinders were in good shape.

The rubber bits for the front and rear master cylinders looked ok-ish to me so I reused those parts. I’m to the point that I prefer old OEM bits to new aftermarket bits if I can get away with them.

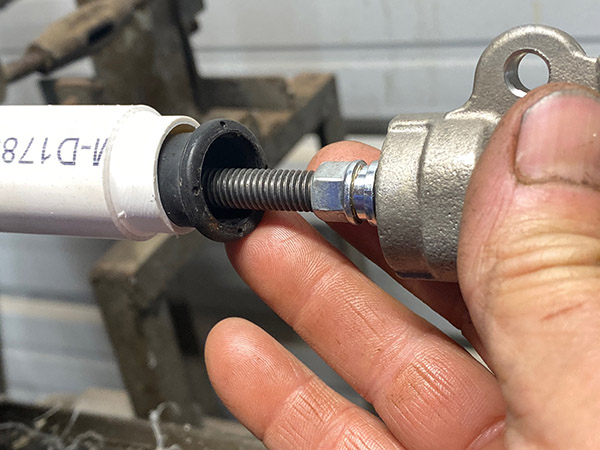
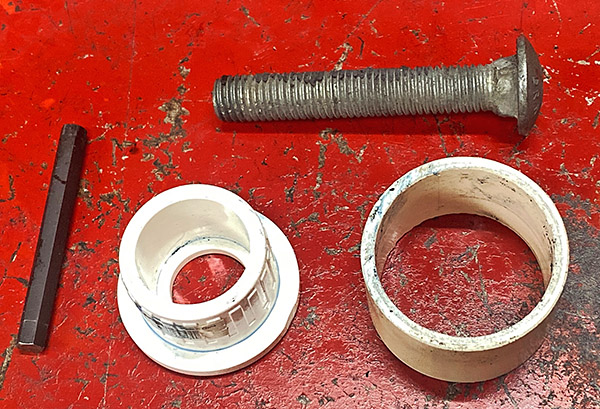
The levers have a pressed in dust seal and I didn’t have a tube the correct size for the job so I turned out a short piece of PVC tubing to push the dust boot into place.

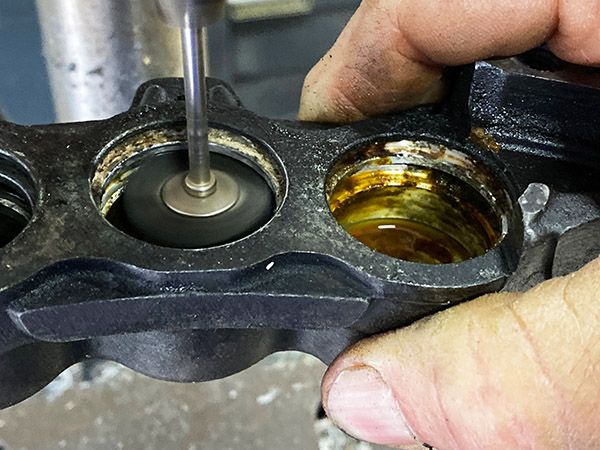
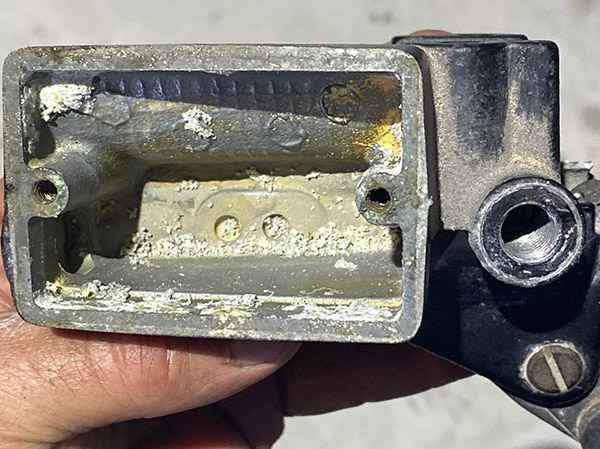
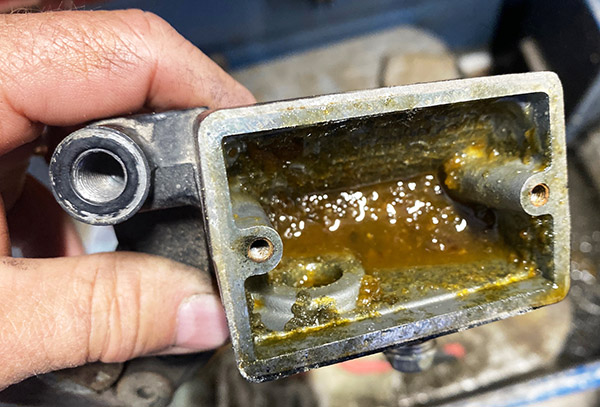
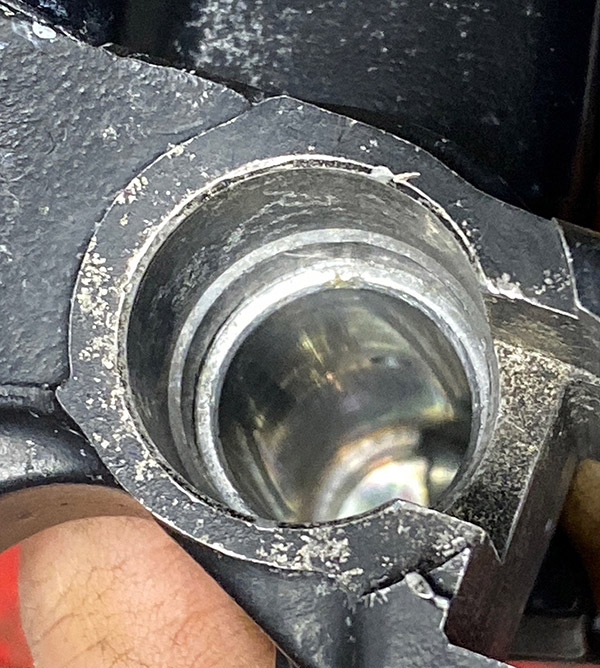
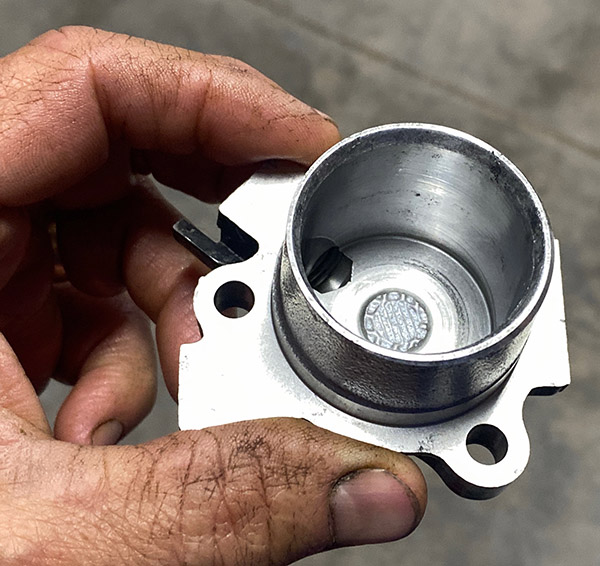
I ordered a new clutch master seal kit as I tore the original dust boot dismantling the thing. I also bought a clutch slave kit but the bore was so bad by the time I had it remotely smooth the piston was loose in the bore. I have ordered a new clutch slave cylinder.

All in, there were 18 hydraulic pistons in the ZRX that needed service. A shop mechanic would never re-use the stuff I did. It may come back to haunt me later.

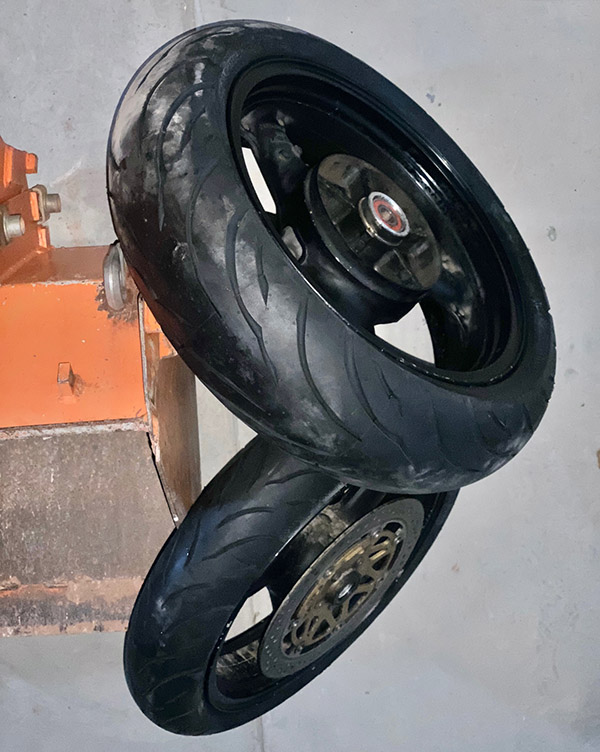
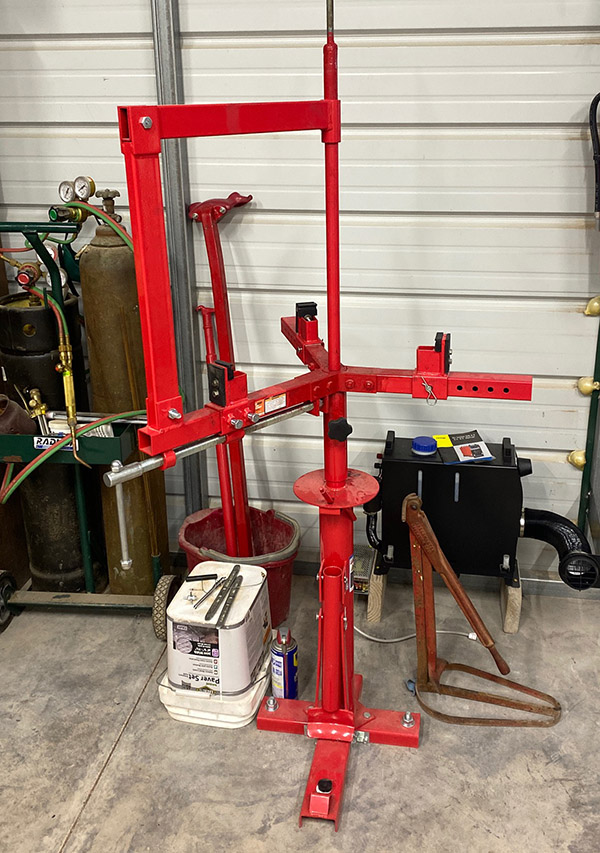
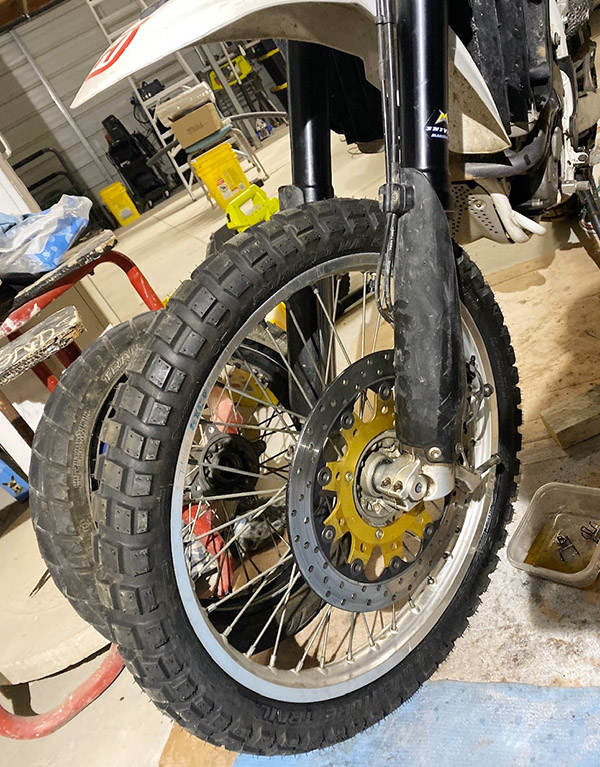
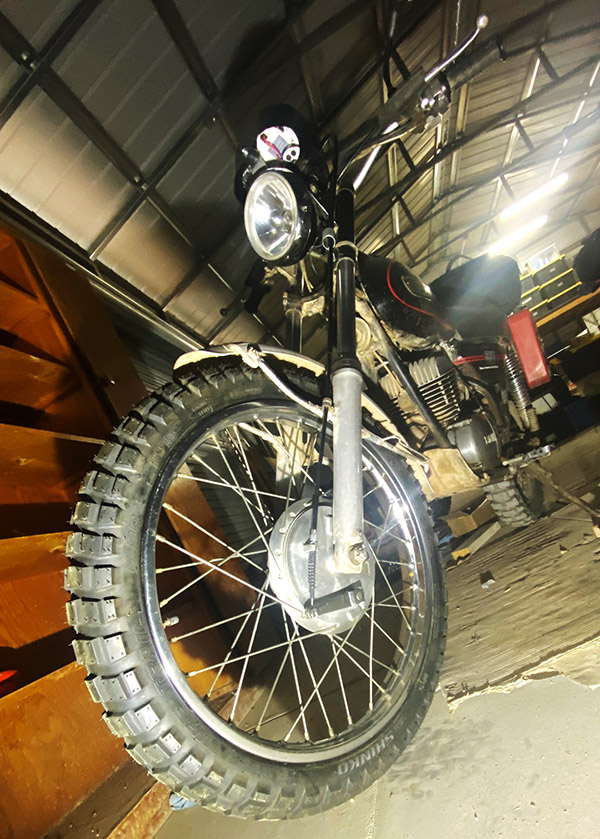
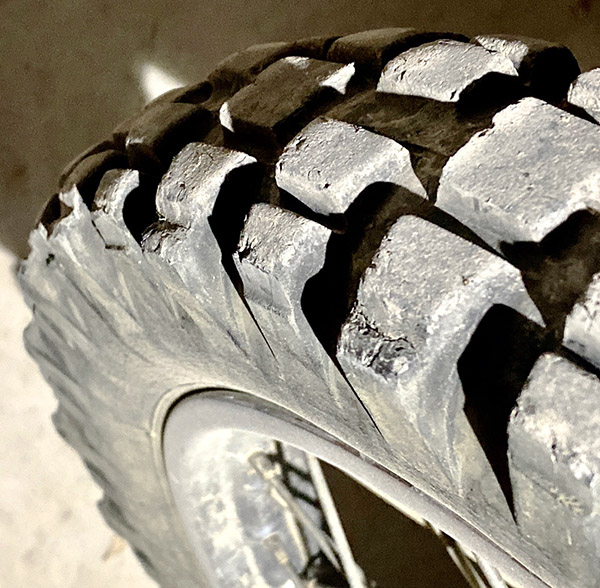
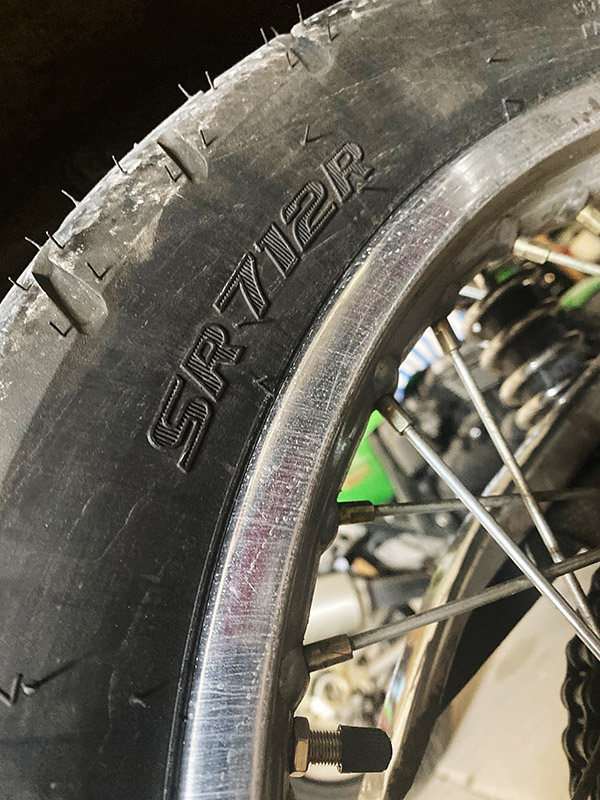
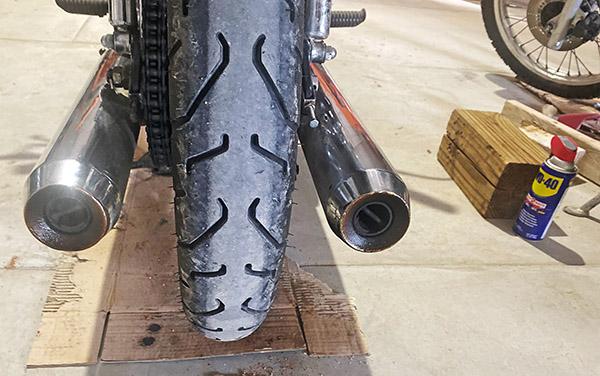
I bought two new, made in Malaysia Continental tires for the Rex as the ones on the bike were made in 2009. The old tire sidewalls had small weather checking. I would have run the old tires if I was just bopping around town but I have a few long trips planned so at $200 for the pair I figured I’d better bite. The Harbor Freight tire changer made the job tolerably easy. Still not as easy as having a shop do it.

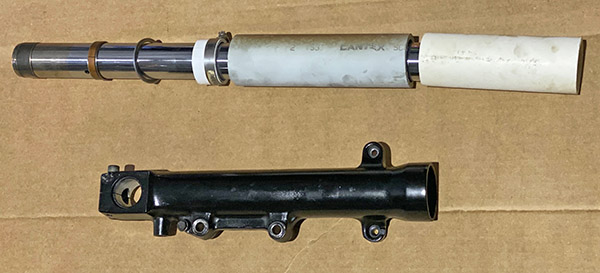
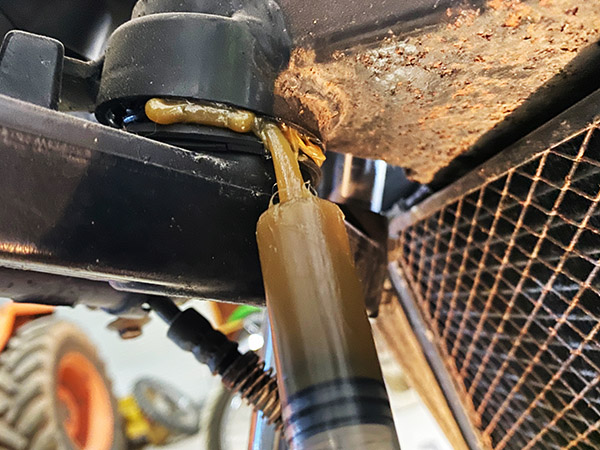
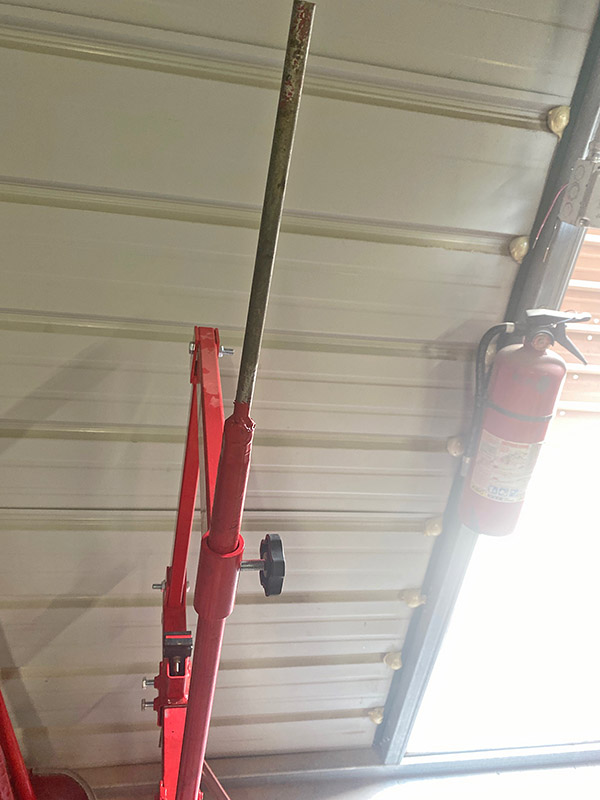
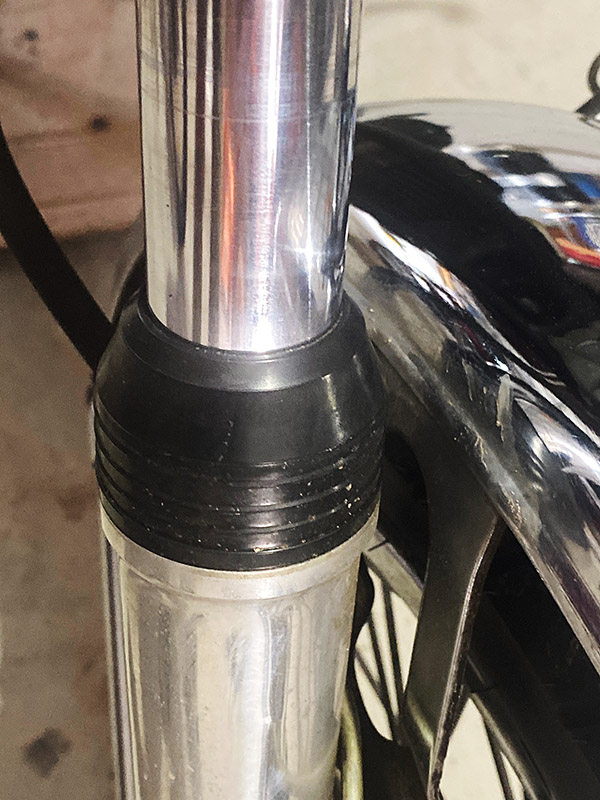
The fork seals were leaking so I popped in a new set of fork seals and replaced the fork oil and while I had the front end apart I dropped the lower triple clamp and pumped in some much needed grease to the steering head bearings.

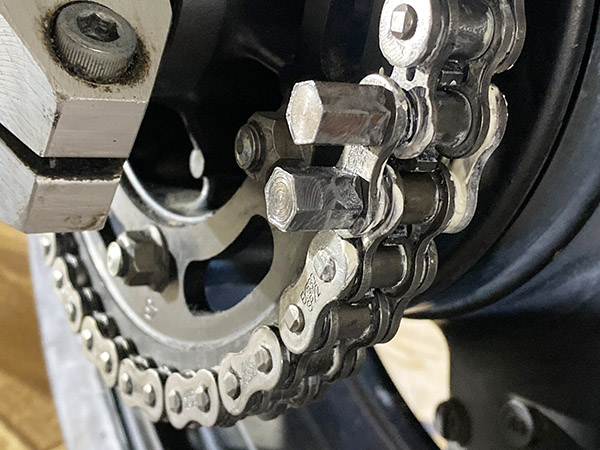
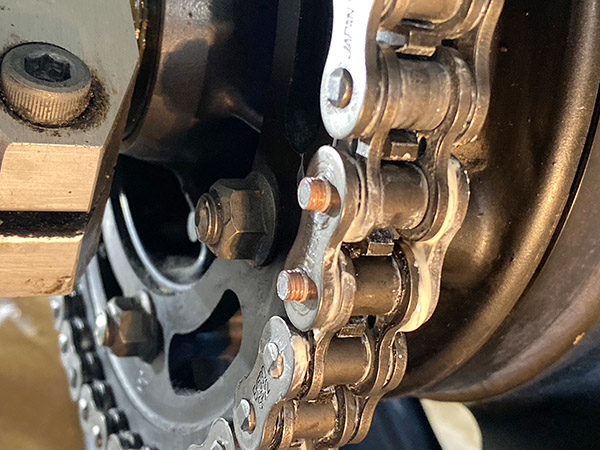
I also bought a new front sprocket and new X-ring chain for the Rex. The chain had a new style master link that worked by pressing the side plate on using small nuts then breaking off the studs that stick out. If it works it will be a good idea, if not I’ll probably break my engine cases when the chain lets go.

If I had taken the ZRX1100 to a shop by this point I would have already exceeded the value of the motorcycle. A shop would need to put in all new brake components to cover their butt. I’m willing to risk my life on shoddy equipment to save money and I’m nowhere near done with the bike or spending money, as you’ll see in future blogs.


Keep the hits coming:  Please click on the popup ads!


More Resurrections are here!

Potpourri Part 1

By Joe Gresh

Clutter tends to accumulate in our lives. The unfinished and the left-hanging gather dust motes and wind up in soggy cardboard boxes of odds and ends. So it is with ExhaustNotes stories: some of them just sort of fizzle out inconclusively yet what remains is not enough meat for a stand-alone follow-up story. In an attempt to close the books on a few articles and give our dear readers peace of mind here are a few loose ends, tied.

The Harbor Freight Tire Machine

I’ve used the Harbor Freight tire machine to change five motorcycle tires and can report a 100% success rate. These successes include installing stiff knobby tires on the wide Husqvarna rims. Five in a row without a leak is unheard of for me. I’ve pinched a tube 5 times in a row! My usual success rate is around 50%. While the tire changer makes the job easier it’s still a bit of a work out. The built-in bead breaker is a godsend for old, stuck on the rim beads and having the rim held securely at waist level is nice on my sore back.

Working the machine, I ended up mostly using regular tire irons instead of the plastic duck-on-a-lever contraption. I haven’t given up on the duck lever and it may be a case of user error. I plan on making the duck part pivot on the lever part to allow it to mate with the curve of the rim better. My experience with the HF tire changer has been positive even if I did have to do a few modifications to make the thing function. I feel like I no longer have to fear the Husky’s tires and am confident I can change them in a reasonable amount of time without too much damage. I’m not sure HF still carries the motorcycle tire adapter so if you want one you might have to check several stores to see if they have the thing in stock.

The Husqvarna 21” front wheel conversion

After spending several hundred dollars and several days labor on the failed Husky wheel conversion I’m happy to report the bike is now back to stock configuration and rideable. After grinding clean through the old caliper I had to buy a new 4-piston Brembo caliper. I also replaced the wheel bearings as the originals had suffered enough of my abuse pounding them out of the wheel hubs twice.

Since I have given up on the 21” wheel idea I bought a Continental TKC knobby in the Husky’s original tire size. The tire cost $140 from Amazon and the knobs are about as high as the worn out knobs of a real dirt tire. The TKC is the knobbiest 17” tire I could find that fit the rim. I’m hoping the TKC will provide a bit more grip off road.


Help us bring more content to you:  Please click on the popup ads!


My buddy Mike graduated from a 390 KTM and has bought a new 890 KTM and I’ll have to work the Husky a bit harder to stay up with his 100 horsepower dirt bike. I’ve also raised the Husky fork tubes up ½” inside the triple clamps, effectively steepening the rake a bit. The old street slick on front would push in the dirt making corners a sit on the gas tank type of deal. Loose gravel was like riding on marbles and mud would coat the old tire within one revolution making the bike feel like it was on ice. Maybe the deeper grooves between knobs will give the mud some place to squish. Anyway, the bike looks much more dirt ready if a bit silly with the tiny front wheel.

Yamaha RT1-B 21” front wheel conversion

After my not so shocking failure converting the Husky to a 21” front wheel I had a brand new 21” knobby tire just sitting in the shed. Mirroring the same poor tire choice issue as the 17” Husky, the 1971 Yamaha’s 3.25 X 19” front tire is an oddball. I have been running through my inventory of $10, new old stock Metzelers but those tires were approaching 30 or 40 years old and had weather checking on the sides. I was getting a bit of chunking on the side knobs also as the rubber was just plain old and breaking apart.

Luckily for me, the Yamaha 21” conversion went smoothly. I bought a 1975 Yamaha DT400 front wheel, which is nearly a drop in conversion. The actual size of the tall-ish Metzeler 19” is only about ¾” shorter than the new 21” tire. I thought the bigger wheel might rub the fender but there’s clearance. I like the low fender look on the old Yamaha so I might raise the fender a tiny bit for more mud room. It’s usable as is, I’ll just have to budget my mud riding.

The old, looping, brake cable guides were in the wrong spot for the new wheel. The brake cable on the new wheel is routed straight up from the wheel, in front of and parallel with the fork legs making the cable shorter and more direct as there is only one turn in the run. So I had to buy a new brake cable. I bent up a small piece of file cabinet to make an upper cable guide, for the bottom I used an off the shelf Adel clamp.

Old Yamaha Enduros are not known for having powerful brakes so I was surprised to see the 1975 conical hub had a ½” larger brake drum. The extra braking power provided by the 6” drum is counteracted by the larger diameter wheel so it’s kind of a wash in the braking department. At least I didn’t go backwards.

At the end of all this back and forth motion I have two motorcycles with new front tires and a warming trend on the way. Spring is right around the corner and Mike has a new 890 KTM that we need to get dirty. We have the whole state of New Mexico to explore. I’ll have some more potpourri for ExhaustnNotes as I continue to tie up those loose ends.


Never miss an ExNotes blog:

RD350 Yamaha Update

The 1974 RD350 has been faultlessly buzzing around south-central New Mexico these last few months without any attention. The old girl was dribbling oil and banging around on her front suspension and the tires that came on the bike were old and cracked. In addition, the rear 4.00×18 tire was too large and rubbed the fender over bumps. The bike kind of bobbed in turns and I didn’t want to take a long ride on those rotten tires. I needed to give the old bike some love.

What held me back was the Harbor Freight tire changer. I was in the middle of modifying the tire machine and I just lost interest. The monsoon rains have precluded any concrete work so I decided to finish the tire machine.

One of the issues with the HF tire machine is that the center shaft is too big for older motorcycles. The center shaft is a pivot point for your duck bar or tire levers. Most new bikes come with big axles and the stock part will work fine on those. I cut a piece of ½” rod 12-inches long and turned out a spacer to go between the factory center bar and the new ½-inch piece. My welding is atrocious but you have to cut me some slack as I can’t see the puddle and weld by sound. Now I can center-post smaller diameter axles without anyone crying about it.

The HF tire machine has three rim-grabber things. Two of the grabbers are pinned into place and one is screw driven. When it works right it really locks the wheel in place, essentially giving you a second set of hands. The grabbers were a sloppy fit on their square-tube arms and it’s hard enough getting all the fingers lined up at one time without stuff moving around. Shimming the grabbers with thin aluminum tightened up the machine and made fitting the rim to the grabbers easier.

While not required for the skinny RD350 tires, I made a duck-bar to assist with bead removal. The duck is a plastic piece that fits over the rim. You use a lever to pull the bead up over the duck’s head and then slide the duck along the rim with the duck bar. The plastic helps prevent scarring your nice chrome or aluminum rims. Needless to say, use lots of tire lube as the first ¼-way around the rim is a hard pull. The duck is actually a part from commercial tire changing machines and it works great on wider rims like you’d find on a sport bike or cars.

I made a steel piece to fit the bolt holes of the duck and welded a 4-foot long, 1” square tube to the duck mount. It’s also an ugly weld but thanks to the miracle of grinders and thick paint it doesn’t look so bad. I messed up by welding the bar to the duck foot square, or at 90 degrees to the bolt axis if that makes any sense to you. This meant that it didn’t sit flush to the curve of the rim when using the center pivot. The pivot point was right where the bar wanted to be.

A quick bending session tweaked the duck-bar enough to be functional. I’ll get it right next time. The duck-bar worked well on the back wheel of the RD350 but the front rim was too skinny. There wasn’t enough room for the duck so I did it the old fashioned way with tire levers.

I bought two Shinko SR712P tires for the RD350, a 3.00×18 for the front and a 3.50×18 for the rear. These are the stock sizes and they don’t rub the fender. The rear looks pretty skinny, I’d like to get a 3.75×18 but I can’t find one. I’ll need new brake shoes for the rear drum but that will have to wait for another maintenance session.

The fork seal replacement was pretty straightforward and so I managed to screw it up. The RD350 has a chrome cover over the brake hose manifold. This cover makes loosening the lower triple clamp pinch bolts impossible unless you remove the top triple clamp and the headlight fork ears. Then the chrome cover can slide up allowing access to the pinch bolts. That was way too much work for me so I decided to pull the sliders off and leave the rest of the fork on the motorcycle.

The RD350 fork slider has a very thin seal retaining area and when I gave the seal a gentle exploratory pry a tiny piece of the damn fork tube cracked by the snap ring groove. I was so upset I didn’t take a photo. Anyway, I worked the cracked piece off and filed the area smooth to make it look like it was made that way. I was temped to do the other side to make them match.

I ended up clamping a big, galvanized carriage bolt into the vice; the head fit behind the seal nicely. Then I cut a piece of PVC pipe that fit over the thin area and contacted the solid part of the fork tube where the dust cover stops. After that a rubber hammer knocked the seal out. It was clear sailing from then on; I reassembled the fork sliders onto the tubes and dumped 5 ounces of 10/30 synthetic motor oil into each fork leg.

For the little amount of work I did the difference was amazing. The RD350 falls into turns with the greatest of ease and holds the line like a supermarket customer getting cash back from a personal check. It feels like power steering. The bounciness is gone and the bike feels much calmer. Now that I can push the bike a little harder those cheap, aftermarket rear shocks are showing a lack of damping. I didn’t notice it before because the front was bouncing so much. The tires are skinny but feel like they grip well. I don’t road race on the street but if I did I could hustle the purple RD350 through the mountains pretty fast.

There’s more to do on the RD350 but I like riding the bike so much I don’t want to disable the thing. I have to fix a leaking oil tank sight glass, re-grease the steering head bearings, replace the rear brake shoes, clean the carbs, and on and on. All that can wait because the sun is out (in the morning before the monsoon rains) and I’ve got to ride this bike.


Click on those popup ads!