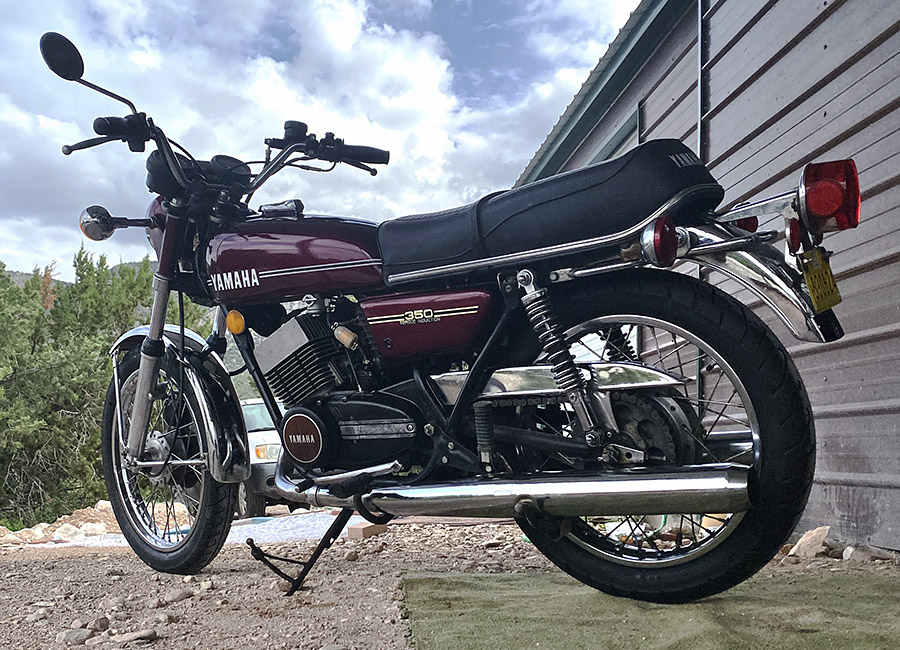
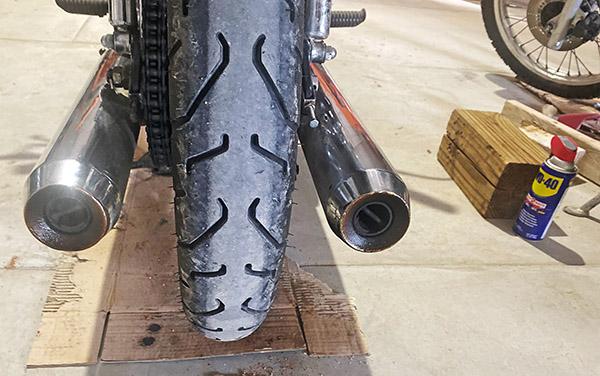
The 1974 RD350 has been faultlessly buzzing around south-central New Mexico these last few months without any attention. The old girl was dribbling oil and banging around on her front suspension and the tires that came on the bike were old and cracked. In addition, the rear 4.00×18 tire was too large and rubbed the fender over bumps. The bike kind of bobbed in turns and I didn’t want to take a long ride on those rotten tires. I needed to give the old bike some love.
What held me back was the Harbor Freight tire changer. I was in the middle of modifying the tire machine and I just lost interest. The monsoon rains have precluded any concrete work so I decided to finish the tire machine.
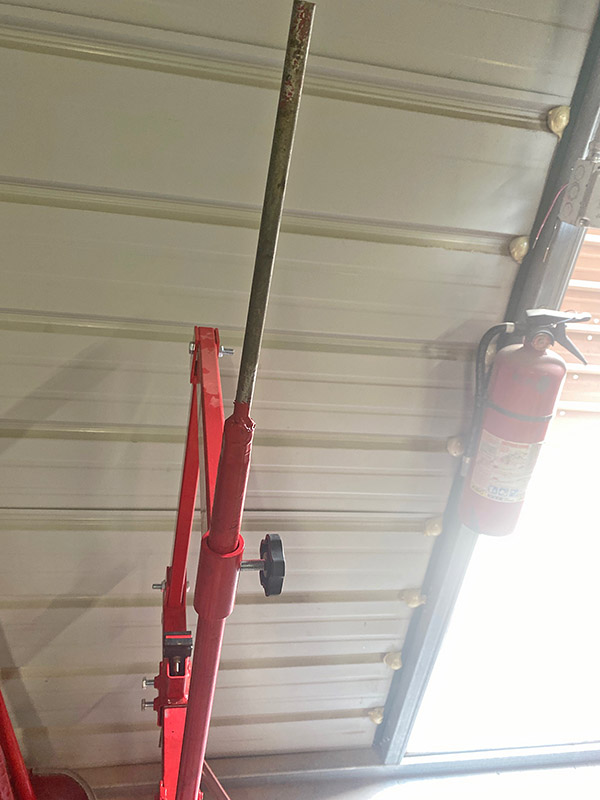
One of the issues with the HF tire machine is that the center shaft is too big for older motorcycles. The center shaft is a pivot point for your duck bar or tire levers. Most new bikes come with big axles and the stock part will work fine on those. I cut a piece of ½” rod 12-inches long and turned out a spacer to go between the factory center bar and the new ½-inch piece. My welding is atrocious but you have to cut me some slack as I can’t see the puddle and weld by sound. Now I can center-post smaller diameter axles without anyone crying about it.
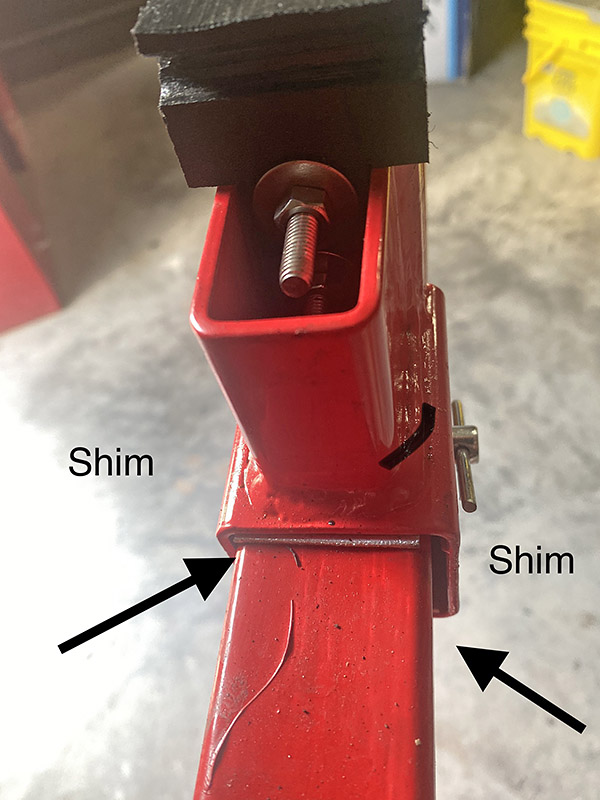
The HF tire machine has three rim-grabber things. Two of the grabbers are pinned into place and one is screw driven. When it works right it really locks the wheel in place, essentially giving you a second set of hands. The grabbers were a sloppy fit on their square-tube arms and it’s hard enough getting all the fingers lined up at one time without stuff moving around. Shimming the grabbers with thin aluminum tightened up the machine and made fitting the rim to the grabbers easier.
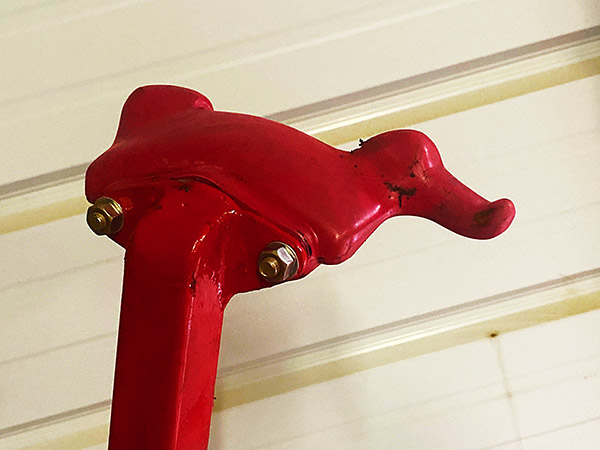
While not required for the skinny RD350 tires, I made a duck-bar to assist with bead removal. The duck is a plastic piece that fits over the rim. You use a lever to pull the bead up over the duck’s head and then slide the duck along the rim with the duck bar. The plastic helps prevent scarring your nice chrome or aluminum rims. Needless to say, use lots of tire lube as the first ¼-way around the rim is a hard pull. The duck is actually a part from commercial tire changing machines and it works great on wider rims like you’d find on a sport bike or cars.
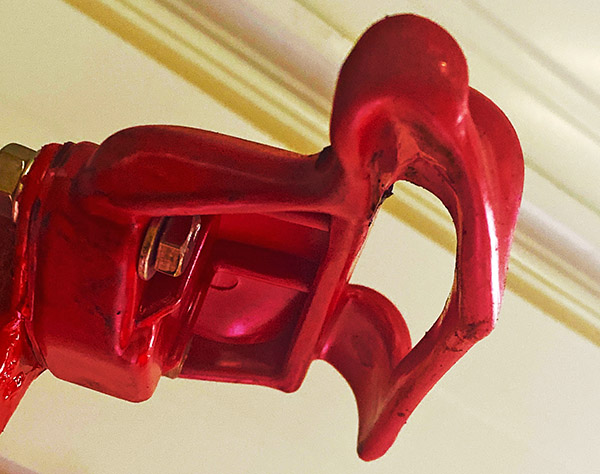
I made a steel piece to fit the bolt holes of the duck and welded a 4-foot long, 1” square tube to the duck mount. It’s also an ugly weld but thanks to the miracle of grinders and thick paint it doesn’t look so bad. I messed up by welding the bar to the duck foot square, or at 90 degrees to the bolt axis if that makes any sense to you. This meant that it didn’t sit flush to the curve of the rim when using the center pivot. The pivot point was right where the bar wanted to be.
A quick bending session tweaked the duck-bar enough to be functional. I’ll get it right next time. The duck-bar worked well on the back wheel of the RD350 but the front rim was too skinny. There wasn’t enough room for the duck so I did it the old fashioned way with tire levers.
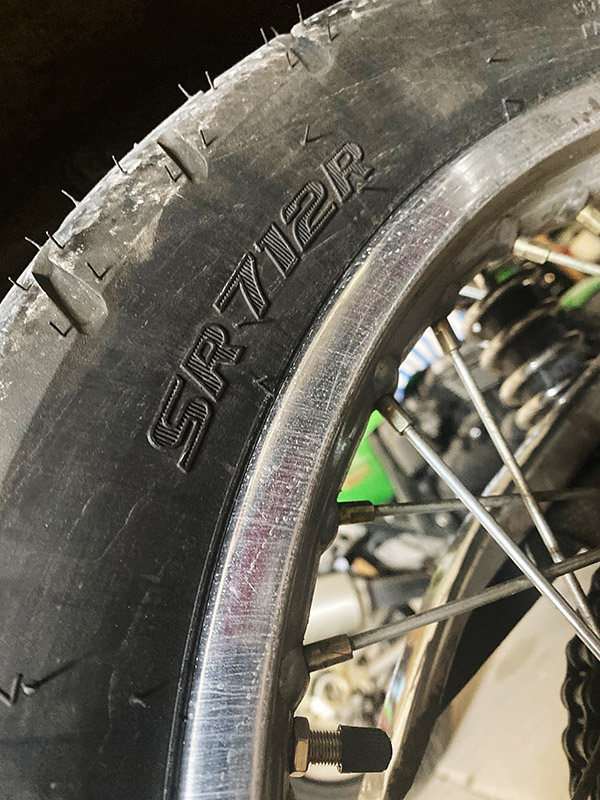
I bought two Shinko SR712P tires for the RD350, a 3.00×18 for the front and a 3.50×18 for the rear. These are the stock sizes and they don’t rub the fender. The rear looks pretty skinny, I’d like to get a 3.75×18 but I can’t find one. I’ll need new brake shoes for the rear drum but that will have to wait for another maintenance session.

The fork seal replacement was pretty straightforward and so I managed to screw it up. The RD350 has a chrome cover over the brake hose manifold. This cover makes loosening the lower triple clamp pinch bolts impossible unless you remove the top triple clamp and the headlight fork ears. Then the chrome cover can slide up allowing access to the pinch bolts. That was way too much work for me so I decided to pull the sliders off and leave the rest of the fork on the motorcycle.
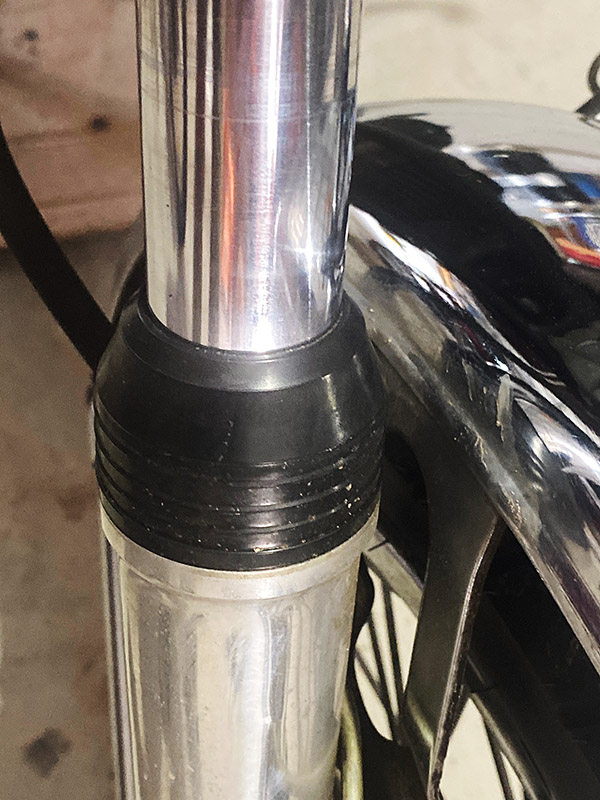
The RD350 fork slider has a very thin seal retaining area and when I gave the seal a gentle exploratory pry a tiny piece of the damn fork tube cracked by the snap ring groove. I was so upset I didn’t take a photo. Anyway, I worked the cracked piece off and filed the area smooth to make it look like it was made that way. I was temped to do the other side to make them match.
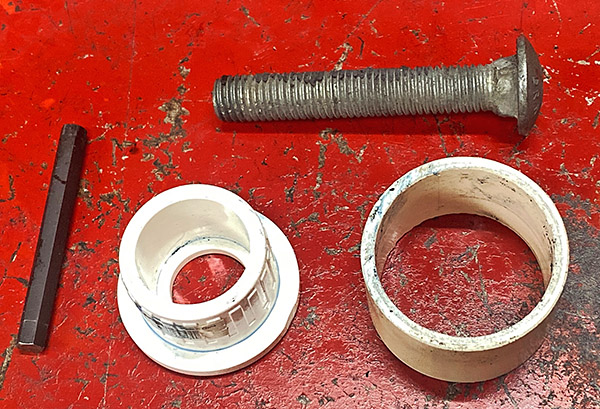
I ended up clamping a big, galvanized carriage bolt into the vice; the head fit behind the seal nicely. Then I cut a piece of PVC pipe that fit over the thin area and contacted the solid part of the fork tube where the dust cover stops. After that a rubber hammer knocked the seal out. It was clear sailing from then on; I reassembled the fork sliders onto the tubes and dumped 5 ounces of 10/30 synthetic motor oil into each fork leg.
For the little amount of work I did the difference was amazing. The RD350 falls into turns with the greatest of ease and holds the line like a supermarket customer getting cash back from a personal check. It feels like power steering. The bounciness is gone and the bike feels much calmer. Now that I can push the bike a little harder those cheap, aftermarket rear shocks are showing a lack of damping. I didn’t notice it before because the front was bouncing so much. The tires are skinny but feel like they grip well. I don’t road race on the street but if I did I could hustle the purple RD350 through the mountains pretty fast.
There’s more to do on the RD350 but I like riding the bike so much I don’t want to disable the thing. I have to fix a leaking oil tank sight glass, re-grease the steering head bearings, replace the rear brake shoes, clean the carbs, and on and on. All that can wait because the sun is out (in the morning before the monsoon rains) and I’ve got to ride this bike.
Click on those popup ads!