A Tale of Two Bowsers

By Joe Gresh

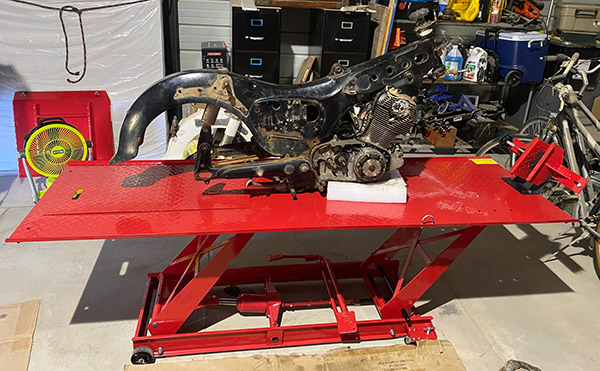
I’m stealing the two-fer idea from Berk mostly because I haven’t had an original thought in 10 years. This Bowsers thing happened last week when I was changing the tire on the ZRX1100 for an upcoming trip to Utah.

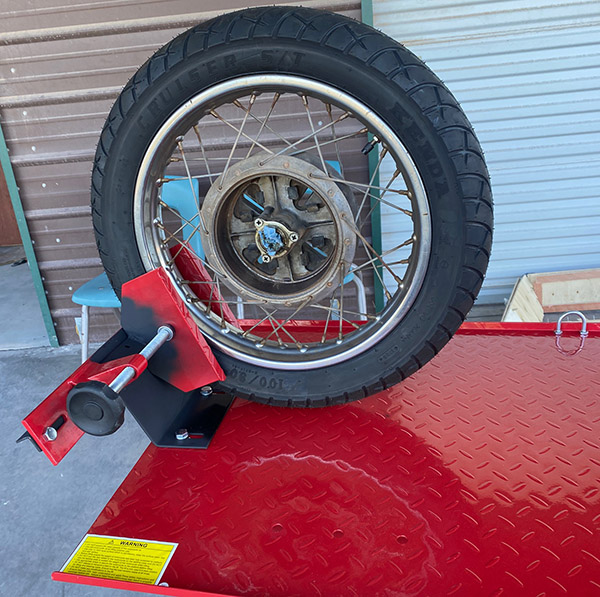
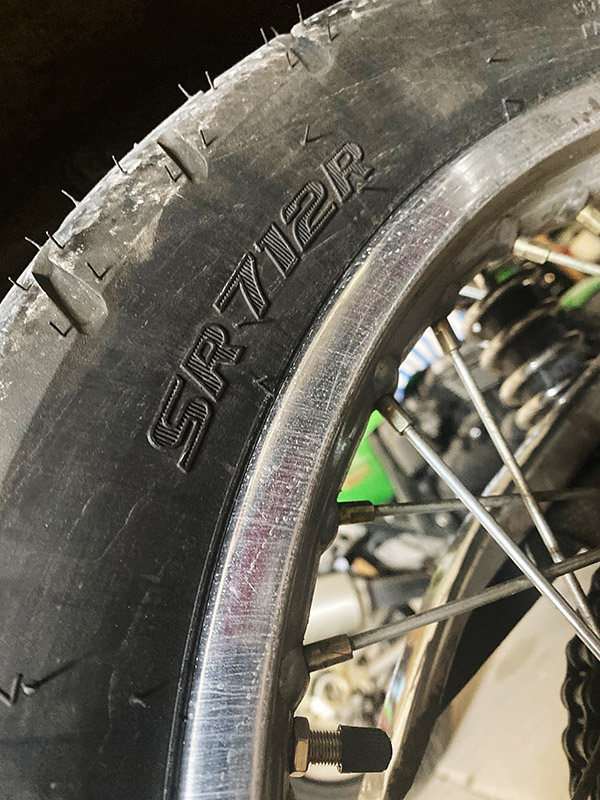
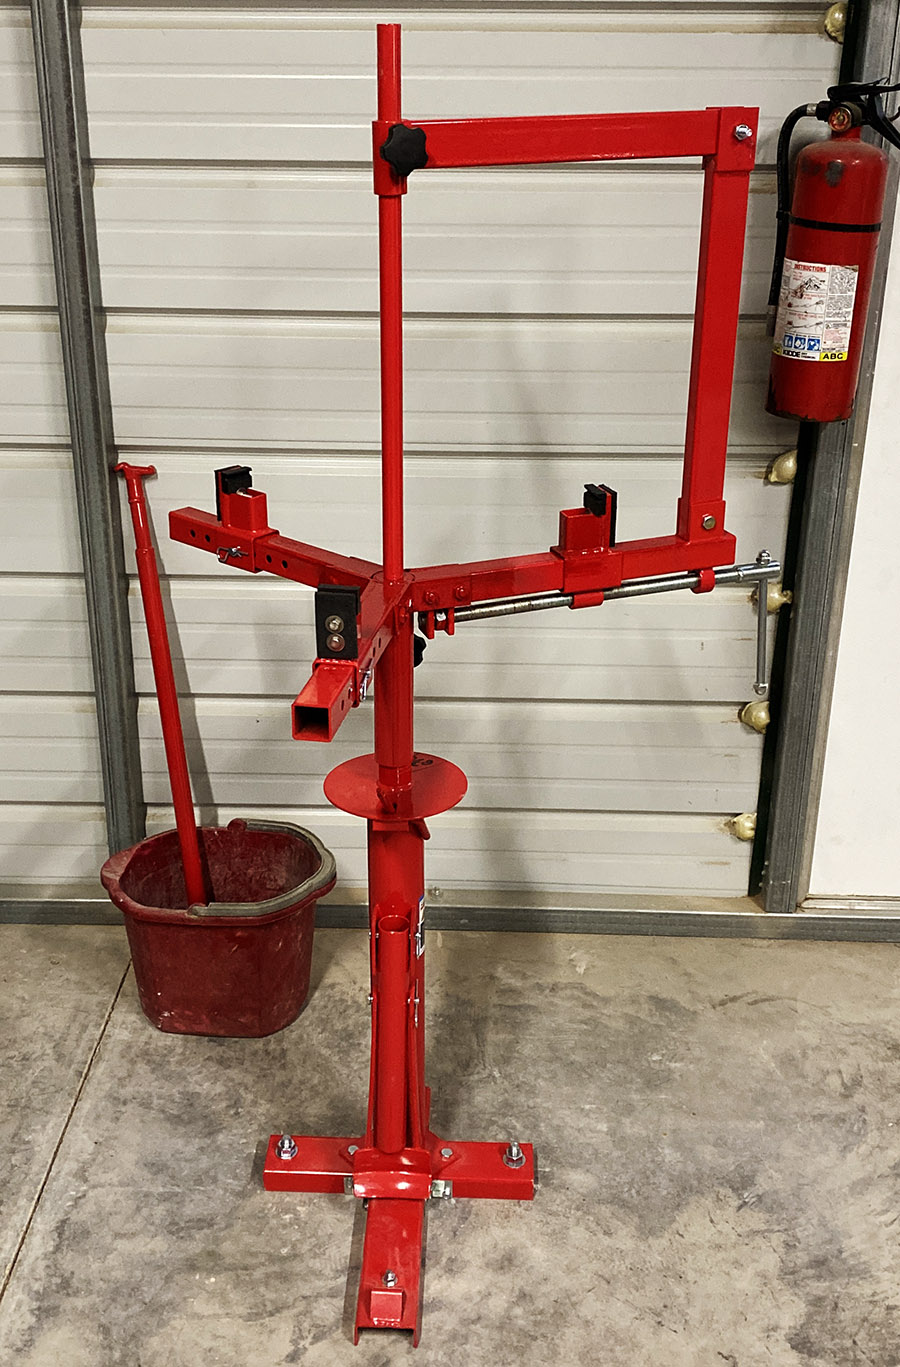
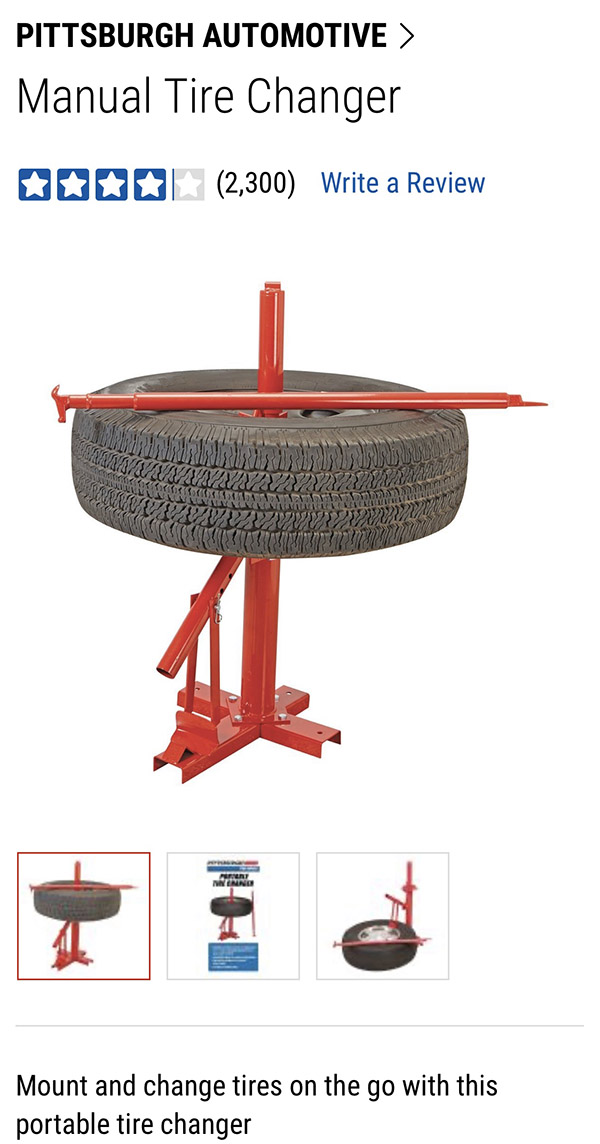
The tire, a Bridgestone, was a bear to get on the rim, very stiff and it took lots of lube and struggle to get the thing fitted. One casualty of the battle was the little dot that is supposed to be near the valve stem ended up 180 degrees opposite. I don’t know how that happened, I started with it in the correct position.

The tire was so difficult I left the dot position where is was, figuring to cancel out any imbalance with wheel weights later.

Normally I don’t have much trouble airing up a tubeless motorcycle tire and use a little 12-volt pump for the task. The Bridgestone had other ideas. The damn beads would not seat. I needed more air pressure and more air volume.

Tools of the trade for a cosplay mechanic.

Back in my youth I wanted to be an auto mechanic and I worked at a few shops mopping floors. In the 1970’s there were no cordless tools. Since all shops had a big compressor I needed an air impact, hammer, ratchet, drill to complete my cosplay mechanic’s kit.

The old Craftsman, sporting an air/water separator filter. Lots of air has gone through this rig.

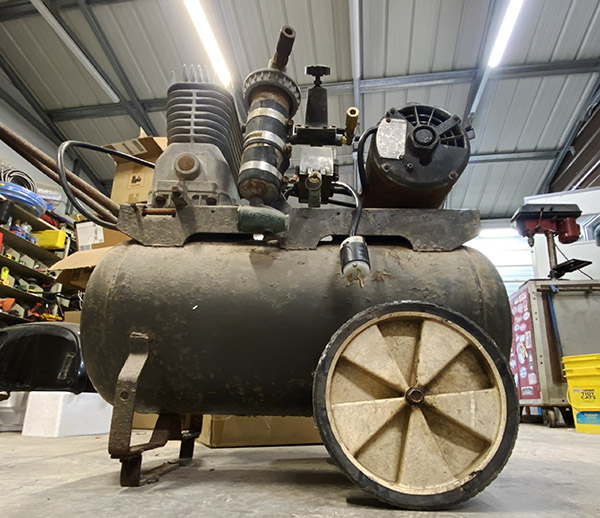
Once you have a bunch of air tools you’ll need a compressor to operate the tools at home so I bought a Sears compressor, I was around 15 years old at the time and since I fancied my self a custom painter in addition to being a mechanic the compressor was used most every day.

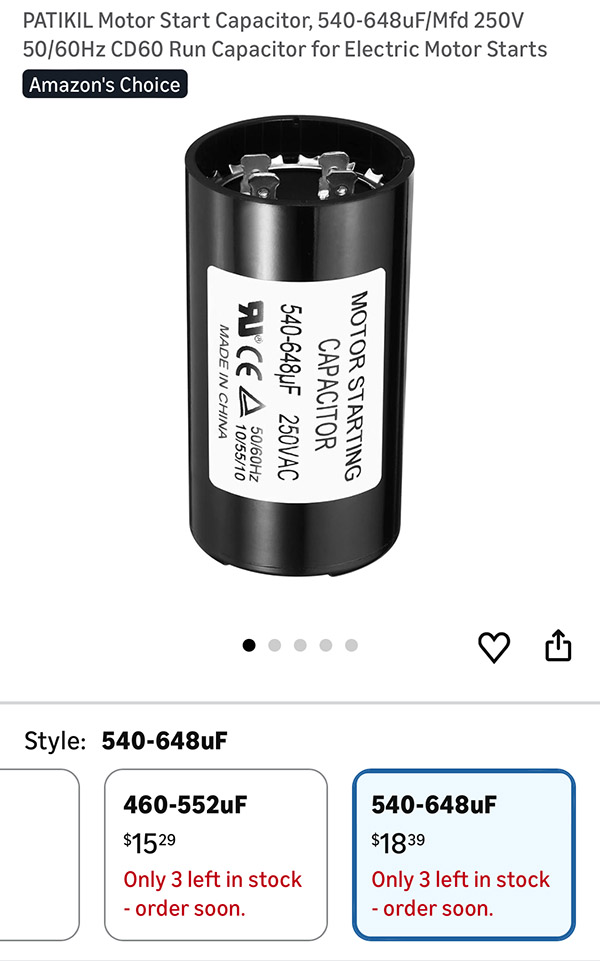
Fast forward 50 years and the Bridgestone tire: I flipped the switch on the Craftsman compressor and a loud buzzing sound was all I got. My first guess was a bad capacitor. I ordered one from Amazon as there was nowhere close to buy electrical bit. Still, I had no air. I needed a compressor right now.

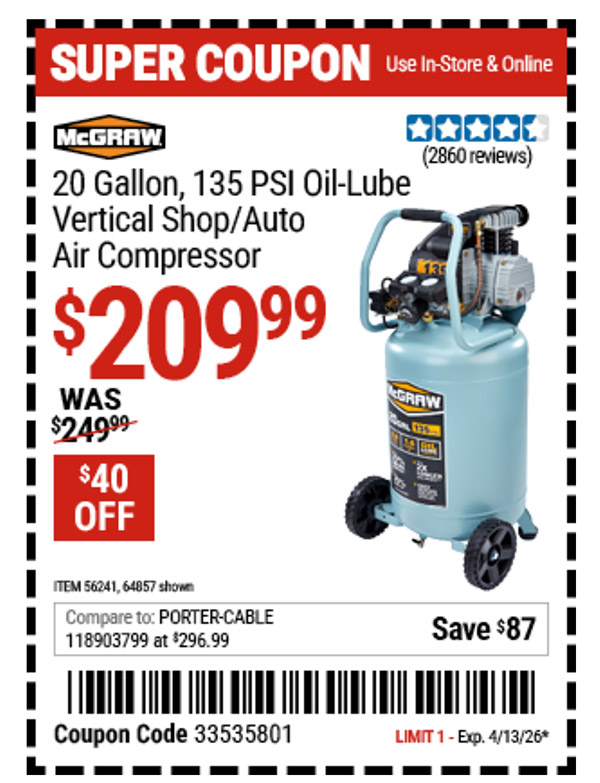
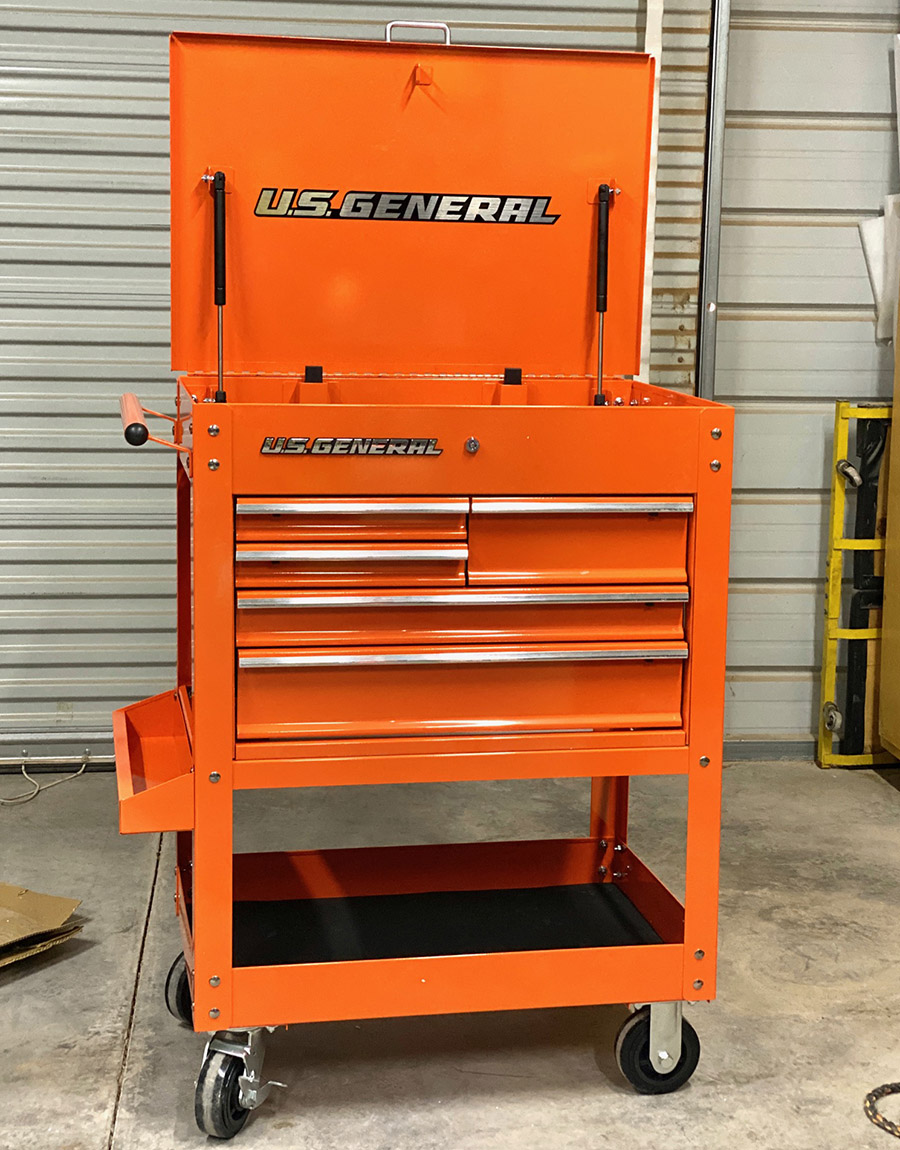
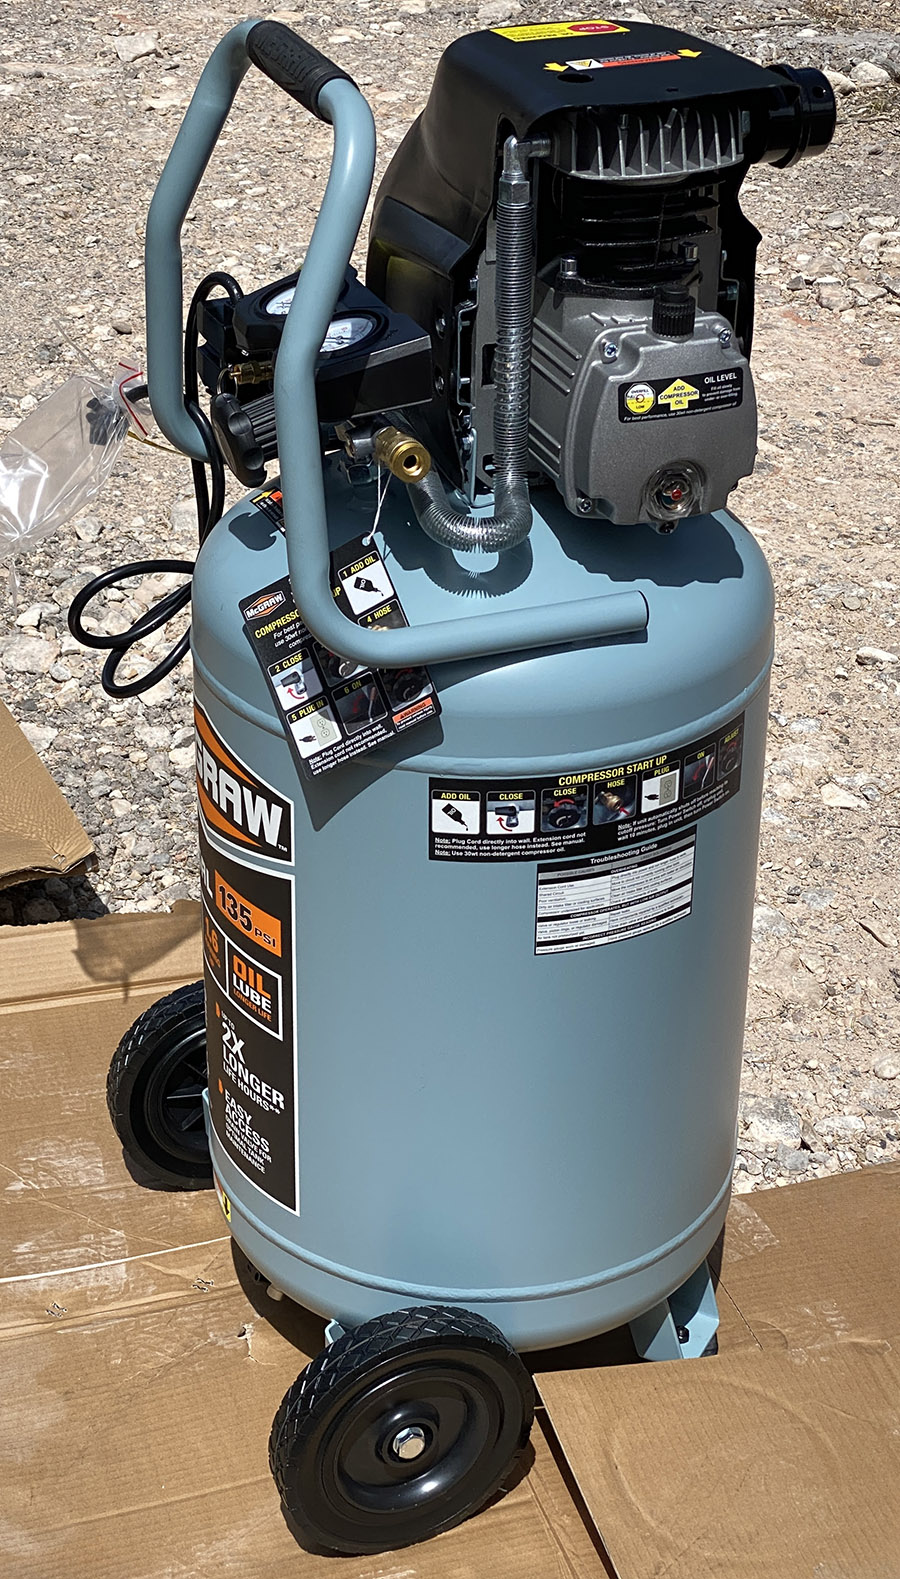
As luck would have it Harbor Freight (I get no commission, although I should) had a 20-gallon unit on sale for $200. I drove down the hill and picked up a copy.

The new compressor looks well made. It’s a vertical unit so the thing takes up slightly less floor space. A big difference between the direct-drive, single cylinder Harbor Freight and the belt-driven, two cylinder Craftsman is the noise: the HF is loud as hell.

With the new compressor’s 125 psi blast it was easy as pie to get the beads seated on the Bridgestone. The tire was well made and it only took 1/2 ounce to balance. Closing that chapter of my life I moved on to the old compressor.

The new Amazon capacitor arrived and I swapped it into the Sears compressor. The result was the same: a loud buzzing sound. Having eliminated one variable I decided the motor start/run switch wasn’t working and the compressor was trying to start on the run circuit.

After 50 years and 3 states the contacts finally lost continuity.

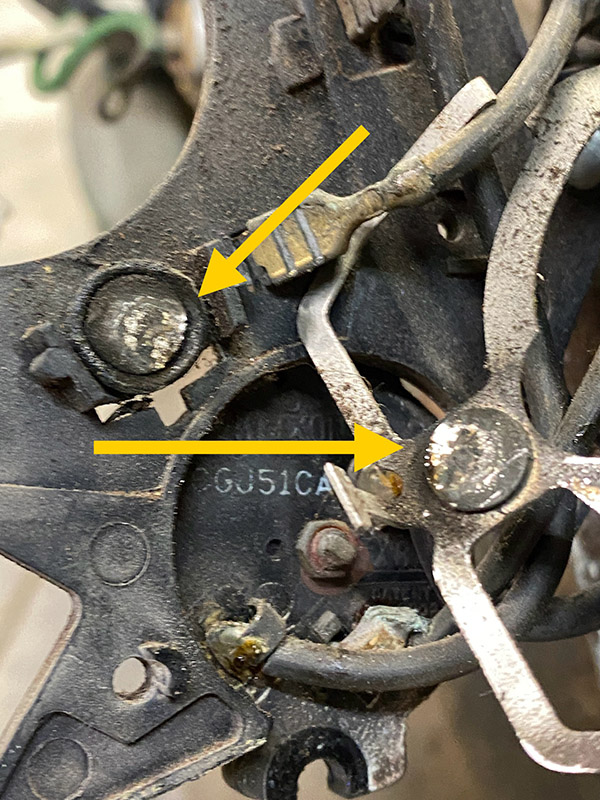
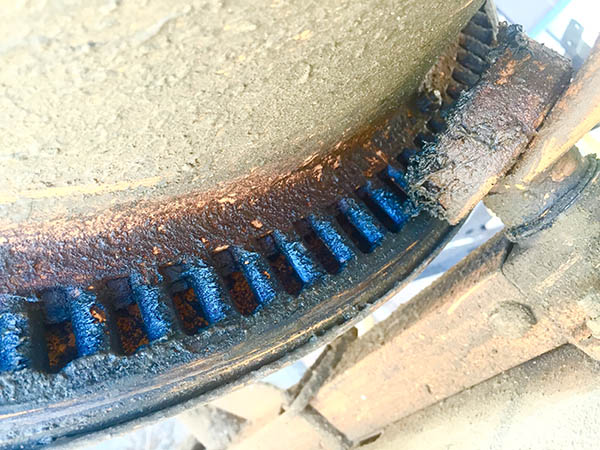
Taking the motor apart was easy and the contacts for start/run were arced and corroded. I felt this was the problem and cleaned the contacts as best I could.

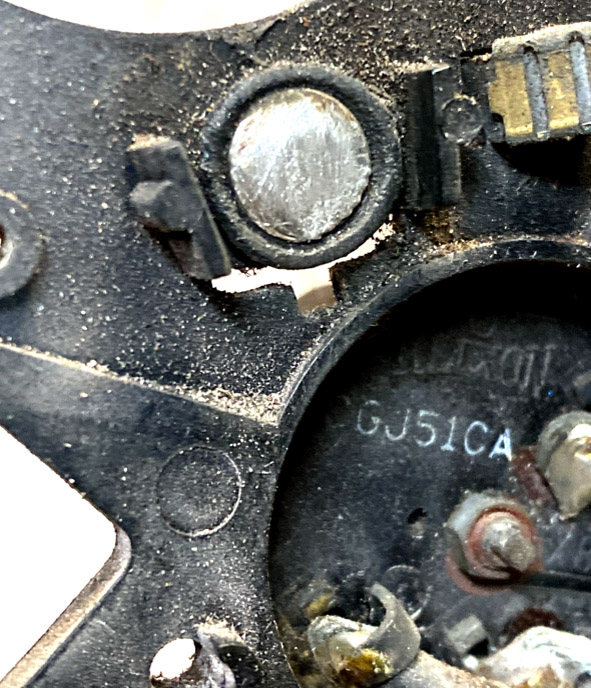
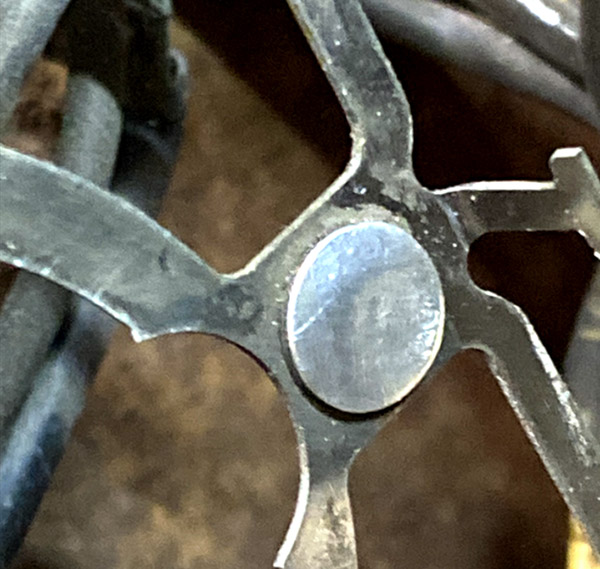
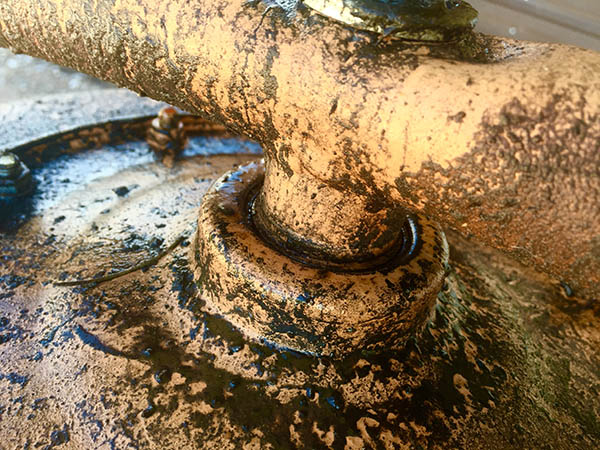
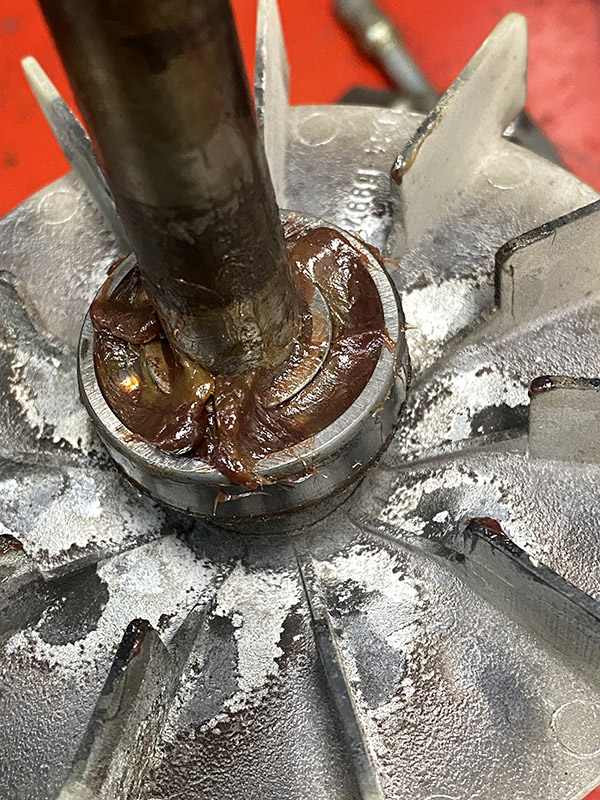
While I had the motor apart I greased the unsealed ball bearings for the first time in 50 years. I’ll be long dead before they need grease again. The pulley was well rusted onto the shaft, it took some heat, penetrating oil and lots of back and forthing to get it pulled off so that I could grease the output side bearing.

After 50 years the bearings were dry. Amazingly they still spun relatively smooth.

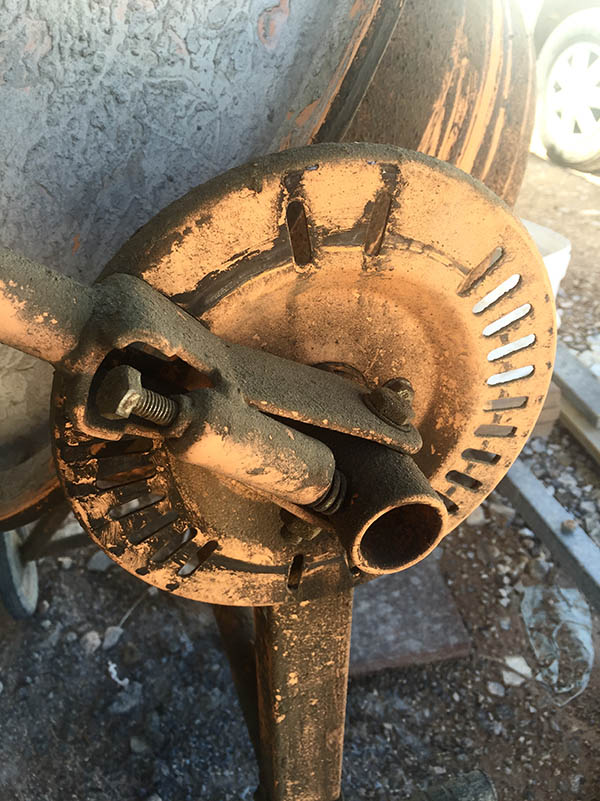
I reassembled the mess, crossed my fingers and plugged in the compressor. The smooth whir coming from the compressor belied its age. The Craftsman was back in business at 50 years old.

So now I have two compressors. The 220-volt Craftsman and the 110-volt Harbor Freight. Even though it’s lower voltage the HF starts with less amp surge which helps out the 6000-watt inverter but it’s loud. The HF also makes 45 pounds more pressure.

The 1-horse motor on the Craftsman packs a wallop on startup, even at the higher voltage, but you can carry on a conversation standing next to the thing. It struggles to get to 80 psi and that is probably due to needing new rings or reed valves.

I guess the big difference is I’m pretty sure the Harbor Freight won’t be working in 2075 but you never know. I wouldn’t bet against that old Craftsman still pumping air for another 50 years.


You know you want it.   Go ahead.


ExNotes Review: Harbor Freight Motorcycle Lift

By Joe Gresh

One of the many red lines crossed on the way to becoming moto-saturated is owning a motorcycle lift. If a rider finds that he needs a lift then things have gone too far and he needs to reevaluate what the hell is actually up.

I’ve wanted a lift for many years but haven’t been able to justify the expense or space requirements a lift brings to the table. (ha!, get it? Table?)

The lift comes securely packaged in a wooden crate. If you know the price of wood nowadays the lift is almost free!

This particular lift from Harbor Freight cost around $300 when it first appeared on my radar 30 years ago. At the time my shop was a 10×10 metal shed and there just wasn’t enough space to park the thing.

Turns out it was a good thing I didn’t take  the plunge as my shed in Florida was flooded several times and the lift would have corroded away. (Ha! Get it? Plunge-flooded? I kill myself!)

My recent acquisition of a pair of Honda Dreams and subsequent crawling around on battered knees got me thinking about a lift again. I have the room now. Floods are unlikely where my shop is situated and the HF sale price of $399 defied quantitative easing, inflation-tracking and recent tariffs on China. In short, $399 seemed like a pretty good deal.

You definitely get your money’s worth in weight as the lift was a heavy bitch to load and unload. Plan on having a few strong backs to move the lift. The guys at Harbor Freight loaded it into the truck with a forklift but I don’t have any strong backs available at home.  I had to slide the crate out of the truck and let it fall the last two feet from the tail gate. It wasn’t really a free fall, I had a floor jack mid-crate to act as a fulcrum when the crate cleared the tailgate. Think of it as a controlled crash landing. The crate took the fall in stride and its contents were undamaged by my rough handling. Plus the lift is a sturdy thing, it would take some doing to bend it.

In this Harbor Freight photo you can see how the clamp won’t do much for holding the motorcycle upright.

The lift comes 99% assembled with only the wheels, tie down points and tire vise to bolt on. If you’re handy 1/2 hour should see the project through. There are a few niggling issues though.

Like most things from China Freight the lift needed a few modifications. It goes with the $399 price point.

Slightly reduced nipples to go with the reduced price. If you want to grease your new lift you’ll need to replace the gold Chinese nipples with good old USA style, silver Chinese nipples.

China must have different size grease guns because all of the grease fitting were slightly undersized and didn’t fit a US style grease gun. Attempts to grease the various grease points just pumped gook all around the nipple. I replaced the China-sized nipples with US-sized nipples and the pressurized grease flowed to the desired locations with no ooze-out around the fitting.

This rubber plug is where you add oil to the pump. Warning: it’s a bear (like Ossa!) to get back in the hole.

The owners manual that came with the lift recommended checking the hydraulic oil in the ram. It was slightly low so I put in a few ounces of fork oil. That was the easy part. Getting the little rubber plug back into the ram housing was a struggle with the lift in the lowered position. I finally gave up and raised the lift for access. It was still a PITA to get the plug back in.

Not much weld on sliding part of the clamp.
I stuck some more welding wire to help hold the slider together
Here it is in action. I’ve yet to clamp the rest of a motorcycle to the table so it may fall apart on me.

As delivered, the tire clamp installs in the wrong place. Down on the floor, it doesn’t provide much resistance to tipping leverage. There are many internet solutions for this issue but all of them required spending additional money. I figure at $400 you shouldn’t need to buy more stuff just to keep the bike from falling over.

As delivered the tire clamp is too close to the fulcrum of tip-ology.
If all you have is a hammer every problem is a nail. It’s the same when you get a welding machine. I added the tire clamp to the top of the tire stop to gain better leverage.
The repositioned tire clamp gets a higher grip for less tip.

The thriftiest way to fix the tire clamp is to relocate the thing on top of the tire stop. This gave me a chance to practice poor welding on a mission critical part. The sliding part of the clamp was lightly welded so I slathered on a bit more metal.

Once the clamp was in place I added a piece of angle iron to prevent jaw-spread, a common occurrence among older motorcyclists. Drilling two extra holes in the angle iron gave me another, more forward attachment point for tie down straps.

This all sounds like a lot of work but it took maybe 2-3 hours and that number includes thinking about things. I’ve got the Dream on the lift for its maiden voyage and it seems to be stable. I give the lift 5 stars for value and 2 deep vein thrombosis’ for HF still not quite getting it right after all these years. If you need a motorcycle lift and don’t mind tinkering and welding a bit the HF lift on sale is hard to beat.

The ’62 Dream gets the honor of being the first to sit atop the HF lift.

Join our Facebook ExNotes page!


Never miss an ExNotes blog:


Help us keep the lights on:


Don’t forget: Visit our advertisers!


Gordon Knives

By Joe Berk

Gordon knives?  You may think you’ve never heard of them, but maybe you’ve seen them without realizing what you were seeing.  Gordon, you see, is the house brand for Harbor Freight knives.  You know Harbor Freight: It’s where the folks who badmouth Chinese motorcycles buy their tools.

The Gordon Bowie. It’s a nice knife.

I don’t shop much at Harbor Freight these days, but it’s not because I think their stuff isn’t any good.  I’m an old  guy and I have all the tools I’ll ever need.  But I still get the Harbor Freight ads, and one of them caught my eye recently.  It was for what I initially thought was a Buck 119 hunting knife, but it wasn’t a Buck: It was a Gordon.  They call it the Gordon Bowie/Hunting knife.  So I rolled on over to my local Harbor Freight store to check it out.

The Gordon has some heft to it. It seems to fit my hand perfectly.
The Gordon Bowie has a 6-inch blade.

You can see the Gordon Bowie before you buy it because it’s packaged in a clear plastic bubble wrap container.  Getting the knife out of that package was a bit of a challenge.

The Harbor Freight website lists the blade material as 7Cr17MoV stainless steel.  Even though I had a course or two in metallurgy in my formative years, I wasn’t sure what that meant, so I Googled it:

7Cr17MoV is a Chinese stainless steel, often used in budget-friendly survival and kitchen knives, known for its good balance of hardness, corrosion resistance, and toughness. It’s essentially a modified version of 440A steel, with added vanadium to enhance strength and wear resistance. While it may not offer the best edge retention compared to high-end steels, it’s relatively easy to sharpen and is known for its durability under hard use.

A Buck 119 goes for about a $75.  The Gordon?   It’s a whopping $29.99.  I had to take a look, and when I did, I liked what I saw.  So I picked one up.  At $30, I can take the risk of it not being perfect.

Then I noticed another Gordon knife hanging on the Harbor Freight display next to the Gordon Bowie.   It was a monster that caught my attention (it was hard to miss, actually).

Visions of Sylvester Stallone as Rambo swam through my mind when I saw this Gordon. Check out the sawing serrations on top of the blade.

Harbor Freight calls the knife you see above their Survival/Hunting knife.  In addition to its size, the other thing that grabbed my attention was the price.  It was either $9.99 or $6.99.  I couldn’t tell which, and I’ll return to that part of the story in a minute.

The Gordon Hunting/Survival knife has an 8-inch blade. It’s an impressive knife.  I don’t know what impressed me more:  The knife’s size, or its low price.

The gigondo Gordon is called their Hunting/Survival knife.  It’s a monster with an 8-inch blade.  The knife has a hollow handle with a cap that unscrews, and inside the cap, there’s a compass.  Cool beans.  A compass.

The Gordon Hunting/Survival knife handle. The end cap unscrews and you can store stuff inside the handle.  Because the handle is hollow and made of aluminum, the knife feels much lighter than it looks.

When I later read the online reviews, one guy said the compass didn’t work.  But you know those online reviews.  Some folks would complain if you hung them with a new rope.  Mostly these reviews consist of what emanates from the southbound end of a northbound bull.  My compass works just fine.

Gordon also gives you some thread, a few matches, and oddly enough, a button or two.  It all fits in the handle and it’s focused on helping you survive in dangerous places.  You know, like LA.   In case you need to hack your way through some bamboo or you lose a button.

The handle’s cap is sealed with an o-ring.
A compass inside the handle’s end cap.
There’s room inside the handle to store the survival accessories that come with the knife, and maybe some other stuff.
This little package of survival stuff came with the Grodon knife.

The Gordon survival knife is cool.  It makes me feel like Rambo. Maybe that’s what it is supposed to do.  The upper part of the blade has a sawtooth pattern milled into it.  The blade is sharp.  Is the metal any good?  Hell, I don’t know, and I probably won’t find out.  I’m not planning any expeditions into the Amazon basin, and even if I were, I probably couldn’t get on the airplane with this thing.  Will it hold an edge? I don’t know that either.  But at $9.99, if I can’t sharpen the thing I’ll just buy another.

The blade material is specified on the Harbor Freight website simply as “stainless steel.”  A Reddit post by one of the many folks on the internet who post such things states that it is 8CR13MOV steel (I don’t know if that’s accurate, but it’s the only blade material reference I found).  Here’s what Professor Google has to say:

8Cr13MoV steel is a popular Chinese stainless steel known for its good balance of performance and affordability, making it a common choice for budget-friendly knives. It offers decent edge retention, corrosion resistance, and ease of sharpening.

Both knives come with sheaths, not that I’ll ever use either.  But it’s nice to know they’re there just in case I ever get the urge to make a Rambo movie.

The Gordon Bowie and Survival/Hunting knives both include sheaths in their incredibly low prices.

You know, it’s funny.  The young lady cashier at Harbor Freight asked if I knew the price of the knives.  I told her the 6-inch Bowie Buck 119 wannabe was $29.99, and the big Gordon survival knife was either $9.99 or $6.99.  I explained that I wasn’t sure because there were two price tags on the larger knife.  She explained that if I was a Harbor Freight member, I could buy the knife for the lower $6.99 price, but as a plain old Harbor Freight nonmember, I’d have to pay the higher $9.99 price. She went on to explain that the annual Harbor Freight membership fee is $29.95.  I told her I didn’t want the membership because, like Woody Allen, I wouldn’t be a member of any organization that would have me as a member (I thought I was really on top of my game with that one, but my borscht belt shtick went right over her head).  She then told me if I told her my email address, I could select one of four different prizes.  As a guy who still gets excited opening a box of Cracker Jacks, her offer appealed to me.  (I was really having a good day.  I love going into any store that sells tools, I was getting two cool knives, and now I had a offer for another free prize.)  I gave that young lady my email and she showed me a menu.  I selected the convertible screwdriver.  And finally, when she rang up the knives, she looked at the Buck 119 wannabe.  “Why is this one so expensive?” she asked, pondering its $29.99 price against the much larger $9.99 survival knife.

Me? Not hardly. But I have the blade if they ever offer the role to me.

So there you have it.  Are these knives any good?  I think they are, but hey, at these prices, who cares?


Like our knife stories?   We have more, you know.

A Custom Bowie Knife
A Buck Canoe
Buck, Cold Steel, and Chinese vs. US Quality
Man, This Is Scary
A Tale of Two Pocketknives
A Stag Film?
Texas Rangers Smith and Wessons
The Buck Stopped Here
The Buck Stops Here


Join our Facebook ExNotes page!


Never miss an ExNotes blog:


Help us keep the lights on:


Don’t forget: Visit our advertisers!


ExNotes Product Review: Harbor Freight 30-Inch, 5-Drawer Mechanic’s Cart

By Joe Gresh

The Harbor Freight/US General 5-drawer tool cart has been on my radar for many years. It always seemed like a pretty good deal at $189 and if you bought the thing when it wasn’t on sale (every few weeks) the price would go up to $269. Paying full price at Harbor Freight is to be avoided at all costs and HF’s unrelenting cycle of blowouts, parking lot sales and clearances has trained their customers to wait them out. This particular mechanic’s cart sale was a Black Friday thing and I debated picking one up but managed to tamp down the urge.

I thought I was in the clear until HF declared an extension to Black Friday, at which point I gave in and went down to their store to pick up one of the damn things. This wasn’t a spur of the moment deal. I have a homemade rollaway box full of tools I rarely use but can’t get rid of and another really cheap top and bottom combination setup also filled with odd bits and lathe tools.

My previous mechanic’s cart is a cut down rolling file cabinet, the type used in offices by the type of secretary born sometime in the 1950s. The file cabinet thing was never great, but it made a good workbench to repair the Husqvarna’s transmission. After that transmission job the cart slowly became covered in tools making it hard to dig through the junk to find a 10mm socket. It became a poorly organized catchall.

The US General 5-drawer cart comes to you mostly assembled. You have to put together the wheels and the lower shelf, along with the uprights and some corners for the top box. The instructions are good enough except for the part about lifting the box up onto the legs. The manual says to not attempt this alone. I’m always alone and the box was heavy and too bulky. I got the thing off the ground but accuracy was suffering and I was worried about scratching the paint or pinching my fingers.

Taking the drawers out to lighten the box was one option. Plan B was to lay the box on its side and slide the frame into position as the frame weighed much less than the box.  Now I had the cart on the ground, so I lifted the thing upright pivoting on the wheels. It was still a strain but easier than lifting the entire box. You get a lot of steel for $189 at HF. After the thing was upright, I tightened all the bolts that hold it together.

The 5-drawer box is really nice. The paint (five colors to choose from; I got KTM orange) looks thick and applied well. The box comes with drawer liners in each drawer and in the bottom shelf.

The wheels appear heavy duty and are probably overkill. HF included a nice, extra-mile feature by providing the swivel casters with grease fittings for the ball bearings in the swivel part. Also included on the two casters are brakes so if you’re working on an incline the box won’t roll away.

The drawers use two methods to secure them from sliding open under transport. The first is a latch on the front of each drawer that you must slide to the side in order to open the drawer. I’m not sure I like these latches. I want the drawers to open without the added finger motions. I may disable these latches.

The second method of drawer retention includes two, spring-loaded lock bars that slide down onto the backside of the drawers when the top of the box is closed. The box comes with four round-Coke-machine type keys so you can lock your stuff if you work in a shop full of shifty characters.

For such a low price the 5-drawer box doesn’t seem cheap at all. I think it’s Harbor Freight’s best toolbox value. Two gas charged struts are used to hold the top in the open position and the unit came with a handy side shelf to store your unguents and the various toxic chemicals that mechanics use in their daily course of events.

My particular 5-drawer had a slight flaw: one of the drawer slides was not in its track correctly and was binding. I had to remove the drawer and slot the slide into the track after which the drawer worked fine. I’m not sure that I didn’t cause the problem when I set the box on the side and lifted the cart upright with all the bolts loose. Maybe it flexed and popped out. With everything tight the box feels sturdy without any wobble.

I give the US General 5-drawer mechanic’s cart high marks and can recommend it if its size suits your needs. Now I’ve got to sort out that mess of jumbled tools and organize my new toolbox, a process that has already begun.


Never miss an ExNotes blog:


Don’t forget: Visit our advertisers!


ExNotes Product Review: Harbor Freight Double Cut Saw

By Joe Gresh

Harbor Freight’s economy brand, Chicago Electric, has been much improved over the years. Back in the 1990s you were lucky to get a few months use out of a CE tool before it burned up. Of course, what did you expect from a 10-inch circular saw that cost 15 dollars? They were sort of one-use tools, bought for a particular job then tossed in the trash after the job was done. This early crappiness has tainted the Chicago Electric brand and there might still be a few dud CE products out there.

I’ve had pretty good luck with more recent Chicago Electric stuff. Their paddle-switch 4-inch grinder has lasted 10 years for me and is still going strong. I have a Chicago Electric sawsall that is pretty old and it has held up well. You no longer get smoke pouring out of a Chicago Electric tool the first time you plug it in.

This Chicago Electric Double Cut saw is marked down on clearance at 44 dollars. In Harbor Freight land a clearance item usually means the tool is being discontinued and when they are out they are out. I had to get my local HF technician go into the back of the store and rummage around to find one. You may have to visit several stores to find one. Clearance tools are usually superseded by a similar tool with a possible upgrade in quality or just bold new graphics so if you can’t find a Double Cut saw just wait a bit and another one with a different part number will appear. Although, it won’t be $44.

I’m impressed with the improved quality of the CE Double Cut saw. The castings, both metal and plastic look well made and finished nicely. This saw has a bit of heft so at least there is some copper and steel in the thing. The saw comes mostly assembled, you only need to put the grab handle on and feed a lube stick into the nifty feed hole provided. Like most CE power tools the cord is stiff and plasticky I guess it’s better than the SO type of cord with the easily damaged jacket. The saw comes with a nice little wrench for changing the two (included, carbide-tipped) blades.

Ergonomically, The saw has some issues for me. The power switch is an odd, push down and forward, deal that takes some getting used to. You have to hold the switch on, this puts your hand close to the front of the saw and your other hand is holding the grip nearby. I would move the switch aft on the tool to give better hand separation and thus more steering control. By necessity, the saw blades are almost completely shielded which makes seeing your cut line impossible. There is a V- notch in the front of the blade housing that gives an Idea of where the cut will be. If you want a precision cut you’ll need to rig up a fence. By the way, don’t even think of removing the shields as the Double Cut puts out metal particles when it plows through steel. Wear safety goggles!

What makes the Double Cut somewhat unique is the two, counter-rotating blades. This arraignment cancels out any kickback or climbing out of the cut. Cutting round stock is a breeze, as the material doesn’t try to spin when the blade makes contact. The saw feels wonderfully neutral in action and not the least bit scary cutting steel. The saw is useable on most any material: steel, aluminum, and wood. There is a blade lube feature for use on stickier metals like aluminum or sappy woods. I bought the saw for metal.

I’ve used the saw on 1/8” mild steel and it cut like a hot knife through I Can’t Believe It’s Not Butter. Again, there’s a fine mist of metal particles generated while cutting so wear those goggles. The finished cut is clean with no sharp flashing like with a 4-inch abrasive cut off wheel. On sheet metal roofing the saw cuts as fast as you can push leaving a clean, square edge to slice your finger on when you hoist the panel onto the roof. If you do metal roofs you need this saw.

I probably should take the saw apart and grease the internals but the thing might fly apart on disassembly so I’ll use it as is for the foreseeable future. The depth of cut is only 1-1/4’ but really, if you tried cutting steel that thick you’d probably burn up the saw. Blade depth adjustment is in your hands as there is no hinged foot to set the blade. I don’t know how long the blades will last cutting steel and if the saw is truly discontinued you might want to stock up on replacement blades available at your local Harbor Freight store.

The verdict is in and I pronounce the Double Cut a fine deal at only 44 dollars. If you work with thin-ish metals, say 1/8” to sheet metal this could be your saw. For complex cuts I still use the 4” grinder with an abrasive, metal cutting blade because the line of sight is better, you can see exactly where the blade is. Harbor Freight isn’t the only company that makes this type of saw. Other brands are available, here’s one online at Amazon and the saw looks about the same.


Never miss an ExNotes blog:

RD350 Yamaha Update

The 1974 RD350 has been faultlessly buzzing around south-central New Mexico these last few months without any attention. The old girl was dribbling oil and banging around on her front suspension and the tires that came on the bike were old and cracked. In addition, the rear 4.00×18 tire was too large and rubbed the fender over bumps. The bike kind of bobbed in turns and I didn’t want to take a long ride on those rotten tires. I needed to give the old bike some love.

What held me back was the Harbor Freight tire changer. I was in the middle of modifying the tire machine and I just lost interest. The monsoon rains have precluded any concrete work so I decided to finish the tire machine.

One of the issues with the HF tire machine is that the center shaft is too big for older motorcycles. The center shaft is a pivot point for your duck bar or tire levers. Most new bikes come with big axles and the stock part will work fine on those. I cut a piece of ½” rod 12-inches long and turned out a spacer to go between the factory center bar and the new ½-inch piece. My welding is atrocious but you have to cut me some slack as I can’t see the puddle and weld by sound. Now I can center-post smaller diameter axles without anyone crying about it.

The HF tire machine has three rim-grabber things. Two of the grabbers are pinned into place and one is screw driven. When it works right it really locks the wheel in place, essentially giving you a second set of hands. The grabbers were a sloppy fit on their square-tube arms and it’s hard enough getting all the fingers lined up at one time without stuff moving around. Shimming the grabbers with thin aluminum tightened up the machine and made fitting the rim to the grabbers easier.

While not required for the skinny RD350 tires, I made a duck-bar to assist with bead removal. The duck is a plastic piece that fits over the rim. You use a lever to pull the bead up over the duck’s head and then slide the duck along the rim with the duck bar. The plastic helps prevent scarring your nice chrome or aluminum rims. Needless to say, use lots of tire lube as the first ¼-way around the rim is a hard pull. The duck is actually a part from commercial tire changing machines and it works great on wider rims like you’d find on a sport bike or cars.

I made a steel piece to fit the bolt holes of the duck and welded a 4-foot long, 1” square tube to the duck mount. It’s also an ugly weld but thanks to the miracle of grinders and thick paint it doesn’t look so bad. I messed up by welding the bar to the duck foot square, or at 90 degrees to the bolt axis if that makes any sense to you. This meant that it didn’t sit flush to the curve of the rim when using the center pivot. The pivot point was right where the bar wanted to be.

A quick bending session tweaked the duck-bar enough to be functional. I’ll get it right next time. The duck-bar worked well on the back wheel of the RD350 but the front rim was too skinny. There wasn’t enough room for the duck so I did it the old fashioned way with tire levers.

I bought two Shinko SR712P tires for the RD350, a 3.00×18 for the front and a 3.50×18 for the rear. These are the stock sizes and they don’t rub the fender. The rear looks pretty skinny, I’d like to get a 3.75×18 but I can’t find one. I’ll need new brake shoes for the rear drum but that will have to wait for another maintenance session.

The fork seal replacement was pretty straightforward and so I managed to screw it up. The RD350 has a chrome cover over the brake hose manifold. This cover makes loosening the lower triple clamp pinch bolts impossible unless you remove the top triple clamp and the headlight fork ears. Then the chrome cover can slide up allowing access to the pinch bolts. That was way too much work for me so I decided to pull the sliders off and leave the rest of the fork on the motorcycle.

The RD350 fork slider has a very thin seal retaining area and when I gave the seal a gentle exploratory pry a tiny piece of the damn fork tube cracked by the snap ring groove. I was so upset I didn’t take a photo. Anyway, I worked the cracked piece off and filed the area smooth to make it look like it was made that way. I was temped to do the other side to make them match.

I ended up clamping a big, galvanized carriage bolt into the vice; the head fit behind the seal nicely. Then I cut a piece of PVC pipe that fit over the thin area and contacted the solid part of the fork tube where the dust cover stops. After that a rubber hammer knocked the seal out. It was clear sailing from then on; I reassembled the fork sliders onto the tubes and dumped 5 ounces of 10/30 synthetic motor oil into each fork leg.

For the little amount of work I did the difference was amazing. The RD350 falls into turns with the greatest of ease and holds the line like a supermarket customer getting cash back from a personal check. It feels like power steering. The bounciness is gone and the bike feels much calmer. Now that I can push the bike a little harder those cheap, aftermarket rear shocks are showing a lack of damping. I didn’t notice it before because the front was bouncing so much. The tires are skinny but feel like they grip well. I don’t road race on the street but if I did I could hustle the purple RD350 through the mountains pretty fast.

There’s more to do on the RD350 but I like riding the bike so much I don’t want to disable the thing. I have to fix a leaking oil tank sight glass, re-grease the steering head bearings, replace the rear brake shoes, clean the carbs, and on and on. All that can wait because the sun is out (in the morning before the monsoon rains) and I’ve got to ride this bike.


Click on those popup ads!

Hasty Conclusions: First Look At The Harbor Freight Tire Changer

I usually change my own motorcycle tires. I’ve been doing it since I was a small child and the job has never been all that easy. In fact, I dread changing tires but there is no other way. The thought of taking a motorcycle in for new tires was as alien and hoity-toity to me as having a live-in maid. The Husqvarna changed all that. The Husky’s wide, 17-inch rims combined with even wider tires really stymied me. I would pinch the tube nearly every time I put a tire on that bike.

One time after pinching the tube four times trying to get the last bit of bead over the rim I stuck the only tube I had in the 150/60-17 back wheel: a 21-inch dirt bike tube. That tube lasted for the duration of the tread life and when it came time for a new tire I folded my cards. I took the rim to our local independent motorcycle shop, Holiday Cycles.

Holiday Cycles charged me $25 to install whichever tire I supplied. Size did not matter. I didn’t need to buy the tire from them, as they don’t stock sizes to fit the Husky. What a relief to drop the new tire and wheel off at Holiday and pick it up a few hours later shiny and new. And there were no holes: the tire held air. This was a wonderful relationship. Holiday gradually raised the price of a tire change to $40 but it was still worth it to me. Avoiding hours of struggle only to have the tire leak was not the sort of thing I wanted to go back to.

Unfortunately, Holiday Cycles closed up recently and I’ve been lucky not to need a new tire on the Husky. There is a Yamaha and a Kawasaki dealer in town that change tires. I’ve never used them; I kind of liked Holiday Cycles.

My buddy Mike from the Carrizozo Mud Chucker’s bought a Harbor Freight motorcycle tire changer and said it was okay. Better than a 5-gallon bucket, I think were his words. Naturally anything Mike gets I have to copy.

Harbor Freight spammed my Facebook page with the motorcycle tire adaptor part for $32. This seemed like a good deal. My first thought was to just get the adaptor and make my own base. When I got to Harbor Freight I saw the base was only $44 and it was made for changing car tires. I looked at the bright red, powder-coated base and thought, no way can I make a base this nice for only $44. I bought the car-tire changer base. I was all in for $76, a little less than two tire changes at the old bike shop. You get a lot of steel for your money with Harbor Freight and I loaded up the weighty boxes of metal and drove home.

Like most of Harbor Freight’s shop equipment, you have to modify the things to make them work a little better or at all. One of the first things I did was take the motorcycle adaptor to Roy’s Welding to weld the three legs of the adaptor to the adaptor hub. The factory setup is a couple bolts on each leg. This does not work well as the bolts are squeezing on square tubing. No matter how tight you torque the bolts, right down to crushing the square tubing, the arms won’t stay flat and move up and down easily.

The whole purpose of the motorcycle adaptor is to secure the rim so that you can work on the beads without the whole assembly skidding across the shed floor. You don’t want the three legs flopping around. Roy had a hard time welding the legs because the powder coating was very thick. “Man, they put a ton on there.” I thanked Roy, paid my $15 and the welded legs are very secure now.

The way the motorcycle adaptor works is two of the legs have adjustable, pinned rim-grabbers. You adjust those to suit your rim size. The third leg has a screw-driven rim-grabber that tightens onto the rim like a vise. Initially I thought the grabbers worked from the inside out. Turns out they grab the outside of the rim.

Since the grabbers are flat-faced when you tighten them onto the rim it doesn’t hold well: the tire slips upward and out of the adaptor. Mike simply heated the grabber tips and bent them inward so that the rim can’t slip out. My other brother, Deet, who also has a Harbor Freight tire machine, made some nice, plastic rim protectors to grip the rim. I copied Deet’s system. We will see if it works or just snaps off the first time I use the motorcycle adaptor.

I had an old bead breaker but the Harbor Freight tire machine comes with a pretty good bead breaker built right into the base. You use the (included) long tire iron as a lever. The base unit for car tires looks like it should work well. I might try changing a few MGB-GT tires on the thing. I think it needs a sturdier center cone to hold automobile rims but maybe not.

Bolting the base unit to the concrete floor was fairly easy. A hammer drill does the job faster than a plain old rotary drill. I used 5/8” expansion studs on three of the base legs and a 3/8” expansion stud on the bead-breaker leg to keep the bolt size down in that area. I also added a few angle pieces to join the three base feet together. Harbor Freight should have welded the foot pieces but that would make the package larger. Shipping stuff from China isn’t cheap.

Adding it up, I have about $100 in the Harbor Freight tire machine with the motorcycle adaptor, anchor bolts and plastic. I had to clean out a section of the shed to make room for it but it looks the business sitting there doing nothing. The long tire iron that came with the base is sort of fat for motorcycle tires so I may look around or make something different, maybe something with plastic tips to keep from scratching chrome wheels. I’ll do an update when I get around to using the thing. I figure with the money I’ll save using the Harbor Freight motorcycle tire changer I can start interviewing for that live-in maid.


Help us continue to bring new stories to you:  Please click on the popup ads!

Whoa!  A free subscription to ExhaustNotes!  You bet!


More Joe Gresh?  You bet!


More ExNotes product reviews?  Absolutely!

Product Review: Harbor Freight 3-1/2 Cubic Foot Concrete Mixer

I remember hot summer days mixing concrete with my father. I remember the two-holed hoe oozing mud like Play-Doh through a Fun Factory press. Back and forth you shoved the concrete with each hard pass plasticizing a frustratingly minor amount. The demand never ceased, more concrete was required all the time until the sun and the humidity and the sweat burning your eyes (combined with the resistance of the aggregate) lulled your body into a Zen state of denial. The only way to push on was to pretend it wasn’t happening. “I am not really here,” I’d tell myself.

“More mud!” Dumping another 80-pound bag of concrete into the wheel-buggy I quietly promised that I would never, ever, under any circumstances, become a concrete finisher.

Harbor Freight. Cement mixers. Life is good.

With the $180 purchase of Harbor Freight’s 3-1/2 cubic foot concrete mixer I broke that promise made so long ago. I got mine at one of Harbor Freight’s closeouts. Or maybe it was a parking lot sale. Come to think of it, could it have been one of the 4357 tool disposals that brought my attention to the mixer? These events are held almost daily at Harbor Freight and if you ever pay full price at that store you’re no friend of mine. The mixer came out of the box in a million pieces and it took the better part of three hours to assemble the thing because I am not genetically disposed to look at directions.

I mixed about 400, 50-pound bags of concrete before the key in the larger of the two pulleys fell out. The parts landed inside the motor box so I stuck the key back onto the pinion shaft and swabbed a bit of lock tight onto the screw holding the key. I’ve since mixed another 800 bags with no further problems. In total, about 15 cubic yards of concrete have been run through the little mixer to date.

Gears. Lube. Like the innards of a Rolex, but on a grander scale…
Industrial grade. Good stuff, Harbor Freight is.

Maintenance on the HF mixer consists of lubing the drum pivots, greasing the large stamped ring gear and oiling the sealed drum bearing with whatever dregs of slippery stuff I have laying about the shed. I do all these things before each use whether I’m mixing 3 bags or 100.

The drum is sized for 150 pounds of concrete mix. Any more and the tilt angle becomes too vertical and the mixing action slows to a crawl. Depending on which size bag of pre-mix concrete is cheapest, I have mixed as high as 180 pounds in the thing but mixing performance suffered with each additional pound. These are nitpicks. I spent less than a week’s rental to own the HF mixer. I give it high marks.

High tech tilt angle control. Who needs instructions?
Warnings? I don’t need no stinkin’ warnings!

It’s funny how life works out. I enjoy mixing and finishing concrete now. I love the smells and textures and the sound of a steel trowel scraping across a smooth burnished surface. These are simple motions that bring back sweet muscle-memories of working with my father and those hot summers when I was young and strong.