ExNotes Product Review: Yamaha RD350 Kveldwulf Top End Replacement Set

By Joe Gresh

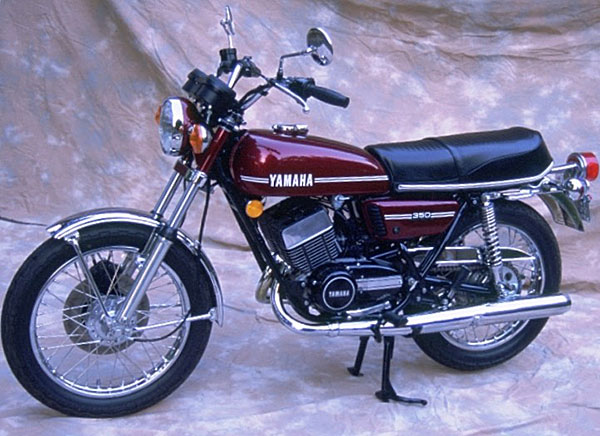
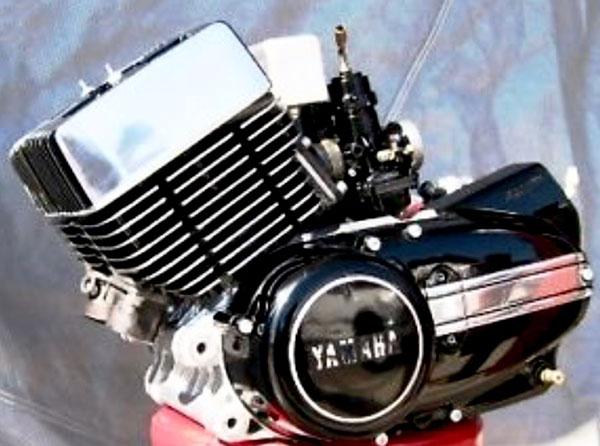
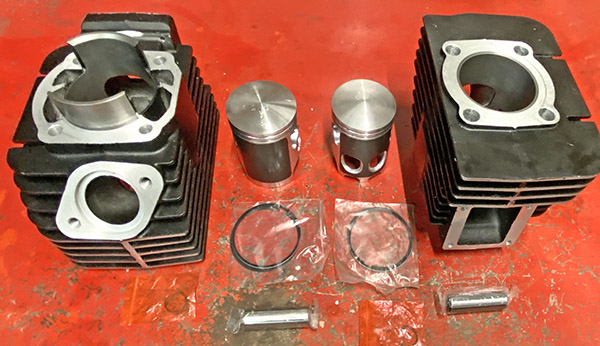
Parts for Yamaha’s RD350 are fairly easy to get but that didn’t stop me from hoarding a new top end set from eBay for the low, low price of $190. For that paltry sum you get two brand new cylinders, two brand new pistons, two brand new ring sets and two brand new wristpins with keepers. My buddy Bodden tried to warn me off the kit saying that the Teutonic name was a ruse and that Yamaha parts are far superior and I believe him. Still, $190 for an entire new top end? I had to bite.

First, there’s nothing wrong with my RD350; it runs great. I bought the Kveldwulf kit more as a spare and hedge against future scarcity. The kit is made in China; you know how international relations are going. We could be cut off at any moment. Unlike many people I don’t have a kneejerk reaction to Chinese products. I give them a chance to see if they are any good. In retrospect I probably should have bought an American made replacement RD350 top end kit (and I will if a company in the USA ever decides to manufacture one).

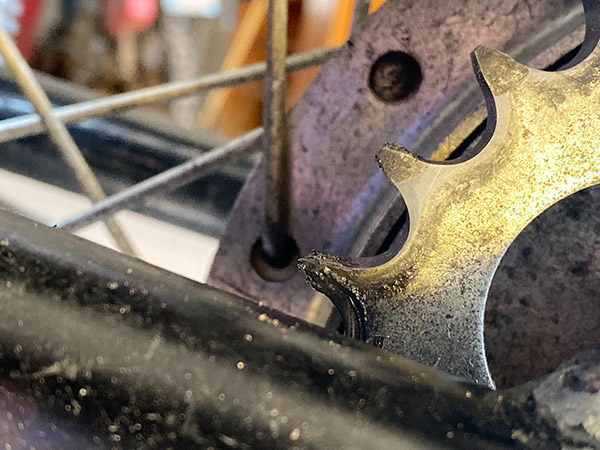
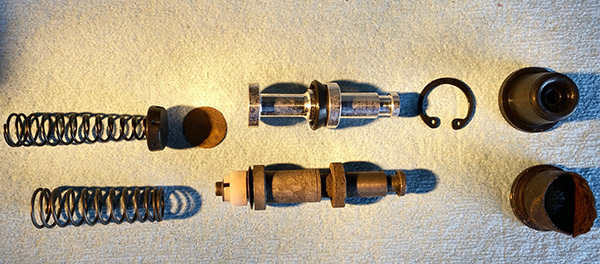
This particular top end kit has its problems. The biggest problem is that the right side piston won’t actually fit through the right side bore. The piston slides in about halfway and stops. Of course I could force it but the bike would only run a few minutes before it seized up. The left side is better but still feels a bit tight to me. What this means is I’ll have to have the cylinders bored to suit the piston size, a process that will probably cost more than the whole Kveldwulf kit.

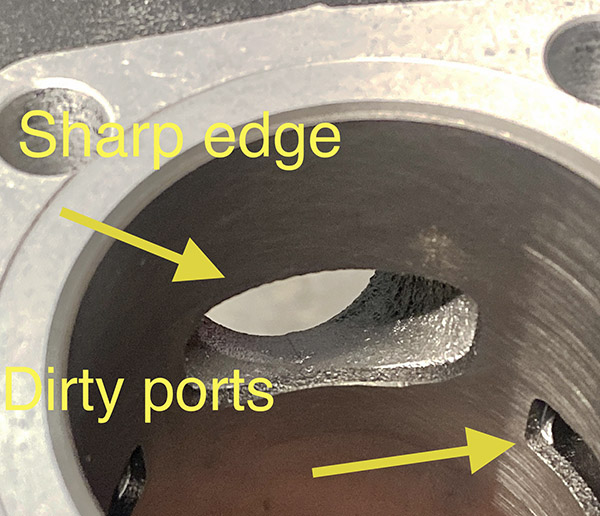
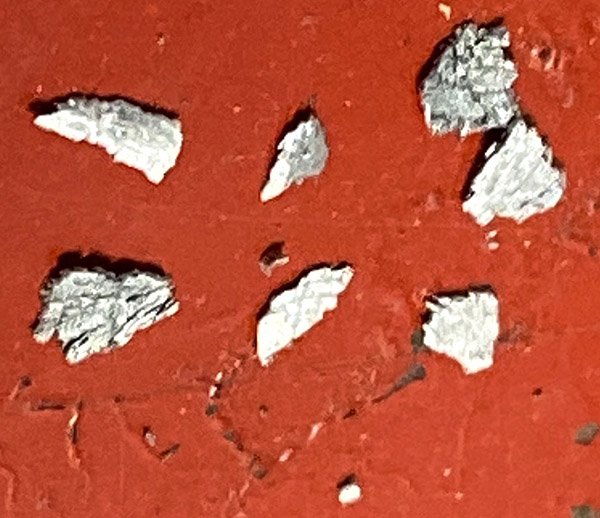
The ports on the kit cylinders are sharp edged and dirty looking. I think I’ll need to chamfer the port edges before using the cylinders or the thing will probably snag a ring. It wouldn’t hurt to run a burr through the ports to knock down some of the roughness either. When I unpacked the box there were quite a few loose bits of aluminum sprinkled throughout.  A thorough cleaning is in order before bolting these parts onto my RD350. So the kit is not at a plug and play type deal.

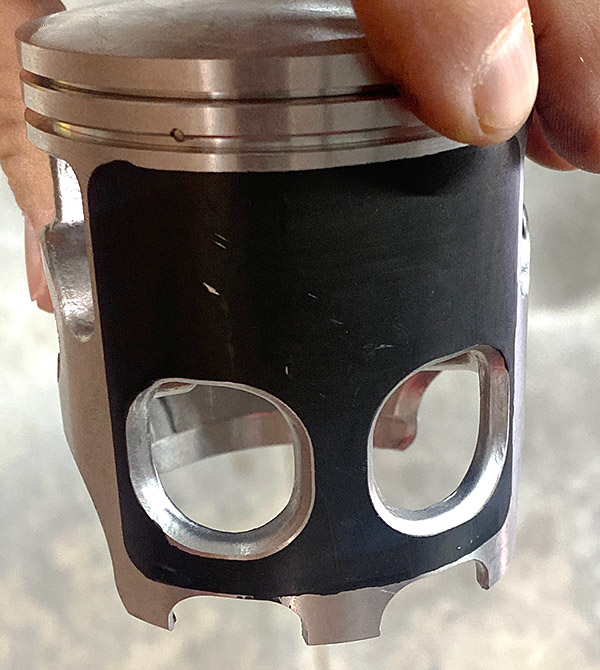
The Kveldwulf pistons come with a Teflon-looking coating. I usually don’t like any of these new-fangled coatings and prefer plain old aluminum. I don’t have my RD350 apart so I can’t check the cut-away skirt and windows to see if the stock piston is the same. I’d also like to compare the ports to a stock cylinder to see how close the new stuff comes to original.

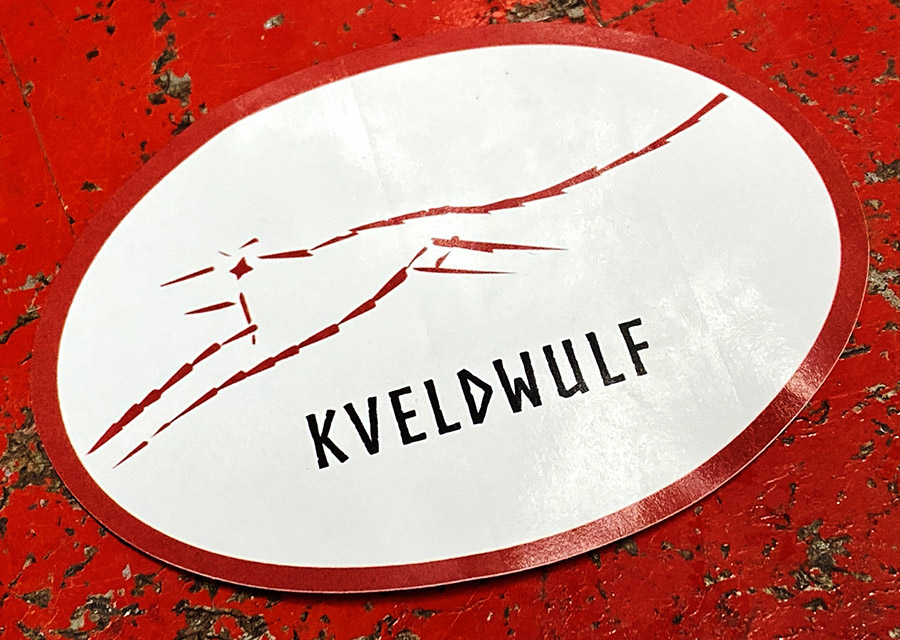
My best translation of Kveldwulf is “night wolf” and the prospects are indeed dim for this dog of an RD350 top end kit. I haven’t decided if I’m going to send it back and put up with that hassle or keep the kit and spend the time and money to remedy all its faults. I suppose if you had a RD350 that was missing its top end or it was severely corroded with broken fins the Kveldwulf kit would move you closer to the goal of a running motorcycle. You’ll have some sweat equity in the thing for sure.

If you have a stock RD350 and want to experiment with altering the ports but don’t want to mess up the original stuff this kit would be a cheap way to learn about two-stroke power bands without risking a ton of money. Then again, maybe I just got a dud. I’ll try to contact the eBay seller; they might take this top end set back and send me another one that is machined correctly. As delivered, I would only use the Kveldwulf kit as a last resort if my top end were totally wiped out, which is a hard thing to do with all the oversize pistons available. I’ll keep you updated whatever happens.


More ExNotes product reviews!

Acid Reflux: Yamaha RD350 Battery Box

I’ve been putting miles on the 1974 RD350 in the last few months, almost doubling the 4100 miles that showed on the bike’s odometer when I first got it. As my confidence in the bike increases so do the miles racked up in a single ride. This increase in running time has led to a problem with the battery that was installed in the RD350.

The battery seemed to work okay; it held a charge and didn’t use too much electrolyte but the fill plugs located on top were seeping a bit of acid. The caps felt snug and the battery vent was not clogged yet after a long ride the acid-damp lay heavy on the battery and even started dripping down the sides. I sort of let it slide for a while. Riding the RD is too much fun and stopping the bike for maintenance seemed like a waste of good weather.

Now that it’s a bit cooler I tackled the battery situation. The acid had dripped down onto the swing arm and corroded the battery box along with the small coil spring that keeps the oil tank vent from kinking. My laziness always comes back to haunt me.

I took the battery box, along with the attached rectifier and voltage regulator out of the frame and washed everything down with a mix of baking soda and water. The affected paint fell off in large chunks. I dismantled the electrical components and soaked the battery box in Evap-Rust then wire brushed any loose paint.

It was a nippy week at The Ranch so painting the box in 50-degree weather was a challenge. I heated the rattle can and the battery box to within 2.8 degrees of each other (measured via a recently calibrated fingertip) then shot the box with primer and two coats of Krylon satin black. I used a brush to apply paint to the bare spots on the swing arm.

It all came out good enough and anyway, I’m riding this bike, not showing it.  The electrical bits, being directly under the battery did not suffer any acid corrosion. I cleaned them up and reassembled the mess into the motorcycle.

Many older motorcycles do not regulate their voltage as precisely as you would like and my Yamaha RD350 is one of the many. With the headlights on and engine revving I measured 14/14.1 volts at the battery. This is ideal. With the headlights off 15 volts were going into the battery. 15 volts is a little too high for comfort but I decided that since I leave the headlights on all the time the original regulator would be okay.

My good buddy Deet told me about using sealed, AGM type, alarm-system/UPS batteries in old bikes. I have had one of them in Godzilla, the 1971 RT1-B for a couple years and it has been working great. These type batteries hold a charge much longer than flooded lead acid batteries. The new one I bought on Amazon has a high tolerance for high voltage; it can handle up to 15-volts charging. These AGM standby batteries can withstand constant trickle charging and long periods of inactivity, which describes vintage motorcycle riding to a tee. The small spade terminals on these batteries are not made for large current loads like an electric starter or lighting up the strip in Las Vegas but they can handle motorcycle lighting and ignition circuits without complaint.

At 4AH the new battery has a bit less capacity than the leaky old 5.5AH unit I took out but I think it will work okay. Close enough counts in hand grenades, horseshoes and motorcycle batteries.

The new battery is a skosh smaller than the old battery so I used some closed-cell packing foam to keep the thing from rattling around inside the battery box. The RD350 is once again ready to rumble. From my experience with the RT1-B, I’m not anticipating any problems with the RD350 but I’ll be sure to let ExhaustNotes readers know if I have any issues with the new AGM set up.


Do a friend a favor or ten:  Click on those popup ads!


Never miss an ExNotes blog:

RD350 Yamaha Update

The 1974 RD350 has been faultlessly buzzing around south-central New Mexico these last few months without any attention. The old girl was dribbling oil and banging around on her front suspension and the tires that came on the bike were old and cracked. In addition, the rear 4.00×18 tire was too large and rubbed the fender over bumps. The bike kind of bobbed in turns and I didn’t want to take a long ride on those rotten tires. I needed to give the old bike some love.

What held me back was the Harbor Freight tire changer. I was in the middle of modifying the tire machine and I just lost interest. The monsoon rains have precluded any concrete work so I decided to finish the tire machine.

One of the issues with the HF tire machine is that the center shaft is too big for older motorcycles. The center shaft is a pivot point for your duck bar or tire levers. Most new bikes come with big axles and the stock part will work fine on those. I cut a piece of ½” rod 12-inches long and turned out a spacer to go between the factory center bar and the new ½-inch piece. My welding is atrocious but you have to cut me some slack as I can’t see the puddle and weld by sound. Now I can center-post smaller diameter axles without anyone crying about it.

The HF tire machine has three rim-grabber things. Two of the grabbers are pinned into place and one is screw driven. When it works right it really locks the wheel in place, essentially giving you a second set of hands. The grabbers were a sloppy fit on their square-tube arms and it’s hard enough getting all the fingers lined up at one time without stuff moving around. Shimming the grabbers with thin aluminum tightened up the machine and made fitting the rim to the grabbers easier.

While not required for the skinny RD350 tires, I made a duck-bar to assist with bead removal. The duck is a plastic piece that fits over the rim. You use a lever to pull the bead up over the duck’s head and then slide the duck along the rim with the duck bar. The plastic helps prevent scarring your nice chrome or aluminum rims. Needless to say, use lots of tire lube as the first ¼-way around the rim is a hard pull. The duck is actually a part from commercial tire changing machines and it works great on wider rims like you’d find on a sport bike or cars.

I made a steel piece to fit the bolt holes of the duck and welded a 4-foot long, 1” square tube to the duck mount. It’s also an ugly weld but thanks to the miracle of grinders and thick paint it doesn’t look so bad. I messed up by welding the bar to the duck foot square, or at 90 degrees to the bolt axis if that makes any sense to you. This meant that it didn’t sit flush to the curve of the rim when using the center pivot. The pivot point was right where the bar wanted to be.

A quick bending session tweaked the duck-bar enough to be functional. I’ll get it right next time. The duck-bar worked well on the back wheel of the RD350 but the front rim was too skinny. There wasn’t enough room for the duck so I did it the old fashioned way with tire levers.

I bought two Shinko SR712P tires for the RD350, a 3.00×18 for the front and a 3.50×18 for the rear. These are the stock sizes and they don’t rub the fender. The rear looks pretty skinny, I’d like to get a 3.75×18 but I can’t find one. I’ll need new brake shoes for the rear drum but that will have to wait for another maintenance session.

The fork seal replacement was pretty straightforward and so I managed to screw it up. The RD350 has a chrome cover over the brake hose manifold. This cover makes loosening the lower triple clamp pinch bolts impossible unless you remove the top triple clamp and the headlight fork ears. Then the chrome cover can slide up allowing access to the pinch bolts. That was way too much work for me so I decided to pull the sliders off and leave the rest of the fork on the motorcycle.

The RD350 fork slider has a very thin seal retaining area and when I gave the seal a gentle exploratory pry a tiny piece of the damn fork tube cracked by the snap ring groove. I was so upset I didn’t take a photo. Anyway, I worked the cracked piece off and filed the area smooth to make it look like it was made that way. I was temped to do the other side to make them match.

I ended up clamping a big, galvanized carriage bolt into the vice; the head fit behind the seal nicely. Then I cut a piece of PVC pipe that fit over the thin area and contacted the solid part of the fork tube where the dust cover stops. After that a rubber hammer knocked the seal out. It was clear sailing from then on; I reassembled the fork sliders onto the tubes and dumped 5 ounces of 10/30 synthetic motor oil into each fork leg.

For the little amount of work I did the difference was amazing. The RD350 falls into turns with the greatest of ease and holds the line like a supermarket customer getting cash back from a personal check. It feels like power steering. The bounciness is gone and the bike feels much calmer. Now that I can push the bike a little harder those cheap, aftermarket rear shocks are showing a lack of damping. I didn’t notice it before because the front was bouncing so much. The tires are skinny but feel like they grip well. I don’t road race on the street but if I did I could hustle the purple RD350 through the mountains pretty fast.

There’s more to do on the RD350 but I like riding the bike so much I don’t want to disable the thing. I have to fix a leaking oil tank sight glass, re-grease the steering head bearings, replace the rear brake shoes, clean the carbs, and on and on. All that can wait because the sun is out (in the morning before the monsoon rains) and I’ve got to ride this bike.


Click on those popup ads!

Yamaha RD350 Part 7: Clutch Without The Cargo

The clutch cable on the RD350 was at max adjustment on the lever perch and the clutch action was a bit stiff so I removed the left side engine cover to clean things up. The cover locating dowel on the bottom was a little corroded so it took some wiggling and wobbling to get it free. Inside I was rewarded with an ignition/alternator assembly that looked nearly new. The screw heads are un-boogered and the cad plating looks like new.

I paid quite a bit for this motorcycle but it’s been worth it as the bike has seen very few ham-fisted sorties into the mechanical aspects of the thing. The sprocket area was well covered in chain grease so I needed to bag up the alternator and clean the area.

Cleaning the clutch release and countershaft sprocket area revealed that the parts were also nearly new. I dismantled the clutch actuator and cleaned up the cover.

I encourage others to leave original finishes alone but the left side cover was missing a lot of paint and had that white corrosion patina that speaks to poor maintenance. A rattle can of Rustoleum satin black matched the original engine color well so I gave it a little squirt. Note I did not polish the bare aluminum parts or touch up the points cover. That stuff wasn’t too bad.

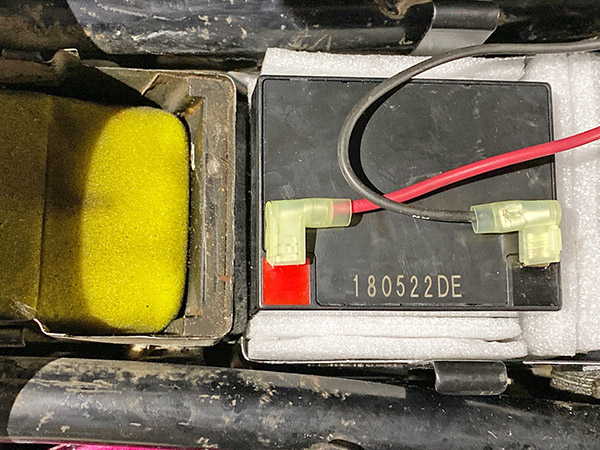
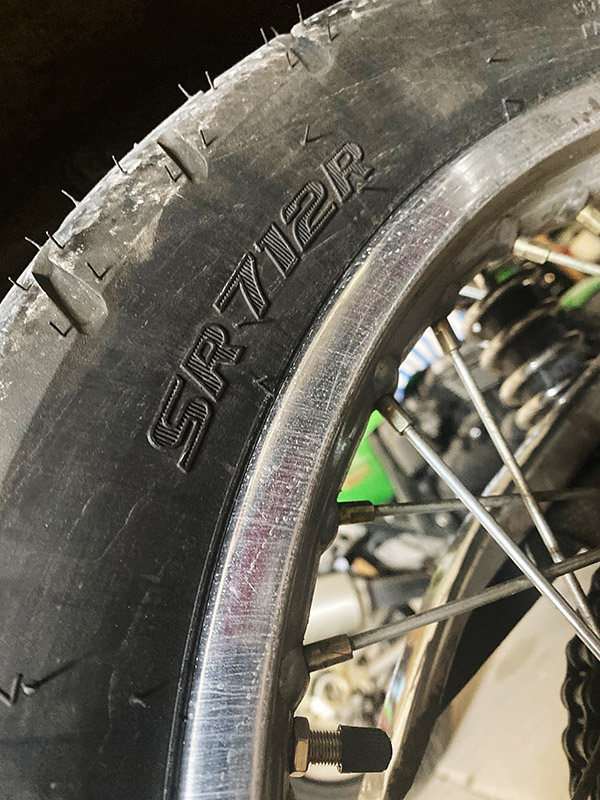
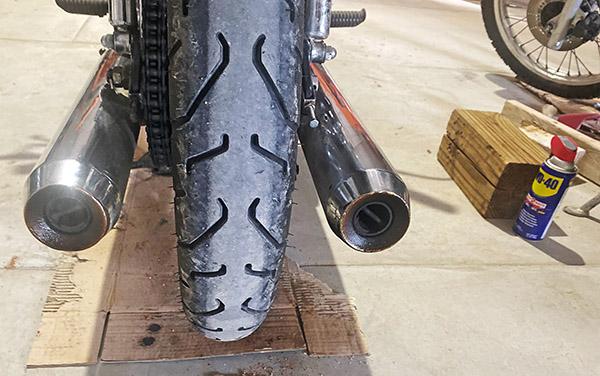
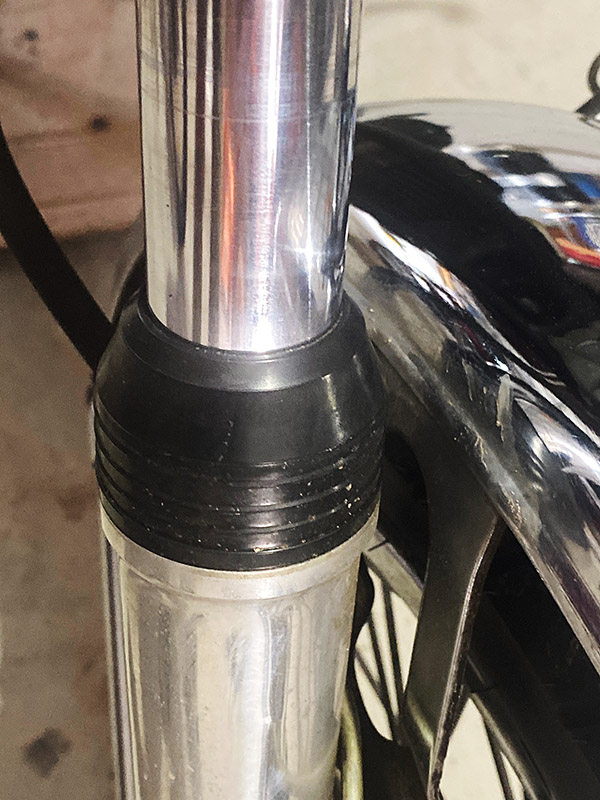
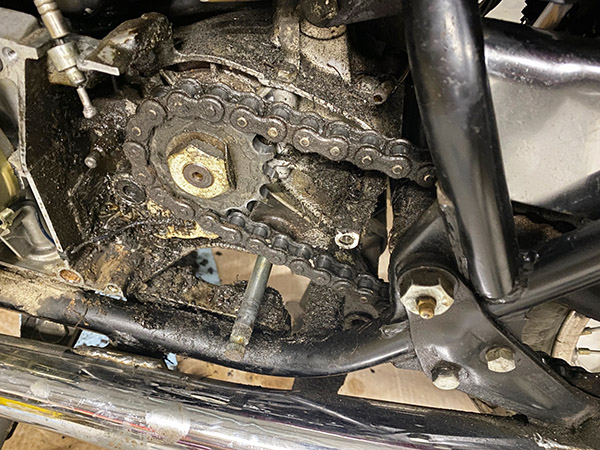
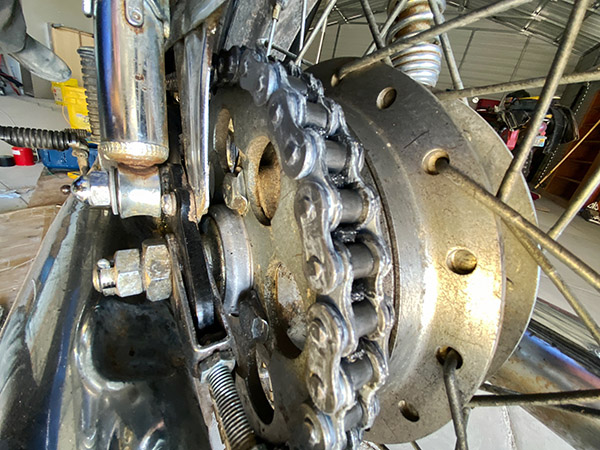
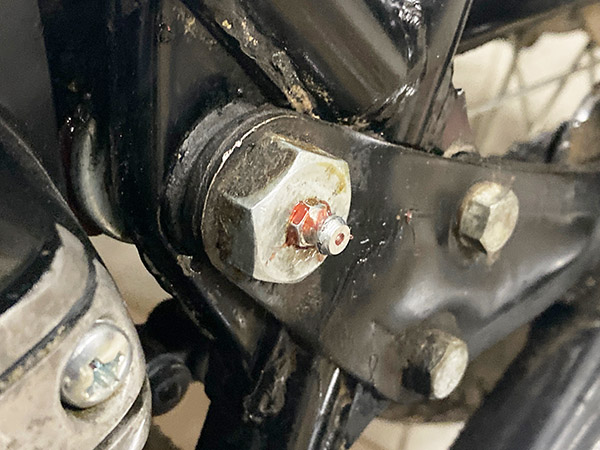
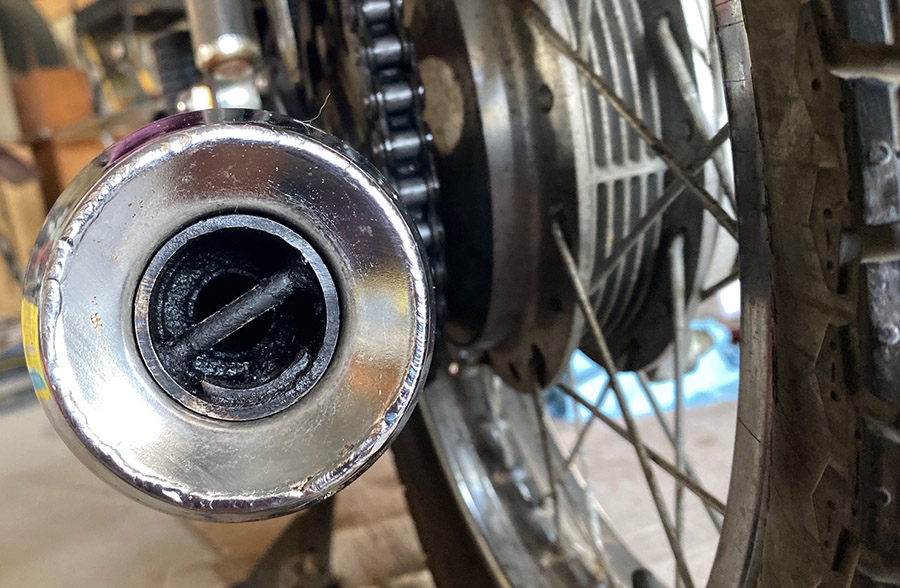
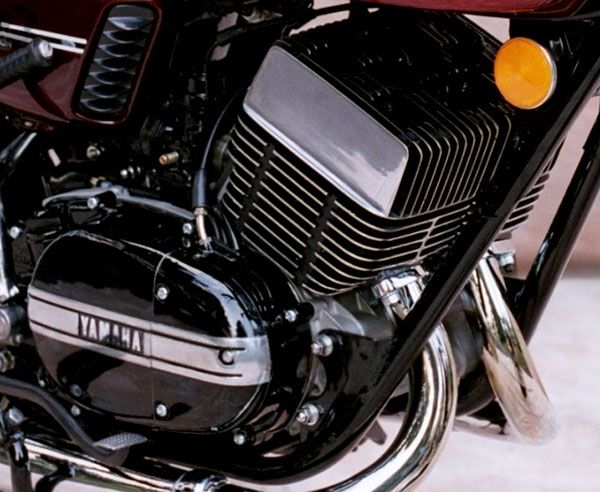
While I had the clutch helix cover apart I decided to install a new chain. I’m not one of those, replace-it-all-or-you’ll-die, type of guys. If the sprockets look unworn I’ll slap a new chain on the old sprockets. I realize this is hearsay in the Big-Sprocket boardrooms but those guys are in the sprocket selling business. The RD sprockets look like new so don’t worry, it will be fine. One glitch was the old tire is a 3.75-18 IRC, the bike calls for a 3.50-18. The narrow swingarm of the RD can barely accommodate the extra ¼ inch. I had to adjust the chain a wee bit tighter than I like to keep the tire from rubbing the front of the gusset. That problem will be solved when I replace the tires.

The RD350 uses a 530-size chain; that’s a pretty heavy chain for a 350’s weight and power. Once these items wear out I plan on going with one of the many 520 chain conversion kits for the RD350. With small displacement engines you don’t want to waste power spinning a heavy chain.

After greasing the clutch release helix and clutch cable, along with the perch pivot the clutch is much smoother and easier to pull in. The RD350 is geared kind of high in first gear so you’ve got to give it some revs and slip the clutch to get it off the line without bogging the thing.

With the new chain and the clutch adjusted I figured I better get the bike legal because there’s no way I’m not going to ride it. I burbled down to DNA title services in Alamogordo with all my paperwork and it was a breeze to swap the title. In New Mexico we have privately run tag agencies in addition to state run agencies. The lines are much shorter at the private places and there’s an incentive to sell you a tag or they make no money. I had my choice of yellow, blue or black tags. I chose yellow because it’s old school New Mexico, like black tags are in California. The transfer, taxes and a two-year sticker cost $265 US dollars.

Arriving home from the title place there was gas leaking from the petcock. Close examination revealed that the hoses were leaking at the petcock barbs. I replaced the leaking fuel hose and added two huge fuel filters along with those springy, compression hose clamps. We will see it the leaks have stopped next ride.

I replaced the funky original Japanese swingarm and brake pedal grease fittings with normal ones that fit the grease gun everybody else on the planet uses. All of the areas were free breathing and took grease ok which makes me think they’re not clogged with hardened old muck.

I still have quite a bit of work to do on the RD350 but it’s rideable as is. I don’t trust the old tires, besides being too big the rear tire is very out of round and who knows how old the tubes are? The front end needs new oil and seals and the steering stem needs greasing. The rear shocks are like pogo sticks. I’ll get to it when I get to it, you know?


More Joe Gresh Resurrections are here!


Never miss an ExNotes blog…get a free subscription here!

Yamaha RD350 Part 5: Stop Me If You’ve Heard This…

I have a bunch of projects stacked up here at Tinfiny Ranch but I really wanted to take the RD for a spin. One little problem: the front brake was not working on the motorcycle. I can ride with a lot of stuff out of commission on a motorcycle, like no air in the tires or a spark plug fouled but I can’t ride without a front brake. So I played hooky from my responsibilities and dug into the brake system.

Installing the aftermarket brake caliper was a doddle, it fit perfectly. The same was true of the aftermarket master cylinder on the right handlebar. The issue came when I filled the brake reservoir with DOT3 and started bleeding the air. I got nothing, zip, nada. Not amount of pumping and bleeding would produce a drop of brake fluid at the caliper.

I thought maybe the new master cylinder was bad so I loosened the master cylinder banjo nut and gave the lever a squeeze. Brake fluid shot out all over my RD’s beautiful purple paint. I was fast with the water hose rinse so no damage was done; at least now I knew something was plugged.

Taking the entire system apart revealed both upper and lower rubber hoses were plugged solid with dried up brake fluid. It took a length of bailing wire worked back and forth to clear the hoses. Then I squirted brake cleaner aerosol through the lines until they ran clear. I also blew out the brake switch manifold, as it was easy to get to with the rest of the brake system dismantled. Before you get all Internet Outraged, I have new rubber brake lines on order. The cleared hoses are temporary just to see if the bike runs ok.

Putting everything back together I could bleed the system and got fluid out of the caliper but the lever didn’t want to build much pressure. I read somewhere that if you pull the lever back to the handlebar and tie it off leaving it that way will get air out of the system. I don’t see how it can but I tried it. It didn’t work.

The next day I tried bleeding the brake again. I was getting good fluid without any air but the lever needed rapid pumping to get pressure on the disc. In short it sucked. I started thinking that there must be something wrong with the new master cylinder and took it apart. Everything looked good inside the bore. The piston and seals looked new.

Reassembling the master cylinder I noticed the lever didn’t completely release from the piston. There was no free play. No play at the master usually makes the brakes pump up not the other way around but I was open for ideas. The after market unit did not have a free play adjusting screw like the stock Yamaha master. I had two ways of adjusting the free play: Grind the lever where it contacted the piston or cut a sliver off the lever stop so that it could travel farther from the handgrip.

I cut a thin sliver from the stop and gained a bit of play. Putting the master back on the bike and bleeding the system again yielded the same results. There was no pressure until the last bit of lever travel.

This led me to examine the inner workings of the reservoir. It seemed like the return hole, the orifice that allows the fluid to return to the reservoir at rest, was bypassing a lot of fluid for the first 75% of lever travel. Plugging the return with my finger (the red arrow) immediately made good pressure at the lever.

You and I both know you can’t very well ride a motorcycle with your finger in the reservoir. It’s not conducive to proper control. I debated plugging the return hole and drilling another further up the bore to make the piston build pressure sooner and was nearly ready to attempt it when a tiny little voice in my head said, “You’re screwing up, Gresh.” I’ve never heard that voice. Must be old age.

At that point I gave up and ordered an Ebay rebuild kit for the stock Yamaha master cylinder. It irked me to no end that the kit cost more than an entire new, non-working master cylinder. The kit showed up and of course it was not at all like the original. The piston differed where the spring connected. The original had a plastic bobbin to seat the spring where the new kit simply lets the spring push directly onto the seal. I suspect the spring will eventually cut through the seal. When that happens tag my tombstone with “He rebuilt master cylinders.”

Until that day I’ll have brakes because the rebuilt master cylinder bled as normal. The RD350 has a killer front brake now. I’m serious: the RD350’s braking is only a step or two behind most modern bikes. It’s amazingly good and will stand the bike on its nose.

Finding a stock air filter was impossible so I sprung for a foam-type Uni filter from Dennis Kirk. It was on sale but still pricy and it fit the RD air box well; if anything it’s a bit too snug. Along the same air-flow lines I pulled the baffles out of the mufflers for cleaning. They were not very dirty leading me to believe the mileage on the bike is lower than the 20,000 the title states.

With a clear exhaust pipe, fresh new air cleaner and working brakes I took the RD for a 15-mile, unregistered spin and the thing ran like a dreidel. I ran through the gears and got to 80 miles per hour in short order. Everything seems to work and the next step will be to repack the steering bearings, replace the fork seals and install new brake hoses. The carbs might need a little synchronizing and I’ll work on that once I get around to lubing all the cables.


More Joe Gresh Resurrections!


Never miss an ExNotes story…subscribe here for free!

Dream Bike: Yamaha RD350

Unlike most of my other dream bikes I’ve actually ridden an RD350. The slightly gaudy 1973 model I rode was mostly the previous generation Yamaha R5 except with reed valves, a disc brake in the front and one additional gear in the transmission giving a total of six. However minor the changes were, the result was spectacular.

The Yamaha RD350…one of my Dream Bikes!

The RD350 was a wheelie king and the bike would blow away any of the other 350cc bikes including the three-pot Kawasaki. Maybe the disc-valve Kawasaki 350 twin from the 1960’s would have outran it but we’ll never know as there were none around my town. It left the Honda CB350 for dead and would stay with a Honda CB750 up to around 70 mph. I know this because we checked.

Not just fast, the RD handled as good as the best bikes of the era. As children we set up a week-end flat track in the high school parking lot and the RD would drift the asphalt corners under power like it was at Ascot Park. That is, until it hooked up and spit you over the high side. Riding it gave you a feeling that anything was possible including dirt trails. It was an all-rounder long before today’s silly, overweight, overwrought, can-opener ADV bikes blundered onto the scene.

Top end on the RD350 was a bit over 100 miles per hour and it got there rapidly. It was slippery in the wet but that was down to the era’s bias-ply, low tech tires. If you rode it hard it drank gas at a startling rate.  Except for fouling a plug now and then or the outside commutator brush wearing down nothing much went wrong in normal use. I have no idea what happens if you race them. Probably nothing good.

The red, 1973 RD model was cool but my dream bike came one year later. In 1974 Yamaha dropped the thick tank badges along with the tacky striping and painted the bike a deep metallic purple. Tastefully subdued decals on the tank sides indicated just who the hell made the thing. It was a thing of beauty and I must own one someday, somehow.

Right side engine, 1974 model.
Left side engine, where the brushes are

Like everything our generation touches, the prices of Japanese motorcycles from 1970’s are getting screwed ever-upwards. Being one of the most desirable motorcycles of that era, RD350’s have gone up quite a bit. You can still find nice ones for $3000 with beaters down around $1500.

Here’s a 1973 RD350 for $1500

I’ve nearly bought one several times but either the distances involved were too great or I came to my senses and bought a thousand bags of concrete instead. As soon as I get a few projects out of the way I’m going to sell off some motorcycles and take another stab at RD350 ownership, in purple for the win.


See all of our Dream Bikes here