
I have a bunch of projects stacked up here at Tinfiny Ranch but I really wanted to take the RD for a spin. One little problem: the front brake was not working on the motorcycle. I can ride with a lot of stuff out of commission on a motorcycle, like no air in the tires or a spark plug fouled but I can’t ride without a front brake. So I played hooky from my responsibilities and dug into the brake system.
Installing the aftermarket brake caliper was a doddle, it fit perfectly. The same was true of the aftermarket master cylinder on the right handlebar. The issue came when I filled the brake reservoir with DOT3 and started bleeding the air. I got nothing, zip, nada. Not amount of pumping and bleeding would produce a drop of brake fluid at the caliper.
I thought maybe the new master cylinder was bad so I loosened the master cylinder banjo nut and gave the lever a squeeze. Brake fluid shot out all over my RD’s beautiful purple paint. I was fast with the water hose rinse so no damage was done; at least now I knew something was plugged.
Taking the entire system apart revealed both upper and lower rubber hoses were plugged solid with dried up brake fluid. It took a length of bailing wire worked back and forth to clear the hoses. Then I squirted brake cleaner aerosol through the lines until they ran clear. I also blew out the brake switch manifold, as it was easy to get to with the rest of the brake system dismantled. Before you get all Internet Outraged, I have new rubber brake lines on order. The cleared hoses are temporary just to see if the bike runs ok.
Putting everything back together I could bleed the system and got fluid out of the caliper but the lever didn’t want to build much pressure. I read somewhere that if you pull the lever back to the handlebar and tie it off leaving it that way will get air out of the system. I don’t see how it can but I tried it. It didn’t work.
The next day I tried bleeding the brake again. I was getting good fluid without any air but the lever needed rapid pumping to get pressure on the disc. In short it sucked. I started thinking that there must be something wrong with the new master cylinder and took it apart. Everything looked good inside the bore. The piston and seals looked new.
Reassembling the master cylinder I noticed the lever didn’t completely release from the piston. There was no free play. No play at the master usually makes the brakes pump up not the other way around but I was open for ideas. The after market unit did not have a free play adjusting screw like the stock Yamaha master. I had two ways of adjusting the free play: Grind the lever where it contacted the piston or cut a sliver off the lever stop so that it could travel farther from the handgrip.
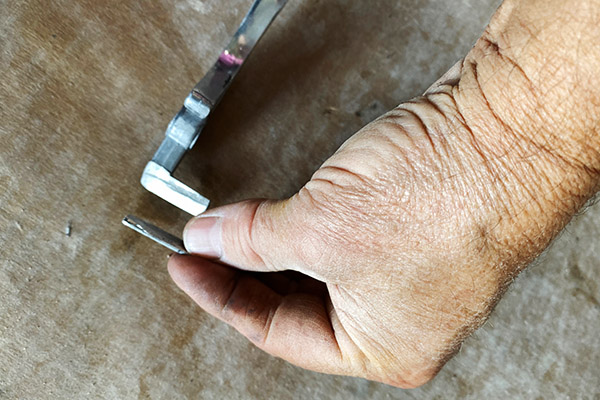
I cut a thin sliver from the stop and gained a bit of play. Putting the master back on the bike and bleeding the system again yielded the same results. There was no pressure until the last bit of lever travel.
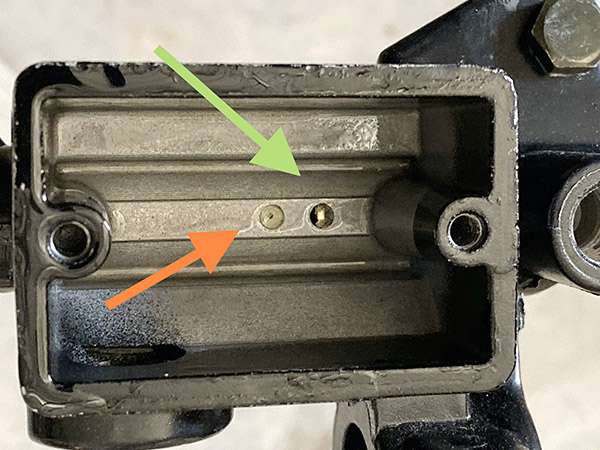
This led me to examine the inner workings of the reservoir. It seemed like the return hole, the orifice that allows the fluid to return to the reservoir at rest, was bypassing a lot of fluid for the first 75% of lever travel. Plugging the return with my finger (the red arrow) immediately made good pressure at the lever.
You and I both know you can’t very well ride a motorcycle with your finger in the reservoir. It’s not conducive to proper control. I debated plugging the return hole and drilling another further up the bore to make the piston build pressure sooner and was nearly ready to attempt it when a tiny little voice in my head said, “You’re screwing up, Gresh.” I’ve never heard that voice. Must be old age.
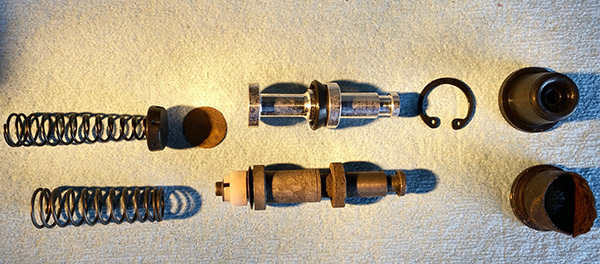
At that point I gave up and ordered an Ebay rebuild kit for the stock Yamaha master cylinder. It irked me to no end that the kit cost more than an entire new, non-working master cylinder. The kit showed up and of course it was not at all like the original. The piston differed where the spring connected. The original had a plastic bobbin to seat the spring where the new kit simply lets the spring push directly onto the seal. I suspect the spring will eventually cut through the seal. When that happens tag my tombstone with “He rebuilt master cylinders.”
Until that day I’ll have brakes because the rebuilt master cylinder bled as normal. The RD350 has a killer front brake now. I’m serious: the RD350’s braking is only a step or two behind most modern bikes. It’s amazingly good and will stand the bike on its nose.

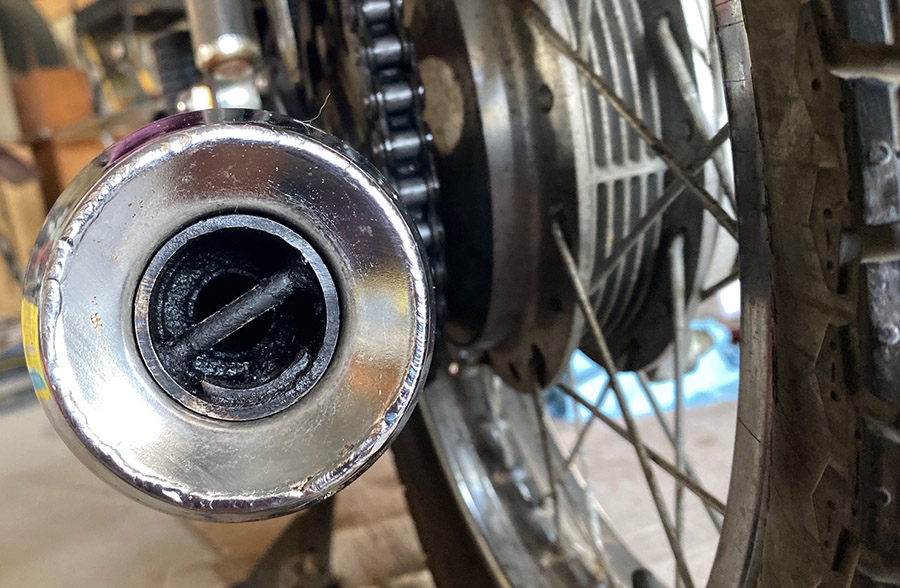
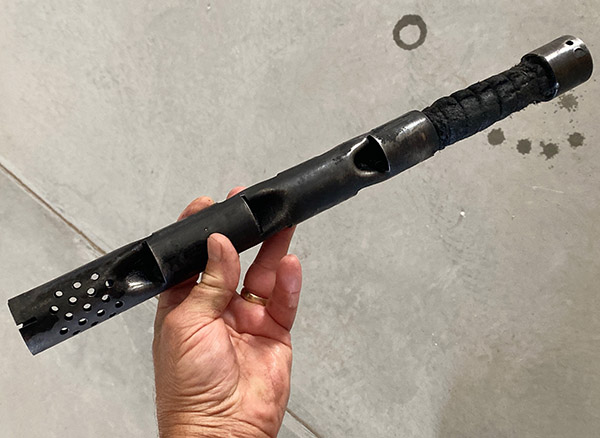
Finding a stock air filter was impossible so I sprung for a foam-type Uni filter from Dennis Kirk. It was on sale but still pricy and it fit the RD air box well; if anything it’s a bit too snug. Along the same air-flow lines I pulled the baffles out of the mufflers for cleaning. They were not very dirty leading me to believe the mileage on the bike is lower than the 20,000 the title states.
With a clear exhaust pipe, fresh new air cleaner and working brakes I took the RD for a 15-mile, unregistered spin and the thing ran like a dreidel. I ran through the gears and got to 80 miles per hour in short order. Everything seems to work and the next step will be to repack the steering bearings, replace the fork seals and install new brake hoses. The carbs might need a little synchronizing and I’ll work on that once I get around to lubing all the cables.
More Joe Gresh Resurrections!
Never miss an ExNotes story…subscribe here for free!
I recently had a chance to buy a low mile, one owner, R5 350, cheap, but the thought of having to disassemble the crankshaft to install new seals put me off.
You don’t have to disassemble the crankshaft. Just replace the two outer seals. Forget about the center seal, it only has to slow things down a bit.
Some outboards had no center seals. Just a labyrinth type of deal.
Joe your comment above about not worrying about the center crank seal got me to thinking. I’m no rocket scientist but is the idea of it kind of like having a cross pipe between the 2 exhaust pipes and /or intake manifolds to help balance the cylinders out? Since it is internal to the motor no additional air is coming into the motor like if it was an outside crank seal leaning the air mixture out. Just sending small amount of premix back and forth between cylinders. Makes sense to me Joe and that’s good to know when looking at twins. What about triples and multi cylinder bikes? Same thing applies I assume?
I had a 7-cylinder Mercury outboard no seals between cycle fees, only crank ends. It had a multi layered seal that had no rubber. Just the distance the air had to travel.
I’m not saying the RD needs no seal, I’m saying if there’s anything in there remotely seal-like it will probably not leak fast enough to hurt the engine. Any air it sucks in is carbureted air with oil and gas.
Damn, spell check murdered that last post. It’s so bad you’ll never figure out what I typed.