Roscoe: It’s slang for a snubnose revolver. No one is really sure where the term originated. There are others…heater, rod, piece, burner, gat (that last one is easy, with me knowing a little bit about The Gatling Gun and all), but the origins of most of these terms are lost in the haze of handgun history. And on that Roscoe terminology, I recently tumbled onto a very cool website I’ll be talking about a bit more here on the ExNotes blog. But that’s for later. This blog is about my Roscoe.
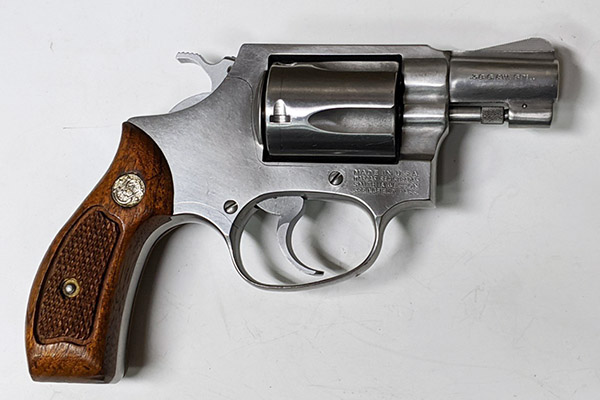
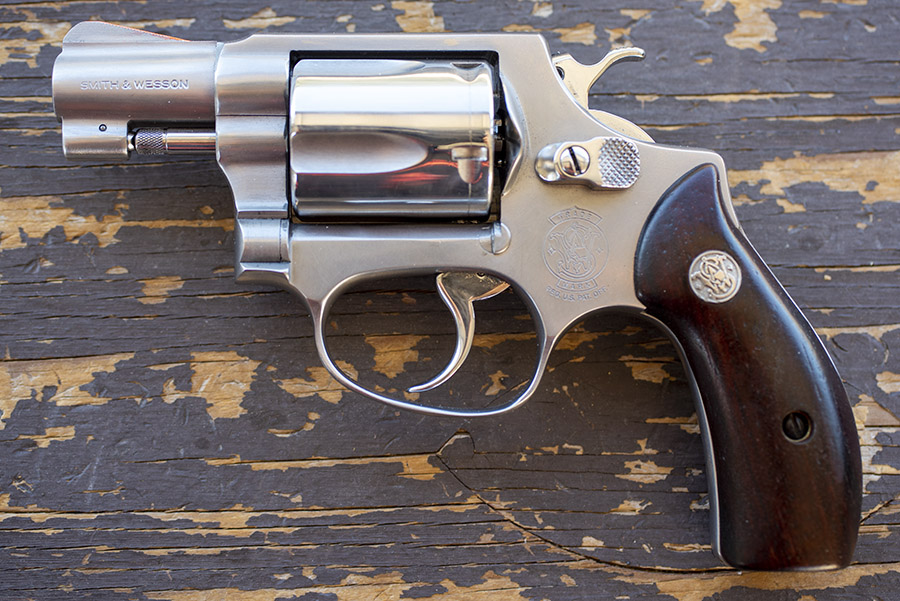
It’s a Model 60 (no dash) stainless steel Smith and Wesson snubbie, to be specific. I mentioned it and the work my good buddy TJ was doing to it not too long ago, and it’s back. And it’s awesome. I had TJ do an action job, a little cosmetics work, and fix a problem or two.
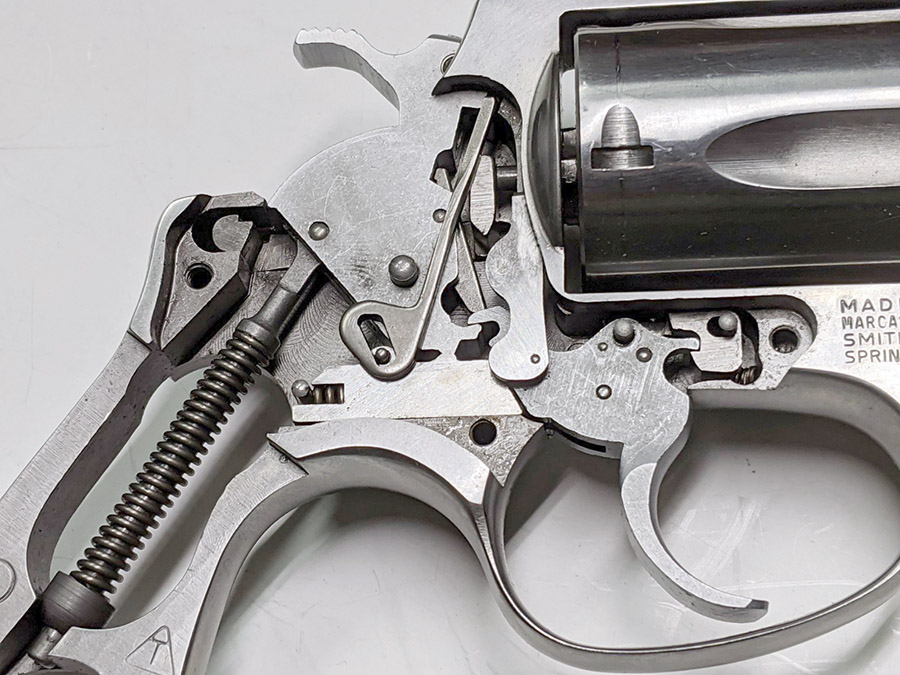
First, the action work. TJ lightened both the double and single action trigger pull, and he did it the old-fashioned way…lots of hand work, polishing, and fitting. Here’s what the guts of my Model 60 look like after a TJ Level 1 action job:

I initially thought I’d have TJ put a high polish on the entire revolver (it would have been something north of $300 just for that work), but TJ was looking out for my best interests. “I can do the whole revolver,” TJ said, “but it will look a lot better if you just have me do the ejector rod, the cylinder, the trigger, the cylinder release, and the hammer.” He was right. It looks awesome.
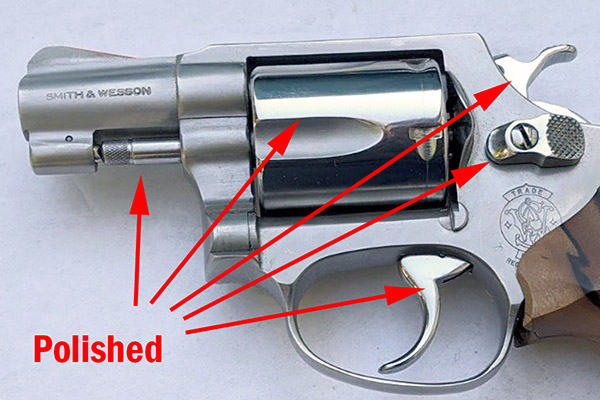
Here are a few more shots of the high polish TJ put on these components.
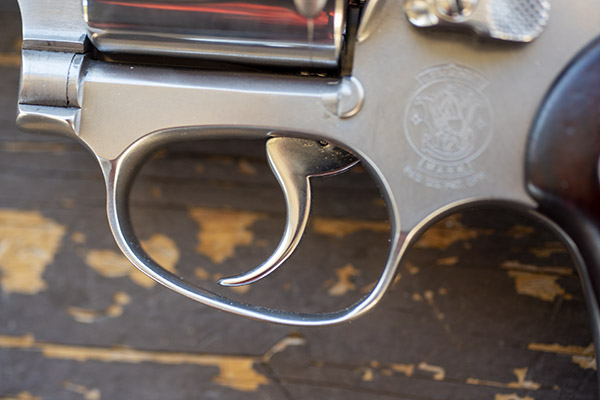
The work on the trigger is lot more than just cosmetic. TJ recontoured the face of the trigger in addition to polishing it, and it really makes a difference in double action shooting. It’s much easier to find and control that precise instant when the hammer drops during double action shooting with the new trigger contour.
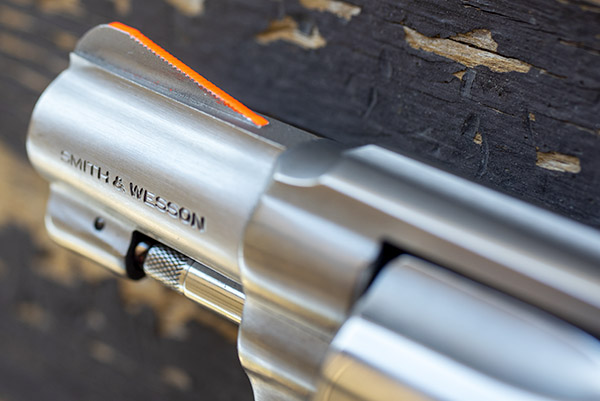
As part of the Level I action job, TJ also applied orange Day Glo to the front sight. It’s a small touch that works wonders. Finding and putting the front sight on target is much faster with this Day Glo treatment. It’s not just a cosmetic thing.
I mentioned in a previous blog that the revolver was hard to open, and TJ found and fixed the root causes of that problem. The ejector rod threads had stripped, the ejector rod’s axis wasn’t concentric to the bore, and the barrel underlug catch was not properly configured. My Model 60 opens and closes the way it should now. It’s slick.
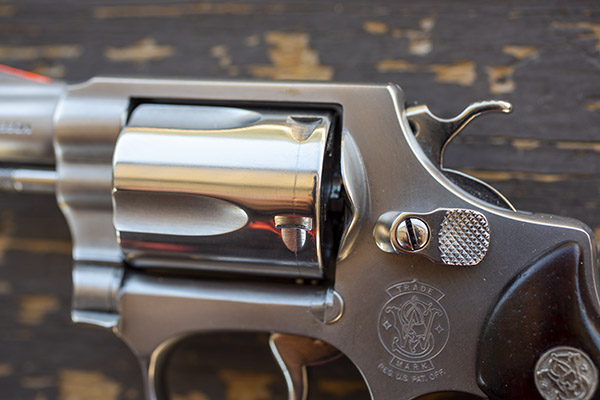
Here’s another small detail I like…polishing the cylinder release and its slotted nut (it’s not a screw, even though it looks like one). This little bit adds a nice touch to the revolver.
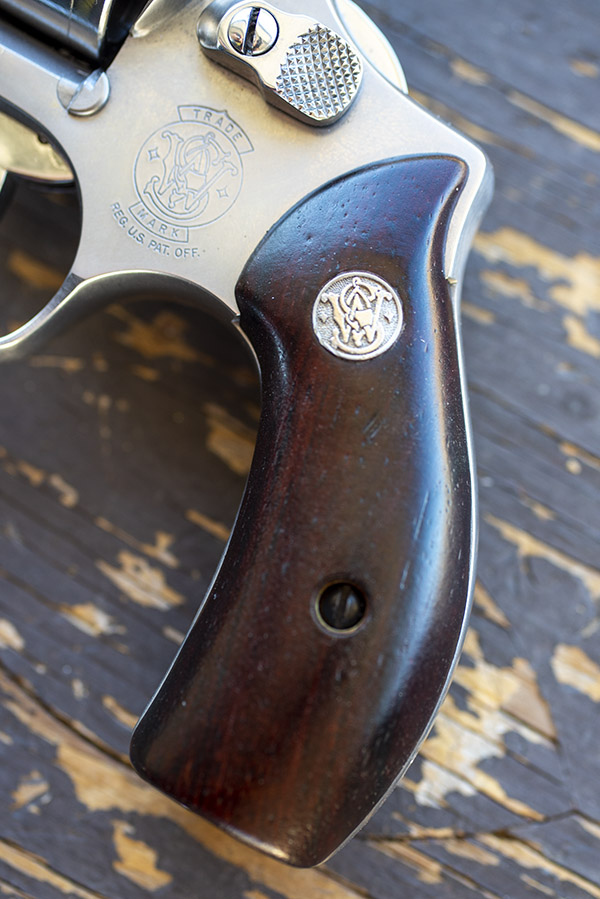
The grips are smooth rosewood, and they work well with their S&W emblems against the stainless steel revolver. I like the look.
So, on to the main question: How did the TJ-customized Model 60 shoot? Superbly well, thank you. I tried two loads with the new-to-me Model 60. The first was the 148-grain wadcutter with 2.7 grains of Bullseye; the second was a 158-grain cast truncated flat point bullet with the same 2.7 grains of Bullseye. I loaded both on my new-to-me freebie Star progressive reloader. Yep, the Star is up and running now, and how it works will be a story for a future blog (in the meantime, you can read about the Star resurrection here).
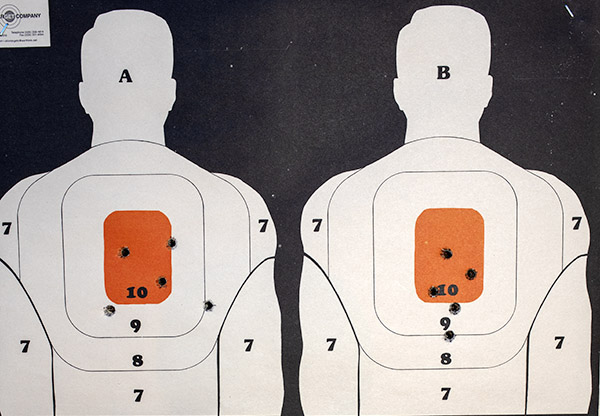
I fired four targets at 50 feet and the results are interesting. The first two targets were with the 148-grain wadcutter load (I use an Alco silhouette that has four small silhouettes on a single target sheet).
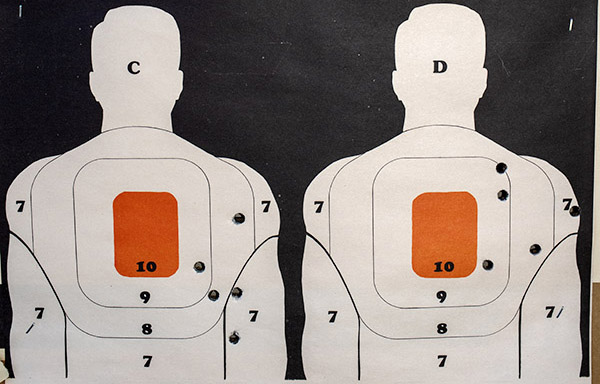
I shot the target on the left with a 148-grain Missouri double-ended wadcutter bullet; the one on the right is with a Hornady swaged 148-grain hollow base wadcutter bullet. I’ll tell you more about those in a bit.
Before TJ did any work on my Model 60, the gun printed wadcutter groups a good 12 inches to the right (good if you want to hit your bad guy in the elbow, I suppose). After TJ fixed the ejector rod issue I described above, the wadcutter bullets still shot a little bit to the right, but much less than they had before. That rightward bias is a function of the load, not the gun (as you’ll see in the next set of targets).
The really good news is how the Model 60 performed with the 158-grain truncated flat point bullets. Those puppies shot exactly to point of aim, and after warming up with the first group on the left target below, I got serious about focusing on that beautiful Day Glo front sight and shot the group you see on the right target. Point of aim was at 6:00, and for a 2-inch barrel Roscoe, that ain’t bad shooting.
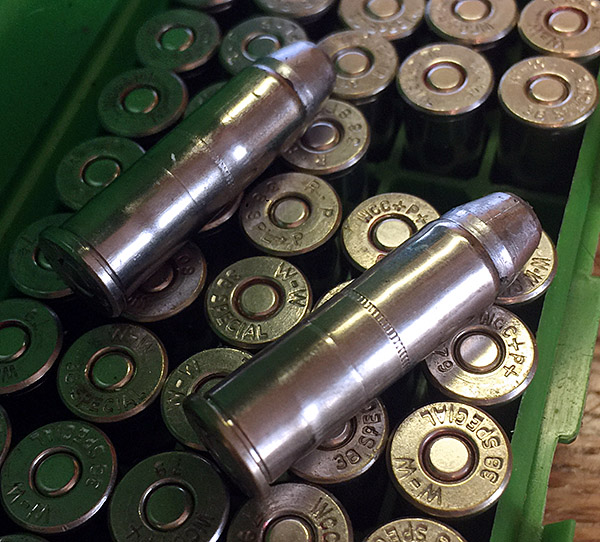
If you’re not familiar with all this wadcutter and truncated flat point bullet business, here’s your lesson for the day. Let’s call it Bulletology 101.

The brass cartridge on the left is loaded with a Missouri 148-grain DEWC (double ended wadcutter) cast bullet; the nickel-plated 38 Special cartridge to its right is loaded with a Hornady 148-grain swaged hollow base wadcutter (HBWC). The Missouri DEWC bullets are symmetrical (they’re the same top and bottom); the Hornady HBWC bullets have (as the name implies) a hollow base (you can see those bullets in the center of the photo above, one inverted and the other right side up). The idea behind a wadcutter bullet is that it punches a clean hole in the target (that makes it easier to score). The two bullets on the right side of the photo above are 158-grain cast truncated flat points. I have a local caster make these for me.
I am enjoying my Model 60 and the custom work TJ did on it, but I’ll tell you what…this puppy bites. The recoil is significant (even with the lighter 148-grain wadcutter loads), and I’m a guy used to shooting big bore handguns. That little .38 Special cartridge is nothing to sneeze at (Elmer Keith, Dirty Harry, and all the rest of the bigger-is-better gunsels notwithstanding).
For a defense gun, I can live with Roscoe’s recoil (it’s not a handgun I would put 100 rounds through during a range session, though). For all you keyboard commandos out there, I know, I know. You can do that all day long. I can, too, with a 1911. But this little Chiefs Special is a handful, and after firing 5 or 6 groups, I’ve had enough. Your mileage may vary. I know, too, that if I put the Pachmayr-style oversize rubber grips on it, it would be more manageable (and I own a pair of those). But then it wouldn’t look like it does now, and I love that look.
Hey, there’s more to this story…TJ also did a little work on my Compact 1911. The latest improvements on the Compact 1911 are coming up in a future blog, so stay tuned!
More Tales of the Gun are here!
Want silhouette targets for your next trip to the range? Don’t pay exorbitant range prices. Get them here.
Custom grips for a snubbie Smith and Wesson? Take a look here!
Never miss an ExNotes blog…get your own free subscription!
Want to turn your handgun into a one-of-a-kind combat companion? You don’t need to live out here; TJ’s work is carried daily by law enforcement officers (and others whose lives depend on their sidearms) all over the world. Here’s where you need to go to get started: