The 9mm Sudden Unintended Disassembly: Concluding Thoughts

By Joe Berk

This is an update on my 9mm 1911 sudden unintended disassembly saga.  I will address four topics:

      • Zeroing in on the cause.
      • Rework of the ammo I had loaded on my Lee turret press.
      • My reconstituted 9mm 1911.
      • Preventing a recurrence.

Let’s get into it.

Zeroing In On The Cause

I’m down to thinking the 1911 event was due to either of two causes: A double propellant charge, or bullet setback (i.e., the bullet slid deeply into the case as the round was being chambered, thereby raising the chamber pressure).

My burst 9mm cartridge case. It was a Remington case, not that it makes any difference. Any case would likely have burst.  Photo by TJ of TJ’s Custom Gunworks.  Compare this to the photo of the double-charged case at the end of the video below.
A Double Charge

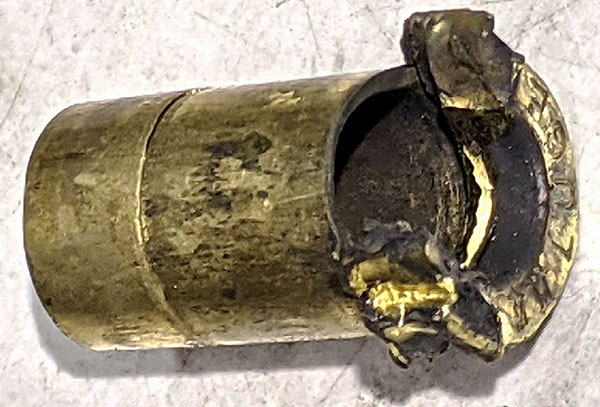
I did a Google search on double-charged cartridges, and what do you know, there’s actually someone out there who did the same thing I did.  He caught it on video and posted it with a photo of the case.  His burst cartridge case sure looks a lot like mine.

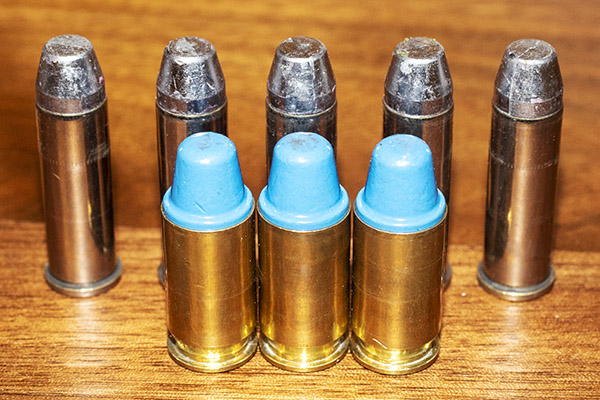
If you compare the photo at the end of the above video to the case stuck in my chamber, they are identical.  I’ve convinced myself that this is the most likely of the two scenarios, but I’ll describe the other scenario (bullet setback) as well.

Bullet Setback

What has me thinking deep thoughts about the second failure mode (pushing the bullet deeper into the case during chambering) is that I think it is relatively easy to screw up while reloading and induce this failure, and from what I’ve read, 1911s are more prone to do this than are other semi-autos.

This is what bullet setback would look like. The bullet is seated much deeper in the case than it is supposed to be, which would raise chamber pressure. This example did not occur in the gun; I loaded dummy case and pushed the bullet in much deeper using my reloading press.  Theoretically, it can be induced by the gun if the bullet is not crimped sufficiently.

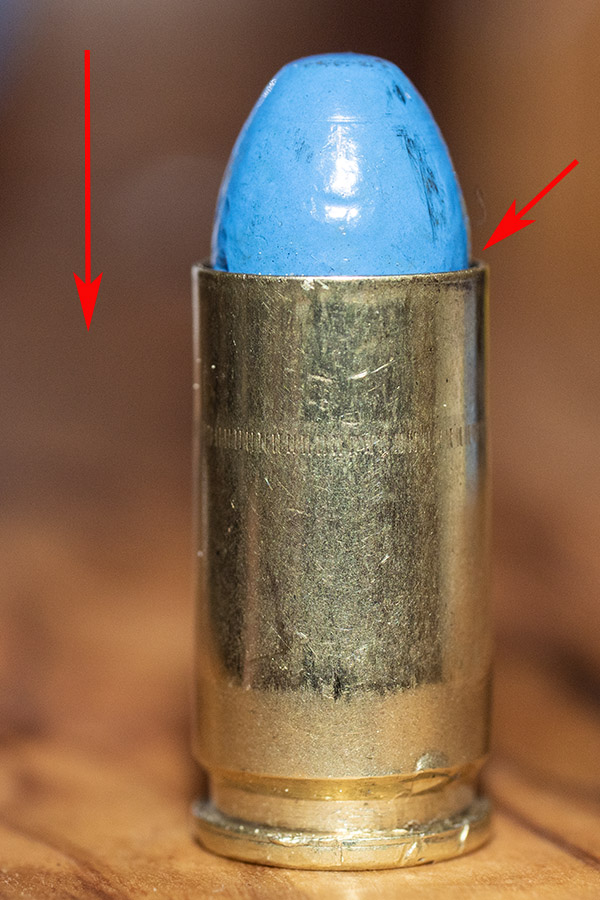
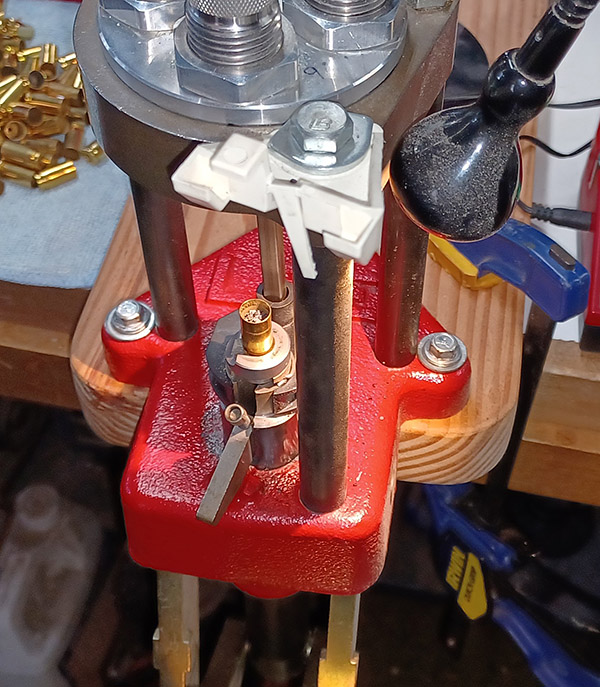
Let’s discuss screwing up the reloading process in a manner that could induce bullet setback.   On my Lee Classic turret press, bullet seating and crimping occur in two separate operations (seating refers to pushing the bullet into the case; crimping refers to locking the bullet in place by crimping the cartridge case mouth).  The third (of the four) dies seats (but does not crimp) the bullet; the fourth die applies a taper crimp to the bullet.  Here’s the screwup:  I’ve had at least a couple of instances where I took the cartridge out of the press after seating the bullet (but before crimping it).   I know; you’re thinking that’s stupid, and I can’t argue with that conclusion.  I don’t know why I did it (too eager to see the completed round, maybe?).  I caught myself, returned the cartridge the press, and crimped it.  But it’s possible I missed the crimping step on a cartridge.

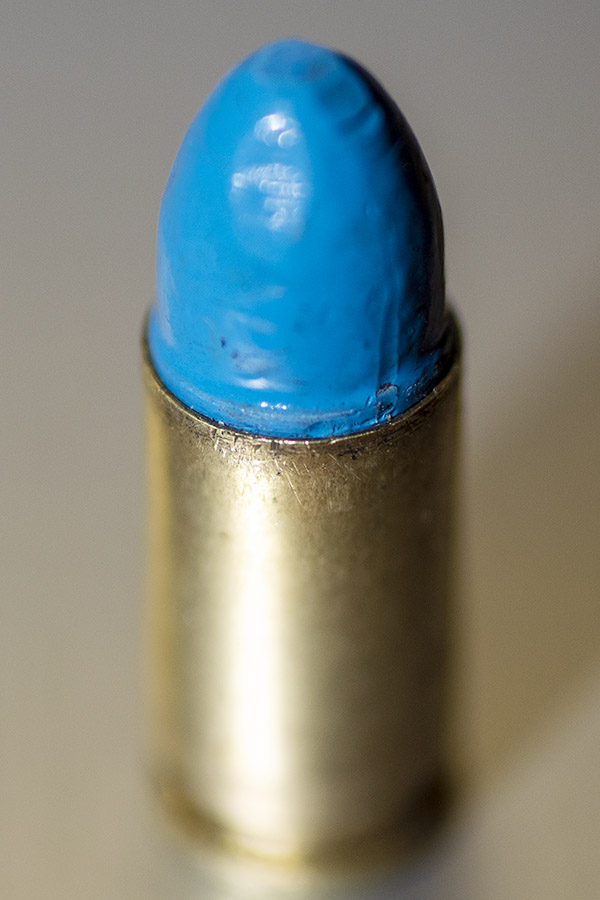
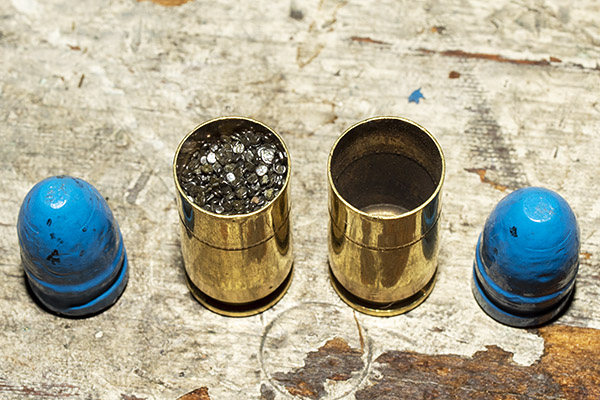
I think setback is the less likely of the two failure modes discussed here.  I tested the crimp by tapping on the bullet with a rubber mallet and it didn’t move.  Failure to crimp or a weak crimp may have caused setback, but on properly crimped bullet, I don’t think setback will occur.  Also, when I made the cartridge shown in the photo above on my RCBS Rockchucker press, it took more effort than I thought it would to seat the bullet as deeply as you see in the photo (and the case had not been crimped).  I doubt that simply chambering the round would drive the bullet in that deeply (even without a crimp).  If you think otherwise, please leave a comment below.

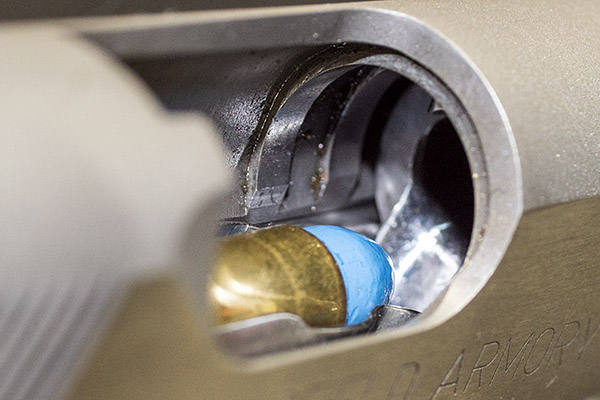
Gun Design and Bullet Setback

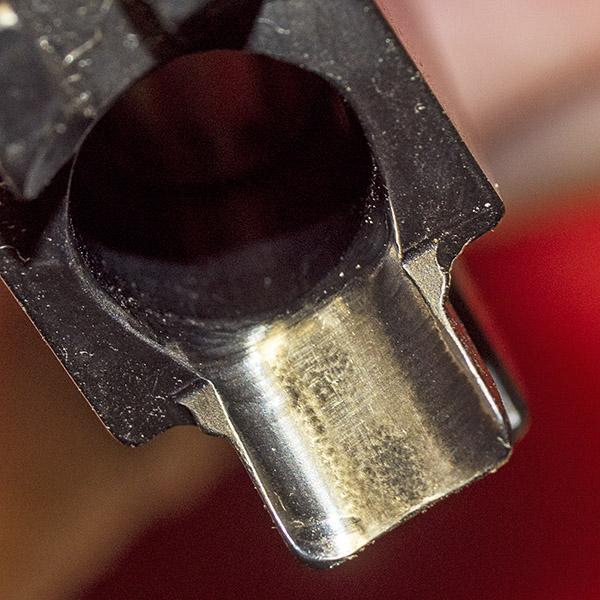
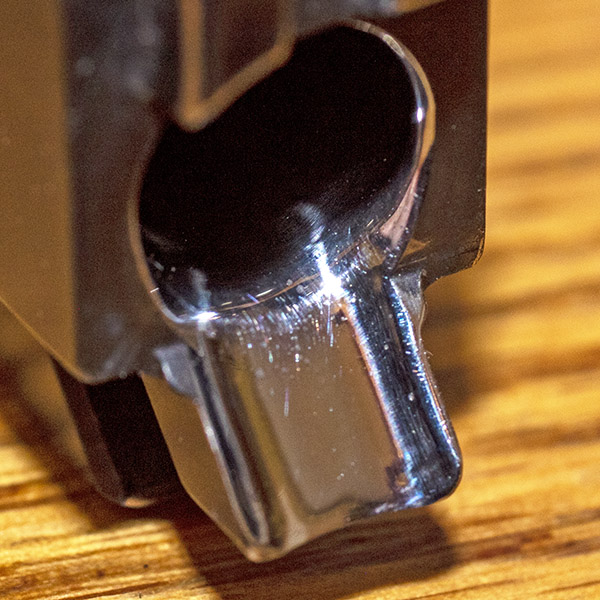
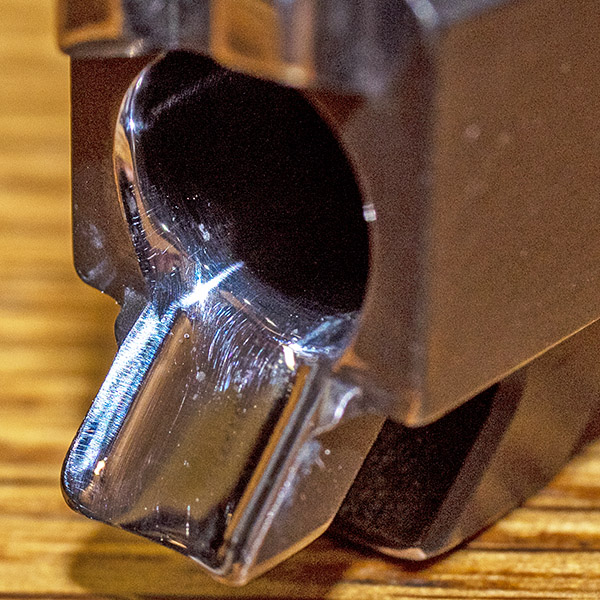
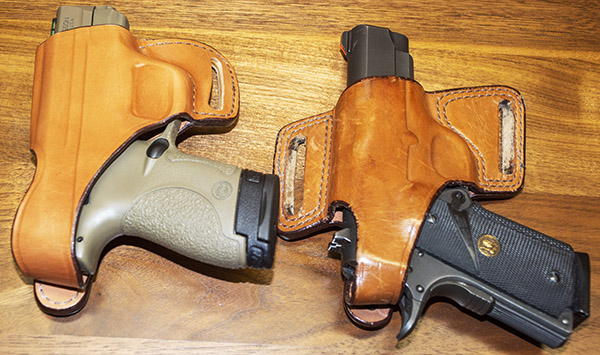
As mentioned above, bullet setback is more likely to occur on a 1911 than it is on other semi-auto handguns.  It has to do with cartridge location in the magazine, and how it feeds into the chamber.  On more modern handguns, the top round in the magazine sits higher in the gun than it does on older design guns.   When the slide shoves the round forward, cartridges in more modern handguns have a straighter path into the chamber.  On a 1911, the top round in the magazine sits lower in the gun.  When the slide pushed it forward, the bullet impacts the ramp, it has to stay situated in the cartridge case without experiencing setback, and the cartridge has to rotate up and then into the chamber.  Because of this, a 1911 is more likely to experience bullet setback than is, say, a gun like the S&W Shield.

A 9mm cartridge waiting to be chambered in a 1911.  It’s a little hard to see in this photo (I did the best I could), but the bullet nose will hit the ramp head on and then slide up the ramp and into the chamber. The potential for bullet setback is a little higher here than on most other modern 9mm semi-auto handguns.
A 9mm cartridge waiting to be chambered in the S&W Shield. Notice how the round is nearly aligned with the chamber as it sits in the magazine.

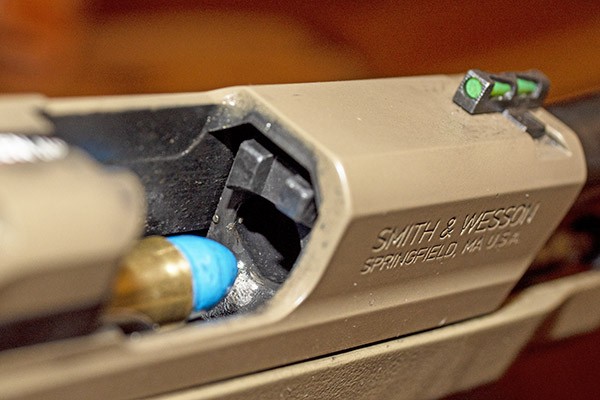
That’s not to say the Smith and Wesson Shield is a better design or that it’s all sunshine and rainbows.  There’s a tradeoff the engineers made on the Shield.  Yep, the Shield’s higher cartridge position makes for a straighter path into the chamber.  It also allows for higher capacity in a smaller gun (my little Shield holds 8 in the magazine and one in the chamber).  But the higher cartridge position can induce another issue:  Failure to extract and eject.

A cartridge case in the S&W Shield caught during extraction on the mouth of the case immediately below it.

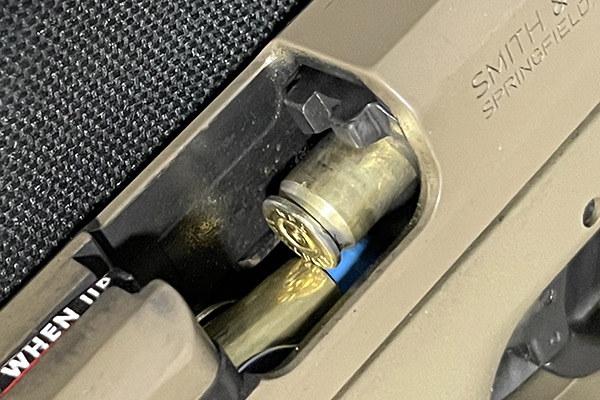
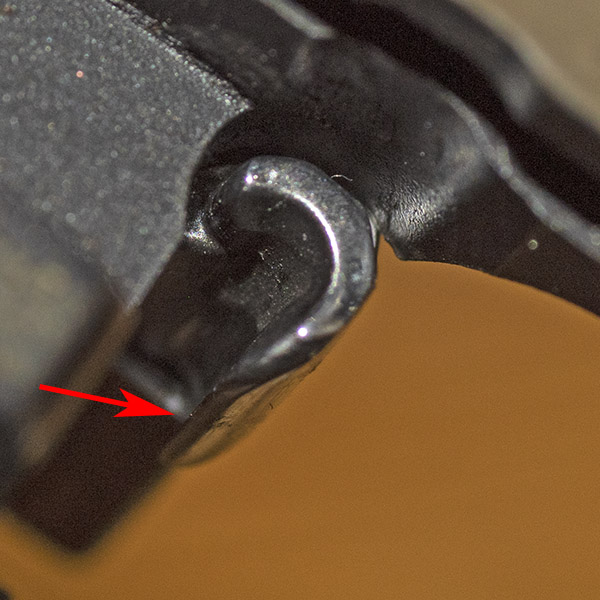
During extraction, the round being extracted has to drive the magazine’s top cartridge down into the magazine as it is being extracted.  it does so by using the next cartridge’s bullet as a cam surface.  The rear edge of the cartridge being extracted bumps into the mag’s top cartridge, and then it has to drive it down so the case can exit the gun after firing.  As it uses the bullet of the mag’s top round for that cam surface, the rear of the cartridge case rim encounters the case mouth of the mag’s top cartridge, and that can cause a failure to extract and eject.  It’s happened to me.  I’ve found the Shield is sensitive to ammo brand, bullet configuration, and crimp.  Too much crimp, and the cartridge goes too deep into the Shield’s chamber and the firing pin won’t light the round off.  Too little crimp and it jams in the manner described above.  Too little crimp and it might experience bullet setback.  Like most things in life, the design is a tradeoff.

Again, I don’t think bullet setback is what happened in my 9mm 1911.  I’m including it here simply because it is interesting and relevant to this discussion.

Ammo Rework

One of the personally dismaying and embarrassing things about blowing up my 9mm 1911 is that it immediately threw into question the approximately 1500 rounds of 9mm and .45 ACP ammo I had reloaded on the Lee turret press.

I thought I could use weighing the rounds as a way to screen for double loads, but on both the 9mm and the .45 cartridges, the weight variation exceeds the weight of the powder charge.  That means I could have a double charge and if it was in a lighter round, it would be within the variability for the loaded cartridge.  So weight was not a way to screen.  I know there will be keyboard commandos with advice to stick to one case manufacturer (or to segregate cases by brand), but the same variability problem exists even when cases are segregated (I’ve checked).  I wish the self-styled “experts” on Facebook would slither back under their rocks (or at least refrain from commenting when they just don’t know what they are talking about, which is most of the time).

The RCBS collet bullet puller. You put your cartridge into the press shell holder, raise it into the collet (the gizmo on the right, which fits inside the gizmo on the left), tighten the crank, and lower the press ram. Voila, the bullet is pulled. Most of the time.  Sometimes it doesn’t work.
An impact bullet pullerr. You put a loaded cartridge into the cap on the hammer head, whack the opposite end against a hard surface a few times, and inertia drives the bullet out of the case. It is a lot of work.
The Grip-N-Pull. It works occasionally. I tried a few cartridges and gave up on it.

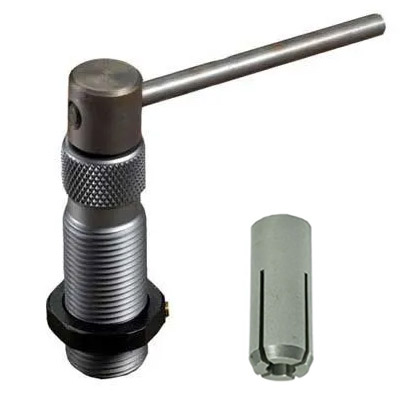
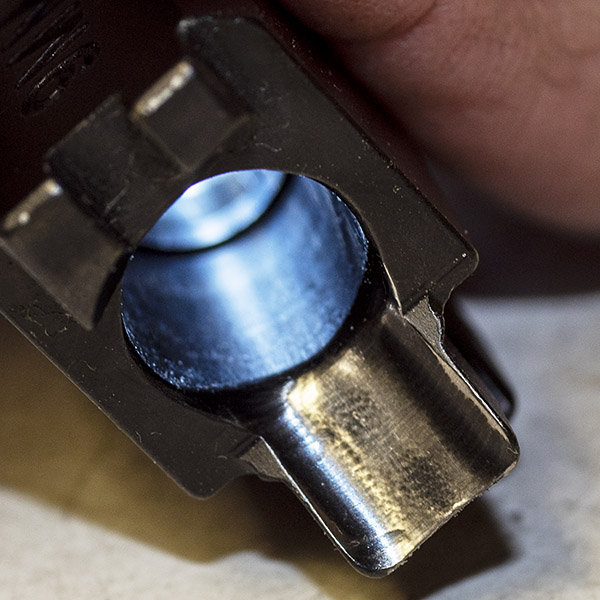
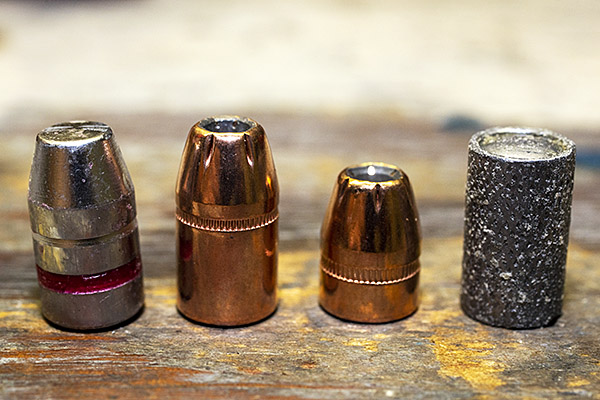
I’ve disassembled and reassembled the 800 9mm rounds I loaded on the Lee turret press.  I did not find a single one with a double charge.  I used my buddy Greg’s RCBS collet bullet puller for this on my 9mm ammo and it worked like a champ with minimal or no bullet damage.  Surprisingly, with all brands of brass, after pulling the 9mm bullets from crimped cartridges I did not have to expand the case mouths again to reseat the bullets.  They slid right in.  I just seated them to the right depth and crimped them again.  Reusing the bullets didn’t seem to affect accuracy, either.

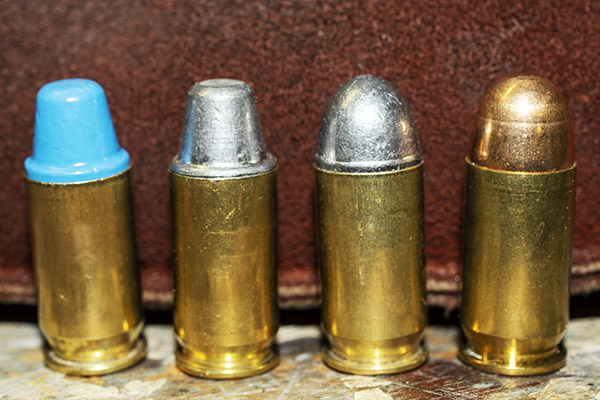
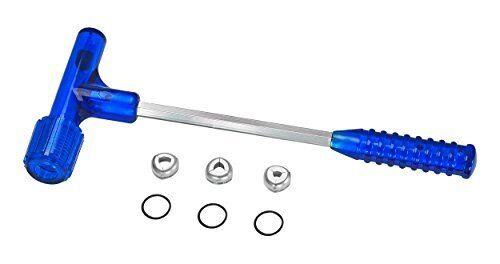
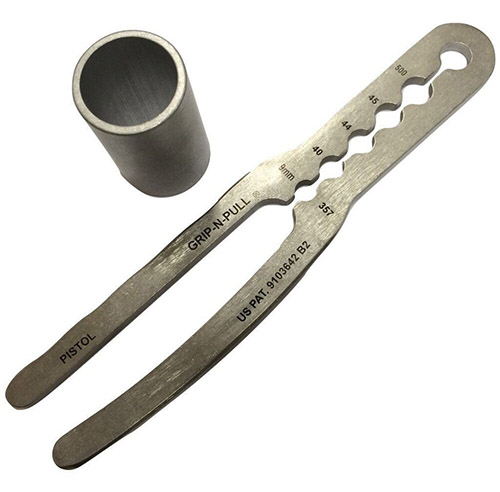
The RCBS collet bullet puller did not work on my .45 ACP ammo.  The .45 collet couldn’t get a good enough grip on powder coated 230-grain roundnose bullets or on my 185-grain cast semi wadcutters.  I tried one of those Grip-N-Pull devices and that didn’t work, either.  The bullets slid right out of it.  To disassemble the .45 cartridges, I had to use an impact bullet puller, and that was tough sledding.  It takes forever.  I don’t like impact bullet pullers, but hey, it is what it is.  And what it is, well, is a lot of labor.  I’m working it a little at time, at a rate of about a box per week.  Three or four months and the rework will be in the rearview mirror.

That double charge sure turned out be one expensive mistake, both in terms of damage to the 1911 and the need to rework a lot of ammo.  Live and learn, I guess.

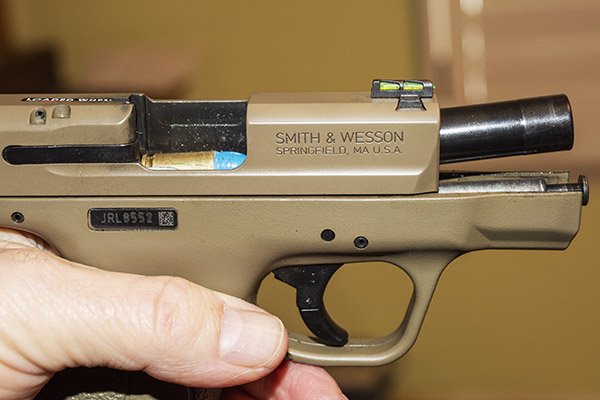
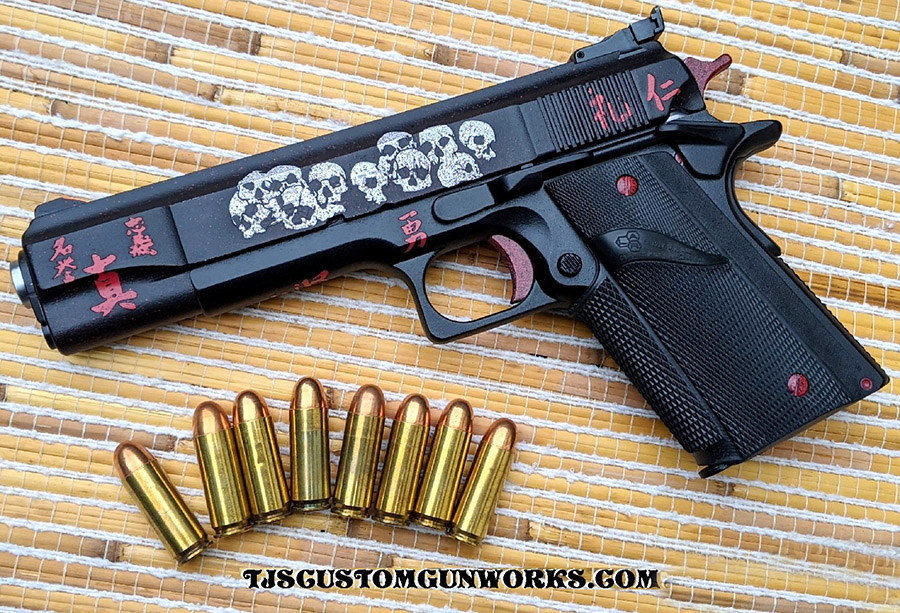
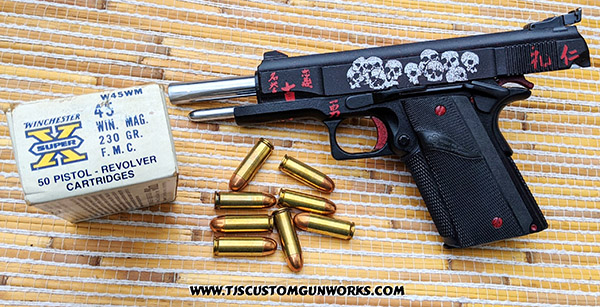
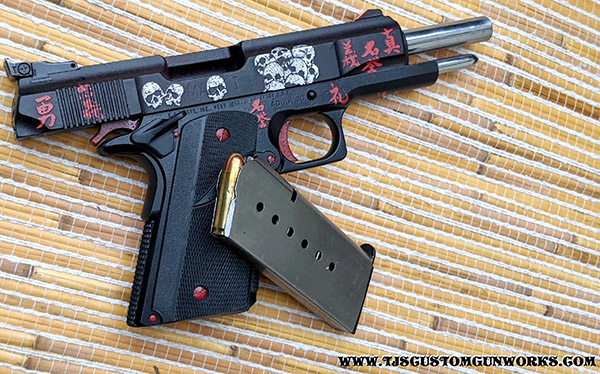
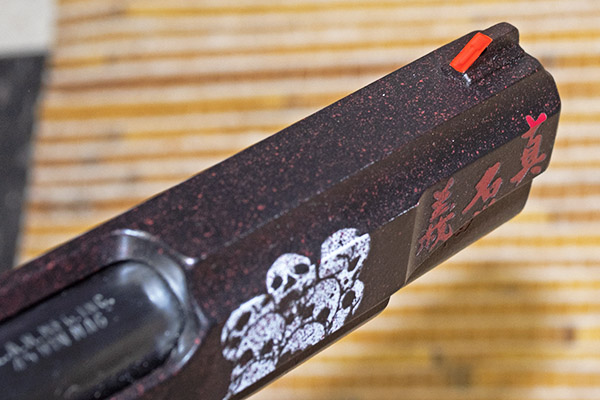
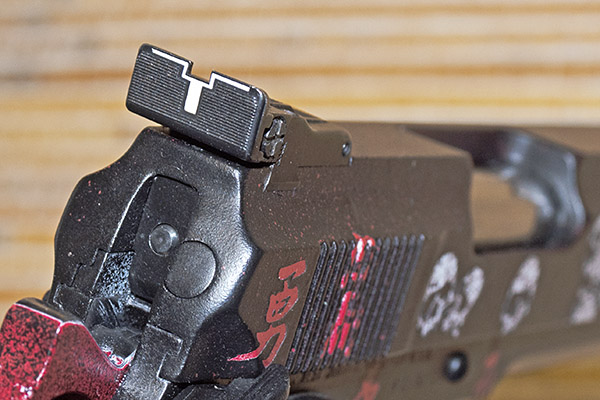
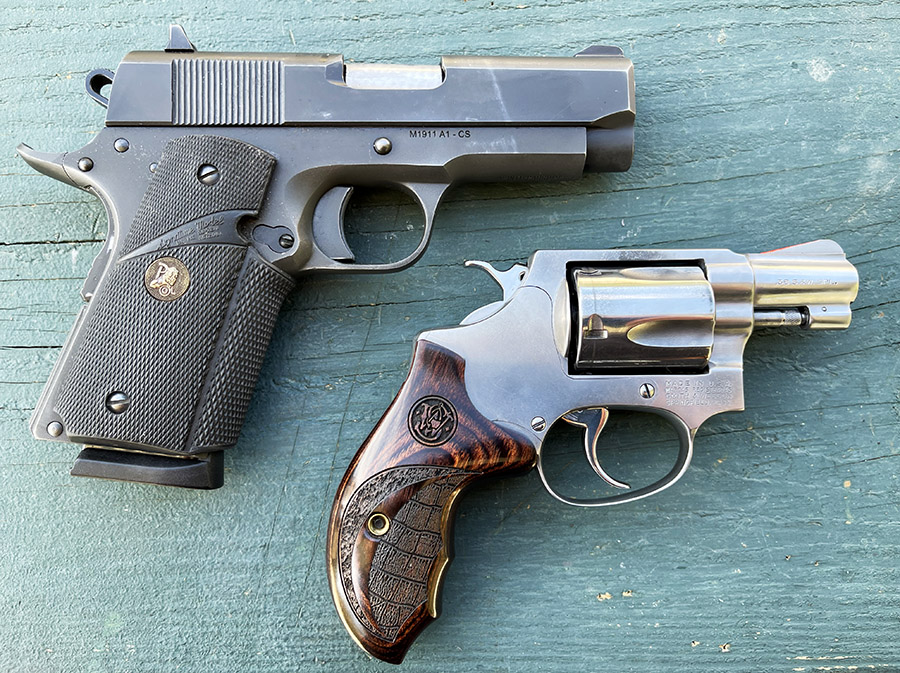
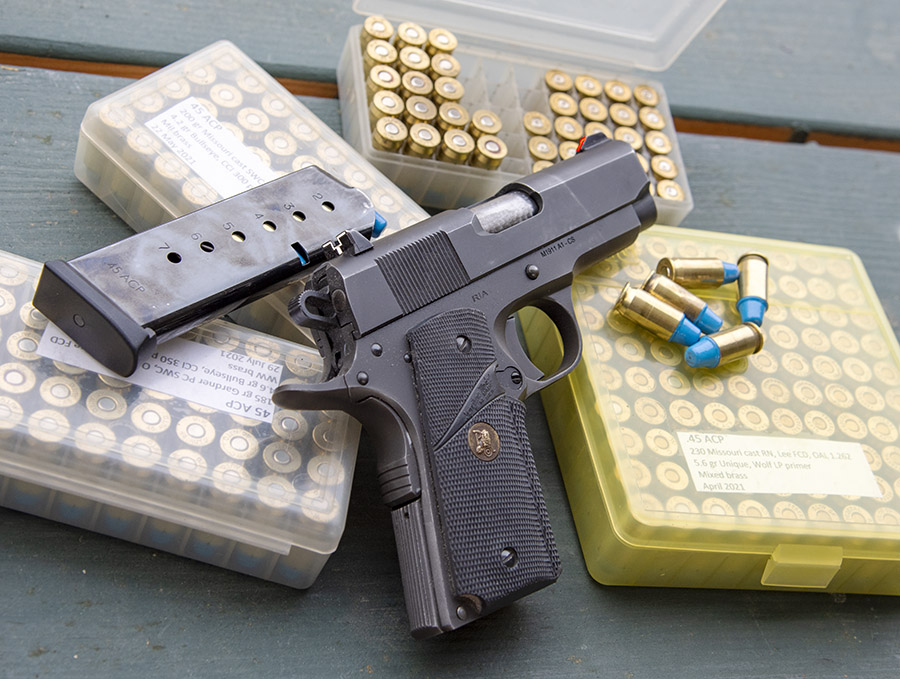
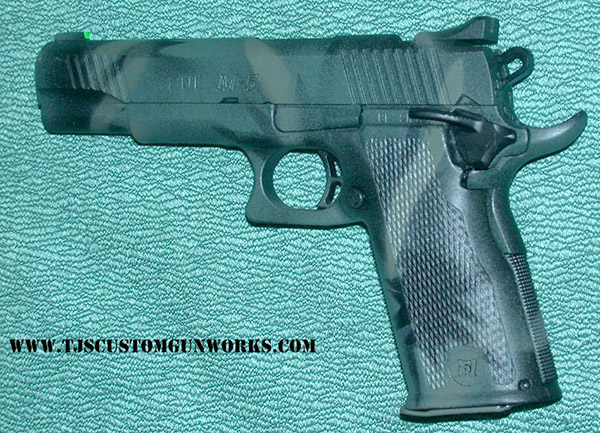
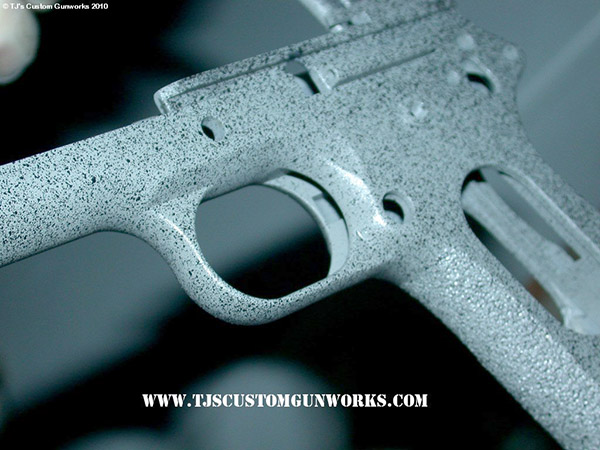
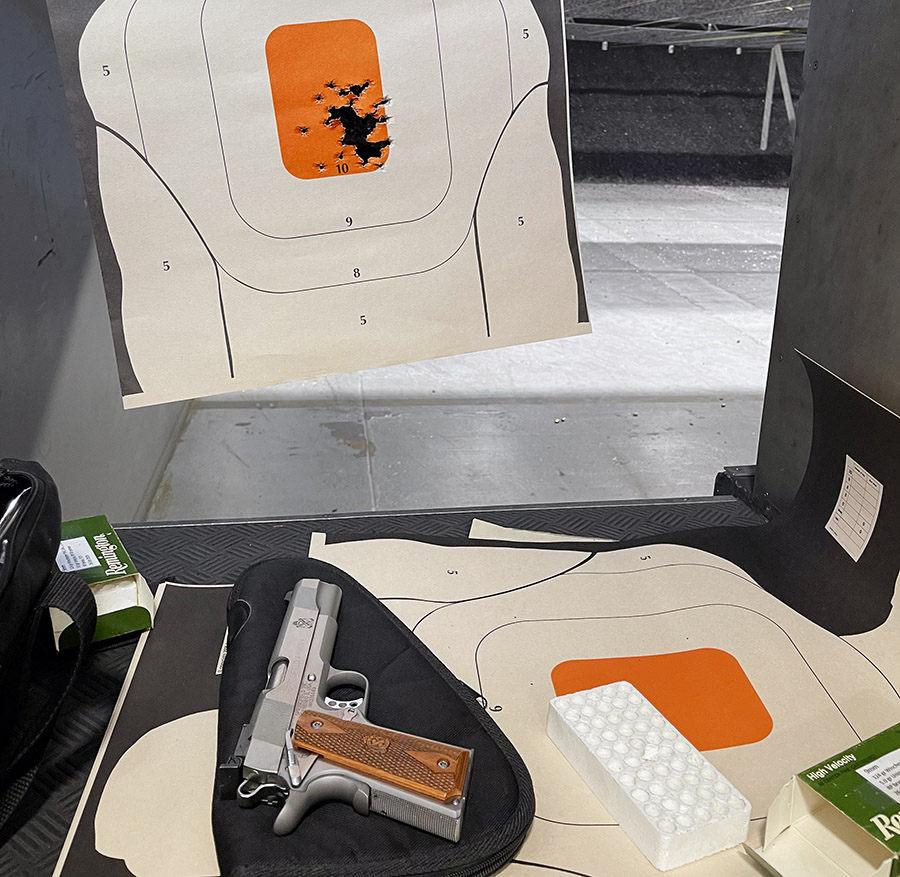
The Reconstituted 1911

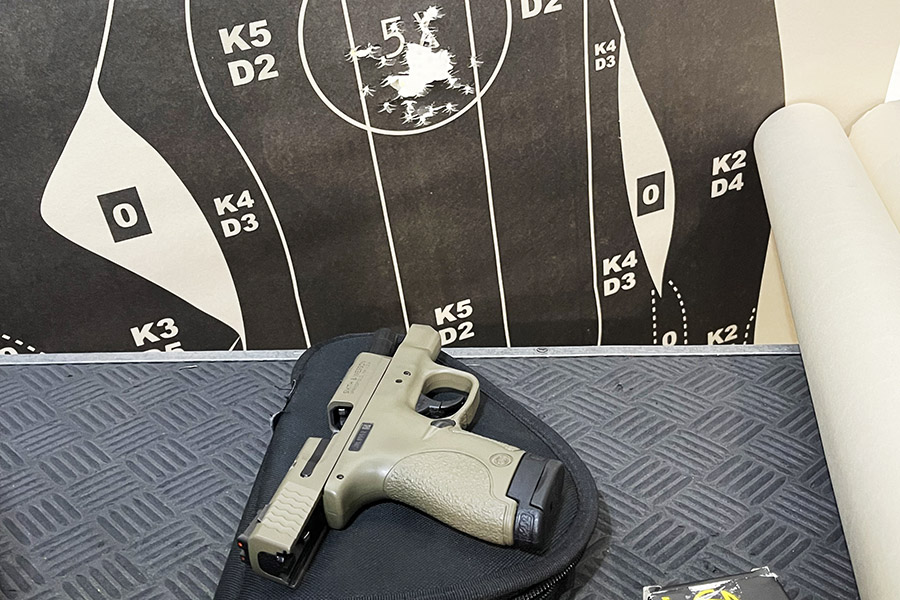
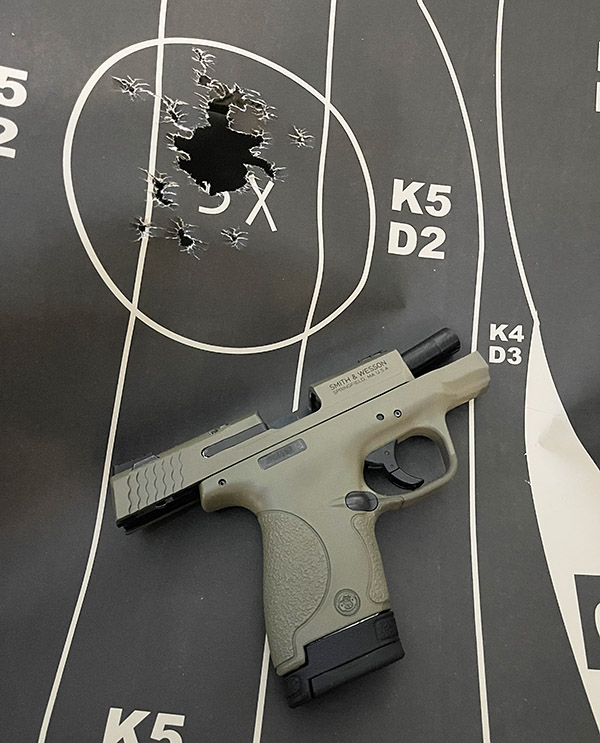
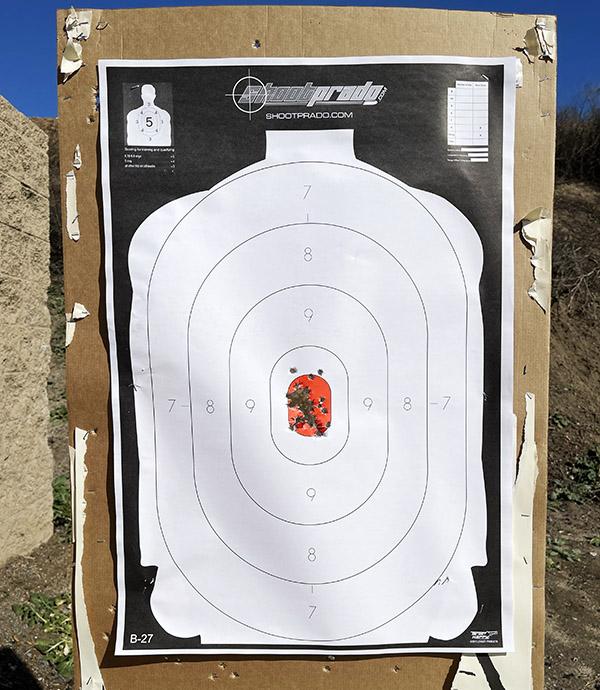
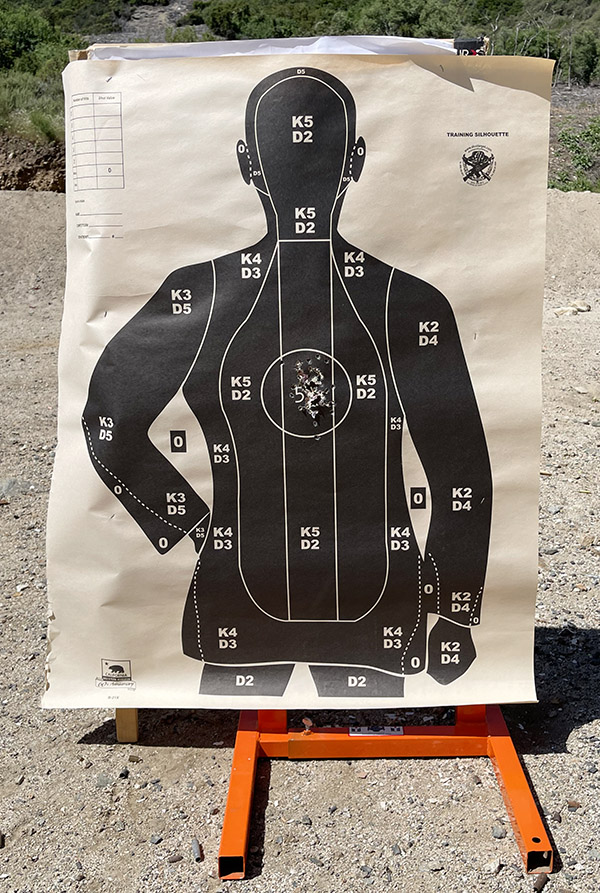
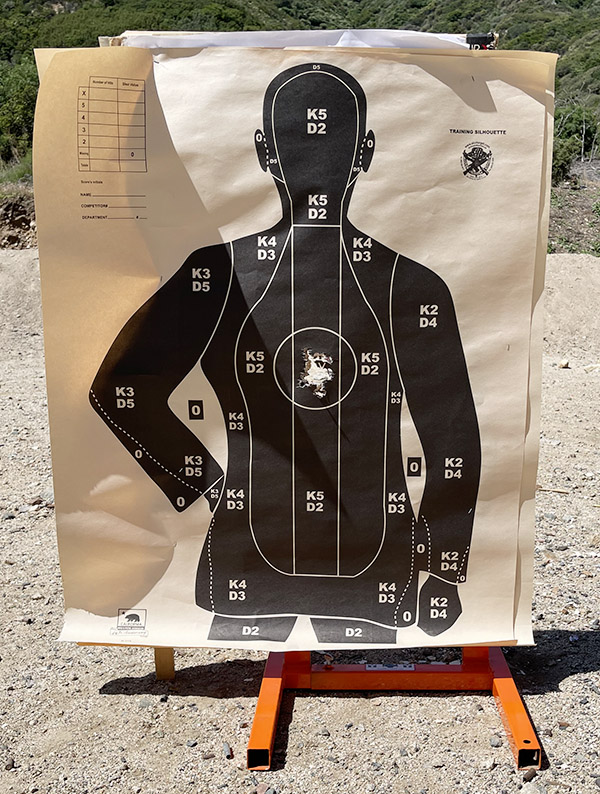
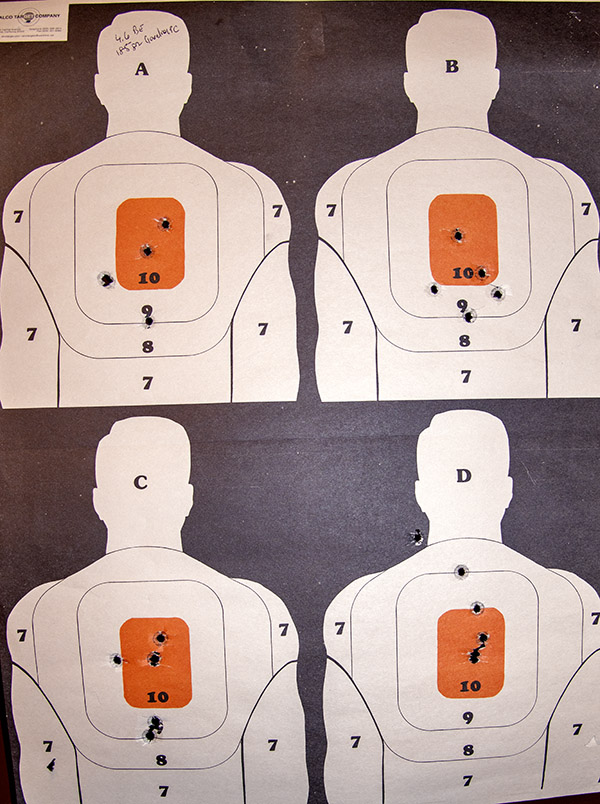
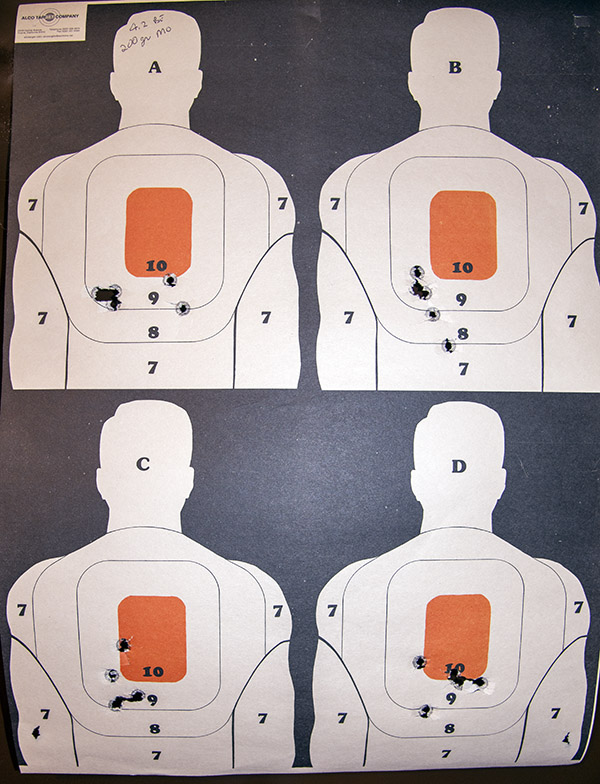
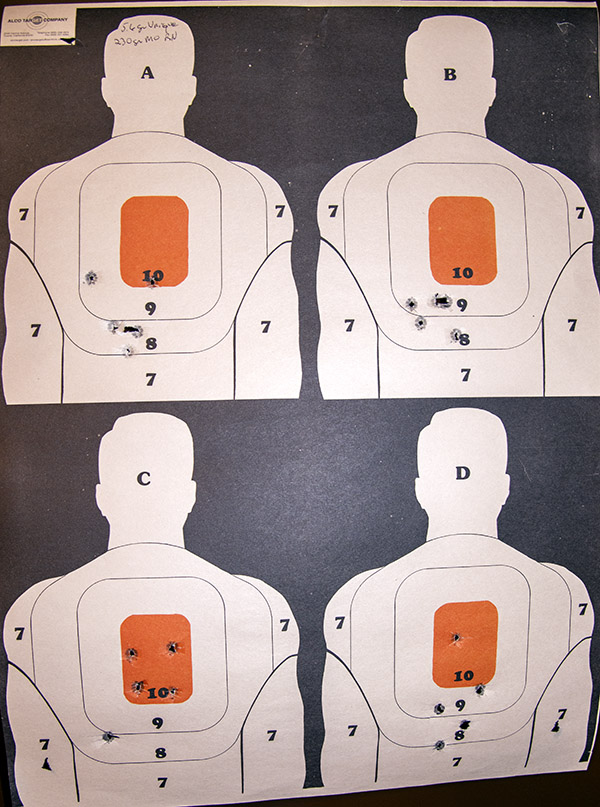
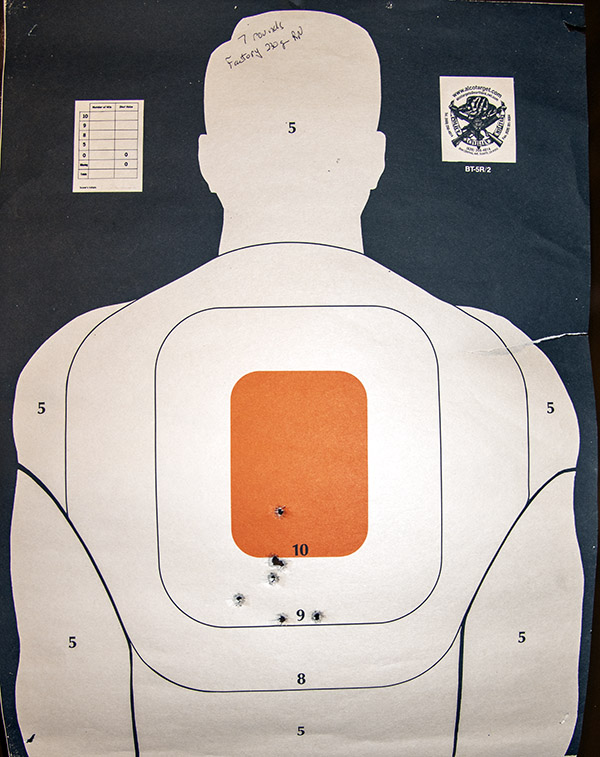
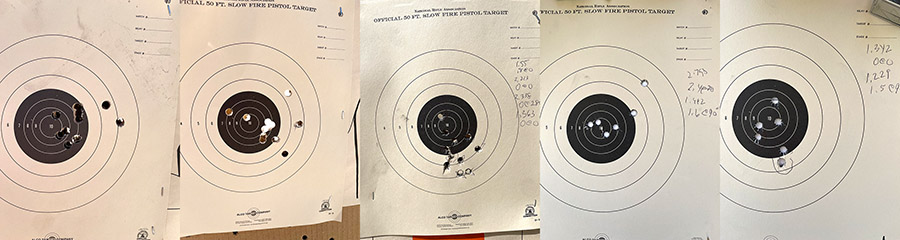
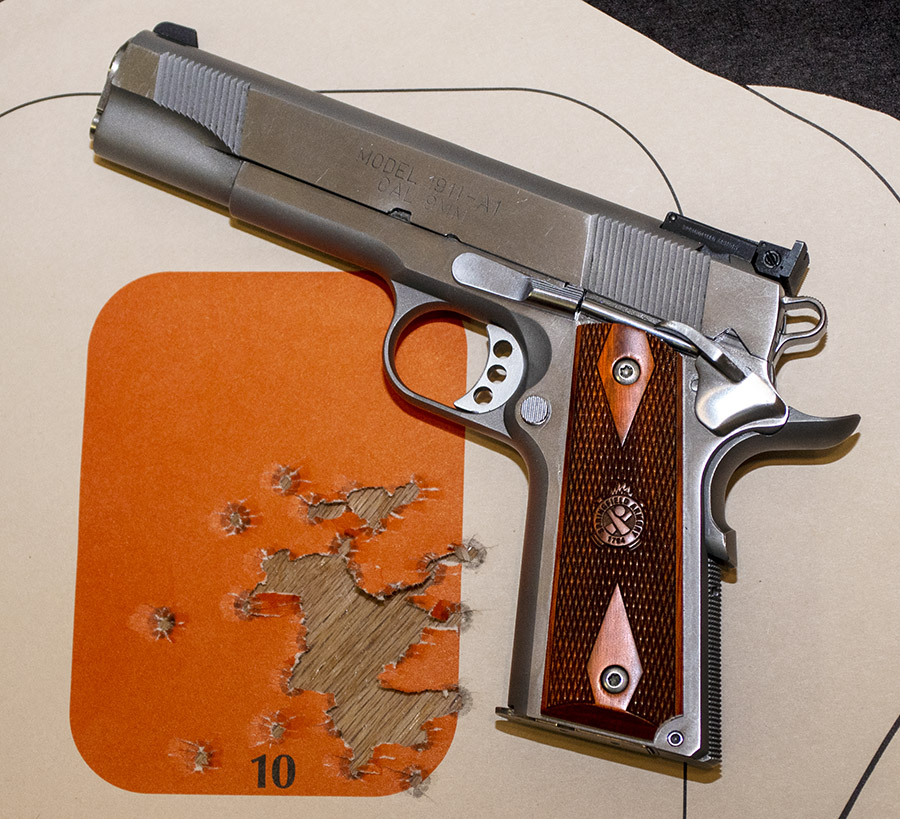
TJ (of TJ’s Custom Gunworks) worked his magic on my 9mm 1911.  As mentioned in a previous blog, in addition to addressing the damage from the burst cartridge, he polished the barrel and ramp, refit an extractor that actually works (shame on you, Springfield Armory, for letting this one get out of the factory with an extractor that didn’t even contact the cartridge case), he recontoured the slide release and the slide release pin (shame on you again, Springfield Armory, for a slide release that was extremely difficult to install), he fit a one-piece guide rod (which is what I asked him to do), and he did one of his magnificent trigger jobs (this 1911 has a “breaking glass” 2 1/2 pound trigger now, with zero creep and no discernible takeup).  This 1911 is a pure joy to shoot.  I loved it before and I love it even more now.  That target at the top of this blog?  It’s a full box of  my reloaded 9mm ammo (50 rounds) fired without resting the gun on anything.  No failures to feed, no failures to eject, no misfires, and every bullet hit in the 10 ring.

50 rounds shooting offhand with the 9mm Springfield Armory 1911.  Custom work by TJ’s Custom Gunworks.

Preventing a Recurrence

Wow.  Where to begin.

I am implementing a number of changes in my reloading to prevent this from occurring again:

      • I’m slowing down and paying more attention.  Duh.  I’m no longer complacent.  Duh again.
      • I’m installing better lighting on my press.
      • I’m standing up so I can see into the cartridge case.
      • I’m switching to a bulkier powder so that a double charge, if it ever occurs again, will spill over the case mouth and make a big, impossible-to-ignore mess.

I don’t mind sharing with you that when this first occurred, my thought was to abandon the Lee Classic turret press and return to loading on my single stage RCBS Rockchucker press.  Double charging a case using a single stage press is (in my opinion) a much less likely thing to happen, and in 50 years of reloading on the Rockchucker, I’ve never had it happen.

When you load on a single stage press, it’s easier to view all of the charged cartridge cases. If any have been double charged, they will stand out.

I have a friend who works for Colt in their customer service department, and he tells me that when he sees a blown up gun sent in, there’s usually a progressive or a turret press somewhere in the story.  But good buddy Paul told me to think about it a while longer and I did.  I’m back to using the Lee turret press, but I’m a little older and a lot wiser now.  The older part wasn’t really necessary, but the wiser part is and hopefully, readers can benefit from my screwup.

Slowing Down and Paying Attention

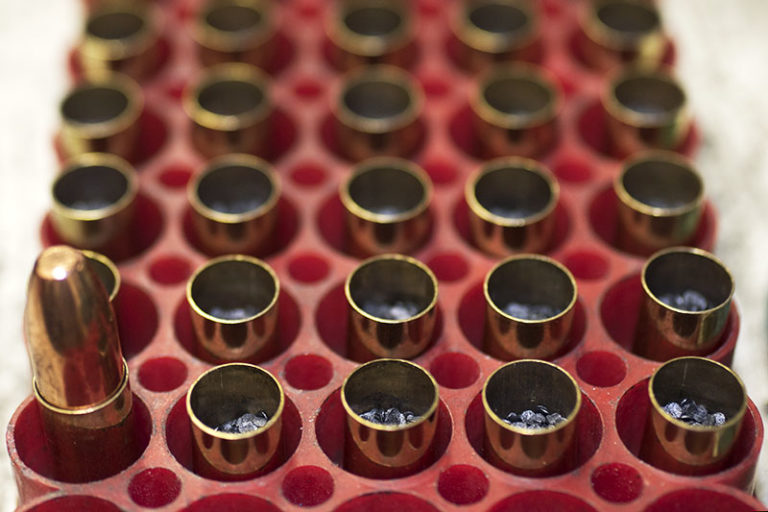
You know, when I worked in the munitions industry I participated in two fatality investigations where inadvertent detonations were involved.  Multiple human errors caused those inadvertent detonations, and one of the key human errors was complacency.  That’s what I had become using the Lee Classic turret press:  Complacent.  I’d been reloading for so long I became entranced with the turret press’s speed, and I started reveling in the thousands of rounds I was cranking out (and it was, literally, thousands of rounds).  I always knew that double charges or skipped steps (like crimping) were really, really bad, but I just never thought I’d be the guy making either mistake.  I wasn’t taking the time I needed to and I became complacent.  That’s changed.  I’ve slowed the pace, and you can bet I’m looking into every case immediately before I place a bullet on top to make sure I haven’t double charged it.  You can also bet that I’m making sure I hit the crimping step on every round.   I’ve actually posted a sign on my reloading bench with the best advice I’ve ever given myself:  Slow down.

Better Lighting

Good buddy Duane (who is both smarter and better looking than me) also reloads with the Lee Classic turret press.  Duane mounted a light above his press to allow better visibility into the charged case.  I’m going to do the same.

Standing Up

I used to sit at the reloading station.  My bench, though, is higher than a standard work table (it’s how I had it built 50+ years ago).  When I’m seated, it’s not as easy to see into the case.  I reload standing up now, and that allows seeing directy into the case.
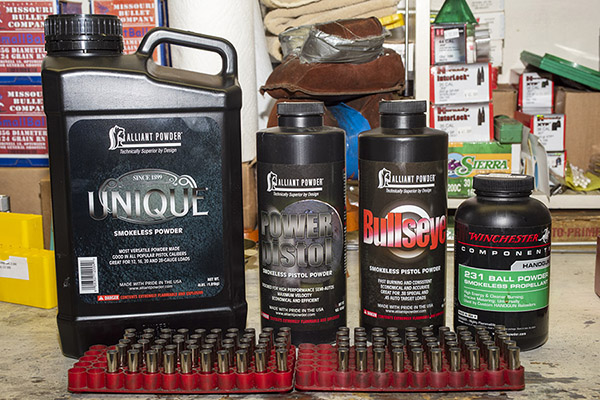
Bulkier Propellant

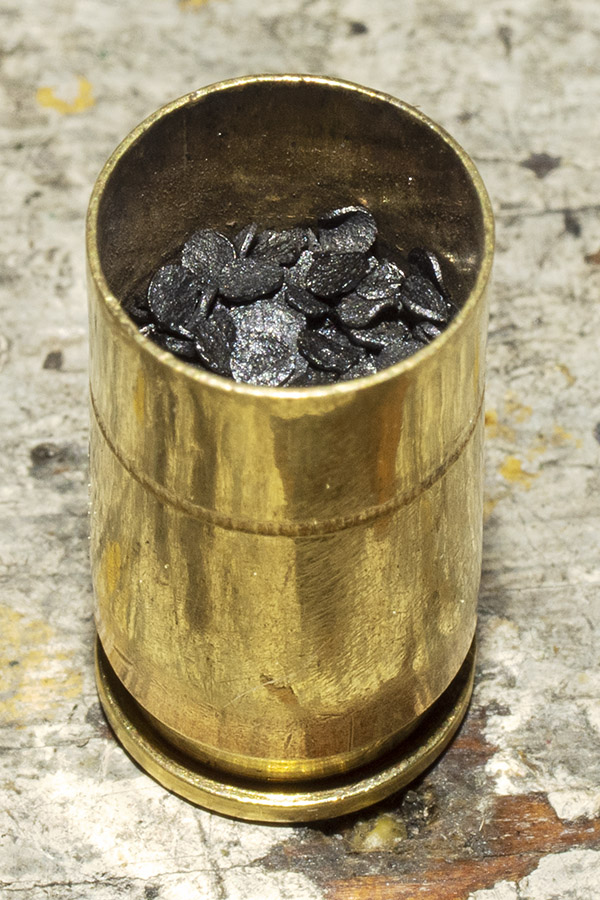
My last change concerns the propellant.  One of the things I investigated shortly after my 9mm hand grenade episode was if it was possible to get a double charge into a 9mm case.  With the load I was using (5.4 grains of Accurate No. 5), the answer was yeah, you could.  It even had a little room left over.  My thinking at the time was that I needed to go to a propellant that would overflow the case if I double charged it.  In the past, I’ve found 4.8 to 5.0 grains of Unique with the 125 grain bullet is a marvelous 9mm load.  Doubling that (i.e., 9.6 grains of Unique will overflow a 9mm case) and if that happens when loading, that’s a good visual indicator that something’s wrong.  So, from here on out when using the Lee turret press, my load will be 4.8 grains of Unique.  That only works for 9mm, though.  Other cartridges (the .45 ACP, for example) will handily swallow a double charge.  There, it’s back to paying serious attention (which we need to do on everything when we reload; it’s just using a propellant that will spill over with a double charge adds an additional indicator if things aren’t done correctly).

A double charge in the case on the left. My load was 5.4 grains of Accurate No. 5. I loaded both cases with this charge, and then took the propellant from the case on the right and poured it into the case on the left. A 9mm can easily swallow a double charge of Accurate No. 5.
A single (correct) charge: 5.0 grains of Unique in a 9mm case.
The most Unique I could load into a 9mm case was 7.9 grains. A double charge would spill over the top of the case and be immediately noticeable (at least in 9mm; the .45 ACP case will take a double charge of Unique without a spillover).

Incidentally, when this happened, I wrote to Lee and asked them if they offered any accessories to prevent a double charge (my Star reloader has a mechanical feature that prevents this from occurring).  The answer was no, but Lee advised using a propellant that, well, read the above again and you’ll know.  I checked the literature that came with the Lee Classic turret press kit, and sure enough, Lee has a recommendation in there to do exactly what I describe here.

Hornady’s Powder Cop

When I posted earlier blogs on Facebook, a few people mentioned a reloading cop.  In 50 years of reloading, I’d never heard of such a thing, but I found it on Amazon.  Hornady’s Powder Cop die is a die with a pushrod indicator.  You add it to a vacant station on the reloading turret after the propellant charging station and when the charged round goes into it, if the case is double charged the rod will go higher than it normally does.

Hornady’s Powder Cop. The idea is that a double-charged case will lift the rod another 3/16 of an inch or so.

I don’t think the Powder Cop is the answer for several reasons.  The Lee Classic turret press doesn’t have an empty station in its turret (all four stations are taken by the Lee 4-die set), you would have to notice that the pushrod indicator rose marginally higher than it was supposed to, and I believe that if a double charge was present, the pushrod might just push into the powder and not rise enough to indicate the double-charge condition.  The Powder Cop might be right for some people, but my equipment can’t use it and I don’t think it’s an effective check.  If you missed the double charge, you would probably miss the rod extending upward a bit further, too.

The RCBS Lockout Die

RCBS offers their lockout die which is, in my opinion, the best option for preventing a double charge on a reloading press, if the press that has an open station.  If the case has an overcharge or an undercharge (or no charge), the lockout die locks the press, which positively lets you know that something isn’t right.  It’s a clever mechanical device that detects either and overcharge or an undercharge and then stops the process.

The RCBS lockout die. If the case has an undercharge or an overcharge, this device stops the reloading process.

Unlike Hornady’s powder cop die, the RCBS lockout die isn’t just a rod moving up and down.  The lockout die stops the show and forces you to check the cartridge that has locked up press movement.  I think it’s a much better approach.  The problem, though, is that you need that extra station on either a turret or a progressive press, and I don’t have that on the Lee Classic turret press (so for me it’s a nonstarter).  What it says to me is that if I were to buy a new press, I would want one that has an extra station.  I think the lockout die is a stellar idea; I just don’t have the real estate for it on my press.

The Bottom Line

I’m convinced that I had a double charge in the round that burst in my 1911.  I’m also convinced that it’s on my to prevent it from happening again.  As explained above, here’s what I’m doing:

      • I’m slowing down and paying attention to what I do.  There is no place for complacency in the reloading world.
      • I will continue to use my Lee Classic turret press, but I’m installing better lighting and standing up so I can see into the cartridge case.
      • I’m switching to a bulkier powder so that a double charge, if it ever occurs again, will spill over the case mouth and make a big, impossible-to-ignore mess.

So there you have it.  If you have any thoughts on any of the above, I’d sure like to hear them.


Never miss an ExNotes blog:


Check out our Tales of the Gun page for more firearms and reloading articles.

Shield Savvy

By Joe Berk

I promised an update on my Smith and Wesson 9mm Shield, and this is it.  I’ve put 2,500+ rounds through the Shield (all reloads with different bullets and powders).  Until I recently took my Shield to good buddy TJ, I was growing increasingly dissatisfied with the pistol’s frequent failures to extract, and I wasn’t alone.  If you Google “failure to extract” and “Smith and Wesson Shield” you’ll find a lot of people are having this issue.  My problem is in the rearview mirror, though, and my Shield is 100% reliable now.  That’s because of TJ.  I’ll get to that in a minute.

That target above?  It’s 50 rounds at 30 feet through my Shield, shooting offhand.  If you’re a reloader, here are the load specifics:

      • Jim Gardner 125 grain powder coated roundnose bullets (Jim sized these to 0.356 inch, which is his standard bullet).
      • Cartridge overall length 1.145 inches.
      • 5.4 grains of Accurate No. 5 propellant.
      • Lee factory taper crimp (light crimp; see below).
      • Ammo loaded on Lee Classic 4-Turret press.
      • Mixed brass.

Ordinarily, I tailor a load to the handgun, and I thought I would be able to do that relatively easily with the Shield.  I found that not to be the case.  The Shield seemed accurate enough with nearly every load I tried, but nearly all had reliability issues.  On the low end, the lighter loads didn’t have enough energy to cycle the action (a common enough problem on compact semi-autos).  Light, mid range, and hot loads all gave the Shield extraction issues.  The Shield experienced a failure to extract about every other magazine.   It was very frustrating.  I scoured the Internet forums for this issue and the opinions were all over the map.  Here’s a smattering of the drivel I found:

      • Don’t use Winchester ammo because the rims are smaller (I measured them; that was baloney).
      • Don’t use cast bullets because they hang up (I knew that was baloney).
      • Don’t shoot aluminum ammo (which I never do, anyway).
      • Don’t shoot 115-grain bullets.
      • Don’t shoot 125-grain bullets.
      • Don’t shoot 147-grain bullets.
      • Clean your gun after every round (seriously?).
      • Don’t limp wrist your gun (again, seriously?).
      • Don’t do this, don’t do that, don’t do this other thing…
      • Do this, do that, do this other thing…

It was all written by people who apparently love the sound of their keyboards clacking.  None of it was useful information.  I felt stupid for wasting my time reading it.


Help us keep the content coming:  Please click on the popup ads!


What I found was that the extraction problem occurred more with powder coated bullets than either plated or jacketed bullets.  Other than that, there wasn’t a lot of correlation between any of the load variables I could play with and the gun’s failure to extract propensity.  Then, during one range visit when I had a failure to extract, I fell back on my failure analysis background.  I put the loaded gun down on the bench (being careful to keep it pointed downrange) and took a photo with my iPhone.

A cartridge case caught during extraction on the mouth of the case immediately below it.

Wow.  How about that?  It was apparent that the case being extracted was hanging up on the case mouth of the round still in the magazine, and it was a strong enough obstacle to pull the extractor off the rim.  This brought up a lot of questions in my mind centered on the crimp and the bullet.  The Gardner bullets have a slight ramped step just north of the crimp.   And when I crimp a bullet for a semi-auto, I put a slight taper crimp on it with the Lee taper crimp die.  I want enough of a crimp to remove the case mouth flare (part of the reloading process to assure the bullet will enter the case mouth without shaving lead or copper), and enough to assure the cartridge will chamber easily.  Maybe I didn’t have enough crimp, I thought, and that was causing the case being extracted to hang up.

One of my reloaded 9mm rounds with a taper crimp and a Gardner powder-coated bullet.

I examined my ammo and I thought it looked good (actually, I thought it looked great; like most reloaders, I enjoy looking at my finished ammo).  But, to make sure, I loaded another box with as much taper crimp as I could get out of the Lee die.  Lee is right when they say their taper crimp die makes it impossible to deform a case: I put a very pronounced crimp on all the cartridges in the next box of ammo.  But that wasn’t the answer, and it created a new problem.  With a semi-auto like the 9mm or the .45 Auto, the cartridge headspaces on the case mouth.  When I used a more pronounced crimp, I started getting misfires.  The rounds were going too far into the chamber, and the firing pin wasn’t igniting the primers reliably.  Nope, more crimp wasn’t the answer.

At this point, I was getting a little frustrated.  All these problems aside, I wanted to like my Shield.   I wanted to use it as my concealed carry weapon, so I needed the thing to be reliable.  Faced with this issue, I knew it was time for what works every time:  A visit to TJ’s Custom Gunworks.

TJ examined the Shield.  He observed that the magazine positions the first cartridge in the magazine unusually high in the gun, and that was probably aggravating the failures to extract.  But there’s not really anything you can do about that.  It’s the gun’s design.  It is what it is.

The Shield’s magazine sits relatively high.
A loaded round waiting to chamber when the Shield’s slide returns to battery.

TJ then took a look at the extractor.  It was pretty dirty with combustion residue, but he felt it should work.   TJ, honest as always, told me he could polish the ramp and the chamber (they come from the factory pretty rough), but he didn’t know if that would fix the failures to extract.  I asked TJ to proceed.

A photo from TJ showing how dirty my extractor was. Even though it was funky (shame on me), TJ felt it would not have caused the extractor to slip off the case rim.

Here are a couple of photos of the chamber and the ramp as they come from the Smith and Wesson factory.   The Shield always fed and chambered reliably; it was only the extraction that was an issue.  TJ explained that if the chamber is rough, it can hang on to the fired case as it is being extracted.  I’ve experienced that on other guns.  The Shield’s chamber and its ramp looked about like I’d expect them to look on a mass-produced pistol, which is to say not very good.  I asked TJ to work his magic on both the ramp and the chamber.

The Shield’s feed ramp and chamber as delivered from the factory. Rough, but not ready.
Another view of the factory Shield feed ramp. It looks like it might have been cut by hand with a dull chisel.

TJ did his usual excellent job, and here’s what things look like now.

Pure TJ magic.
What a good ramp looks like.  Slick.  Smooth.  Shiny.

TJ told me he also put a slight undercut on the extractor to allow it to get a better grasp on the case rim.

The Shield’s extractor, as seen from the bottom. This is the piece that pulls the fired case out of the chamber. TJ undercut the area indicated by the arrow to give the extractor a better grip on the case.

I picked up my Shield a few days later and went to the range that afternoon. The Shield is now what it is supposed to be.  You saw the target at the top of this blog.  I fired 50 rounds without a single failure to extract and eject.  The gun just feels a lot smoother and slicker now.  My Gardner bullet and Accurate No. 5 load is perfect.  And the recut extractor drops the cartridges in one nice small pile on the floor behind me.  Wow.  I’m impressed.  Then, just to make sure (and because I was having so much fun) I fired another box of 50 rounds (again, with ammo loaded on the Lee Classic Turret press using the load at the top of this page).

Another target, another 50 rounds. Reliable as death and taxes, and accurate. Now, the Shield is as it should have been from the factory (thanks to TJ).

The Lee Classic Turret press does a magnificent job, and now, so does my Smith and Wesson Shield.  It’s the way the pistol should have come from the factory.

It’s bothersome that most of my recent gun purchases have required additional work to get them to perform the way they should.  In my former life as an aerospace manufacturing guy, I used to manage organizations with machine shops.  I know it would cost a little more for the gun companies to do the kind of things TJ did to my Shield (and several other guns, for that matter).  I wish the gun companies would do that; they ought to just hire TJ as a consultant (he knows what they need to do).  The bottom line here? If you have a Smith and Wesson Shield and you want it to be what it is supposed to be, get in touch with TJ.

There are a lot of things I like about the Shield.  Accuracy and illuminated sights are at the top of the list.  You can get a feel for its accuracy from the targets shown here.  None of this was bench rested; it was all shooting offhand on an indoor range with banging and clanging and brass flying all around me.

I found that after firing a a box of ammo, gunshot residue tends to occlude the sides, front, and rear of the front sight, and that causes the red to glow a lot less.  But that’s a minor point.  The Shield’s high visibility sights are great.

Holstered, the S&W Shield is about the same size as the Rock Island Compact 1911.
Another Shield-to-Compact-1911 comparison: The holstered Shield on top of the holstered 1911. Length and height are about the same.
The Shield is narrower than the 1911, and much lighter. It should be easier to carry concealed.

I bought a Bianchi leather holster for the Shield.  It’s similar to the Bianchi I use with my Compact 1911.  When I put the Shield in its holster I was surprised:  It’s really not any smaller than my Compact 1911.  It’s a bit narrower, but by the time both guns are holstered, the overall width is about the same.  Where the Shield has a clear advantage, though, is weight.  And even though the Shield with its polymer frame is much lighter than the Compact 1911, the recoil is quite a bit less than the .45.  Now that the Shield has been made more reliable by TJ, it will make a good concealed carry gun.  Incidentally, TJ worked his magic on my 1911, too.  It’s one of the most reliable handguns I’ve ever owned.

Ten rounds from the Compact 1911, ten from the Model 60, and ten from the Shield. All are in the 10 ring, 28 of the 30 are in the X-ring.

Never miss an ExNotes blog:

TJ’s Latest Custom Handguns

By Joe Berk

I had lunch with good buddy TJ (of TJ’s Custom Gunworks) recently and he showed me an LAR Grizzly .45 Winchester Magnum handgun he recently completed.  It’s wild.  It’s the one you see in the photo above and in the additional photos below.   Here’s TJ’s description:

The Path of Bushido, a custom L.A.R. Grizzly .45 Winchester Magnum (it’s a supersized 1911). This handgun is Duracoated with Skulls of Death and Kanji characters depicting the seven Samurai virtues of the Bushido. This magnum features the typical 1911 match action, trigger, and reliability work, as well as barrel and bushing clearance reduction. The gun also has melted edges, a speckled Duracoat finish, a Bullet-guide rod, and Millett target sights with orange DayGlo on the front.

The photos can only begin to the do justice to this stunning handgun (trust me, I’ve seen it in person).  And that .45 Win Mag cartridge…think of it as the illegitimate offspring of the already-powerful .45 ACP cartridge (my favorite, by the way) and the .44 Magnum.  It’s a very impressive hand cannon.

One of the things I like best about TJ’s latest creation is the Millett sights.  In my opinion, there are none better.  I have these on both my Rock Island Compact 1911 and my bright stainless Colt 1911, and TJ is the pistolsmith who installed them on both guns.

If you were wondering about the Bushido emblems on the Grizzly, here’s an explanation:

I asked TJ what the Grizzly looked like before he worked his magic, and TJ shared this photo with me:

At the end of our visit, I asked TJ what else he’s been up to lately.  Take a look.  These are magnificent.  This first one is a SIG P239 with black camo treatment, a jeweled hammer, a rounded trigger, and lots of internal smoothing and reliability enhancement.

This next one is compact Colt Agent 1911 with Tiger Duracoat and a matching a matching TJ’s knife.

This is another compact 1911 (a Colt Defender) with a camo surface treatment and all the internal reliability action work.  It’s not easy to get a compact 1911 to perform, but TJ sure did it on mine.  I’ve put thousands of rounds through my TJ-customized Rock Island Compact.  TJ took what was a relatively unreliable gun and turned it into a masterpiece.

Here’s a TJ-modded Ruger Match Champion revolver, with jeweled bits, recontoured trigger, and an action job.

One last photo…this is a SIG P220 grip in which TJ custom inlayed the US government insignia.  TJ does a lot of work for senior government folks here and abroad.  It’s cool stuff.

I’ve had six handguns and a rifle customized by TJ, and every one of them is a stellar example of his craftsmanship.  These include my Model 59, a bright stainless Colt 1911, my MacManus Colt 1911, the Rock Island Compact, a Model 60 Smith and Wesson snubbie, a Ruger Mini 14, and my new Colt Python.   In addition to my guns, folks who follow the ExNotes blog took my advice and had TJ work on their guns, like Marty with his custom Colt Combat Commander, Bob with his Beretta 92, and others who are not listed here.  You might have noticed that TJ advertises here on ExNotes.  If you want to reach the folks who follow the blog, you might consider doing so, too.   You can contact us at info@ExhaustNotes.us and you can reach TJ by clicking on the link below.


Two Bodacious Belly Guns

Not too long ago, I posted the Model 60 handjob blog, which was a story about fitting a new hand to the revolver to correct an out-of-time situation.  When I took the reworked Model 60 to the West End Gun Club to check its performance, I brought along my Rock Island Compact 1911.  Both guns are on my concealed carry permit and I thought it might be cool to rapid fire on the police qualification target at 7 yards.

As you can see from the photo above, the guns appear to be comparably sized, but that photo is a bit misleading.  I don’t feel like I’m printing with the Compact 1911 (you know, allowing the gun’s outline to standout against my shirt), but the 1911 does hang heavier and it presents a bigger shape under an untucked shirt.   I’ll get to the specs of both guns in a minute, but first let’s take a look at how they compare on target.  The first target is the Model 60; the second is the Rock Island Compact 1911.

50 rounds, rapid fire, at 7 yards from the Smith and Wesson Model 60 (all fired double action).
50 rounds, rapid fire, at 7 yards from the .45 ACP Rock Island Compact 1911.

I shot both targets using a two-hand hold from the standing position.  Both are accurate and close enough, as they say, for government work.

The loads were fairly stiff.  I used a cast 158-grain truncated cone bullet with 4.4 grains of Unique propellant for my .38 Special ammo, and a 185-grain cast semiwadcutter bullet with 5.0 grains of Bullseye for the .45 ACP.  Given the choice, I wouldn’t want to be hit by either one.  But I’m betting that the 1911 hits harder.

.38 Special and .45 ACP reloads. Both were fairly stout. The 158-grain truncated conical bullet .38 Special loads are potent.  The .45 ACP semiwadcutters come from Jim Gardner’s casting operation, and they are accurate and hard hitting.

The Model 60 Smith and Wesson weighs 19 ounces empty and it carries 5 rounds (which adds another 1.8 ounces, for a total of just under 21 ounces).  The 1911 weighs 34.6 ounces empty and it carries 7 rounds in its 7-round mags (that adds another 3 ounces, for a total of 37.6 ounces).   The loaded 1911 weighs almost twice as much as the loaded Smith and Wesson revolver.  Anything you measure in ounces may not seem like a lot, but trust me, when you carry it all day, it is.  From a weight perspective, the Model 60 has an advantage.

I know all you keyboard commandos want to tell me I could carry 8 rounds in the 1911, but I won’t carry with a loaded chamber in a semi-auto.  Save your breath if you think I should.  The Israelis don’t carry with a round chambered and they seem to know what they’re doing, we didn’t carry with a round chambered when I was in the Army, and I’ve seen more than a few accidental discharges from folks who carried with a round chambered in a semi-auto handgun.  Nope, it’s an empty chamber for me.  Your mileage may vary.

From an accuracy perspective, you can see from the targets above that I shoot the 1911 better.  I don’t think the 1911 is inherently more accurate than the Model 60.  But in my hands, and with my old eyes, I can hold a tighter group with a 1911.  Most of that has to do with my 1911’s sights.  I have a red ramp/white outline set of Millet sights that good buddy TJ (of TJ’s Custom Guns) installed on my 1911, and those things are the best handgun sights I’ve ever used.  The Model 60’s sights…well, let’s just say it’s a game of hide and seek with them.  The 1911 gets the nod from an accuracy perspective.

You might think 7 versus 5 rounds is a tremendous advantage.  On paper, maybe.  In real life, the average number of rounds fired by a concealed carry permit holder in a confrontation is less than 2 rounds.  It’s kind of a draw from a capacity perspective, at least from my perspective.  If you’re a keyboard commando, you may feel differently.  Go post your opinions on Facebook; they need folks like you.

So what’s my preference?  Most of the time, it’s the 1911, but I love both of these handguns.


More Tales of the Gun!


Never miss an ExNotes blog:  Sign up here for free!

A Custom TJ Combat Commander

We’ve featured TJ’s Custom Gunworks a few times here on the ExNotes blog.  I’ll take credit for influencing another good buddy who had TJ work his magic on a Colt Combat Commander, and this one is a honey.  Colt’s Combat Commander is a 4.25-inch barreled version of the 1911.  This TJ custom auto is hard chromed and it is a stunning example of TJ’s workmanship. You can see it in the photos and you can see the results on the range.

The Combat Commander shown here has had the following modifications:

      • Polished hard chrome finish over stainless steel.
      • Throated and polished barrel and frame.
      • Fitted and polished extractor.
      • New match trigger and action job.
      • New match hammer.
      • Smoothed breech face.
      • Polished full length guide rod.
      • Satin polish on barrel hood and chamber.
      • Extended slide catch.
      • New and rounded steel mainspring housing.
      • Trigger pull set to 3.0 lbs.
      • Melted sharp edges.
      • Reduced strength and smoothed magazine release button.
      • DayGlo red front sight.
      • Honduran rosewood burl grips.

I’ve seen this gun in action on the range and it is a thing of beauty.  I’ve had a few guns customized by TJ, and I’ve steered a few friends there. I’ve had six handguns and a rifle customized by TJ, and every one of them is a stellar example of his craftsmanship.  These include a Model 59, a bright stainless Colt 1911, the MacManus Colt 1911, the Rock Island Compact, a Model 60 Smith and Wesson snubbie, a Ruger Mini 14, and a new Colt Python.  TJ’s emphasis is on reliability and perfection and on all of my guns he met those objectives in every case.  When it comes to custom firearms, it doesn’t get any better than TJ’s Custom Gunworks.


You can read more firearms features on the Tales of the Gun page.


Enjoying the ExNotes site?  Want to help support us?


Never miss an ExNotes blog.  Sign up here for free!

RIA Compact: Load vs Point of Impact

My Rock Island Armory Compact 1911 is a favorite.  I carry with factory ammo (Winchester’s 230-grain hardball, like I had in the Army).  But that’s not what I shoot on the range; there, I shoot reloads exclusively.  This blog answers a question keeping all of us awake at night:  Where do different loads shoot compared to factory ammunition?

What you’re going to see aren’t tiny target groups.  The Rock Compact 1911 is a concealed carry handgun. I know Facebook trolls can shoot dime-sized 1911 groups at 100 yards with both eyes closed. What you see below are my groups.

I have three favorite loads for my .45.  The first is one I’ve been shooting for 50 years.  That is a 230-grain cast roundnose bullet (I like Missouri bullets, although I’ve had good luck with just about any cast 230-grain roundnose), 5.6 grains of Unique, whatever primers I can find, and whatever brass I have on hand.  I use the Lee .45 ACP factory crimp die on all my ammo; overall length is 1.262 inches.  This load is a bit lighter than factory ammo, but not by much.  The good news is it feeds in any 1911 (it doesn’t need a polished ramp and chamber) and wow, it’s accurate.

From left to right: 185-grain Gardner powder-coated cast semi-wadcutter, 200-grain Missouri cast semi-wadcutter, 230-grain Missouri cast roundnose, and Winchester 230-grain full metal jacket hardball .45 ACP ammunition.

The next load is a 200-grain cast semi-wadcutter bullet (I use Missouri or Speer), 4.2 grains of Bullseye, anybody’s primers, and mixed brass.  Cartridge overall length on this one is 1. 255 inches. The semi-wadcutter profile usually needs a polished feed ramp and chamber.

The third load is a 185-grain cast semi-wadcutter bullet and 4.6 grains of Bullseye.  For this test, I had CCI 350 primers.  My usual 185-grain cast load uses 5.0 grains of Bullseye and a CCI 300 primer, but primers are tough to find these days so I dropped the powder down to 4.6 grains.  Lately I’ve been using Gardner powder-coated bullets.  They look cool and they’re accurate.  Cartridge overall length is 1.260 inches.  Like the load above, this one needs a polished ramp and chamber, too.

And then there’s factory ammo.  I use 230-grain hardball from Winchester.  Just for grins I measured its overall length; it is 1.262 inches.  Factory hardball typically runs between 1.260 and 1.270 inches.

Good buddy TJ over at TJ’s Custom Gunworks polished my Compact’s ramp and chamber (it feeds anything), he recut the ejector (no more stovepiping) and fitted a better extractor, he polished the barrel and the guide rod, he engine-turned the chamber exterior, and he installed red ramp/white outline Millett sights. The Compact didn’t need a trigger job; it was super-crisp from the factory. I added the Pachmayr grips.  You can read more about the Rock here.

All shooting was at 50 feet, all groups (except with factory ammo) were 5-shot groups, I used a two-hand hold, and my point of aim was 6:00 on the bullseye.

I shot my first set of four groups with the 185-grain cast semi-wadcutter load.  As you can see on the target below, the groups move around a bit.  That notwithstanding, the center of the groups seems to be pretty much right on the point of aim.

185-grain Gardner bullets and 4.6 grains of Bullseye.

About that 4.6 grains of Bullseye with the CCI magnum primers:  The standard load (5.0 grains of Bullseye and regular primers) is a much more accurate load.

The next four groups were with the 200-grain cast semi-wadcutter.  The center of these groups is maybe just below the point of aim.  Maybe.  It’s very close to the point of aim.

200-grain semi-wadcutter Missouri cast bullets.

Next up was the 230-grain cast roundnose load.  The groups are about 2 inches below the point of aim and maybe slighly biased to the left, but they’re still pretty close.

230-grain cast roundnose Missouri bullets.

My last shots were with the Winchester 230-grain roundnose factory ammo.  I used a full-sized silhouette target (not the four-targets-per-sheet targets you see above) and again, I held at 6:00.  The point of impact is just about at point of aim (maybe a scosh lower).

On target with 230-grain Winchester hardball ammo.

The bottom line?  The Compact shoots different loads to different points of impact, but the difference isn’t significant.  Predictably, the 230-grain loads shoot a little lower than the 200-grain loads, and the 200-grain loads are a bit lower than the 185-grain loads.  Factory ammo shoots essentially to point of aim.  The differences wouldn’t matter on a real target.  For a fixed sight combat handgun all are close enough for government work.

One last comment:  Every load tested fed and functioned perfectly with my TJ-modified Compact Rock.  If you want world class custom gun work, TJ’s Custom Gunworks is the best.

What’s next?  I’m going to repeat this test, but with a Turnbull-finished Smith and Wesson 1917 revolver.   That’s going to be fun.

A 1917 Smith and Wesson with Turnbull color case hardening. It, too, shoots the .45 ACP cartridge.

More Tales of the Gun!


Do us a solid:   Please click on the popup ads!

Here’s why you should click on those popup ads!

A Note From Bob on TJ’s Custom Gunworks

My good buddy Bob, who enjoys playing with things that go bang as much as I do, followed the stories I’ve done on my TJ-modified revolvers and pistols.  Bob wrote to ask if the guy really is that good.  He is, I said. In fact, he’s better.

Bob took the plunge and had TJ refine several of his guns.  Bob sent this note to me after he took his TJ-modified automatics to the range.


Joe,

I got my Berettas back from TJ. I initially took him a M-1951 and a 92 and when he was done with those I picked them up and dropped off another 92 for a Level 1 package and a Radom P-64 that I was having trouble with. Picked those up a few weeks ago and finally got to the range yesterday. Took the M-1951 and both 92s and what a difference. Just wonderful.

You were totally right about TJ. And I would like to do a guest blog at some point. Any tips?

Bob


Bob, thanks for the note and the photos, and the offer to write a guest blog.  We always love receiving them.  As for tips, if the question refers to writing, my advice is to just be yourself.  If it refers to shooting, that’s easy:  Focus on the front sight.   And thanks again!


Hey, all of our gun stories are here on our Tales of the Gun page!  Revolvers, autos, milsurps, lever guns, single shot rifles, reloading, and much, much more!


Never miss an ExNotes blog…sign up here for free!


Check out my custom guns from TJ’s Custom Gunworks!  I’ve had six handguns and a rifle customized by TJ, and every one of them is a stellar example of his craftsmanship.  These include my Model 59, a bright stainless Colt 1911, my MacManus Colt 1911, the Rock Island Compact, a Model 60 Smith and Wesson snubbie, a Ruger Mini 14, and my new Colt Python.  TJ’s emphasis is on reliability and perfection and he’s met both of those objectives in every case.  When it comes to custom firearms, TJ is in a class of one!

TJ’s Urban Camo Process

A couple of months ago I shared a photo of a very cool SIG 239 that good buddy TJ had finished in Urban Camo (it’s the one you see in the photo above).  I was intrigued by the finish, and as TJ walked me through the steps, I started to get an appreciation for how much work is involved.  Here’s the process as TJ explained it to me:

Step 1:  Disassemble, clean and inspect the firearm.
Step 2:  Sand blast or other surface preparation.
Step 3:  Apply base coat (black Duracoat for the gun you see above).
Step 4:  Add camo stickers to create pattern.
Step 5:  Spray light grey Duracoat.
Step 6:  Add more camo stickers to create pattern.
Step 7:  Spray dark grey Duracoat to create pattern.
Step 8:  Add more camo stickers to create pattern.
Step 9:  Spray base coat again (black Duracoat for the gun you see above).
Step 10:  Remove all camouflage stickers and inspect gun.
Step 11:   Overspray muting stripes (netted flat black).
Step 12:  Spray clear coat.
Step 13:  Clean excess Duracoat from holes, rails, etc.
Step 14:  Reassemble and oil firearm.

Here’s what it looks like as the gun proceeds through the urban camo application process:

The above makes for a good-looking gun and a durable finish.  After it’s fully cured, it’s relatively impervious to solvents or gun oils.

TJ can do other finishes as well, including a soft camouflage done without the tape described above (freehand spots or stripes).

TJ can also do speckling (like you see below), which is a good finish for hiding pitting and other surface imperfections.

If you would like to get a feel for a few of the other finishes TJ offers, you might take a look at his website at www.TJsCustomGunworks.com.

I’ve had six handguns and a rifle customized by TJ, and every one of them is a stellar example of his craftsmanship.  These include my Model 59, a bright stainless Colt 1911, my MacManus Colt 1911, the Rock Island Compact, a Model 60 Smith and Wesson snubbie, a Ruger Mini 14, and my new Colt Python.  TJ’s emphasis is on reliability and perfection and he’s met both of those objectives in every case.  It’s been money well spent.  When it comes to custom firearms, TJ is in a class by himself.


Model 60 S&W Load Test Results

A week or so ago I posted a load development plan for my .38 Special Smith and Wesson Model 60, and I recently finished the Model 60 load testing.  The Model 60 with its new Altamont grips and the custom work good buddy TJ did for me is surprisingly accurate.

Altamont grips on the Model 60. They improved accuracy significantly.

I tested four bullets and four different propellants at two different levels, and I fired two 3-shot groups with each load combination.  The one exception was the Hornady 148-grain swaged hollow base wadcutter bullet, which I tested with one propellant (Bullseye) at one level (2.7 grains).  I did that because the wadcutter load is my standard target load (and it’s what my Star progressive reloader is set up to produce).  The other bullets were the Hornady 110-grain jacketed hollow point, the Hornady 158-grain jacketed hollow point, and a cast 158-grain flatpoint bullet a local caster produces.

The four bullets used for this test: The 158-grain cast flatpoint, the 158-grain Hornady jacketed hollow point, the 110-grain jacketed hollow point, and the Hornady 148 grain hollow base wadcutter.
Four propellants used for this test: Unique, Power Pistol, Bullseye, and Winchester 231.

The propellants were Bullseye, Unique, 231, and Power Pistol.  As I mentioned above, all groups were 3-shot groups, and I fired each from a bench at 50 feet.  I tested for group size and for deviation from the aim point, and I used the standard NRA 50-ft slow fire bullseye target.  Point of aim was at 6:00 for all loads.

A few of the NRA 50-foot slow fire targets. I fired several groups on each target, marking my shots as I progressed. I took about 3 hours to test fire all loads included in this test.

The group size/accuracy results follow.

In addition to recording group sizes, I was also interested in where the groups printed with respect to my point of aim.  I held my aim at 6:00 on the bullseye.  Here’s what I found.

With regard to the group size testing, some of the loads were consistent, and others had some variability I think was mostly due to me. Many of the groups that went above, say, 2.3 inches or so in group size had two of the three shots right next to each other and then one was a flyer that opened the group up.  I attribute that to pilot error.  Yeah, I know, if I used a machine rest I could have eliminated that, but I don’t have a machine rest.  You get what you get with this test, and that’s me.

The 110 gr Hornady JHP shot significantly low with all loads, and its accuracy was okay but not great. It was close enough, I think, for a defense round, but this bullet shot 4 to 6 inches low pretty consistently. That’s because the lightweight bullet squirts out of the barrel before the muzzle has a chance to rise much in recoil (so it hits lower).  You might think that these 110 grain bullets would offer a significant recoil reduction, but if that occurred, I couldn’t feel it (the recoil felt about the same as the 158-grain loads).  My conclusion is that, for me, 110-grain bullets are a nonstarter for the Model 60.

My standard target load (2.7 gr Bullseye and wadcutter bullets) grouped relatively well, although for me it shot about an inch to the right in the Model 60.  That’s probably close enough for government work.  It’s good to know this load works, because that’s the load my Star reloader is set up to make (and I make a lot of them).

The 158-grain bullets are obviously what the Model 60 is set up to shoot, and of the two tested, the best accuracy occurred with the 158-grain cast bullet and Winchester’s 231 propellant.  It’s a sweet load at either the high or low propellant level, and it shoots essentially to point of aim at 50 feet.

I can also load the 158-grain cast bullet with Bullseye on the Star reloader, and that load did okay at 2.8 grains of Bullseye.  The Star reloader has a small amount of adjustment in it for powder throw, but I would leave it at 2.7 grains (the same as the wadcutter load) if I loaded the 158-grain cast flatpoint bullets on it.  That’s close enough.

Overall, I was surprised at how accurate a little snubnose can be. It’s not dramatically different than larger target handguns. Some of this is undoubtedly due to TJ going through the gun and making sure everything is perfect. And some of it is due to the Altamont grips.  I sure enjoy shooting this handgun.


Help keep us in components:  Please click on those popup ads!


More Tales of the Gun.


Never miss an ExNotes blog…get a free subscription here:

TJ’s Bulldog

What does a professional, world-class pistolsmith use for his personal weapon of choice?

I asked good buddy TJ (of TJ’s Custom Gunworks) that question, and the answer was surprising.  This is a man who knows handguns inside and out, and a guy who is one of the top men in the world for custom-crafted combat handguns.  SIGs, 1911s, Colt and Smith revolvers and autos, and more.  A guy who could have just about anything he wanted.  His guns are carried by law enforcement officers, special agents, and others the world over.  So what is TJ’s personal sidearm?

It’s a highly-customized Charter Arms Bulldog, chambered in the mighty .44 Special cartridge.  It’s the one you see here and in the photo above:

As you might imagine, TJ did not leave the gun stock.  These are the custom features TJ’s personal .44 carries:

      • Satin brushed hard chrome finish
      • 1.5-inch barrel (cutdown from stock barrel)
      • Radiused and polished trigger
      • “Melted” (rounded – sharp edges removed) contours throughout
      • Night sights with orange DayGlo highlighting
      • Custom-contoured front sight
      • Level 1 action work
      • Action modified to double action only
      • MagNaPorted barrel
      • Bobbed hammer
      • TJ custom prototype laser grips (modified from Crimson Trace S&W grips)

TJ explained that double action is the only way he uses revolvers.  You know, there’s a school of thought that a good man with a double action revolver can fire faster than can one with a semi-auto handgun.  You can read more about that in Ed McGivern’s Fast and Fancy Revolver Shooting, a good read for anyone interested in improving their handgun shooting with a double action revolver.

TJ’s Charter Arms custom Bulldog is a very impressive weapon.  You can see more photos of it, and a few of TJ’s other custom guns, on the TJ’s Custom Gunworks website.


Help us bring more content to you:  Please click on the popup ads!


More Tales of the Gun!


Never miss an ExNotes blog:  Sign up here for free!