New Shoes for the Model 60

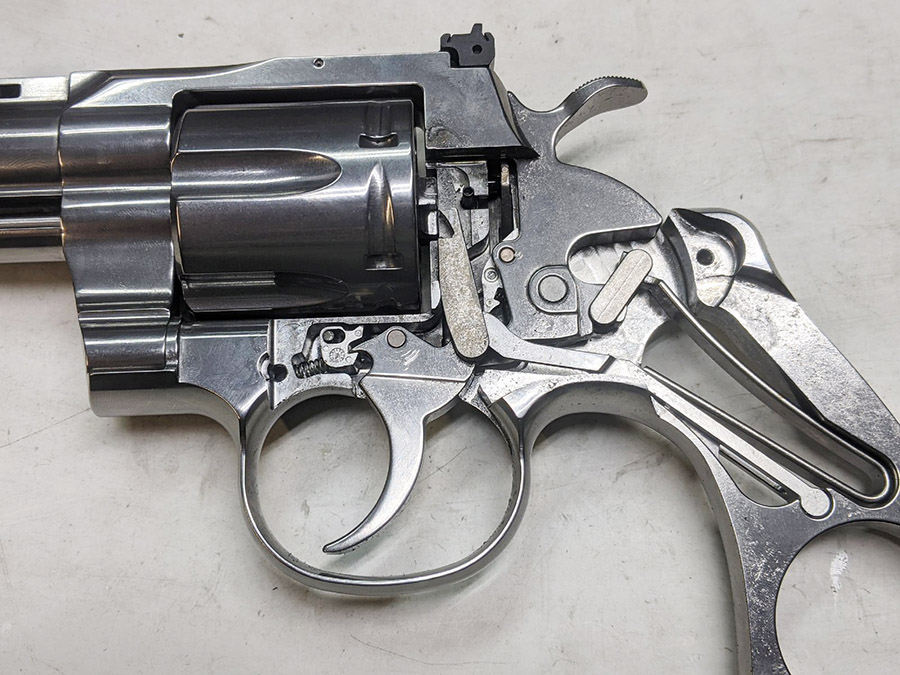
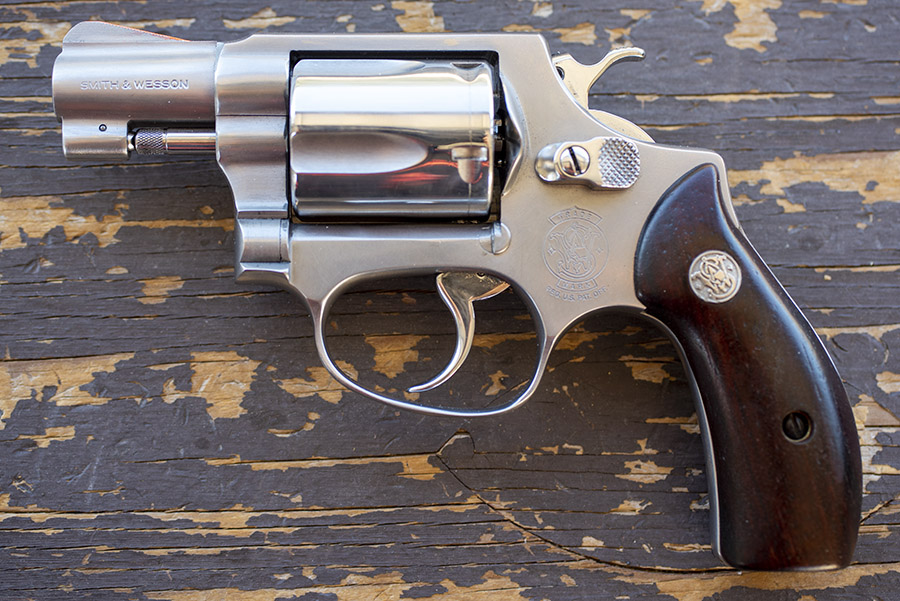
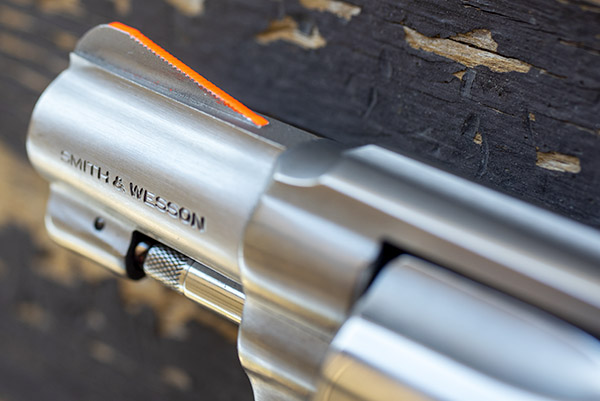
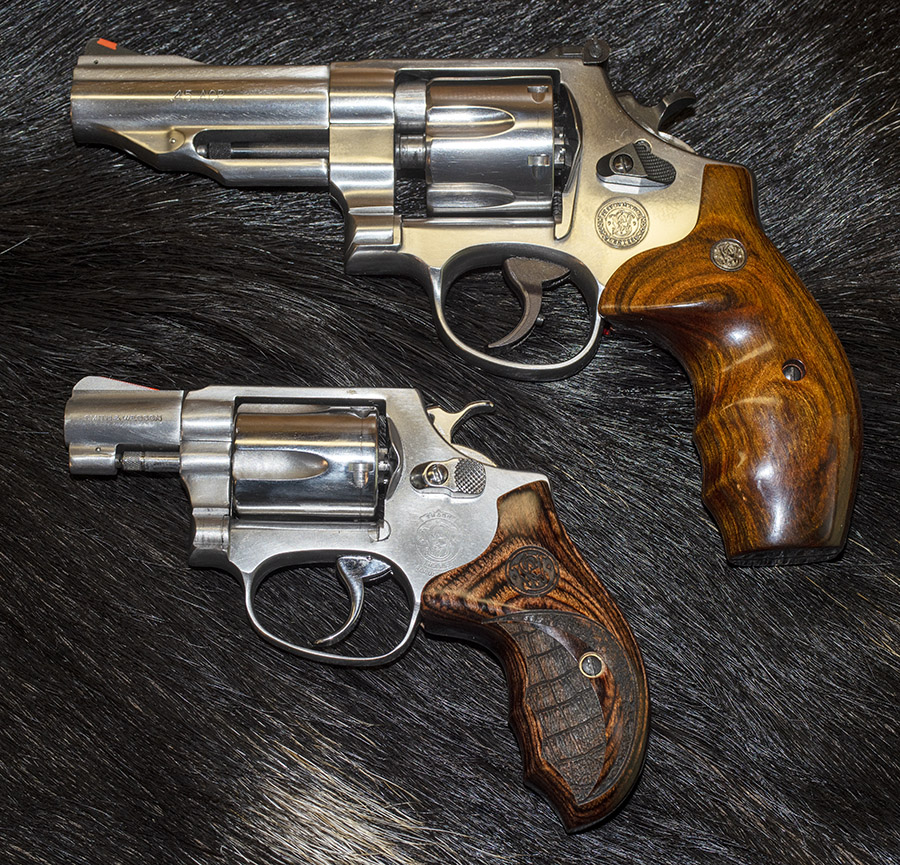
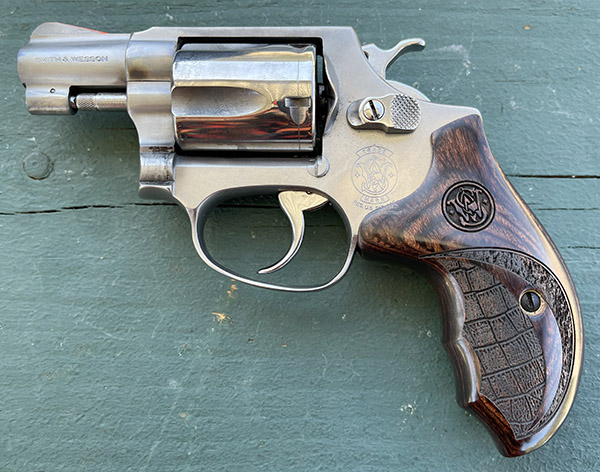
I visited with good buddy Paul up north last week, and while I was there he showed me a set of Altamont grips he had for his Smith and Wesson snubnose handgun.  When I saw the grips it was love at first sight, and I had to have them for my TJ-customized Model 60.  Paul was happy to oblige (thanks, Paul!), I came home with a new set of Altamont‘s finest, and they promptly went on the Model 60.  The Model 60 now looks like a scaled-down version of the big .45 ACP Smith & Wesson Performance Center Model 625, and I had to grab the shot you see above.   The 625 wears custom grips, too, but that’s a story for another blog.

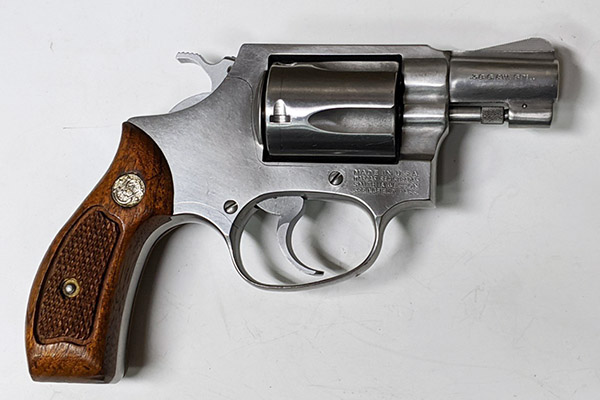
There’s no question I’ve gone overboard in getting grips for the Model 60.  It came with the stock checkered walnut grips (the original equipment on this handgun), as well as a set of Pachmayr rubber grips.  The Pachmayrs would have been better for shooting, but I wanted a set of smooth rosewood grips and I found them on Ebay.  They looked great, but they were painful to shoot.

The Model 60’s OEM checkered walnut grips. Photo by TJ of TJ’s Custom Gunworks.
Smith and Wesson J-frame uncheckered rosewood grips. These are the same size as the walnut grips shown above.
The problem with both the OEM walnut grips and the replacement rosewood grips is that they are too small. My pinkie wraps around beneath the frame and takes a pounding with each shot.

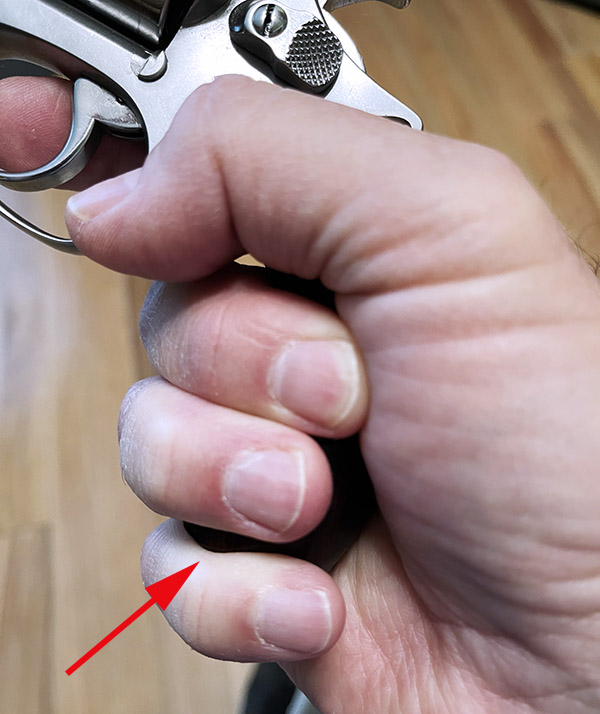
The problem with the stock walnut grips and the Ebay rosewood grips is that my little finger gets under the grip.  The recoil from the little Model 60 is significant (as we engineers like to say, f = ma), and it would pound my pinkie every time I fired it.  Think about putting your pinkie sideways on a table and having someone whack it with a hammer, and you’ll have a pretty good idea what shooting this little snubbie was like.

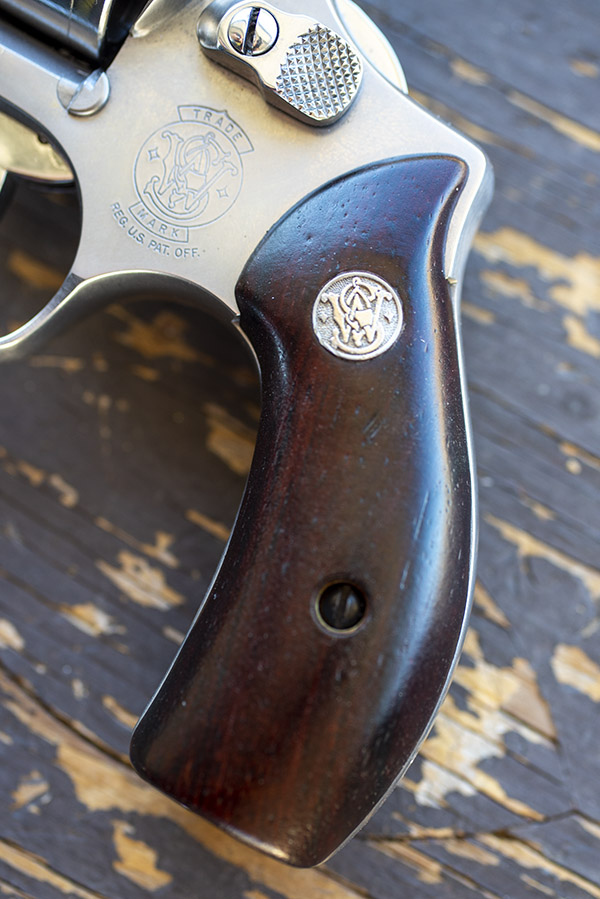
All that’s changed with the Altamont grips Paul provided.  Take a look.  They’re beautiful.

Custom Altamont grips for the Model 60. Note the stippling (a crocodile pattern!) and the laser-engraved S&W logo.
The Altamont grips installed on the Model 60.

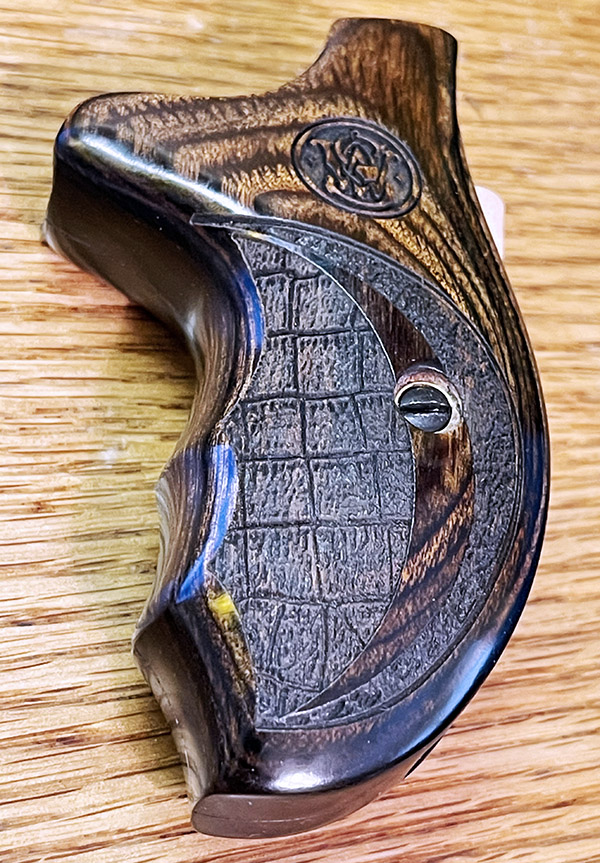
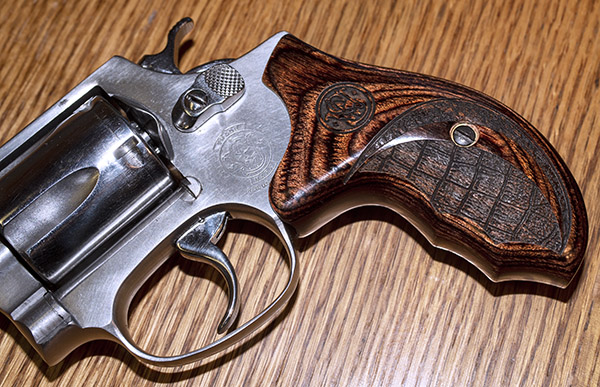
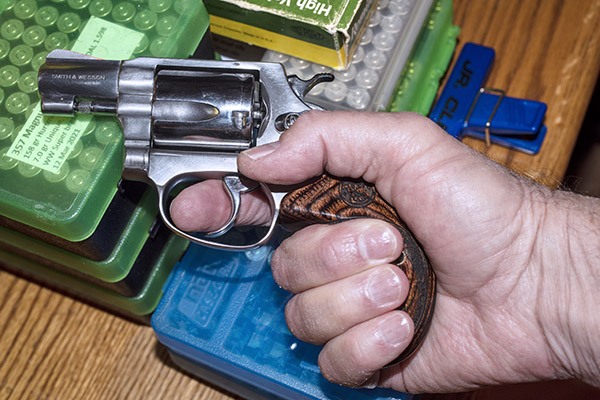
The new Altamont grips are extended just a bit below the frame and they have finger grooves.  It keeps my pinkie from getting underneath the frame, and with the new grips the Model 60 just feels right in my hand.

The Altamont grips provide a much better ergonomic hold. I like them a lot.

These new Altamont grips have a much better feel to them.  The wood-to-metal fit is way better than with the stock grips (the grips exactly contour to the Model 60’s frame, unlike the OEM grips).   The next obvious question, and the one that really matters is this:  How did the Model 60 shoot with the new grips?

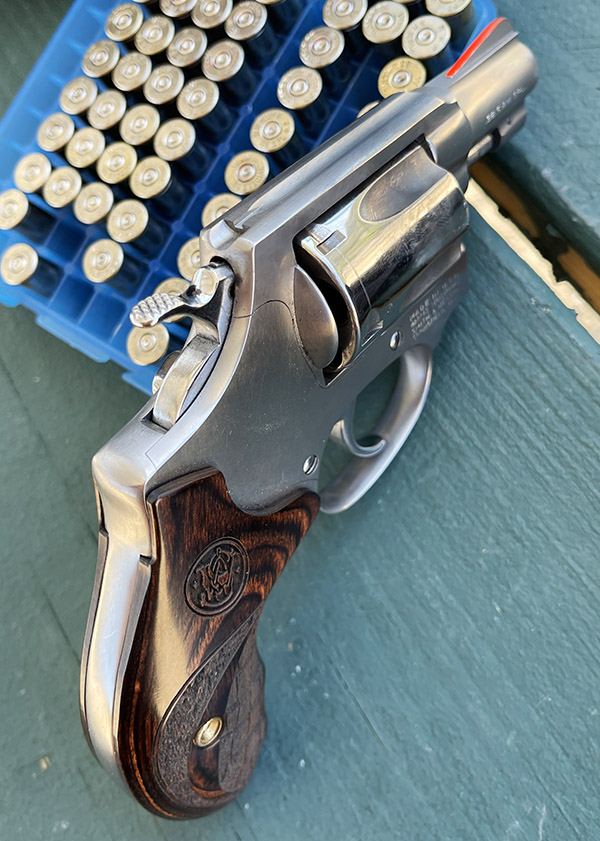
In a word, it was amazing.  The new Altamont grips completely changed the character of the Model 60.  First, a couple of shots of the Model 60 on the range:

The Model 60 became an entirely different animal with the Altamont grips. It’s much easier to shoot now.
Good buddy TJ reworked my Model 60 extensively. It has an action job, selective polishing (ejector rod, cylinder, trigger, hammer, and cylinder release), and a red ramp front sight. TJ’s Custom Gunworks is the place to go if you want a bespoke handgun.

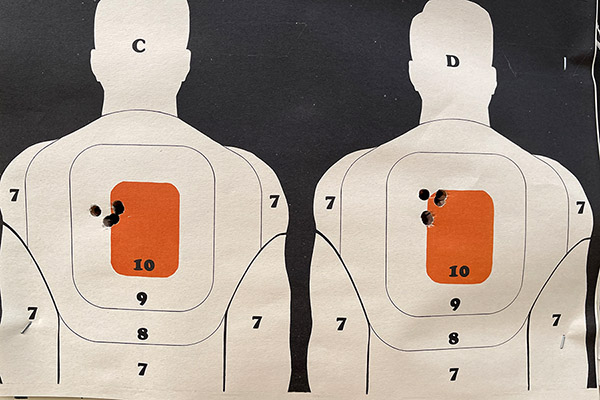
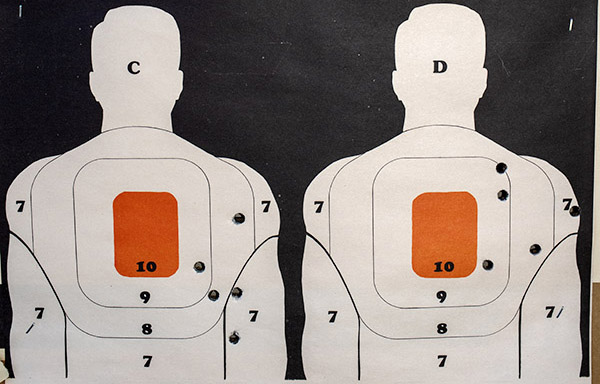
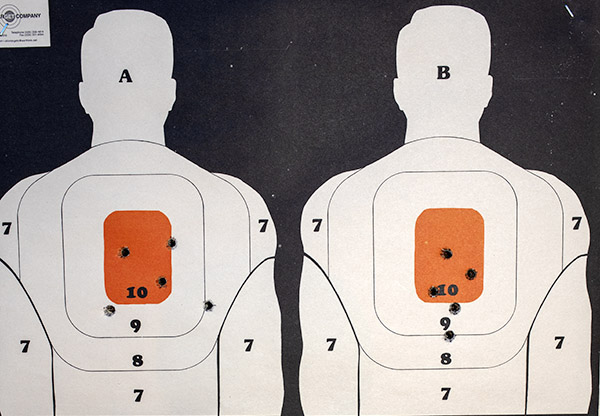
And here are two targets I shot at 15 yards (45 feet).  One has 10 shots on it; the other has 12 (each had two cylinders of 5 cartridges, and I had a couple left over to finish the box).

Two targets on the 15-yard line. That little Model 60 has near-target grade accuracy with the Altamont grips. If you have a snubbie, you need these grips!

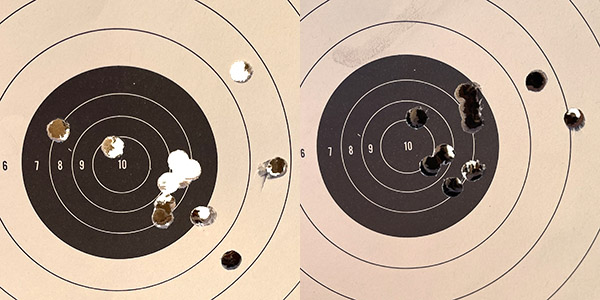
Several things are amazing about the above targets.  The first is that it was windy as hell out on the range this morning, and even though I was shooting with both hands from a bench, I could see the sights swimming around as the wind gusted.  The second is that the groups are dramatically tighter than they had ever been before with this handgun.  And the third is that the revolver shot almost exactly to point of aim.  I was holding at 6:00 on the 50-foot slow-fire NRA targets you see above.  My load was the tried and true .38 Special target load:  2.7 grains of Bullseye propellant with the 148-grain Hornady hollow base wadcutter.  Before, with the OEM and rosewood grips shown above, this same load shot a good 12 inches to the right of the point of aim, and the groups were huge.  Evidently, as the revolver discharged, it was rotating to the right in my hands with those much smaller grips (and beating the hell out of me in the process).  The Altamont grips brought the point of impact essentially in line with the point of aim and just a bit high, which is what I want in a handgun.

You may recall from a recent blog that I have a load development test planned for the Model 60, and I’ll be firing the cartridges I loaded for it within the week.  I was up north on a secret mission last week and I didn’t get to shoot during that time.  I recently read that if you go 72 hours without firing a handgun your skills deteriorate.  I believe that, and I wanted to get in a little shooting before I shoot for group size.  Hopefully, the Santa Ana winds through the Cajon Pass will die down, conditions will be right, and I’ll get to do some real accuracy testing in the next few days.  You’ll get the full report right here.  Stay tuned, my friends.


More Tales of the Gun are right here!


Never miss an ExNotes blog:  Subscribe here for free:

A TJ Trigger for My New Python

As I mentioned in a recent blog, good buddy TJ (of TJ’s Custom Gunworks) reworked the trigger on my Colt Python.  The original single action trigger had a lot of creep, it was heavy, and what surprised me most of all was that it actually cocked the hammer another few degrees before it released.   I was getting a little double action when firing single action.

That bothered me enough to call my contact at Colt Manufacturing, and I think he was surprised when heard about it, too.   He checked with his engineering department, and the word came back:  They had to do that to meet the California and Massachusetts drop test requirements.  I checked the California regulation and it requires dropping a loaded, cocked revolver from a height of 1 meter six times on a concrete surface without the gun firing inadvertently.   Think about that.  Dropping a loaded and cocked revolver, a .357 Magnum, onto a concrete floor.  Six times.

Me?  I’m going with an alternative approach.  I’m not going to drop my loaded, cocked, .357 Magnum revolver on a concrete surface even once.  It’s kind of a common sense approach, one that the politicians in California and Massachusetts apparently think we can’t be trusted to take.

A loaded revolver.   Cocked.  Dropped.  Six times.  Onto a concrete floor.  What were they thinking?

I’m not one to to argue Darwinism versus Divine Creation (we don’t do politics or religion here on ExNotes), but here’s a thought.  Maybe someone who drops a cocked, loaded, .357 Magnum revolver on a concrete surface six times, well, maybe Darwin was on to something.  Maybe that person needs to be culled from the gene pool.  Before you get your shorts in a knot, though, remember my preface:  It’s just a thought.

Anyway, back to the main attraction, and that’s the trigger job TJ did on the new Python.  TJ took photos of the Python’s internals (the complete parts interface is shown above in the large photo).  The photo below shows what was causing the trigger creep and the hammer movement during a single action trigger pull:

That’s the hammer on the left, and the trigger on the right.  You’ll notice that the hammer’s sear area (denoted by the red arrows) is kind of rough and it contains a hooked ledge of sorts.  That’s what was rotating the hammer back a few more degrees when the trigger was actuated in the single action mode.

TJ modified the sear to eliminate the hooked ledge and create the angles and surface finish the Python trigger-to-hammer interface deserves.  That’s what you see below.

Before he improved the sear interface, the Python’s double action trigger pull was 9 1/2 lbs; it is now 9 lbs.  The single action trigger pull was a very creepy 5 1/2 lbs; now there is no perceptible trigger or hammer movement before the hammer is released and the trigger breaks at a very clean 2 1/4 lbs.   The upgrade completely changes the character of the new Python.  I can’t imaging anyone buying a Python and not wanting to have the trigger cleaned up in this manner.  TJ is the guy to do it.

The next big question is:  Did the new trigger a make a difference in how the Python performed?  Hey, you tell me.  Here are two 5-shot groups shot at 50 feet with the improved trigger:

Those two groups were shot with my go-to .38 Special target load (a 148-grain wadcutter and 2.7 grains of Bullseye prepared on my Star reloader).  The group on the left measures 0.680 inches; the one on the right measures 0.830 inches.  Some of the .357 Magnum loads performed just as well.   I’ll share all my Python load testing results in a near-term future blog.  I didn’t adjust the sights during my load testing because I’d be moving them with each new load; I’ll zero the gun when I’ve selected the load I want for the Python.  I am a happy camper; these are phenomenally good results.

You might be wondering about now why you’d need a trigger job on a $1500 handgun.  Folks, this isn’t Colt’s fault.  They’re doing what they have to in order to meet a requirement imposed by people who don’t understand what they are doing.  Don’t get upset with Colt.  Do the right thing and vote.

If you have a Python and you’re not happy with the trigger, take a look at TJ’s Custom Gunworks and drop TJ a note.  Trust me on this:  You’ll be glad you did.


More Tales of the Gun!


Never miss an ExNotes blog!


More gun porn?  Check this out!

A TJ Roscoe

Roscoe:  It’s slang for a snubnose revolver.  No one is really sure where the term originated.   There are others…heater, rod, piece, burner, gat (that last one is easy, with me knowing a little bit about The Gatling Gun and all), but the origins of most of these terms are lost in the haze of handgun history.  And on that Roscoe terminology, I recently tumbled onto a very cool website I’ll be talking about a bit more here on the ExNotes blog.  But that’s for later.  This blog is about my Roscoe.

It’s a Model 60 (no dash) stainless steel Smith and Wesson snubbie, to be specific.  I mentioned it and the work my good buddy TJ was doing to it not too long ago, and it’s back.   And it’s awesome.  I had TJ do an action job, a little cosmetics work, and fix a problem or two.

First, the action work.  TJ lightened both the double and single action trigger pull, and he did it the old-fashioned way…lots of hand work, polishing, and fitting.  Here’s what the guts of my Model 60 look like after a TJ Level 1 action job:

I initially thought I’d have TJ put a high polish on the entire revolver (it would have been something north of $300 just for that work), but TJ was looking out for my best interests.  “I can do the whole revolver,” TJ said, “but it will look a lot better if you just have me do the ejector rod, the cylinder, the trigger, the cylinder release, and the hammer.” He was right.  It looks awesome.

Here are a few more shots of the high polish TJ put on these components.

The work on the trigger is lot more than just cosmetic.  TJ recontoured the face of the trigger in addition to polishing it, and it really makes a difference in double action shooting.  It’s much easier to find and control that precise instant when the hammer drops during double action shooting with the new trigger contour.

As part of the Level I action job, TJ also applied orange Day Glo to the front sight. It’s a small touch that works wonders. Finding and putting the front sight on target is much faster with this Day Glo treatment.  It’s not just a cosmetic thing.

I mentioned in a previous blog that the revolver was hard to open, and TJ found and fixed the root causes of that problem.  The ejector rod threads had stripped, the ejector rod’s axis wasn’t concentric to the bore, and the barrel underlug catch was not properly configured.  My Model 60 opens and closes the way it should now.  It’s slick.

Here’s another small detail I like…polishing the cylinder release and its slotted nut (it’s not a screw, even though it looks like one).  This little bit adds a nice touch to the revolver.

The grips are smooth rosewood, and they work well with their S&W emblems against the stainless steel revolver.  I like the look.

So, on to the main question:  How did the TJ-customized Model 60 shoot?  Superbly well, thank you.  I tried two loads with the new-to-me Model 60.  The first was the 148-grain wadcutter with 2.7 grains of Bullseye; the second was a 158-grain cast truncated flat point bullet with the same 2.7 grains of Bullseye.  I loaded both on my new-to-me freebie Star progressive reloader.  Yep, the Star is up and running now, and how it works will be a story for a future blog (in the meantime, you can read about the Star resurrection here).

I fired four targets at 50 feet and the results are interesting.  The first two targets were with the 148-grain wadcutter load (I use an Alco silhouette that has four small silhouettes on a single target sheet).

I shot the target on the left with a 148-grain Missouri double-ended wadcutter bullet; the one on the right is with a Hornady swaged 148-grain hollow base wadcutter bullet.  I’ll tell you more about those in a bit.

Before TJ did any work on my Model 60, the gun printed wadcutter groups a good 12 inches to the right (good if you want to hit your bad guy in the elbow, I suppose).  After TJ fixed the ejector rod issue I described above, the wadcutter bullets still shot a little bit to the right, but much less than they had before.  That rightward bias is a function of the load, not the gun (as you’ll see in the next set of targets).

The really good news is how the Model 60 performed with the 158-grain truncated flat point bullets.  Those puppies shot exactly to point of aim, and after warming up with the first group on the left target below, I got serious about focusing on that beautiful Day Glo front sight and shot the group you see on the right target.  Point of aim was at 6:00, and for a 2-inch barrel Roscoe, that ain’t bad shooting.

If you’re not familiar with all this wadcutter and truncated flat point bullet business, here’s your lesson for the day.  Let’s call it Bulletology 101.

The brass cartridge on the left is loaded with a Missouri 148-grain DEWC (double ended wadcutter) cast bullet; the nickel-plated 38 Special cartridge to its right is loaded with a Hornady 148-grain swaged hollow base wadcutter (HBWC).  The Missouri DEWC bullets are symmetrical (they’re the same top and bottom); the Hornady HBWC bullets have (as the name implies) a hollow base (you can see those bullets in the center of the photo above, one inverted and the other right side up).  The idea behind a wadcutter bullet is that it punches a clean hole in the target (that makes it easier to score).  The two bullets on the right side of the photo above are 158-grain cast truncated flat points. I have a local caster make these for me.

I am enjoying my Model 60 and the custom work TJ did on it, but I’ll tell you what…this puppy bites.  The recoil is significant (even with the lighter 148-grain wadcutter loads), and I’m a guy used to shooting big bore handguns.  That little .38 Special cartridge is nothing to sneeze at (Elmer Keith, Dirty Harry, and all the rest of the bigger-is-better gunsels notwithstanding).

For a defense gun, I can live with Roscoe’s recoil (it’s not a handgun I would put 100 rounds through during a range session, though).  For all you keyboard commandos out there, I know, I know.  You can do that all day long.  I can, too, with a 1911.  But this little Chiefs Special is a handful, and after firing 5 or 6 groups, I’ve had enough.  Your mileage may vary.   I know, too, that if I put the Pachmayr-style oversize rubber grips on it, it would be more manageable (and I own a pair of those).  But then it wouldn’t look like it does now, and I love that look.


Hey, there’s more to this story…TJ also did a little work on my Compact 1911.  The latest improvements on the Compact 1911 are coming up in a future blog, so stay tuned!


More Tales of the Gun are here!

Want silhouette targets for your next trip to the range?    Don’t pay exorbitant range prices.  Get them here.

Custom grips for a snubbie Smith and Wesson?  Take a look here!
Never miss an ExNotes blog…get your own free subscription!


Want to turn your handgun into a one-of-a-kind combat companion?  You don’t need to live out here; TJ’s work is carried daily by law enforcement officers (and others whose lives depend on their sidearms) all over the world.  Here’s where you need to go to get started: