
I’m going at the Star resurrection slowly, methodically, and piecemeal. I suppose I could completely disassemble the thing, clean, degrease, and polish all the bits and pieces, and then reassemble it all. But I’m a little bit scared I might not remember how it all goes back together, and I don’t want to spread everything out and make my workbench unusable during this resurrection. Nope, slow and easy is the path forward for me. I’m doing it one bite at a time and I am enjoying the meal.
The Star Powder Dispenser
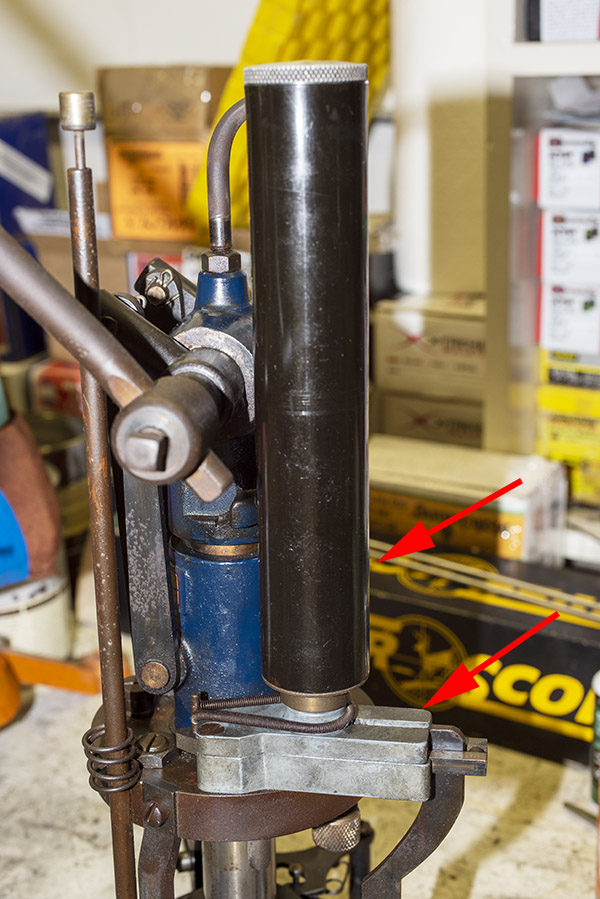
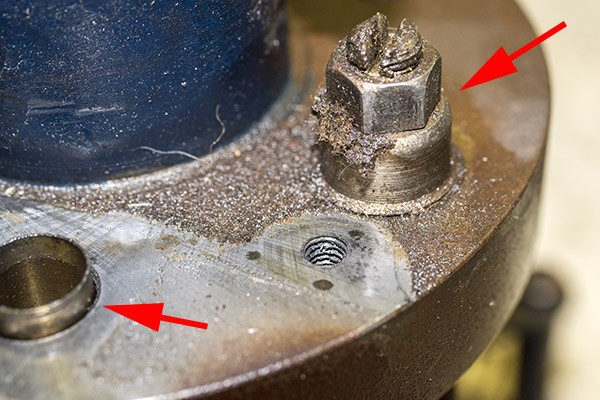
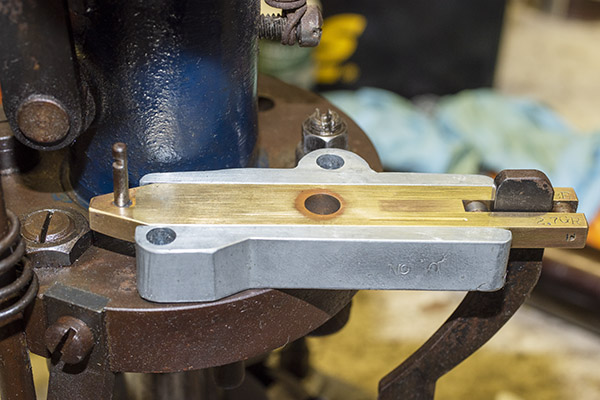
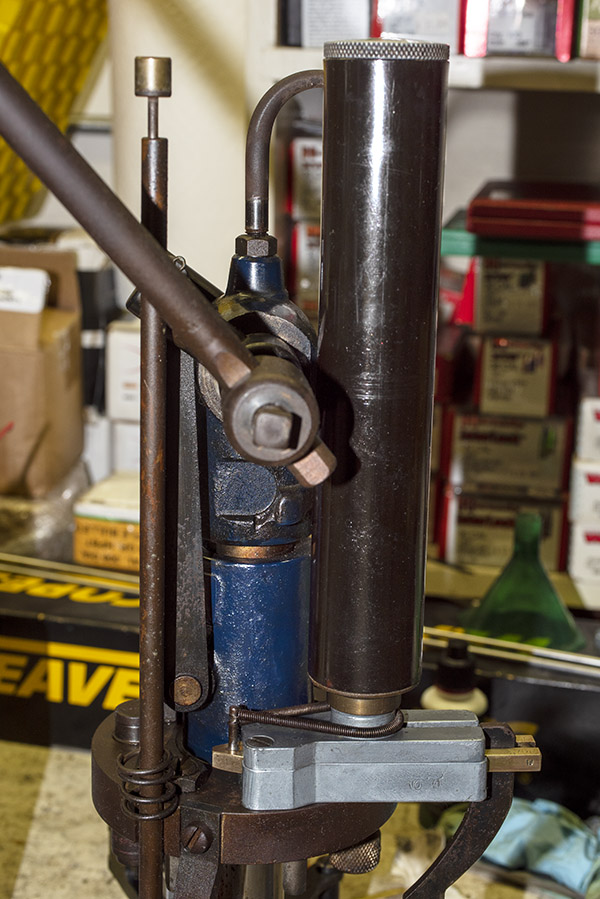
The first bite is the powder dispenser. It’s the deal that automatically dispenses the right amount of propellant each time the Star’s lever is pulled. It consists of a powder hopper subassembly (the upper arrow) and the dispensing mechanism (the lower arrow), as you see in the photo below.
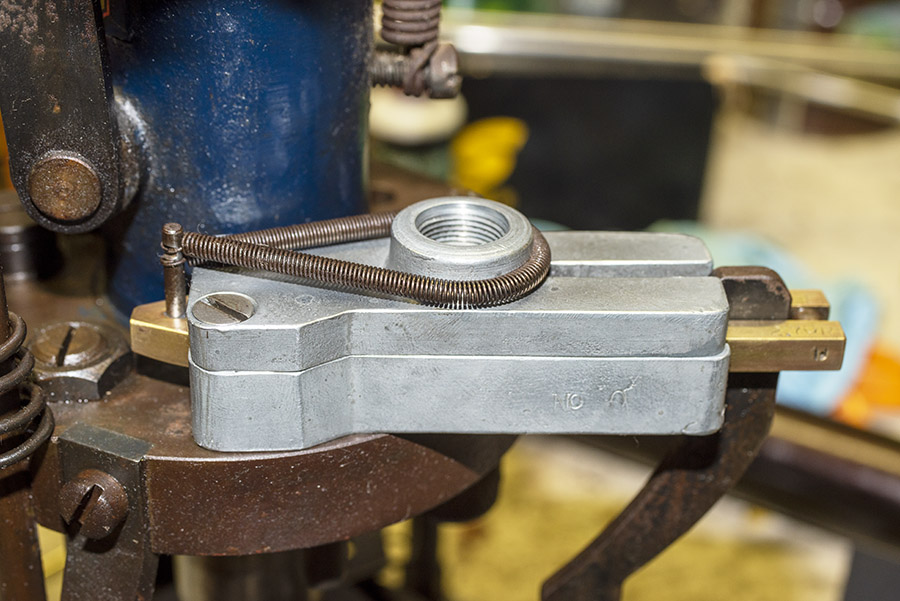
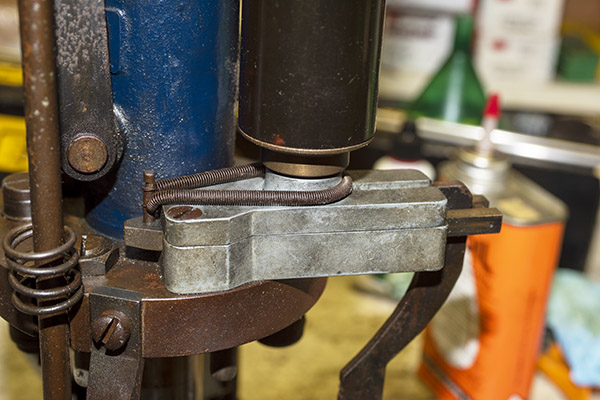
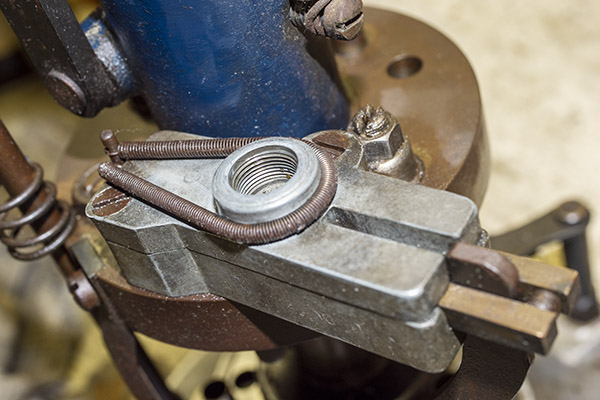
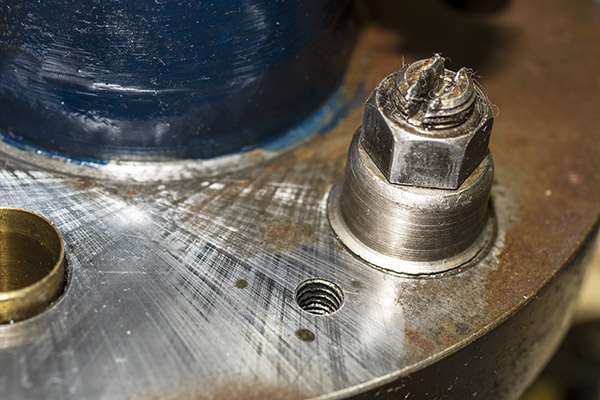
Here’s another photo of the dispensing mechanism. It mounts to the Star’s upper plate (Star calls this upper plate the tool head).
Powder Dispenser Disassembly
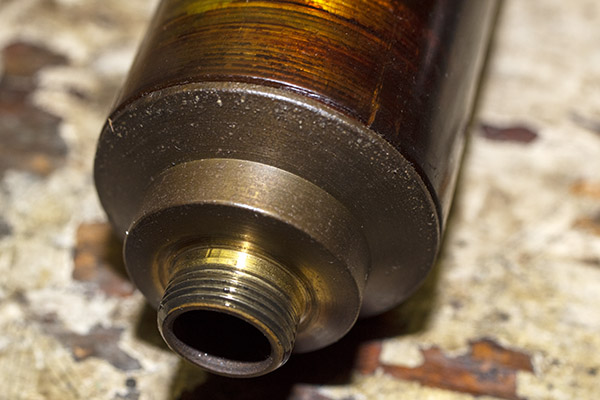
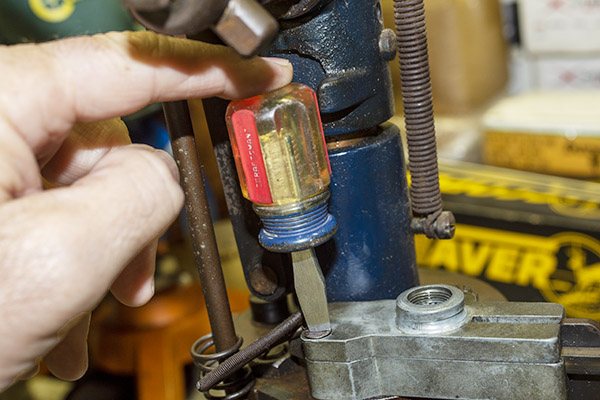
Here’s the bottom of the powder hopper. It’s brass and it mounts by threading into the powder dispensing subassembly. The silo that holds the powder is plastic, and I think when it was new the plastic was probably clear. It’s occluded with age. That’s okay. So have I.
This is the powder dispensing mechanism with the powder hopper removed.
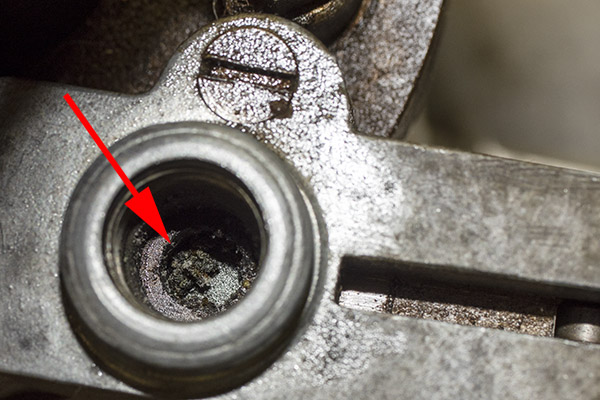
Looking inside the powder dispensing mechanism, there were still a few grains of powder left inside from the last time this reloading equipment was used. I’m guessing that was quite a while ago. My Nikon camera and Sigma
macro lens do a wonderful job for this kind of photography.
Incidentally, speaking of the last time this device was used…several of our readers suggested that the number etched onto the Star reloader’s base was a social security number. Before identity theft became the problem it is today, it was common for folks to etch their social security number on things to prevent theft. One of our blog readers located the man whose social security number was located on this Star reloader. That owner was born in 1926 and died in 2009. To my surprise, there’s a social security death index where you can find this information. Who knew?
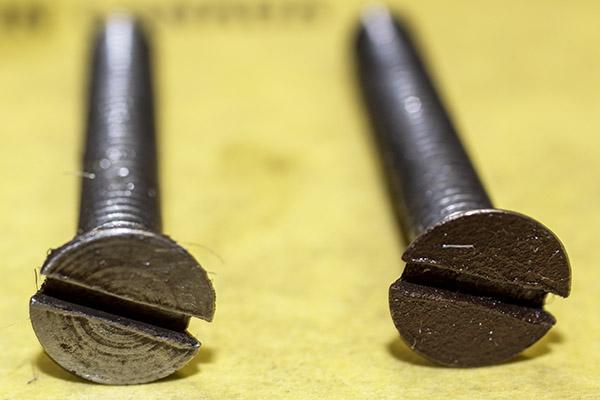
Back to the job at hand: The powder dispensing mechanism is secured to the tool head with two slotted screws. I had applied a bit of Kroil to these screws a day earlier and they unscrewed easily. Kroil
is good stuff.
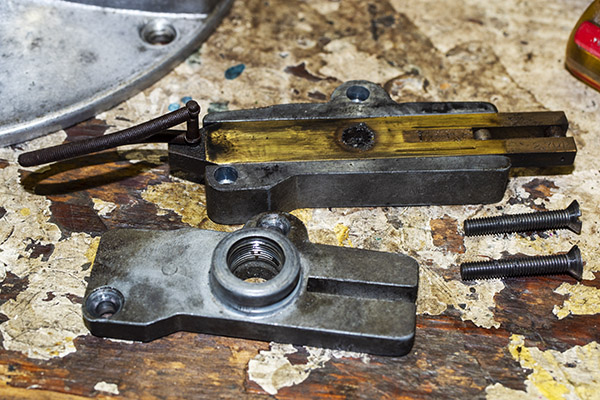
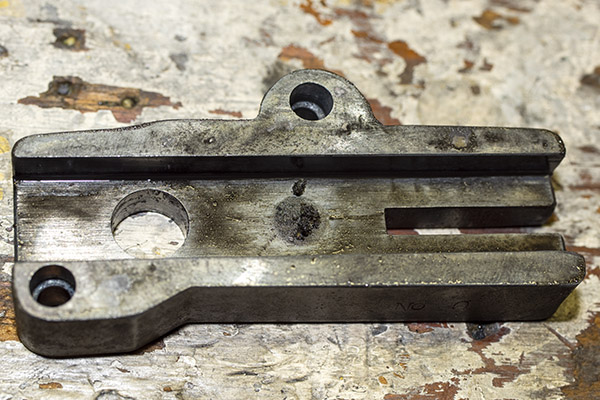
With the two screws removed, the photo below shows what the powder dispenser mechanism looked like. There’s a lower housing, an upper cover, a spring, the two attach screws, and the powder slide. It was all pretty funky when I disassembled it, but I took care of that.
The powder slide is what actually meters (determines the amount) of powder dropped into each cartridge. When the tool head is up (before you actuate the lever), powder drops into a cavity in the slide. When the tool head is lowered (when you actuate the lever), the powder slide is pushed to the left, the cavity containing the powder moves over the powder spout, and the powder drops through the spout into the cartridge case.
Cleaning Things Up
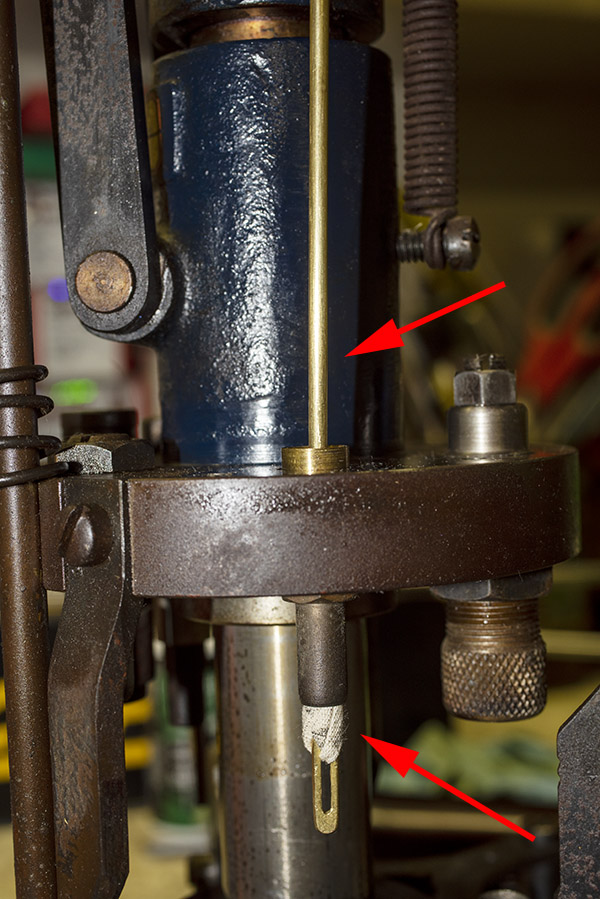
The tube sticking up through the tool head in the photo below is the powder spout. It’s what the left arrow points to. The right arrow points to the bullet seating and crimping die. There was a lot of crud on the die.
The spout was funky, so I ran a patch through it with a cleaning rod.
The bullet seating and crimping die is the last of the three reloading dies. It was super funky. It’s the die that seat the bullet and crimps the cartridge case.

Here’s the “after” photo. I went to work on the die with WD 40 and a toothbrush.
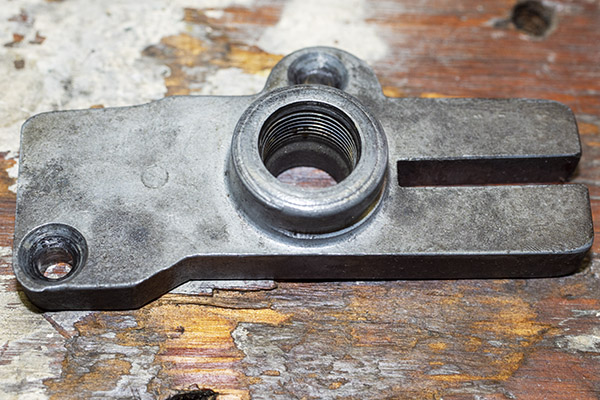
This is the powder dispenser lower housing. It’s funky, too, but just wait.
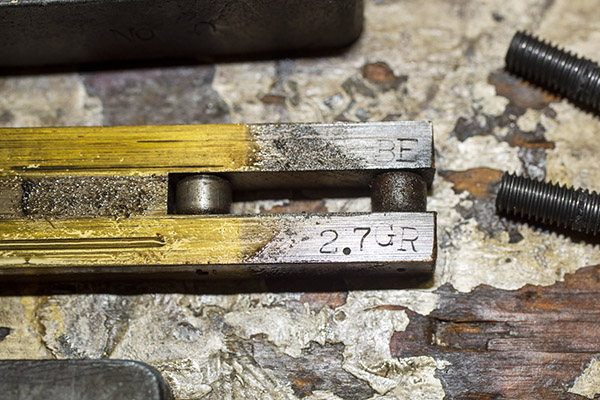
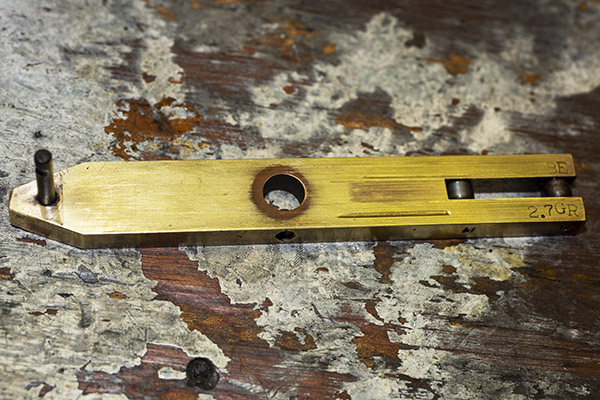
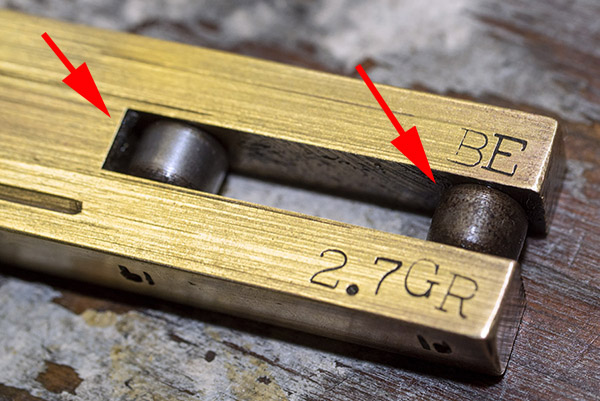
The photo below shows the powder slide, and it says exactly what I hoped it would say. Note the “BE” on the upper tine, and the “2.7 GR” on the lower tine. That means this powder slide is designed to throw 2.7 grains of Bullseye powder, and that’s a good thing. That powder and that charge, along with a 148-grain lead wadcutter bullet, is the accuracy load in .38 Special. I got lucky; this is exactly what I wanted to see. Note the two rollers between the tines. I’ll explain what they do a little further along in this blog. And yeah, I know, this is another funky piece. But wait; you’ll see.
More funkiness…the powder dispensing mechanism cover.
Here’s another shot of the powder slide and its spring. This is the “before” picture. And that hole in the center? It’s the feature that determines how much powder goes into each cartridge. If you want a different charge on a Star reloader, you need to buy a different power slide. Like I said, I got lucky. This one was set up for 2.7 grains of Bullseye. It’s just what I wanted.
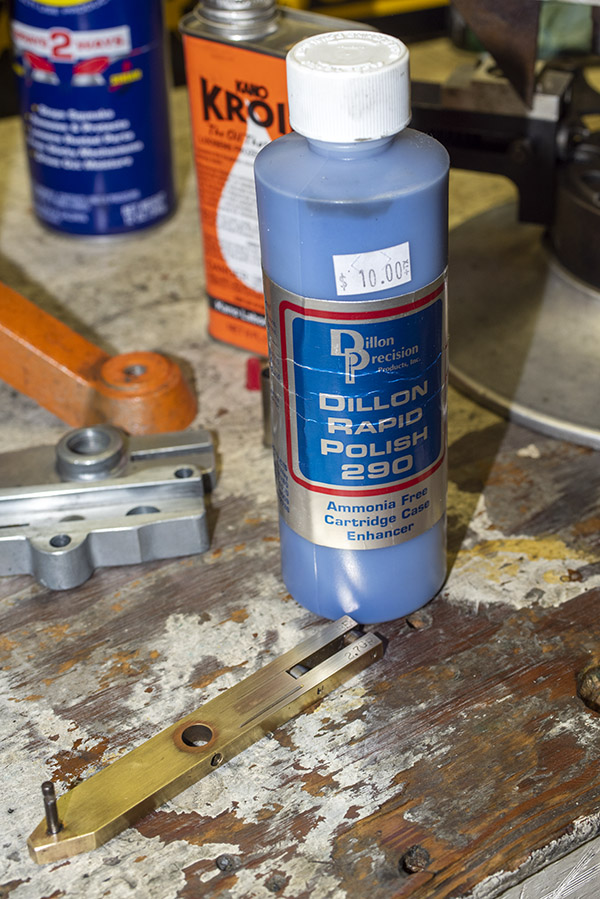
I wiped the powder slide off and, being that it was brass, I wanted to get rid of all the oxidation and then polish it. I was thinking it would be cool if I had some Brasso, but since I’m no longer in the Army I don’t have any. Then I remembered: I have Dillon
Rapid Polish brass polish that I use with my Franklin Arsenal
brass tumbler, and it does the same thing. I put a little on a rag and used it to polish the powder slide.
Here’s another shot (the “after” photo) of the powder slide.
Note the rollers on the left end of the powder slide. This thing is like a Ducati: It has desmodromic valve actuation. I’ll explain that a little bit further down.
Next up would be the powder dispenser mounting screws. I went to work on them with a Scotchbrite pad and they cleaned up nicely.
Here’s the powder dispenser base and the powder on the tool head.
And here’s the powder dispenser cover, the spring, and the mounting screws reassembled. I used a Scotchbrite pad to clean up the powder dispenser housing and powder dispenser cover, too. They look good.
And finally, here’s the powder hopper reinstalled on the powder dispenser.
Desmo Dispenser Actuation
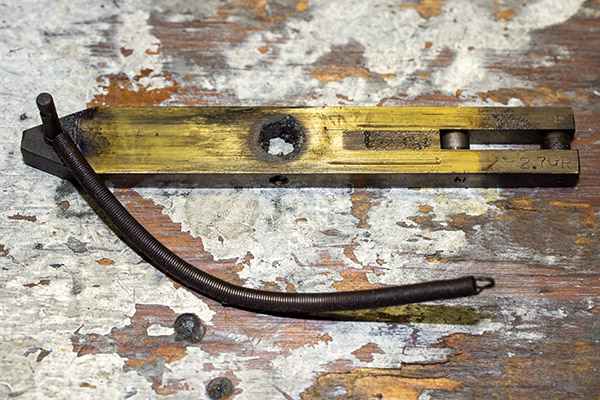
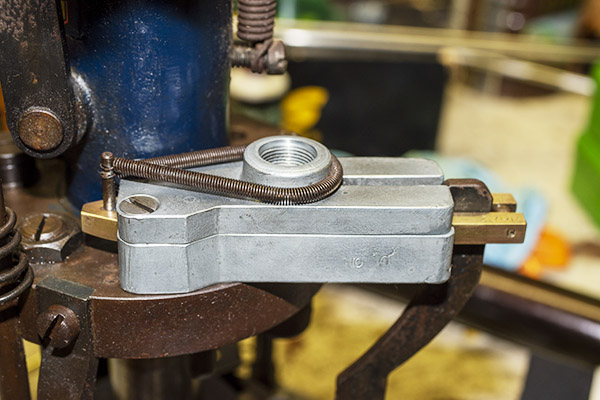
You might be wondering how the powder dispenser works. It’s really quite clever. When the Star reloader lever is actuated, the tool head moves up and down on the main shaft, bringing the powder dispenser with it. As that occurs, the powder slide translates back and forth as it moves along the curved cam you see in the photo below.
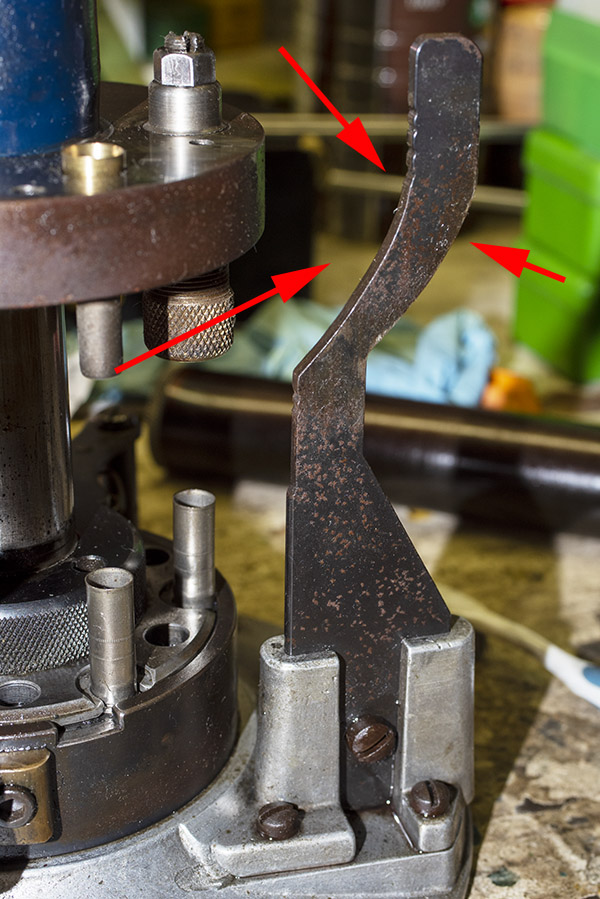
Remember those two rollers in the powder slide?
They follow the vertical cam path shown two photos up. The inner roller rolls along the cam as the tool head moves down, and the outer roller rolls along the cam as the tool head is returned to the up position. This is desmodromic actuation, just like Ducati uses on the their motorcycle intake and exhaust valves. They’re driven open by a cam, and they’re driven closed by a cam. Star could have just used pins instead of rollers, but they went with rollers (a more expensive and more reliable approach, I think). When the tool head moves down, the powder slide takes 2.7 grains of Bullseye powder, shifts it over the powder spout, and gravity does the rest. Take a look.
This is all very cool stuff, and if you get the feeling I’m having a good time bringing the Star back to life, you’re a very perceptive person. If you’re just tuning in to this adventure and you want to see our earlier blogs on the Star reloader resurrection, you can find them here.
Next up? That’s going to be the primer feed mechanism. Stay tuned!
Sign up here for all the ExNotes blogs! It’s free!
Excellent work, my brother. I’ll be sending some .38 special brass as soon as I get around to shooting .
I’m having a lot of fun with this old press.
That was the greatest reloader every produced ,bet I reloader 100,000 rds on my Star ,nary a deviation on ammo . ,sold it in 1974 after I stopped shooting PPC competitively , was at the time shooting 180 rds daily several months prior to shooting at Nat’l PPC at Jacksonville Miss. , could easily crank out 500 rds. an hour ,many times I think I should have oiled it and put it in Storage ,I still have my Smith 19 and shoot it weekly ,now had 100,000 rds fired thru it , I’m 81 now and have fond memories of my Star and PPC competition , still can drive a tack at 50’
That’s awesome, Jerry. Thanks for commenting and thanks for subscribing!