Gats and Hats I: The Model 60 S&W

There’s a Facebook group called Snub Noir and I enjoy it.  They have a lot of good info there about concealable revolvers, and it projects kind of a ’40s/’50s/’60s vibe having to do with private investigators and police officers (and movies, TV shows, and novels from that era).  It’s centered on the Colt and Smith snubbies of the day, and on today’s snubbies, too.  If you’re into snub nosed revolvers, you’ll like this place.  If you visit it, you’ll understand the Gats and Hats thing.

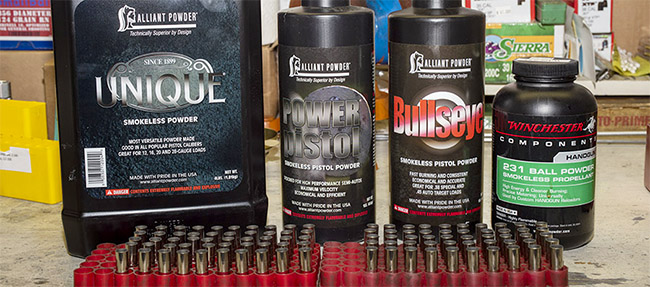
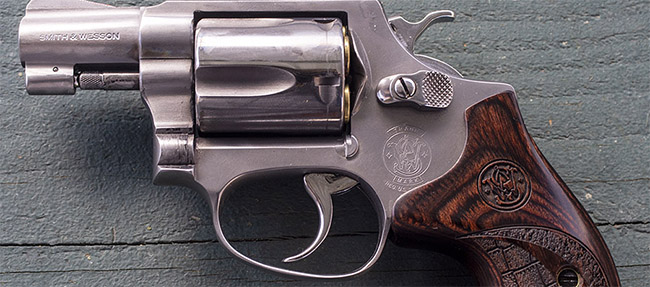
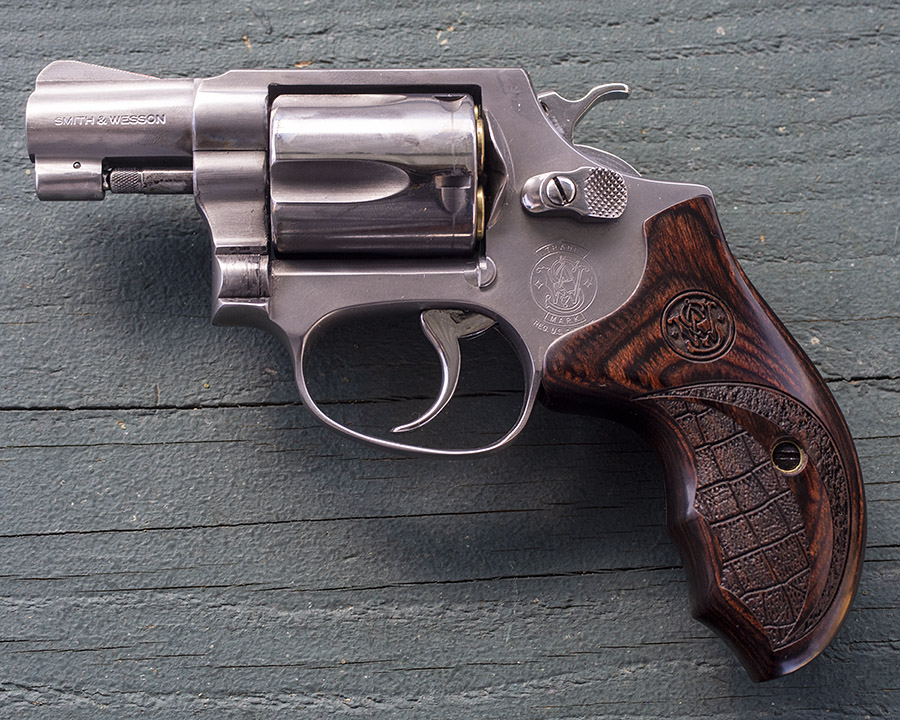
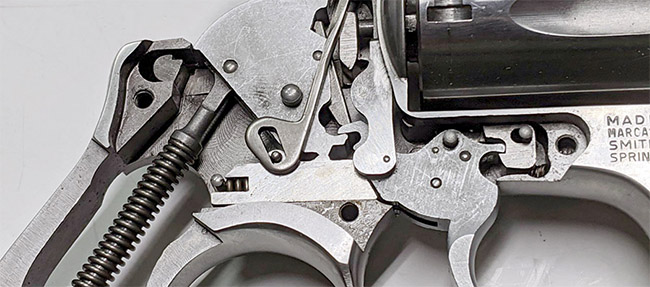
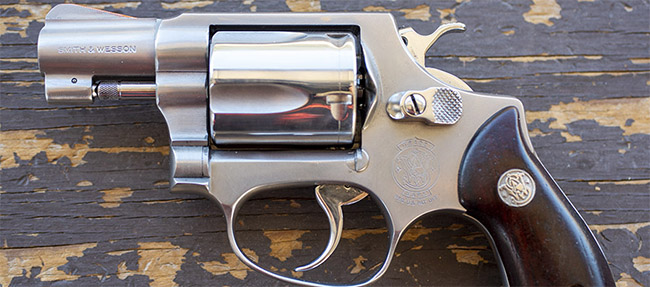
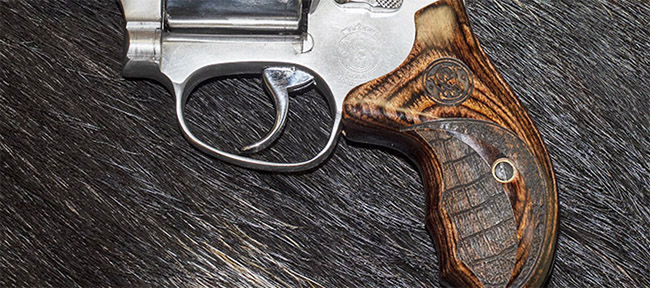
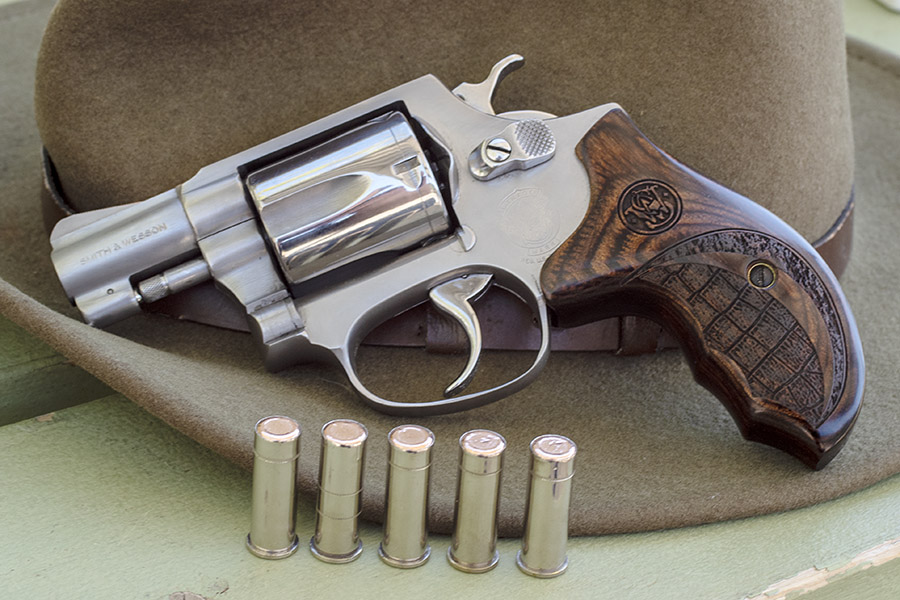
That beautiful S&W Model 60 you see in the big photo above is my personal carry gun and it’s a sweet piece.  It’s been selectively polished, it has Altamont grips, and it has a TJ action job (you can read more about TJ’s work on his website and I’ll give you a few more links on my Model 60 at the end of this blog).  I’ve done a fair amount of load testing with the Model 60 and I know the loads it likes from accuracy and shoot-to-point-of-aim  perspectives.  The best load is the FBI load, which is a 158-grain bullet over 3.5 grains of Winchester 231 propellant.

Five rounds of .38 Special, with a 158-grain flatpoint cast bullet and 3.5 grains of Winchester 231. It’s a great load. You can read about it in the links provided at the end of this blog.

I wanted to try something different, though.  I’ve shot the Model 60 at 50 feet, 25 yards, 50 yards, and 100 yards.  I know, I know: Those latter two distances are not really what the snub nose revolver designers had in mind when they designed these guns.  But I was curious when I did those tests.  I know a retired police officer who can hit a clay target at 50 yards (the kind you dust in trap or skeet shooting).

The police sometimes qualify at 7 yards, and I think that’s more in line with what a snubbie is intended to do.   And, you know, there’s this zombie apocalypse thing that’s coming down the road.  I’ve done my homework, and I know that most zombie hostage incidents (i.e., where a zombie is holding a damsel in distress) occur at 7 yards.  I wondered:  How would I do firing my Gat double-action as quickly as I could at 7 yards?  I want to be prepared, you know.

Five rounds is all the Model 60 holds. It sure is slender and it conceals well.

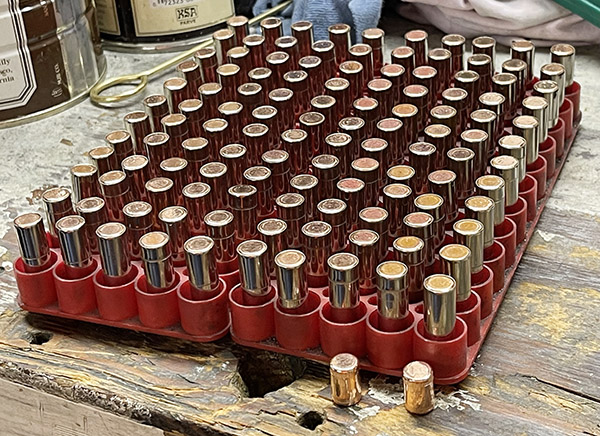
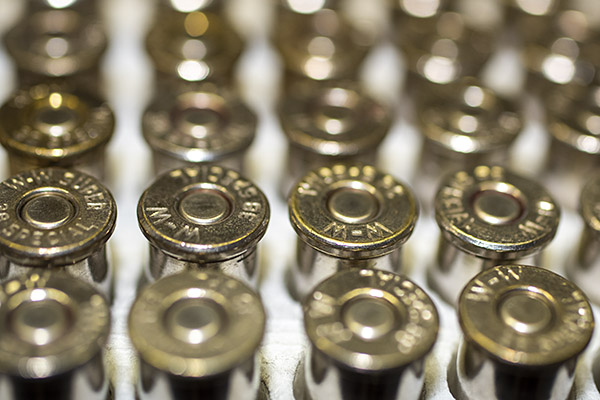
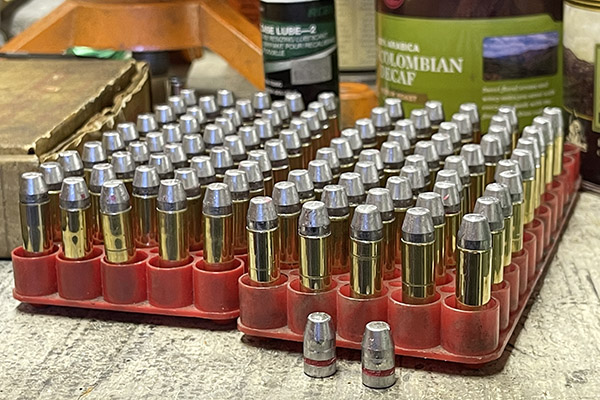
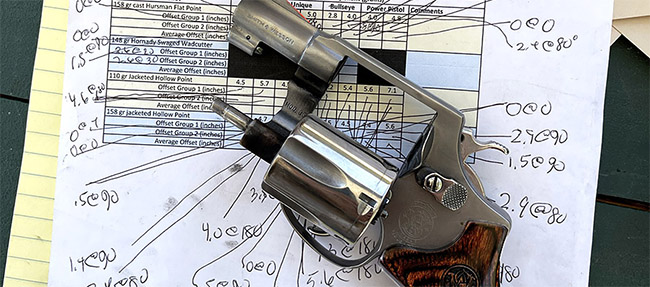
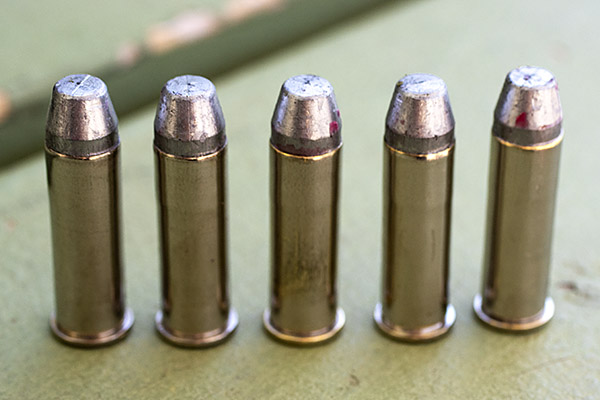
Fortunately for me, zombie-holding-hostages targets are readily available on Amazon, so I grabbed a couple and headed to the range to test my hostage rescue skills with two different loads.  The first was the old bullseye target competition .38 Special standard:   A 148-grain wadcutter (in this case, copper-plated wadcutters from Xtreme Bullets) over 2.7 grains of Bullseye propellant.  It’s the load I’m set up to produce in large quantities on my Star reloader, and it’s the load you see in the top photo (the Dr. Seussian Gat in the Hat pic).  The other is the FBI load mentioned above: A 158-grain bullet and 3.5 grains of Winchester 231 secret sauce.

So how’d I’d do?   The short answer is not too bad.  Not as good as I thought I would, but good enough and certainly close enough for government zombie work.  The first target (the one immediately below) shows the results of six full cylinders (30 rounds, as the Model 60 holds five rounds).  The good news is 29 of those shots went directly into the zombie’s noggin and none hit Betty (the hostage).

Betty and her zombie captor. He’s toast. Note the one round that tumbled just above Betty’s head. These were low-velocity wadcutter loads.

The bad news?  One of the wadcutter bullets tumbled.  Fortunately for Betty it went right over her head.  You can see the bullet’s outline in the target above.  It might have been that the Star threw a light load on that round, or maybe a case split and let too much pressure escape, or maybe these light target loads are marginal in the Model 60’s short 2-inch barrel.  Win some, lose some.  Betty’s okay, though…that’s the important thing.

Not surprisingly, the FBI load did much better (old J. Edgar know what he was doing against both zombies and commies, I think).  The 30 holes you see in Mr. Zombie below went into a tighter group, none of the bullets tumbled, and most importantly, none of them went into Betty.

Betty liked the FBI load better. So did I. The zombie offered no opinion.

I feel better now.  I know if I can keep my wits about me and I have my Model 60, and if I can get the zombie to pose with Betty like you see above at 7 yards, he’s toast and Betty’s going to be just fine.  For any zombies who follow the ExNotes blog:  You’ve been warned.


Never miss an ExNotes blog…sign up for free:


As this blog’s title states, this blog is Gats and Hats I.  Will there be a Gats and Hats II?  Stay tuned, my friends.  Two more days, and we’re calling in the heavy artillery.


More gun stories?  Hey, it’s what we live for!


Want to know more about the Model 60 featured in this blog?   It’s all in the links below:

The Model 60 heads to TJ.
A TJ Roscoe.
New shoes for the Model 60.
A Model 60 load development plan.
Model 60 load testing results.
Getting hammered, and the effects of incomplete primer seating.

The Model 60, Betty, and Getting Hammered

That’s a Model 60 Smith and Wesson snubbie you see in the big photo above, and Betty and Boris you see in the photo below.  You’ve read about the Model 60 before here on the ExhaustNotes blog.  One thing about the Model 60 I wasn’t excited about is that it had a tendency to misfire occasionally when firing double action (it always fired single action, but when shooting double action, I would get one or two misfires in every box of ammo).

I know I was supposed to shoot Boris (the zombie), but Betty is the real troublemaker here and it was easier to get a better sight picture on her.  Sorry about that, Betty.  Sometimes it’s fun to mix it up a bit and shoot zombie targets.

When shooting double action, the hammer fall is a little less than it is when firing single action, and that little bit of energy loss makes a dfference in ignition reliability.  I tried replacing the hammer spring on the Model 60 (thinking the spring had fatigued like it did on my Rock Island Compact), but I still had the double action misfiring problem.  Hmmm.  It was time for a bit of online research.

The Model 60’s hammer spring. Removing it requires the same high-tech tool I used to disassemble the Rock Island Armory Compact 1911. You don’t have to remove the sideplate on a Model 60 to remove and replace the hammer spring.

I’ve read that there are differences in primer manufacturers that can make a difference in ignition sensitivity, with CCI primers being the hardest to light and Federal being the easiest.   These days, it’s a stroke of good fortune to find any kind of primers.  I have CCI primers (with components, halitosis is better than no breath at all).  I had tried Winchester primers in the Model 60 in the past and they had the same propensity to occasionally double action misfire.

.38 Special wadcutter ammo loaded on my Star. Those are 148 grain Xtreme wadcutter bullets in the foreground. They’re called wadcutters because they punch a clean hole in the target. These particular bullets are orientation insensitive; you can load them in the cartridge case facing up or facing down (they are the same on both ends).

My research tumbled me onto something I kind of already knew but more or less forgot:  Primer seating makes a difference.  It’s typically not an issue for most guns, but on those with little hammers (like the Model 60 snubnose), it matters more.  From what I read, you can’t just seat your primers to a consistent depth and call it good.  There’s variability in the primer height and there’s variability in the primer hole depth.  There’s also variability induced by the carbon residue from the last shot if you’re reloading fired cases.  The conventional wisdom is that you need to have the primer anvil in firm contact with the bottom of the primer cavity, maybe even with a little bit of crush on the primer cup material.  A little bit of primer crush affects primer output less (i.e., it’s better, or so I’ve read), than not having the primer fully seated.  If a primer is not fully seated, the first strike may or may not light the primer.  If the primer is not seated, a lot of the hammer’s energy is consumed finishing the primer seating operation.  After the primer gets seated the rest of the way by the firing pin, the hammer may not have enough energy left to ignite the primer.  It all makes sense to me.

Primers need to be fully seated, which usually means the primer face should be 0.005 to 0.006 inch below flush.

The more I thought about the above, the more I convinced myself the Model 60’s occasional misfires were a primer seating issue.   The reason I think that’s what I had going on is because when I had a misfire, the cartridge that misfired always fired on the second strike.  That’s consistent with the primer-not-fully-seated hypothesis.  If it was just a matter of insufficient firing pin energy, the primer wouldn’t fire on the second strike, either.  The issue is more pronounced on a little snubby like the Model 60 because it has such a tiny hammer and hammer spring.  There’s not a lot of energy there like there is on a Colt Python or a Ruger Blackhawk (those handguns have much bigger hammers and hammer springs).

I loaded a box of 38 Special ammo on my Star reloader (I love that machine) and examined the primer seating depth.  They were below flush with the rear of the cartridge, but not by much.  I can fix that, I knew.  The Star has an adjustment for primer seating depth, as explained in the photos below.

Lowering the primer seating adjustment shaft is accomplished by loosening a locknut and turning the shaft in a bit more.
The Star’s primer seating shaft. It operates a lever on the press downstroke that pushes the primer up to seat it in the cartridge case.  Adjust the shaft down, and the gizmo seating the primer pushes it into the cartridge case deeper.

After adjusting the Star to seat the primers deeper, I loaded another box of .38 Special wadcutter ammo.  You can guess where this story is going.  I double action fired a box of ammo I loaded before I made the adjustment, and I had two misfires.  That’s about how the Model 60 has always performed.  Then I shot the second 50 cartridges using ammo that I reloaded after making the primer seating depth adjustment, and every round fired.  There were zero misfires.  My Model 60 double action misfire issue was primer seating.   What do you know.  Live and learn.

All this is interesting, but I usually don’t shoot wadcutter ammo loaded on the Star in the Model 60.  My Star reloader is configured to load the classic .38 Special target load: 2.7 grains of Bullseye and a 148 grain wadcutter bullet.  The powder weight is not adjustable without buying a new powder throw bar for the Star, and I don’t want to do that.  The Star will remain dedicated to .38 Special wadcutter ammo.

For the Model 60, I found that a good accuracy load (and a heavier load better suited for defensive purposes) is 3.5 grains of WW 231 propellant and a 158 grain cast flatpoint (also known as a truncated cone) bullet.  That combination shoots to point of aim at 50 feet in the Model 60.  I reload that ammo on my single stage RCBS Rockchucker press.  For primer seating on the Rockchucker, I use an old Lee priming tool (they called it the AutoPrime II) I’ve had for 40 years (it’s shown in the photo below).  Unfortunately, Lee no longer offers this system and they don’t have anything that offers both automatic primer feeding and primer seating on the press upstroke.   That’s a pity, because it’s a good approach and allows for much more positive primer seating.

A good primer seating system no longer offered: The Lee auto primer. It is 40 years old and still works well.  A mini-ram replaces the shell holder in the Rockchucker ram, and the primer seating operation occurs up north.
Freshly-reloaded .38 Special ammo with ballistics similar to the old FBI load…a 158 grain cast flatpoint bullet and 3.5 grains of WW 231.

A couple of final notes…when doing this kind of testing, I always make sure the revolver is clean and properly lubricated.  My preference is BreakFree cleaner and lubricant.  It does a stellar job.  And if you’re wondering about the grips on the Model 60, they from Altamont.  Those grips turn the Model 60 into a more manageable and less punishing handgun.  I like them.

You know, one of the things I enjoy with this reloading hobby is just how much there is to learn.  I’ve been reloading for about 50 years now, and I’m still learning (and sometimes relearning) new things.  When you roll your own, you’re in charge and you can tune a load for better accuracy, better reliability, and lower cost.  Reloading is a cool hobby, and it’s as much fun as the shooting itself.


Click on our pop up ads!


Never miss an ExNotes blog…sign up for a free subscription:


More gun and reloading stories are here!


More Model 60 articles!

A TJ Tune For My Model 60
A TJ Roscoe
New Shoes For The Model 60
A Model 60 Load Development Plan
Model 60 Load Testing