The Henry Single Shot: A Tack-Driving Buffalo Gun!

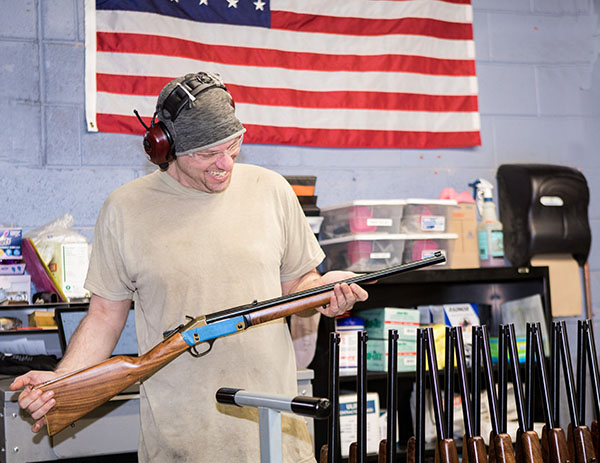
It’s time to get out and do stuff.  Yeah, this CV19 thing is a disaster, but it looks like what the wizards recommended is starting to produce results, and that gave me an excuse to get to the range again.   Not that anyone ever needed an excuse to get to the range, but I felt like it was time, and that beautiful Henry Single Shot I’ve been writing about (but had not yet fired) was calling my name.

Exhibition-grade walnut, blue steel, polished brass, and a box of .45 70 ammo. Life is good!

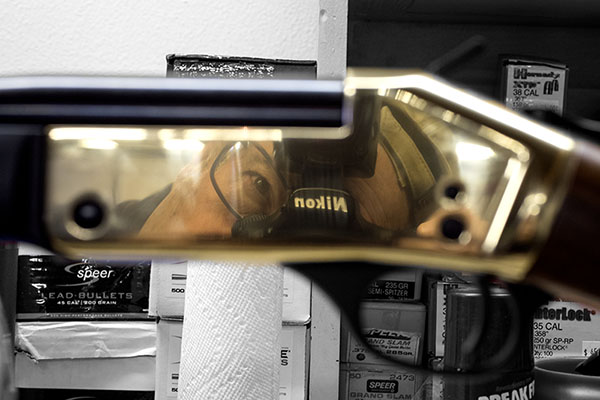
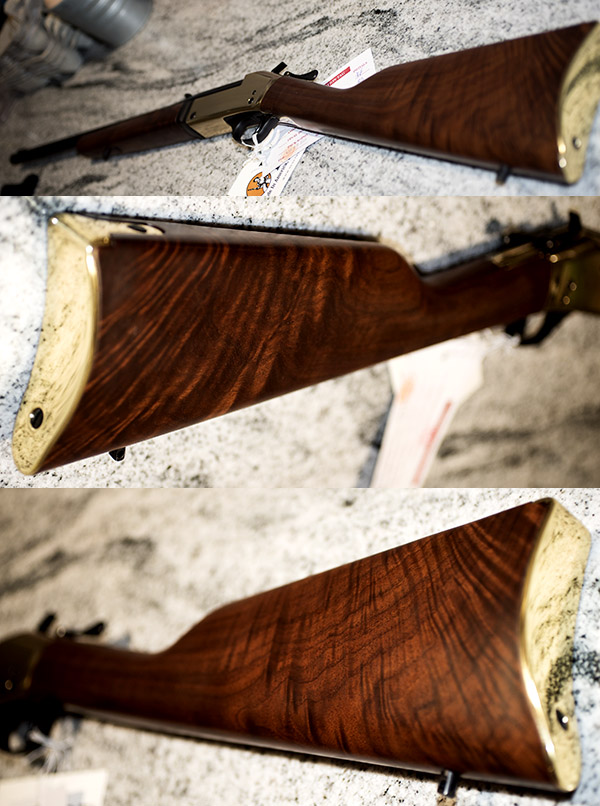
I had my Nikon with me, too, so I was finally able to get some good D810 photos of this beauty from Henry’s Rice Lake, Wisconsin manufacturing operation.

A view from the right.
And the view from the left.

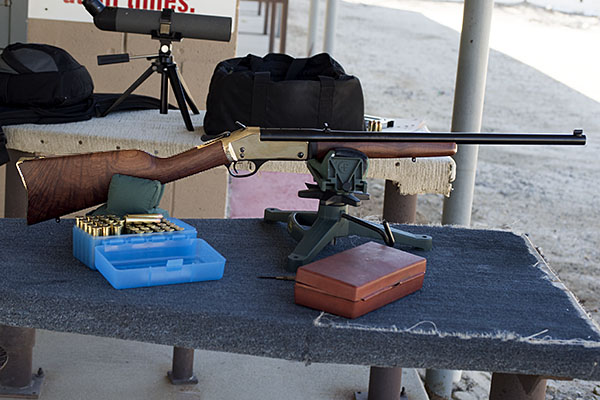
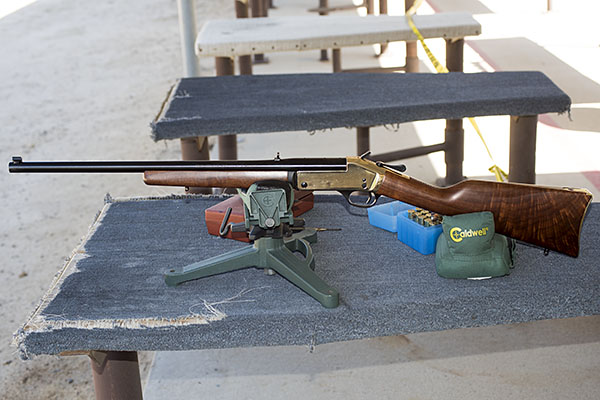
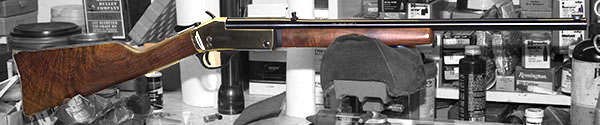
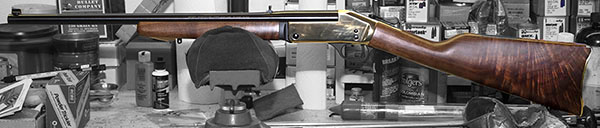
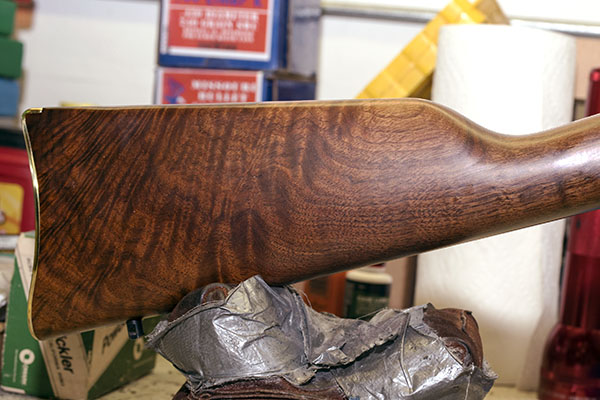
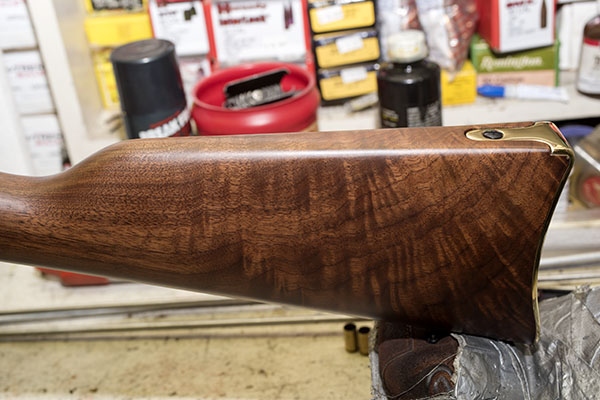
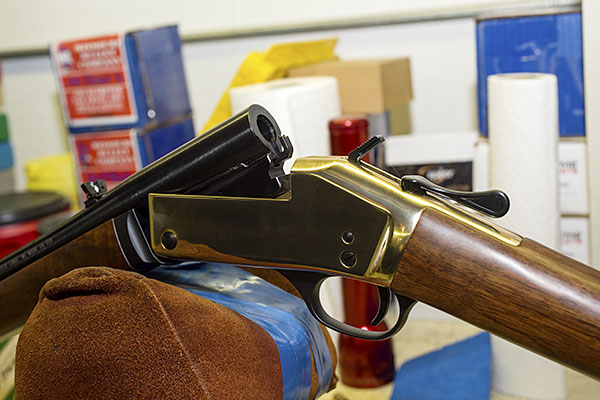
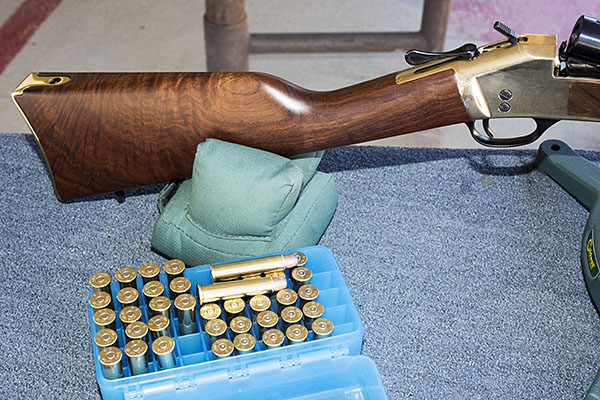
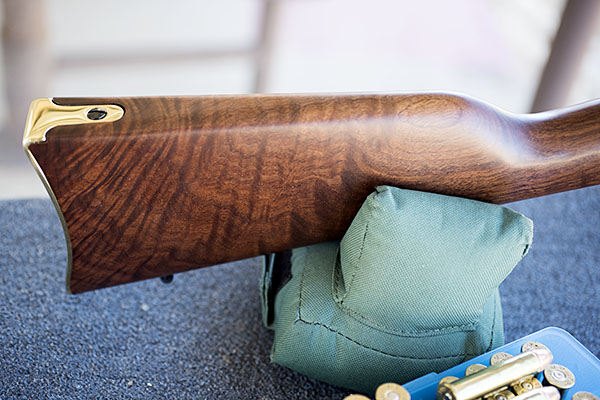
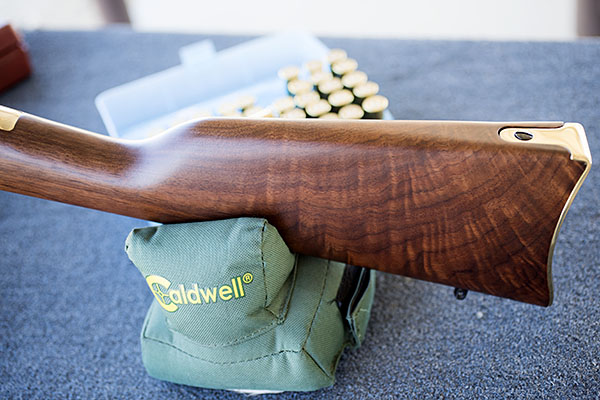
I wanted a couple of photos showing the entire rifle, and then I wanted to get a couple more showing the highly-figured walnut stock.   The folks at Henry sure did a great job.

Sweet, huh?  The polished brass buttplate works, too.  This is a stunning bit of American firearm artistry.  Like Mr. Imperato says, made in America, or not made at all.
What’s nice is the stock is highly-figured on both sides. It’s hard to find wood like this on a production rifle these days. Always has been. I believe it’s getting tougher, too.

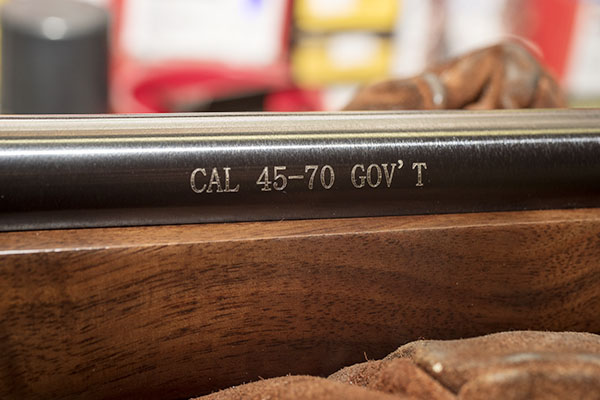
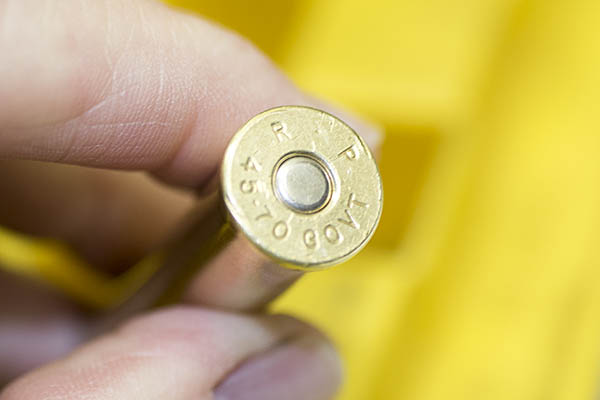
The .45 70 cartridge is a big one, and I’ve written about it in earlier blogs.  There’s a list of links to our earlier blogs on the Henry single shot at the end of today’s post, along with a few other cool links.   Take a stroll through them to get a feel for how I came to acquire this magnificent rifle (after you’re read this blog and shared it on all your social media platforms, of course).

If you have one of these and someone says “bring enough gun,” you’ll have all the bases covered with the Henry Single Shot.

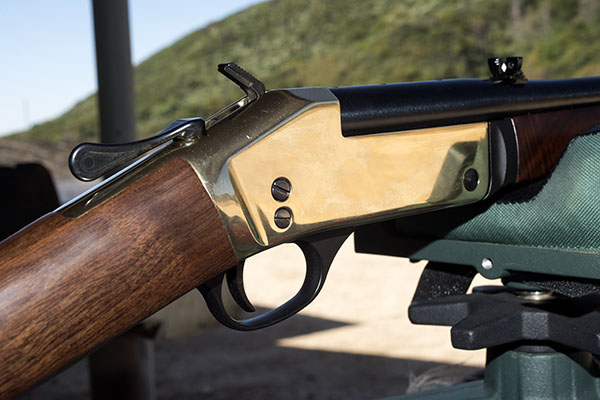
It was fun shooting the Henry, both literally (more on that in a second), and figuratively (with the Nikon).  The brass receiver on these guns photographs well, I think.

The rear sight is a standard folding leaf. You can flip it to the other side so that you don’t have the white diamond, and you can invert it to get a square notch instead of the U-notch. I’ve left mine as it was delivered from the factory.

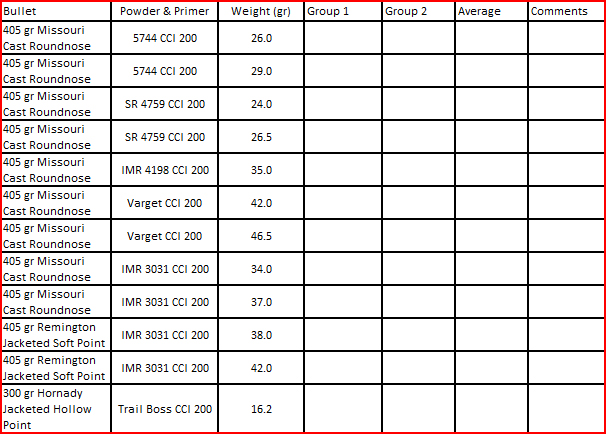
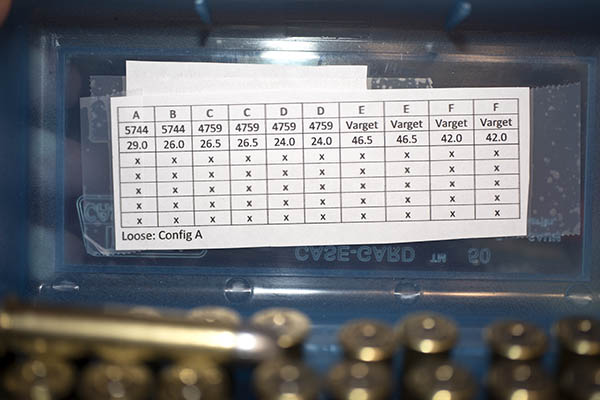
On to the good stuff, and that’s an answer to the most basic question for any firearm: How does it shoot?  In a word or two, superbly well.  I had a big plan to test all kinds of different loads, but I don’t want to bore you with the details of what didn’t work well and get right to what did.

First, a word on my marksmanship.   It had been about 9 weeks since I’d been to the range, and the ability required to shoot a rifle well is not something you just pull out of drawer and pick up where you left off.  Nope, rifle marksmanship is an art, and I needed to put a few rounds downrange before the Henry started performing.  Well, actually, that’s not quite accurate: I had to send a few rounds downrange before I started performing.  There’s a skill set involved in shooting a rifle well.  You can read our treatise on rifle marksmanship later (I’ll include a link for that at the end of this article, too).

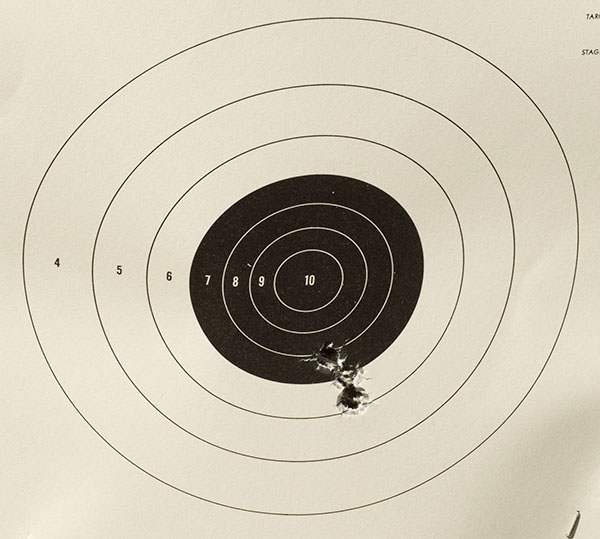
I started with four targets this morning at 50 yards and the results were not what I wanted, but I knew it was me and not the rifle.  So I put another four targets out, and I started to settle down.  It was a beautiful morning out at the West End Gun Club.   Bright skies, mild temperatures, no wind, and I had the range to myself.  It wasn’t too long before I was in the groove.  The first target (the top left) was a bit shaky (good enough for deer or hog, and especially good enough for buffalo), but not what I knew I should be able to do with this rifle.   The second target (top right) was a lot better, as I was kind of figuring out how to get the right sight picture.  Shooting with iron sights is much more challenging than simply laying a scope’s crosshairs on the bullseye.  Iron sights demand skill and practice.  With 9 weeks away from the firing line, I was coming up short on both, but I was getting my groove back.  I could feel it.  The third target (bottom left) was another good deal, and then the fourth target sealed the deal.   That one was a 0.740-inch group, with all the holes touching.  With open sights on a lightweight .45 70 at 50 yards, I’ll take three-quarter-inch groups all day long.

50 yards, with a 6:00 hold on each target. Top left, top right, bottom left, and bottom right. Not bad, if I do say so myself.

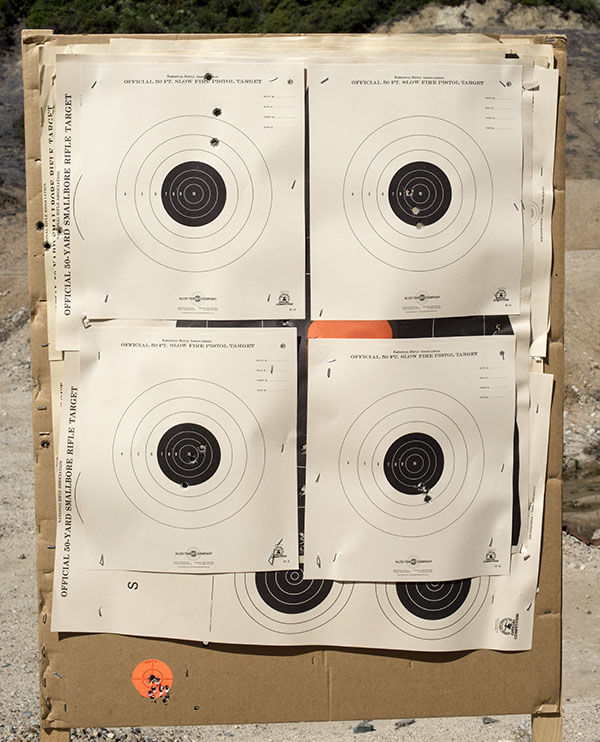
Here’s another photo of my last target of the day, showing that beautiful 0.740-inch group.  Bring on the buffalo.  I’m ready.  So is my Henry.

I think I’ll leave the Henry’s adjustable rear sight right where it is.

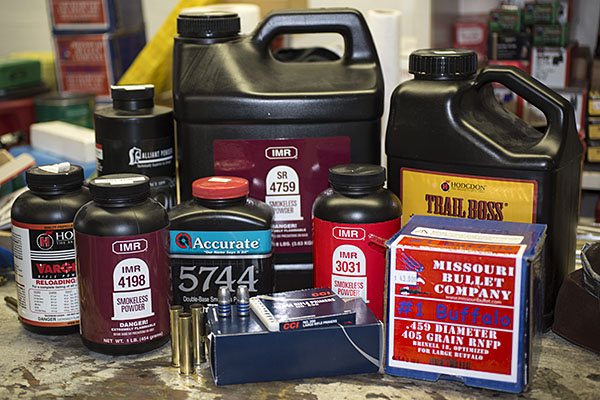
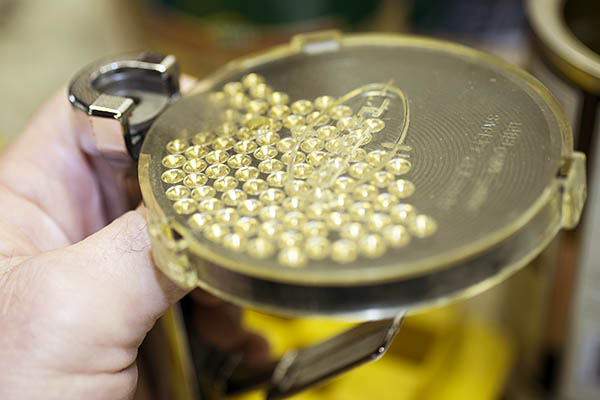
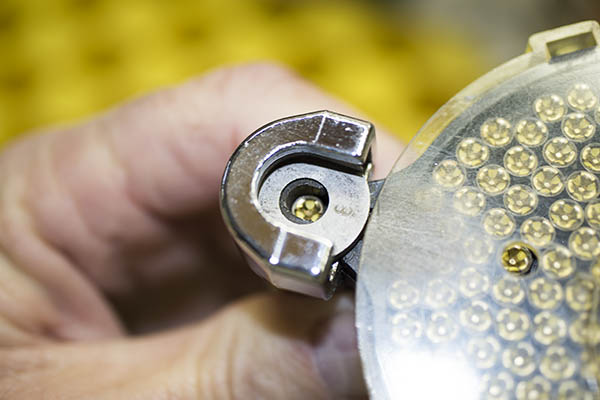
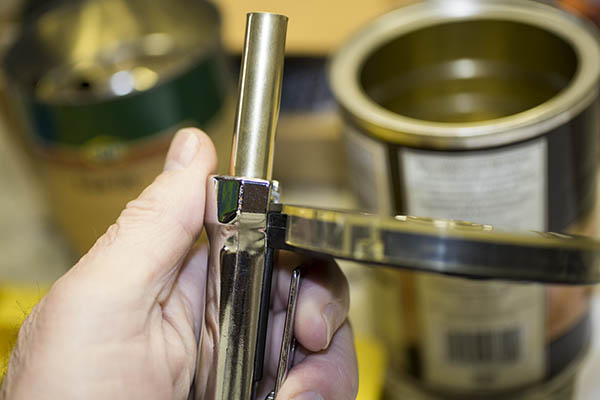
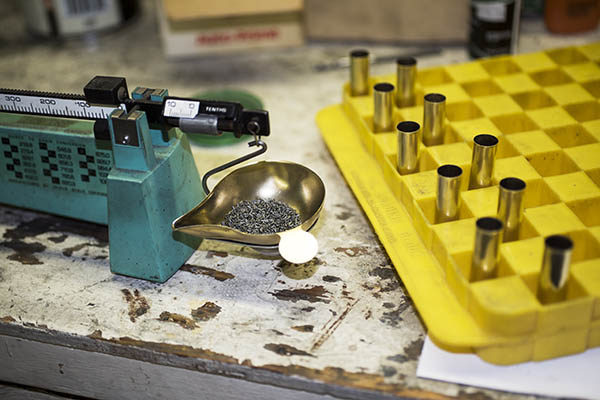
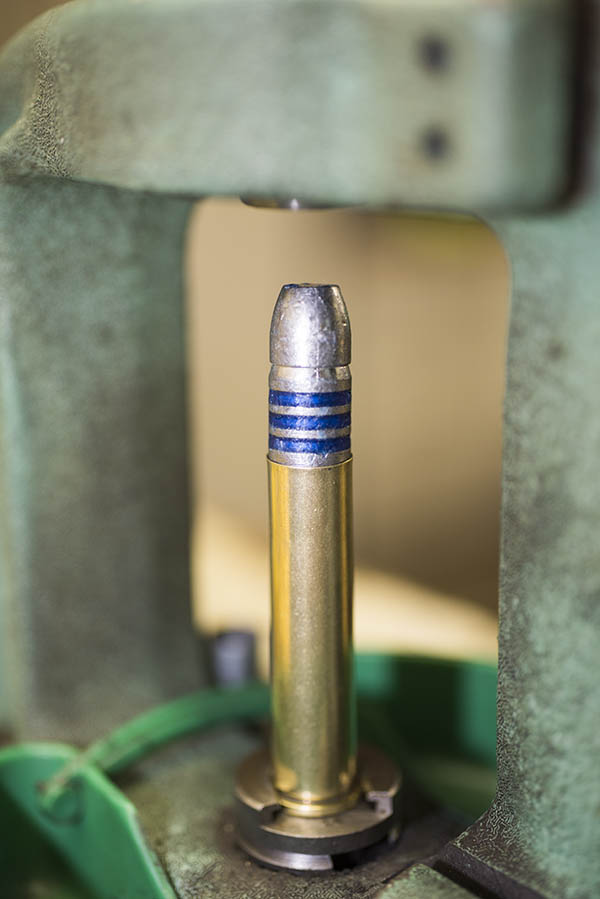
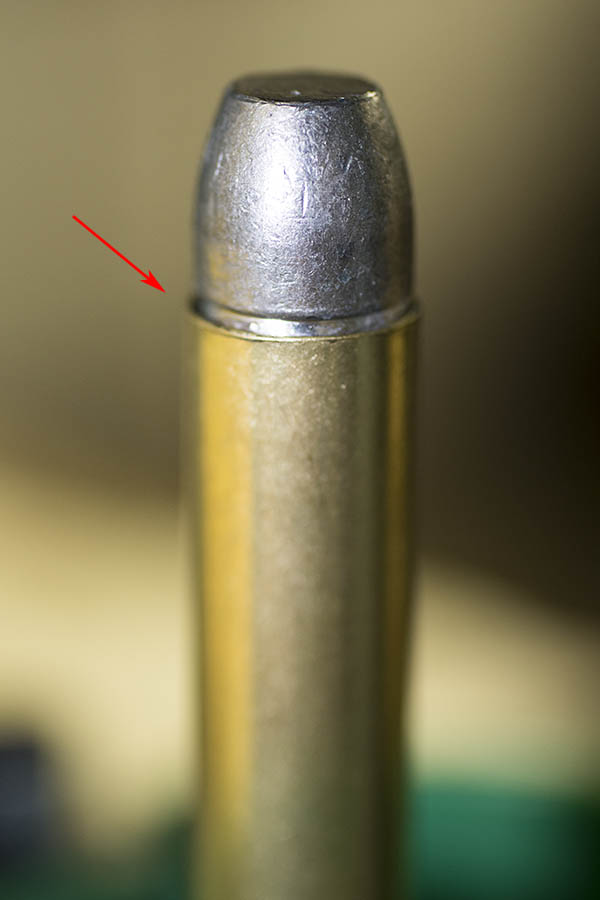
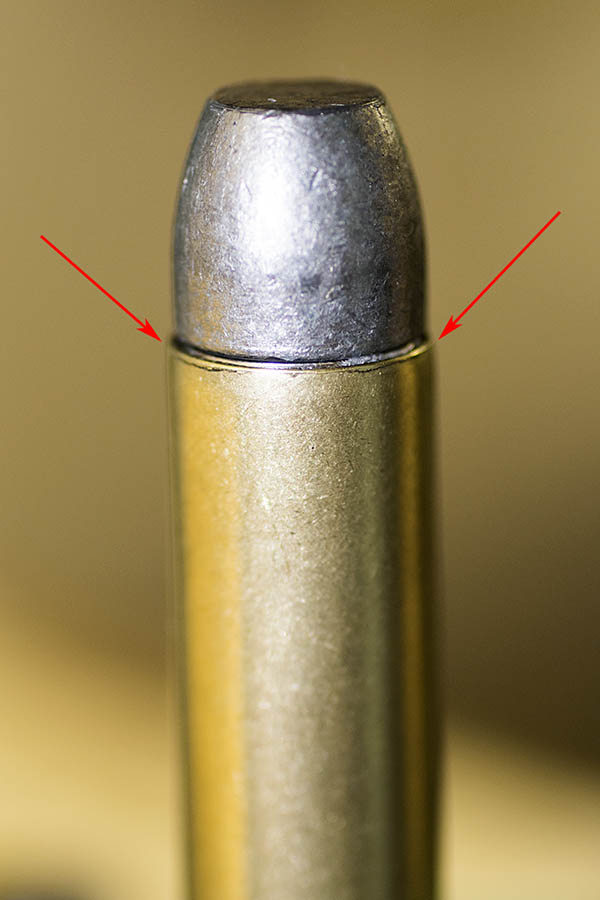
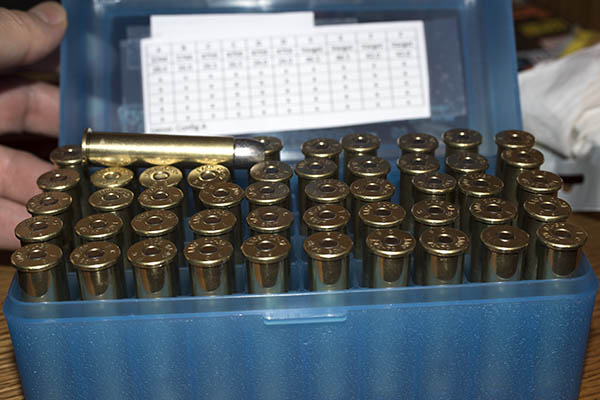
The secret sauce?   It goes like this:  A 300-grain Hornady jacketed hollow point bullet crimped in the cannelure, 16.2 grains of Trail Boss powder, a CCI 200 primer, and Federal brass.  I don’t think the brass makes much of a difference when shooting .45 70, as long as the brass is trimmed to a uniform length.  I used Federal brass because it’s what I had, and I’ve had it a long time.  My .45 70 brass is over 40 years old.  It’s been loaded a lot of times, but when you load at Springfield levels, brass lasts a long time.

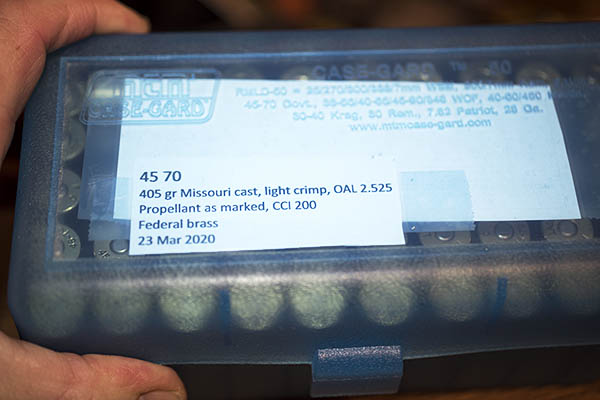
So what’s it like to shoot the Henry .45 70 Single Shot?  It’s fun.  The Henry is more of carbine than a full-sized rifle, although the length of pull is the same as my other rifles and the barrel is a full 22 inches.  It’s that single shot design that allows the overall package to be shorter.  It’s a compact, hard-hitting package with recoil that is one thin red hair on the good side of tolerable.  The rifle’s brass buttplate adds substantially to the rifle’s overall rich appearance, but let me tell you, you feel it when the hammer drops.  I was glad the 300-grain bullets worked well; the 405-grain loads I had were just a hair over a tolerable recoil level for me.  My shooting was all in shirt sleeves shooting off the bench, though.  With a winter jacket or on a hunt, making friends with 405-grain bullets would be a lot easier.

It’s stunning just how elegant the Henry .45 70 Single Shot is, and what’s equally stunning is the amount of “cool” you get for the price.   The MSRP on this rifle is $628, and Henry tells you on their website that you should expect a discount from that price.  To me, the benchmark single shot rifle is Ruger’s No. 1, and that rifle is something like $1500 these days.  I believe the Henry’s fit and finish are actually superior to what you get on a Ruger No. 1.   The walnut on my Henry is exceptional.  I think Henry is undercharging for these rifles.   They’re that good.

So where am I on all of this?  The Henry likes 300-grain bullets better than the heavier 405-grain stuff, and that’s where I’ll focus future load development.  Several suppliers offer 300-grain .458 bullets, and there are other powders to try.   One more thing I want to make sure you know:  I love this rifle.  Life is good.  I’m having a lot of fun with my Henry.


Check out our earlier Henry Single Shot stories here:

Henry’s Home
Developing a Henry .45 70 Load:  Part 2
Developing A Henry .45 70 Load:  Part 1
The Henry Is In California
Henry Rifles:  Made in America Or Not Made At All


Want more gun stuff?  Hey, just click here!


Our rifle marksmanship blog is here!


Never miss an ExhaustNotes blog!  Sign up here:

Henry’s home, and an interview with Dan

California’s 10 days are up, and Henry is in the house!

Henry, of course, is my new brass-framed .45 70 Single Shot from the rifle manufacturer of the same name.  I haven’t shot it yet, but I’m ready.  Eager, too.  This is going to be fun.

To continue the story and as promised, a few days ago I interviewed Daniel Clayton-Luce, Henry’s Director of Communications.  As you know from reading our earlier blogs, I am impressed with Henry and I purchased one of their new Single Shot rifles. I picked up my Single Shot yesterday (practicing all the required social distancing rules, of course), and wow, it is one fine firearm.  Take a look.

With me, it’s always been about the wood.   I’ll get better photos when I’m basking in the grand and glorious sunshine at the West End Gun Club (and I’m not sure just yet when that will be), but here are a few teaser shots.

Like I said above, I haven’t shot the Henry yet.  But my first impressions are very, very good.  The wood is stellar (both the stock and the fore end), the wood-to-metal fit is way better than what I’m used to seeing on production guns, the action feels crisp and tight, and the brass frame and buttplate are classy.  The trigger is a little heavy, but it is breaking-glass crisp, and the rifle shoulders well.  The quality is off the charts.  It’s that good.

So, about that interview with good buddy Dan from Henry USA…let’s get to it.  My first questions were these: What prompted Henry to enter the single shot rifle market, and did Henry do so by purchasing the old Harrington and Richardson design and production equipment?

Dan explained to me that the new Henry Single Shot is a Henry through and through, it has no relation to the H&R design, and I would absolutely notice a difference in quality between it and the H&R guns. He sure was right. I am a collector and admirer of fine rifles (I’ve focused primarily on Ruger No. 1 and Ruger No. 3 rifles), and I think I know a bit about what goes into a good rifle. For me, the Ruger No. 1 has been the gold standard, especially the earlier ones made in the late 1960s and 1970s. I’m here to tell you that the new Henry is equal to those rifles, and perhaps even better. The fit, the finish, the wood, the bluing, and the overall feel of my Henry is absolutely top notch. Surprisingly, the new Henry brass-framed .45 70 (at an MSRP of a little over $600) is less than half the cost of a new Ruger No. 1. I am impressed. Dan told me that Henry decided to enter the single shot market with a premium offering, and after examining my new rifle, I can tell you that “premium” is the right adjective. My Henry Single Shot is stunning.

I told Dan that I thought entering the single shot rifle market had to be a risky venture (H&R went out of business, Ruger’s No. 1 sales have declined significantly, and the rage today seems to be black plastic Rambo wannabee guns). Dan told me that bringing the Henry Single Shot to market wasn’t as dicey a proposition as it might appear. Henry USA felt there was a strong desire in many shooters to get back to the basics, and shooting doesn’t get more basic than only having one shot. You need to make that one shot count, Dan said, and there’s an inherent challenge that makes a successful hunt with a single shot rifle more rewarding. It forces you to slow down, take your time with each shot, and think about the fundamentals. Dan didn’t have to convince me. I knew exactly what he was talking about.  My first rifle was a single shot and I’ve been addicted to them ever since.

Dan told me the Henry Single Shot is doing well. Sales are good, and the rifle is a flexible platform (it is easy to introduce new calibers). In viewing the Henry USA website, I saw that the Single Shot is offered in .223, .243, .30 30, .308 Winchester, .357 Magnum, .44 Magnum, and .45 70.  They have shotgun versions, too, in .410, 20 gauge, and 12 gauge. I suggested that Henry consider adding .22 Hornet to the mix (the .22 Hornet is a classic cartridge and it is one of my favorites, as you know from our earlier blogs on the Ruger No. 3 and my vintage Winchester Model 43). Dan said they would take a look at that and I immediately put my oar in the water…I told Dan when they bring out a .22 Hornet I want the first one off the production line (with fancy walnut, of course).

I asked Dan if they were going to offer replacement barrels to allow changing from one caliber to another. There are no plans to do so, he told me, and I can see the logic in that. Henry offers two models of the Single Shot rifle, one with a brass frame and one with a steel frame. The brass frame models are offered in chamberings that operate at lower pressure (.45 70, .357 Magnum, and .44 Magnum). If the barrels were interchangeable, there’s a risk someone might mount the barrel for a higher-pressure cartridge (e.g., .308 Winchester) on a brass frame. I get it.

I asked about folks using Henry rifles in competition, and Dan told me they are popular in both SASS (Single Action Shooting Society) and cowboy silhouette. There are no kits on the market for slicking the actions on a Henry lever gun (as exist for Marlin rifles), but the Henry rifles still have a good presence in these events.

Henry’s website says that Henry is the leading lever action manufacturer. Dan said that’s true, both from the perspective of quantity of rifles and sales revenue. That’s impressive. Marlin and Winchester have been around for more than 150 years, and Henry has already surpassed them,

My next question was on takedown and cleaning. I’ve owned Marlin and Winchester lever guns, and the difference in disassembling the two for cleaning is significant. On the Marlin, you only have to remove one screw (the lever pivot screw), and then the lever, the bolt, and the ejector are easily removed to provide access to the breech. Disassembling a Winchester is much more complex. Dan told me the Henry lever guns are like Marlins in that regard. That’s a good thing. On that same topic, I spent some time looking at Henry’s web-based maintenance videos. As a guy who’s done a few of those for CSC Motorcycles (I know what it takes to make a good video), I was impressed. The Henry videos are excellent.  They cover disassembly, reassembly, sight adjustment, cleaning, and more. This is good stuff.

Anthony Imperato is Henry’s President and CEO (that’s Mr. Imperato you see in the photo above). In the video on the Henry website he comes across as a cool guy, so I asked the question: What’s he really like? Dan told me that Anthony is a personable, good-natured, hands-on leader and a genuine nice guy. He’s a shooter, too. That was good to hear. When I work with the best motorcycle companies (like CSC or Janus), it’s always good to see that the top people are riders as well as business leaders. Dan told me that the overwhelming majority of the nearly 500 employees at Henry are shooters and hunters. It sounds like a team I would like to join. If I was younger and looking for a place to make a difference, I’d send a resume to Henry.

Henry USA started as a small manufacturing operation in Brooklyn, New York.  Henry outgrew the Brooklyn facility and moved manufacturing to Bayonne, New Jersey.  In 2016, Henry opened a second plant in Rice Lake, Wisconsin to manufacture the Single Shot.  Henry has grown to nearly 500 employees and they now offer a wide range of rifles, shotguns, and accessories.  Take it from me, folks:  Henry is the real deal, a genuine Made-In-America success story.

I asked Dan about the make/buy mix on their guns, and he told me 100% of the parts in a Henry are made in the U.S. The walnut comes from Missouri and is finished in North Carolina. There must be something about the soil and the water in Missouri; all the best wood from custom riflesmiths comes from Missouri. And North Carolina has a long heritage of making high end furniture, so it’s a natural fit for those good Southerners to craft the Missouri walnut for Henry. Henry uses a spray varnish on all but their modern version of the original Henry rifle (those rifles have an oil finish).  I examined my Henry carefully, and the finish is flawless.  I’m pretty picky about that sort of thing, having finished a few rifles myself.  These folks have it wired.   Henry does its own machining, too, including the barrels.

Dan and I spoke about their different models for a bit, and I asked which one is the most popular. The best-selling of all the Henry rifles is their H001, the .22 lever action rifle. In the Single Shot series, it’s the .45 70 (I guess great minds work alike). Dan told me every Henry has a lifetime warranty that follows the gun. New, used, or inherited, Henry stands behind the rifle for life. That says a lot. Henry tests every rifle for safety and functionality. They don’t test for accuracy, but they don’t need to. I know from firing good buddy TK’s beautiful brass-framed .44 Mag Henry lever gun that they are very accurate. When TK let me shoot his .44, I put five slugs through a hole you could cover with a quarter. In fact, it was that morning on the range a few years ago with TK that first planted the Henry seed in my mind.

I was going to ask Dan why someone would buy a Henry instead of a Marlin, a Winchester, or a Ruger, but I already knew the answer.  It’s for all the reasons you see above.  Good walnut, classy looks, a good trigger, real craftsmanship, a great price, accuracy, a lifetime warranty, and it’s all made right here in the USA.  It just doesn’t get any better than this.  The Henry .45 70 Single Shot is a beautiful and handy carbine that looks and feels the way a gun should.  It’s 7 pounds and .45 70 chambering will make for a bit of kick on the bench with the 405-grain Missouri bullets, but that’s okay.   On a hunt, I’ve never felt the recoil or even heard the gun fire when the hammer drops.  That’s what intense concentration does; you folks who have experienced it already know that.  The look?  Henry nailed it.  There’s something about polished brass, blue steel, and fancy walnut that simply feels right on a fine firearm, and Henry has made this a fine firearm indeed.


Stay tuned to the ExhaustNotes blog for the .45 70 Henry range test.  Sign up here and never miss an ExhaustNotes blog!


Check out our earlier Henry Single Shot stories here:

Developing a Henry .45 70 Load:  Part 2
Developing A Henry .45 70 Load:  Part 1
The Henry Is In California
Henry Rifles:  Made in America Or Not Made At All


Want more gun stuff?  Hey, just click here!


Would you like to know more about Henry USA?  Here you go, folks!

Developing a .45 70 Henry Load: Part 2

The new Henry Single Shot, brass frame .45 70 rifle. Henry makes a beautiful rifle.

I’m using the time before I pick up my new Henry rifle to prepare the reloaded ammunition I want to test for accuracy.  You will recall that in an earlier blog we discussed the three .45 70 load levels shown in modern reloading manuals.  As I mentioned in that earlier blog, I use the loads intended for the 1873 Trapdoor Springfield.  Those loads were powerful enough to take down all kinds of critters back in the 1800s, and in developing loads for other .45 70 rifles, I’ve found these to be fun to shoot and accurate.

Missouri 405-grain cast .45 70 bullets. These have proven to be very accurate in other .45 70 rifles.  I’m trying these and two other bullets in the Henry.  The .22 Long Rifle cartridge you see here didn’t come with the Missouri bullets; I added it to give you an idea of just what a monster the .45 70 cartridge is.

My loads are based primarily on the components I have on hand and loads I’ve known to work well in the past.  Powders include SR 4759, IMR 4198, IMR 3031, 5744, Varget, and Trail Boss.  Bullets include the Remington 405-grain jacketed soft point, the Hornady 300-grain jacketed hollow point, and the Missouri 405-grain cast roundnose.

A photo showing some of the components to be used in this test. When loading, I would never have all of this stuff on the reloading bench, and in particular, I would never have more than one powder on the bench at the same time. The risk of mixing powders is too great. If you have more than one powder container on the bench, it’s very easy to pour the remaining powder in the dispenser into the wrong container (don’t ask me how I know this). When that happens, the only prudent thing to do is throw the mixed powder on the front lawn (it makes good fertilizer).

I like all of the bullets I listed above, but I particularly like the Missouri bullets.  The Missouri cast bullets seem to always be available, they are relatively inexpensive, and they are accurate.   I’m expecting to see great accuracy from these in the Henry, as they shoot well in the Ruger and the Marlin.  The 405-grain Missouri bullets are accurate in the Chiappa 1886, too, but that rifle’s stock design and buttplate make the recoil painful when shooting the heavier Missouri bullets.

Here are the .45 70 loads I will test in the Henry:

When testing for accuracy, it helps to keep things organized.  I’ll bring this table to the range with me and record my results as soon I retrieve the targets. All loads will be fired using open sights at 50 yards.

For a more in-depth reloading process overview, I invite you to review our earlier series on loading .45 ACP ammunition.  The .45 70 reloading process is very similar to loading handgun ammo.  That’s because the .45 70 is nearly a straight-walled cartridge, so the steps are the same.  This is what is involved in reloading .45 70 ammo:

The reloading process. It looks complicated, but it’s very intuitive. Most folks who reload find it as enjoyable as shooting.

I use mostly RCBS or Lee reloading dies for all of the cartridges I load.  Both are good companies, and both offer superior customer service (if you ever need it, which has only occurred a couple of times for me).  I’ve been reloading .45 70 ammo for close to 50 years now, and I’ve been using the same set of RCBS dies the entire time.

A three-die RCBS set. The first die (on the left) deprimes and resizes the fired case to its original diameter. The case has to be lubricated for this step, or else it will stick in the die.  The second die is called the expander die.  It expands the upper portion of the cartridge case and, if adjusted to do so, adds a flare to the case mouth.   The third die (on the right) is the bullet seating and crimping die.  It can be adjusted to change the depth to which the bullet is seated, and to add a crimp if you wish to do so.

The expander die (the one in the center of the above three dies) is the one that flares the case mouth.  It contains a threaded insert with a step in it to apply the bell mouth to the case.

In this photo, the case expander has been removed from the die to show the diametral step. It is this step that adds a flare to the case mouth.

This is what the case mouth should look like after it has been flared.  You don’t want to overdo this step.  You just want to get enough of a flare to allow the bullet to get started in the case.

A .45 70 case with a flared mouth. We add the flare to allow the bullet to enter the case with no shaving of the bullet.

After the case has the flare applied, it’s time to clean the primer pockets and then prime each case.  I use another RCBS tool to clean any combustion residue from the primer pocket (see our earlier tutorial on loading .45 ACP ammo), and then I use a Lee priming tool to seat the primers.

The Lee priming tool. This is another tool I’ve been using for five decades. It’s a much better way to prime cartridge cases.
A CCI 200 large rifle primer in place, ready to be seated in a cartridge case. The .45 70 cartridge requires a Lee No. 8 shellholder, shown in place in this photo.
A .45 70 case in the Lee priming tool. Compressing the handle (shown to the right of the priming tool barrel) forces the primer into the case. You do this one at a time for each case.
A freshly primed .45 70 cartridge case.

After all the cases have been cleaned, flared, and primed, it’s time to add propellant.  I use my RCBS scale along with a powder dispenser to add the right amount of powder to each case.  To get the correct amount of powder, I always consult a load manual.  I’m showing you different charge weights in this blog, but DO NOT rely on what I’m telling you (or what you read on the Internet from other people) for this information.  Always consult a reloading manual.  Several reloading manuals are available; I prefer the Lyman manual and it’s the one I use most often.  Most of the other manuals are either from bullet manufacturers or propellant manufacturers, so they list only their components.  The Lyman manuals are not restricted to a single brand of bullets or powders, as Lyman does not manufacture bullets or powders.   Lyman does a good job, I think.

My RCBS powder scale, the reloading tray, and ten .45 70 cases waiting for their propellant charges.

When I load different test loads as I’m describing in this blog, I’ll charge and complete each group separately.  Typically, that’s ten cartridges in a group.

Once the cases have been charged with propellant, it’s time to seat and crimp the bullet.  I typically use a light crimp for the .45 70.  Crimping involves bending the flared case mouth into a crimping groove (sometimes called a cannelure) on the bullet.  You crimp a cartridge for three reasons: To prevent the bullet from being forced further into the cartridge case if it is fed into the chamber automatically (as occurs with, say, a 9mm or .45 ACP cartridge), to prevent the bullet from backing out of the case due to the recoil of other cartridges (as might occur in a revolver or a rifle magazine), and to hold the bullet in place when the primer first fires (this allows the flame front to build to a consistent pressure in cartridge prior to driving the bullet down the bore).   It’s that last reason that I’m most interested in here.  It should make for a more accurate cartridge.  Theoretically, neither of the first two reasons is a consideration for a single shot rifle.

A Missouri bullet on top of a charged .45 70 case, ready to be run into the bullet seating die in the RCBS Rockchucker press.

Seating the bullet and crimping it is a bit of a dance.  You have to get the bullet seated to the right depth, and then you have to apply the crimp.  We use the third and final die in a three-die set to accomplish both.  I screw the bullet seating portion of the die fairly far into die initially and then I screw the die into the press to get the bullet seating depth where I want it.  In this case, I want the top of the brass case to be nearly even with the top of the bullet’s crimp groove.   Then I back the bullet seat all the way up in the die, and screw the die body into the press such that it forms the crimp (there’s a tapered decreased diameter in the die insider diameter that forms crimp).  Once I have the crimp where I want it (and the amount of crimp I want), I then screw the bullet seater all the way such that it contacts the bullet.  I then make sure everything is jake on the next round (you know, the same crimp and the same cartridge overall length), I make any required small adjustments, and then I lock everything down with the die’s two locknuts and load the remaining cases.

Adjustments on the seating and crimping die. The small-diameter threaded shaft controls fine adjustment of the bullet seating depth. Turning the main die body into or out of the press controls coarse bullet seating depth and crimp. The two locknuts (denoted by the arrows on the left) lock the bullet seating shaft and the die body in place.
The Missouri bullet nearly fully seated in the case, but not yet crimped. I’ll seat the bullet just a bit deeper, and in the last few thousandths of an inch on the press stroke, the upper edge of the cartridge case will be crimped by the die around the bullet.
A seated and crimped Missouri bullet in a .45 70 brass case. When I bellmouth the cases, I only open them up just enough to allow the bullet to start into the case. When I crimp, I only crimp a little bit. This minimizes working of the brass around the case mouth. Loading at the Trapdoor Springfield levels as I do, and using this minimal amount of opening and then crimping the brass, results in long case life. These cases were purchased in the 1970s and I’m still using them.
A completed round. This .45 70 cartridge is ready chamber and fire.  It’s a big cartridge.

After I’ve done all of the above, I immediately label the packaged, reloaded ammo so that I know what I have.  I can’t rely on my memory and do this later; I always perform the labeling operation as soon as the reloading operations are complete.

A box of 50 .45 70 cartridges labeled and ready to take to the range. I always label my loads as soon as I finish them.
Because these are cartridges loaded differently for accuracy testing in the new Henry rifle, I included a map inside the cartridge container to identify how each group has been loaded.
Ready to go to the range. Reloaded cartridges are less expensive than factory ammunition, and I will be able to find which combination of components performs with the greatest accuracy in my new Henry rifle. With factory ammo, you pay more and you get what you get in terms of accuracy.

There you have it.   I have all the .45 70 ammunition I want to test loaded, boxed, labeled, and ready to go to the range.  Now all I have to do is take possession of my new Henry, head out to the West End Gun Club, and see what works best.  You’ll get to see it, too, right here on the ExNotes blog.


Check out our earlier Henry Single Shot stories here:

Developing A Henry .45 70 Load:  Part 1
The Henry Is In California
Henry Rifles:  Made in America Or Not Made At All

And check out our other Tales of Gun Stories here.