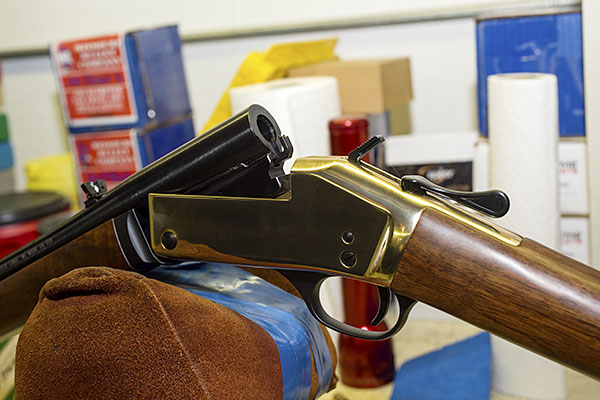
A Ruger .45 70 Circassian No. 1

By Joe Berk

The .45-70 Government cartridge was destined for obsolescence in the middle of the last century and then a curious thing happened:  Ruger chambered their No. 1 single shot rifle for it and Marlin did the same with an adaptation of their lever action rifle a short while later.

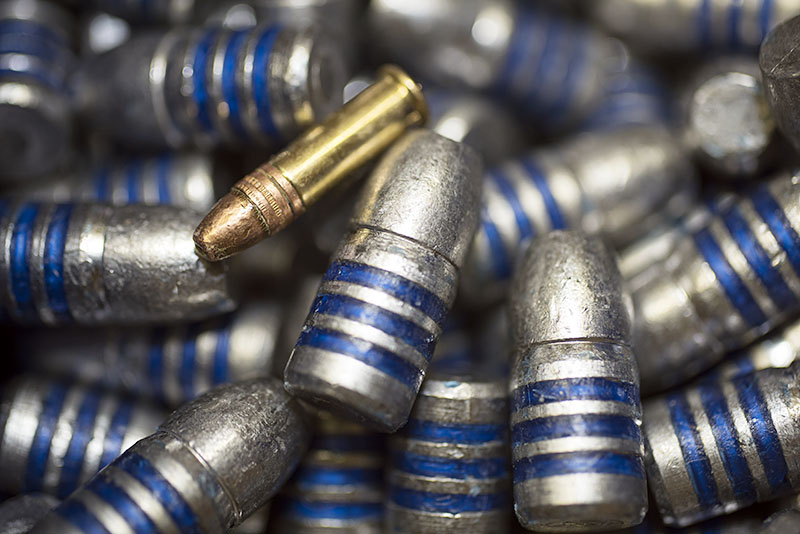
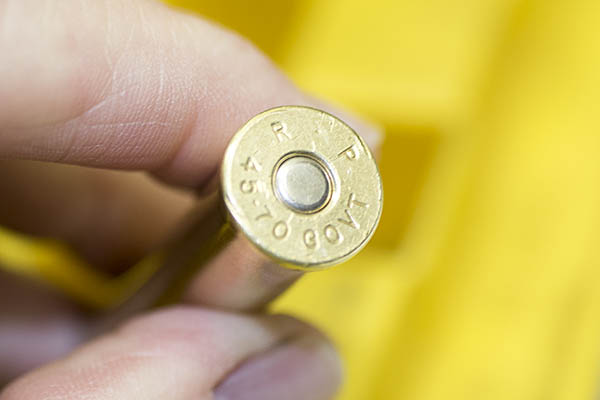
300-grain .45 70 Winchester and .22 LR Federal cartridges.

When Marlin and Ruger came on board with their .45 70 rifles, there was suddenly significant interest in the cartridge.  I fell in love with the .45 70 when I bought a Ruger No. 1 in 1976 (a rifle I still have), and I’ve been reloading the cartridge ever since.  I’ve owned several No. 1 Rugers, a few Ruger No. 3 rifles, a bunch of Marlin .45 70s, and a replica 1886 Winchester (by Chiappa, with wood that is way nicer than anything from Winchester).

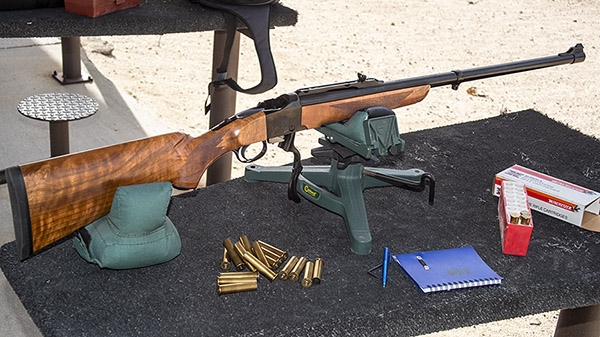
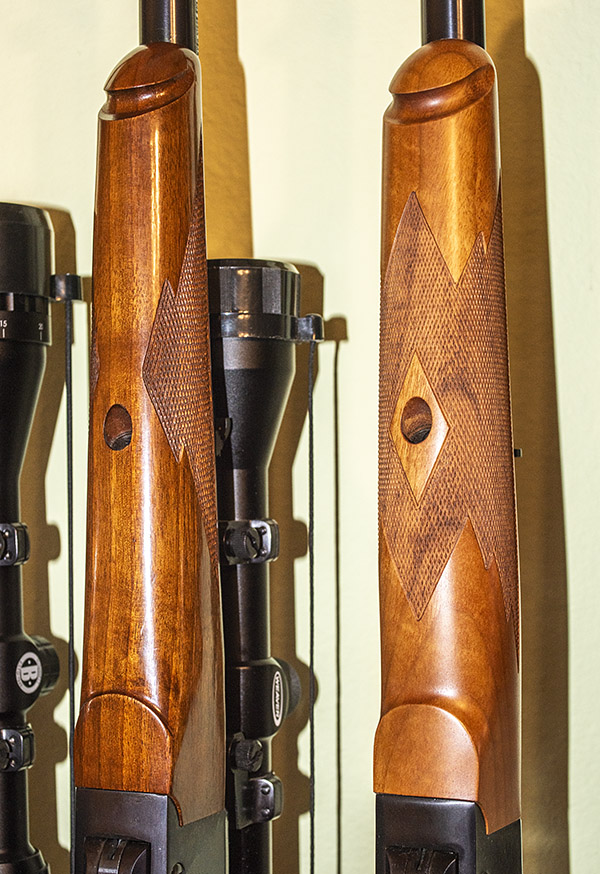
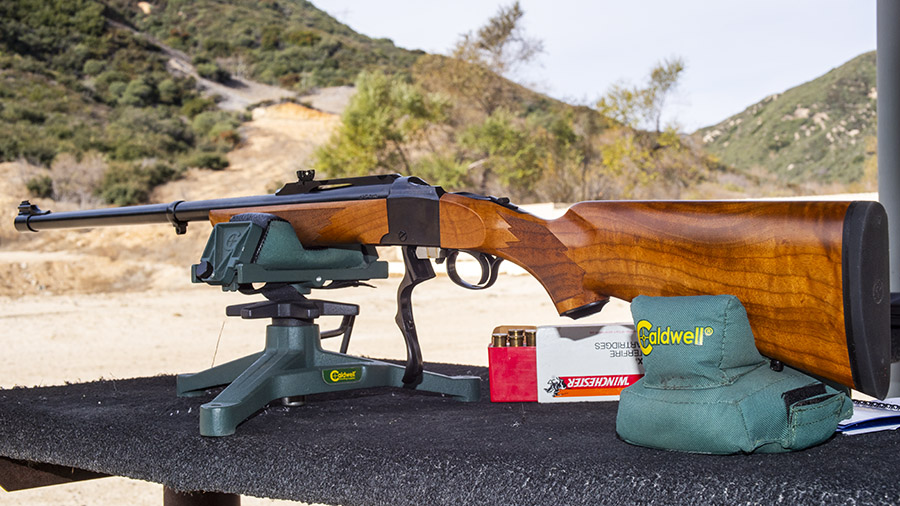
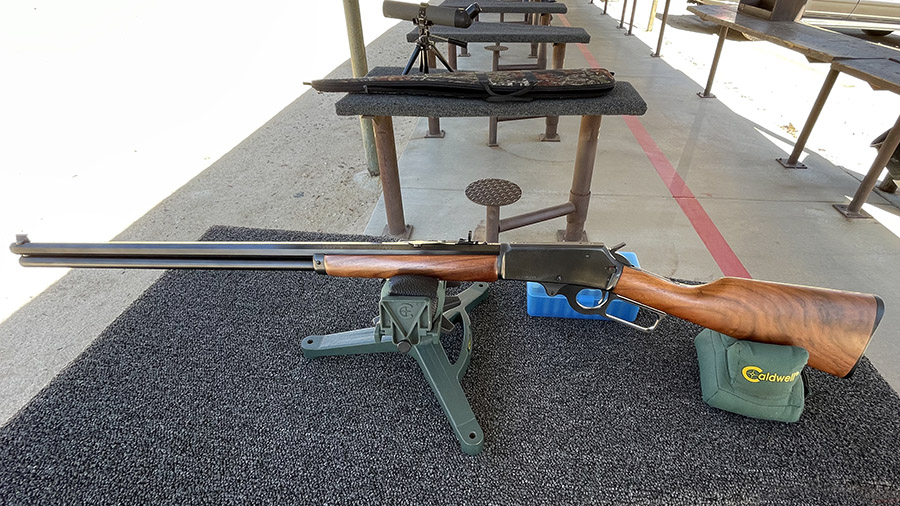
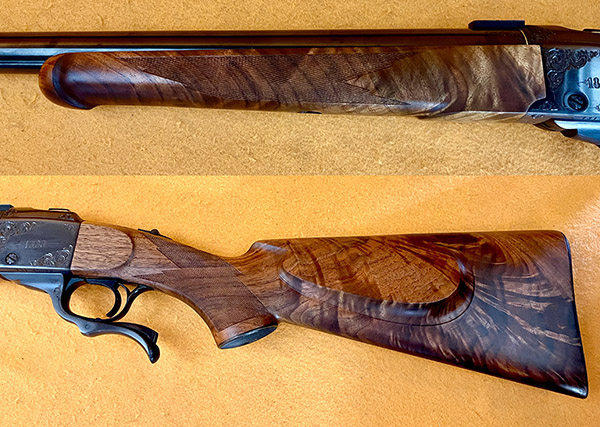
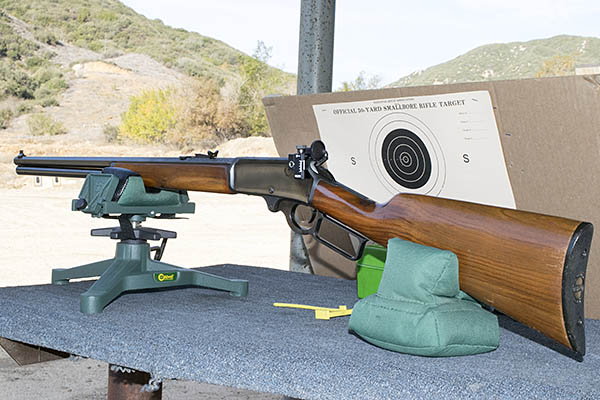
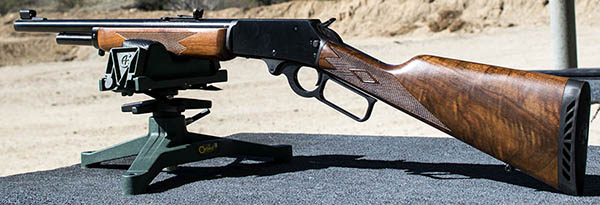
Starboard side of the Ruger Circassian .45 70 No. 1 rifle with 26-inch barrel.
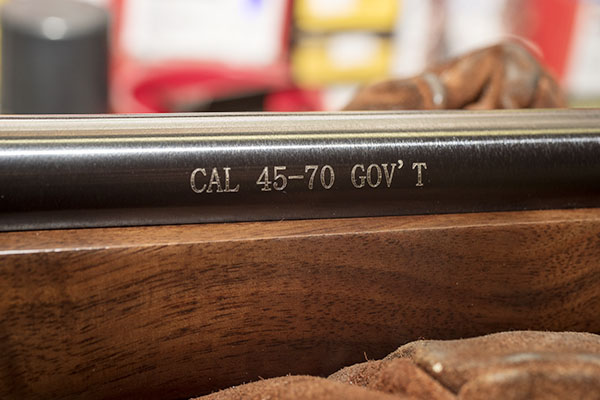
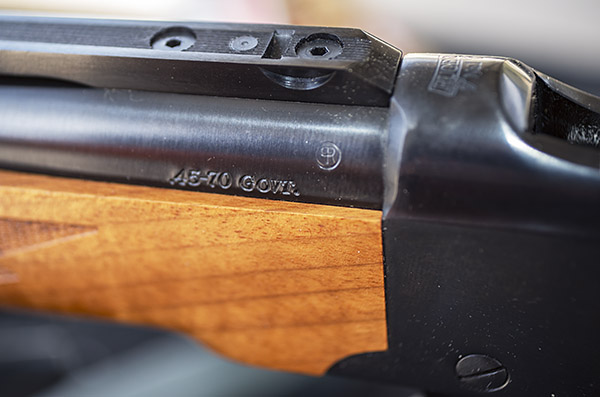
Yep. The .45 70 was adopted as the official US Army cartridge in 1873, hence the “Gov’t” designation sometimes seen with the cartridge name.
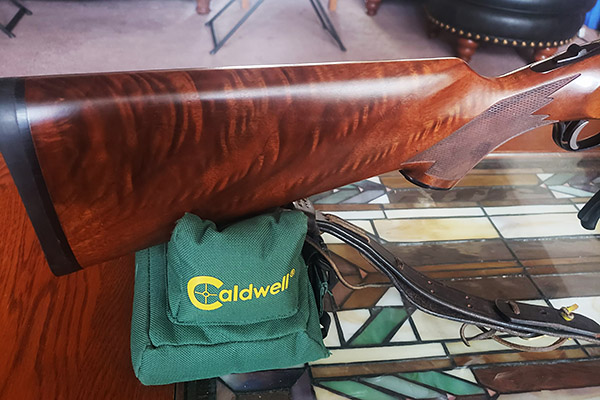
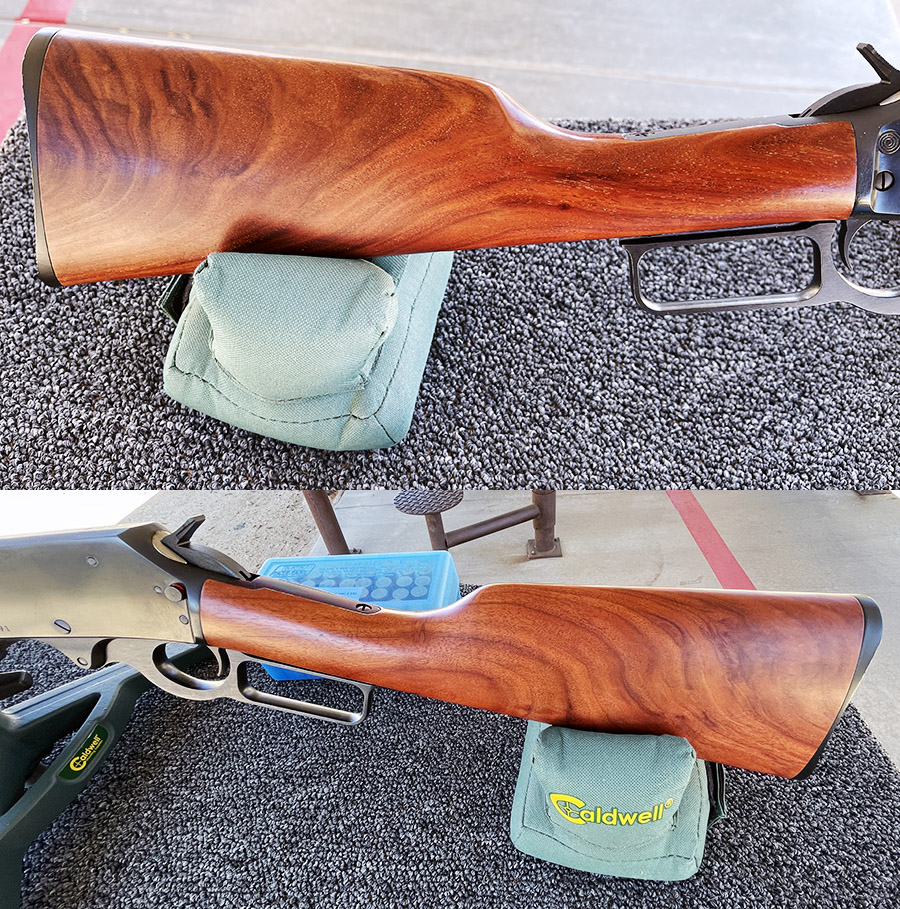
In addition to its Circassian walnut and 26-inch barrel, these rifles included wrap-around checkering on the forearm. The standard checkering pattern for a Ruger No. 1 is shown on the rifle to the left.

All these manufacturers have offered special editions of their .45 70 rifles. One of the more recent offerings from Ruger was a 26-inch barreled No. 1 with a Circassian walnut stock.  When it was first offered about 7 years ago by Lipsey’s (a Ruger distributor), it was a limited run of only 250 rifles.  They sold out immediately and folks still wanted these, so Lipsey’s and Ruger offered a second run of 250 rifles.  I wanted one with fancy wood, but none of the Circassian Rugers I saw online had wood nice enough to be interesting.  Even though the rifles had Circassian walnut, all the ones I saw were plain and straight grained.  Then one day I wandered into a local gun shop and I saw the rifle you see here.  It caught my eye immediately and at first I couldn’t believe what I was seeing.  These rifles were next to impossible to find and here was one right in front of me.  It was pricey, but I Presbyterianed the guy down to $1050 (you fellow Members of the Tribe will get it) and I pulled the trigger (figuratively speaking).

Ruger’s more recent .45 70 No. 1 rifles have a short leade (the distance between the forward edge of the cartridge case and where the rifling starts).  Mine won’t chamber cartridges with 400-grain and above bullets.  In fact, I had some ammo I had loaded with an old batch of Hornady’s 300-grain jacketed hollow points, and this ammo wouldn’t chamber, either.   I examined the profile of my old 300-grain Hornady bullets and compared it to pictures of the current Hornady 300-grain bullets, and it was obvious the older bullets had a more gradual ogive (the curved portion of the bullet’s profile).  I ordered a box of the current Hornady 300-grain slugs, I loaded them, and the ammo chambered in this rifle easily.  In researching this issue on the Internet, the issue of recent Ruger .45 70 rifles’ shorter leades is a complaint that’s popped up more than once.  One guy even sent his rifle to Ruger, but he said Ruger measured the chamber and returned it to him with no work done (according to him, Ruger said the rifle met SAAMI chamber spec requirements).  It’s not really an issue to me; if I want to shooter the heavier bullets I’ll use a different .45 70 rifle.

I had some Winchester factory .45 70 cartridges in my ammo locker, including the Winchester load with 300-grain hollow point bullets.  I thought I would shoot those to see how they did in the Circassian No. 1.

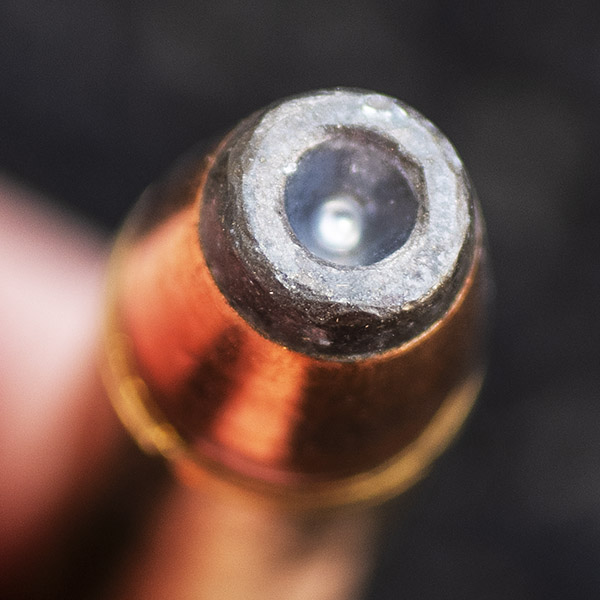
A big ol’ .45 70 hollow point cartridge.
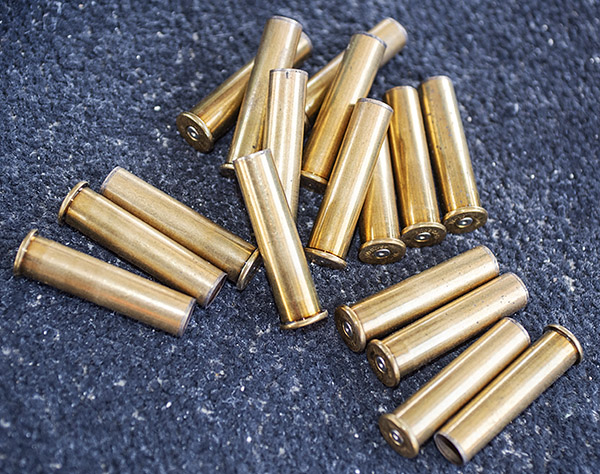
Spent cases destined for reloading. This is one of my favorite cartridges to reload.

My first shots were at 50 yards, and the Ruger grouped nicely.  The shots were biased very slightly to the right.  That’s okay, because the Ruger rear sight is adjustable for both windage and elevation.   I didn’t bother making the adjustments on the range, as it was a fairly windy day.  I’ll make the adjustments, if necessary, on the next trip.

50-yard groups with the Circassian No. 1. The groups are biased to the right, some more than others (a function of how I held the rifle for each group).  Ignore the upper right target and the circled holes to the right of the bullseye; those were from a .243 I had out on the same day.

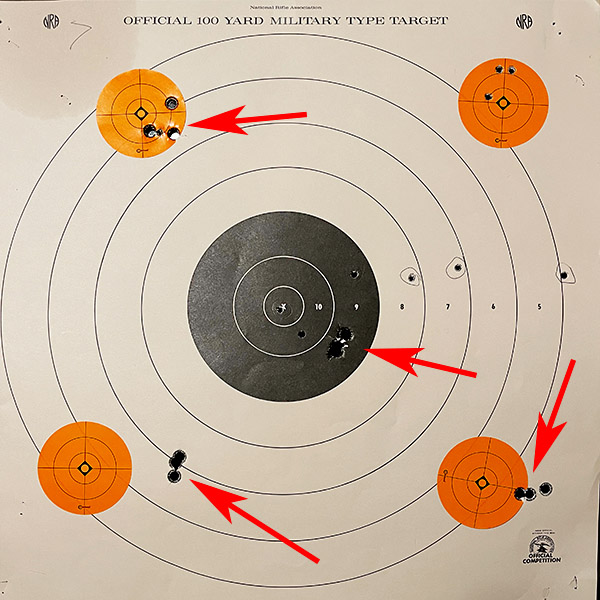
I then set up a standard 100-yard target (at 100 yards).  There were 20 rounds in the box of Winchester .45 70 ammo and I had already shot four 3-shot groups at 50 yards.  That left eight rounds to play with at 100 yards, and play around I did.

Eight shots at 100 yards. I need to move the rear sight a bit to the left. The vertical stringing is most likely a function of not allowing the barrel to cool between shots.

The results surprised me.  I was holding on the bullseye at 6:00, and those big 300-grain hollowpoints hit at about the right elevation.  As was the case with the 50-yard targets, the point of impact was biased to the right.  The first three made a tight group and then the shots climbed as I progressed through the eight.  The vertically strung group was only about an inch in width.  The stringing is almost certainly due to barrel heating and the barrel being deflected up by the forearm (it’s not free floated).  I was pleased with the results.  It told me that I could leave the elevation adjusted for 50 yards and it would still be spot on at 100.  On my next range outing with this ammo, I’ll adjust the rear sight to the left a scosh and take my time between shots to preclude the stringing.  Even with the stringing you see in the above target, it’s not too shabby for a 100-yard group with open sights.


More blogs on this and other .45 70 rifles?  You bet!

Buffalo Guns
A Wind  River Marlin .45 70 Rifle
A .45 70 Remlin 1895
The 1886 Winchester
Turnbull Guns
Marlin Cowboy Front Sight Installation
Marlin 1895 Cowboy Revisited
Henry Rifles
The Henry Is In California
Developing a Henry .45 70 Load: Part 1
Developing a Henry .45 70 Load: Part 2
Henry’s Home and an Interview with Dan
Henry Accuracy Loads


Never miss an ExNotes blog:


Don’t forget: Visit our advertisers!


Bringing a 405 Ruger No. 1 Back To Life

Good buddy and fellow Inland Empire shooter Jose recently posted on Facebook about what has to be one of the best deals ever for a highly collectible Ruger No. 1 in .405 Winchester.  Ruger produced only a small number of these rifles (I’ve only seen one in person at a gun show a few years ago).  This one has exceptional walnut, which makes it even more desirable.

Here’s Jose’s story.  Enjoy, my friends.


I’ve never had any desire to hunt African game and I probably never will. But I’ve enjoyed reading about the African plains rifles since I was a kid in junior high school. Bringing a copy of Guns & Ammo magazine to school would probably get you a quick trip to the principal’s office these days…but I digress.

Exquisite walnut is often found on the older Ruger No. 1 rifles.

Quite a few years ago I saw an old Ruger No.1 Tropical in the consignment rack of a small gun shop that is now long gone. The owner said, “just pick it up and feel the heft.”  And of course, I did and the next thing you know we were talking price, knowing I would never pay $2,000 for a collectible Ruger No. 1.  Shaun confided in me that the rifle’s owner couldn’t find the obsolete 405 ammo for it anywhere and he wasn’t a handloader, so he wanted to sell the rifle. Another problem with the rifle was that a previous owner had cut down the front sight, probably because he had been shooting handloads with .41 caliber pistol bullets. So we settled on $500 and I became the owner of my first “unobtainable” Ruger No. 1!

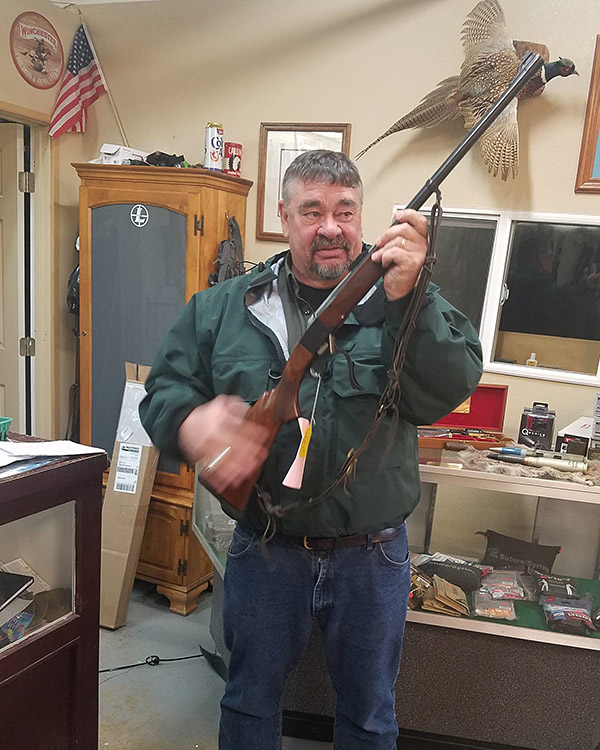
In the gun shop years ago eyeing the Ruger No. 1. Salesman Shaun said, “hand me your phone and let me take a photo of you so you can see how good you look with that rifle!”  Shaun passed away a couple of years ago, but I know he smiled down from Heaven yesterday as I fired the Ruger No. 1H Tropical for the first time. And he was right, this gun was meant for me!

It took me a lot of searching over the past few years, but I finally located a set of 405 Win reloading dies, the shell holder, and all the components to bring this rifle back to life.

Hornady had made a run of new 405 Winchester brass and I was lucky enough to find a New Old Stock box of 50 shells. I also located some new Barnes .412, 300 grain TSX bullets.

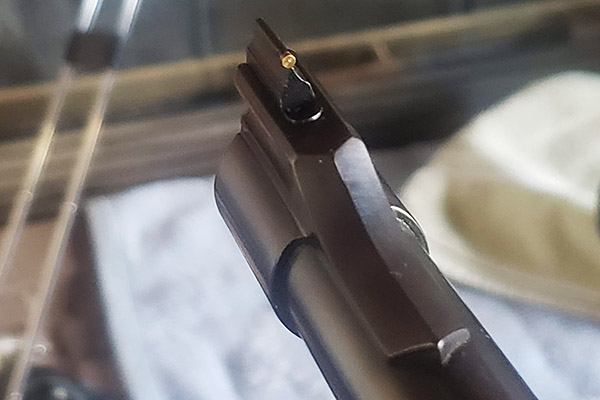
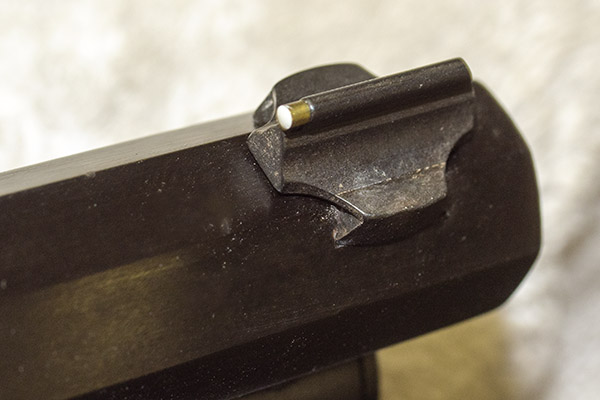
The first step in restoring the old 1H Tropical was to contact Ruger and purchase a new gold bead front sight. That was a simple install as the blade is held in place by a small detent spring.

New Ruger NOS gold bead front sight blade installed.

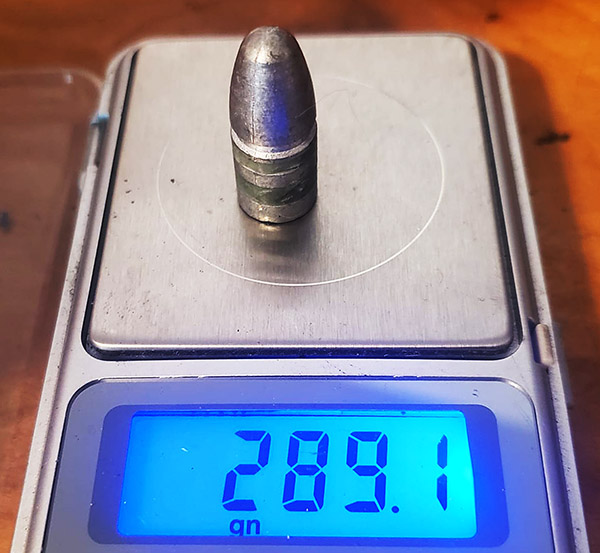
Not wanting to use the expensive Barnes TSX bullets quite yet, lead bullets were cast from lead wheel weights with a bit of tin added using a Lyman 412263 plain base mold to cast 288 grain bullets. These were sized to 0.413 inch and lubed with Alox. Lyman has since discontinued this fine old bullet mold.

A Lyman 412263 bullet, lubed and sized.

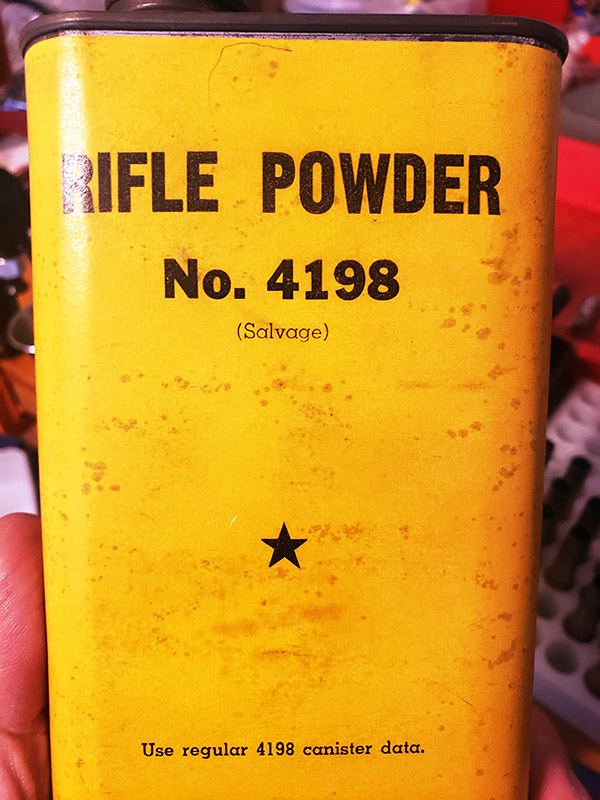
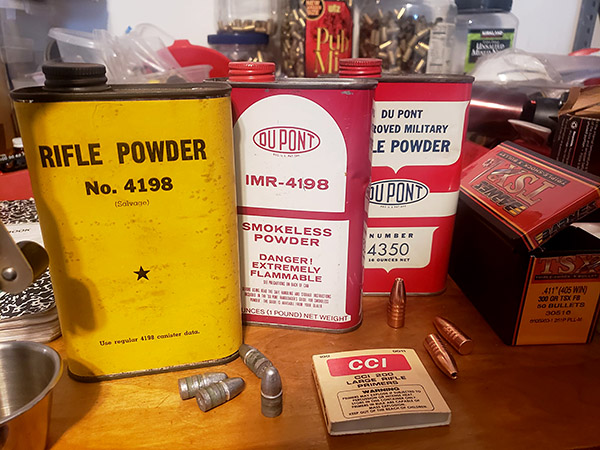
Finally, yesterday morning I decided it was time to resurrect this old rifle! Besides, the project would give me the opportunity to test some old “salvage” Hodgdon 4198 powder I’ve had sitting on the shelf for nearly two decades. The powder is probably from the 1950s or early 1960s. I also had some ancient CCI 200 large rifle primers on hand.

Hodgdon “salvage” 4198 smokeless powder. The powder is probably WW II US Military surplus powder that Hogdon bought in bulk and repackaged in the late 1950s or early 1960s.
Vintage components for a vintage cartridge.

I loaded 20 rounds of 405 Winchester ammo using the cast lead bullets and a starting load of 38.5 grains of 4198 and headed down the hill with good friend Yvon to an informal shooting range on BLM land.

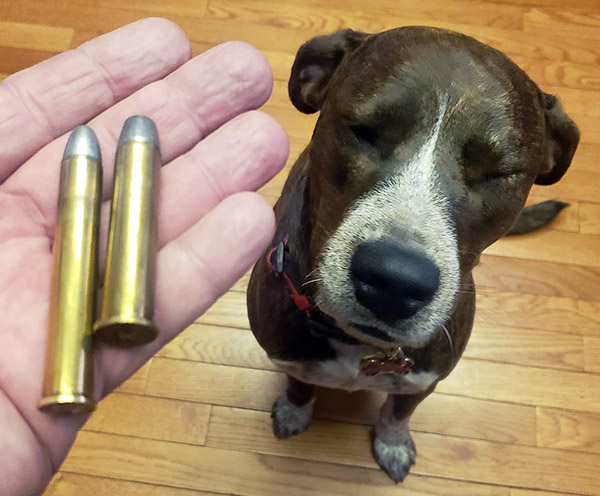
The obsolete 405 Winchester cartridge (left) and the popular 45-70 Government cartridge (right) used by 1880s plains buffalo hunters of the American west. I don’t shoot buffalo and never will. But I enjoy reviving and firing old guns!

Let me say that this Ruger No. 1H Tropical in 405 Winchester lives again. It shoots incredibly tight groups with the cast bullets and gold bead open sights.

My next project will be to develop a non-lead hunting load using the 300 grain Barnes TSX bullets.

Bringing life back into old obsolete rifles can be tons of fun.


That’s an awesome story, Jose, and thanks for allowing us to share it here on the ExNotes blog.  Your No. 1 has to be one of the best deals ever.   The dealer’s original asking price is probably what that rifle is worth if you could find one for sale.  Well done, my friend.


More Tales of the Gun!

Marlin 1895 Cowboy Revisited

This is a followup to an earlier blog  about installing a new Williams front sight on my 1895 Marlin Cowboy lever gun.  I dialed in the new front sight on the Marlin 1895 Cowboy and it was right on the money.

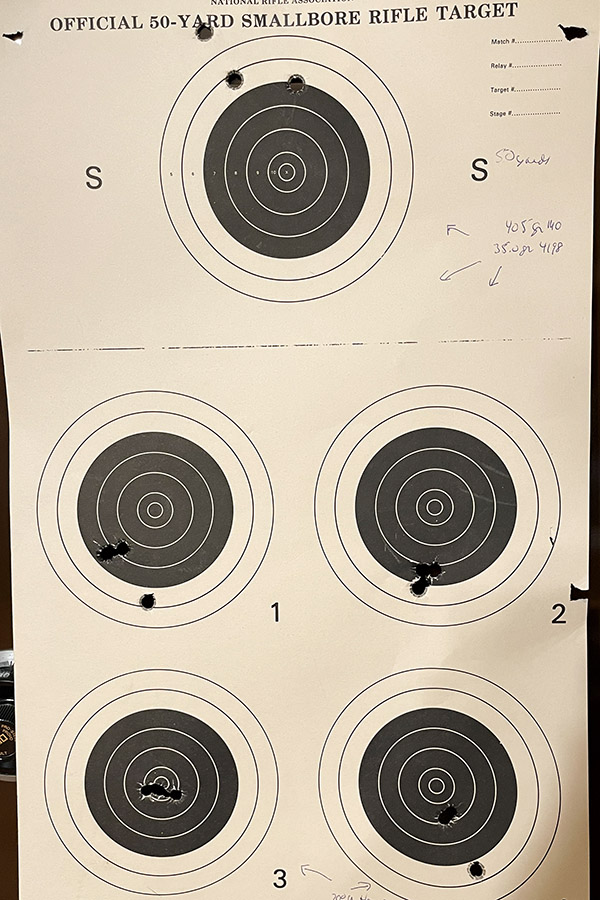
I shot on the 50-yard range at a smallbore rifle target.  The top center S target caught my first three shots (with my 405-grain cast bullet load) and they were a touch high, so I dropped the rear sight one click and drifted it slightly to the right with my brass punch and a small hammer.  Targets 1 and 2 caught the next six rounds (all with the same 35.0 grains of IMR 4198 and the 405-grain Missouri cast bullet).  By Target 2, I was dialed in…dead center and hitting right at the point of aim.  Then I switched to another favored but lighter accuracy load, and that’s 16.2 grains of Trail Boss with a 300-grain Hornady jacketed hollow point.  I shot that load at the bottom two targets.

The Marlin Cowboy rifle kicks hard with the 405-grain bullet when shooting from the bench, but it sure is accurate. Both loads can shoot one-hole groups at 50 yards if I do my part.  I didn’t do as well at 100 yards (the above are 50-yard groups), but I think that was because I was feeling the effects of too much recoil already.  That front sight change worked for me, and the 1895 is a good shooting lever gun.


More Tales of the Gun are here.

Safe Queen, or Shooter?

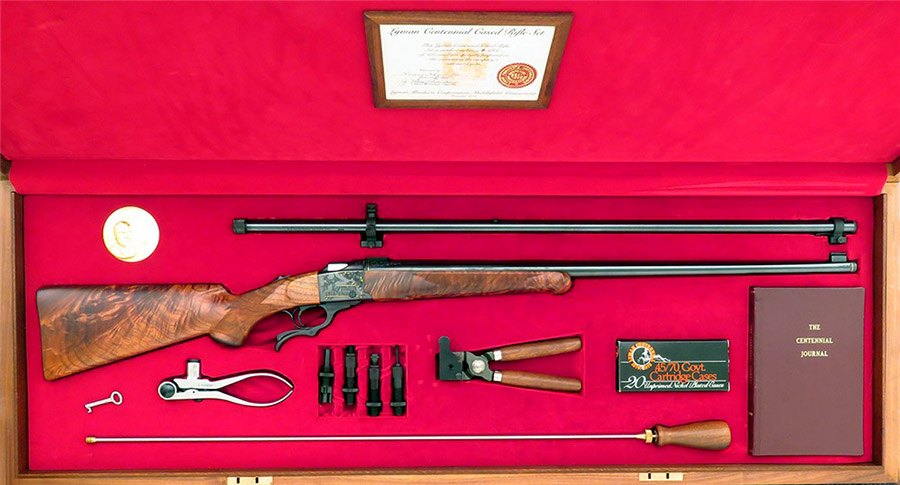
Some folks won’t shoot a commemorative or high end custom gun, and instead relegate the firearm to a life of being on display or taking up residence as a safe queen.  Other folks espouse a manly “I won’t have a gun I don’t shoot” attitude.  I’m a few days away from having to make that decision with the Lyman Ruger No. 1 you see in the photo above.  What’s your feeling, and why?

Let us know here in the comments section and don’t waste any energy posting on Facebook.  This is where the cool kids hang out and we want to know what you think.


More Tales of the Gun are right here!

Marlin Cowboy Front Sight Replacement

About a dozen years ago I bought an impressive Marlin 336 Octagonal in 30 30, but that’s not the rifle you see in the photo up top.  I didn’t realize it at the time, but that 30 30 Marlin was a collectible rifle and I got a hell of a deal on it.  I’ll give you a link to that story at the end of this one.

When I started the Peoples Republik of Kalifornia paperwork on the 336 Octagonal, I saw a brand new 1895 Cowboy Marlin at the same gunstore with the John Marlin proof and exceptional walnut.  And that, my friends, is the rifle you see in the photos here.  I’m not in the habit of buying two rifles at the same time (in fact, you can’t even do that here in Nuttyland any more), but wow, that 1895 was pretty and I bought both the 336 and the 1895.  That Marlin rang all the bells for me…an octagonal 26-inch barrel, the .45 70 chambering, and killer wood.  The time to buy a lever gun with superior wood is when you see it, and that’s what I did.

Wowee! A Marlin Cowboy in .45 70 with super walnut and a John Marlin proof mark!

Over the last dozen years, I only had the Cowboy on the range a couple of times, and that was enough for me to know the sights were way off.    A couple of weeks ago, I decided to find out exactly where it was printing with my favorite .45 70 load (more on that in a bit).  The Cowboy grouped superbly well (it coverleafed rounds at 50 yards), but I had to go to the very top of the adjustment range on the rear sight to finally get the bullets to hit at the point of aim at 50 yards. In the rear sight’s middle elevation setting, the point of impact was 10 inches low at 50 yards. I couldn’t adjust the rear sight any higher, so I knew I needed a lower front sight.

I tried to call Marlin to ask for a shorter front sight, but all I got was a message telling me to go to their website.  I struck out there, too.  The website said that Ruger (Marlin’s latest and current owner) isn’t in a position to service Marlins or provide parts yet and they don’t know when they will be.  Hey, at least they were honest, and that counts for something.

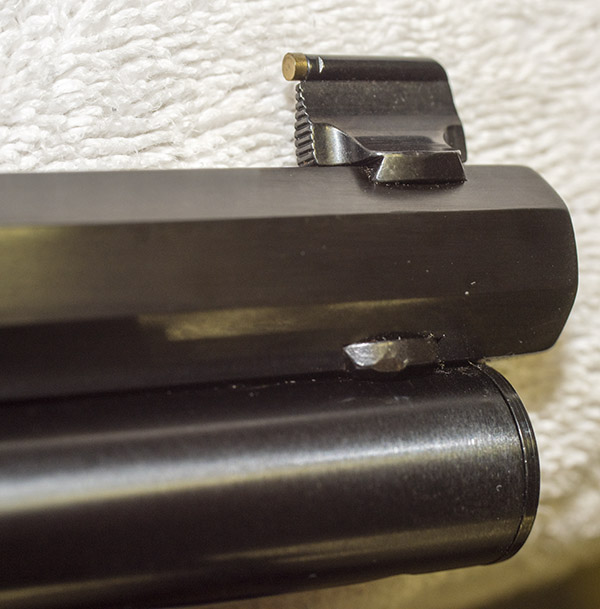
The lollipop front sight as the rifle was delivered from Marlin. It was way too high, which caused the bullets to hit way too low.
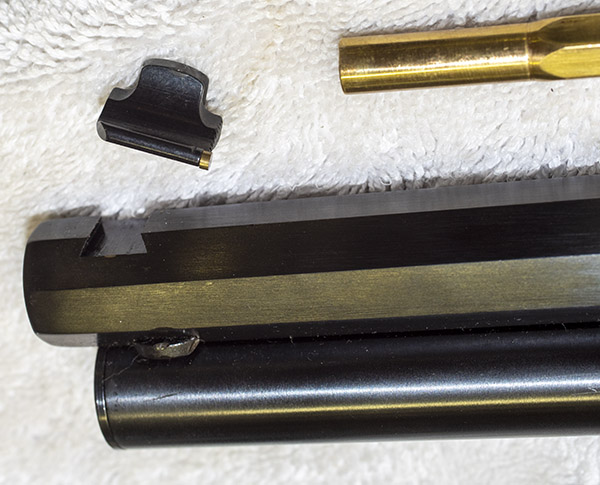
I gently tapped the front sight out with a brass drift and a hammer.
The front sight that came with the rifle was 0.505 inches tall. That’s too tall for my loads.

Okay, I reasoned, this should be no problem.   I called Williams, the experts on iron sights, and I hit paydirt.  The Williams guy told me that in recent years Marlin put whatever front sights they had in stock on their rifles with no thought given to where the guns would print.  That’s what happened on my rifle.

Getting the correct front sight once you know where the rifle is printing is simple.  The height of the front sight that came with the rifle was about 0.500 inches, and it was printing 10 inches too low with the rear sight as high as it would go.  It’s an a/b=c/d calculation.  If you know the sight radius, the front sight height, the distance to the target, and how low or high the point of impact is, you can calculate the required change in front sight height to move the point of impact the amount you want.  I’d like to say it’s advanced engineering, but the truth is it’s a 7th grade algebra problem (and I made it through the 7th grade successfully, aside from a ton of time in detention).  The calculation goes like this:

Required change in front sight height =
(desired shift on target/(50*36))(sight radius)

where

        • 50*36 is the distance to the target in inches (50 yards * 36 inches/yard)
        • The sight radius is 23 inches
        • The desired point of impact on the target is 10 inches up (the rifle was grouping 10 inches below point of aim).

I did the math, and the required change in front sight height was a drop of (10/(50*36))(23) = 0.128 inches.  That meant I needed a front sight about 0.372 inches tall.

What you see above is what Marlin should have done when they selected the correct front sight for this rifle, but they didn’t and I did.  I bought two new front sights.  One would raise the point of impact about 13 inches at 50 yards, and the other that would raise it about 5 inches at 50 yards. I knew that one of the two should work.  The cost for both was only $35, and in the grand scheme of things, I always figured I can’t have too many gun parts to play with.

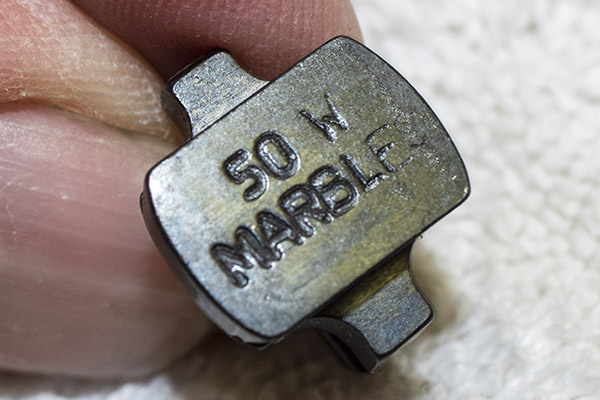
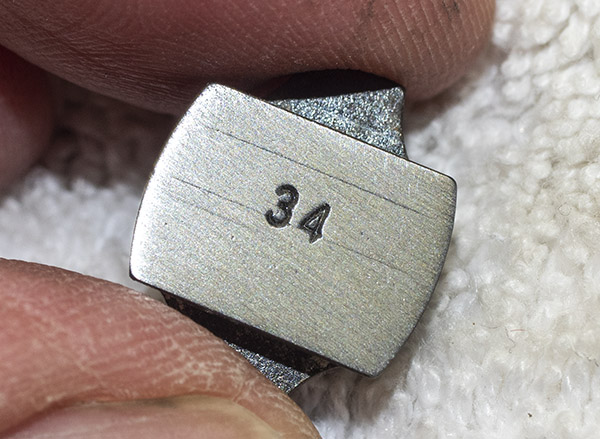
Williams had .341 and a .410 front sight.  You can’t get the exact height you want but that’s okay…that’s why the rear sight is adjustable.  So I bought both rear sights. The rear sight height adjustment would give me the room to dial either in. The .341 front sight would give me more than I needed; the .410 would give me a little less than I needed, but either one should get me into the adjustment range.

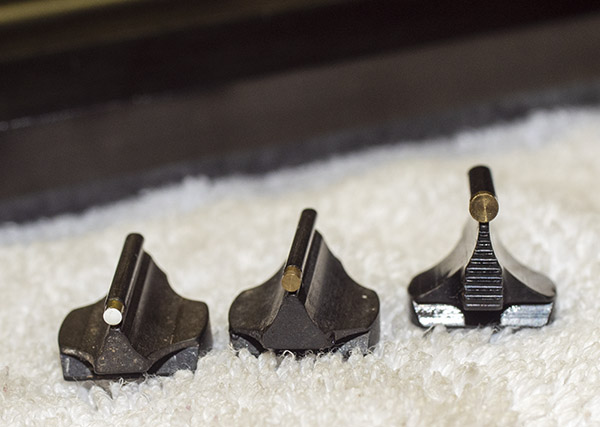
The two Williams replacement front sights on the left, and the original Marlin front sight on the right.

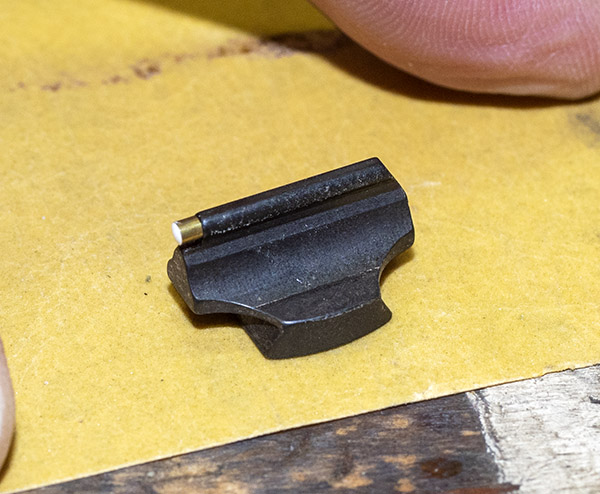
The front sight mounts in a dovetail on the barrel, and it has to be fitted.  It’s an interference fit, but it has too much interference as delivered.  You have to gently sand material off the bottom of the replacement sight so it goes into the dovetail with just a little interference.  Easy does it is the mantra here (you can take material off, but you can’t put it back on).  You want enough interference so the front sight has to be tapped in with a brass drift and it won’t move around due to recoil or normal hunting knocking about.

Sanding the front sight base down, a thousandth or two at a time.
The Williams 0.341 inch front sight ready for installation.
A white dot (which I greatly prefer over the brass dot) front sight, on station and ready for duty.

So how’s it all going to work?  I’ll let you know after I get to the range.  Oh, and my favorite .45 70 load?  It’s the 405-grain Missouri Bullet Company cast bullet, crimped in the cannelure, with 35.0 grains of IMR 4198.


One more thing…that 336 Marlin Octagonal I told you about?  It’s right here, along with a bunch of other cool lever gun stuff!  You’ll want to go there…the 336 Octagonal is an interesting firearm.


Sign up here!


The rest of the story with the new front sight installed!

Henry’s home, and an interview with Dan

California’s 10 days are up, and Henry is in the house!
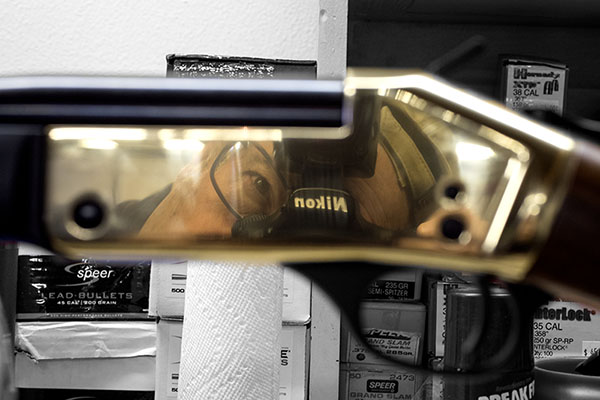
Henry, of course, is my new brass-framed .45 70 Single Shot from the rifle manufacturer of the same name.  I haven’t shot it yet, but I’m ready.  Eager, too.  This is going to be fun.

To continue the story and as promised, a few days ago I interviewed Daniel Clayton-Luce, Henry’s Director of Communications.  As you know from reading our earlier blogs, I am impressed with Henry and I purchased one of their new Single Shot rifles. I picked up my Single Shot yesterday (practicing all the required social distancing rules, of course), and wow, it is one fine firearm.  Take a look.

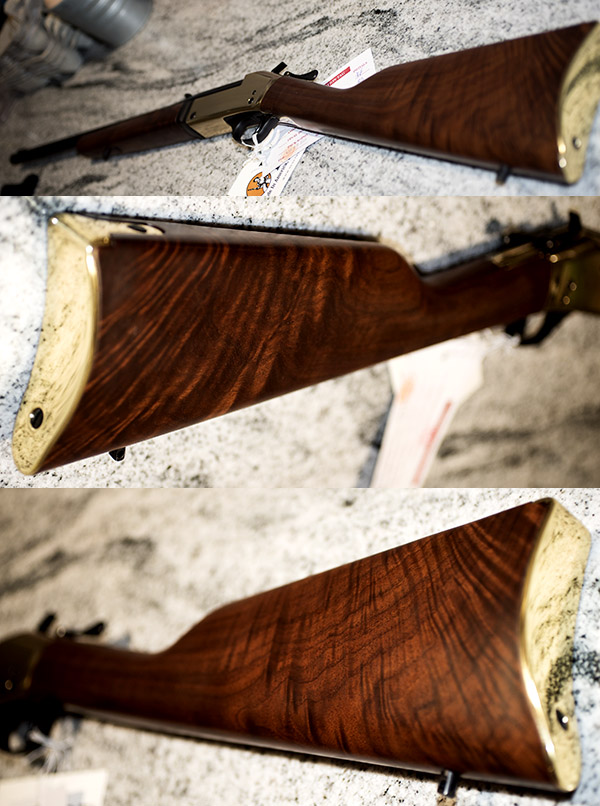
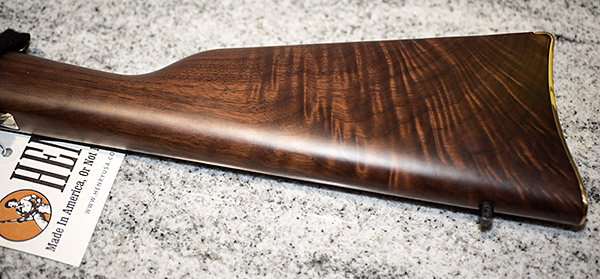
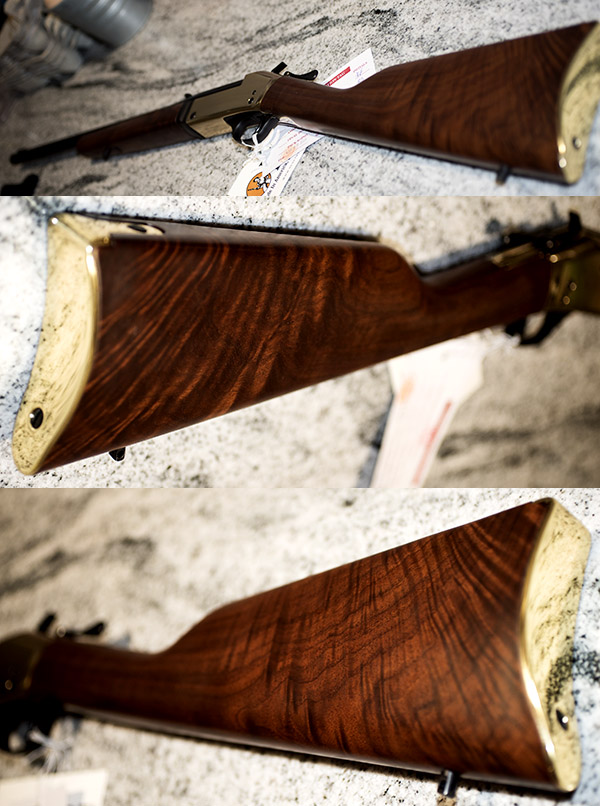
With me, it’s always been about the wood.   I’ll get better photos when I’m basking in the grand and glorious sunshine at the West End Gun Club (and I’m not sure just yet when that will be), but here are a few teaser shots.
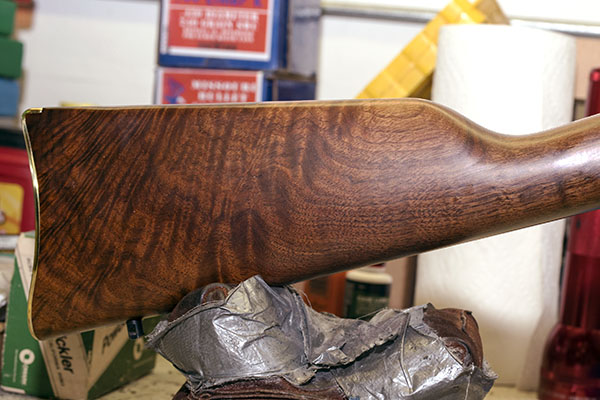
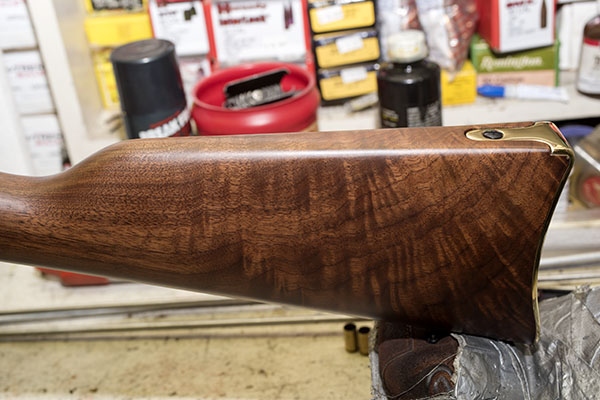
Like I said above, I haven’t shot the Henry yet.  But my first impressions are very, very good.  The wood is stellar (both the stock and the fore end), the wood-to-metal fit is way better than what I’m used to seeing on production guns, the action feels crisp and tight, and the brass frame and buttplate are classy.  The trigger is a little heavy, but it is breaking-glass crisp, and the rifle shoulders well.  The quality is off the charts.  It’s that good.

So, about that interview with good buddy Dan from Henry USA…let’s get to it.  My first questions were these: What prompted Henry to enter the single shot rifle market, and did Henry do so by purchasing the old Harrington and Richardson design and production equipment?

Dan explained to me that the new Henry Single Shot is a Henry through and through, it has no relation to the H&R design, and I would absolutely notice a difference in quality between it and the H&R guns. He sure was right. I am a collector and admirer of fine rifles (I’ve focused primarily on Ruger No. 1 and Ruger No. 3 rifles), and I think I know a bit about what goes into a good rifle. For me, the Ruger No. 1 has been the gold standard, especially the earlier ones made in the late 1960s and 1970s. I’m here to tell you that the new Henry is equal to those rifles, and perhaps even better. The fit, the finish, the wood, the bluing, and the overall feel of my Henry is absolutely top notch. Surprisingly, the new Henry brass-framed .45 70 (at an MSRP of a little over $600) is less than half the cost of a new Ruger No. 1. I am impressed. Dan told me that Henry decided to enter the single shot market with a premium offering, and after examining my new rifle, I can tell you that “premium” is the right adjective. My Henry Single Shot is stunning.

I told Dan that I thought entering the single shot rifle market had to be a risky venture (H&R went out of business, Ruger’s No. 1 sales have declined significantly, and the rage today seems to be black plastic Rambo wannabee guns). Dan told me that bringing the Henry Single Shot to market wasn’t as dicey a proposition as it might appear. Henry USA felt there was a strong desire in many shooters to get back to the basics, and shooting doesn’t get more basic than only having one shot. You need to make that one shot count, Dan said, and there’s an inherent challenge that makes a successful hunt with a single shot rifle more rewarding. It forces you to slow down, take your time with each shot, and think about the fundamentals. Dan didn’t have to convince me. I knew exactly what he was talking about.  My first rifle was a single shot and I’ve been addicted to them ever since.

Dan told me the Henry Single Shot is doing well. Sales are good, and the rifle is a flexible platform (it is easy to introduce new calibers). In viewing the Henry USA website, I saw that the Single Shot is offered in .223, .243, .30 30, .308 Winchester, .357 Magnum, .44 Magnum, and .45 70.  They have shotgun versions, too, in .410, 20 gauge, and 12 gauge. I suggested that Henry consider adding .22 Hornet to the mix (the .22 Hornet is a classic cartridge and it is one of my favorites, as you know from our earlier blogs on the Ruger No. 3 and my vintage Winchester Model 43). Dan said they would take a look at that and I immediately put my oar in the water…I told Dan when they bring out a .22 Hornet I want the first one off the production line (with fancy walnut, of course).

I asked Dan if they were going to offer replacement barrels to allow changing from one caliber to another. There are no plans to do so, he told me, and I can see the logic in that. Henry offers two models of the Single Shot rifle, one with a brass frame and one with a steel frame. The brass frame models are offered in chamberings that operate at lower pressure (.45 70, .357 Magnum, and .44 Magnum). If the barrels were interchangeable, there’s a risk someone might mount the barrel for a higher-pressure cartridge (e.g., .308 Winchester) on a brass frame. I get it.

I asked about folks using Henry rifles in competition, and Dan told me they are popular in both SASS (Single Action Shooting Society) and cowboy silhouette. There are no kits on the market for slicking the actions on a Henry lever gun (as exist for Marlin rifles), but the Henry rifles still have a good presence in these events.

Henry’s website says that Henry is the leading lever action manufacturer. Dan said that’s true, both from the perspective of quantity of rifles and sales revenue. That’s impressive. Marlin and Winchester have been around for more than 150 years, and Henry has already surpassed them,

My next question was on takedown and cleaning. I’ve owned Marlin and Winchester lever guns, and the difference in disassembling the two for cleaning is significant. On the Marlin, you only have to remove one screw (the lever pivot screw), and then the lever, the bolt, and the ejector are easily removed to provide access to the breech. Disassembling a Winchester is much more complex. Dan told me the Henry lever guns are like Marlins in that regard. That’s a good thing. On that same topic, I spent some time looking at Henry’s web-based maintenance videos. As a guy who’s done a few of those for CSC Motorcycles (I know what it takes to make a good video), I was impressed. The Henry videos are excellent.  They cover disassembly, reassembly, sight adjustment, cleaning, and more. This is good stuff.
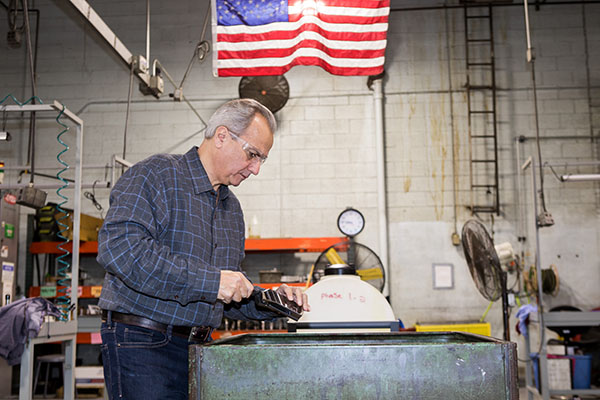
Anthony Imperato is Henry’s President and CEO (that’s Mr. Imperato you see in the photo above). In the video on the Henry website he comes across as a cool guy, so I asked the question: What’s he really like? Dan told me that Anthony is a personable, good-natured, hands-on leader and a genuine nice guy. He’s a shooter, too. That was good to hear. When I work with the best motorcycle companies (like CSC or Janus), it’s always good to see that the top people are riders as well as business leaders. Dan told me that the overwhelming majority of the nearly 500 employees at Henry are shooters and hunters. It sounds like a team I would like to join. If I was younger and looking for a place to make a difference, I’d send a resume to Henry.

Henry USA started as a small manufacturing operation in Brooklyn, New York.  Henry outgrew the Brooklyn facility and moved manufacturing to Bayonne, New Jersey.  In 2016, Henry opened a second plant in Rice Lake, Wisconsin to manufacture the Single Shot.  Henry has grown to nearly 500 employees and they now offer a wide range of rifles, shotguns, and accessories.  Take it from me, folks:  Henry is the real deal, a genuine Made-In-America success story.
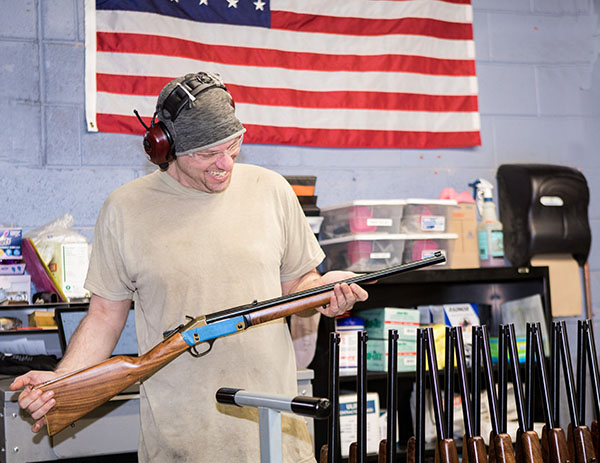
I asked Dan about the make/buy mix on their guns, and he told me 100% of the parts in a Henry are made in the U.S. The walnut comes from Missouri and is finished in North Carolina. There must be something about the soil and the water in Missouri; all the best wood from custom riflesmiths comes from Missouri. And North Carolina has a long heritage of making high end furniture, so it’s a natural fit for those good Southerners to craft the Missouri walnut for Henry. Henry uses a spray varnish on all but their modern version of the original Henry rifle (those rifles have an oil finish).  I examined my Henry carefully, and the finish is flawless.  I’m pretty picky about that sort of thing, having finished a few rifles myself.  These folks have it wired.   Henry does its own machining, too, including the barrels.

Dan and I spoke about their different models for a bit, and I asked which one is the most popular. The best-selling of all the Henry rifles is their H001, the .22 lever action rifle. In the Single Shot series, it’s the .45 70 (I guess great minds work alike). Dan told me every Henry has a lifetime warranty that follows the gun. New, used, or inherited, Henry stands behind the rifle for life. That says a lot. Henry tests every rifle for safety and functionality. They don’t test for accuracy, but they don’t need to. I know from firing good buddy TK’s beautiful brass-framed .44 Mag Henry lever gun that they are very accurate. When TK let me shoot his .44, I put five slugs through a hole you could cover with a quarter. In fact, it was that morning on the range a few years ago with TK that first planted the Henry seed in my mind.

I was going to ask Dan why someone would buy a Henry instead of a Marlin, a Winchester, or a Ruger, but I already knew the answer.  It’s for all the reasons you see above.  Good walnut, classy looks, a good trigger, real craftsmanship, a great price, accuracy, a lifetime warranty, and it’s all made right here in the USA.  It just doesn’t get any better than this.  The Henry .45 70 Single Shot is a beautiful and handy carbine that looks and feels the way a gun should.  It’s 7 pounds and .45 70 chambering will make for a bit of kick on the bench with the 405-grain Missouri bullets, but that’s okay.   On a hunt, I’ve never felt the recoil or even heard the gun fire when the hammer drops.  That’s what intense concentration does; you folks who have experienced it already know that.  The look?  Henry nailed it.  There’s something about polished brass, blue steel, and fancy walnut that simply feels right on a fine firearm, and Henry has made this a fine firearm indeed.


Stay tuned to the ExhaustNotes blog for the .45 70 Henry range test.  Sign up here and never miss an ExhaustNotes blog!


Check out our earlier Henry Single Shot stories here:

Developing a Henry .45 70 Load:  Part 2
Developing A Henry .45 70 Load:  Part 1
The Henry Is In California
Henry Rifles:  Made in America Or Not Made At All


Want more gun stuff?  Hey, just click here!


Would you like to know more about Henry USA?  Here you go, folks!
Developing a .45 70 Henry Load: Part 2

The new Henry Single Shot, brass frame .45 70 rifle. Henry makes a beautiful rifle.

I’m using the time before I pick up my new Henry rifle to prepare the reloaded ammunition I want to test for accuracy.  You will recall that in an earlier blog we discussed the three .45 70 load levels shown in modern reloading manuals.  As I mentioned in that earlier blog, I use the loads intended for the 1873 Trapdoor Springfield.  Those loads were powerful enough to take down all kinds of critters back in the 1800s, and in developing loads for other .45 70 rifles, I’ve found these to be fun to shoot and accurate.

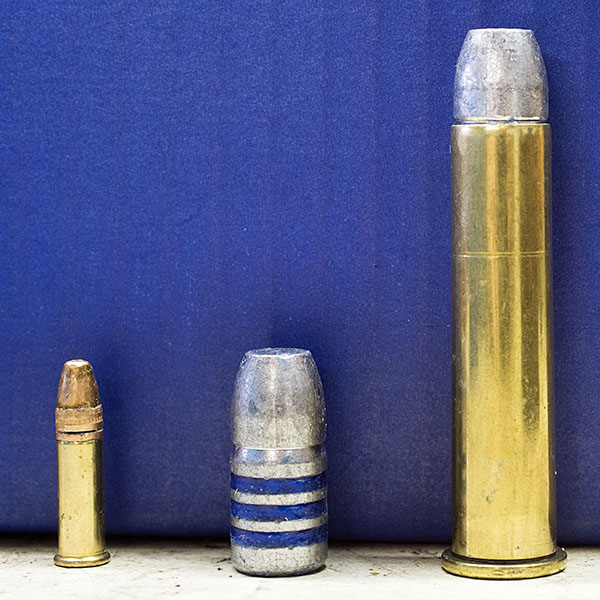
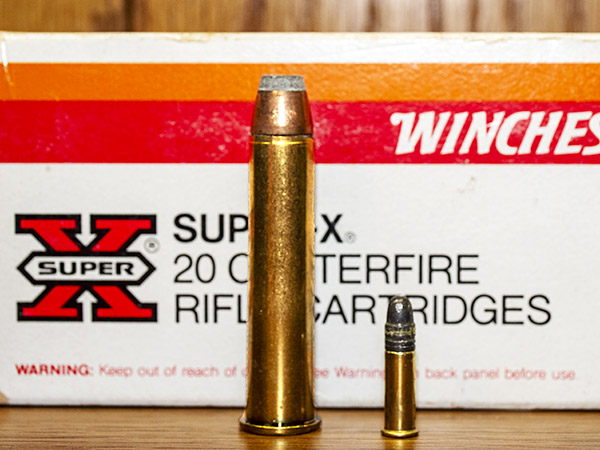
Missouri 405-grain cast .45 70 bullets. These have proven to be very accurate in other .45 70 rifles.  I’m trying these and two other bullets in the Henry.  The .22 Long Rifle cartridge you see here didn’t come with the Missouri bullets; I added it to give you an idea of just what a monster the .45 70 cartridge is.

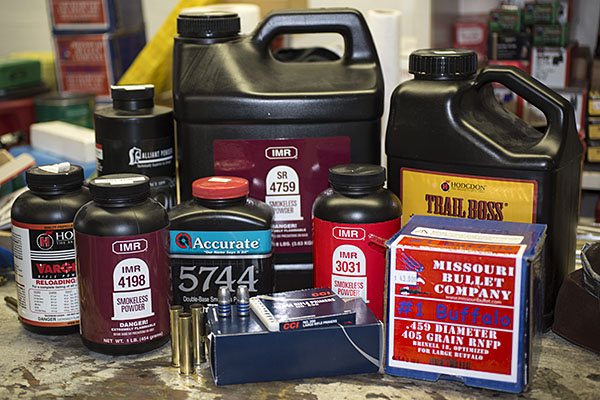
My loads are based primarily on the components I have on hand and loads I’ve known to work well in the past.  Powders include SR 4759, IMR 4198, IMR 3031, 5744, Varget, and Trail Boss.  Bullets include the Remington 405-grain jacketed soft point, the Hornady 300-grain jacketed hollow point, and the Missouri 405-grain cast roundnose.

A photo showing some of the components to be used in this test. When loading, I would never have all of this stuff on the reloading bench, and in particular, I would never have more than one powder on the bench at the same time. The risk of mixing powders is too great. If you have more than one powder container on the bench, it’s very easy to pour the remaining powder in the dispenser into the wrong container (don’t ask me how I know this). When that happens, the only prudent thing to do is throw the mixed powder on the front lawn (it makes good fertilizer).

I like all of the bullets I listed above, but I particularly like the Missouri bullets.  The Missouri cast bullets seem to always be available, they are relatively inexpensive, and they are accurate.   I’m expecting to see great accuracy from these in the Henry, as they shoot well in the Ruger and the Marlin.  The 405-grain Missouri bullets are accurate in the Chiappa 1886, too, but that rifle’s stock design and buttplate make the recoil painful when shooting the heavier Missouri bullets.

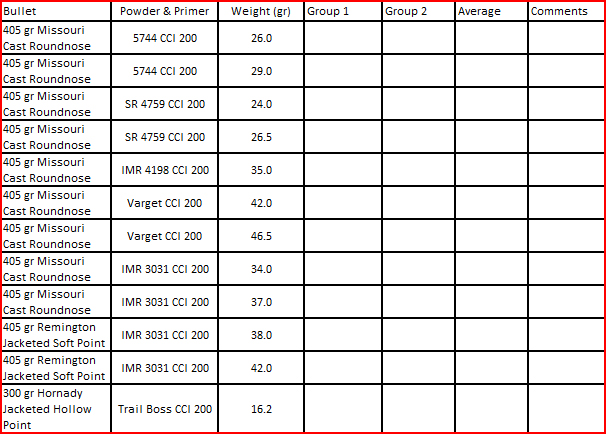
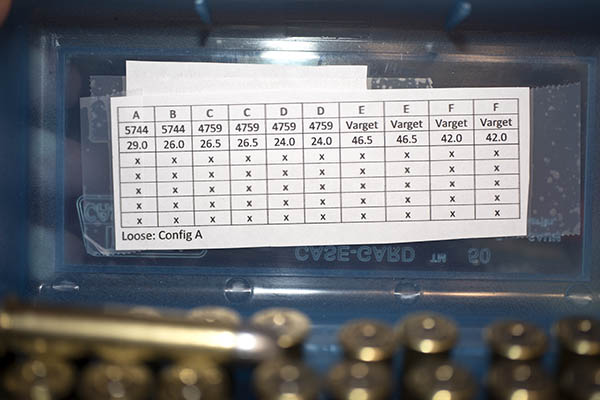
Here are the .45 70 loads I will test in the Henry:

When testing for accuracy, it helps to keep things organized.  I’ll bring this table to the range with me and record my results as soon I retrieve the targets. All loads will be fired using open sights at 50 yards.

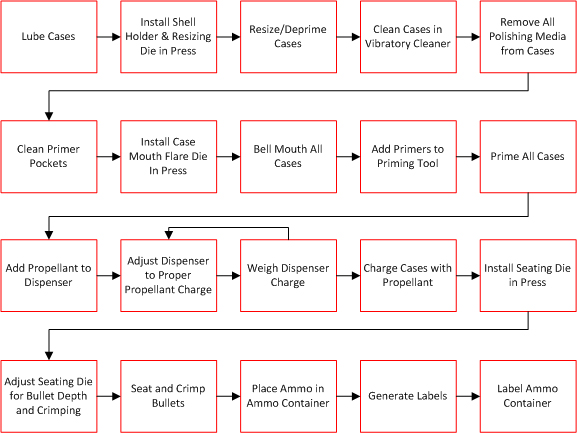
For a more in-depth reloading process overview, I invite you to review our earlier series on loading .45 ACP ammunition.  The .45 70 reloading process is very similar to loading handgun ammo.  That’s because the .45 70 is nearly a straight-walled cartridge, so the steps are the same.  This is what is involved in reloading .45 70 ammo:

The reloading process. It looks complicated, but it’s very intuitive. Most folks who reload find it as enjoyable as shooting.

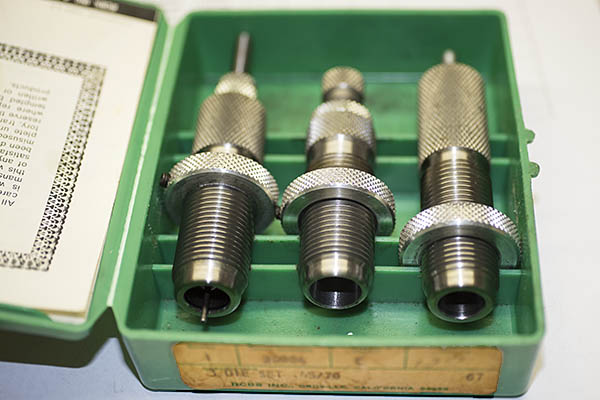
I use mostly RCBS or Lee reloading dies for all of the cartridges I load.  Both are good companies, and both offer superior customer service (if you ever need it, which has only occurred a couple of times for me).  I’ve been reloading .45 70 ammo for close to 50 years now, and I’ve been using the same set of RCBS dies the entire time.

A three-die RCBS set. The first die (on the left) deprimes and resizes the fired case to its original diameter. The case has to be lubricated for this step, or else it will stick in the die.  The second die is called the expander die.  It expands the upper portion of the cartridge case and, if adjusted to do so, adds a flare to the case mouth.   The third die (on the right) is the bullet seating and crimping die.  It can be adjusted to change the depth to which the bullet is seated, and to add a crimp if you wish to do so.

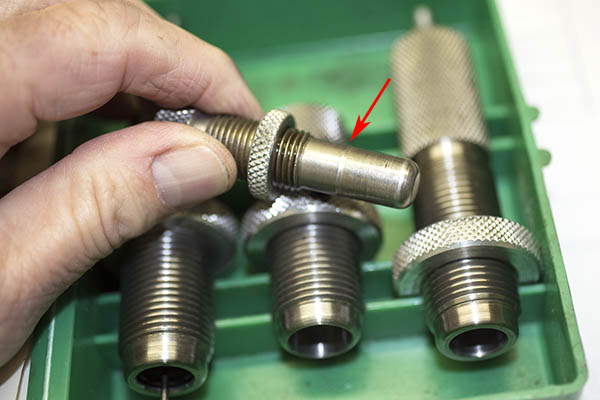
The expander die (the one in the center of the above three dies) is the one that flares the case mouth.  It contains a threaded insert with a step in it to apply the bell mouth to the case.

In this photo, the case expander has been removed from the die to show the diametral step. It is this step that adds a flare to the case mouth.

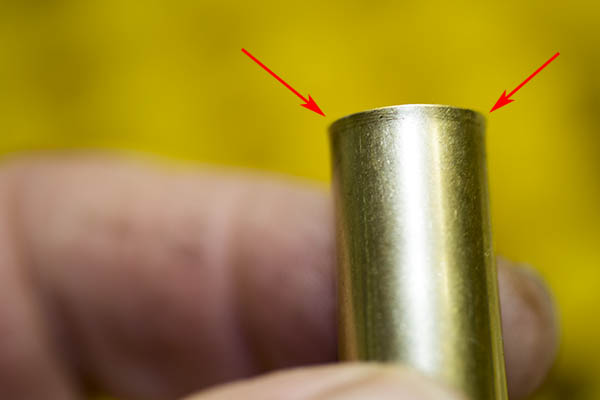
This is what the case mouth should look like after it has been flared.  You don’t want to overdo this step.  You just want to get enough of a flare to allow the bullet to get started in the case.

A .45 70 case with a flared mouth. We add the flare to allow the bullet to enter the case with no shaving of the bullet.

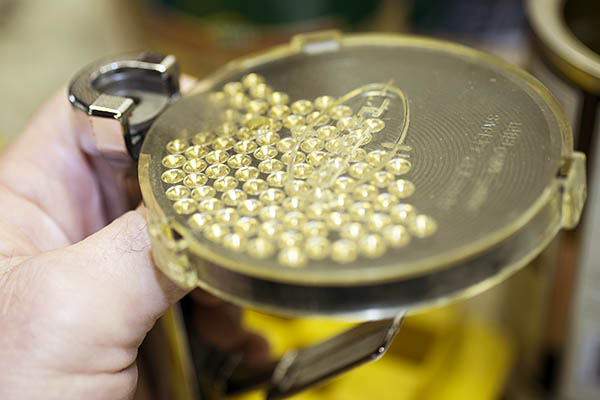
After the case has the flare applied, it’s time to clean the primer pockets and then prime each case.  I use another RCBS tool to clean any combustion residue from the primer pocket (see our earlier tutorial on loading .45 ACP ammo), and then I use a Lee priming tool to seat the primers.

The Lee priming tool. This is another tool I’ve been using for five decades. It’s a much better way to prime cartridge cases.
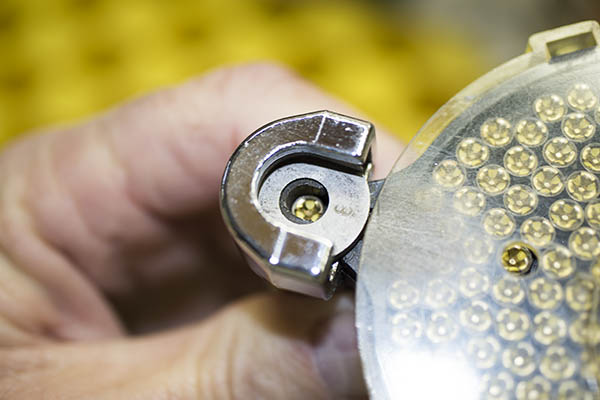
A CCI 200 large rifle primer in place, ready to be seated in a cartridge case. The .45 70 cartridge requires a Lee No. 8 shellholder, shown in place in this photo.
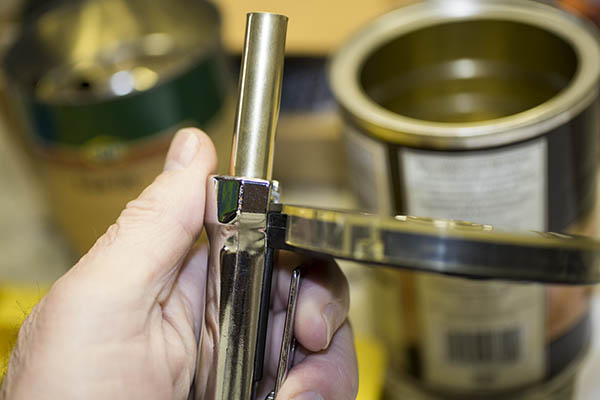
A .45 70 case in the Lee priming tool. Compressing the handle (shown to the right of the priming tool barrel) forces the primer into the case. You do this one at a time for each case.
A freshly primed .45 70 cartridge case.

After all the cases have been cleaned, flared, and primed, it’s time to add propellant.  I use my RCBS scale along with a powder dispenser to add the right amount of powder to each case.  To get the correct amount of powder, I always consult a load manual.  I’m showing you different charge weights in this blog, but DO NOT rely on what I’m telling you (or what you read on the Internet from other people) for this information.  Always consult a reloading manual.  Several reloading manuals are available; I prefer the Lyman manual and it’s the one I use most often.  Most of the other manuals are either from bullet manufacturers or propellant manufacturers, so they list only their components.  The Lyman manuals are not restricted to a single brand of bullets or powders, as Lyman does not manufacture bullets or powders.   Lyman does a good job, I think.

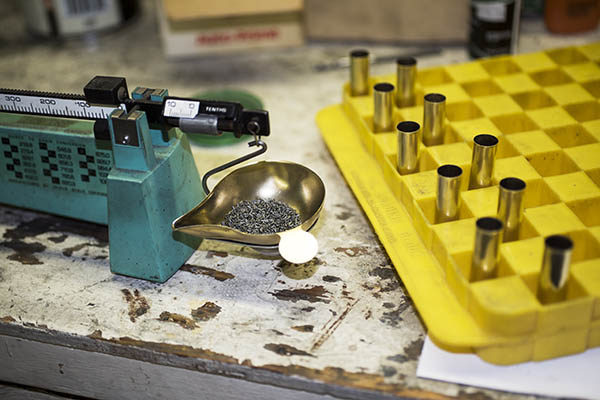
My RCBS powder scale, the reloading tray, and ten .45 70 cases waiting for their propellant charges.

When I load different test loads as I’m describing in this blog, I’ll charge and complete each group separately.  Typically, that’s ten cartridges in a group.

Once the cases have been charged with propellant, it’s time to seat and crimp the bullet.  I typically use a light crimp for the .45 70.  Crimping involves bending the flared case mouth into a crimping groove (sometimes called a cannelure) on the bullet.  You crimp a cartridge for three reasons: To prevent the bullet from being forced further into the cartridge case if it is fed into the chamber automatically (as occurs with, say, a 9mm or .45 ACP cartridge), to prevent the bullet from backing out of the case due to the recoil of other cartridges (as might occur in a revolver or a rifle magazine), and to hold the bullet in place when the primer first fires (this allows the flame front to build to a consistent pressure in cartridge prior to driving the bullet down the bore).   It’s that last reason that I’m most interested in here.  It should make for a more accurate cartridge.  Theoretically, neither of the first two reasons is a consideration for a single shot rifle.

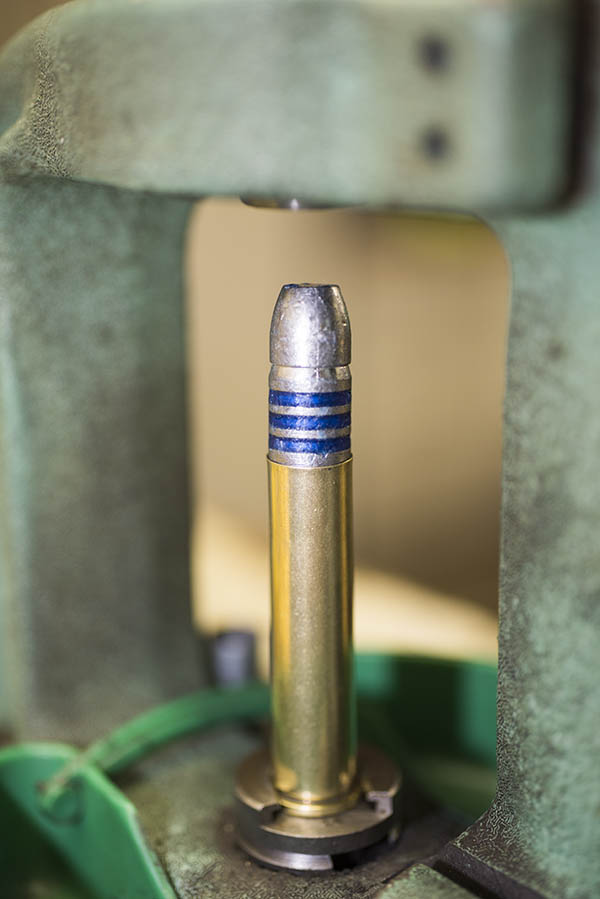
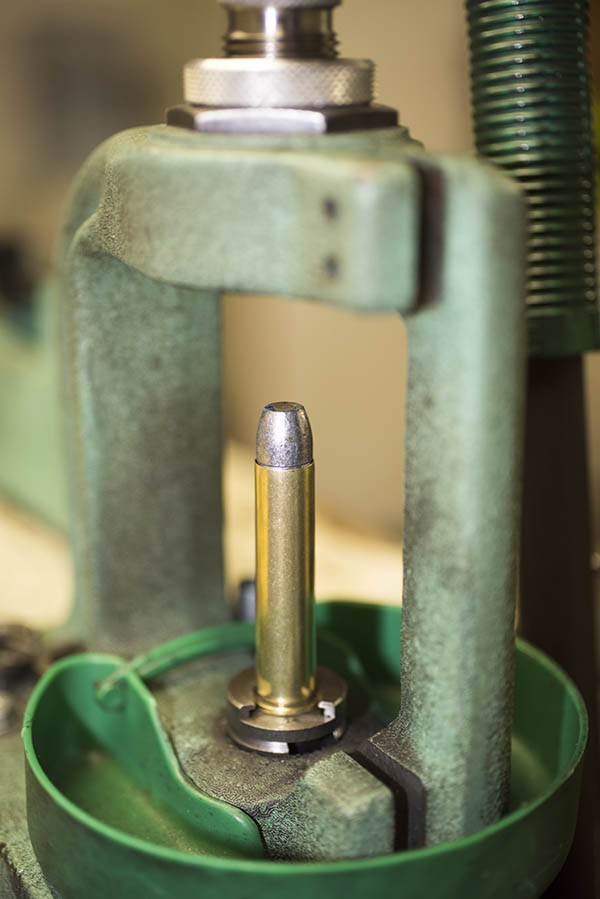
A Missouri bullet on top of a charged .45 70 case, ready to be run into the bullet seating die in the RCBS Rockchucker press.

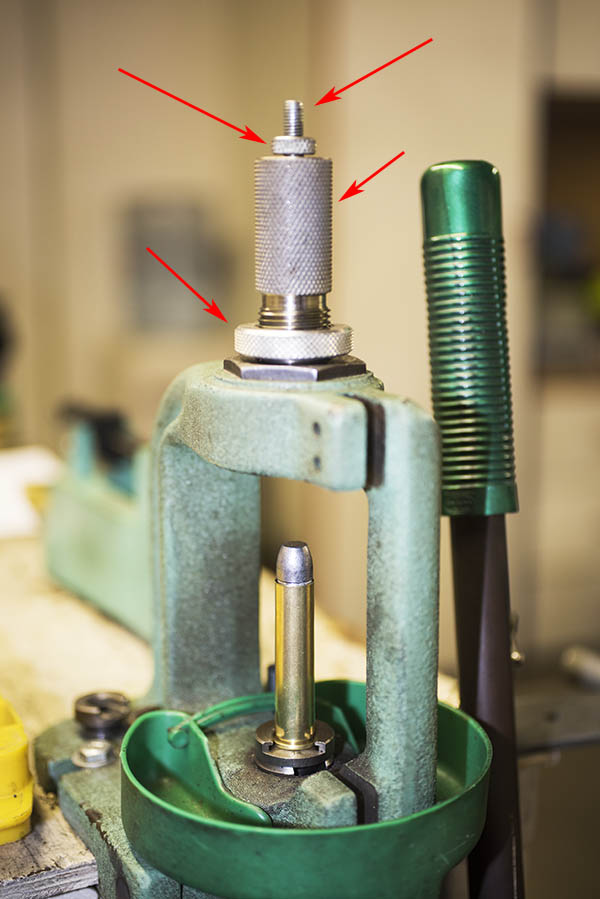
Seating the bullet and crimping it is a bit of a dance.  You have to get the bullet seated to the right depth, and then you have to apply the crimp.  We use the third and final die in a three-die set to accomplish both.  I screw the bullet seating portion of the die fairly far into die initially and then I screw the die into the press to get the bullet seating depth where I want it.  In this case, I want the top of the brass case to be nearly even with the top of the bullet’s crimp groove.   Then I back the bullet seat all the way up in the die, and screw the die body into the press such that it forms the crimp (there’s a tapered decreased diameter in the die insider diameter that forms crimp).  Once I have the crimp where I want it (and the amount of crimp I want), I then screw the bullet seater all the way such that it contacts the bullet.  I then make sure everything is jake on the next round (you know, the same crimp and the same cartridge overall length), I make any required small adjustments, and then I lock everything down with the die’s two locknuts and load the remaining cases.

Adjustments on the seating and crimping die. The small-diameter threaded shaft controls fine adjustment of the bullet seating depth. Turning the main die body into or out of the press controls coarse bullet seating depth and crimp. The two locknuts (denoted by the arrows on the left) lock the bullet seating shaft and the die body in place.
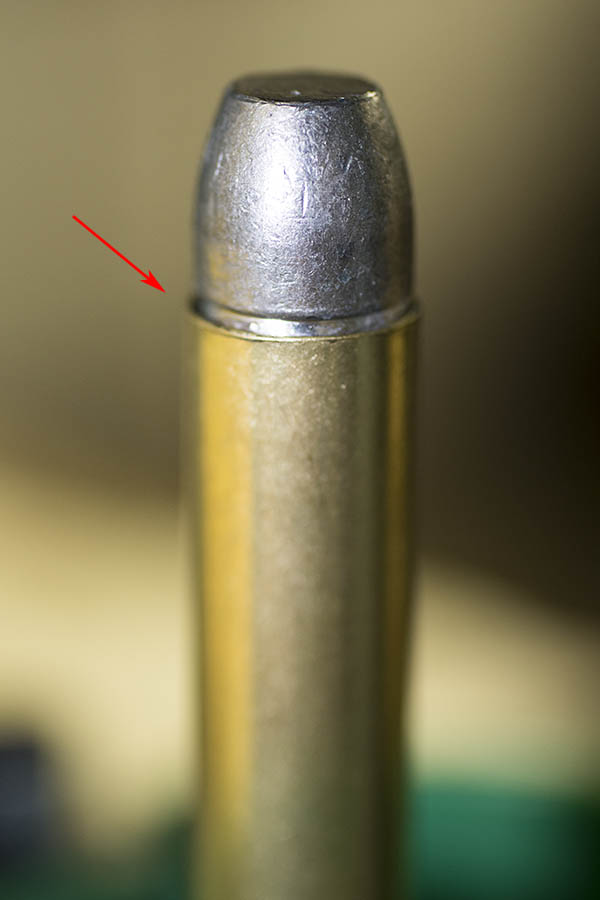
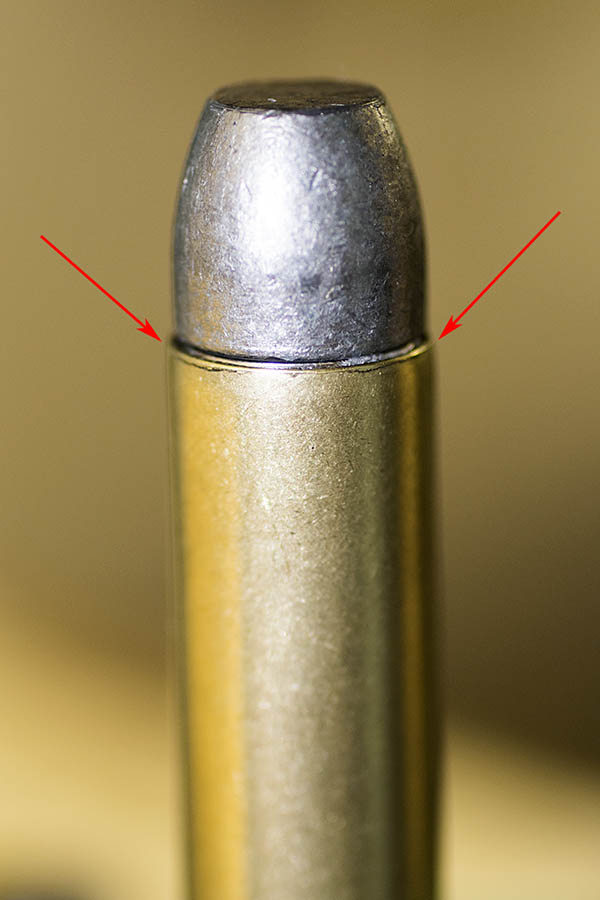
The Missouri bullet nearly fully seated in the case, but not yet crimped. I’ll seat the bullet just a bit deeper, and in the last few thousandths of an inch on the press stroke, the upper edge of the cartridge case will be crimped by the die around the bullet.
A seated and crimped Missouri bullet in a .45 70 brass case. When I bellmouth the cases, I only open them up just enough to allow the bullet to start into the case. When I crimp, I only crimp a little bit. This minimizes working of the brass around the case mouth. Loading at the Trapdoor Springfield levels as I do, and using this minimal amount of opening and then crimping the brass, results in long case life. These cases were purchased in the 1970s and I’m still using them.
A completed round. This .45 70 cartridge is ready chamber and fire.  It’s a big cartridge.

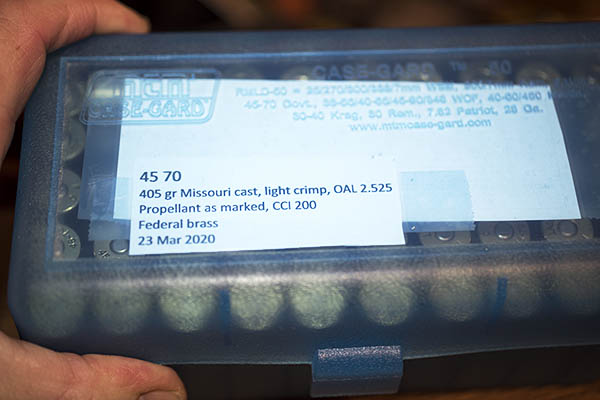
After I’ve done all of the above, I immediately label the packaged, reloaded ammo so that I know what I have.  I can’t rely on my memory and do this later; I always perform the labeling operation as soon as the reloading operations are complete.

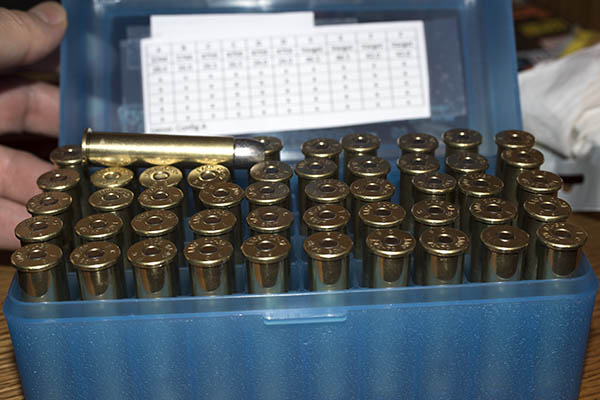
A box of 50 .45 70 cartridges labeled and ready to take to the range. I always label my loads as soon as I finish them.
Because these are cartridges loaded differently for accuracy testing in the new Henry rifle, I included a map inside the cartridge container to identify how each group has been loaded.
Ready to go to the range. Reloaded cartridges are less expensive than factory ammunition, and I will be able to find which combination of components performs with the greatest accuracy in my new Henry rifle. With factory ammo, you pay more and you get what you get in terms of accuracy.

There you have it.   I have all the .45 70 ammunition I want to test loaded, boxed, labeled, and ready to go to the range.  Now all I have to do is take possession of my new Henry, head out to the West End Gun Club, and see what works best.  You’ll get to see it, too, right here on the ExNotes blog.


Check out our earlier Henry Single Shot stories here:

Developing A Henry .45 70 Load:  Part 1
The Henry Is In California
Henry Rifles:  Made in America Or Not Made At All

And check out our other Tales of Gun Stories here.

Developing a Henry .45 70 Load: Part 1

The new Henry Single Shot. Mine has exceptionally fancy walnut. I am a soft touch when fancy walnut is involved.

I’m about a week away from having sufficiently cooled (at least in the Peoples Republik of Kalifornia’s eyes), which is another way of saying I have 7 days left until my 10-day waiting period is over, and then I’ll be able to pick up my new Henry .45 70 Single Shot.  (“Single Shot” is capitalized because it’s a proper noun; it’s Henry’s official name for this rifle.)

Another view showing the entire Henry Single Shot rifle. I’ll get better photos when I get to the range; I shot these photos at the dealer.

I am loading a series of cartridges to test for accuracy in the new Henry and I’m going to tell you about the loads, but before I get into that I want to tell you about the three levels of reloads you find in the .45 70 reloading manuals.  I’ll post about the different loads (and reloading those rounds) in the next blog.

A Sense of Scale: A .22 Long Rifle cartridge, a 405-grain Missouri cast .45 70 bullet (just the bullet is bigger in both length and diameter than an entire .22 cartridge), and a reloaded .45 70 cartridge.

.45 70 History

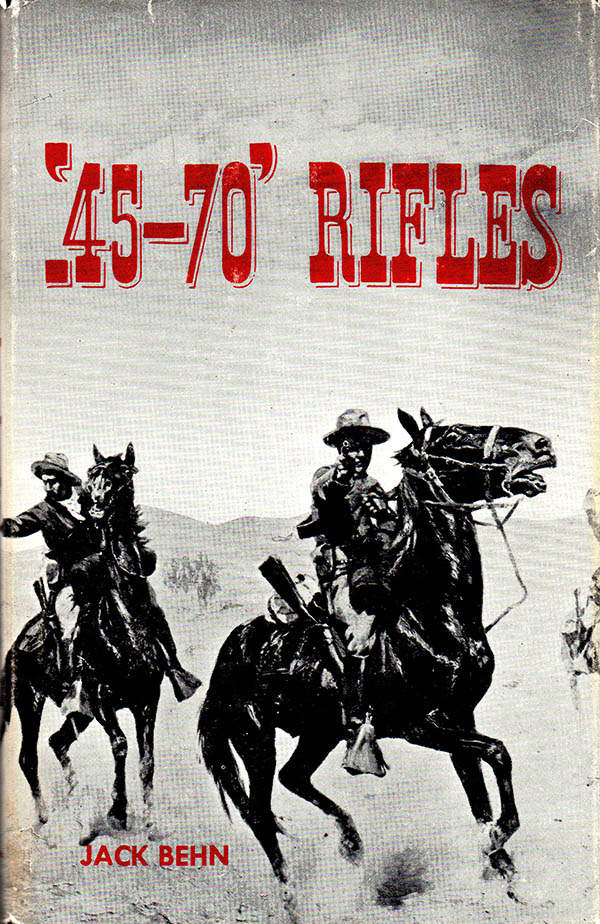
I’ve been a student of the .45 70 for close to 50 years, and the cartridge is nearly 150 years old.  One of the best sources of information on the early .45 70 rifles is Jack Behn’s touchstone reference shown below.

One of the best references on early .45 70 rifles is Jack Behn’s excellent 1956 book. It was published by the Gun Room Press, an imprint owned by the now defunct Rutgers Gun Store. When I picked up my 1973 Colin D. MacManus 1911 .45 auto, it was from the Rutgers Gun Store in Highland Park, New Jersey.

At the end of the Civil War, the Army knew it needed a breechloading rifle (one that loaded from the rear with metallic cartridges).  This resulted in development of the 1873 Springfield rifle and the .45 70 500 cartridge, so designated because it fired a 500-grain, .458-inch diameter lead cartridge propelled by 70 grains of black powder.  That was later changed to a 405-grain lead cartridge because soldiers complained that recoil with the 500-grain projectile was excessive.

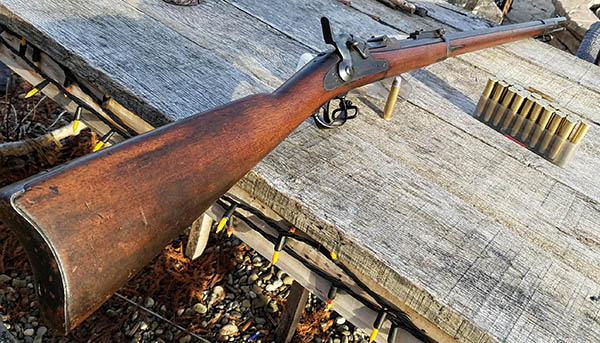
An 1873 Trapdoor Springfield rifle.

That .45 70 Trapdoor Springfield remained in service from 1873 through the Spanish American War and our wars against the Plains Indians.  It was also the rifle most frequently used by buffalo hunters to nearly exterminate the American bison, which was really little more than an extension of the war against the Indians (it’s not widely known, but the dominant reason the U.S. Government encouraged eradication of the American bison was because it was the principal source of food, shelter, and clothing for the Indians).

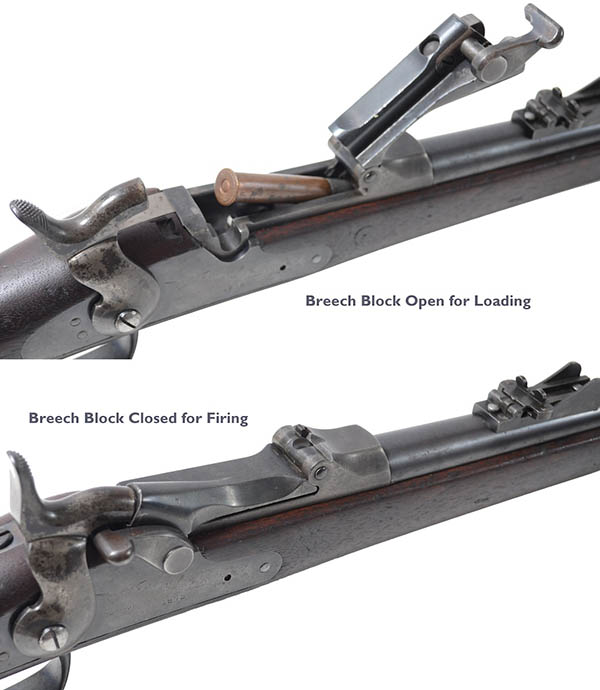
The Trapdoor action.  New in its day, it is antiquated today.  It is a weaker action than are those used in modern single shot and lever action rifles, and it therefore is loaded to lower chamber pressures.

Trapdoor Springfield .45 70 Loads

The “Trapdoor” designation for the 1873 Springfield refers to the action design.   The Springfield’s action had a hinged element that rotated forward to allow loading a cartridge, which was then closed and locked in place prior to firing a round.   It was state of the art in  1873, but it was inherently weak and limited the pressures to which ammunition could be loaded.  But it was enough.  The Springfield action could withstand pressures up to around 17,000 psi, sufficient to launch a 405-grain projectile at velocities a little north of 1400 feet per second.  It was more than enough to kill a man, and in fact, it was enough to kill a buffalo.

Winchester and Marlin .45 70 Loads

The .45 70 cartridge had a lot going for it, and in 1886, Winchester introduced a .45 70 lever action repeater (their Model 1886).  Marlin had previously introduced a .45 70 lever action repeater in 1881.  The Winchester and Marlin rifles had two advantages:  They could fire repeatedly by operating the lever action and squeezing the trigger, and the lever gun actions were stronger (so they could be loaded to higher pressures with resulting higher velocities).  I don’t know that any of the ammo companies loaded the cartridge to the higher pressures the Winchester and Marlin rifles could handle back in those days (probably out of a fear that the ammo might be used in the weaker Springfield action), but folks who reload today and who have either a Marlin or a Winchester can load their ammunition to the higher levels allowed by the lever gun receivers.

The reloading manuals show that the Model 1895 Marlin and Model 1886 Winchester lever actions can handle chamber pressures in the 27,000 psi range.   That’s enough to drive a 405-grain bullet out at about 1700 feet per second.  That’s a smoking hot load.

This is a Chiappa reproduction of the 1886 Winchester rifle, chambered in .45 70. This is a lever action rifle.
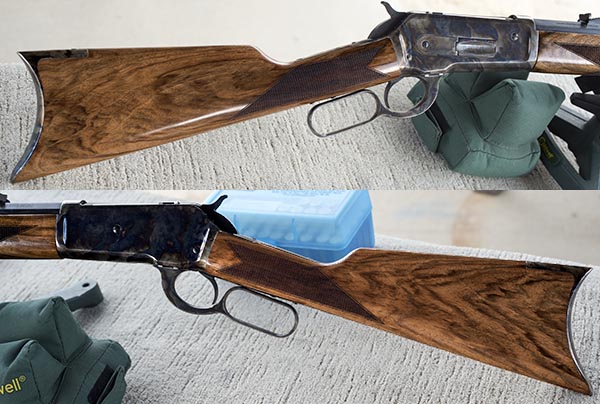
The 1886 Chiappa reproduction. The curved metal buttplate is a faithful reproduction of the original Winchester design, and it is punishing when the hammer drops. Nice wood, huh?
A modern Marlin 1895. When I saw this one on the rack, I knew I had to have it. I’ve owned the rifle about 25 years now. It’s very accurate, and it regularly shoots into an inch with open sights at 50 yards.

Ruger No. 1 and No. 3 .45 70 Loads

The next step in the .45 70 evolutionary chain?  That would be the single shot rifles offered by Ruger starting in the 1970s.  Ruger had two:  Their No. 1 rifle and the No. 3.  Both use the same action, and it’s strong.  In the Ruger rifles, you can load .45 70 ammunition to nearly the same velocities and the same pressures as a .458 Winchester Magnum, which is to say, crazy levels (at least in terms of recoil).   Ruger rifles chambered in .45 70 can handle pressures approaching 40,000 psi, with 405-grain bullet velocities north of 2,000 feet per second.  I’ve done this.  It’s no fun.

A Ruger No. 1 falling block rifle. This is the rare 26-inch barreled version with figured Circassian walnut. Ruger only made a limited number of these variants and most of them have very plain wood. It’s pretty, but the Marlin shown above is more accurate.

.45 70 Loads:  The Bottom Line

The upshot of all this?  There are three levels to which you can reload .45 70 ammunition:  The Trapdoor Springfield level, the 1886 Winchester/Marlin level, and the Ruger level.  When you see this in a reloading manual, you’ll see three sets of reloading data, designated separately as explained in this blog.

What does all this mean in the real world?  Your mileage may vary, but for me, I never venture into the Marlin/Winchester and Ruger .45 70 reloading levels.   There’s just too much recoil, and you don’t need to go there for accuracy.  I would argue further that you don’t need to go there for lethality (the .45 70 in 1873 Trapdoor Springfields killed a lot of buffalo).  I stick to the Springfield levels for all of my rifles (even though I could go higher), and that’s how I’m going to load for the new Henry rifle, too.


More Tales of the Gun here, including detailed info on each of the rifles shown above!

The Henry is in California

I sure was surprised a couple of days ago.  While sheltered in place, or locked down, or in self-isolation, or whatever the nom du jour is, I received an email from my local FFL telling me that my Henry Rifle had arrived.  Wow, I didn’t even know it had been shipped yet!  You know the deal…I’m here in California and I have to wait 10 days so that I can cool sufficiently before taking possession of the new rifle, but I wanted to get the process started.  I made an appointment so as not to be around too many other people and off I went.  Truth be told, it felt great just getting out of the house, and I felt even better when I saw the Henry .45 70.  It’s beautiful.

You can refer to our earlier blog for the first part of the Henry story.  In it, I told about asking their marketing director (good buddy Dan) to try to get me one with a nice piece of walnut, and wow, did they ever!  When I arrived at the FFL, the lighting at the store was not conducive to great photography, but I did my best:

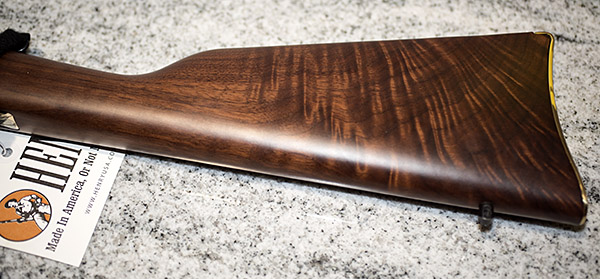
What’s really nice about this rifle is that the stock is highly figured on both sides, and it is what I would call exhibition grade walnut. I’m guessing it’s American walnut, as Henry prides itself on being made in America.  I’ve been collecting rifles for a good half century now, and I have some with really nice wood.  The new Henry jumped to the head of the pack.  It’s stunning.

I had hoped to have a more in depth chat with Dan this week, but like all companies, Henry has its hands full right now.  That’s okay; we’ll get to chat later.  What Dan told me earlier is that all these rifles are nice, and they are a cut above what one would normally see in a rifle in this price range.  I think he’s being too modest.  I’ve seen and I own rifles that cost two to four times as much as this Henry, and the fit and finish on those is not as nice as this.  It truly is a beautiful rifle.  My compliments to Henry USA!

I’ve already started loading .45 70 for the Henry ammo development effort, and I think the next blog will be on that topic.  This is going to be fun, folks.  I can’t wait to talk possession of the rifle and I can’t wait to start shooting it.  I’m eager to see how the rifle performs, and I’m equally eager to get the Henry on the bench and out in the sunlight so I can get better photos for you…this rifle deserves it!


More Tales of the Gun can be found right here!


We’re going through a rough patch right now, and when I say we, I mean that literally.  We, as in the whole world, are working through a terrible situation.  But it will pass, and when it does, we’ll be better people.  I’ve cut back substantially on the time I spend on social media for a lot of reasons, not the least of which is my deep disappointment in people who are using the current world health situation to post stupid stuff.  But every once in a while you see something good, and this meme from Southern Pride and Dixie Proud was one of those rare occasions:

Henry Rifles: Made in America or not made at all…

Henry Single Shot rifles. The steel-framed ones have a conventional pistol grip stock. The brass-framed rifles have a straight grip. They are available in chamberings ranging from .223 to .45 70.

About four years ago I went to the range with my good buddy TK. TK is a cool guy and he had a rifle I didn’t know much about. It was a new .44 Magnum Henry lever action rifle with a brass receiver and, in a word, it was stunning. The brass and the bluing were highly polished, the walnut stock was highly figured, and wow, was it ever accurate. I’d seen Henry rifles before but I had never handled or fired one, and when TK let me shoot his…well, let me put it this way:  Wow!  TK was impressed with my marksmanship and so was I.  I put five .44 slugs through a hole you could cover with a quarter, and folks, with open sights, that’s good shooting.  The rifle looked, felt, handled, and shot the way a rifle should.

Just a couple of weeks ago, good buddy Greg and I were on the range again and Greg had a new toy. He had recently purchased an older Harrington and Richardson break open rifle in .223, and it was nice. Harrington and Richardson stopped making their rifles some time ago, and I always thought having one in .45 70 would be the right thing to do.  But I had never gotten around to scratching that itch.  Maybe it was time to do something about that, I thought.

I like the concept of break open rifle, and I love the concept of a single shot. They are just cool. You have to make every shot count, and that’s appealing to me.  A Ruger No. 1 or a Ruger No. 3 single shot rifle has always been my first choice.  There’s something about a single shot rifle that floats my boat.

Seeing Greg’s H&R single shot .223 got me to thinking about Henry rifles again, probably because I’d seen something on the web about Henry having introduced a new single shot. I remembered the quality of TK’s Henry, and I love the break open configuration I was seeing on Greg’s H&R.  It reminded me of my very first rifle…a .177 caliber pellet gun I’ve had since I was a kid wandering the woods in New Jersey.  What I had in mind was a Henry single shot rifle with a brass frame chambered in .45 70 (one of the world’s all-time great cartridges).  Throw in some fancy walnut, and it would be perfect.  It would be just what the doctor ordered.

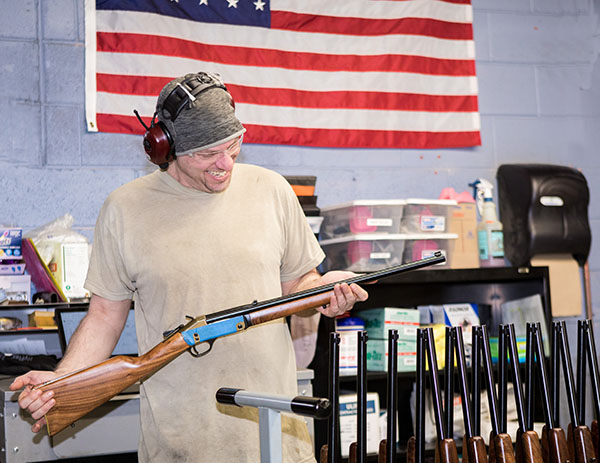
One of the artisan’s at the Henry plant handling a .45 70 single shot rifle. Check out the walnut!

Hmmmm.  Brass.  Walnut.  .45 70.  The wheels were turning, and that prompted a visit to Henry’s website.  What’s this?  A contact form?  Hmmmm again.  Would it be possible to get a Henry Single Shot in .45 70, brass framed, with hand-selected walnut?  Well, it seems the Henry folks had checked out our ExNotes gun page, and the answer was swift: Yep, they could help me on this.

So, to make a long story a little less long, I’ve been corresponding with Henry USA and I bought one of their brass frame single shot rifles. The good folks at Henry assured me it will have nice walnut. I’m talking to the Henry marketing director to learn a little more about the company tomorrow and I’ll be posting a blog about that in the near future. I’ll soon have a new Henry rifle in the ExNotes armory, and you can bet I’m going to have lots to say about it.

Stay tuned, folks. You’ll read all about it right here.


Check out our Tales of the Gun!