Developing a .45 70 Henry Load: Part 2

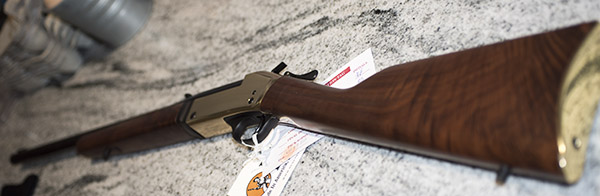
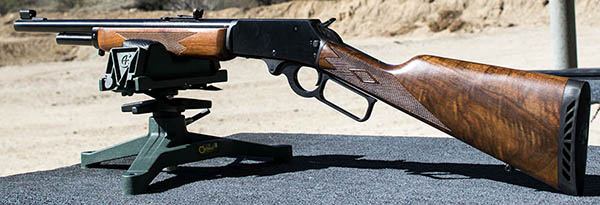
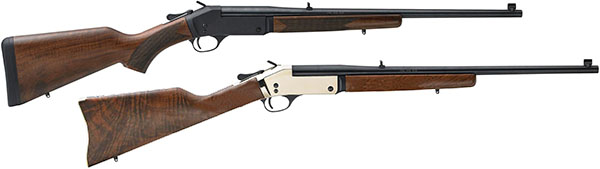
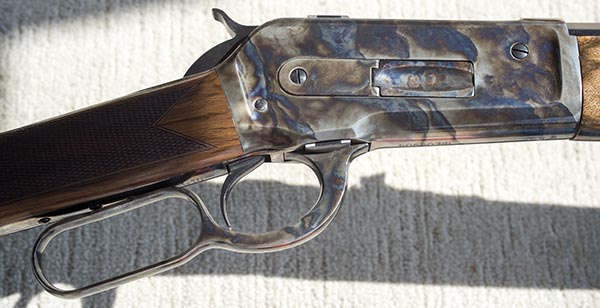
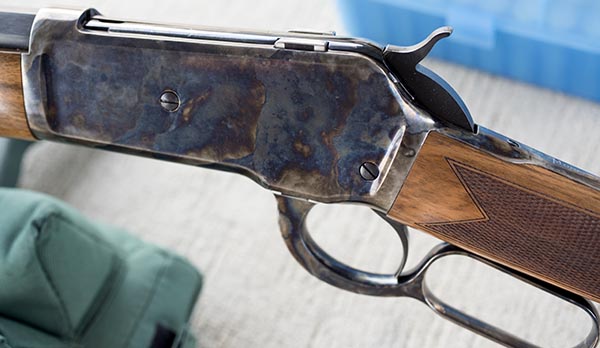
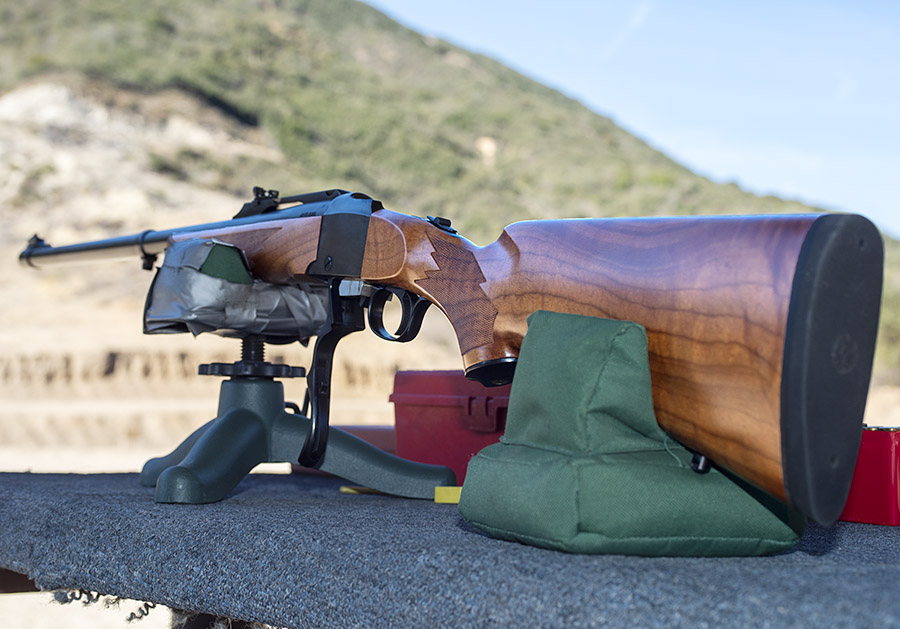
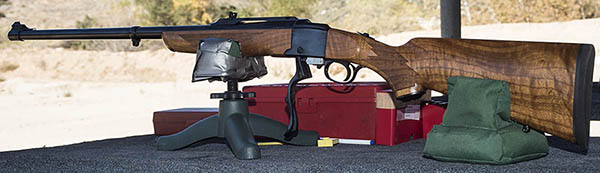
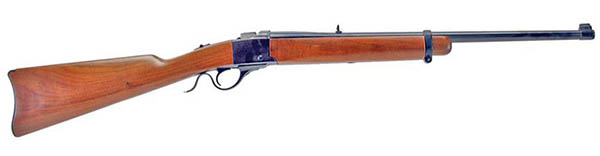
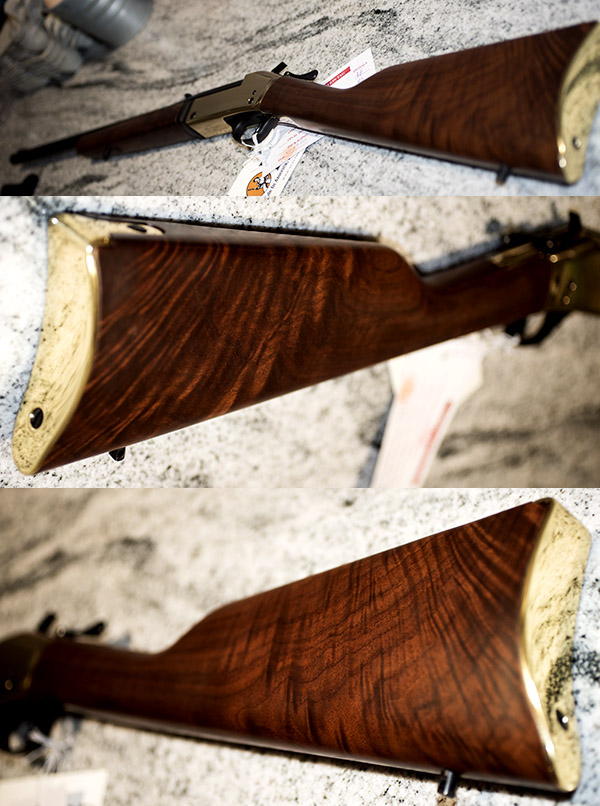
The new Henry Single Shot, brass frame .45 70 rifle. Henry makes a beautiful rifle.

I’m using the time before I pick up my new Henry rifle to prepare the reloaded ammunition I want to test for accuracy.  You will recall that in an earlier blog we discussed the three .45 70 load levels shown in modern reloading manuals.  As I mentioned in that earlier blog, I use the loads intended for the 1873 Trapdoor Springfield.  Those loads were powerful enough to take down all kinds of critters back in the 1800s, and in developing loads for other .45 70 rifles, I’ve found these to be fun to shoot and accurate.
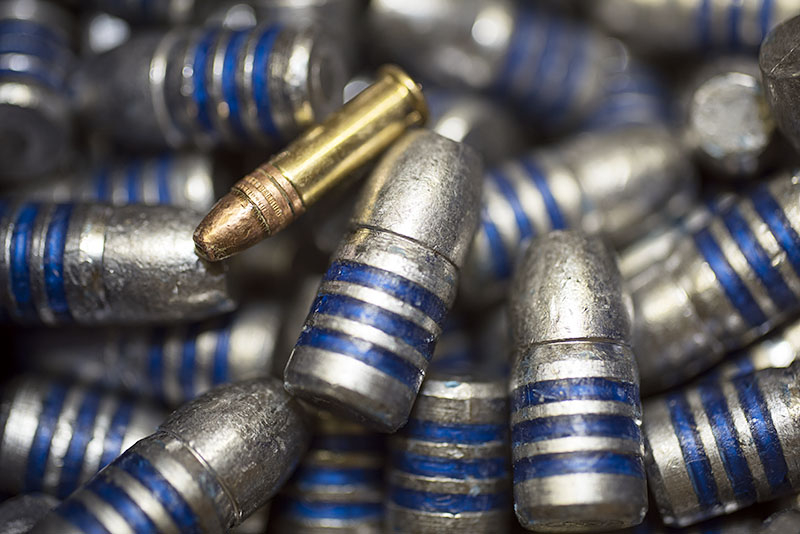
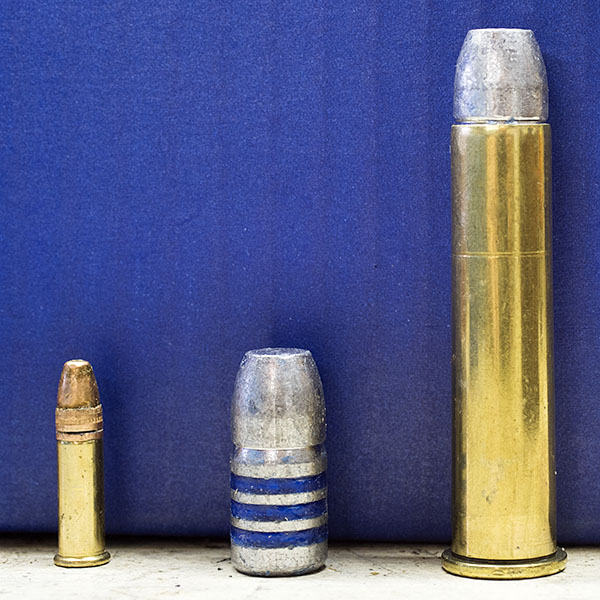
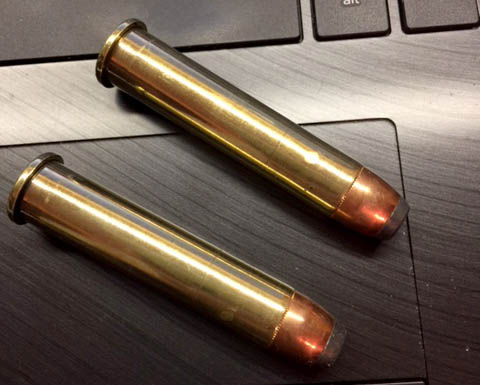
Missouri 405-grain cast .45 70 bullets. These have proven to be very accurate in other .45 70 rifles.  I’m trying these and two other bullets in the Henry.  The .22 Long Rifle cartridge you see here didn’t come with the Missouri bullets; I added it to give you an idea of just what a monster the .45 70 cartridge is.

My loads are based primarily on the components I have on hand and loads I’ve known to work well in the past.  Powders include SR 4759, IMR 4198, IMR 3031, 5744, Varget, and Trail Boss.  Bullets include the Remington 405-grain jacketed soft point, the Hornady 300-grain jacketed hollow point, and the Missouri 405-grain cast roundnose.
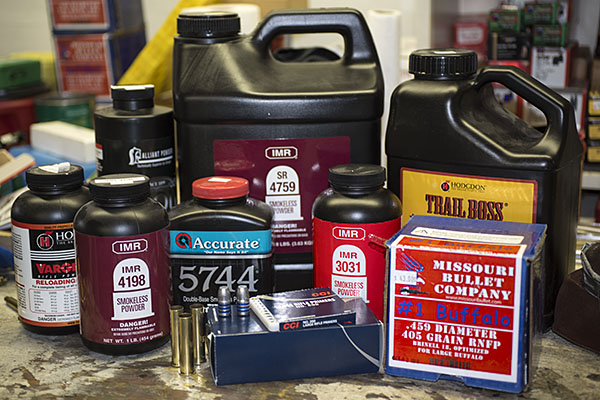
A photo showing some of the components to be used in this test. When loading, I would never have all of this stuff on the reloading bench, and in particular, I would never have more than one powder on the bench at the same time. The risk of mixing powders is too great. If you have more than one powder container on the bench, it’s very easy to pour the remaining powder in the dispenser into the wrong container (don’t ask me how I know this). When that happens, the only prudent thing to do is throw the mixed powder on the front lawn (it makes good fertilizer).

I like all of the bullets I listed above, but I particularly like the Missouri bullets.  The Missouri cast bullets seem to always be available, they are relatively inexpensive, and they are accurate.   I’m expecting to see great accuracy from these in the Henry, as they shoot well in the Ruger and the Marlin.  The 405-grain Missouri bullets are accurate in the Chiappa 1886, too, but that rifle’s stock design and buttplate make the recoil painful when shooting the heavier Missouri bullets.

Here are the .45 70 loads I will test in the Henry:
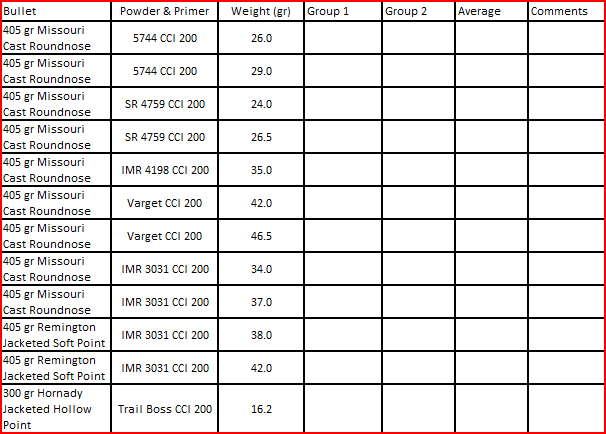
When testing for accuracy, it helps to keep things organized.  I’ll bring this table to the range with me and record my results as soon I retrieve the targets. All loads will be fired using open sights at 50 yards.

For a more in-depth reloading process overview, I invite you to review our earlier series on loading .45 ACP ammunition.  The .45 70 reloading process is very similar to loading handgun ammo.  That’s because the .45 70 is nearly a straight-walled cartridge, so the steps are the same.  This is what is involved in reloading .45 70 ammo:
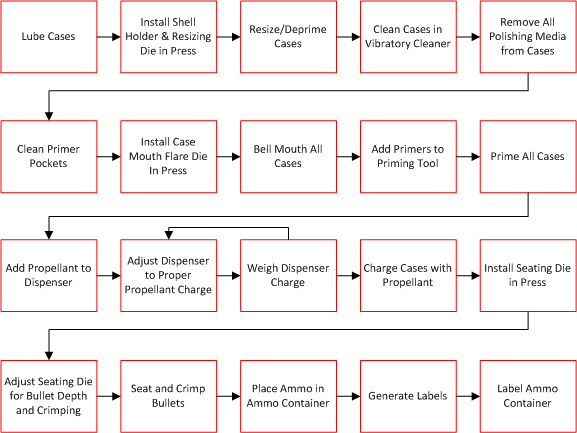
The reloading process. It looks complicated, but it’s very intuitive. Most folks who reload find it as enjoyable as shooting.

I use mostly RCBS or Lee reloading dies for all of the cartridges I load.  Both are good companies, and both offer superior customer service (if you ever need it, which has only occurred a couple of times for me).  I’ve been reloading .45 70 ammo for close to 50 years now, and I’ve been using the same set of RCBS dies the entire time.
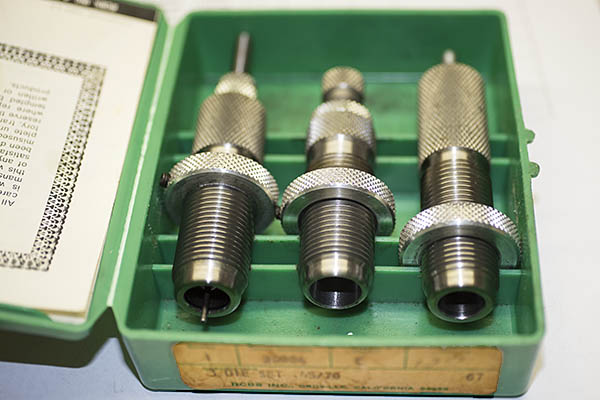
A three-die RCBS set. The first die (on the left) deprimes and resizes the fired case to its original diameter. The case has to be lubricated for this step, or else it will stick in the die.  The second die is called the expander die.  It expands the upper portion of the cartridge case and, if adjusted to do so, adds a flare to the case mouth.   The third die (on the right) is the bullet seating and crimping die.  It can be adjusted to change the depth to which the bullet is seated, and to add a crimp if you wish to do so.

The expander die (the one in the center of the above three dies) is the one that flares the case mouth.  It contains a threaded insert with a step in it to apply the bell mouth to the case.
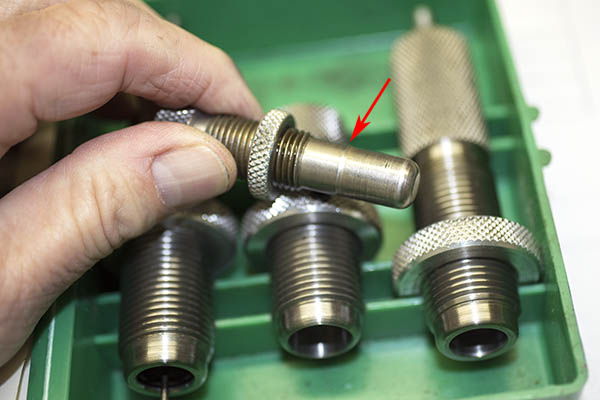
In this photo, the case expander has been removed from the die to show the diametral step. It is this step that adds a flare to the case mouth.

This is what the case mouth should look like after it has been flared.  You don’t want to overdo this step.  You just want to get enough of a flare to allow the bullet to get started in the case.
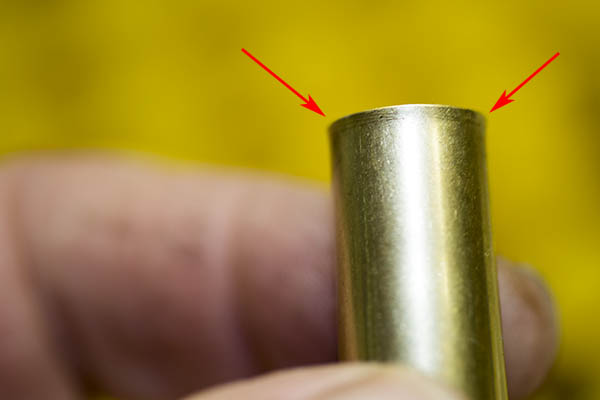
A .45 70 case with a flared mouth. We add the flare to allow the bullet to enter the case with no shaving of the bullet.

After the case has the flare applied, it’s time to clean the primer pockets and then prime each case.  I use another RCBS tool to clean any combustion residue from the primer pocket (see our earlier tutorial on loading .45 ACP ammo), and then I use a Lee priming tool to seat the primers.
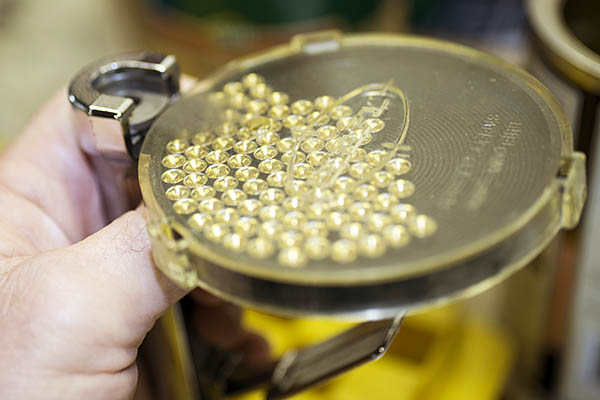
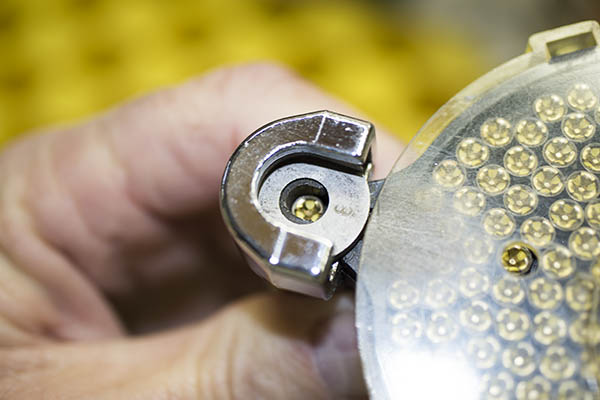
The Lee priming tool. This is another tool I’ve been using for five decades. It’s a much better way to prime cartridge cases.
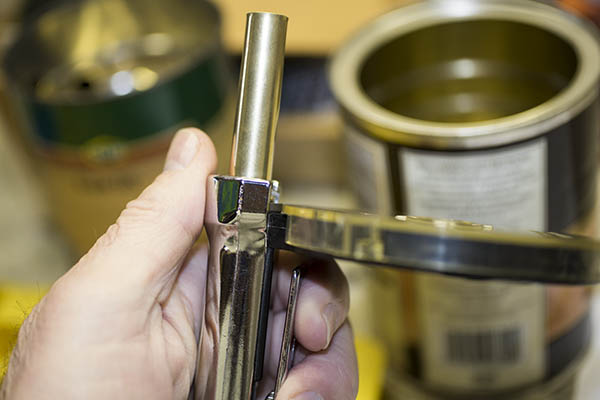
A CCI 200 large rifle primer in place, ready to be seated in a cartridge case. The .45 70 cartridge requires a Lee No. 8 shellholder, shown in place in this photo.
A .45 70 case in the Lee priming tool. Compressing the handle (shown to the right of the priming tool barrel) forces the primer into the case. You do this one at a time for each case.
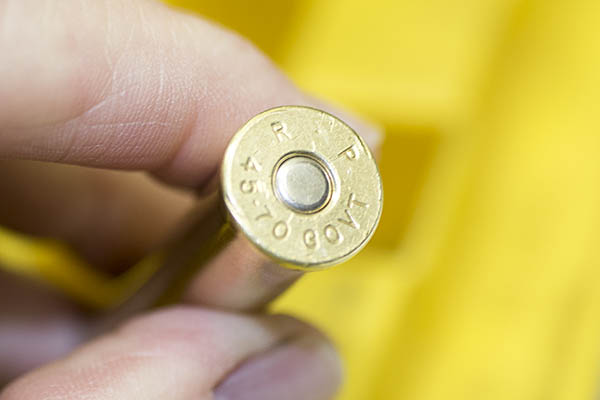
A freshly primed .45 70 cartridge case.

After all the cases have been cleaned, flared, and primed, it’s time to add propellant.  I use my RCBS scale along with a powder dispenser to add the right amount of powder to each case.  To get the correct amount of powder, I always consult a load manual.  I’m showing you different charge weights in this blog, but DO NOT rely on what I’m telling you (or what you read on the Internet from other people) for this information.  Always consult a reloading manual.  Several reloading manuals are available; I prefer the Lyman manual and it’s the one I use most often.  Most of the other manuals are either from bullet manufacturers or propellant manufacturers, so they list only their components.  The Lyman manuals are not restricted to a single brand of bullets or powders, as Lyman does not manufacture bullets or powders.   Lyman does a good job, I think.
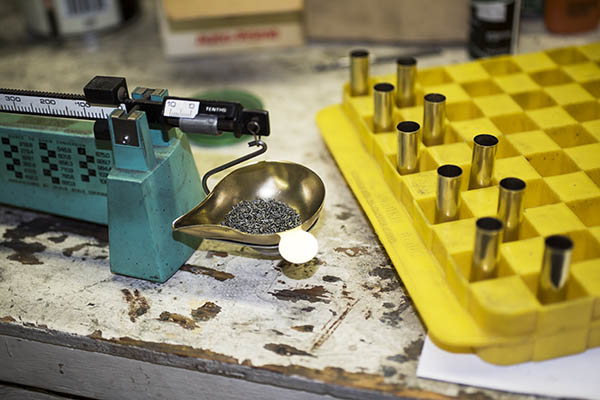
My RCBS powder scale, the reloading tray, and ten .45 70 cases waiting for their propellant charges.

When I load different test loads as I’m describing in this blog, I’ll charge and complete each group separately.  Typically, that’s ten cartridges in a group.

Once the cases have been charged with propellant, it’s time to seat and crimp the bullet.  I typically use a light crimp for the .45 70.  Crimping involves bending the flared case mouth into a crimping groove (sometimes called a cannelure) on the bullet.  You crimp a cartridge for three reasons: To prevent the bullet from being forced further into the cartridge case if it is fed into the chamber automatically (as occurs with, say, a 9mm or .45 ACP cartridge), to prevent the bullet from backing out of the case due to the recoil of other cartridges (as might occur in a revolver or a rifle magazine), and to hold the bullet in place when the primer first fires (this allows the flame front to build to a consistent pressure in cartridge prior to driving the bullet down the bore).   It’s that last reason that I’m most interested in here.  It should make for a more accurate cartridge.  Theoretically, neither of the first two reasons is a consideration for a single shot rifle.
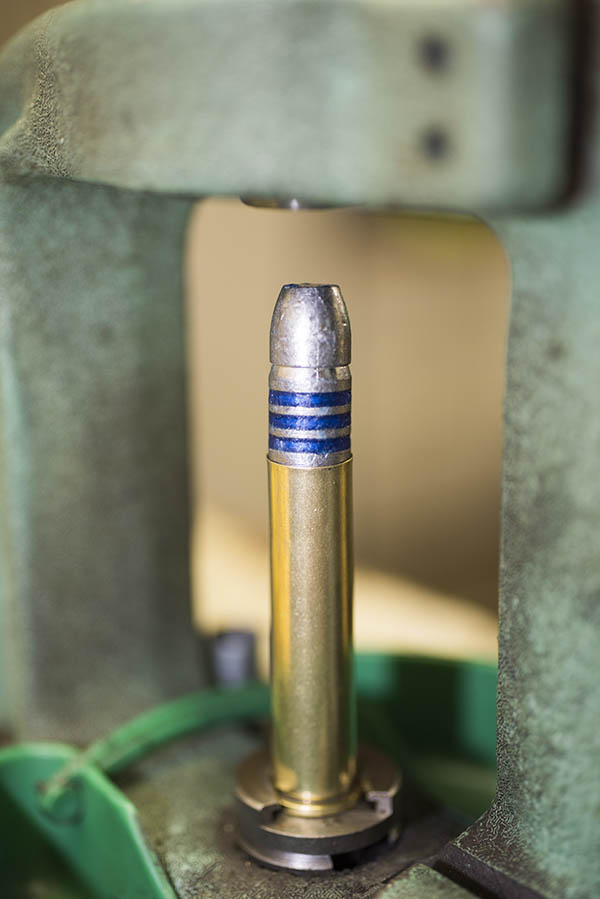
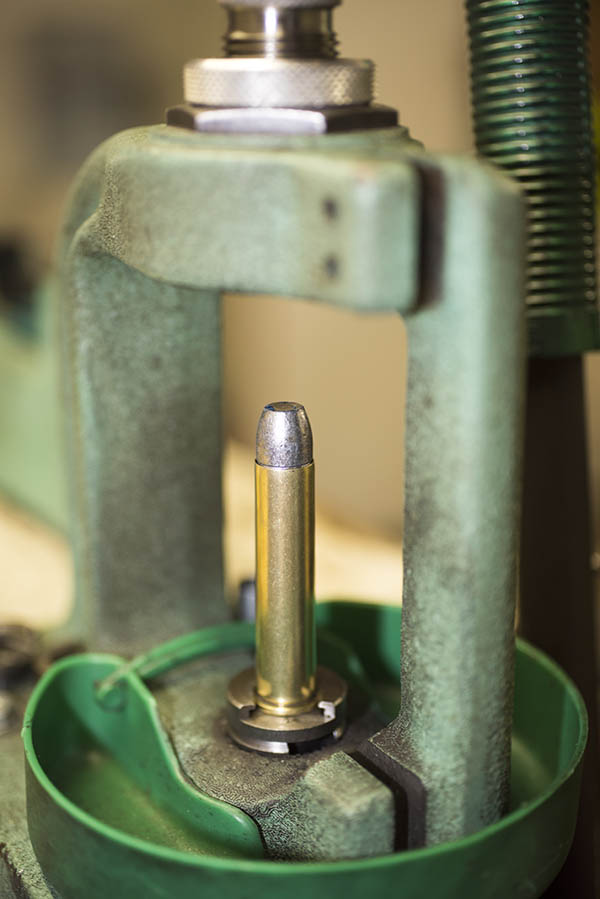
A Missouri bullet on top of a charged .45 70 case, ready to be run into the bullet seating die in the RCBS Rockchucker press.

Seating the bullet and crimping it is a bit of a dance.  You have to get the bullet seated to the right depth, and then you have to apply the crimp.  We use the third and final die in a three-die set to accomplish both.  I screw the bullet seating portion of the die fairly far into die initially and then I screw the die into the press to get the bullet seating depth where I want it.  In this case, I want the top of the brass case to be nearly even with the top of the bullet’s crimp groove.   Then I back the bullet seat all the way up in the die, and screw the die body into the press such that it forms the crimp (there’s a tapered decreased diameter in the die insider diameter that forms crimp).  Once I have the crimp where I want it (and the amount of crimp I want), I then screw the bullet seater all the way such that it contacts the bullet.  I then make sure everything is jake on the next round (you know, the same crimp and the same cartridge overall length), I make any required small adjustments, and then I lock everything down with the die’s two locknuts and load the remaining cases.
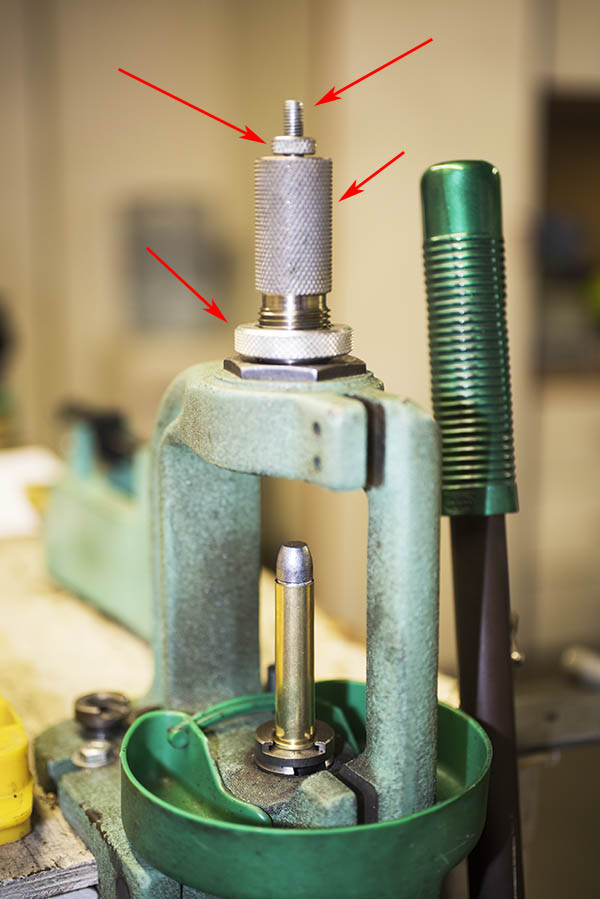
Adjustments on the seating and crimping die. The small-diameter threaded shaft controls fine adjustment of the bullet seating depth. Turning the main die body into or out of the press controls coarse bullet seating depth and crimp. The two locknuts (denoted by the arrows on the left) lock the bullet seating shaft and the die body in place.
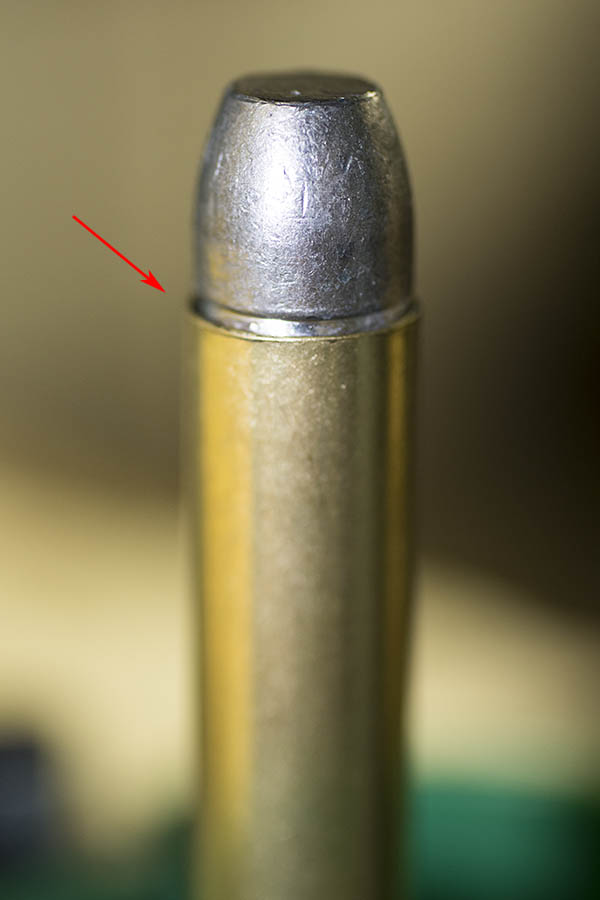
The Missouri bullet nearly fully seated in the case, but not yet crimped. I’ll seat the bullet just a bit deeper, and in the last few thousandths of an inch on the press stroke, the upper edge of the cartridge case will be crimped by the die around the bullet.
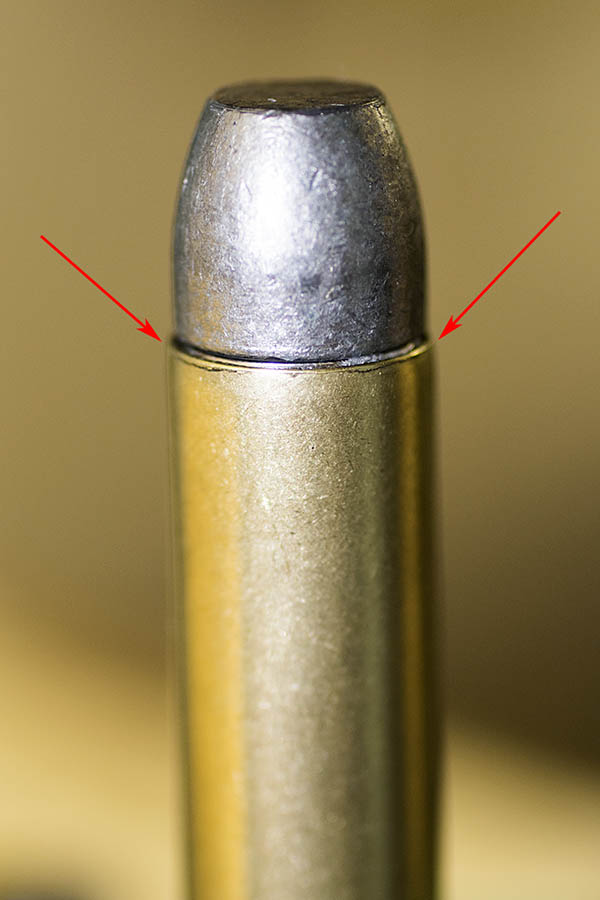
A seated and crimped Missouri bullet in a .45 70 brass case. When I bellmouth the cases, I only open them up just enough to allow the bullet to start into the case. When I crimp, I only crimp a little bit. This minimizes working of the brass around the case mouth. Loading at the Trapdoor Springfield levels as I do, and using this minimal amount of opening and then crimping the brass, results in long case life. These cases were purchased in the 1970s and I’m still using them.
A completed round. This .45 70 cartridge is ready chamber and fire.  It’s a big cartridge.

After I’ve done all of the above, I immediately label the packaged, reloaded ammo so that I know what I have.  I can’t rely on my memory and do this later; I always perform the labeling operation as soon as the reloading operations are complete.
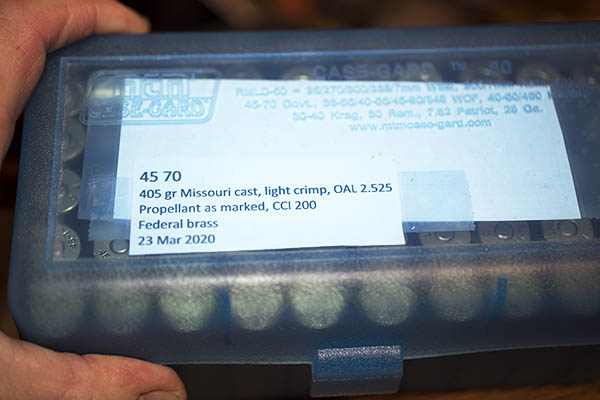
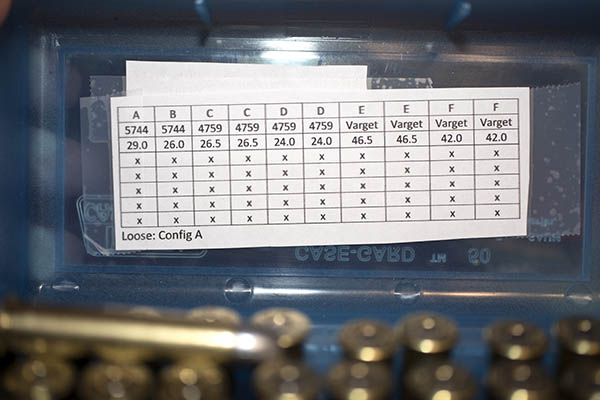
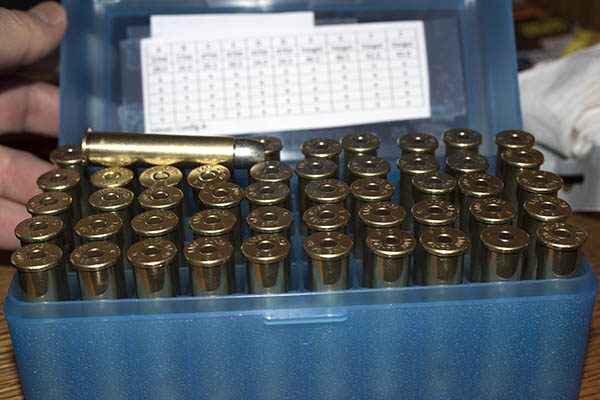
A box of 50 .45 70 cartridges labeled and ready to take to the range. I always label my loads as soon as I finish them.
Because these are cartridges loaded differently for accuracy testing in the new Henry rifle, I included a map inside the cartridge container to identify how each group has been loaded.
Ready to go to the range. Reloaded cartridges are less expensive than factory ammunition, and I will be able to find which combination of components performs with the greatest accuracy in my new Henry rifle. With factory ammo, you pay more and you get what you get in terms of accuracy.

There you have it.   I have all the .45 70 ammunition I want to test loaded, boxed, labeled, and ready to go to the range.  Now all I have to do is take possession of my new Henry, head out to the West End Gun Club, and see what works best.  You’ll get to see it, too, right here on the ExNotes blog.


Check out our earlier Henry Single Shot stories here:

Developing A Henry .45 70 Load:  Part 1
The Henry Is In California
Henry Rifles:  Made in America Or Not Made At All

And check out our other Tales of Gun Stories here.
Developing a Henry .45 70 Load: Part 1

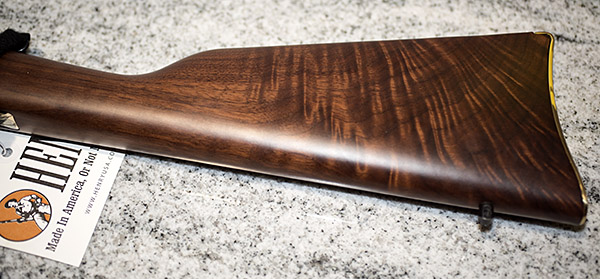
The new Henry Single Shot. Mine has exceptionally fancy walnut. I am a soft touch when fancy walnut is involved.

I’m about a week away from having sufficiently cooled (at least in the Peoples Republik of Kalifornia’s eyes), which is another way of saying I have 7 days left until my 10-day waiting period is over, and then I’ll be able to pick up my new Henry .45 70 Single Shot.  (“Single Shot” is capitalized because it’s a proper noun; it’s Henry’s official name for this rifle.)

Another view showing the entire Henry Single Shot rifle. I’ll get better photos when I get to the range; I shot these photos at the dealer.

I am loading a series of cartridges to test for accuracy in the new Henry and I’m going to tell you about the loads, but before I get into that I want to tell you about the three levels of reloads you find in the .45 70 reloading manuals.  I’ll post about the different loads (and reloading those rounds) in the next blog.

A Sense of Scale: A .22 Long Rifle cartridge, a 405-grain Missouri cast .45 70 bullet (just the bullet is bigger in both length and diameter than an entire .22 cartridge), and a reloaded .45 70 cartridge.

.45 70 History

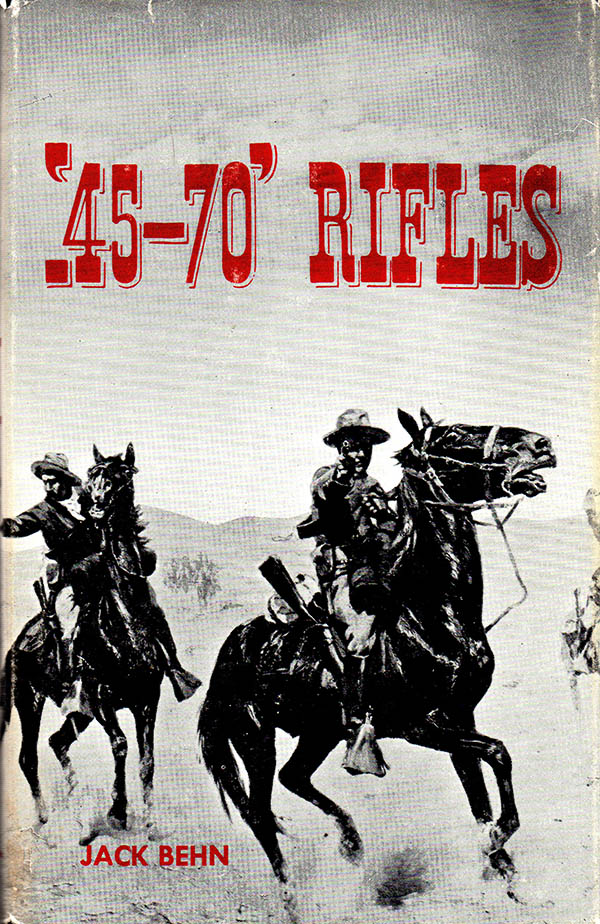
I’ve been a student of the .45 70 for close to 50 years, and the cartridge is nearly 150 years old.  One of the best sources of information on the early .45 70 rifles is Jack Behn’s touchstone reference shown below.

One of the best references on early .45 70 rifles is Jack Behn’s excellent 1956 book. It was published by the Gun Room Press, an imprint owned by the now defunct Rutgers Gun Store. When I picked up my 1973 Colin D. MacManus 1911 .45 auto, it was from the Rutgers Gun Store in Highland Park, New Jersey.

At the end of the Civil War, the Army knew it needed a breechloading rifle (one that loaded from the rear with metallic cartridges).  This resulted in development of the 1873 Springfield rifle and the .45 70 500 cartridge, so designated because it fired a 500-grain, .458-inch diameter lead cartridge propelled by 70 grains of black powder.  That was later changed to a 405-grain lead cartridge because soldiers complained that recoil with the 500-grain projectile was excessive.

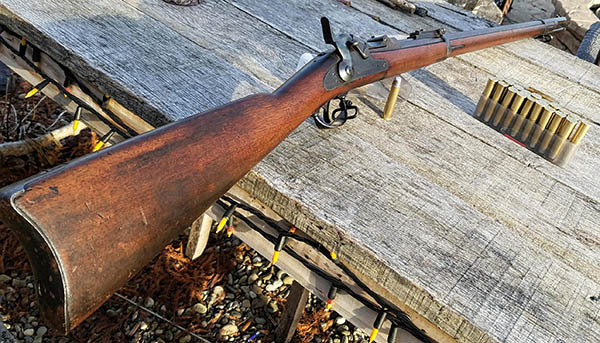
An 1873 Trapdoor Springfield rifle.

That .45 70 Trapdoor Springfield remained in service from 1873 through the Spanish American War and our wars against the Plains Indians.  It was also the rifle most frequently used by buffalo hunters to nearly exterminate the American bison, which was really little more than an extension of the war against the Indians (it’s not widely known, but the dominant reason the U.S. Government encouraged eradication of the American bison was because it was the principal source of food, shelter, and clothing for the Indians).

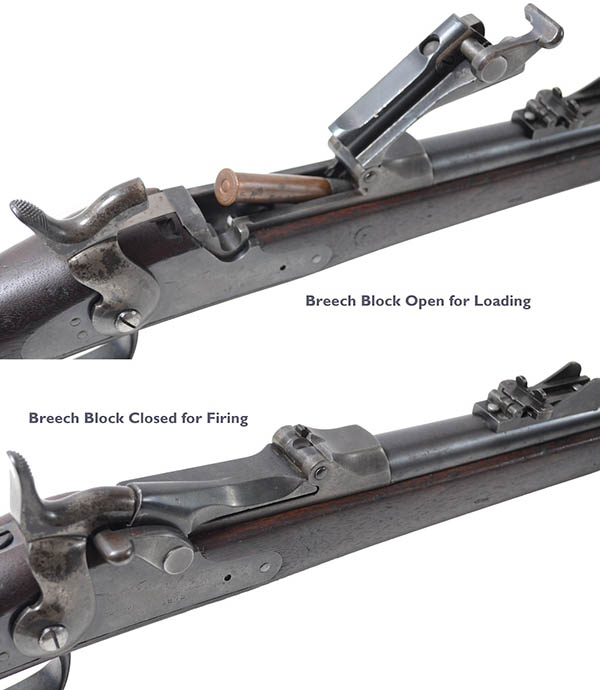
The Trapdoor action.  New in its day, it is antiquated today.  It is a weaker action than are those used in modern single shot and lever action rifles, and it therefore is loaded to lower chamber pressures.

Trapdoor Springfield .45 70 Loads

The “Trapdoor” designation for the 1873 Springfield refers to the action design.   The Springfield’s action had a hinged element that rotated forward to allow loading a cartridge, which was then closed and locked in place prior to firing a round.   It was state of the art in  1873, but it was inherently weak and limited the pressures to which ammunition could be loaded.  But it was enough.  The Springfield action could withstand pressures up to around 17,000 psi, sufficient to launch a 405-grain projectile at velocities a little north of 1400 feet per second.  It was more than enough to kill a man, and in fact, it was enough to kill a buffalo.

Winchester and Marlin .45 70 Loads

The .45 70 cartridge had a lot going for it, and in 1886, Winchester introduced a .45 70 lever action repeater (their Model 1886).  Marlin had previously introduced a .45 70 lever action repeater in 1881.  The Winchester and Marlin rifles had two advantages:  They could fire repeatedly by operating the lever action and squeezing the trigger, and the lever gun actions were stronger (so they could be loaded to higher pressures with resulting higher velocities).  I don’t know that any of the ammo companies loaded the cartridge to the higher pressures the Winchester and Marlin rifles could handle back in those days (probably out of a fear that the ammo might be used in the weaker Springfield action), but folks who reload today and who have either a Marlin or a Winchester can load their ammunition to the higher levels allowed by the lever gun receivers.

The reloading manuals show that the Model 1895 Marlin and Model 1886 Winchester lever actions can handle chamber pressures in the 27,000 psi range.   That’s enough to drive a 405-grain bullet out at about 1700 feet per second.  That’s a smoking hot load.

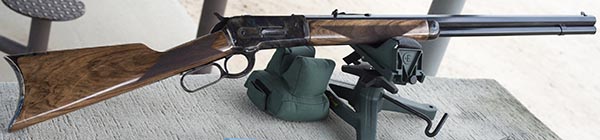
This is a Chiappa reproduction of the 1886 Winchester rifle, chambered in .45 70. This is a lever action rifle.
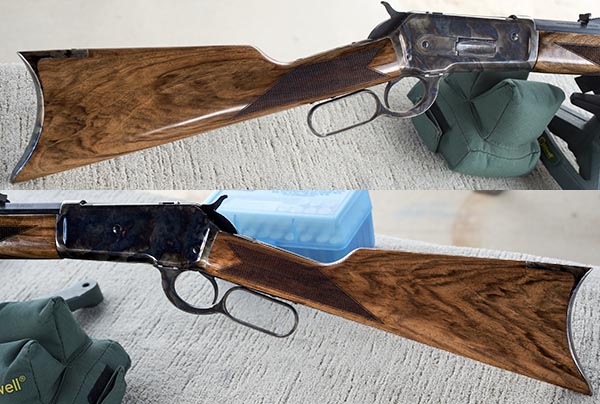
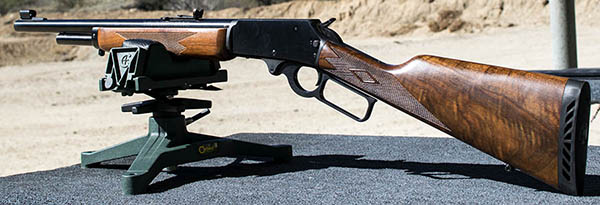
The 1886 Chiappa reproduction. The curved metal buttplate is a faithful reproduction of the original Winchester design, and it is punishing when the hammer drops. Nice wood, huh?
A modern Marlin 1895. When I saw this one on the rack, I knew I had to have it. I’ve owned the rifle about 25 years now. It’s very accurate, and it regularly shoots into an inch with open sights at 50 yards.

Ruger No. 1 and No. 3 .45 70 Loads

The next step in the .45 70 evolutionary chain?  That would be the single shot rifles offered by Ruger starting in the 1970s.  Ruger had two:  Their No. 1 rifle and the No. 3.  Both use the same action, and it’s strong.  In the Ruger rifles, you can load .45 70 ammunition to nearly the same velocities and the same pressures as a .458 Winchester Magnum, which is to say, crazy levels (at least in terms of recoil).   Ruger rifles chambered in .45 70 can handle pressures approaching 40,000 psi, with 405-grain bullet velocities north of 2,000 feet per second.  I’ve done this.  It’s no fun.

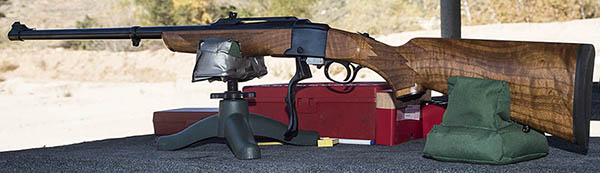
A Ruger No. 1 falling block rifle. This is the rare 26-inch barreled version with figured Circassian walnut. Ruger only made a limited number of these variants and most of them have very plain wood. It’s pretty, but the Marlin shown above is more accurate.

.45 70 Loads:  The Bottom Line

The upshot of all this?  There are three levels to which you can reload .45 70 ammunition:  The Trapdoor Springfield level, the 1886 Winchester/Marlin level, and the Ruger level.  When you see this in a reloading manual, you’ll see three sets of reloading data, designated separately as explained in this blog.

What does all this mean in the real world?  Your mileage may vary, but for me, I never venture into the Marlin/Winchester and Ruger .45 70 reloading levels.   There’s just too much recoil, and you don’t need to go there for accuracy.  I would argue further that you don’t need to go there for lethality (the .45 70 in 1873 Trapdoor Springfields killed a lot of buffalo).  I stick to the Springfield levels for all of my rifles (even though I could go higher), and that’s how I’m going to load for the new Henry rifle, too.


More Tales of the Gun here, including detailed info on each of the rifles shown above!

The Henry is in California

I sure was surprised a couple of days ago.  While sheltered in place, or locked down, or in self-isolation, or whatever the nom du jour is, I received an email from my local FFL telling me that my Henry Rifle had arrived.  Wow, I didn’t even know it had been shipped yet!  You know the deal…I’m here in California and I have to wait 10 days so that I can cool sufficiently before taking possession of the new rifle, but I wanted to get the process started.  I made an appointment so as not to be around too many other people and off I went.  Truth be told, it felt great just getting out of the house, and I felt even better when I saw the Henry .45 70.  It’s beautiful.

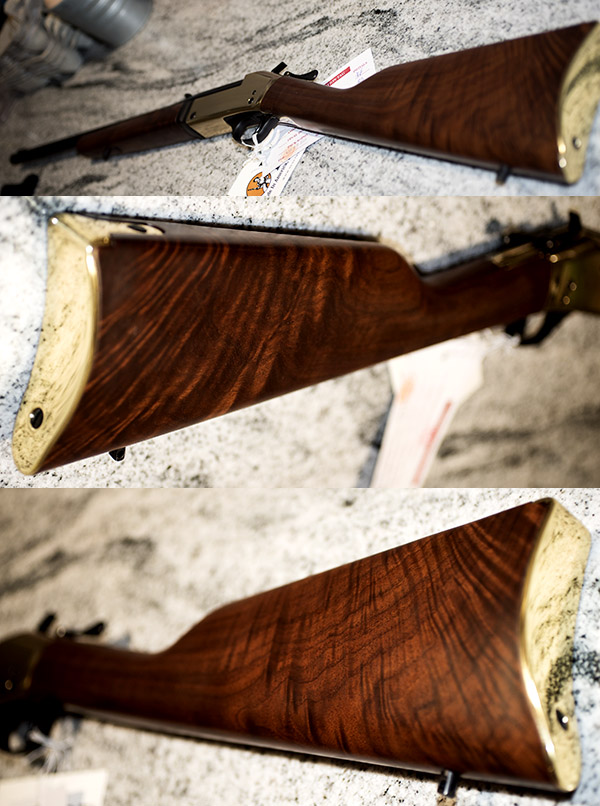
You can refer to our earlier blog for the first part of the Henry story.  In it, I told about asking their marketing director (good buddy Dan) to try to get me one with a nice piece of walnut, and wow, did they ever!  When I arrived at the FFL, the lighting at the store was not conducive to great photography, but I did my best:

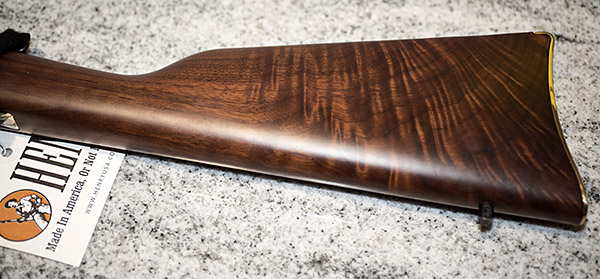
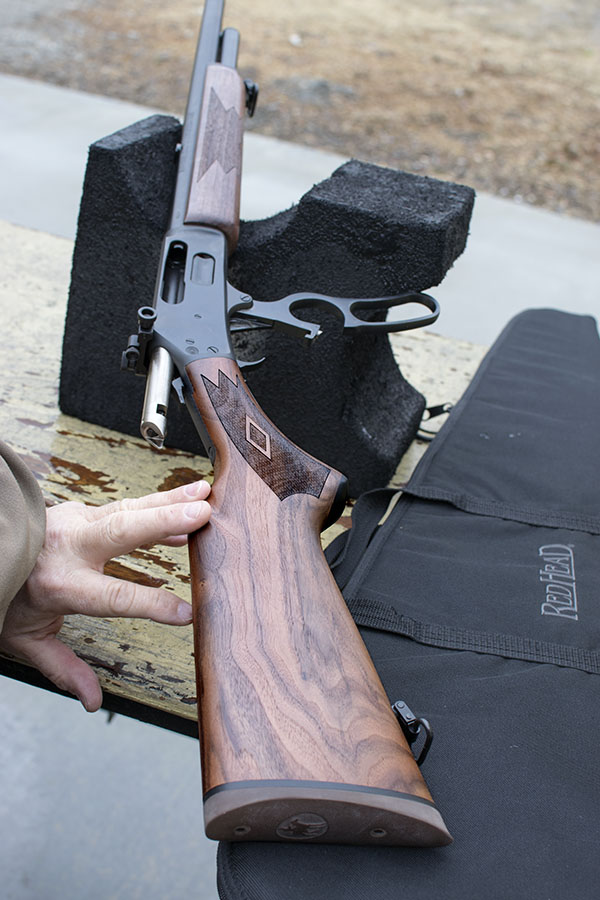
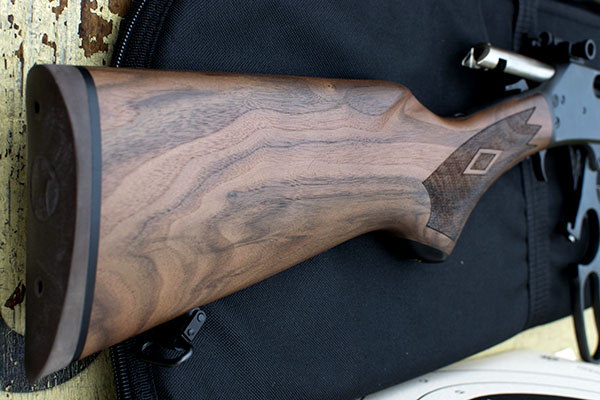
What’s really nice about this rifle is that the stock is highly figured on both sides, and it is what I would call exhibition grade walnut. I’m guessing it’s American walnut, as Henry prides itself on being made in America.  I’ve been collecting rifles for a good half century now, and I have some with really nice wood.  The new Henry jumped to the head of the pack.  It’s stunning.

I had hoped to have a more in depth chat with Dan this week, but like all companies, Henry has its hands full right now.  That’s okay; we’ll get to chat later.  What Dan told me earlier is that all these rifles are nice, and they are a cut above what one would normally see in a rifle in this price range.  I think he’s being too modest.  I’ve seen and I own rifles that cost two to four times as much as this Henry, and the fit and finish on those is not as nice as this.  It truly is a beautiful rifle.  My compliments to Henry USA!

I’ve already started loading .45 70 for the Henry ammo development effort, and I think the next blog will be on that topic.  This is going to be fun, folks.  I can’t wait to talk possession of the rifle and I can’t wait to start shooting it.  I’m eager to see how the rifle performs, and I’m equally eager to get the Henry on the bench and out in the sunlight so I can get better photos for you…this rifle deserves it!


More Tales of the Gun can be found right here!


We’re going through a rough patch right now, and when I say we, I mean that literally.  We, as in the whole world, are working through a terrible situation.  But it will pass, and when it does, we’ll be better people.  I’ve cut back substantially on the time I spend on social media for a lot of reasons, not the least of which is my deep disappointment in people who are using the current world health situation to post stupid stuff.  But every once in a while you see something good, and this meme from Southern Pride and Dixie Proud was one of those rare occasions:

Henry Rifles: Made in America or not made at all…

Henry Single Shot rifles. The steel-framed ones have a conventional pistol grip stock. The brass-framed rifles have a straight grip. They are available in chamberings ranging from .223 to .45 70.

About four years ago I went to the range with my good buddy TK. TK is a cool guy and he had a rifle I didn’t know much about. It was a new .44 Magnum Henry lever action rifle with a brass receiver and, in a word, it was stunning. The brass and the bluing were highly polished, the walnut stock was highly figured, and wow, was it ever accurate. I’d seen Henry rifles before but I had never handled or fired one, and when TK let me shoot his…well, let me put it this way:  Wow!  TK was impressed with my marksmanship and so was I.  I put five .44 slugs through a hole you could cover with a quarter, and folks, with open sights, that’s good shooting.  The rifle looked, felt, handled, and shot the way a rifle should.

Just a couple of weeks ago, good buddy Greg and I were on the range again and Greg had a new toy. He had recently purchased an older Harrington and Richardson break open rifle in .223, and it was nice. Harrington and Richardson stopped making their rifles some time ago, and I always thought having one in .45 70 would be the right thing to do.  But I had never gotten around to scratching that itch.  Maybe it was time to do something about that, I thought.

I like the concept of break open rifle, and I love the concept of a single shot. They are just cool. You have to make every shot count, and that’s appealing to me.  A Ruger No. 1 or a Ruger No. 3 single shot rifle has always been my first choice.  There’s something about a single shot rifle that floats my boat.

Seeing Greg’s H&R single shot .223 got me to thinking about Henry rifles again, probably because I’d seen something on the web about Henry having introduced a new single shot. I remembered the quality of TK’s Henry, and I love the break open configuration I was seeing on Greg’s H&R.  It reminded me of my very first rifle…a .177 caliber pellet gun I’ve had since I was a kid wandering the woods in New Jersey.  What I had in mind was a Henry single shot rifle with a brass frame chambered in .45 70 (one of the world’s all-time great cartridges).  Throw in some fancy walnut, and it would be perfect.  It would be just what the doctor ordered.

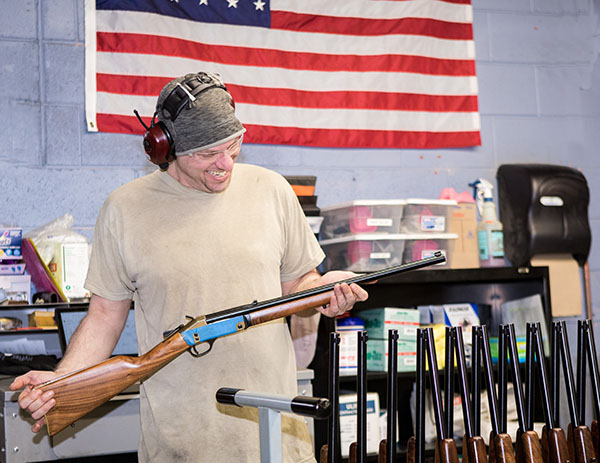
One of the artisan’s at the Henry plant handling a .45 70 single shot rifle. Check out the walnut!

Hmmmm.  Brass.  Walnut.  .45 70.  The wheels were turning, and that prompted a visit to Henry’s website.  What’s this?  A contact form?  Hmmmm again.  Would it be possible to get a Henry Single Shot in .45 70, brass framed, with hand-selected walnut?  Well, it seems the Henry folks had checked out our ExNotes gun page, and the answer was swift: Yep, they could help me on this.

So, to make a long story a little less long, I’ve been corresponding with Henry USA and I bought one of their brass frame single shot rifles. The good folks at Henry assured me it will have nice walnut. I’m talking to the Henry marketing director to learn a little more about the company tomorrow and I’ll be posting a blog about that in the near future. I’ll soon have a new Henry rifle in the ExNotes armory, and you can bet I’m going to have lots to say about it.

Stay tuned, folks. You’ll read all about it right here.


Check out our Tales of the Gun!

The 1886 Winchester

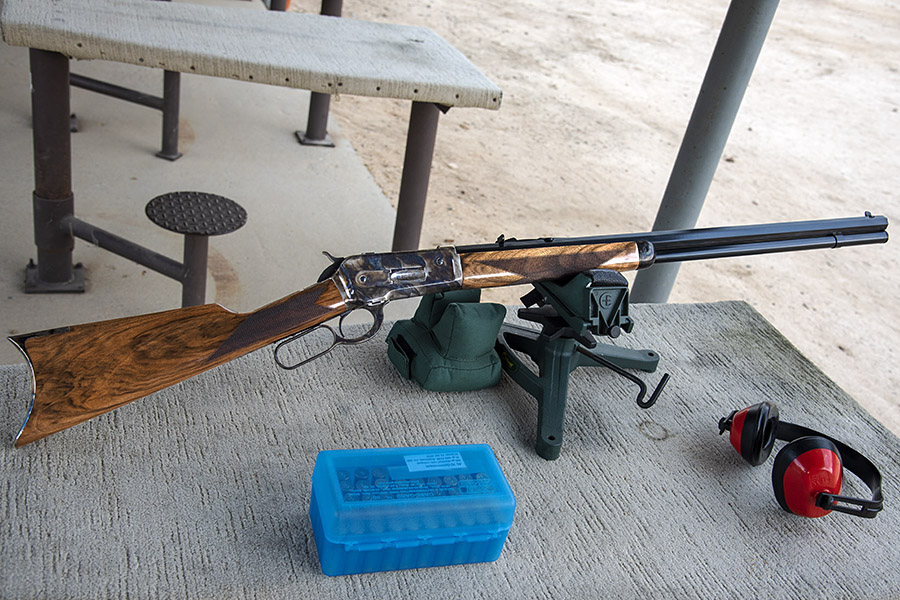
An 1886 rifle chambered in .45 70. Octagonal barrel. Color case hardened receiver and other bits. Finely-figured walnut. It was a good day.

It was one of Theodore Roosevelt’s favorite rifles, and it was a rifle I’ve wanted for a long time:  The 1886 Winchester, except mine isn’t a Winchester.  Mine is a Chiappa, and it’s a faithful reproduction of the original 1886 Winchester.  After a diligent search, I purchased mine through Gunbroker.com from an outfit in Pennsylvania called Elk County Ammo and Arms and I had it shipped to my favorite local gun shop, Bullet Barn Guns here in southern California.

I picked up my 1886 this week and I was on the rifle range with it the day I did so. It wasn’t my brightest move; it was over a hundred degrees on the firing line and the heat made me woozy by the time I got home.  But I wanted to shoot my 1886.  Not surprisingly, I was the only nut on the range that afternoon.  Also not surprisingly, I enjoyed every second of my 1886 range session.  For me, the rifle’s heritage, beauty, performance, accuracy, and general magnificence overcame the heat.   Even though old Davy Crockett did his thing a good half century before the Winchester 1886 came on the scene, I kept hearing the music from that old 1950s TV show while I was on the range. You know.  Davy Crockett, King of the Wild Frontier and all that.  A stunningly-beautiful 1886 and high temperatures will do that do you.  King of the Wild Frontier.  I liked that.  It’s how I felt that afternoon, a feeling fueled by the vintage look and feel of my 1886.

My 1886: Blue Steel and Walnut

Well, not just blue steel and walnut.   Blue steel, color case hardened steel, a 26-inch octagonal barrel, and extremely well-figured walnut.  It’s a combination that’s tough to beat, especially on a classy lever gun like the 1886.

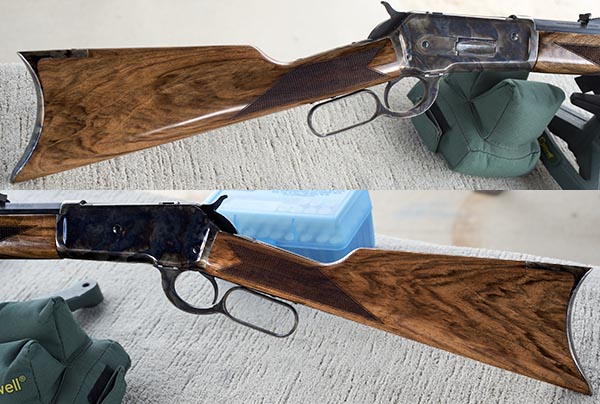
Left and right views of my 1886. This is a beautiful rifle. But that buttplate!

The folks at Chiappa know what they’re doing.  Check out this color case hardening.  It’s stunning.

This is a classy rifle. The color case hardening is magnificent.
The craftsman in Italy who do this kind of work are underpaid. I have no idea how much they earn, but I think they are underpaid.  This kind of work is priceless.
The fore end tip is also color case hardened. The checkering is hand cut and beautifully executed.
Painfully beautiful, this buttplate is.  It captures the era and the feel of an original 1886, but with full power loads, it’s painful.

The 1886 and 45 70 Accuracy

So what’s it like shooting the 1886?   Hey, take a look…

The 1886 Chiappa will shoot.  The heat not withstanding, I was having a good time out there.  The sun was playing hide-and-seek behind the clouds, and when it went behind the clouds, the difference in accuracy was immediately apparent.  I saw firsthand what happens when you have glare on the front sight.  When the sun ducked behind the clouds, the front sight stood out clearly.  When the clouds moved away and the sun bore down on the 1886 directly, the front sight caught a fair bit of glare.  It made getting a clear sight picture difficult, and you can see the results on the target below.

Five 5-shot groups at 50 yards with the Chiappa 1886.  The first three groups were shot with the sun behind the clouds. The Chiappa 1886 is accurate! The sun emerged for the last two groups, and the accuracy difference was startling.  Glare from the front sight made the groups open significantly. My 1886 had not been zeroed yet. The purpose of this range session was just to see how the 1886 would group, and it did not disappoint.

I had my Marlin 45 70 accuracy load (a 405 grain cast bullet with 35.0 grains of IMR 4198 powder) and I used it on the target above.  I fired the first three groups with the sun behind the clouds and no front sight glare.   Then the clouds shifted, the sun was out in the open, and the front sight started winking at me.   Glare kills accuracy when shooting open sights.  I proved it. With no front sight glare, the groups were impressive.

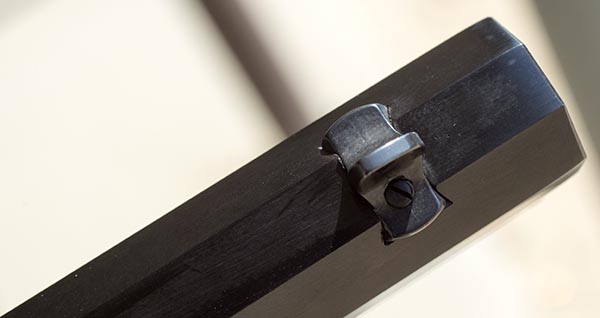
The 1886 was shooting to the right, and when I examined the sights, sure enough, the front sight was slightly biased to the left.   On a rifle or handgun rear sight, you move the sight in the direction you want the bullets to go (if you want your shots to move to the left, you move the rear sight to the left).  On the front sight, it’s just the opposite.  You move the front sight in the opposite direction you want the bullets to move.

Look very closely, and you can see the front sight is a bit to the left.  That octagonal barrel is beautiful.

The front sight on my 1886 needed to move to the right because I wanted to move the shots to the left.  I had a gunsmith screwdriver kit with me at the range, but between the heat and my sweating like a stuck pig I didn’t want to fool around trying to move the sights out there.  I thought it would be best to wait until I returned home and do it in my shop.  That’s what I did, and I’m eager to get back out on the range and try it again.

45 70 Recoil

In the video above, the 1886’s recoil looks to be pretty mild, and it was for the three shots you see me firing in the YouTube (I was shooting a light Trail Boss load).  I brought two different loads with me to the range.   One was the aforementioned light Trail Boss load; the other was the more serious IMR 4198 load that I also mentioned earlier.   Trail Boss and IMR 4198 are two different propellants; Trail Boss loads generally give low bullet velocity and low recoil (you know, it’s the old f = ma thing).  IMR 4198 makes the bullet step out more earnestly and that load used a heavier bullet.  Both resulted in a sharp step up in recoil.

With the light Trail Boss load and a 300-grain Hornady jacketed hollow point bullet, the recoil was tolerable (as you can see in the video).  With my accuracy load (the one I developed for my 45 70 Marlin, a 405-grain cast bullet and 35 grains of 4198), the steel 1886 buttplate hurts big time. I had to use a wadded up T-shirt as a half-assed recoil pad for a field expedient.  But the rifle will shoot.   It’s accurate, as the above groups show.

The Gunstores

As I mentioned above, I bought my Chiappa 1886 from Elk County Ammo and Arms in Pennsylvania.  There are a lot of shops selling the 1886 Chiappa, but Elk County Ammo and Arms was the only one willing to take photos of my rifle and email them to me so I could see what I was getting.   That was a big plus for me, and it cinched the deal once I saw the actual rifle. I had Elk County Ammo and Arms ship the rifle to my local gun store, Bullet Barn Guns, here in southern California.  Bullet Barn Guns is a family-run operation and they are absolutely top notch in every regard.  Like me, they appreciate blue steel and fine walnut, and they were blown away by my 1886 when it arrived (so much so that they shot photos of it and emailed them to me, too).  The folks at Bullet Barn are enthusiasts, just like me.

The 1886 Chiappa:  The Bottom Line

I’m a happy camper.  I wanted an 1886 with good wood and this one answered the mail.  The walnut is stunning.  The checkering is hand cut and sharp (it’s not laser cut or pressed, as is the case on many rifles today). The walnut is oil finished, which makes it easily repairable when the inevitable hunting, range, and general use scratches occur.  The metal work is superior (you can see that in the above photos). The trigger is good (there is no creep).   And the rifle is accurate.  It groups well.   After I shot the above target, I used up the remainder of the box of ammo I brought to the range shooting at a rock out at about 150 yards, and I connected every time.  That was cool.

About the only thing I don’t care for is that the lever does not lay flush against the receiver; it’s angled out a degree or two. I don’t think that’s a big deal, but I had to find something to bitch about (I’m told it’s part of my charm).  That’s it.

The bottom line is that the Chiappa 1886 is a beautiful and accurate rifle. I had wanted an 1886 with nice wood and color case hardening for a long time, and now I have one.  Keep an eye on the ExNotes blog, folks.  This is a rifle that will be back on these pages.


Like stuff on blue steel and walnut, or maybe the 45 70 cartridge?  Hey, check out our Tales of the Gun page!

A Wind River Marlin rifle…

By Joe Berk

You remember my post on being a bad influence?  You know, I get a new rifle, get all pumped up about it, and then my buddies buy the same thing?  And you remember that at least couple of the gun blogs we’ve done have been “A Tale of Two (fill in the blank)” gun stories, with the other guns owned by good buddy Greg, or Paul, or one or another of my shooting buddies?

Well, it turns out I’m not the only bad influence in town.  There was a movie not too long ago (Wind River) where the main character carried a stainless steel, scoped, .45 70 Marlin lever gun, and he reloaded his own ammo to boot.  Good buddy Greg saw that movie and decided his life wouldn’t be complete unless he had a similar rig.  Here’s the trailer for Wind River to give you a bit of background if you haven’t seen the movie…
You might have noticed the Harvey Weinstein credit at the start of the movie (now there’s a guy who’s fortunes have certainly reversed).  I saw Weinstein speak (in person) at a Bud Ekins and Steve McQueen motorcycle tribute event about 10 years ago, but I digress…that’s a story for another blog and another time.  Back to the main attraction for this blog.

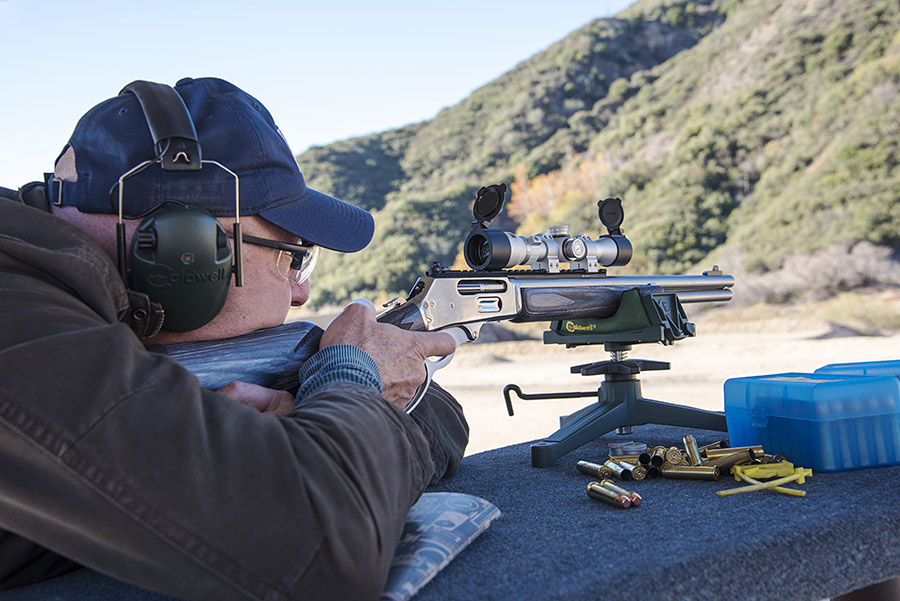
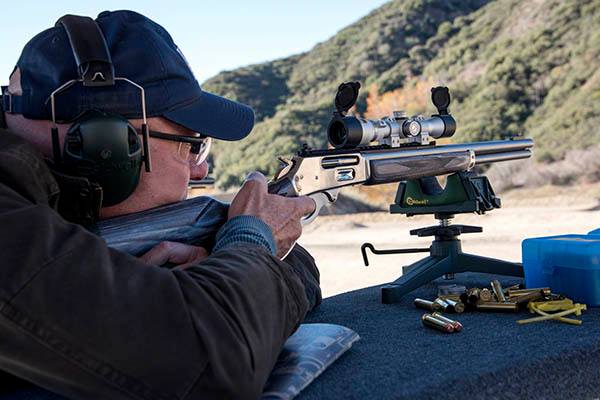
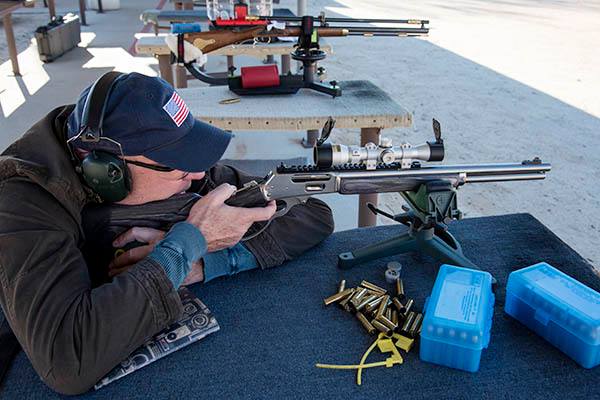
Anyway, Greg pulled the trigger on what I’m calling the Wind River Marlin, and we took his new rifle to the range this weekend.  Greg’s new 1895 is awesome from both accuracy and power perspectives.   Highly-polished stainless steel, laminated stock, big loop, long-eye-relief scope, Picatinny rail mount, 16-inch barrel, and more.  It’s very impressive…

Greg and the Wind River Marlin, settling in to drop the hammer.
Deep breath, let it halfway out, gently squeeze…
…and another 400-grains of lead heads downrange. I tripped the shutter just as the rifle was recoiling and caught the thing in midair. Note the rifle lifting off the rest in recoil.

Here’s a very short video of Greg firing the Wind River special…watch it bounce around when it recoils.  The lens caps dance around a bit, too!

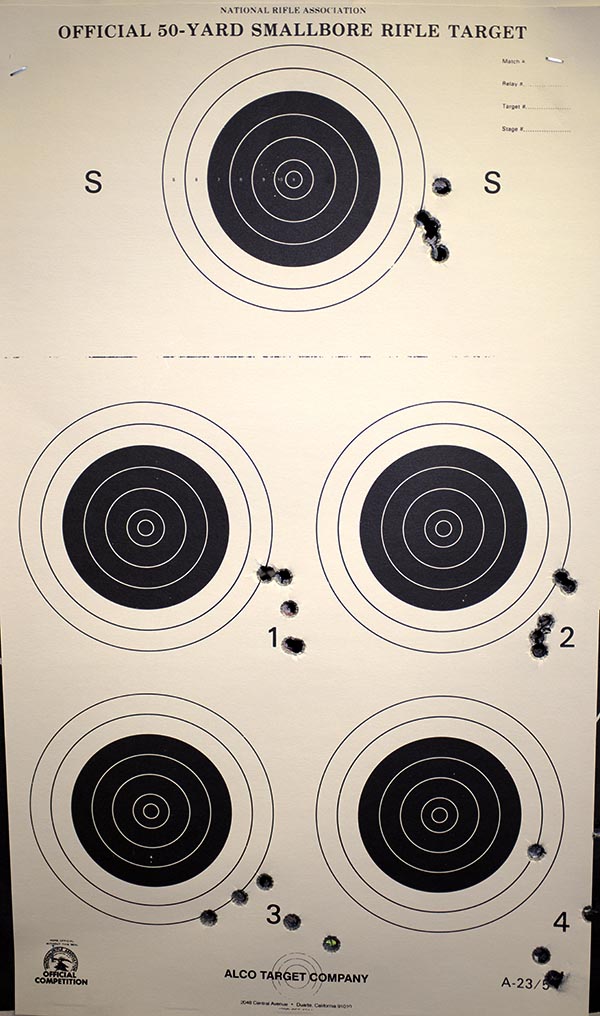
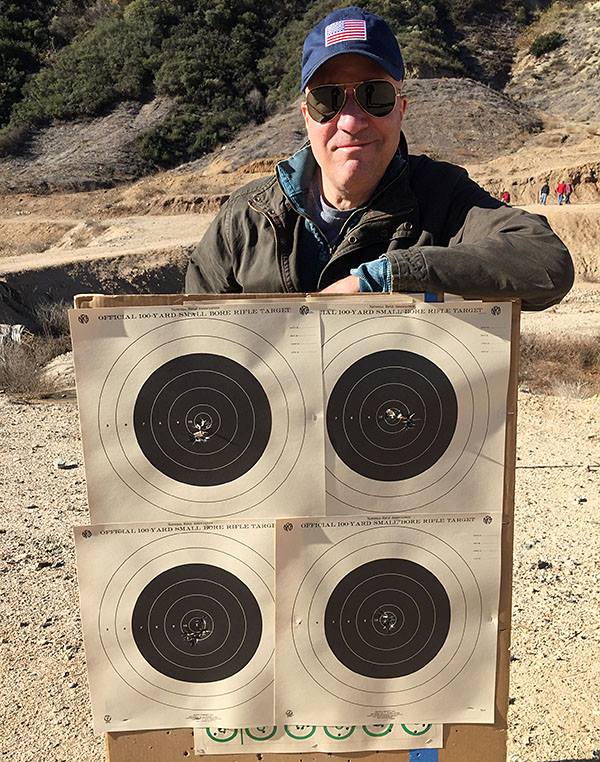
And here’s what it looked like on the target at 50 yards…that’s outstanding accuracy and great shooting.

The guy is good. That’s four 5-shot groups, and it’s great shooting in any caliber. It’s amazing in a cartridge as powerful as the .45 70.

The concept of a scoped lever action rifle, and particularly one with a long-eye-relief scope, kind of fits in with the Jeff Cooper Scout Rifle idea.   I like it because I’ve always wondered what kind of accuracy these big bore lever guns are truly capable of, and Greg’s new stainless steel 1895 confirms that the Marlin lever guns can be tack drivers with the right load and a skilled rifleman.   Some might argue that a lever gun should use iron sights (the traditionalist approach), or that a scope looks out of place on a lever action rifle.  Greg’s rifle dispels both notions.  The Wind River rifle looks great, and it has the accuracy t0 match its looks.

Another school of thought holds that the modern Marlins are not as good as the older ones.   These folks generally push the notion that when Marlin was an independent company (before Remington acquired Marlin a few years ago) the quality was better.  That’s hogwash, again as shown by Greg’s stainless steel Marlin 1895 and Paul’s blued-steel version of the same rifle.  The current production Marlins are every bit as good as the older ones.

I, too, had a new Marlin on the range today (mine was of the .30- 30 flavor, but it was different rifle than the 336 Octagon covered here) .  But that’s another story for a another blog, which is coming up in the next few days.  Stay tuned!


Help keep us going!


More Tales of the Gun stories!


Never miss an ExhaustNotes blog: Subscribe for free!

A bad influence?

I may be that kid your mother always warned you about. You know, the bad influence. The one who might do something she wouldn’t like, and then you follow suit. Moms live in fear of guys like me.

Paul’s .45 70 Marlin 1895. These are impressive rifles.

When it comes to guns, I am pretty sure I’m the guy she had in mind. On more than a few occasions, I’ll get fired up about a firearm (no pun intended), and then several of my friends will buy the same thing. It’s happened with Mosin-Nagants, 1911 .45 autos, Ruger No. 1 rifles, and most recently, big-bore Marlins. Caliber .45 70 Model 1895s, to be precise. Several of my friends now own these rifles and they are a hoot. One of these days we’ll have one of our informal West End Gun Club matches and restrict it to .45 70 rifles only. That should be fun.

Paul and I both appreciate fine walnut, and Paul’s recent purchase of his brand-new Marlin is no exception. It’s unusual to see wood this highly figured on a production rifle. Take your time, peruse what’s available on Gunbroker.com on a regular basis, visit every gun store you can, and every once in a great while you find something like this.

I was in northern California last week and that’s always a good opportunity to visit with my good buddy Paul and send a little lead downrange. Well, maybe not a little. You see, Paul recently purchased a .45 70 Marlin 1895, and these rifles send lead downrange at the rate of 400 grains a shot. There are 7,000 grains in a pound. Do the math…that’s a big-ass bullet. Hell, they used to use these things for shooting buffalo.

There’s no way I’d ever shoot one of these magnificent creatures, but back in the day when the buffalo hunters did, more often than not they were using a .45 70 rifle. I grabbed this photo on a recent trip to Tennessee.

The Marlins are great rifles, and you can pick up a 45 70 Model 1895 for around $600 if you shop around for a bit. Marlin was acquired by Remington a few years ago, and their quality took a hit during the transition as they moved production from the old Marlin factory in Connecticut to the Remington plant in New York. Judging by the recent rifles I’ve examined (including Paul’s), the quality issues are all in the rear-view mirror now. The new Marlins sure shoot well, too.

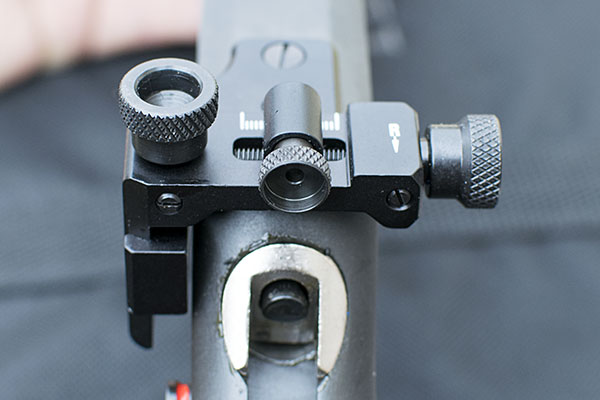
A Williams peep sight on Paul’s Marlin. If you know what you’re doing (and Paul does) these can shrink your groups significantly.

Paul added a Williams aperture rear sight to his 1895, and this was the first time he shot it. I had spotting duties. The first round went low left about 10 inches, and then Paul walked succeeding rounds up and to the right by adjusting the rear sight as I called the shots to him. It didn’t take too many shots to zero the rifle, and from that point on, it was simply a question of evaluating which of several different handloads grouped best. Paul had prepared test rounds using Unique and IMR 4227 propellant, all using the Missouri 400 grain cast lead bullet. The winner was 13.0 grains of Unique behind the mighty Missouri slug. At 50 yards, this load grouped well.

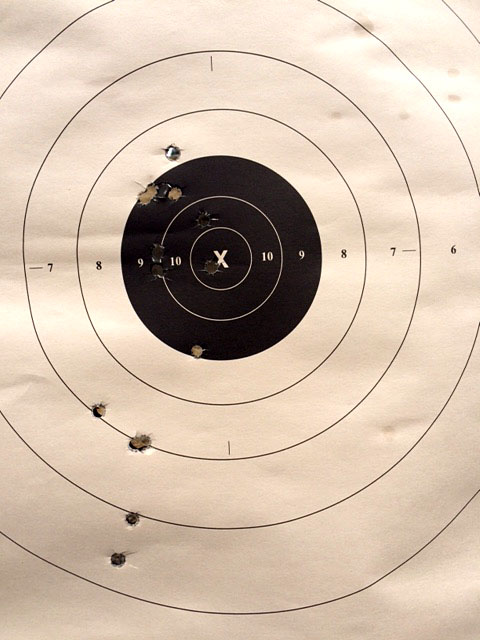
The target. Low, adjust, a bit higher, adjust some more, and well, you get the idea. It took only a few shots to get the Marlin dialed.

We were at a Santa Clara County public range and it was a rainy day, but we managed to have fun on both the rifle and handgun ranges. We shot the .45 70 and then my personal favorite handgun, the 1911 .45 Auto.  Yep, Paul had his 1911 out, and we had fun with it, too.

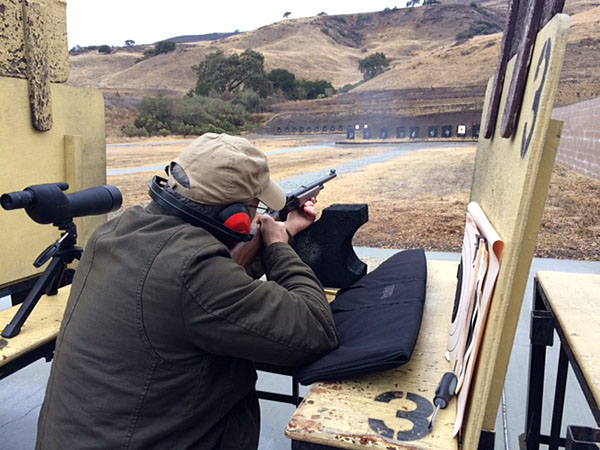
Paul shooting his 1895 at the local gun club.

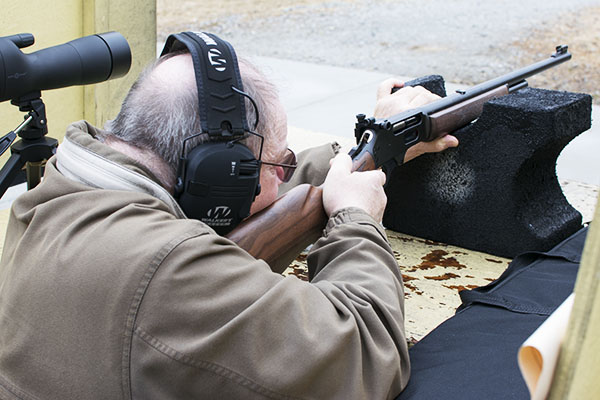
Paul let me try the Marlin. He tried to capture the muzzle blast, but timing the camera to the shot is tough.

Yours truly behind the 1895. From the rear, Paul and I could be twins. We’ve been shooting buddies for more than 60 years. This photo shows the smoke just after I fired, and that’s good enough.
Paul’s “Mil Spec” model Springfield 1911. These are fine guns, way better than what I carried in the Army.

Other folks on the range are always intrigued by the .45 70 cartridge. Compared to the most common rounds seen on rifle ranges these days, they’re huge.  The perception is that the recoil must be horrendous. It can be if you load near the upper end of the propellant charge spectrum, but at the lower powder charge ranges, these guns are a lot of fun. That’s a topic for another blog, one that will appear here soon. Stay tuned!


Want to read our other ExhaustNotes Tales of the Gun stories? Just click here!

Buffalo Guns!

The 45 70 is a cartridge that’s been around since 1873, and it’s a whopper. Its designation was originally the 45 70 500 (a .45 caliber, 500 grain bullet, packed with 70 grains of powder). It was an Army cartridge used in the 1873 Springfield rifle, and the recoil was fierce enough that Uncle Sam soon cut the bullet weight to 405 grains. The cartridge was also used in Sharps and other rifles, and the early Gatling guns.

Reloaded 45 70 cartridges, with the 300-grain Hornady bullet. This is a big cartridge. It’s what buffalo hunters and Gatling guns used.

After the Army went to the 30 06 cartridge (in, of course, 1906), the 45 70  just about went belly up.   But then Ruger re-introduced the 45 70 in their No. 1 single shot rifle in the early 1970s, and Marlin reintroduced their 1895 rifle shortly after that. The fun started all over again. That’s when I got in the game (back in the 1970s), and I’ve been happily sending those big .45 slugs downrange ever since.

I’m a big fan of the 45 70 and I’ve been told I’m a bad influence, as I’ve had several friends buy 45 70 rifles after hanging around me. It’s been fun, especially reloading the 45 70 and comparing recipes (more on that in a second).

As mentioned above, the Ruger No. 1 was the first of the modern rifles chambered in 45 70, and it’s a beautiful firearm. The Ruger No. 3 was an economy version of the No. 1 that Ruger only made for a few years. The No. 3 rifles were substantially less than a No. 1 when new, but because they’ve been discontinued, No. 3 rifles often sell for as much as a No. 1 (and sometimes more).   The Marlin is less than either Ruger, but don’t confuse price with quality (or fun).  The Marlin is a hoot to shoot, too.

A 45 70 Ruger No. 1, with Circassian walnut furniture and a 26-inch barrel.
The Ruger No. 3, also in 45 70. These rifles sold for about $139 when new. Today they can sell for as much as $1000 in pristine condition.
A Marlin 1895 45 70 Guide Gun. I bought this rifle because of its wood. It’s a good shooter, too.

I mentioned that my several of my friends now have 45 70 rifles, and we all reload 45 70 ammo. The idea is that we want to find the most accurate load for our rifles, and every rifle (even the same model) has its preferences. No two guns shoot the same.

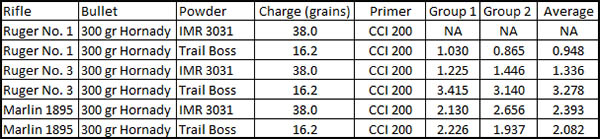
Here’s where all this going. One of my buddies tested a load that looked promising in his 45 70 (a load using Trail Boss gunpowder with a 300 grain jacketed hollow point bullet), so I tried his load along with one other, all in the above three rifles, to see how they would do.

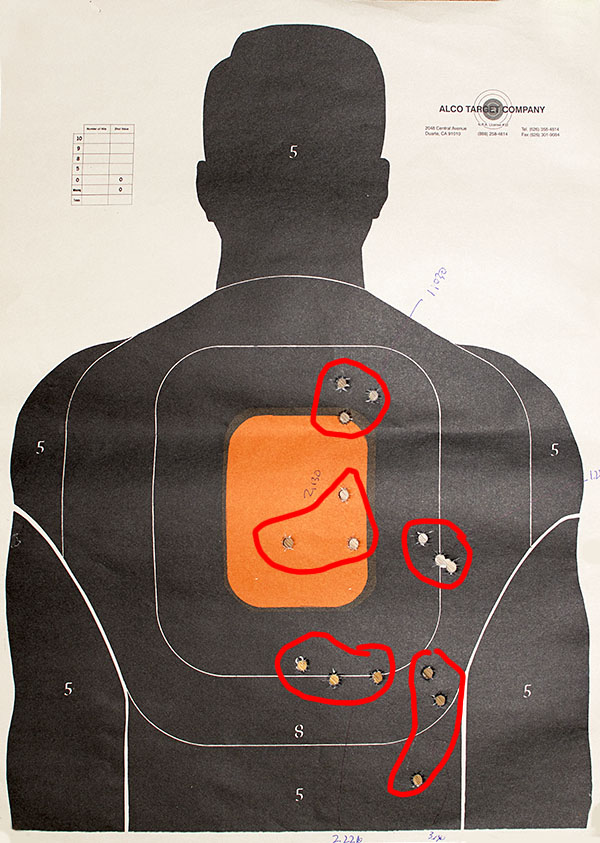
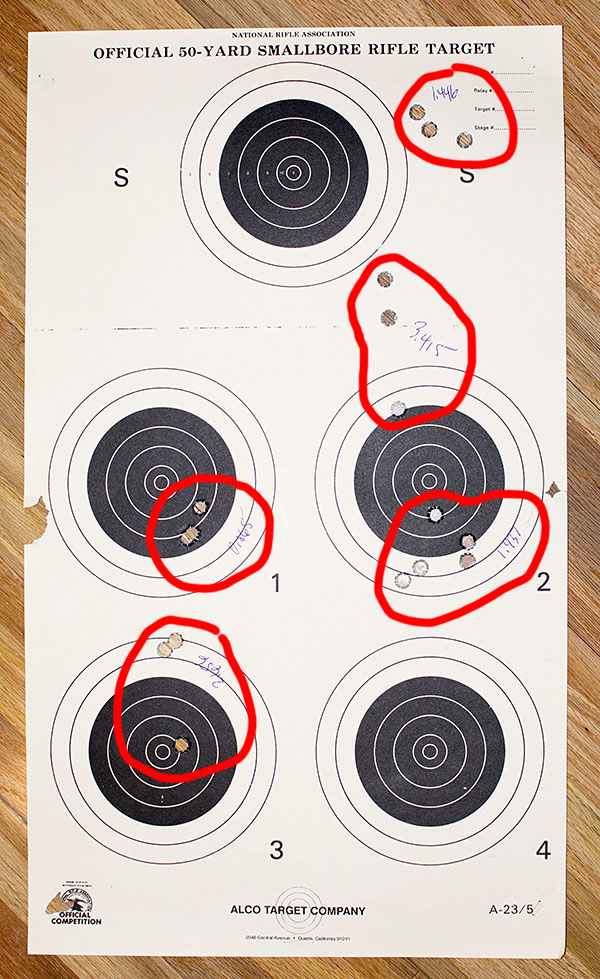
I shot at two targets for this test (a standard silhouette target and a 5-bullseye target).  I shot each rifle at the silhouette’s orange center first (my aim point) because I didn’t know where the rounds would hit and I wanted to make sure I was on paper. Then I shot a second group from each rifle at the bullseye targets. I shot 3-shot groups except for one, as noted in my results in the table below.  Note that all targets were fired at a distance of 50 yards.

First, the targets…

There are five different groups on this target. My point of aim was the bottom of the orange rectangle.
The bullseye targets. I wasn’t worried about each group’s location; at this point, only group size was of interest. After picking the best load, I’ll adjust the rifle’s sights.

And finally, my tabulated results….

The first load tested would not chamber in the Ruger No. 1 because the bullets were seated too far forward in the brass cartridge case; better to find this out at the range than on a hunting trip!

The Ruger No. 1 really liked that 16.2 grain Trail Boss load (it was my buddie’s favored load). It delivered a 1-inch group. This load was also good in the Marlin, but not nearly as good as others I have shot in that rifle (the Marlin shoots into 0.6-inch with the right load). The No. 3 Ruger seemed to like the 3031 powder load with the 300 grain jacketed hollow point bullets.

As I mentioned above, every rifle responds differently to a given load, and that’s what we try to find…the best load for the best rifle.


Want to see our other Tales of the Gun?  Just click here!