
This post wraps up our tutorial on reloading .45 ACP ammunition, although from time to time we’ll be posting favored .45 loads as we continue to add Tales of the Gun blog posts featuring this fine old cartridge. If you’d like to catch up by reading the first three parts of this series, here they are:
Reloading Part I
Reloading Part II
Reloading Part III
So, on to Part IV.
We’re in the home stretch now, folks, with the last steps in creating our custom-crafted .45 ACP ammunition. The tools and components we’ll use in these remaining reloading steps are the propellant, the powder dispenser, our previously prepped-and-primed .45 ACP brass cases, bullets, the third reloading die, a reloading scale, a caliper to measure cartridge overall length, and boxes and labels to hold and identify the ammo we’ve created.

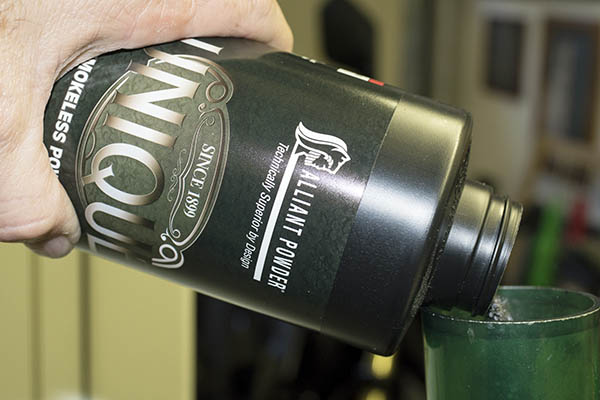
My preferred propellants for .45 ACP ammo are Unique or Bullseye, and of the two, I prefer Unique. Some folks prefer Bullseye. Others may use different propellants. One of the more enjoyable aspects of the reloading process is you can try different recommended propellants (and different charges of these propellants) to find the secret sauce that works best for you.
Help us bring more articles to you…please click on the popup ads!
What does that mean? For a revolver, it usually means the load that is the most accurate. For a semi-automatic handgun (like the 1911), accuracy is not the only requirement. You also need to have a load with enough energy to cycle the action. Usually, the loads shown in a reloading manual are powerful enough to cycle the action. You should never go above the maximum propellant charge listed in any reloading manual, and you should only approach that by testing loads at the lower end first, and then working up to a higher level if you feel a need to for accuracy or functionality reasons (but never go above the max load).
Here’s another important point: Whichever powder you choose to use, never have any propellant other than the one you are using on your reloading bench. You don’t want to get the propellants mixed up, or mistake one for another.
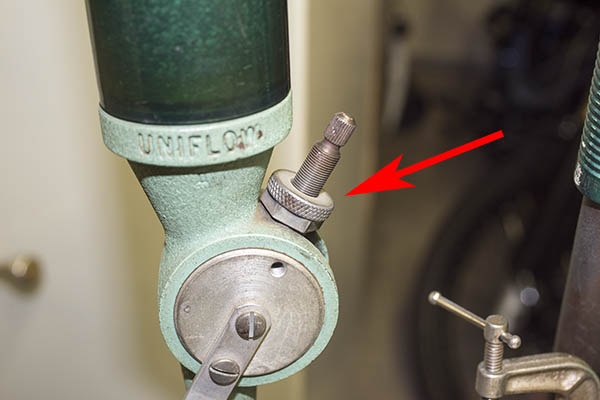
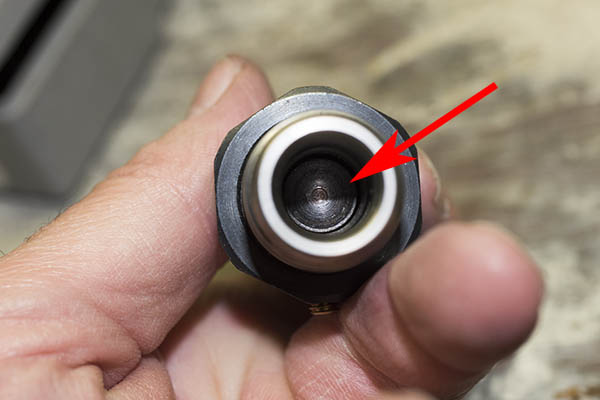
After you’ve added propellant to the powder dispenser, tap the dispensing handle against the lower stop several times to settle the powder. What we’re going to do next is to adjust the throw weight (the weight of powder dispensed) by adjusting the dispenser with the threaded adjustor shown in the photo below.
What we do at this point is get our reloading scale, set it to zero grains, and make sure the indicator (the balance arm) is in a neutral position (as indicated on the left side of the balance arm against the graduations on the scale markings on the left of the scale. Once the scale is zeroed, use the sliding and turning adjustors for the weight of propellant you wish to use. After years of accuracy testing and shooting, I’ve settled on 5.8 grains of Unique as the load I use with a 230-grain cast roundnose bullet.
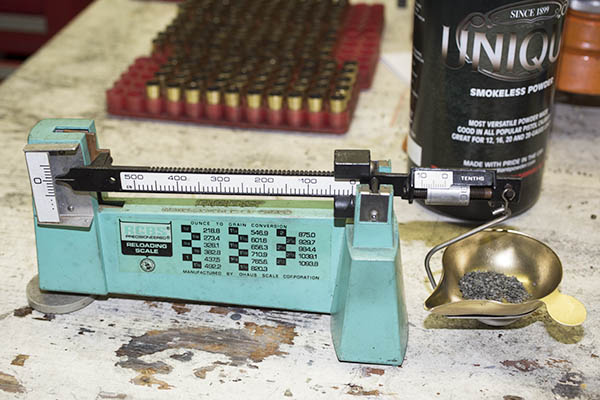
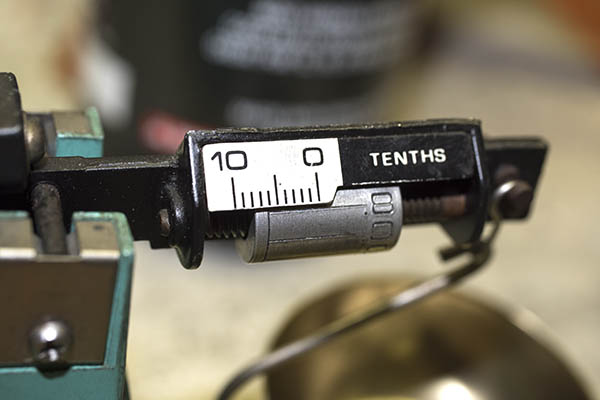
Note in the photo above that the sliding weight is at zero grains, and further note in the photo below that the rotating adjustor wheel is set to 5.8 grains. For anything under 10 grains, you leave the sliding weight at zero and set the weight with the rotating barrel as shown below. For most .45 ACP loads, we use the rotating barrel only.
After adjusting the powder dispenser’s adjustor and checking the weight with the scale, we now have the dispenser releasing 5.8 grains of Unique propellant every time the dispenser is actuated. I’ll throw several charges to make sure the dispenser is dispensing consistently, and once I’m satisfied it is, we’re now ready to dispense 5.8 grains of propellant in each of the prepped and primed cases we prepared in Part III of of our .45 ACP reloading series.

When you dispense powder, it’s important to be consistent. I don’t like to stop until I’ve done the entire tray of prepped and primed cases, and I don’t like to be interrupted while I’m doing this. After you’ve dispensed the propellant in each cartridge case, visually inspect the tray to make sure every case is charged with propellant, and all propellant heights are approximately equal. We’re looking for missed cases here (if that happens, the primer will push the bullet into the barrel just a bit, which requires disassembling the firearm to hammer the bullet back out with a rod, and that’s basically the end of your shooting session that day). We’re also looking for any cases that are double-charged (i.e., cases that have two charges of powder in a single case). A double charge is real serious and dangerous business, as it will most likely blow up the gun, injure you, or worse. You have to pay attention to what you’re doing here. Like I just said, this is serious business.
So, after we’ve charged the cases with propellant, we now ready to move on to the next step, which is seating the bullets.
We’ll now use the seating die, the last of the three dies in our die set. This part of the operation requires a bit of adjusting and a bit of finessing on our part. We’re actually doing two things with this third and final die. We’re seating the bullet to the correct depth in the cartridge case (to meet the cartridge overall length requirement, which is found in your reloading manual), and we’re removing the cartridge case bellmouth that allowed the bullet to enter the case.
In order to make both adjustments, we’ll work with how far we thread the entire die into the reloading press (this affects both bullet seating depth and crimp), and we’ll also work with the bullet seating adjustor. These two parts of the die are shown by the red arrows in the photo below.
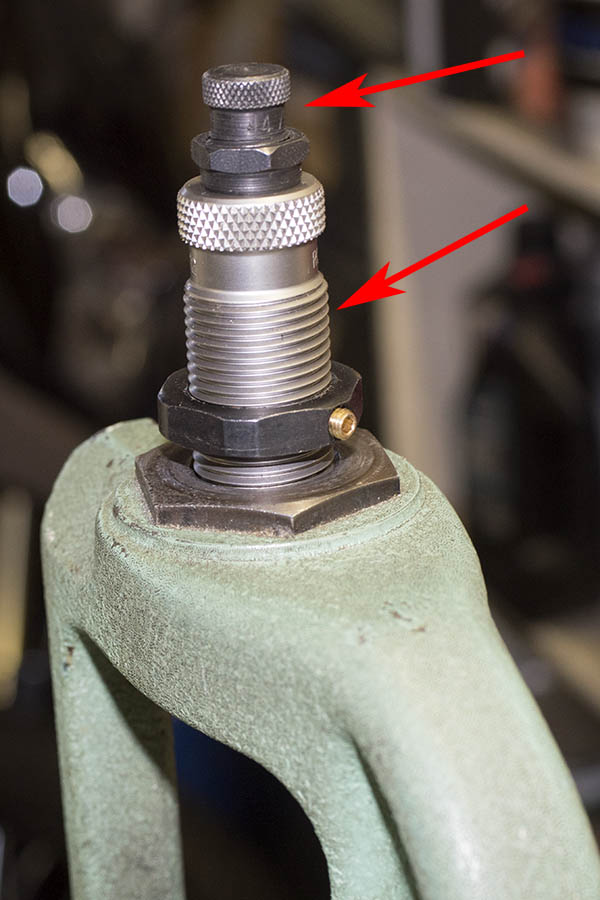
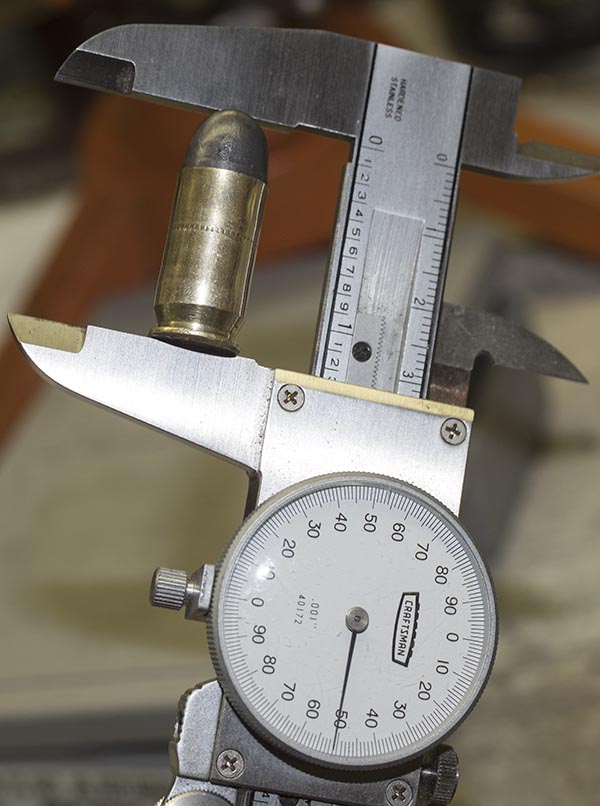
Here’s how I do this. I first screw the bullet seating adjustment all the way into the die, and then I’ll use this to seat the bullet to the right depth by threading the entire die into the reloading press, a little at a time. With each adjustment, I’ll run the charged case (with a bullet on top) into the die with the press. I keep doing this until the cartridge overall length is where I want it to be. For a 230-grain roundnose bullet, I adjust the seating depth such that the cartridge overall length is 1.250 inches, as specified by my reloading manual. That cartridge overall length is good, as it allows the cartridge to feed into the chamber, and it allows the cartridge to fit into the magazine.
Once I have the bullet seated to a depth that provides the correct cartridge overall length, I then back the bullet seating adjustor all the way out. Then I’ll start the crimping adjustment process by threading the entire die deeper into the press, a little bit at a time, running the cartridge into the press with each incremental downward die adjustment. The reason I ran the bullet seating adjust all the way out is that I don’t want it to push the bullet in any further while I adjust the crimp.
Here’s what going on here. Remember that I said the seating die does two things: It seats the bullet to the correct depth, and it crimps the cartridge. In the case of the .45 ACP, we’re not really crimping the bullet into the case. We just want to remove the brass case bellmouth that we previously added to allow the bullet to start into the case. The inside of the seating die has a reduced circumference step. Our purpose in making this adjustment is to thread the die into the press just enough to have the case make contact with the inner die step. That will remove the bellmouth. We’re not crimping here; we’re just removing the bellmouth so that the brass case becomes a straightwall case around the bullet.
Once I have adjusted the die body by screwing it into the press enough to remove the case bellmouth (and with the press ram raised to position the cartridge all the way up in the die), I then run the bullet seating adjustor all the way down, such that it contacts the top of the bullet. This will position the die such that it removes the case bellmouth, and simultaneously seat the bullet to the correct cartridge overall length. At this point, I can lock everything in position with the two locknuts (one for the die body in the press, the other for the bullet seating adjustor in the die) while the ram is in the raised position with a cartridge in the die. At this point, I’m ready to finish the rest of the cartridges.
At this point, what I do is put a bullet on each charged case, and then I start running each cartridge, with a bullet on top, thr0ugh the reloading press.
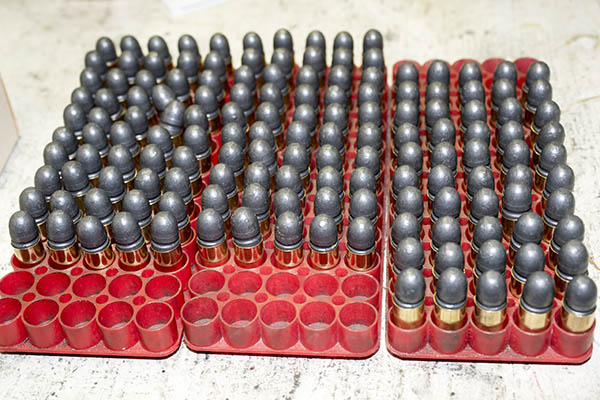
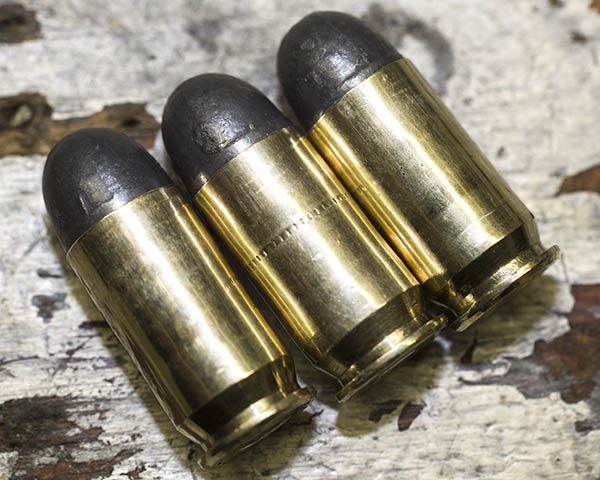
With each run up the press, I’ll create a reloaded cartridge. Here are three reloaded rounds…
As I produce each round, I place it in one of the plastic boxes I use for my ammo.
Once the above steps are done, I then take the propellent remaining in the powder dispenser and return it to the propellant container (in this case, the Unique bottle). That’s one of the reasons it’s important to only have one bottle of propellant on the reloading bench. You don’t want to dump the leftover powder into the wrong propellant container. If that happens, you can’t use the container of propellant you just emptied the leftover powder into because now it contains a mix of two different propellants. The only thing you can do is throw it away. It’s just to risky to use it. And yeah, I’ve had to do that before.
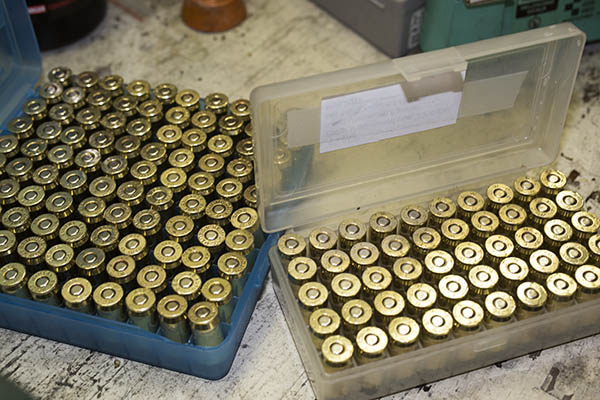
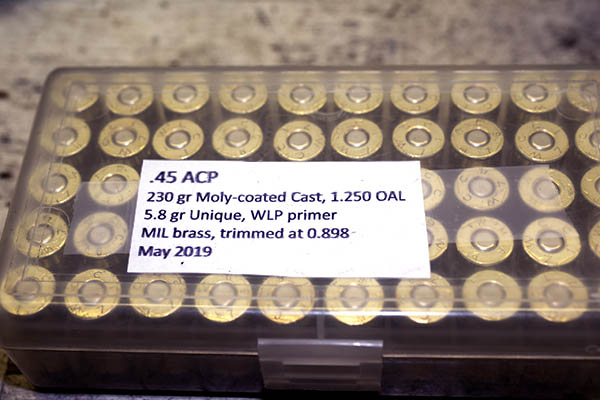
There’s one more step, and that’s labeling each box of reloaded ammo with cartridge, bullet weight and type, cartridge overall length, propellant type and charge, primer type, brass type, brass trim length, and the date I manufactured the ammo.
At this point, I’m good to go. It’s off to the range…
So there you have it. Reloaded .45 ACP ammo, as good as or better than what you can buy anywhere. I just returned from the range a few minutes ago, where I shot some of the ammo you see in the photo above, and yeah, it functioned flawlessly and hit the target every time.
If you enjoyed this post, let your friends know about us. Leave a comment if you’d like to add to or join the discussion. We love hearing from you. And if you never want to miss an ExhaustNotes blog, please sign up for our automatic email notifications!
Want to read more gun stuff? Check out our Tales of the Gun page!
That’s some mighty fine shootin’ !