A Slice of Life: ExhaustNotes Injury Review

Here at ExhaustNotes we don’t limit ourselves to giant, 10-bike comparison tests and feature stories describing the joys of motorcycle riding. ExhaustNotes is much more hands-on than those other guys. In this case we were a little too hands-on.

Loyal readers will know this but for you newbies I’ll say it again: I’ve been building stuff around the house and letting the moto-journo aspect of my career flounder. Normally that’s not a problem as I lie about most of the things I write about anyway.

This story starts with a pre-hung door installation on the Sun Porch behind Tinfiny’s Carriage House. Yes, everything at Tinfiny Ranch has a proper name. The door is all glass except for a metal/wood surround to hold the glass and make space for the doorknobs, hinges and bolt.

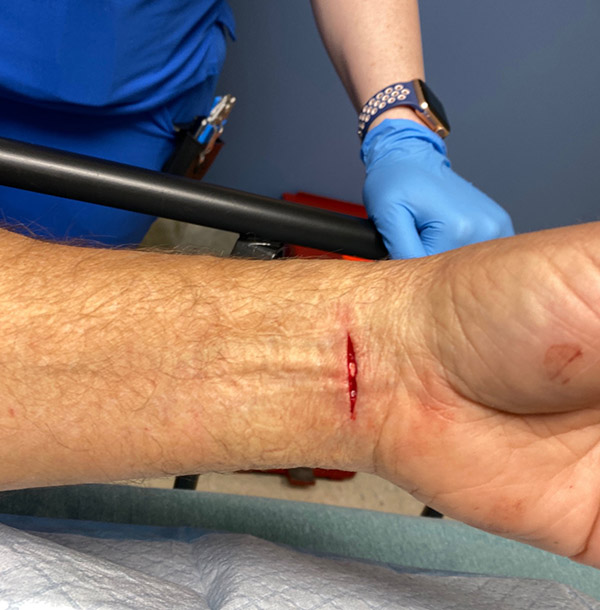
Being double pane and all glass the door is sort of heavy and as I was lifting it into position I let the door slide slowly down to the floor. I felt warmth on my left wrist but chalked it up to the early stages of Covid infection. Unfortunately I was not as lucky as that. Blood was dripping from a deep cut over my wrist and could see tendons and what I thought was bone. I started freaking out; it was like the scene in Terminator where Arnie peels back his skin to reveal the mechanical parts of his arm. I couldn’t figure out what happened and since I usually faint at the sight of blood I knew I was on borrowed time. I quickly clamped the door to the existing studs and went to the bathroom to throw up.

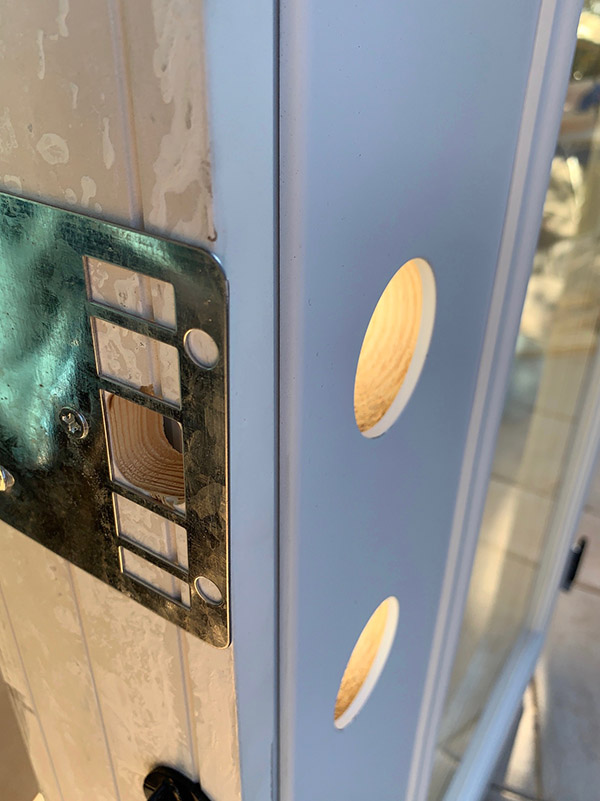
As it turns out there was a razor sharp piece of metal screwed into the frame of the door, I imagine reinforcing the lock area. This piece of metal was standing proud of the door by about ¼-inch. That’s the bit that cut me.

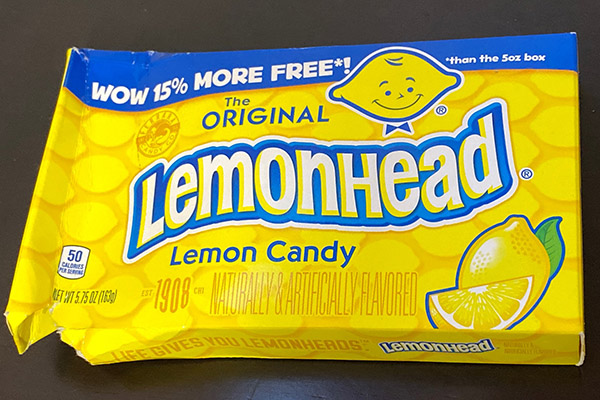
My new weight loss diet consists of Lemon Heads, a candy that is around 98% pure sugar. I call it The Ferrara diet. What with the sugar rush I wasn’t feeling all that hot before I sliced my arm open. The wound made me even queasier. CT was running around trying to find a bandage to stanch the flow of blood as I sank down onto the bathroom floor in a cold sweat. CT found some paper towels and tape and eventually I felt good enough to walk out to the car.

The ride to the hospital took about ½ hour during which I kept yelling “Yi-Yi-Yi-Yi!”, “Michigan!” and “Whoa Daddy!” to keep my mind off the injury. Our local hospital is undergoing expansion so the emergency room has been relocated between two employee parking lots and miles of temporary fence.

CT pulled up to the front and told me to wait in the car while she got a wheel chair. “Oh hell no!” I said, “I don’t need a wheelchair, this is embarrassing.” We had a brief, ultimately futile argument for me, and out came a hospital guy with a wheelchair.

The hospital guy wheeled me to wait in a hallway where a lady was coughing up Covid viruses the size of Lemon Heads. She answered yes to every Covid-question the nurse asked her. It was like her body was a perfect storm of Covid. The hospital guy wheeled me into another room. “Here’s the guy that cut his wrist,” he told the admitting clerks. What the hell? Now I’m a suicide risk?  I said, “Look, let me be clear. I did not try to kill myself, I cut my wrist on a door.” It sounded phony as hell.

Back out in the hallway the old lady was gone but the corona virus cloud was still so dense I could actually see the little bastards tugging at my facemask trying to gain access to my respiratory system.

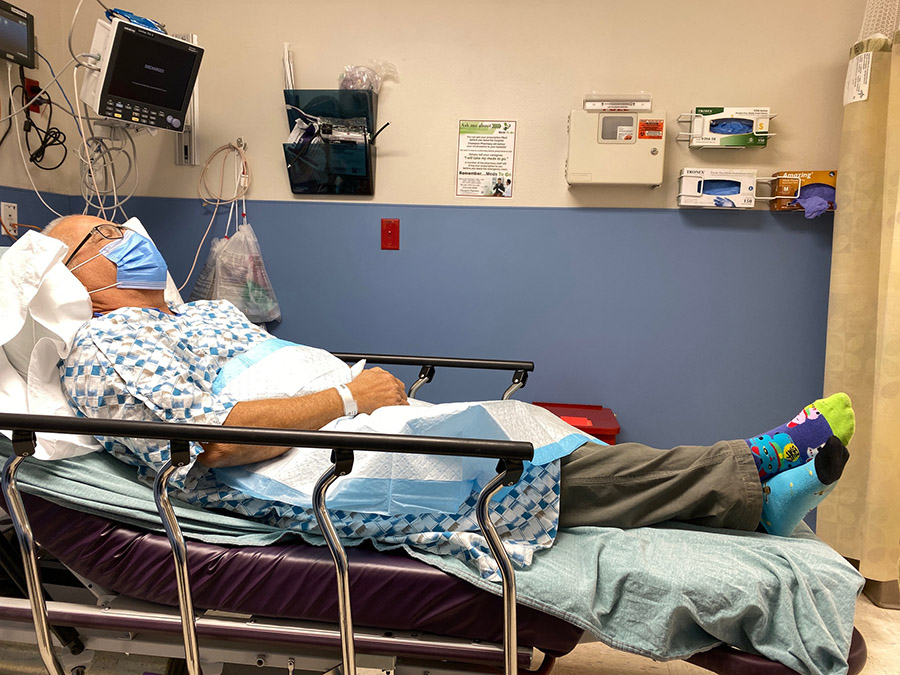
Enough time had elapsed from the initial injury that I was feeling somewhat cocky. Like maybe I had lain on the bathroom floor just to elevate the injury. Yeah, that’s it. I was even thinking about how good a Lemon Head would taste right about now. I was wheeled into Room 9 and the nurse told me to take off my shirt and put on a hospital gown. I had on mismatched socks.

Dr. Wells came in to examine me. I told him about the door but of course I would say something like that if I were trying to conceal a suicide attempt. He said that it was a nice clean cut and that he would be back later to stitch it up. I took a nap as things seemed under control.

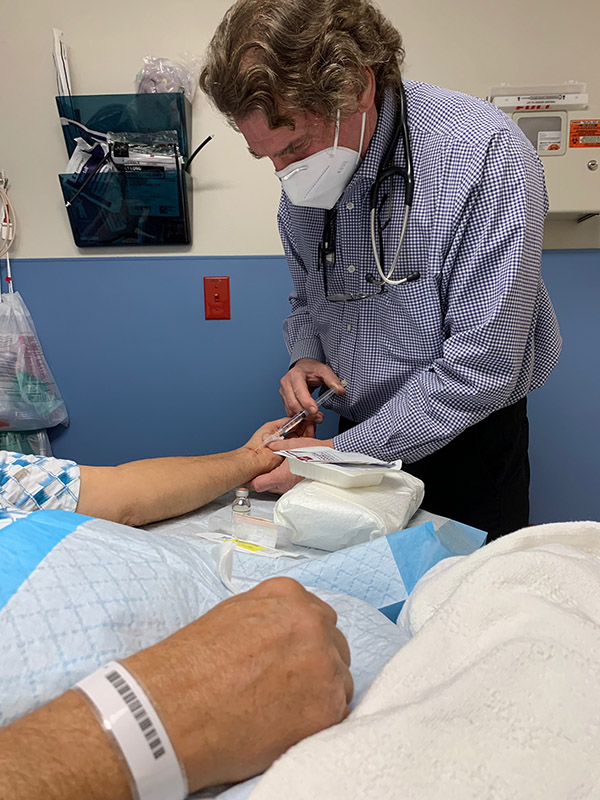
True to his word, Dr. Wells came back and asked me all kinds of questions about my job and boats during which he shot some numbing agent into my wrist area. After a short burning sensation I couldn’t feel a thing. As he sewed me up, it felt like someone tugging on my sleeve. Drugs and a good bedside manner really help.

By this time I felt the crisis was past and I could look at my injured wrist without any nausea. I guess it’s true what they say, time does heal all wounds. CT took me home and my wrist seems ok. Luckily I didn’t cut any tendons or veins. After taking a day off I finished installing the door with CT helping to lift the thing.

On a side note: that piece of sharp metal is gone. I don’t care if it weakens the locking system. Kick the door down for all I care. I’ll have to be more observant with my home projects, turns out it’s safer to ride motorcycles than install doors.


Never miss any Joe Gresh…subscribe here:

How much money will I need in Baja?

From time to time, I hear this question:  How much cash should I take to Baja?  Costs have gone up in Baja (like everywhere else), but Baja is still a cheap date.  How much you’ll need will depend on your tastes, how much you drink, and where you stay.  To cut to the chase, when I ride in Baja, I’ll take a thousand bucks with me if I’m going to be there for a week, and I always come home with money in my pocket.  You can bring a credit card to Baja, but once you get out of the tourist spots (Ensenada, San Felipe, Loreto, La Paz, and Cabo), Baja is mostly a cash proposition.  In these tourist spots, costs will be more in line with what you’d pay in the US for food and lodging, too.  You can’t depend on being able to use your credit in the smaller towns and at the more remote gas stations.

Expenses in Baja will include food, gasolina, lodging, and if you’re going to see the whales or the cave paintings, the cost of admission for those things.  Figure on $50 for a half-day whale-watching tour (it’s worth every penny, in my opinion); the cave paintings a little less.   Both are great things to see (many folks describe them as life-changing, and I’m in that category).  If you plan to have a drink or two at night, you’ll need a bit for that, too.

Gasoline prices in Baja are usually about the same as they are in California.  That’s usually works out to something north of $3 per gallon.  They sell it by the liter and it’s easier to pay in pesos, but they’ll take dollars at an exchange rate that is not usually in your favor.  It’s best to have pesos and pay in the native currency.  You can see our earlier blog on fuel in Baja for more information.

Food is inexpensive if you eat in other than touristy restaurants.  My friends think I’m a genius at finding good spots to eat in Baja, but my secret is simple:  I just look for the spots with lots of cars and pickups parked in front.  It works every time.  I’ll usually budget $25 US a day for food. It’s easier to pay in pesos, but most restaurants will also take dollars.  I might add this:  I’ve never had a bad meal in Baja.  I could write a book just about the restaurants down there.   There are many hidden treasures.  We’ve listed a few on our Baja page.

Hotels are typically between $25 and $70 per night outside of the tourist towns.  In the smaller spots, $25 seems to be the norm.  In the more well known hotels (like Malarrimo’s in Guerrero Negro), it’s going to be more like $70 per night.  The rooms won’t be fancy, but they will be clean, and if you’re like me, you’re not going to be riding Baja as a hotel critic.

Don’t forget your Baja insurance.  You have to get a separate insurance policy for your motorcycle when you go into Baja, and based on my 30-plus years of riding south of the border, BajaBound Insurance is the best.  You should purchase it online before you cross into Mexico, and the BajaBound website makes that easy to do.

If your stay is going to be longer than a week, you’ll need to pay for a Mexican tourist visa (a week or less is free).  The cost for a tourist visa is $30.  You can (and should) pick up your tourist visa as soon as you cross into Mexico.

Here’s a summary of how the above stacks up (all amounts are in US dollars):

As I mentioned at the start of this blog, when I go into Baja for a weeklong trip, I’ll usually start with $1000 in my wallet and I usually return with money left over.  In the event you do need more cash, there are banks in the larger towns with ATMs, and they’ve always worked for me.


We have much more information, including suggested riding itineraries, on our Baja page.  You can read about some of our great rides in Baja here.

Want more info on exploring Baja on a motorcycle?   Pick up a copy of Moto Baja!

Product Review: A-iPower, APW2700C Pressure Washer

With all the home projects I’ve been doing lately I haven’t had much time for motorcycle hijinks. Poor Berk is having to carry the blog’s content-load all by himself. While I may not have moto-content I do have a few new toys to review, one of them being the APW2700C pressure washer.

Normally I like electric power for infrequently used power tools and I have a Harbor Freight electric pressure washer that does everything I need it to do with only one hitch. That hitch being the amperage the washer draws is so great it doesn’t like running on a long extension cord. That’s a problem at the Love Shack where the (unpowered) carport is 100 feet from the shack. Pressure washing out there is impossible unless you have a fairly good-sized generator to run the washer.

Another place the electric washer won’t work is on Christine, the MGB GT project as it is a fair distance from the shed at Tinfiny Ranch. I could move the car closer but there is so much rat guano inside I’d rather field clean it where she sits. In anticipation of your next question, ”Why not move one of the 35,000 generators you seem to have stacked at Tinfiny Ranch?” I say that kind of attitude will get you no new tools.

I bought the APW2700C pressure washer because it was cheap, had good reviews and it’s a horizontal crankshaft engine. The vertical crank pressure washers are ok, I guess, but if the high-pressure pump quits the engine is pretty much useless. The horizontal crank prime mover can be repurposed into any number of mini bikes, go-carts or log splitters.

I got mine on sale for around $200 and that’s really cheap compared to the average $350 price tag for a gas-powered washer. Shipping was free also! The quality looks really good with jewel like bits and pieces scattered all over. The unit even came with a quart of oil.

The APW2700C pressure washer is delivered broken down in a smaller box so there are a few parts to assemble. The handle snaps into the frame of the washer and a wand holder bolts on the side. Other than that, connect up the hose, wand and choose a tip and the unit is ready to go.

When the time came to blast the rat poo out of the MGB GT’s engine room the pressure washer started up second pull and ran perfectly. There are three different tips to alter the spray pattern but I’ve only used the wide pattern. The high pressure hose seems plenty long and the machine came with a soap dispenser bottle should you decide to mix detergent with the spray.

I’m happy with the APW2700C pressure washer, and I’m amazed at how good this pressure washer looks for only 200 bucks but since most of my possessions are junk I may have a skewed idea of what good means. The 2700 in the product name refers to the amount of pressure the unit supposedly makes. I have no way of measuring the output pressure but it’s plenty strong. It blew the paint off the MGB’s valve cover but didn’t remove the body color paint on the sides of the engine room.

I’ve got a few more pressure washing jobs for the APW2700C pressure washer and then I’ll drain the fuel until I need it again. I have no idea how long the washer will last but with my home-shop duty cycle it might be years before I find out.


More ExNotes product reviews are here!

The B-36 Bomber, Fort Worth, Amon Carter, and more

This could be a long blog read or a short one.  It’s your call.  I have two YouTube videos today that are pretty amazing, in my opinion.  One is short and one is long.

By way of background, my first job as an engineer was on the F-16 program at General Dynamics in Fort Worth, Texas.   The reason I guess that’s significant is a few years ago I came across this video, Six Turning Four Burning, and as I watched it, I recognized the General Dynamics plant where I worked in the background.  The video is an excerpt from Strategic Air Command, a 1950s movie starring Jimmy Stewart.  It features the Convair B-36 bomber, an airplane with six radial piston engines and four jet engines (hence the six turning, four burning title).  I think you’ll enjoy it.

Yesterday, I was channel surfing on Netflix and I found a documentary about the B-36.  That had my attention, because when I worked at General Dynamics 40 years ago, there were still guys there who had worked on the B-36 engineering development program.  They spoke about the B-36 in reverential tones, and to them, it was perhaps mankind’s greatest accomplishment.

Everything about the B-36 was Texas sized.  It had a wingspan larger than a 747.  The tail was so tall they had to raise the aircraft nose 18 feet to get the tail to clear the Convair plant exit as these giants came off the assembly line.   I don’t know what impressed me more…the aircraft itself, or the way those oldtimers talked about it.

The last B-36 built at the Convair plant in Fort Worth, Texas. The nose had to be raised to allow the tail to clear the huge doors at the end of the mile-long indoor assembly line.  I worked in that plant on the F-16.

The B-36 documentary I found on Netflix is also on YouTube.  This video is about an hour long, but it’s a good one, and if you like the kinds of things you see here on the ExhaustNotes blog I think you’ll enjoy it.  I sure did.

Even though I lived in Fort Worth and spent a ton of time on the Carswell AFB runway working F-16 issues, I had no idea how prominently Fort Worth and a man named Amon Carter figured into the B-36 story.  The B-36 movie above educated me on that topic.  When I lived in Fort Worth, I visited the Amon Carter Museum of American Art, which has perhaps the world’s greatest collection of Frederic Remington paintings and sculptures.  One that really spoke to me was Remington’s Old Stagecoach of the Plains.  It was a huge painting, so realistic I could almost see the stagecoach moving and hear it creaking and rattling.  It was awesome.

Frederic Remington’s Old Stagecoach of the Plains, on display in the Amon Carter Museum of American Art in Fort Worth, Texas.

If you are ever in the Fort Worth area, I think the Amon Carter museum on Camp Bowie Boulevard is a “must see” destination.


Want some cool B-36 stuff?  How about the Hayne’s owner’s workshop B-36 manual?  Or maybe a mahogany B-36 model?


Never miss an ExNotes blog…sign up here:

Product Review: Evapo-Rust Rust Remover

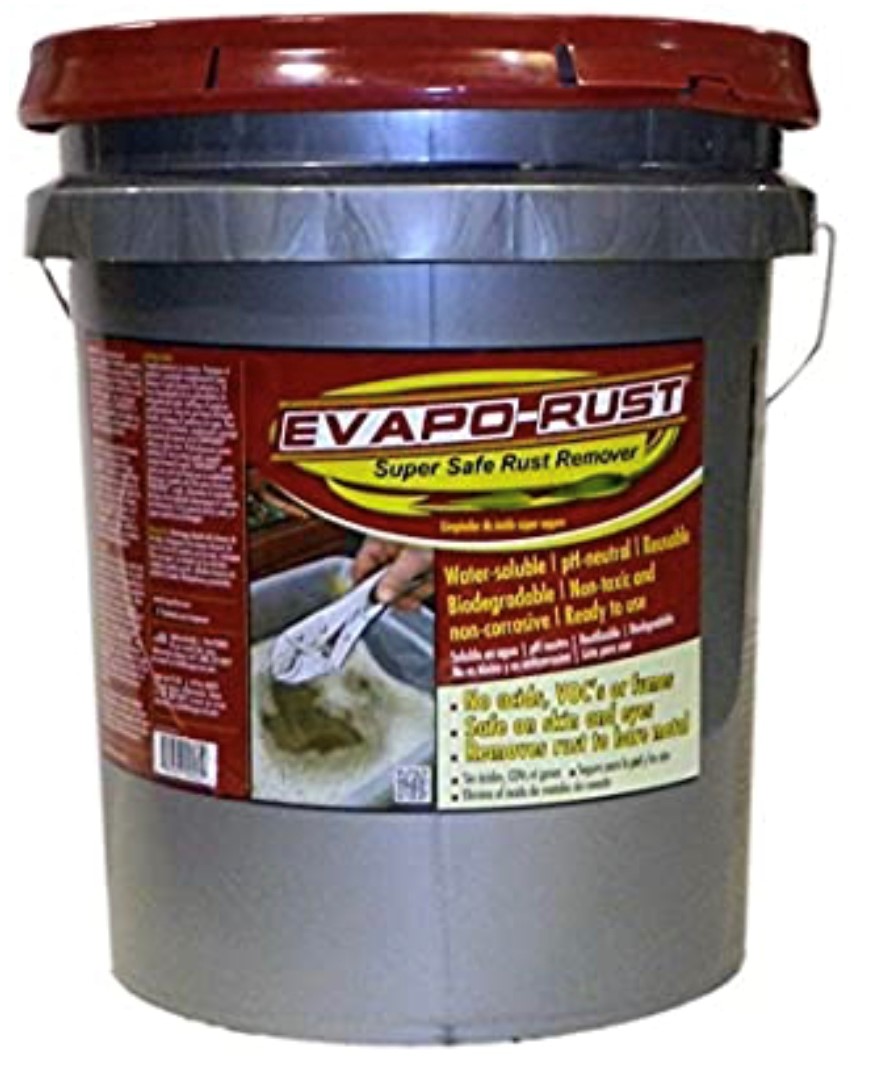
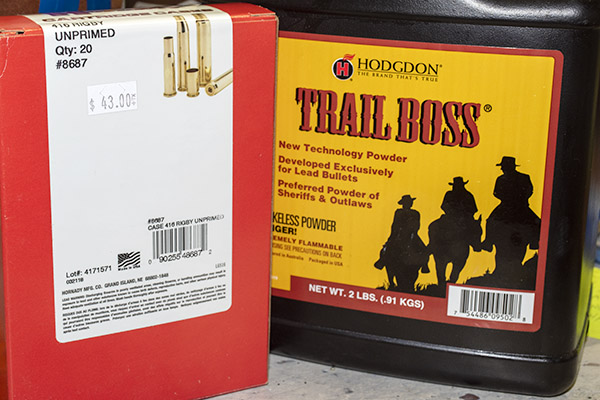
I’ve used many different types of rust removers in my somewhat futile effort to keep old clunkers on the road. Ospho is okay on metal but not so good on aluminum, cider vinegar is great but very slow working and is acidic but the best one I’ve found is Evapo-Rust.

This fairly large container of Evapo-Rust can be bought online for less per ounce than the local big-box stores. If the stuff weren’t so expensive I’d use it to clean the inside of rusty gas tanks. As it is I can buy a new gas tank for about twice the cost of enough Evapo-Rust to fill the old, rusty tank

I’ve soaked zinc carburetor bodies in Evapo-Rust for a week without eating the soft base material. Rubber parts seem unaffected after a bath in Evapo-Rust. I don’t think it will eat carburetors ever but I haven’t tried it as long as ever. Evapo-Rust cleans the gooey carb residue along with the powdery zinc corrosion equally well. The brass carb parts come out looking like new. I haven’t found any metal the Evapo-Rust won’t clean. I’m sold on the stuff for carbs.

Evapo-Rust is great for chrome or zinc plated nuts and bolts and all the little doo-dads that need de-rusting during a motorcycle restoration. One example is the chrome headlight fork ears on the old Kawasaki 900. They were lightly rusted between the folded parts of the ears and there was no way to get down in there to clean them. A few days soaking in Evapo-Rust saw them nice and clean. After washing the parts with water I give them a shot of oil and they haven’t re-rusted. (Note: I live in New Mexico so rust is not much of a problem out here.)

Like most things in life there are a couple catches: You want to avoid leaving parts in an uncovered container of Evapo-Rust for a month like I did. The Evapo-Rust evaporates down into a thick, dark, almost plastic mass that glues itself to your part and the container. It’s a real chore to pull the part out of the container. The freebased Evapo-Rust is the consistency of really strong taffy candy. That gunk is harder to get off than the original rust! Check your parts every week or so and seal the lid if you can.

Evapo-Rust does not work as well on parts too large to submerge. I tried it on some rusty corrugated roof panels. Following Evapo-Rust instructions I soaked rags with the product and laid the wet rags on the rusty spots. Then I covered the rags with a large sheet of plastic to keep the area moist. After a couple days the rags were stuck to the roofing. I used water and elbow grease to pull the rags off. The rust was somewhat cleaned up but I think regular Ospho works better on large surfaces.


ExhaustNotes.us product reviews are here!

Eleanor

I don’t name my guns.  Except for one.   That’s Eleanor in the photo above.

I have a thing for big bore rifles, and chambered for the mighty .416 Rigby, Eleanor certainly qualifies.  We don’t have too many elephants, rhinos, or cape buffalo in southern California.  But if any ever become an invasive species here in the Peoples Republik, I’m ready.  I’ve read all the African hunting stories, living vicariously through the adventures of folks like Theodore Roosevelt, Peter Hathaway Capstick, and others.  It’s what prompted my path toward rifles like Eleanor.

But I digress.  Back to the topic du jour.  Sometimes you just wake up and think to yourself:  I have to to load me some .416 Rigby today.

That’s what happened to me recently.  I won’t get to shoot Eleanor for a few more days, but I thought I would share a few photos of the sausage-packing process involved in prepping .416 Rigby ammo.  The drill on that fine day was for a couple of reduced-velocity loads using cast bullets and Trail Boss propellant.  It’s going to be a fun day at the range when I light the candle on these puppies.

Reloading is sort of like cooking.  You start with a recipe and the right ingredients.  In this case, that includes .416 Rigby brass (something you don’t find laying around at the range) and Trail Boss propellant (which, like most reloading components, is pure unobtanium these days).

I’m well stocked with unfired, virgin Hornady brass and I used Montana Bullet Works cast 350-grain gas check projectiles.  Because I’m loading cast bullets, the first step involved flaring the case mouth.  I use the Lee universal flaring tool for this.   You can see its business end in the photo below.

Here’s the Lee’s flaring die and a flared case mouth.

This is what the cartridge case looks like after it has been flared.  You can see the diameter opens up slightly at the case mouth.  This prevents shaving lead off the bullet base as it is seated in the brass cartridge case.

The Montana Bullet Works bullets are impressive.   Actually, they are beyond impressive.  I think they are perfect.  They look more like machined parts rather than cast parts.  I loaded their 350-grain flatnose cast bullets (they are 22 Brinell hardness linotype bullets) with a gas check base (take a peek at the next photo).  The blue stuff is lubricant.

I’ve fired the Montana bullets before with 5744 propellant in Eleanor and they work well, as you can see on the targets below (I order my targets from Amazon).  Those were 3-shot groups at 50 yards using the same Montana 350-grain cast bullets and 45.0 grains of 5744 propellant.  Eleanor is an elephant rifle with iron sights, and I’m getting groups that would work well with prairie dogs.

There’s no leading with the Montana bullets.   The Lyman cast bullet reloading manual (which I believe to be the best) lists 5744 and the 350-grain cast bullet as the most accurate load in this chambering (I like the Lyman manuals better than any of the others).

The photo below shows a bullet just starting into the cartridge case.  I had already seated CCI 200 primers into the cases.

Trail Boss is a reduced velocity propellant that is designed to occupy most or all of a cartridge case’s interior.  It’s a light powder.  The shape is unusual.  The grains look like little washers.

Trail Boss is so big and fluffy my RCBS powder dispenser couldn’t throw a big enough charge with a single throw.  I wanted to load these at 30 grains and 34 grains (suggested min and max with this propellant), so I set the powder dispenser to 15 grains (that’s what you see in the powder tray above) and threw two charges for each case, and then I did the same at 17 grains (again, throwing two charges for each case).  According to the folks who make Trail Boss, the max load should not exceed the base of the bullet, and the minimum charge is 70% of the max charge.  Here’s what a charged case with the max charge looks like.

I next seated the bullets.  These cartridges are so long that you have to put the charged brass case into the shell holder, and then angle the bullet up into the die and set it back down on the case before you run the ram up.  I do bullet seating and crimping in two operations.  I’ll seat all the bullets to the required overall length without a crimp, and then I’ll adjust the die and run each round through again to get a good crimp.  I use an old RCBS Rockchucker single-stage press I bought new in 1974.  I’ve been using it ever since.

And here’s one last photo just to convey a sense of scale.   From right to left, what you see below is a six-pack of .45 ACP cartridges in a moon clip ready for my 1917 revolver, a .45 70 round (I loaded some of those earlier today, too), and the .416 Rigby.

So how do these Rigby rounds shoot?  I’m going to find out soon, folks, and I’ll let you know.  Eleanor and I have a date at the West End Gun Club (don’t tell Sue).  Stay tuned.  It’s going to be fun.


More Tales of the Gun stories!

Order targets from Amazon.

Buy RCBS reloading equipment here!

Never miss an ExhaustNotes blog: Subscribe for free!