
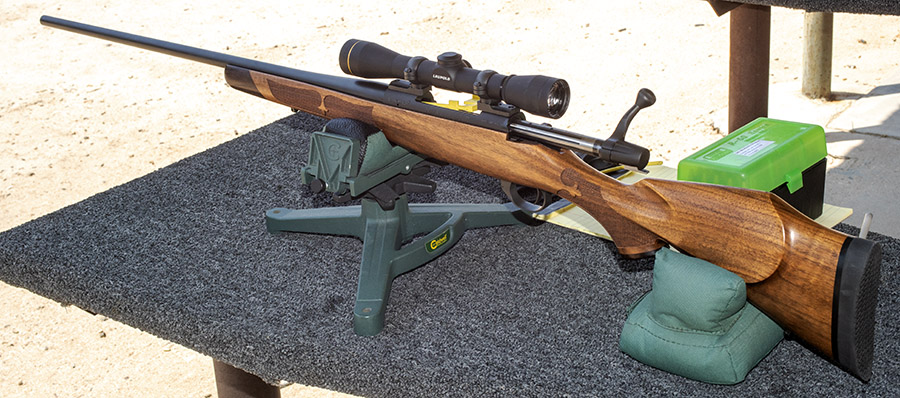
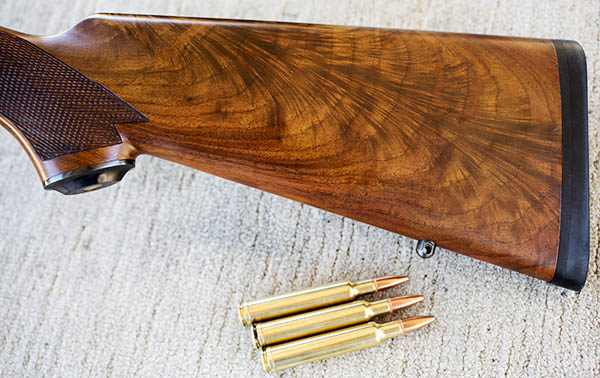
Last week I wrote a blog about my .300 Weatherby Magnum Vanguard Safari, and I recently spent a bit of time with it on the range. In a word: Wow! This is a most impressive firearm, as is the .300 Weatherby Magnum cartridge.
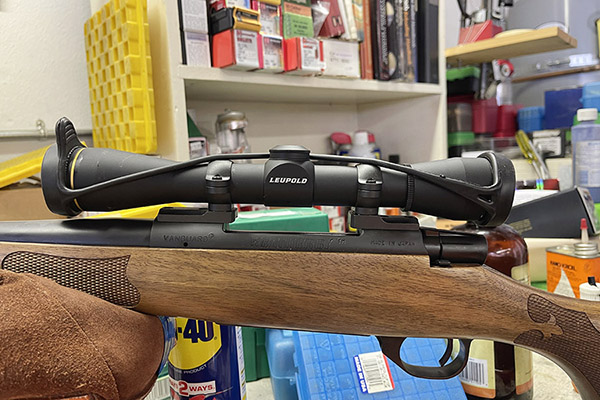
Before the rifle arrived, I called both Leupold and Weatherby to ask which rings and mounts I should use to mount a 4X Leupold scope. Both told me they didn’t know because there are so many possible combinations of rifles and scopes (which kind of surprised me; you’d think they would know). The Leupold tech rep suggested I try their dual dovetail mounts and low rings and he gave me the part numbers. (so it was off to Amazon for both). The Leupold guy said he didn’t know if what he suggested would work and if it would clear the scope’s bells, but that’s what I ordered and it worked like a champ. The Leupold scope has a lot of eye relief and it just looks right with the low mounts. The matte finish on the rifle, the mounts, the rings, and the scope looks good.
Good buddy John asked about how I sight in a scope, and I thought I would explain that here. I don’t use a boresighting device. The idea of sticking something in the muzzle doesn’t appeal to me, as it is the most sensitive part of the rifle and any nicks or dings in this area will hurt accuracy significantly. My approach is to:
-
-
- Set the rifle up on the rest, pointing it at a bullseye downrange.
- Remove the bolt.
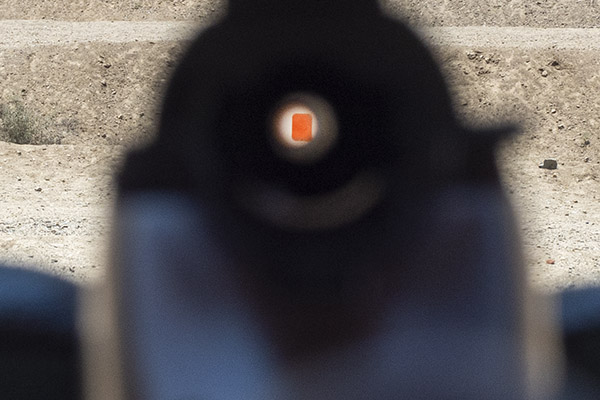
- Look through the barrel and center the bullseye at 50 yards in the bore. I use the rear opening of the barrel and the front opening of the barrel (which visually form two concentric rings) like a peep sight, getting the circles formed by both centered on the bullseye.
- Bring the scope’s crosshairs onto the bullseye without moving the rifle on the rest.
- Fire the first shot.
- Make scope adjustments accordingly for subsequent shots.
-
I can usually get the first shot within 10 inches of the bullseye using the above approach. A couple of times I’ve got it within 2 inches of the bullseye on the first shot, and this was one of them. I took some photos to make my explanation easier to understand.
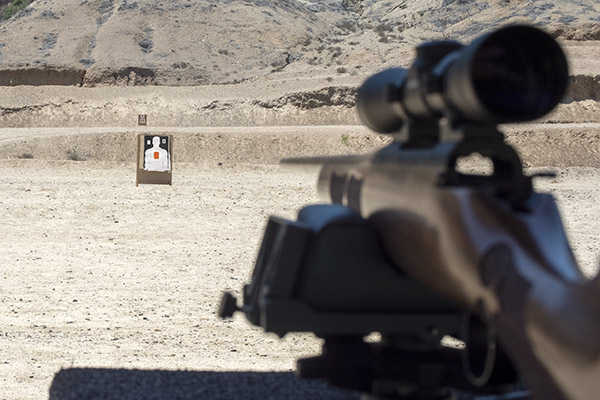
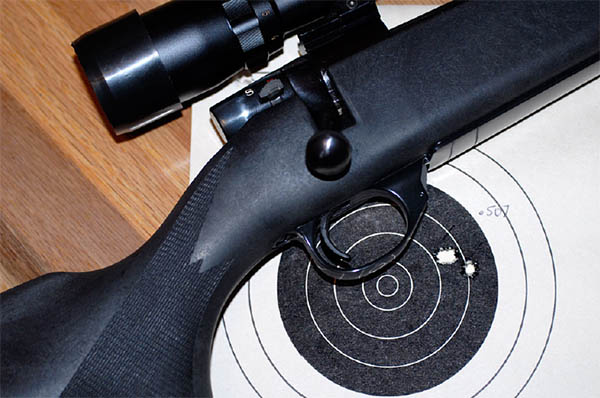
First, set the rifle in the rest and have a target at either 25 yards or 50 yards:
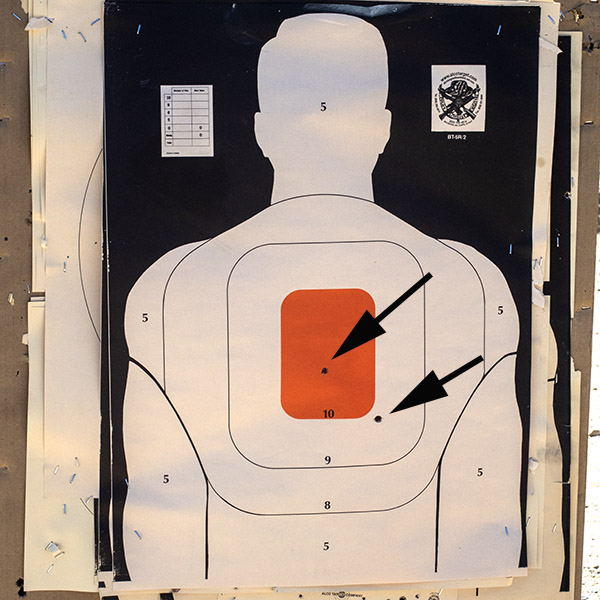
Next, center the bullseye in the barrel:
Then (without moving the rifle), bring the scope’s crosshairs onto the target:

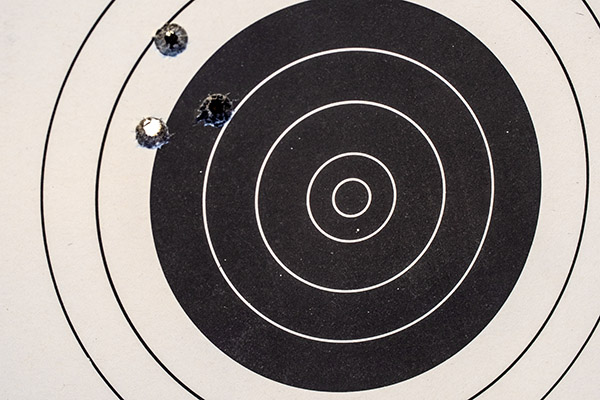
At this point, my approach is to fire one shot to see where it hits and then make adjustments. My first shot was the one at the lower right in the target below. I cranked in 15 clicks of elevation and 15 of windage, and my next shot was near the middle of the orange bullseye.
That was close enough to get me started. I then moved a target out to 100 yards and fired a few groups. This was the third group, and it measured 0.865 inch.
Not everything ran as smoothly as that target above suggests, though. About a third of my .300 Weatherby Magnum ammunition (all ammunition I reloaded) had difficulty chambering or would not chamber at all, and the rest of the groups were all much larger than that .865 group shown above. I was pretty sure the chambering difficulties were affecting accuracy, but that one good group showed the rifle had potential.
I recognized that the chambering difficulty was the same problem I had encountered with my .257 Weatherby Magnum Ruger No. 1 rifle. A traditional resizing approach didn’t work on the .257 Weatherby Magnum cartridge, and when I called Sierra about it, they told me turn the resizing die into the press an additional quarter turn after the die contacts the shell holder. I think there’s another issue as well due to case distortion due to the neck expander dragging during the resizing operation. If the cases are not well lubed inside the case neck, the dual-radius Weatherby shoulder is more easily distorted upward when withdrawing the case from the resizing die (more easily distorted, that is, than would be a conventional non-dual-radius case shoulder). The trick is to lube the inside of the case neck and to do the extra quarter turn of the die into the press. This addresses the neck expansion longitudinal distortion, takes out all the clearances in the reloading press’s pivot points, and accounts for any springback in case exterior dimensions.
I went home, pulled the bullets on the .300 Weatherby Magnum cartridges that wouldn’t chamber, resized as described above, cleaned the cases thoroughly, and then reloaded them.
On the next range visit a few days later, every round chambered easily, and wow, the results were good. My first group was the one at the top of the target shown below (it measured 1.452 inches). I dialed in five clicks left the Leupold and fired the next two groups in the two lower targets. The group on the left is 1.191 inches, and the one on the right is 0.871 inch.
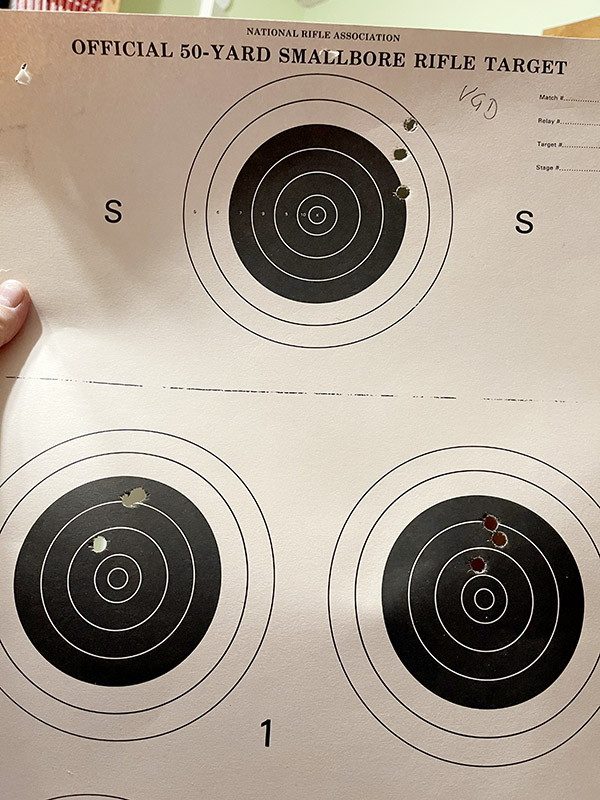
Note that these 300 Weatherby Magnum groups were fired with a 4X scope at 100 yards. It’s not easy to get great groups with a rifle that smacks you authoritatively each time you squeeze the trigger (the .300 Weatherby Magnum is one potent SOB). My load was the 180-grain Remington jacketed soft point bullet and IMR 7828 SSC powder a grain or two below max, and I’m not done yet. If my shoulder and my wallet hold out (and I can find components) I’ll bet I can get a ½-inch out of this rifle.
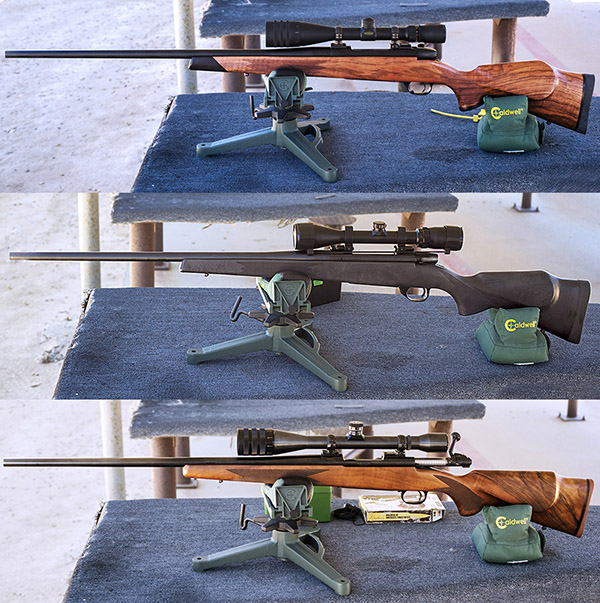
Take a peek at an earlier blog on three rifles chambered for the .300 Weatherby Magnum!
What’s it like meeting Roy Weatherby? Hey, take a look!
How about a Ruger No. 1 in .300 Weatherby Magnum!
Hey, how about an earlier standard Vanguard in .300 Weatherby Magnum!
More gun stories? You bet! Just click here!
Never miss an ExNotes blog!