
I usually change my own motorcycle tires. I’ve been doing it since I was a small child and the job has never been all that easy. In fact, I dread changing tires but there is no other way. The thought of taking a motorcycle in for new tires was as alien and hoity-toity to me as having a live-in maid. The Husqvarna changed all that. The Husky’s wide, 17-inch rims combined with even wider tires really stymied me. I would pinch the tube nearly every time I put a tire on that bike.
One time after pinching the tube four times trying to get the last bit of bead over the rim I stuck the only tube I had in the 150/60-17 back wheel: a 21-inch dirt bike tube. That tube lasted for the duration of the tread life and when it came time for a new tire I folded my cards. I took the rim to our local independent motorcycle shop, Holiday Cycles.
Holiday Cycles charged me $25 to install whichever tire I supplied. Size did not matter. I didn’t need to buy the tire from them, as they don’t stock sizes to fit the Husky. What a relief to drop the new tire and wheel off at Holiday and pick it up a few hours later shiny and new. And there were no holes: the tire held air. This was a wonderful relationship. Holiday gradually raised the price of a tire change to $40 but it was still worth it to me. Avoiding hours of struggle only to have the tire leak was not the sort of thing I wanted to go back to.
Unfortunately, Holiday Cycles closed up recently and I’ve been lucky not to need a new tire on the Husky. There is a Yamaha and a Kawasaki dealer in town that change tires. I’ve never used them; I kind of liked Holiday Cycles.
My buddy Mike from the Carrizozo Mud Chucker’s bought a Harbor Freight motorcycle tire changer and said it was okay. Better than a 5-gallon bucket, I think were his words. Naturally anything Mike gets I have to copy.
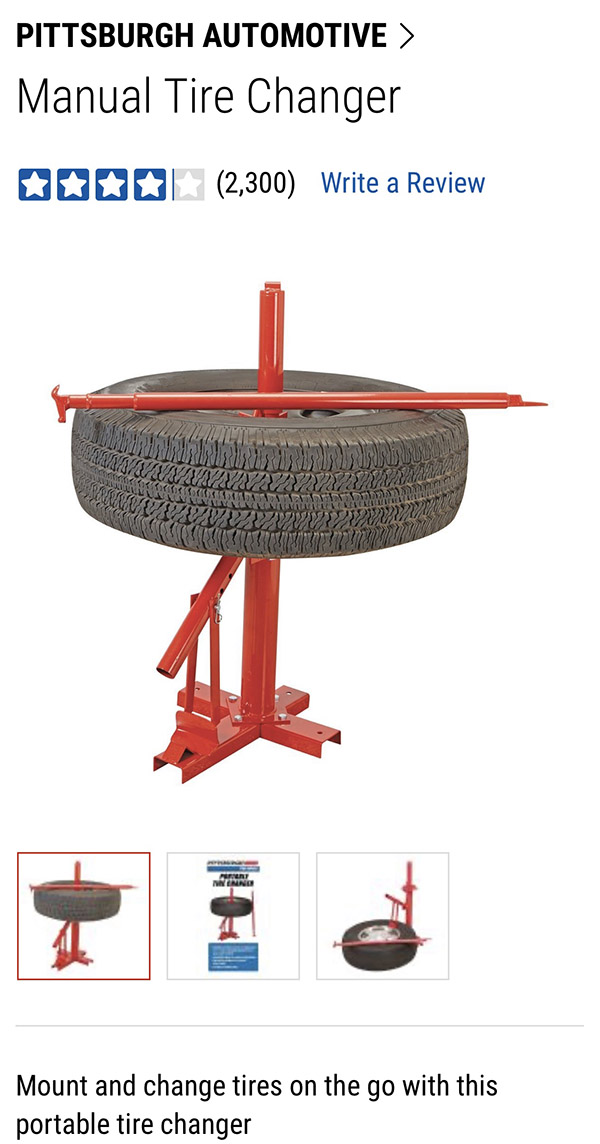
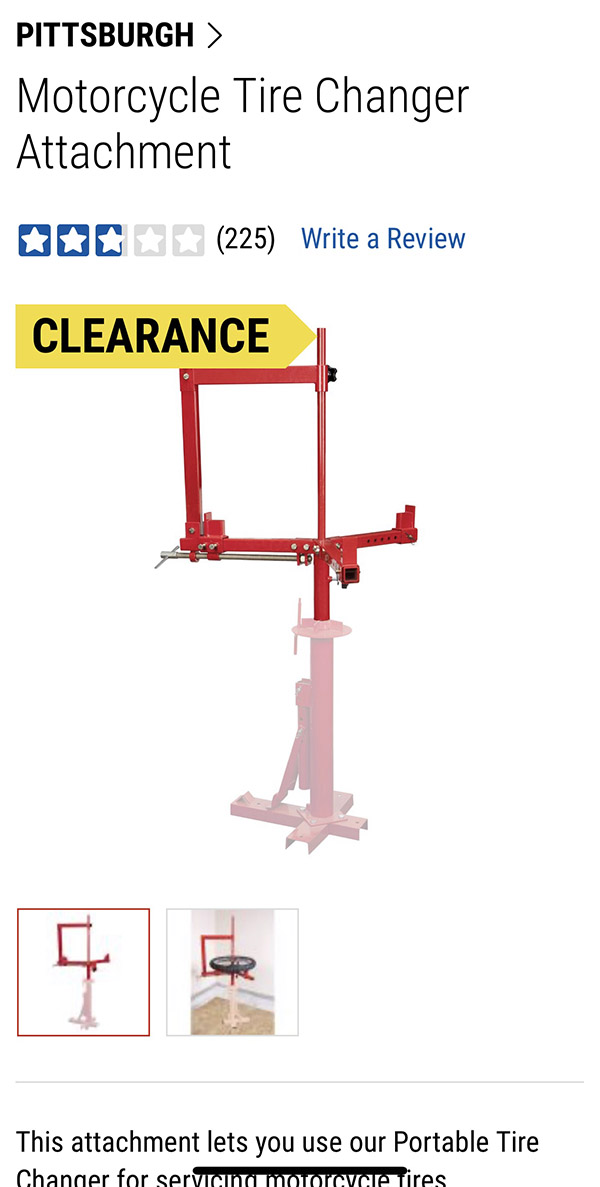
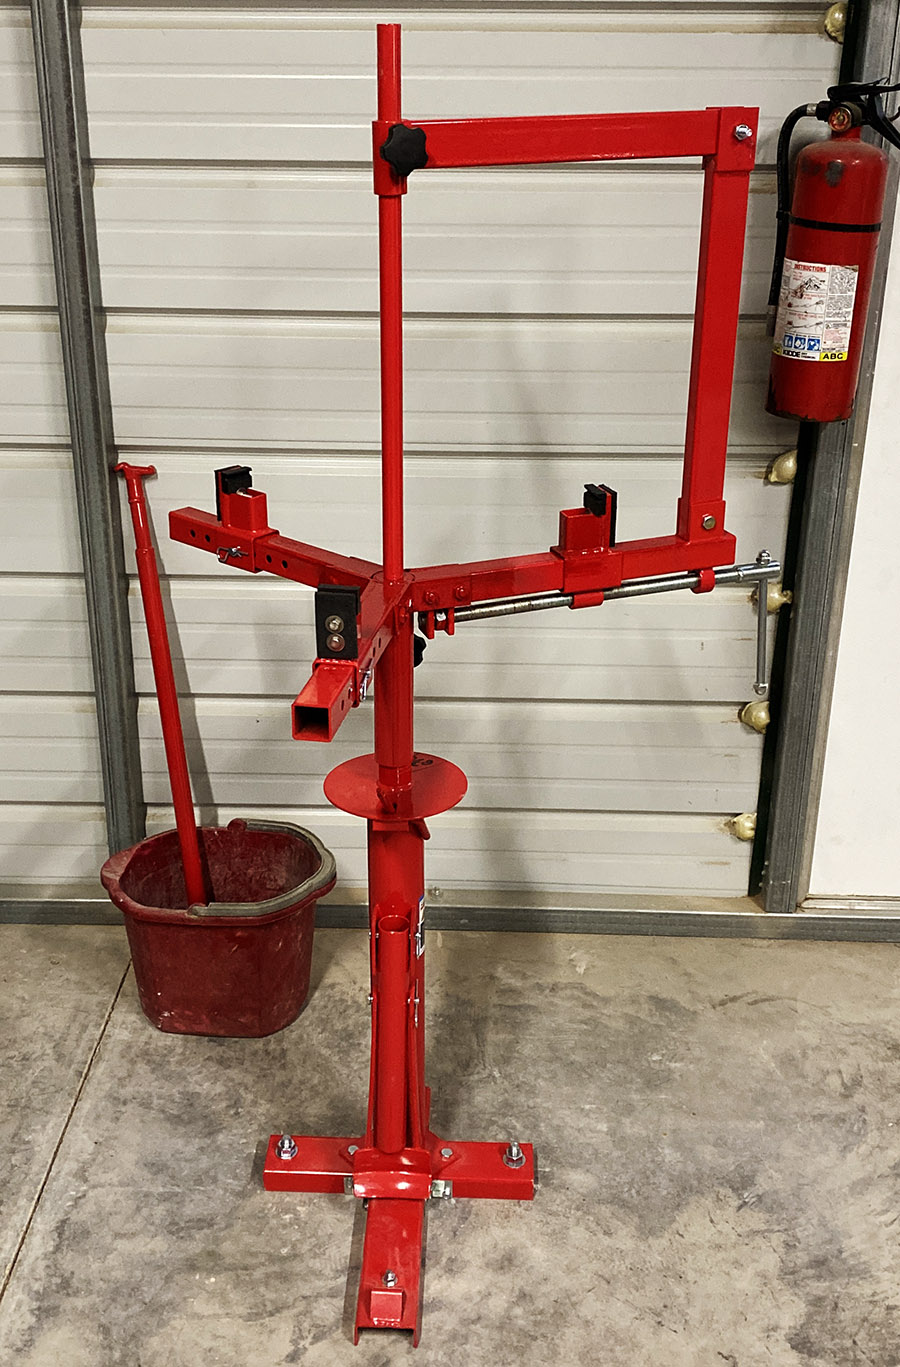
Harbor Freight spammed my Facebook page with the motorcycle tire adaptor part for $32. This seemed like a good deal. My first thought was to just get the adaptor and make my own base. When I got to Harbor Freight I saw the base was only $44 and it was made for changing car tires. I looked at the bright red, powder-coated base and thought, no way can I make a base this nice for only $44. I bought the car-tire changer base. I was all in for $76, a little less than two tire changes at the old bike shop. You get a lot of steel for your money with Harbor Freight and I loaded up the weighty boxes of metal and drove home.
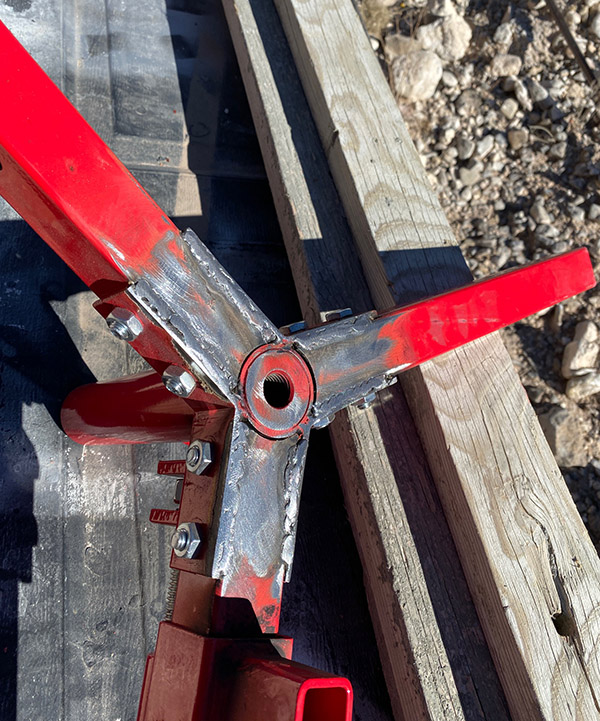
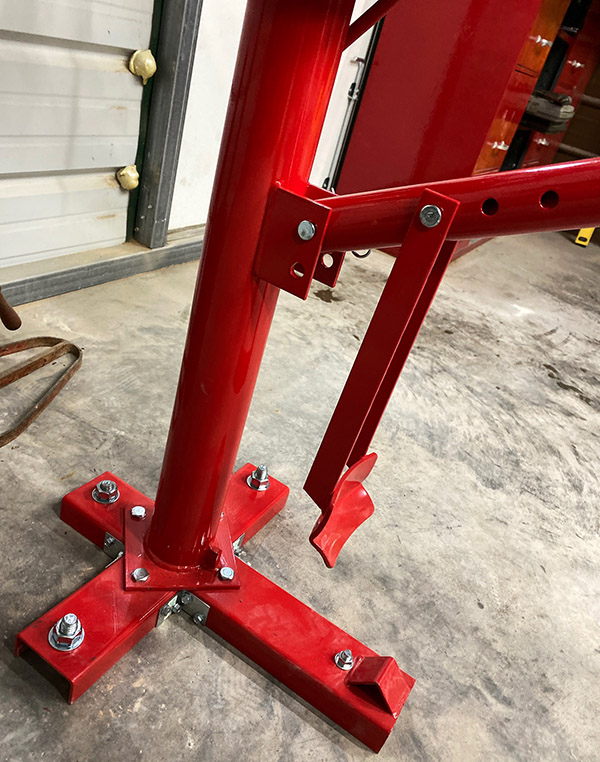
Like most of Harbor Freight’s shop equipment, you have to modify the things to make them work a little better or at all. One of the first things I did was take the motorcycle adaptor to Roy’s Welding to weld the three legs of the adaptor to the adaptor hub. The factory setup is a couple bolts on each leg. This does not work well as the bolts are squeezing on square tubing. No matter how tight you torque the bolts, right down to crushing the square tubing, the arms won’t stay flat and move up and down easily.
The whole purpose of the motorcycle adaptor is to secure the rim so that you can work on the beads without the whole assembly skidding across the shed floor. You don’t want the three legs flopping around. Roy had a hard time welding the legs because the powder coating was very thick. “Man, they put a ton on there.” I thanked Roy, paid my $15 and the welded legs are very secure now.
The way the motorcycle adaptor works is two of the legs have adjustable, pinned rim-grabbers. You adjust those to suit your rim size. The third leg has a screw-driven rim-grabber that tightens onto the rim like a vise. Initially I thought the grabbers worked from the inside out. Turns out they grab the outside of the rim.
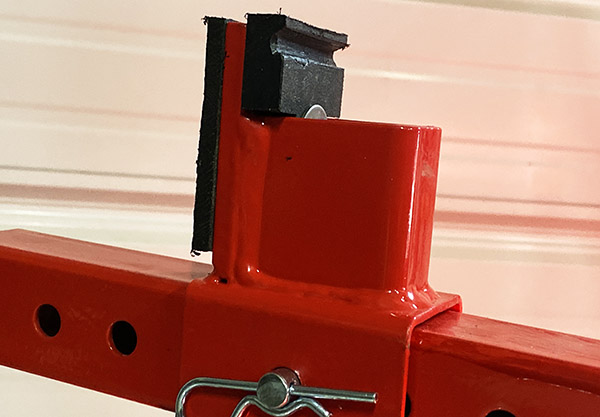
Since the grabbers are flat-faced when you tighten them onto the rim it doesn’t hold well: the tire slips upward and out of the adaptor. Mike simply heated the grabber tips and bent them inward so that the rim can’t slip out. My other brother, Deet, who also has a Harbor Freight tire machine, made some nice, plastic rim protectors to grip the rim. I copied Deet’s system. We will see if it works or just snaps off the first time I use the motorcycle adaptor.
I had an old bead breaker but the Harbor Freight tire machine comes with a pretty good bead breaker built right into the base. You use the (included) long tire iron as a lever. The base unit for car tires looks like it should work well. I might try changing a few MGB-GT tires on the thing. I think it needs a sturdier center cone to hold automobile rims but maybe not.
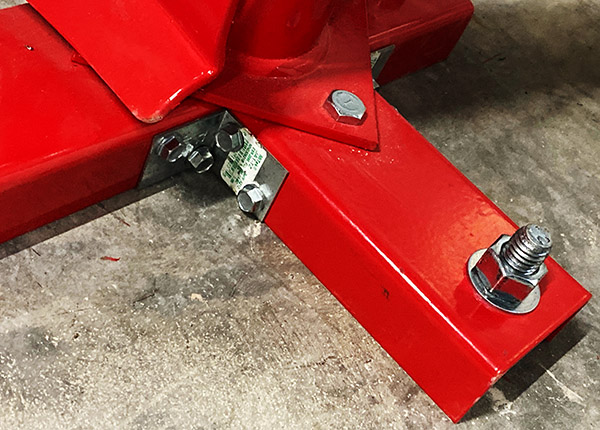
Bolting the base unit to the concrete floor was fairly easy. A hammer drill does the job faster than a plain old rotary drill. I used 5/8” expansion studs on three of the base legs and a 3/8” expansion stud on the bead-breaker leg to keep the bolt size down in that area. I also added a few angle pieces to join the three base feet together. Harbor Freight should have welded the foot pieces but that would make the package larger. Shipping stuff from China isn’t cheap.
Adding it up, I have about $100 in the Harbor Freight tire machine with the motorcycle adaptor, anchor bolts and plastic. I had to clean out a section of the shed to make room for it but it looks the business sitting there doing nothing. The long tire iron that came with the base is sort of fat for motorcycle tires so I may look around or make something different, maybe something with plastic tips to keep from scratching chrome wheels. I’ll do an update when I get around to using the thing. I figure with the money I’ll save using the Harbor Freight motorcycle tire changer I can start interviewing for that live-in maid.
Help us continue to bring new stories to you: Please click on the popup ads!
Whoa! A free subscription to ExhaustNotes! You bet!
More Joe Gresh? You bet!
More ExNotes product reviews? Absolutely!