
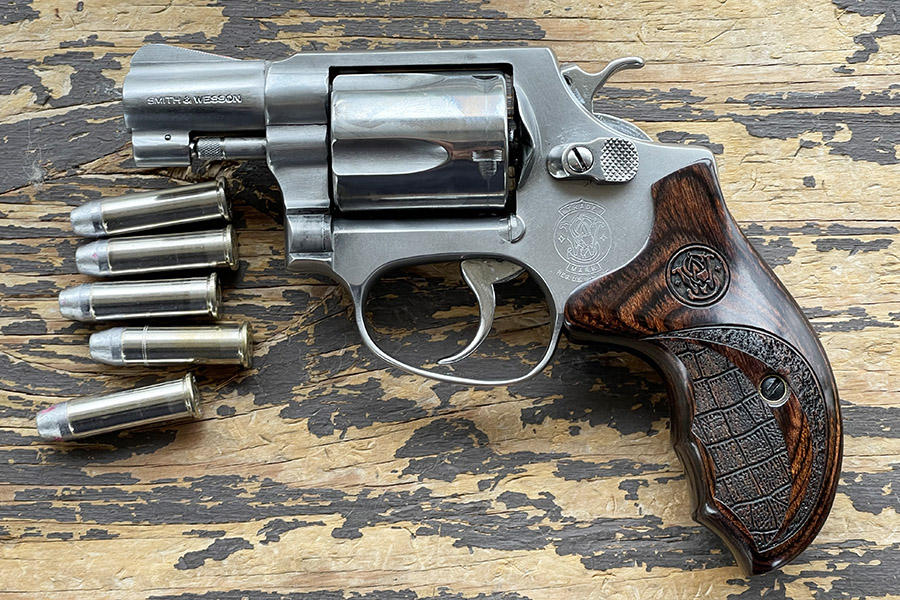
I love my S&W Model 60 and I shoot it a lot. It’s particularly cool after I had TJ (of TJ’s Custom Gunworks) do an action job on it. Not content to leave well enough alone, I convinced myself that (after tracing the occasional double action misfire to not-fully-seated primers) that what I really needed was a lighter hammer spring (in addition to the lighter trigger spring I had already installed). Wolff Springs sells a lighter hammer spring kit, and I went for the lightest hammer spring I could get.
The lighter trigger spring affects single action trigger pull after you have already cocked the gun and it has nothing to do with the occasional double action misfiring I had experienced in the past. Double action trigger pull is affected by both the trigger spring and the hammer spring, but the hammer spring is a much beefier spring and it drives most of the resistance when firing double action. The hammer spring, if too light, can induce misfires.
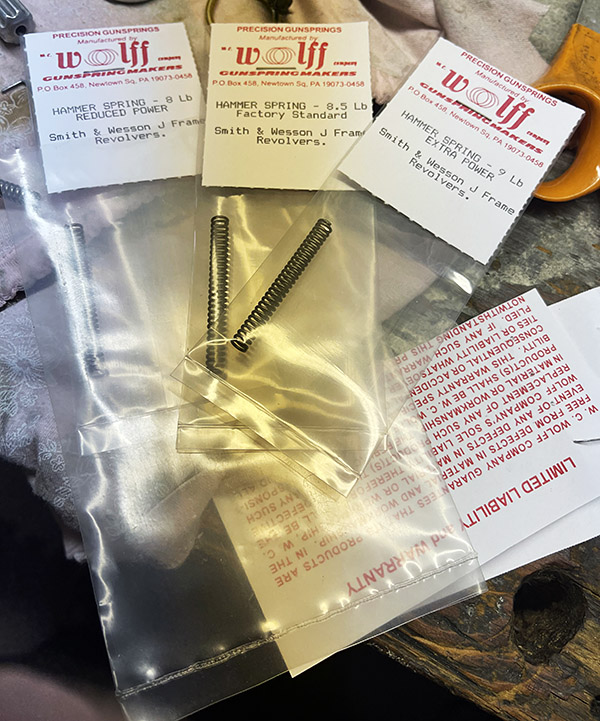
The Wolff hammer spring kit includes a standard strength spring (an 8 1/2-pound spring), a heavier spring (a 9-pound spring), and a lighter spring (an 8-pound spring). I wanted a lighter double action pull, so I used the 8-pound spring. The tradeoff is this puts less force on the hammer, which means it has lower velocity when it hits home, and that ups the likelihood of a misfire.
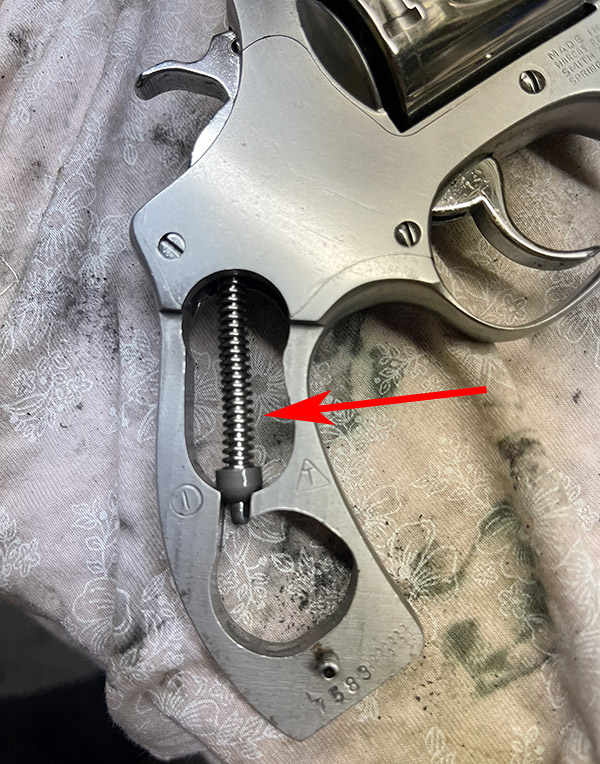
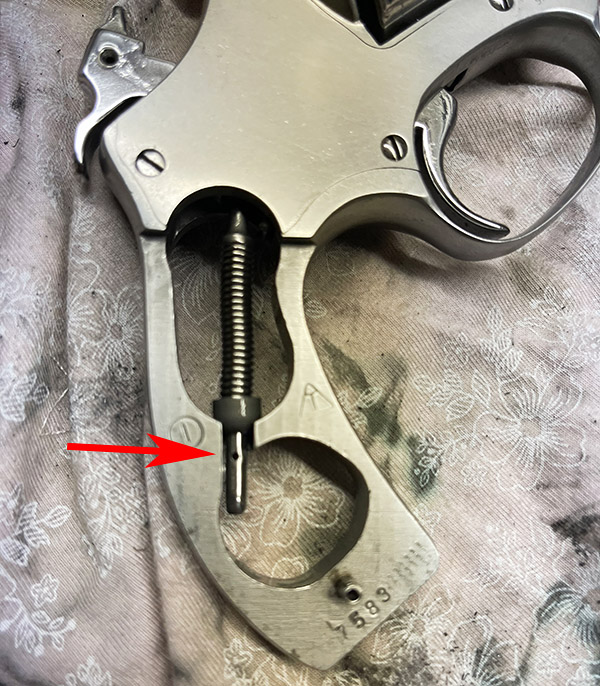
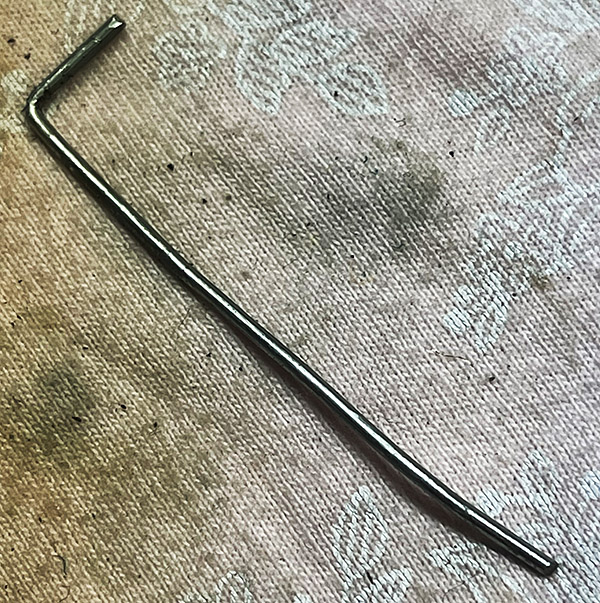
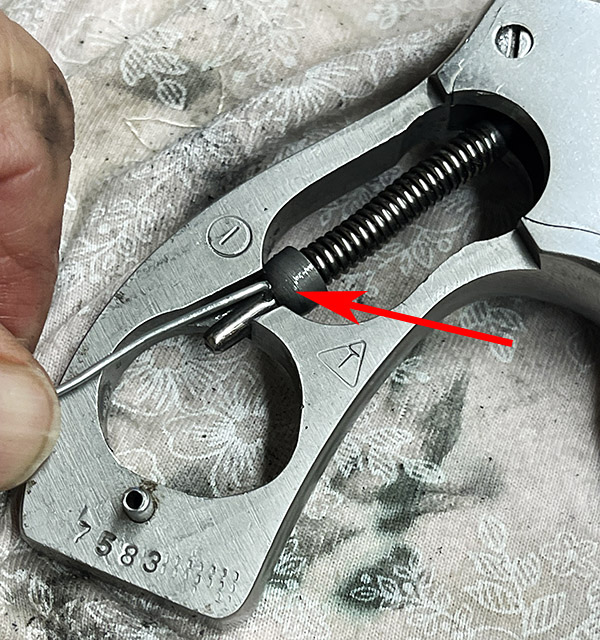
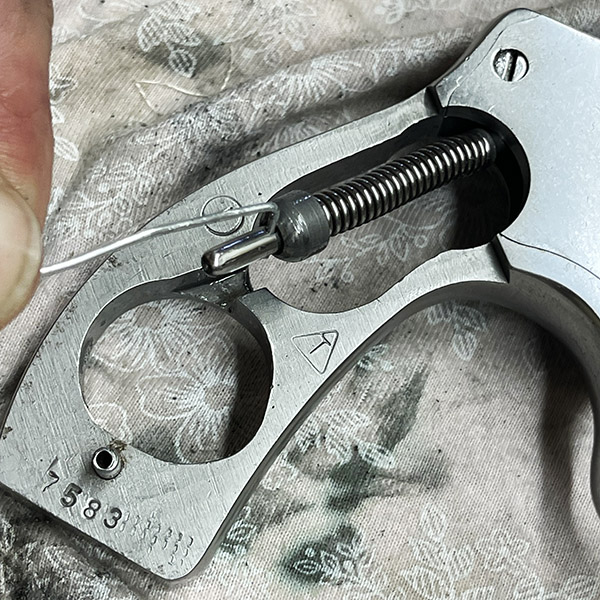
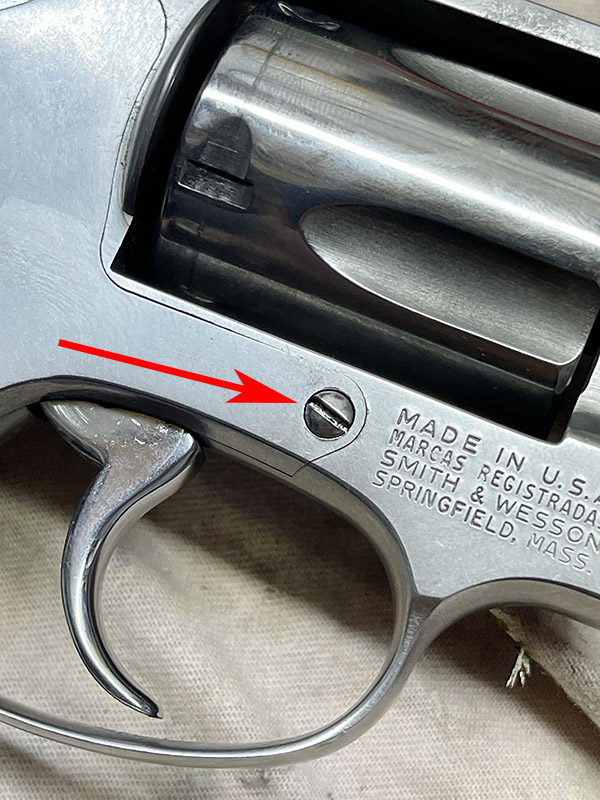
The hammer spring is easy to change, and if necessary, I can go for either of the two heavier springs at the range. All it takes is a small screwdriver to remove the grips, and the same exotic custom tool used for disassembling the Rock Island Compact 1911 (a bent paper clip). The photos below show how this is done.
While installing the new hammer spring, I noticed that my normal gun cleaning routine just wasn’t cutting it on the Model 60. There was still a bit of lead in the barrel, and the powder residue was building up around the yoke. I selected a bronze bristled toothbrush and went to work on the cylinder, the yoke, and the frame, and a bronze bore bush for the bore. When the remnants of gunfights past were gone (you know, my encounters with zombies, as previously described), I spritzed the gun with the universal cleaner (WD40) and then I wiped it down before applying gun oil.
That’s when I noticed that the barrel-to-cylinder gap was nonexistent. Zip. Nada. Zero. The front of the cylinder was touching the rear of the barrel. Uh oh. That’s no good. There’s supposed to be a gap there (like you see in the photo below), because if there’s no gap the cylinder will drag on the barrel. That will degrade the double action trigger pull and, in a worst-case scenario, it can drive the revolver out of time (the chamber won’t be aligned with the barrel). The technical term for the fore-and-aft cylinder movement that assures a minimum clearance when the cylinder is fully forward is called end shake. There needs to be some, and there needs to be a gap. Ideally, that should be 0.004 to 0.008 inches. Any less, and powder and lead residue will bind the cylinder, any more and too much gas escapes (and velocity suffers).

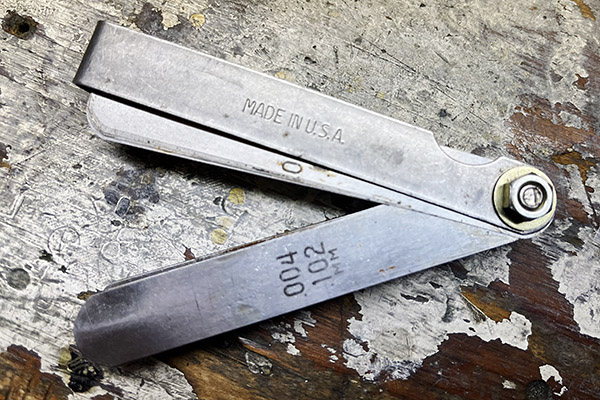
You measure the barrel-to-cylinder gap with a feeler gage, just like you would when setting the valves on a motorcycle. I’ve done that (as you know from reading this blog and any of the CSC shop manuals), and I already had the feeler gages I needed.
After a bit of internet research, I learned that the way to address inadequate gap is by shimming the cylinder and its fit on the yoke. That’s when I first learned there’s a business that specializes in making shims for this exact purpose. In short order I was communicating with Lance Shively, who heads TriggerShims.com.
Lance and his wife, Tammy, run a real Mom and Pop operation that manufactures gun specific shims for a living. Lance has an extensive background in small engine repair and tool and die making, and he and Tammy parlayed that into TriggerShims, which has been doing well for more than 14 years now. Lance told me his primary concern is customer satisfaction, and I can tell you my perception in working with TriggerShims is they have mastered it. I had the Model 60 custom end shake shims in three days, there was no postage charge, and the price was more than reasonable for custom gun parts. Lance runs a Christian business, he believes in God and country, and he’s not bashful about letting people know that. He and Tammy also sell select items from other vendors when he finds a company he likes and believes in, but that is a very select group. The two biggest ones are Wolff and Volquartsen.
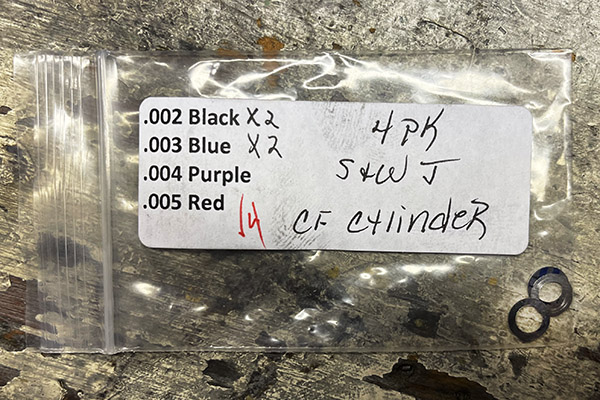
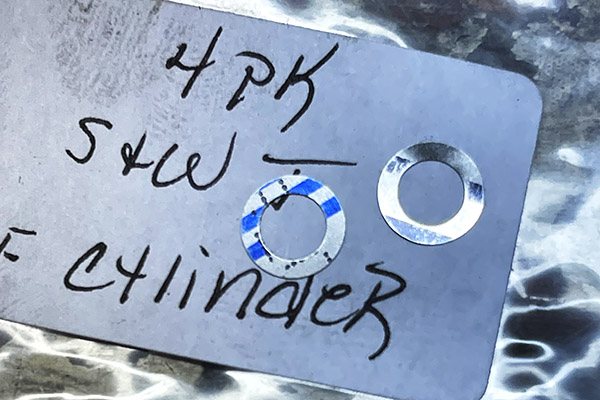
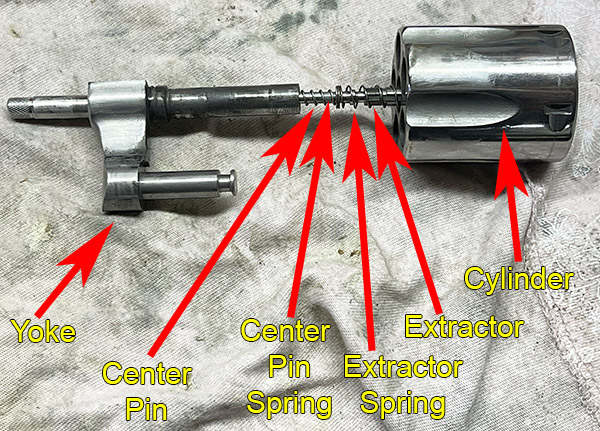
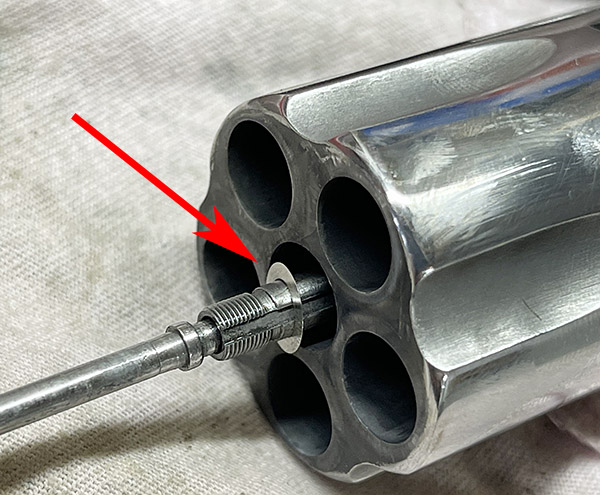
I received the shims I ordered from Lance in just a few days, and installation was trivially easy. I had to remove the yoke, disassemble the ejector rod from the extractor, install the shim I wanted to use (I went with a single .003-inch shim to give the clearance I wanted), and then reassemble everything. It only took a few minutes, and the only tricky part was remembering that the ejector rod had a left-hand thread.
TriggerShims.com manufactures over 100 firearm-specific shims with thicknesses from .002-inch to .007-inch, with some specialty items as thick as .010-inch and as thin as .0015-inch. Lance sends shims worldwide, with Australia and Canada being the biggest international customers (he also ships to more than 100 other countries).
Lance and I had a good conversation, during which he told me he enjoyed exploring the ExhaustNotes site and our blog. One thing led to another, and TriggerShims.com is our newest advertiser. You’ll see the TriggerShims.com logo on the ExNotes blog and all ExNotes pages, and Lance asked if he could post links to some of our Tales of the Gun stories on the TriggerShims.com site. Hey, you bet, Lance, and welcome aboard.
I had the Model 60 on the range yesterday morning, and it is a much smoother running revolver. I confirmed another issue I’ve experienced on this revolver before, and that’s a slightly out-of-time situation when firing double action (probably induced by the cylinder drag described above). That’s going to take a new hand to correct (“hand” is the nomenclature used for the part that advances the cylinder). The replacement hand is on order, and there will be another Model 60 blog coming up in a couple of weeks on it. As always, stay tuned.
More Tales of the Gun!
Never miss an ExNotes blog…sign up here for free!
With the amount of tuning, fetteling, adjusting and cleaning you do it’s amazing you ever find time to knock over liquor stores.
In and out in seconds. That’s the secret.
With the amount of tuning you do, it’s similarly amazing you find time to ride!
Very interesting and useful post.