
By Joe Gresh
I’m starting to worry about the timeline on this Kawasaki project. It’s already almost June and we will be leaving for Laguna Seca the beginning of July. Parts are trickling in slowly now and I’ve found things to keep me busy. I don’t want to ride the Yamaha RD350 all the way to California but I will if it comes down to it.
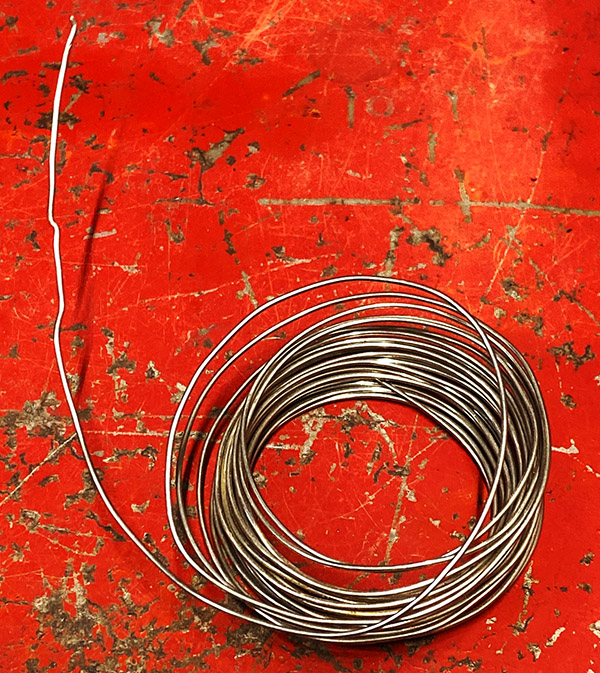
After assembling the rebuilt front calipers onto the 1999 ZRX1100’s forks I tried to flush out the brake lines with a can of spray brake cleaner stuff. No go as all three of the hoses were clogged so badly I couldn’t get a drop of liquid out of them. I guess old brake fluid turns into a solid after many years. A piece of stainless wire, sort of stiff, was worked back and forth into each line pausing occasionally to give the line a squirt. It was slow going but my thrifty ways were rewarded when I managed to force the wire all the way through the hose. Now I could really give the inside of the line a good, high pressure blast with the brake cleaner and air compressor.
I had the same problem with the rear brake hose and solved it the same way. Bleeding so many pistons takes patience and I don’t rush to do the thing in one day. The tiny bubbles take a long time to percolate to high points and I’ve got rear pedal pressure fairly good now. The front calipers are taking a bit longer. I have solid line pressure but I think there might be a bubble or two occupying space that should be DOT 4 fluid.
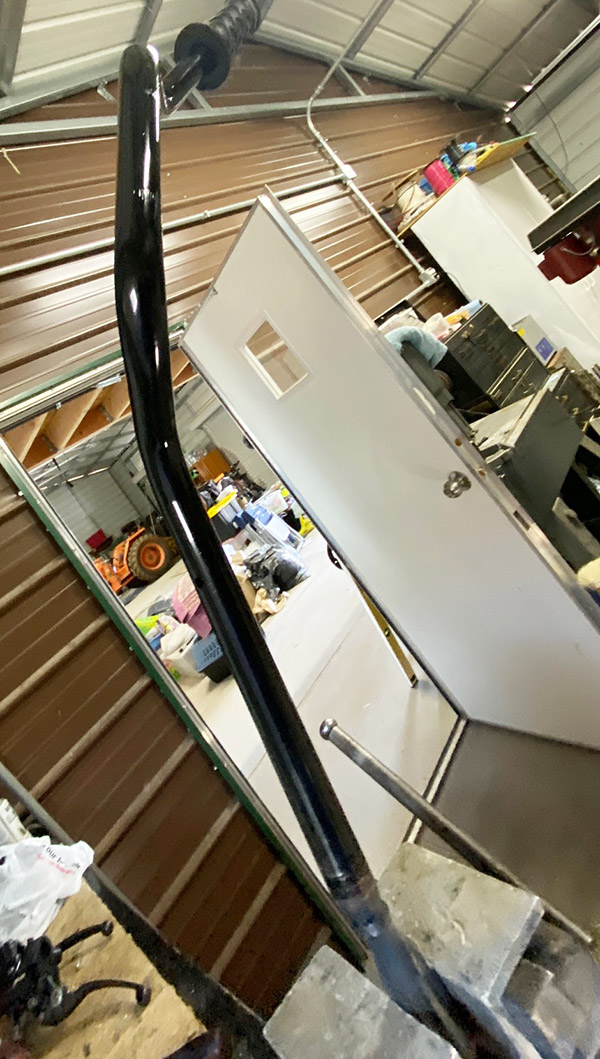
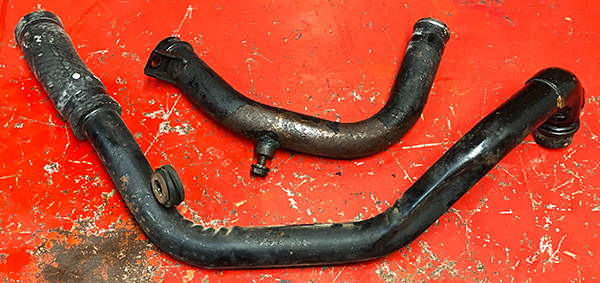
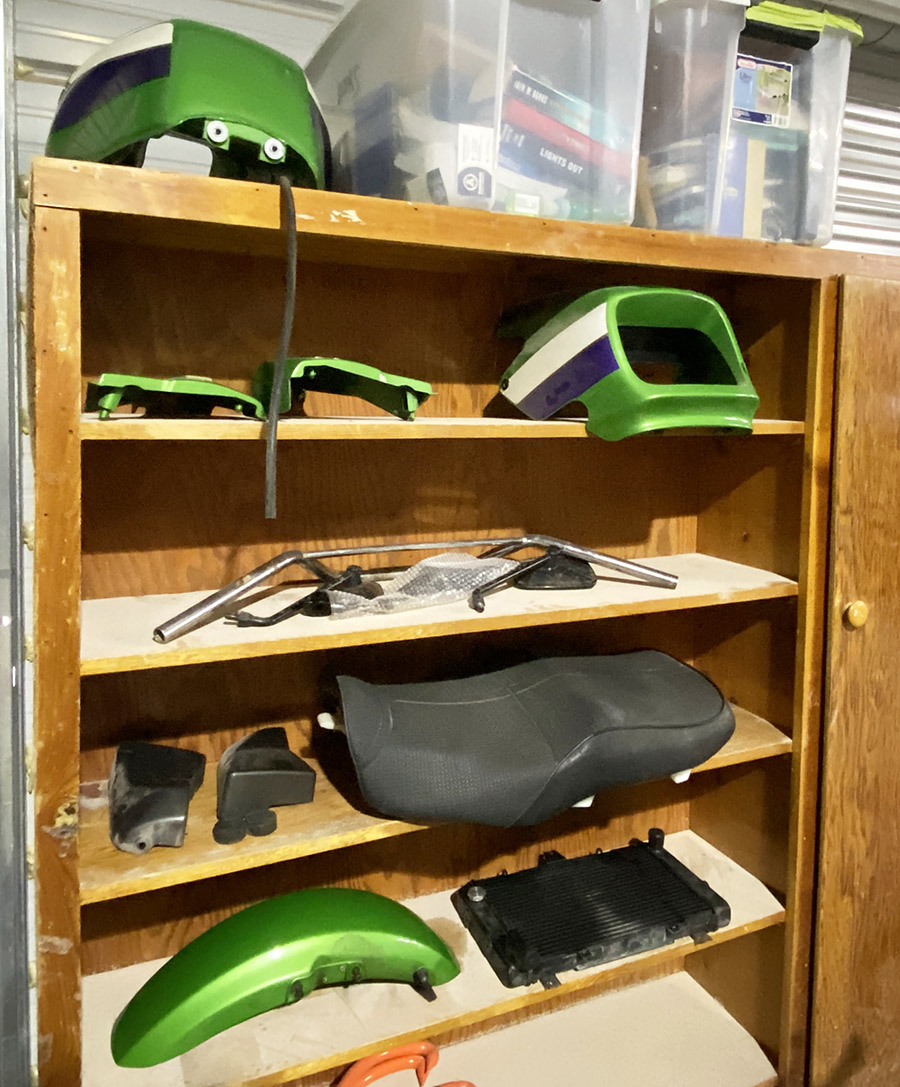
The Kawasaki ZRX has a lot of black painted parts. I love this even though most of the black paint was rusty and flaking off. There’s nothing easier than applying black paint. It’s a popular color and if it’s a shade or two off no one will notice. I gave the handlebars and water pipes a shot of Rust-Oleum engine paint.
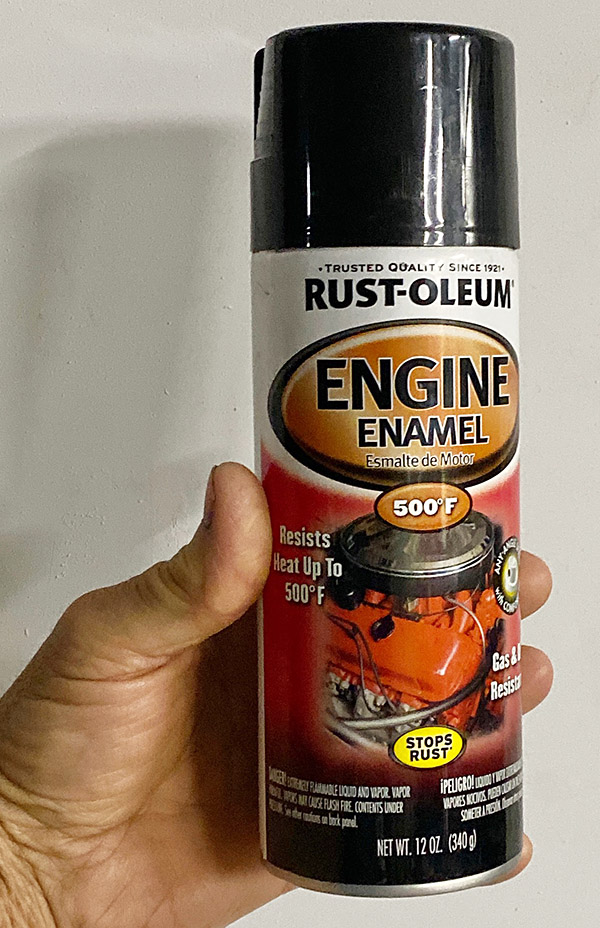
This brand of paint seemed to mix well with the original Kawasaki paint. I tried another brand but it lifted the old paint at the margins where old paint meets bare metal.
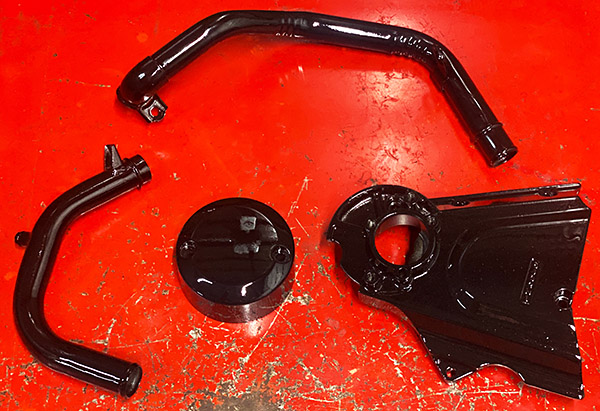
The clutch slave cylinder leaked onto the sprocket cover area eating the paint so I wire brushed the cover, along with the slave cylinder cover and shot them with the same black paint.
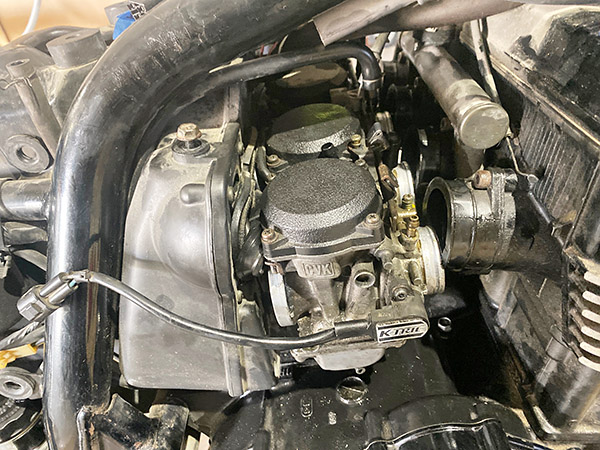
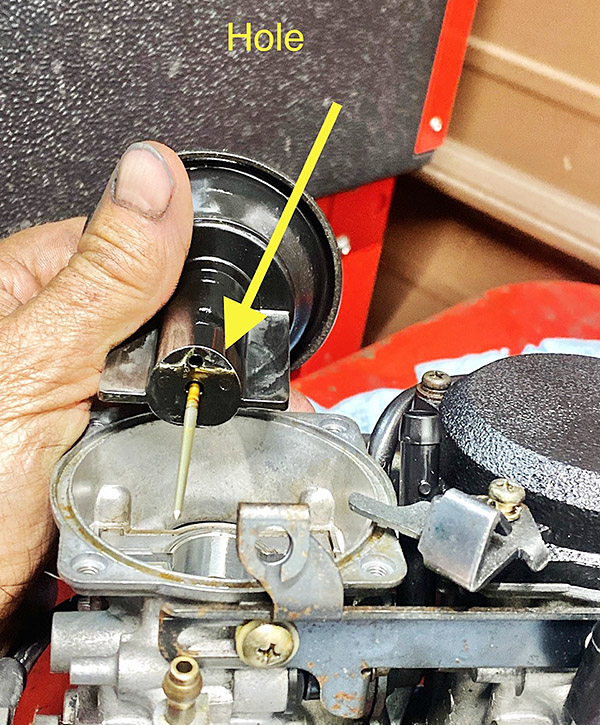
Removing the four carburetors out of a ZRX is no easy feat. The book says to pull them from the air intake side first, and then slide them out of the manifolds on the cylinder head side. Well, I’m here to tell you that method doesn’t work. It was a battle but I had to slide the carbs out of the manifold first then work the air cleaner boots back with a screwdriver. I’m dreading putting the carbs back in. I think I’ll use a thin flat piece of steel on the air cleaner side to push the boots back without snagging the carbs.

The carbs were gummed up with old gooey gasoline but they weren’t the worse I’ve seen. Luckily all the vacuum diaphragms were intact and flexible. I had to remove the factory, no-tamper idle screw plugs to clean out the idle passage. Oddly, one idle screw was set to 1-3/4 turns out while the rest were +1-ish turn out. I’m going to split the baby and make them all 1-1/4 turns out to start. Located on the bottom of the carbs, these idle screws are somewhat accessible while the carbs are still on the bike so I can adjust them later if needed.
After cleaning all four carbs and reassembling them I wanted to bench test for leaks before facing the gauntlet of those rubber boots. I set the carbs in the vise and rigged a funnel to pour gas in. The gas ran out #4 carb as fast as I put it in. Taking the #4 float bowl off and inspecting the needle and seat revealed nothing so I cleaned the seat and rubber tipped needle again and ran another test. No change; the gas flowed like wine. I have ordered four new float needles so we will have to revisit the carb issue later.
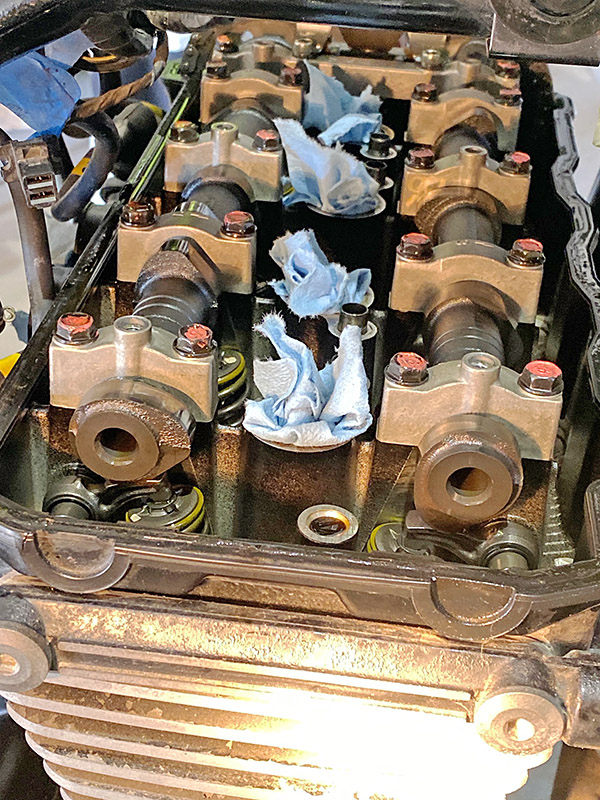
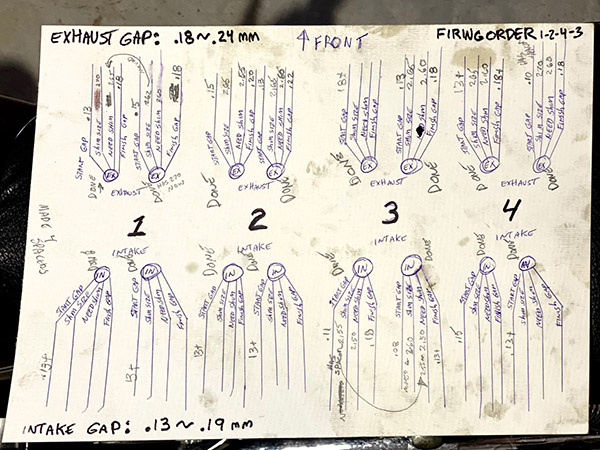
After 25,000 miles I felt it was time to do the Kawasaki-recommended 12,000-mile valve clearance check. As expected, they were all at the minimum gap specified or too tight. With 16 valves it’s easy to get mixed up with your adjustments so I made a chart to keep track of which valve needed what shim.
Kawasaki made the valve setting process easier by using cam follower type rockers. These rockers are mounted on a long shaft that runs through the cylinder head. The rockers are held in place over the valve stem by springs on the rocker shaft. This means you can slide the rocker over on the shaft and lower it so that the valve spring keeps the rocker from returning to its original position. No more having to swap in a shim just to rotate the cams to the next valve that needed setting. I was able to measure all the valves and determine what size shims I needed in two rotations of the crankshaft. After swapping the shims I could, I ended up needing seven shims in total. The local Kawasaki shop had them for $4 each.
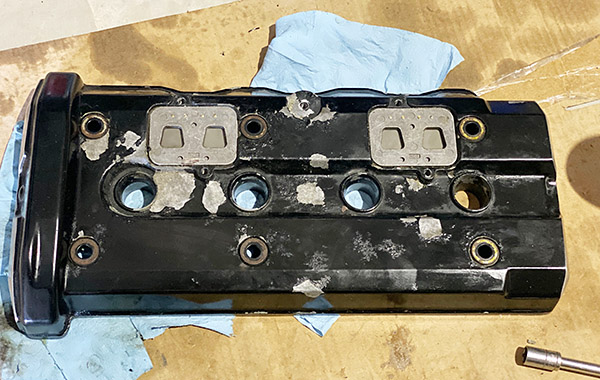
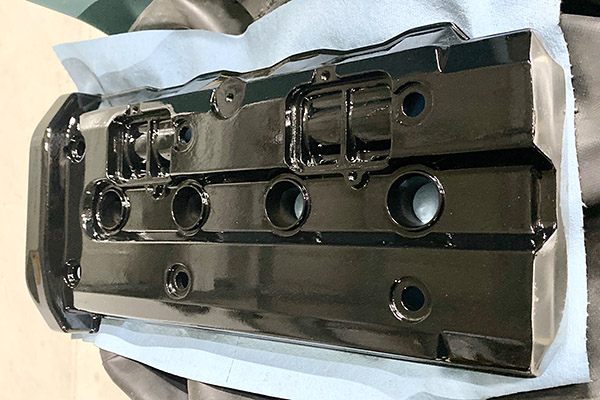
I was going to use a new valve cover gasket but the thing costs like $80. That’s too much for a big rubber ring. My plan is to dollar cost average and get one more use out of the old gasket. I’ll splurge on a new gasket at 50,000 miles…maybe. The cover looked pretty bad so I cleaned it up and shot it black with the same paint as I used on the coolant pipes. The gaskets on the crankcase breather reed valves tore when I removed the plates for painting so I ordered the four total gaskets at $30. This motorcycle repair business sure is expensive.
In Rex Rx Part 5 I hope to start getting closer to starting the beast. I’m waiting on bits and pieces so it might be time to do a few days of concrete work.
Help us help you: Please click on the popup ads!
Miss the first four installments? Hey, check them out here:
More Resurrections? You bet!
Never miss an ExNotes blog:
Your project makes me feel guilty. For over 16 years I just keep putting gas in my Tiger 1050 and pushing the starter button and off we go. Over 86,000 miles worth. Oh, an occasional oil change too….what an engine that Triumph Triple is…..
Want to rest easy? Put a manual shutoff in the fuel line. A quality 3/8 inch barbed valve will work in that hose.
At last, a rattle can paint that works, Rust – Oleum! I love that stuff and black is black! I use that on Used Sportsters as well as “Rare Foreign” bikes too… It is good to see others (you as a famous person) admit to using it and singing its praises! Of course, I don’t do much work on motorcycles… but I do ride them!
Just a thought, are you able to assemble the carbs onto the air box, then install the air box with carbs attached (as an assembly) into the frame?
I can’t tell from your pictures, but that’s what I envision.
Single carb bikes are things of beauty !
Just about a dead ringer for the black Kawasaki used on the Rex
Before you slide those carburetors back in get 2 of those really thin flexi cutting boards at Wally World, one on the front of the carb rack and one on the rear with a little silicon spray, and with you’re air box pulled back a smidge, Bam just like that your in.