
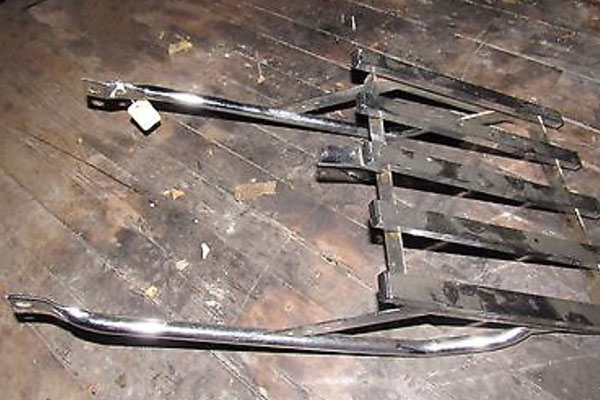
 Zed is missing its chrome seat bar and rather than finding a stock replacement I grabbed this $50, period-correct luggage rack from eBay. All my motorcycles have rear racks. I need a place to strap stuff because I get around, you know? I dig the square tubing and the big-hair, 1980’s plastic plugs filling the open ends.
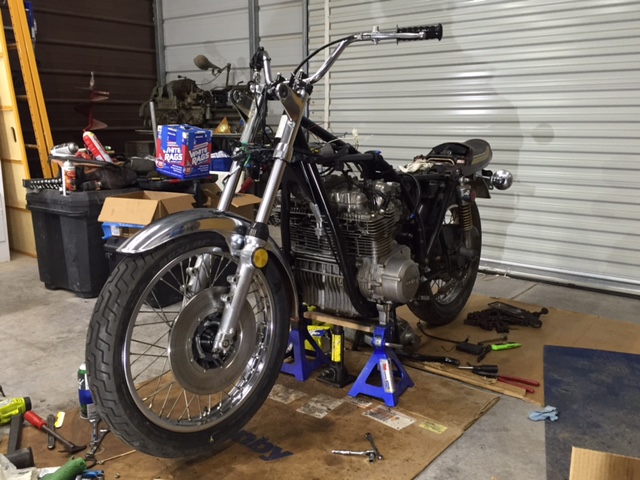
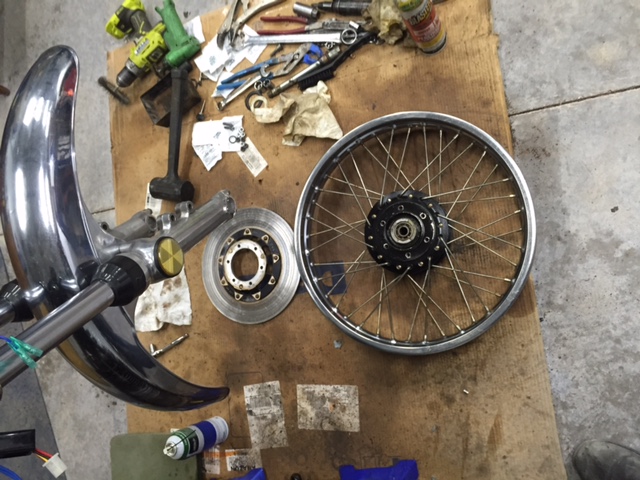 Zed’s 41,000 mile, front wheel bearings are probably stock and I could’ve cleaned them up and re-greased them but a new set is not that expensive so I popped the old ones out and fitted new bearings.
 I had an old-ish Dunlop tire in stock. I bought it new to put on Godzilla for a run from Hunter’s place in Oklahoma to Florida and that’s all the miles it has done. I guess I should worry about the rubber aging. In my defense, it’s been stored in a dark trailer and the Fingernail-Probe test reveals a fresh feel to the rubber. Anyway, the Dunlop is about 20 years newer than the tire that came on Zed so I call it a win. No one will believe this but I did install a new tube in the front and managed to get the tire onto the rim without pinching the tube.
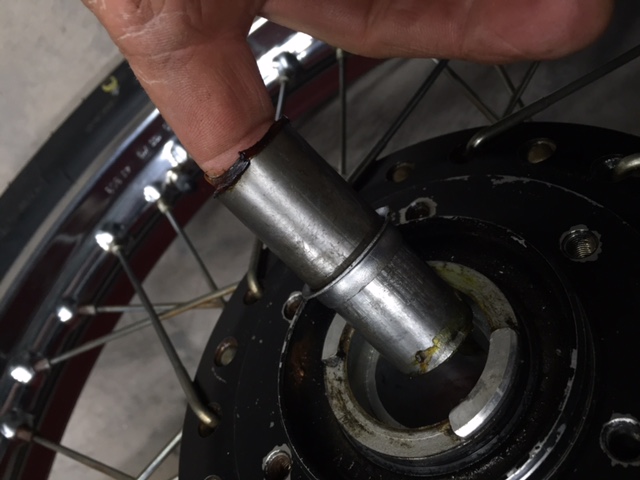
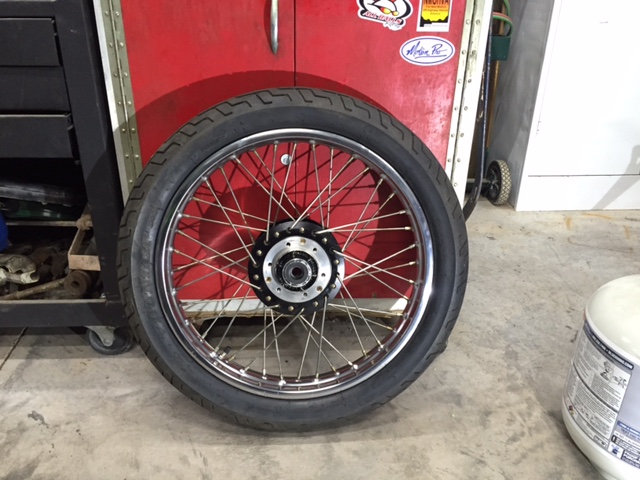 The grease inside the speedometer drive was hardened so I cleared out the muck and squished new grease into the worm drive parts. I also had to swap the disc to the opposite side of the wheel as Zed came with the caliper mounted backwards. They tell me this mod improved handling but I’ll not ride around listening to Z1 experts constantly telling me my brakes are backwards.
 My latest order from Z1 Enterprises showed up. It’s like Christmas in November around here. This pile may not look like $600 bucks worth of stuff but $600 doesn’t go as far as it used too. Hell, if you take your motorcycle to a dealer for an oil change and a tune up it’ll be $600 easy. The sprockets and chain are wear items so knock those off Zed’s repair bill. The brake pads and shoes also shouldn’t count against the bike’s total cost either as those would wear out if the bike were running. I’m changing them as a prophylactic measure. I don’t want old brake linings coming unglued at 130 mph.
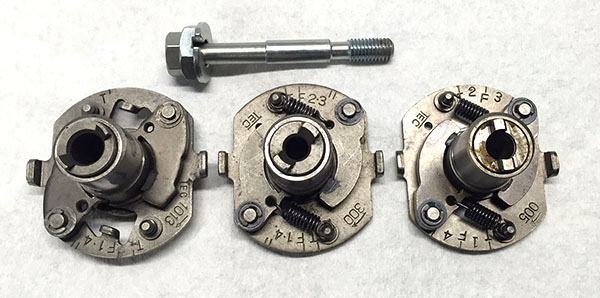
 The most expensive part of the order was the ignition advancer @ $159. My buddy Skip sent me a couple advancers in the hope one would fit but as luck would have it there must be 537 different advancers for the Z1. The left advancer fits the crankshaft bolt (loosely) and looks close from this side but the advancer has timing marks only for cylinders 1 and 4. Also note how close the “T” (top center) and the “F” (ignition fire) marks are. The center advancer unit has all the correct cylinder markings but the bolt hole is too small for the crank bolt. This unit also has “F” and “T” close together.
On the right is the new advancer from Z1E. This one fits the crank bolt snugly. Check out how much more ignition retard there is between “F” and “T”! The new unit also has all four cylinders stamped into the metal.
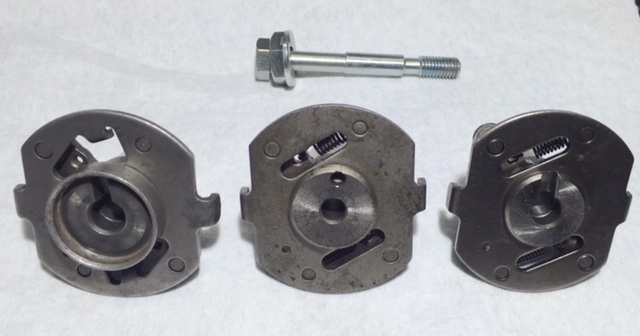
 Moving to the backside of the three advancers we see that the left unit has a cup that prevents the advancer from sitting flush onto Zed’s crankshaft end. The middle unit will marry to the crank ok but note the slight degree angle difference on the locator-pin hole. Finally the new unit, like the bear’s soup, is just right.
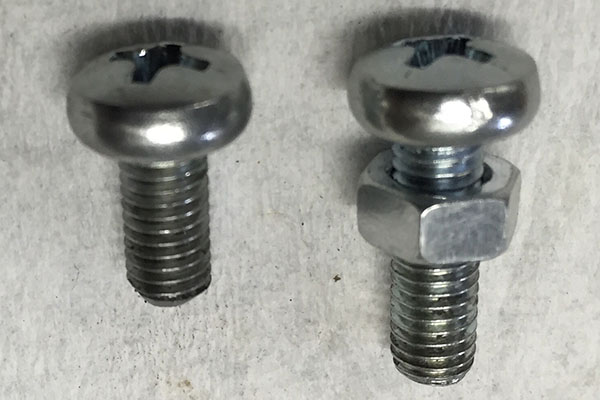
 To attach the points plate I had to shorten 3 screws. The best way I’ve found to do this is to run a nut onto the screw, cut the screw, grind the screw making the grinding wheel cut towards the center of the screw (or dragging the metal away from the threads). Removing the nut will clean any swarf left in the threads. The nut should start back on the screw without problems, if not, I’ll clean the screw up some more with the grinder.
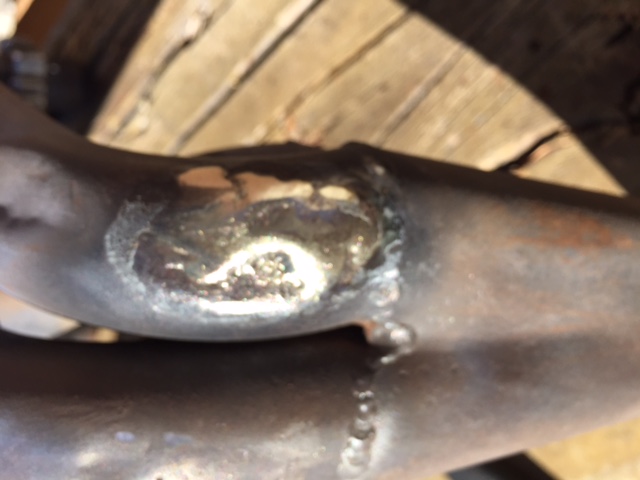
 Zed’s exhaust system hangs low and as such has hit the ground frequently enough to create pinholes. When pipe gets this thin I prefer to braze the holes closed. The brazing rod requires less heat and leaves a nice, thick pad to give a dirt rider something to beat on.

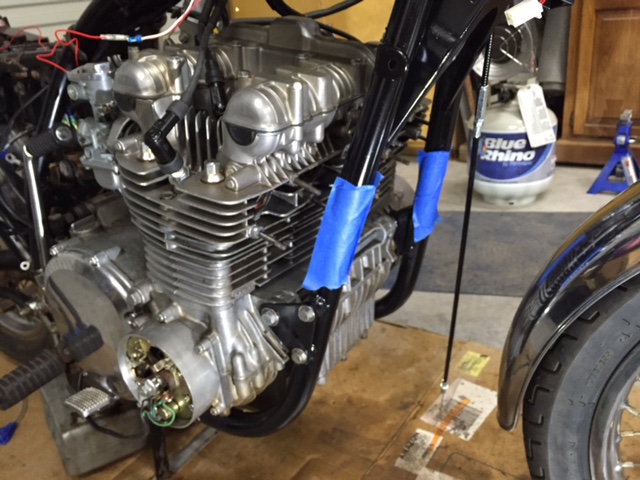
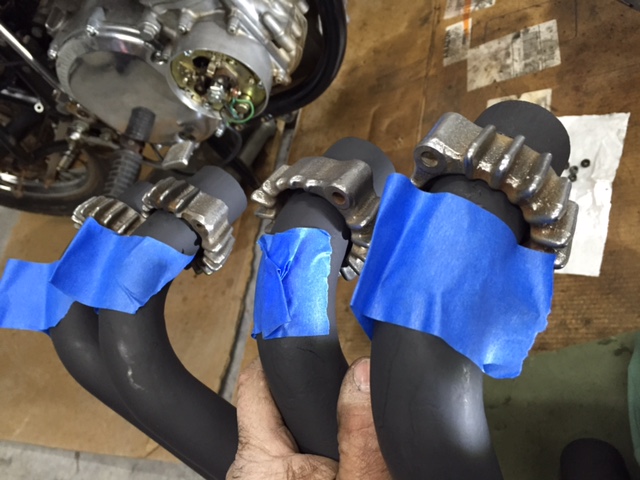
 Finally, when I fit the exhaust headers I tape around the frame tubes to help prevent scratches. I also tape the headers to keep the exhaust collars from falling down the pipe scarring up the new paintwork.
Click here to see earlier posts from the Zed resurrection!
And don’t forget to sign up for our auto-notifications each time we post a new blog!
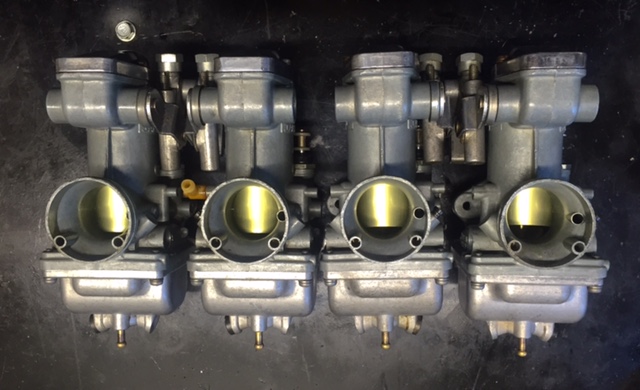 I’ve been spending some time with Zed’s carburetors, working on details that required home-brewed engineering. The Mikuni carbs on Zed don’t have a traditional choke (a flap that blocks air going into the carb causing a rich mixture) but we still call it a choke. Instead, Zed’s carbs employ an enrichener circuit, which is more like a tiny, completely separate carburetor grafted onto the main body of the carb. Sort of like the brain inside Krang’s stomach on the Teenage Mutant Ninja Turtles cartoon. The enrichener has its own air intake on the upwind side of the throttle slide. This fuel circuit is fixed; no adjustment needed and is controlled by a plunger on the downwind side of the throttle slide. Lifting the plunger allows air to flow through the tiny carburetor at a pre-set fuel/air mixture and if everything else is right, helps a cold Kawasaki engine start better.
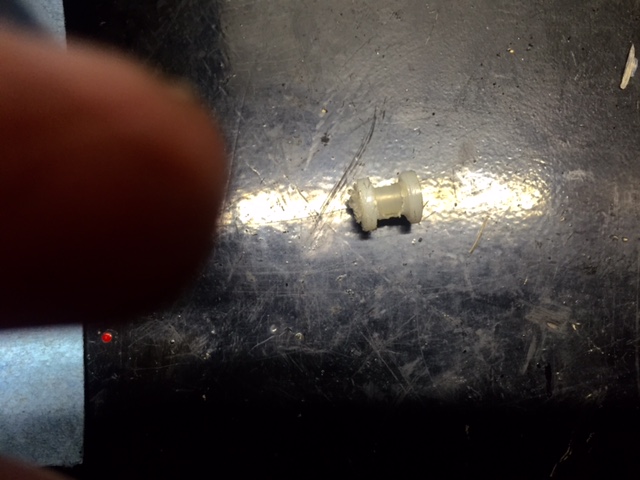 Back to square one. I noticed how the bobbin was nearly the same size as the pop rivets I’d been using to assemble parts of Tinfiny’s generator room. I have about 500 of these rivets in stock so I could afford to lose a few. Knocking the pin out of the pop rivet revealed a bore just a wee bit small for the plunger shaft but it was not a problem to run a drill bit through making the bore an exact fit for the plunger. A pop rivet only has one flanged side so I repeated the process on a second rivet, cut the two rivets to equal the length of a factory bobbin and assembled the mess. I cannot wait for a hard-core Z1 enthusiast to happen upon the aluminum bobbin. It’ll probably cause a heart attack as most Z1 fans are around 75 years old.
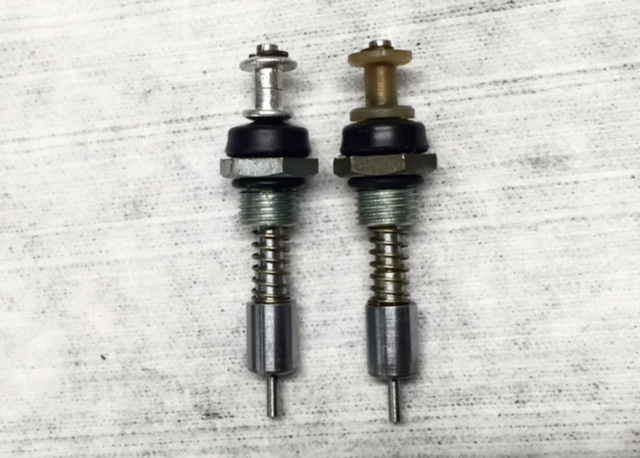 Between the throttle linkage pivots on each set of two carbs there are little dust covers made from a treated black paper. Or maybe the dust covers are rubber, I can’t tell. Three of the four covers were broken on Zed. The covers go over the springs and ball joints on the linkage. They don’t seal all that well but might keep a larger bug from crawling in there.
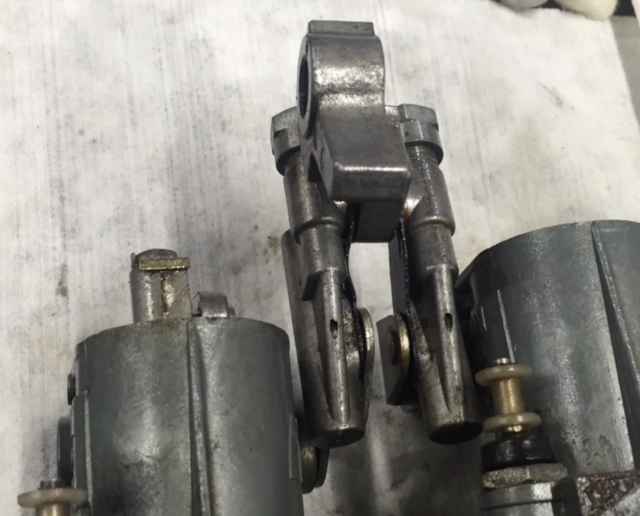 This is a part I didn’t bother looking for because I can make new ones in less time than it takes to look them up and order them. I used the thin plastic lid from a box of self-tapping sheet metal screws. Without a lid you know the screws are going to end up scattered across the shed floor. The dust covers didn’t come out as nice as I would have liked. Luckily, once installed you can’t see the things.
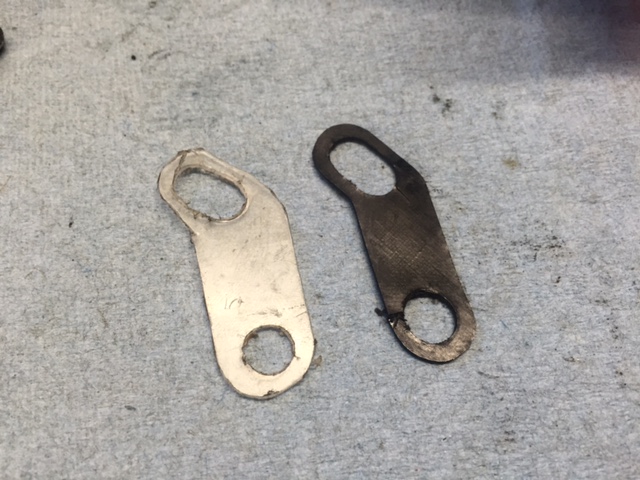 On the Z1 900cc, each set of two carbs share a fuel inlet pipe. The pipe goes between the carbs and is a metal Tee fitting with thick rubber o-rings cast onto the straight section of the Tee. This rubber hardens and shrinks resulting in a loose, leaky fit. You can buy new ones for 34 dollars but if you’ve read Zed’s Not Dead this far you know what is going to happen next.
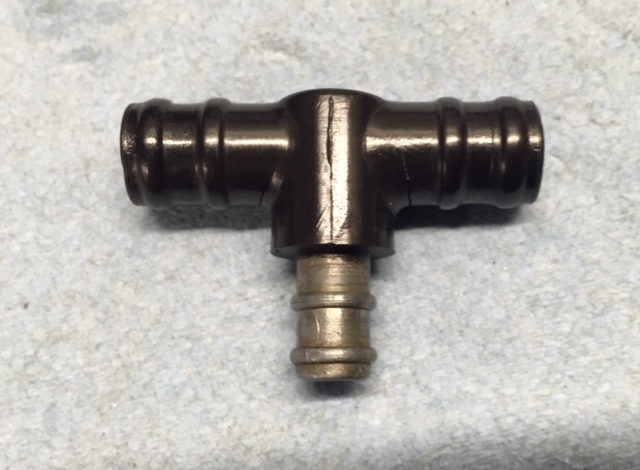 I cut the rubber away from the fuel pipe and polished the exposed metal to ensure a smooth sealing surface. Then I drilled a small hole near the end of the pipe in order to install a pin (made from the drill bit). The pin is the same length as the width of the fuel inlet bore so once it is installed in the carb body the pin can’t fall out.
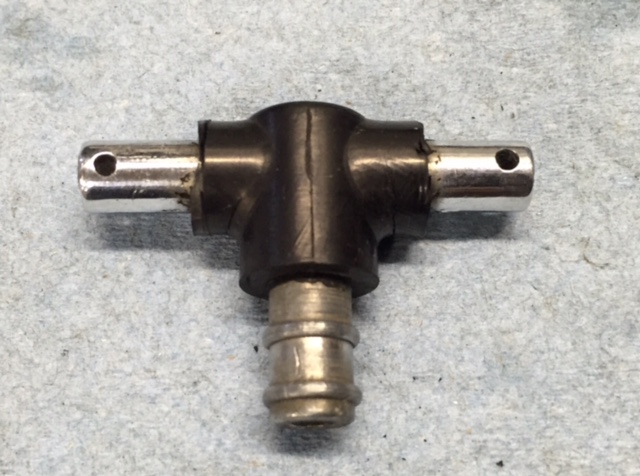 Now I used a ¼-inch length of rubber fuel hose (be sure to use the non-reinforced hose as cloth reinforcing strands will wick fuel, causing a leak) and slid this hose onto the fuel Tee. Next came washers and finally the pin. The assembly fits snugly into the carburetors. It helps to put the fuel feed hose on before you slide the carbs together. Hopefully it won’t leak.
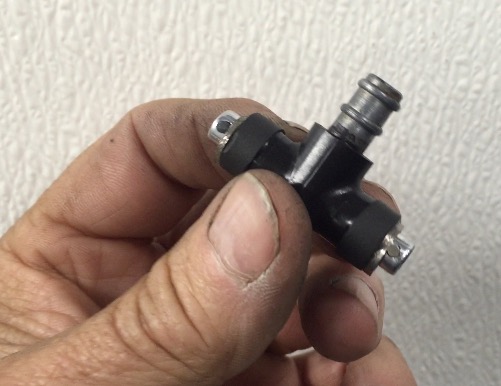 I’ve got the carbs assembled onto the rack and everything seems to work smoothly. I’ll be testing the float levels on the bench and will sync the throttle slides as close as I can get them. The idea being all four slides move the same distance in unison. Even if they’re not perfect the bike should run reasonably well. Later, manifold vacuum gauges can be used to adjust the carbs for any slight differences between cylinders.