Our latest Resurrection story about Joe Gresh’s ZRX is not our first big Kawi resurrection story. Going back a few years, we previously ran a 20-blog series on a Z1 Kawasaki. This Wayback Machine piece was the culmination of that story, with a link at the end that will take you to the entire series. Those big Kawis are cool, and the Z1 is unquestionably the coolest of them all.
By Joe Gresh
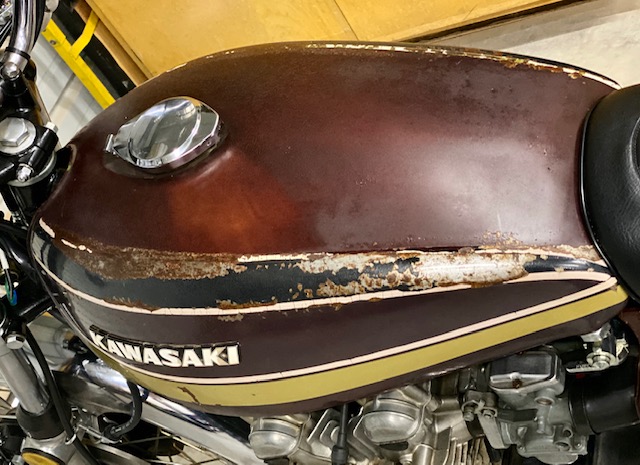
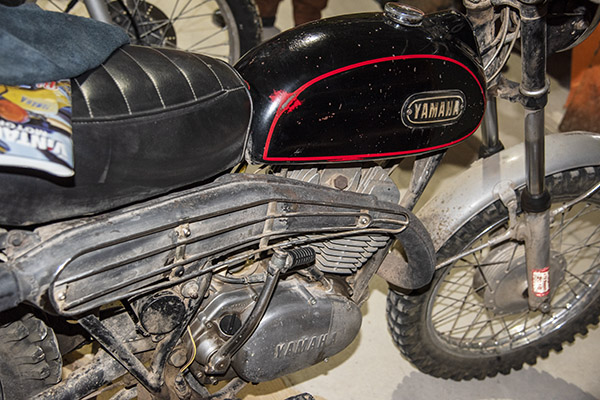
You may recall from Zed 19 I had to re-soak Zed’s gas tank as 10 days were not enough to dissolve the rust. I drained, dried and reloaded the tank with apple cider vinegar and let it sit for 4 more days. This is what it looked like originally:
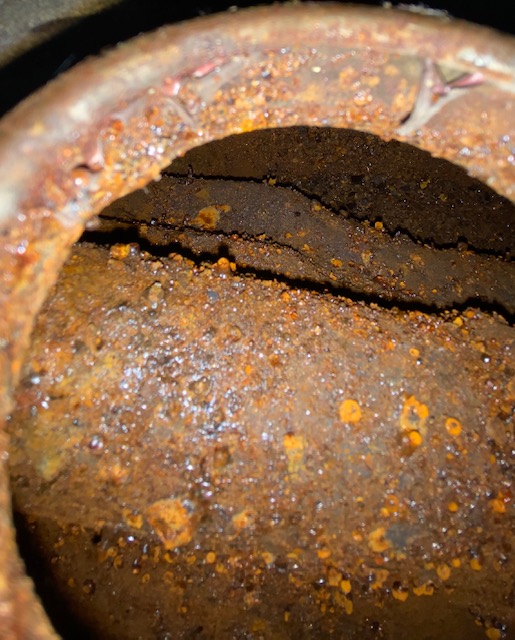
The second session really knocked most of the rust out. After rinsing I dumped a large box of baking soda into the tank and added clean rainwater sloshing it as I filled to mix thoroughly. I don’t know the chemical reaction that takes place but the baking soda neutralizes the acid, turning the metal a dull grey, almost white color. This treated metal does not flash rust and I’ve been going 3-4 years on another tank I cleaned like this without rust reappearing. It’s like the metal turns passive and stops reacting to oxygen.
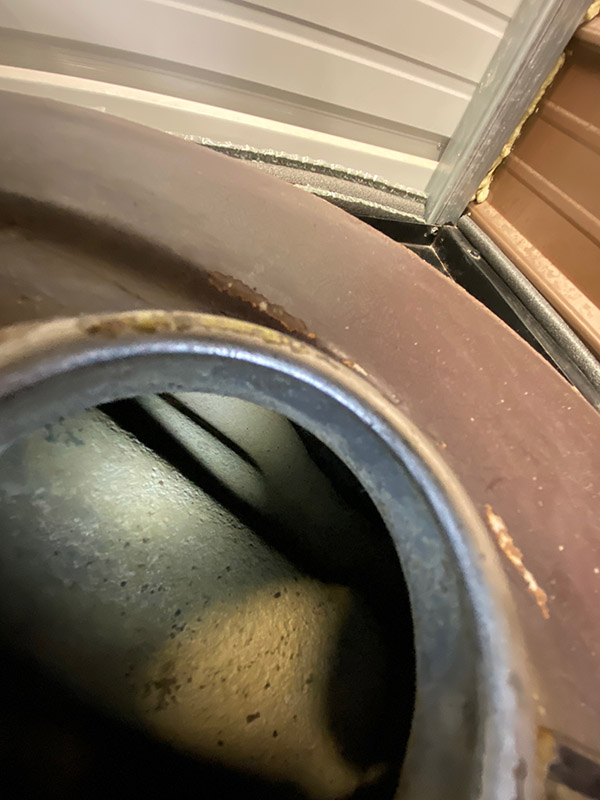
If I wasn’t so hell-bent on riding this bike I think I would flush and cider the tank one more time but it looks good enough and I’ve got to ride! I connected a small hose to my shop vac and played it all over inside the tank. I can hear nothing when I shake the tank so at least there are no big chunks loose inside.
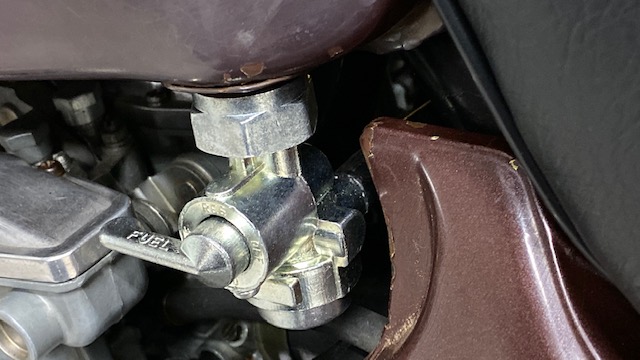
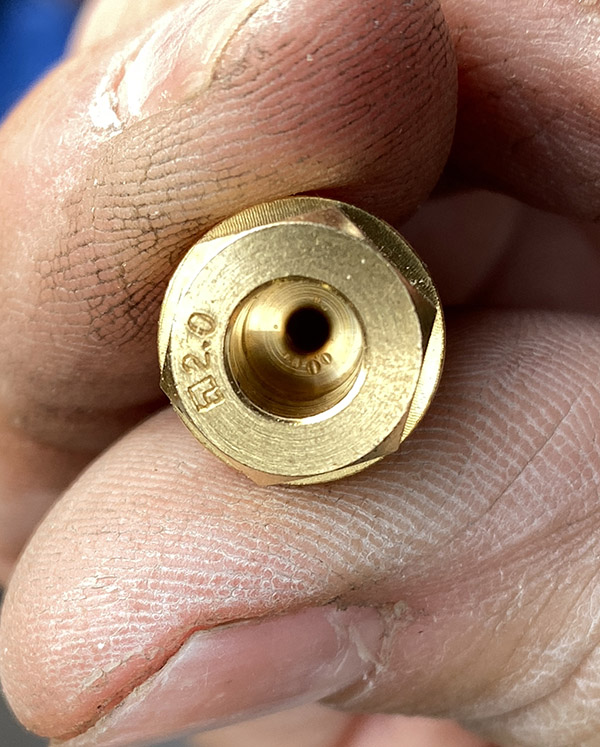
Proving that even the simplest life forms can learn I bought an entire new petcock for $23 rather than the rebuild kit for $8. This is real growth on my part. Usually I buy the kit, mess with it for hours then put it on only to have it leak. Only then will I buy the new one. Kawasaki uses a turnbuckle-type left-hand/right-hand thread on the Z1 petcock. It took about 145 tries to get it to tighten up facing the correct direction.
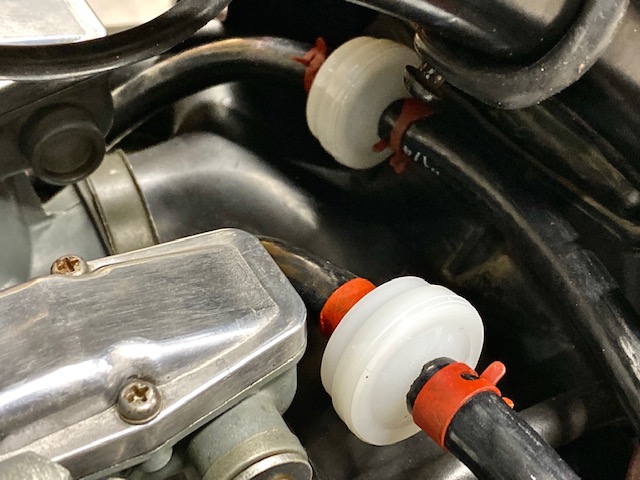
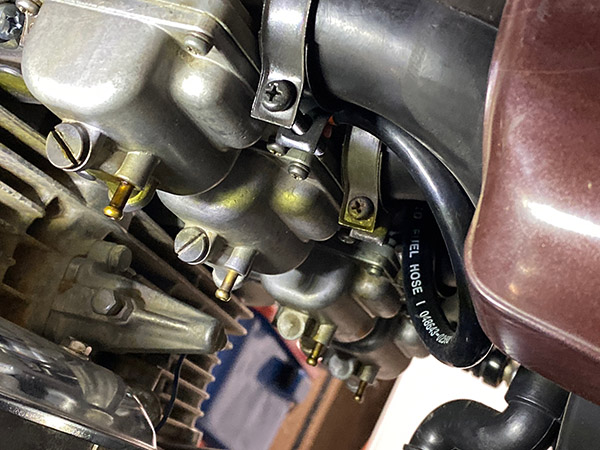
The new petcock has screens inside the tank and a bowl filter but with 40% of Zed’s tank out of my view-field I can only assume the entire tank is as clean as the places I can see. Inline fuel filters, one for each set of two carbs will hopefully catch any debris still in Zed’s tank.
An update on the Z1 Enterprises regulator/rectifier: It works. The battery charges @ 14.8 volts which is still a tad high but much better than the 17 volts Kawasaki’s setup was doing.

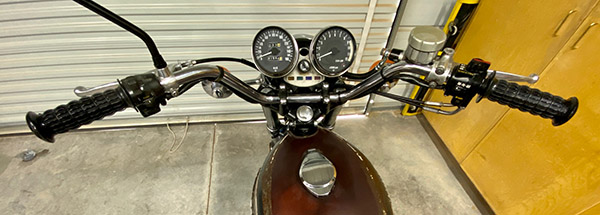
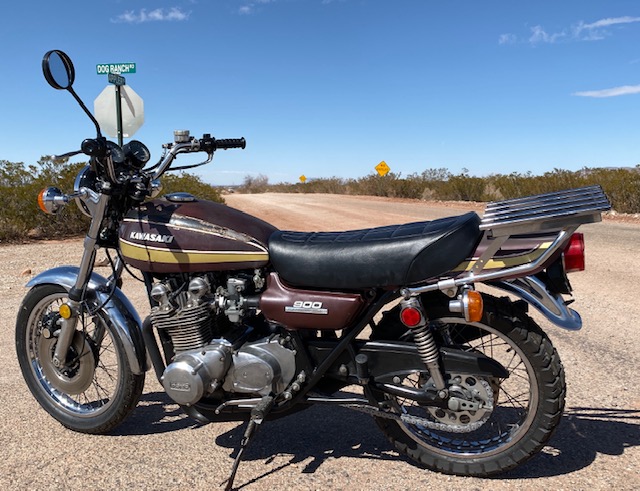
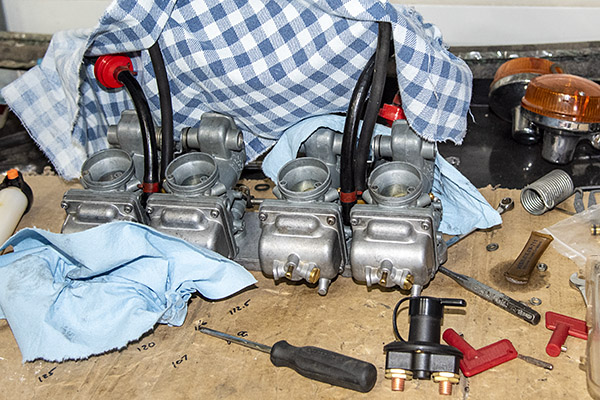
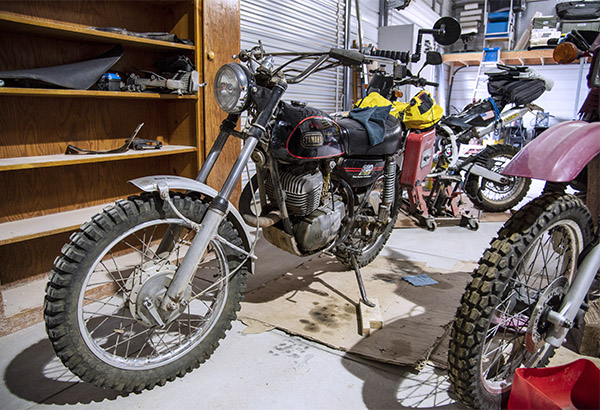
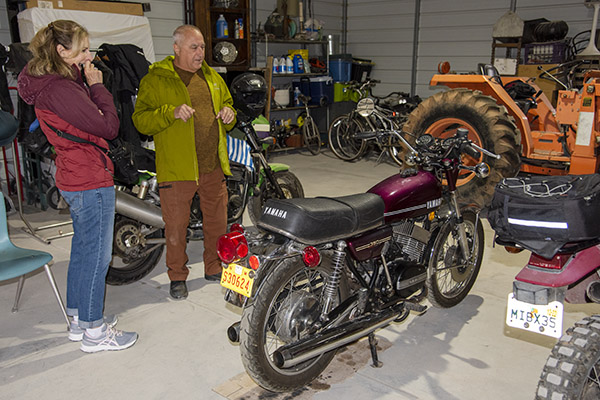
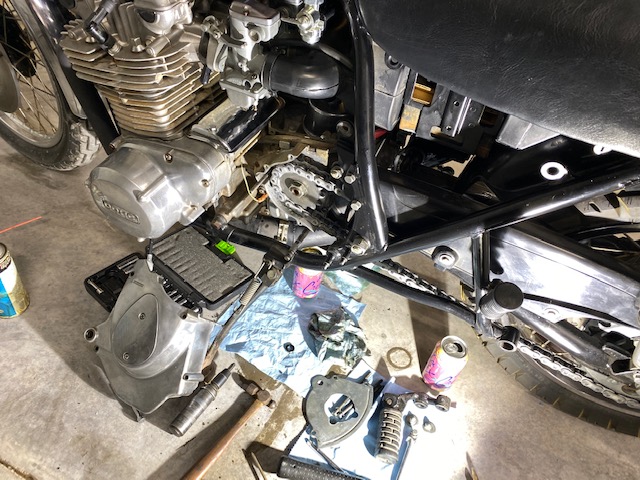
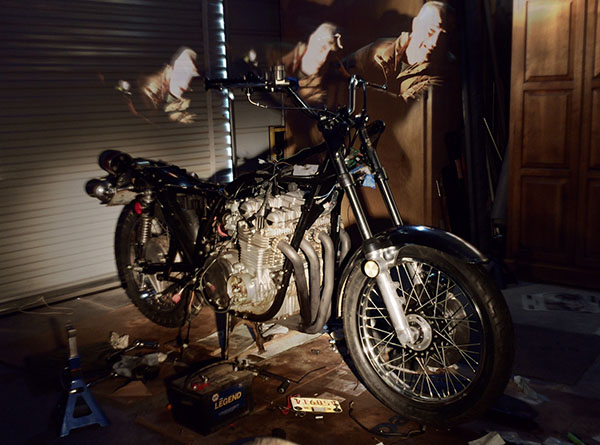
From the top Zed looks pretty well sorted. I took it for a ride and it ran really well for off the bench carb settings. It might be a little rich at idle or it might just be our 6000-foot elevation. I’m not going to tinker with it for now. I’d rather get some miles on the bike.
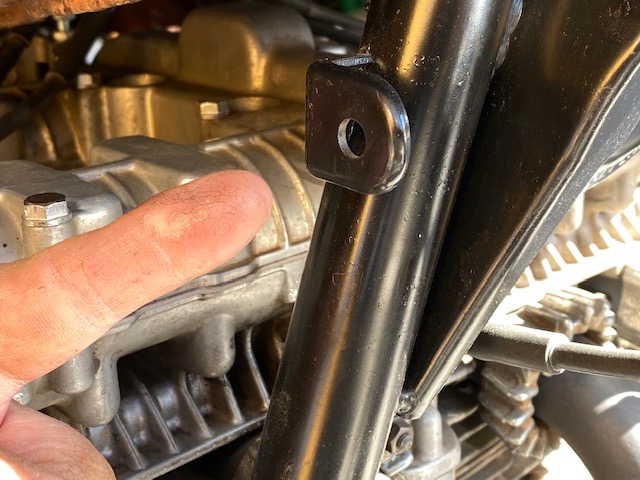
I don’t know what this bracket is for. Located on the right side down tube near the tach drive, it’d too light for a steering damper mount. Anyway, there’s enough stuff on the bike as is so I’m not going to worry about it.
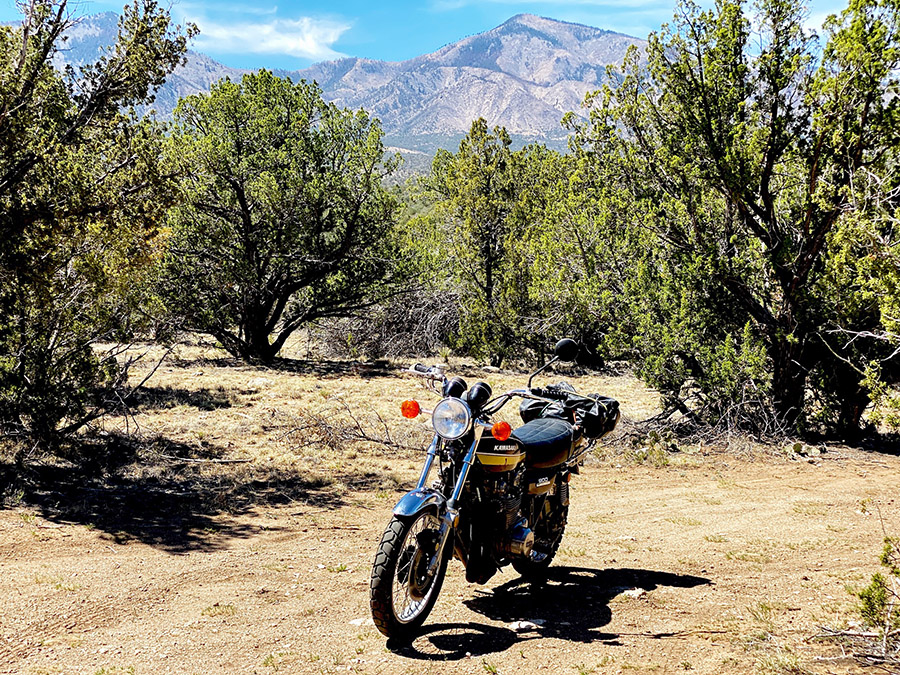
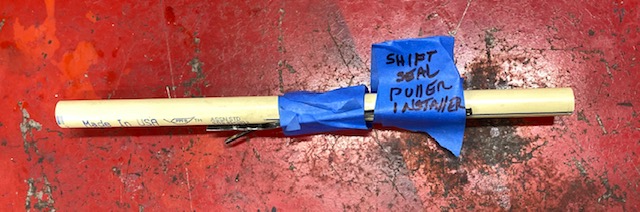
I took Zed to my secret proving grounds and she ran through all 5 gears smoothly. The bike hit 90 MPH without even trying. I’ll need a better front tire to do any high-speed work. The brakes work ok. When you ride a SMR 510 Husqvarna all other motorcycle brakes seem like crap. After 33 miles there are small oil leaks at the tach drive and countershaft area. Maybe the clutch pushrod seal or sprocket seal is the culprit. That stuff is easy to fix.
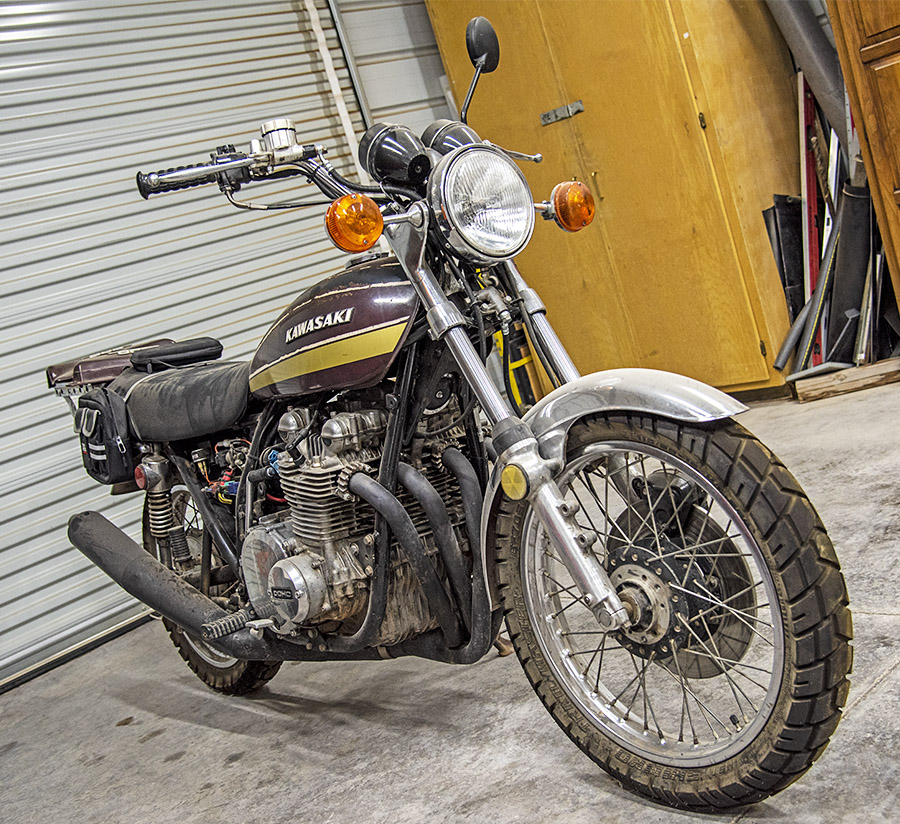
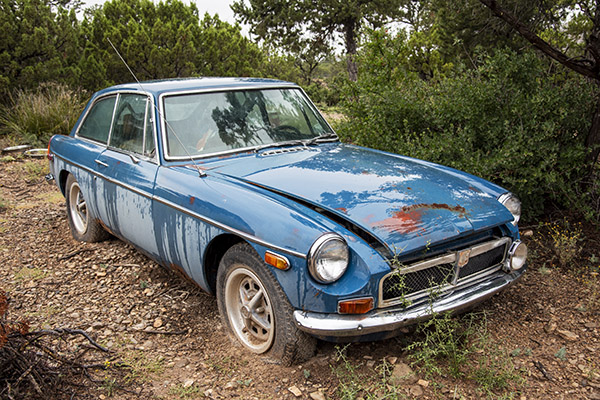
The patina on Zed is excessive, bordering on shabby. The bike sat outside for years and paint wise there’s nothing left to polish or wax. The finish is just not there. The pin striping is cracked and missing sections. I’m not sure what to do about that. On the one hand a ratty bike may be less attractive to thieves and old Z1’s are getting fairly expensive. On the other hand it does look pretty bad. I’ve seen my Enduro buddy Mr. French do some amazing work with rattle cans. Maybe I’ll give it a go. The paint can’t look any worse.
That’s it: from Dead to Zed in 20 easy sessions. Don’t worry, this won’t be the last you’ll hear of Zed. I’ll be doing some long trips on this bike, maybe Mexico, maybe ride to a few flat track races. I’ll update the blog if I do any more major work on the bike. The story of Zed’s resurrection may be ending but the story of Zed is just beginning.
And there you have it. If you’d like to run through the gears (i.e., the previous 19 installments of Zed’s Not Dead), you can do so here!


 The positive battery cable was swollen like a snake swallowing a pack rat. I cut the jacket away to reveal a green, copper powder. This is never a good sign and even though the cable will still read ok on an ohmmeter, under high current the flow of electricity will be restricted.
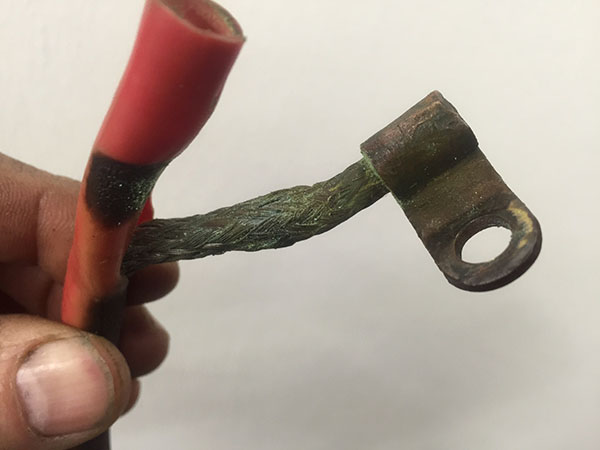 I de-soldered the original battery lugs and re-crimped and soldered a new 6-gauge positive lead. The original battery terminals are shaped to lay flat alongside the battery and you won’t find anything to match them at your local Home Depot. The terminals are solid copper so they clean up and take solder nicely. I also added a new 30-amp, inline fuse holder to replace the melted original.
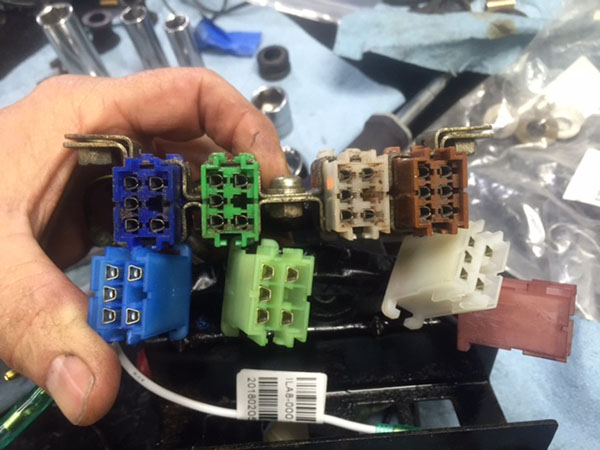
 This 3-way connection is the heart of Zed’s power supply. One lead is to the 20-amp fuse from the battery positive. One lead is charging current from the rectifier and the last lead supplies power to everything on the motorcycle (except the starter). This connection takes a beating and Zed’s was discolored, and overheating had taken the spring out of the female bullet connectors.
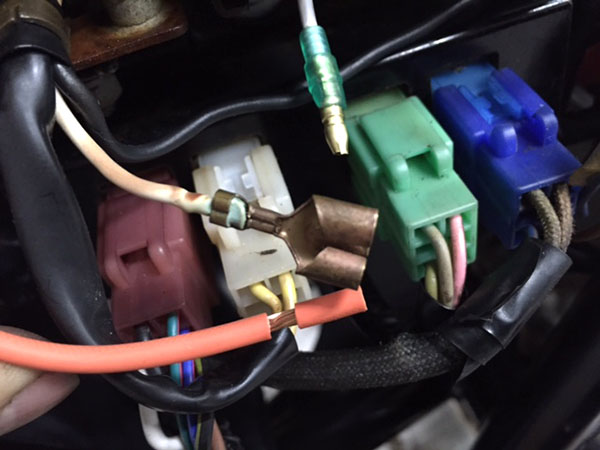 I decided to go off-script here because the three-way connection is one of the few bad design choices Kawasaki made on the Z1. Instead I used 3 soldered ring terminals and bolted the connection together. Then I insulated the connection with electrical tape and thick red heat shrink tubing (not shrunk).
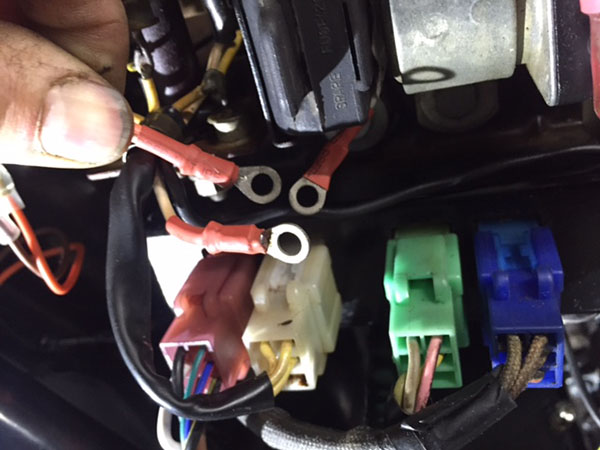 With the new fuse holder, jumper harness, battery cable, grounds to the block, blinker relay, brake light switch and tail harness everything under the right-side cover is complete. It’s not the prettiest wiring and may not faithfully follow original Kawasaki wiring practices but it should work and hopefully not melt down.
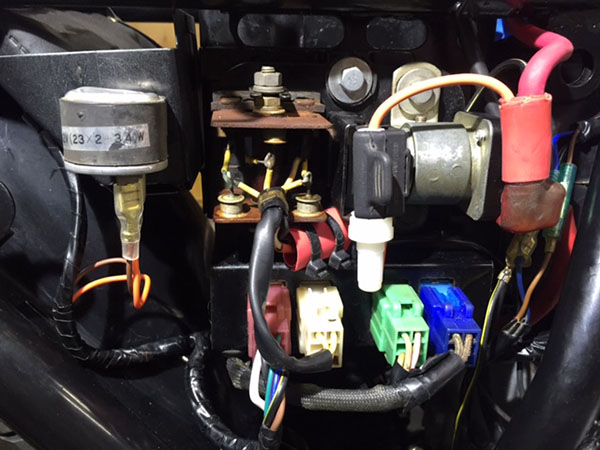 Hardcore Zed’s Not Dead fans will recall the hokey swing arm zerk fitting that was gnawing into my Zen. The main issue is the swing arm is metric thread and I’m too lazy to find a stock metric grease fitting. I pulled the offending fitting and cut the entire top off of the thing then drilled and tapped the part that fits into the swing arm for a ¼-28 zerk fitting.
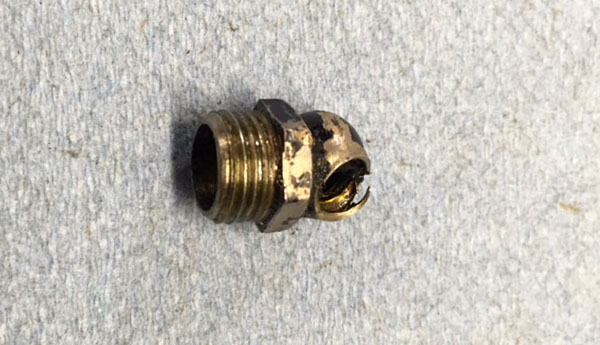 The new set up is much cleaner looking and even though no one will ever see it I’ll sleep better at night knowing it’s there. Oooooommmmmm…
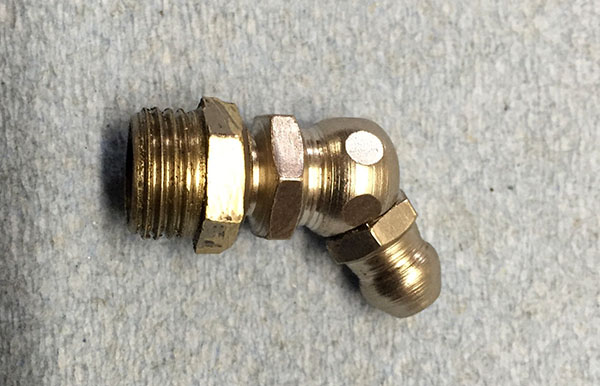 The left handlebar switch cluster was a cluster. The blinker switch was stuck and no amount of WD40 would free the lever so I dismantled the switch and cleaned all the tiny, rusted parts.
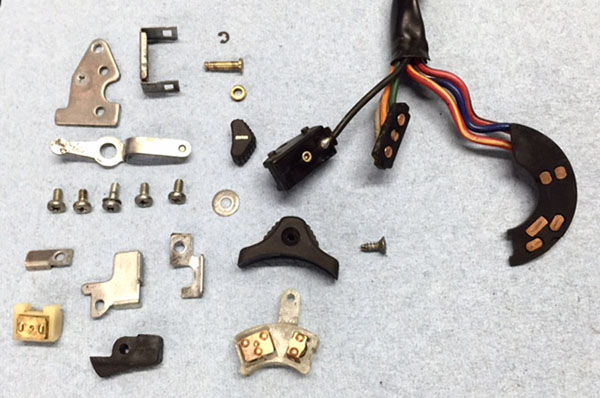 The switch now moves in all the right places. It remains to be seen if it actually directs the electrons where they are supposed to go. The last major electrical challenge on Zed is the instruments and the connections inside the headlight shell. I’ll tackle those in Zed 15.
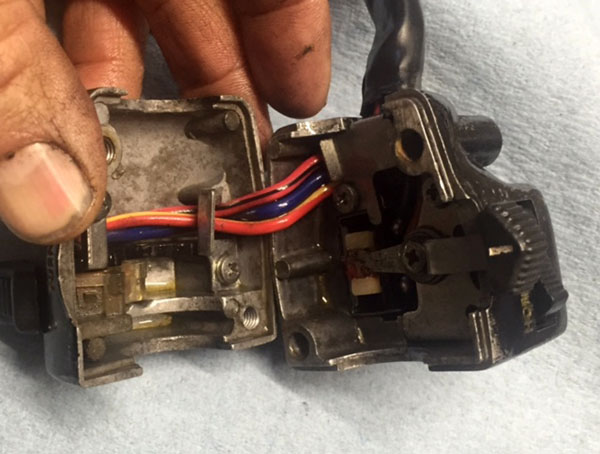
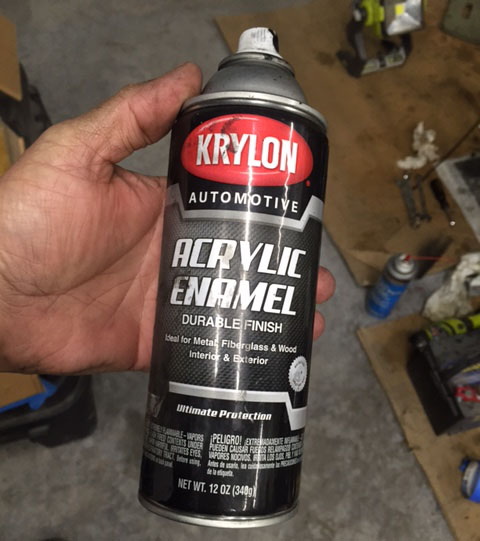 Until I misted the swing arm, for some reason the transition zone between bare metal and original paint bubbled up making a mess out of the thing. I don’t know what the difference was but after trying to remedy the situation four times I gave up, sanded the swing arm and shot it with primer. The black paint laid down nicely after that but so much for keeping it original-ish.
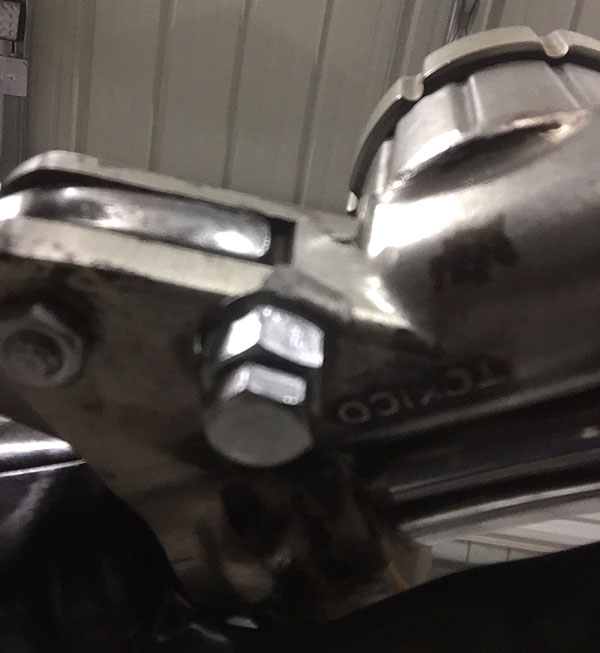 I started on the front brake system and noticed this cool little eccentric bolt that adjusts the free play on the master cylinder. There are so many nice touches like this on the Z1. Kawasaki tried to build the best motorcycle they could. The master cylinder was in good shape. These things are a bear to reassemble but after five tries I managed to get the plunger in the bore along with the c-shaped travel stopper and the snap ring. The only complaint I have against the Z1 Enterprises master cylinder kit is that it didn’t come with the rubber bellows (the part that keeps brake fluid from sloshing in the reservoir) so I’ll have to order that bit.
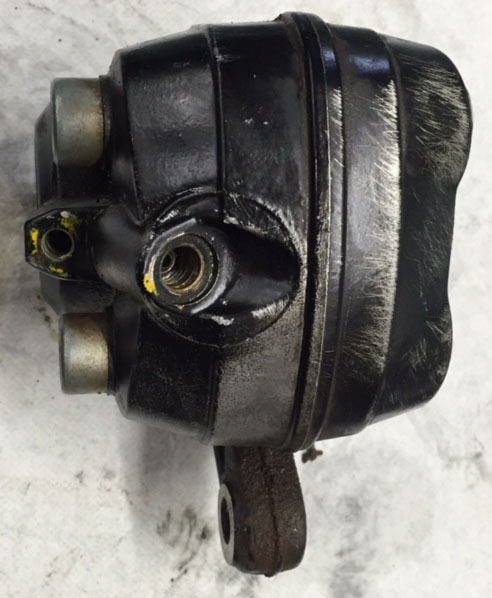 The metal brake line to the caliper was stuck mightily. I tried heat and penetrating oil and even bought a set of metric line wrenches but in the end it took a vise and brute force to remove the line. It’s not destroyed but I’ll be buying a new metal line along with both flexible hoses and the little bracket that holds the line away from the front fender.
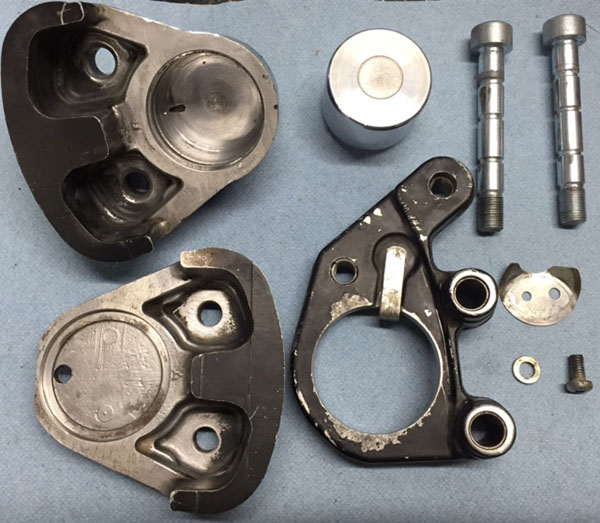 Once apart, the caliper was in excellent condition. I sanded the bore to remove corrosion and the
 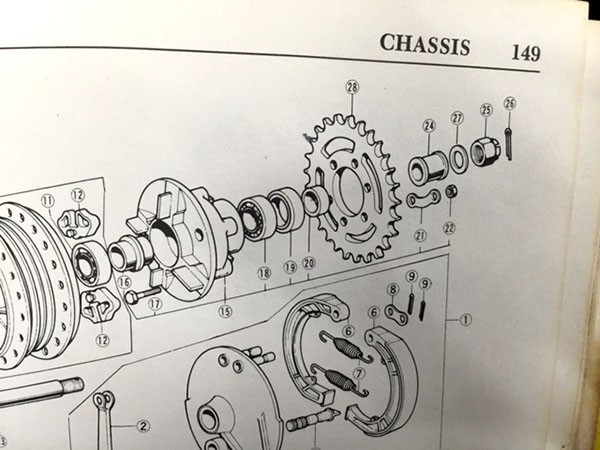 The previous owner had the rear axle assembled wrong and my book was illustrated with the spacers reversed so a quick message to Skip Duke and I had the spacer order correct.
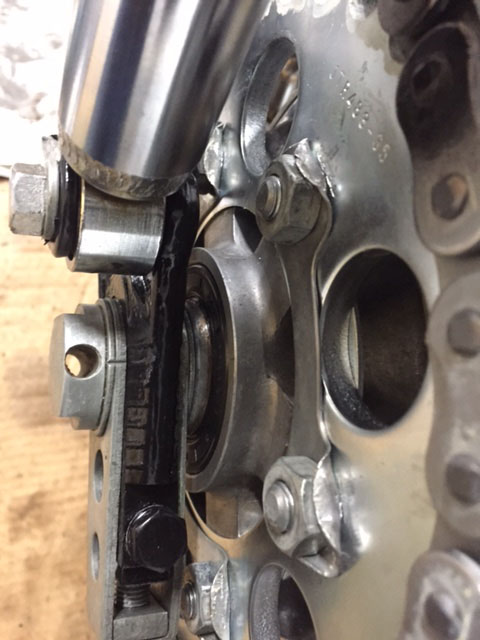
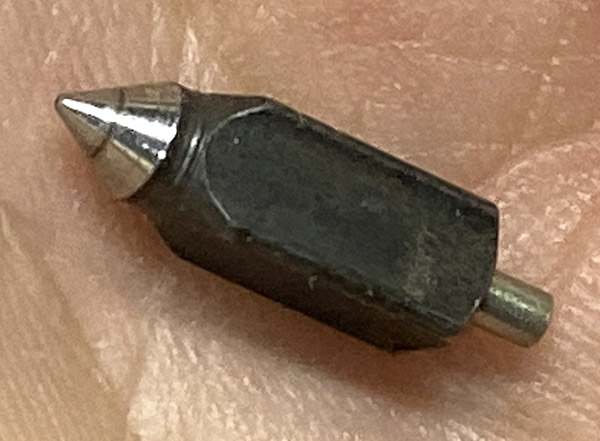
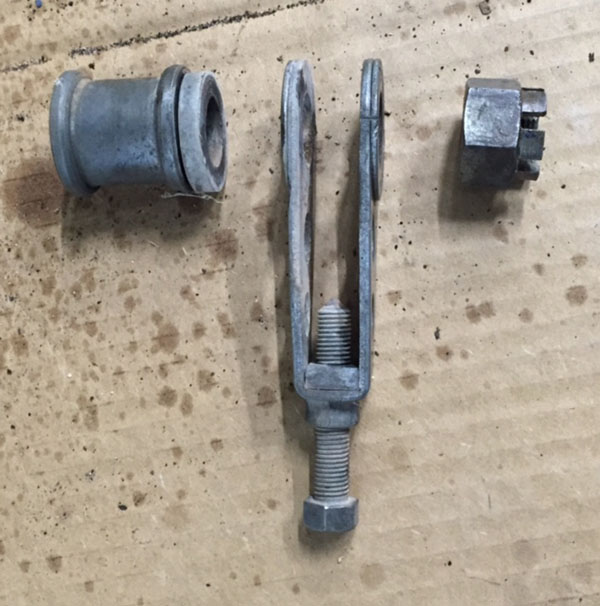
 The sprocket side gets only the seal spacer while the drum brake side gets the long, necked-down spacer. The thick washer-spacer (that was jammed into the drum brake side) is actually a washer. It spaces the castle nut the correct distance for the cotter pin or hitch pin hole.
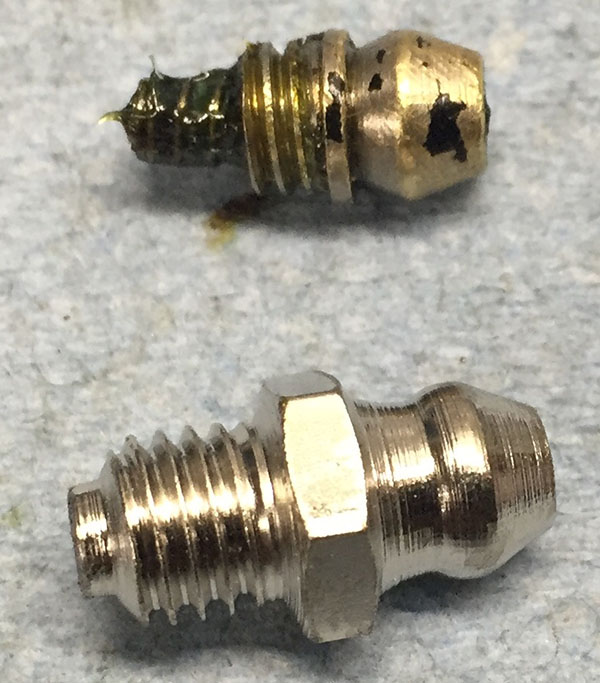 The stock swing arm grease nipple would not accept my grease gun fitting resulting in grease all over the place. In this photo you can see the differences. Rather than get the correct tool I tapped the fitting for a standard nipple and screwed the mess together.
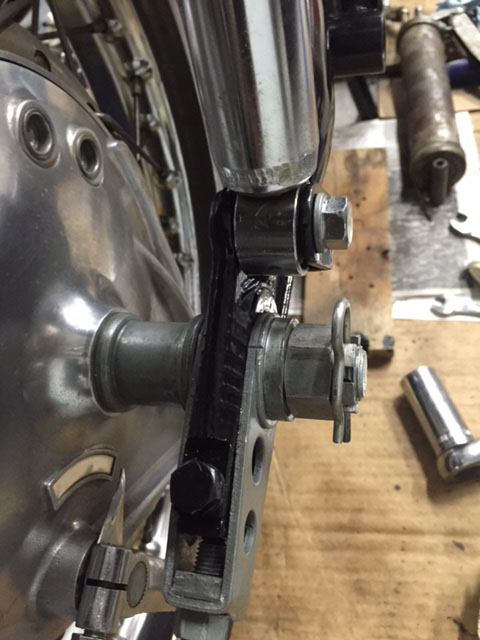
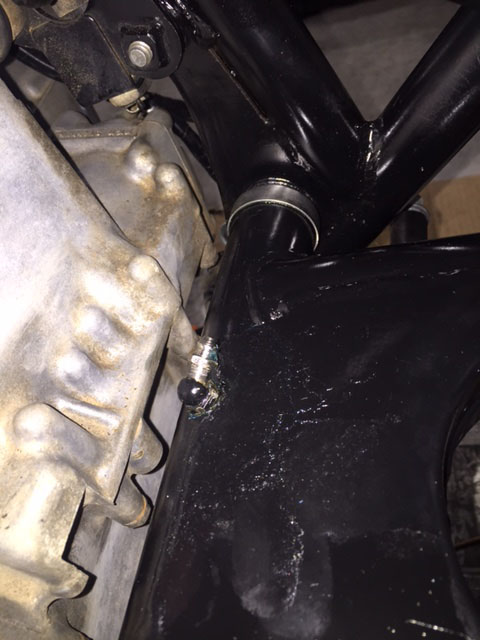 I’m not happy with the grease nipple set up although it did allow me to grease the swing arm. I’m going to remove the fitting and have another go at making it look better.
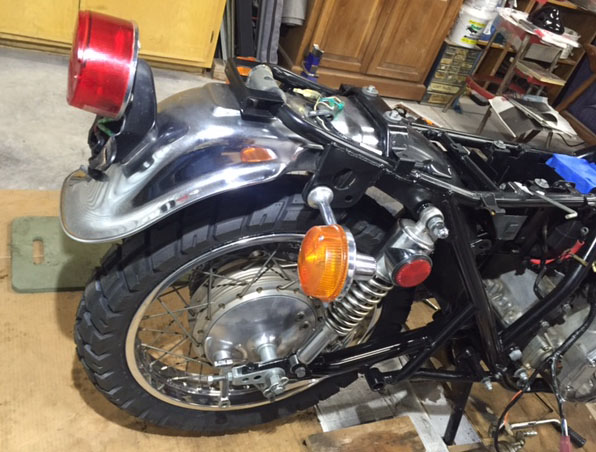 Zed’s rear end is coming along nicely. I think the 4.10X18 tire looks a little puny on the bike so you may get a Smokey burn out video after all. Next tire I get will be a 4.50X18.
 While I’m busting a new tire onto Zed I figured I might as well replace the rear wheel bearings. I could have cleaned them and re-greased them and if I was broke I would have.
 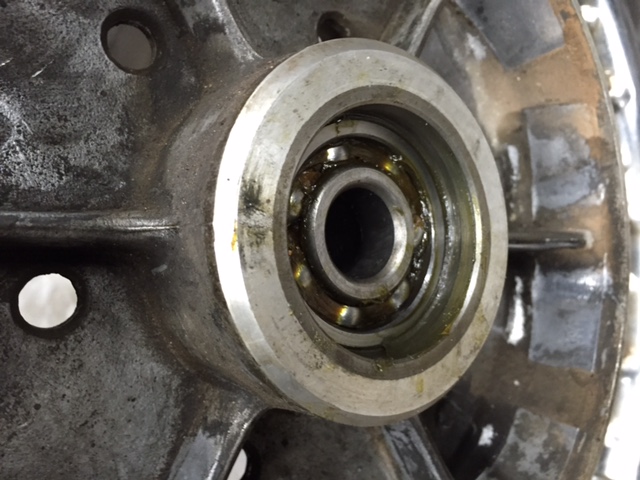 Kawasaki made a nice motorcycle when they built the Z1. Stuff like a brake shoe wear indicator was rare back in the 1970’s. Mama K even went to the trouble of recessing the brake shaft opening to fit a felt dust seal. That’s class, man. I’m not sure it does any good because the brake shoes generate more dust than you’d get kicked up from the street. Maybe it helps the shaft grease stay clean.
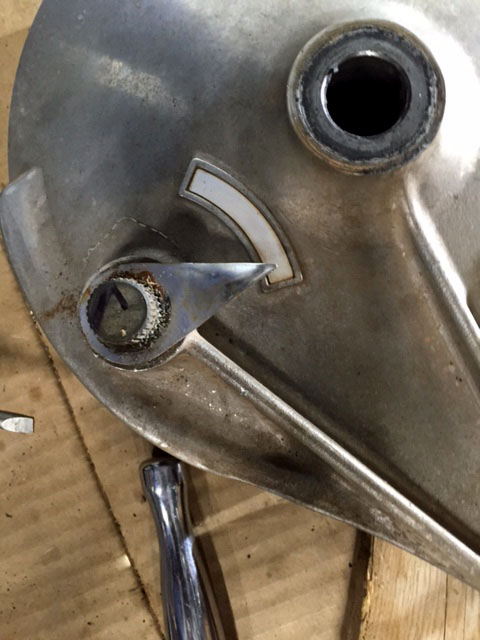 Kawasaki threw everything at the Z1. The sprocket carrier has its own bearing so that gives a total of three rear wheel bearings. Pretty sweet; I wish my Yamaha 360 had a better sprocket carrier design. The hub wears out and I have to feed spring-steel from a ¾-inch tape measure to take up the slack.
 Part of the fun of working on motorcycles is setting up the exploded parts shot. I like to get all the parts clean before reassembly because they will never be cleaned again. Rear discs are mostly standard now but a husky rear drum like this will stop a bike just fine.
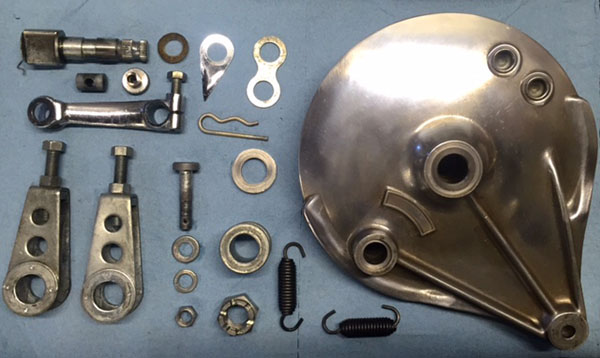 Changing tires is a lot of stress for me. If you don’t plan to use the tube or tire you can cut the work involved in half by cutting the old tire off. Use a razor, utility knife and lube the blade with a little oil. Then plunge in and pull the knife. Don’t saw at it. As you cut move around a little and you will find the thinnest part of the tire. Once you’re there, ride that sucker all the way around. After you do both sides the tread falls away leaving two beads. They pop off easy with no tire to create resistance and you can peel the remains off the rims without a tire iron.
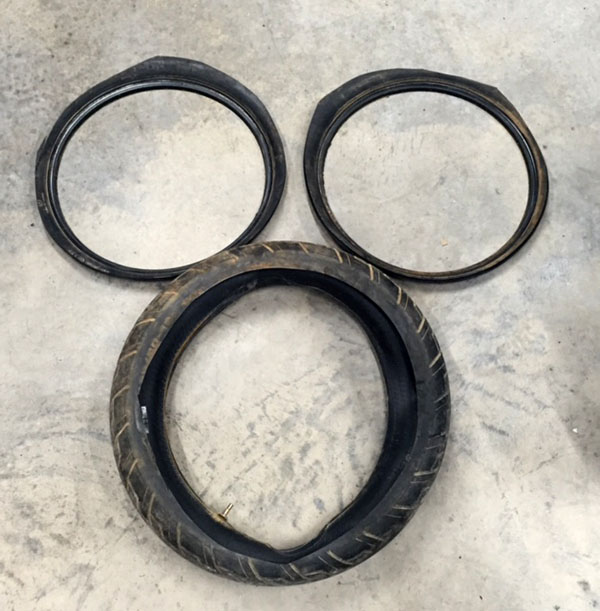 I removed the swingarm to check the bushings and lube the mess. Zed’s battery box is pretty rusty so I removed it to clean and paint the thing. I looked at the rear of the bike and decided there wasn’t much more to take everything off and give the rusty frame tubes a lick of paint. So I did.
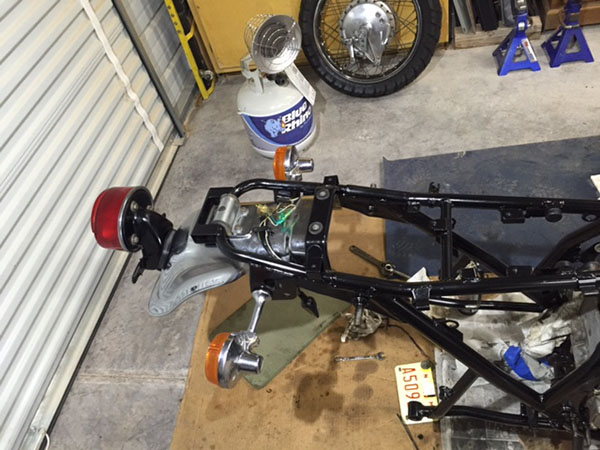 Reassembling the rear of the bike is going well and the
 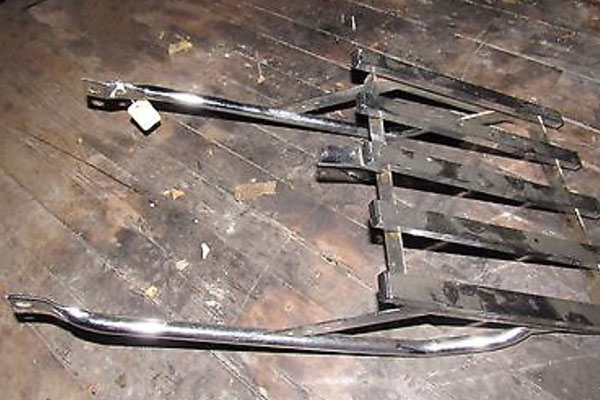 Zed is missing its chrome seat bar and rather than finding a stock replacement I grabbed this $50, period-correct luggage rack from eBay. All my motorcycles have rear racks. I need a place to strap stuff because I get around, you know? I dig the square tubing and the big-hair, 1980’s plastic plugs filling the open ends.
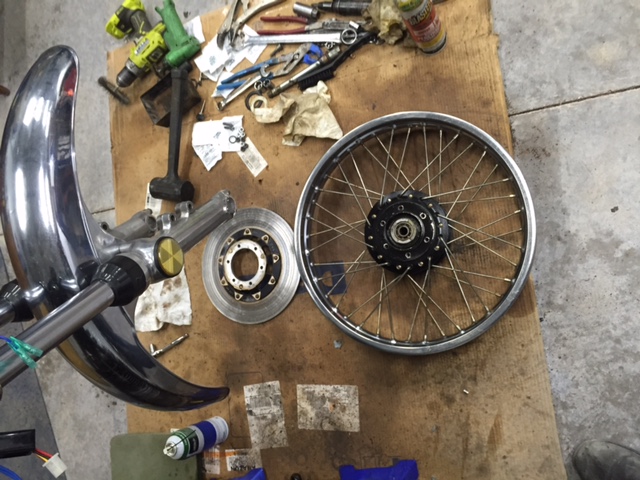 Zed’s 41,000 mile, front wheel bearings are probably stock and I could’ve cleaned them up and re-greased them but a new set is not that expensive so I popped the old ones out and fitted new bearings.
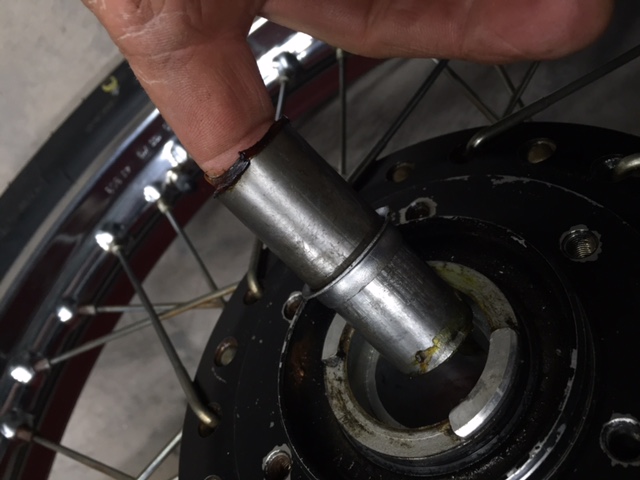 I had an old-ish Dunlop tire in stock. I bought it new to put on Godzilla for a run from Hunter’s place in Oklahoma to Florida and that’s all the miles it has done. I guess I should worry about the rubber aging. In my defense, it’s been stored in a dark trailer and the Fingernail-Probe test reveals a fresh feel to the rubber. Anyway, the Dunlop is about 20 years newer than the tire that came on Zed so I call it a win. No one will believe this but I did install a new tube in the front and managed to get the tire onto the rim without pinching the tube.
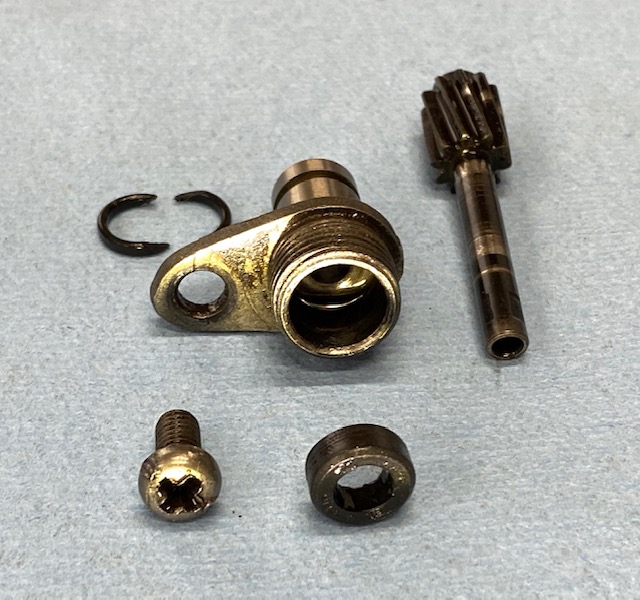
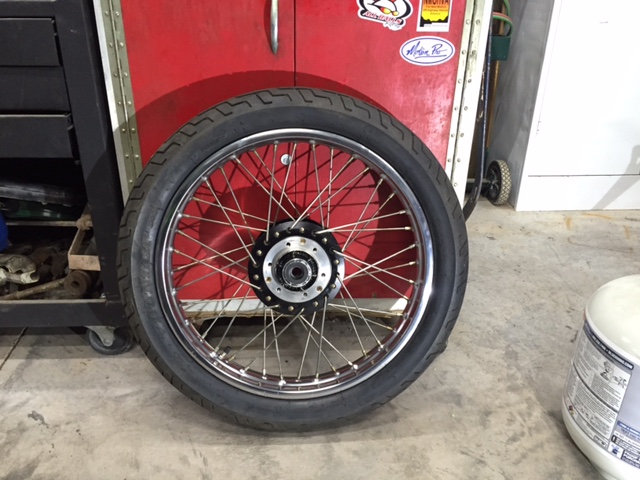 The grease inside the speedometer drive was hardened so I cleared out the muck and squished new grease into the worm drive parts. I also had to swap the disc to the opposite side of the wheel as Zed came with the caliper mounted backwards. They tell me this mod improved handling but I’ll not ride around listening to Z1 experts constantly telling me my brakes are backwards.
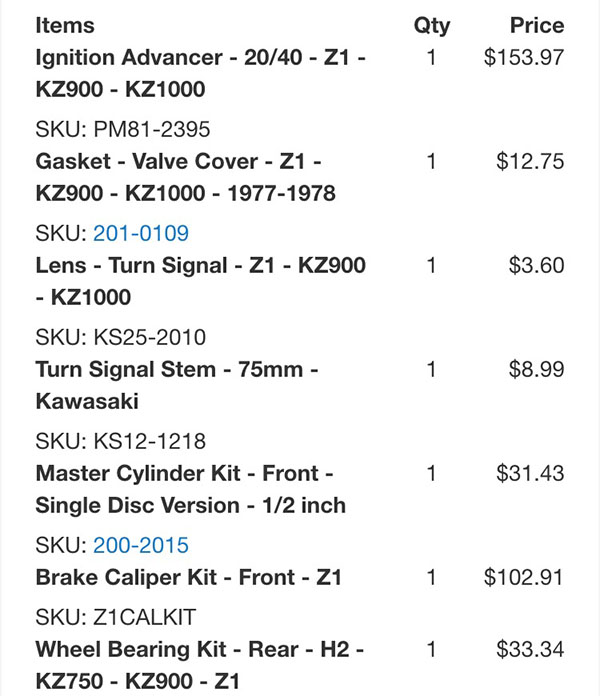
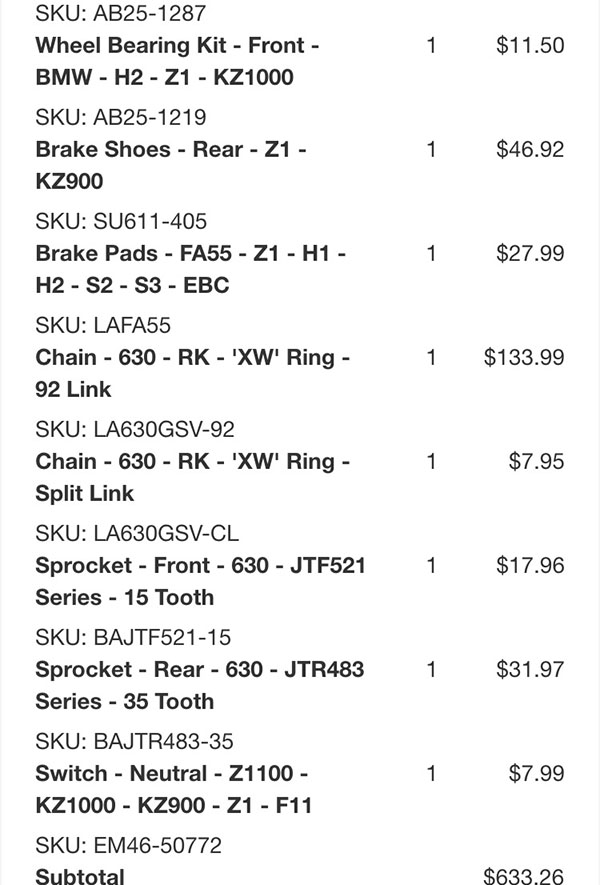
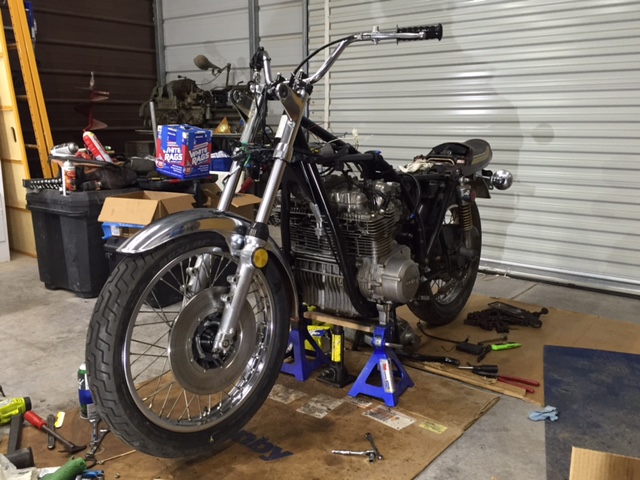 My latest order from
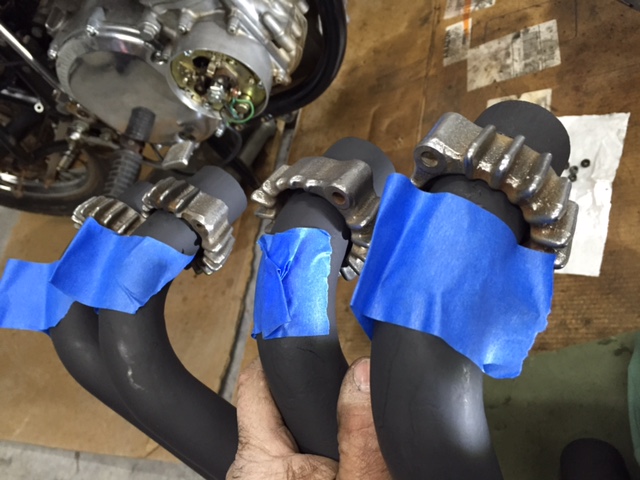
  The most expensive part of the order was the ignition advancer @ $159. My buddy Skip sent me a couple advancers in the hope one would fit but as luck would have it there must be 537 different advancers for the Z1. The left advancer fits the crankshaft bolt (loosely) and looks close from this side but the advancer has timing marks only for cylinders 1 and 4. Also note how close the “T” (top center) and the “F” (ignition fire) marks are. The center advancer unit has all the correct cylinder markings but the bolt hole is too small for the crank bolt. This unit also has “F” and “T” close together.
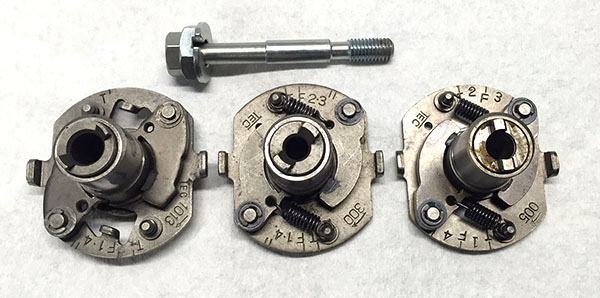 Moving to the backside of the three advancers we see that the left unit has a cup that prevents the advancer from sitting flush onto Zed’s crankshaft end. The middle unit will marry to the crank ok but note the slight degree angle difference on the locator-pin hole. Finally the new unit, like the bear’s soup, is just right.
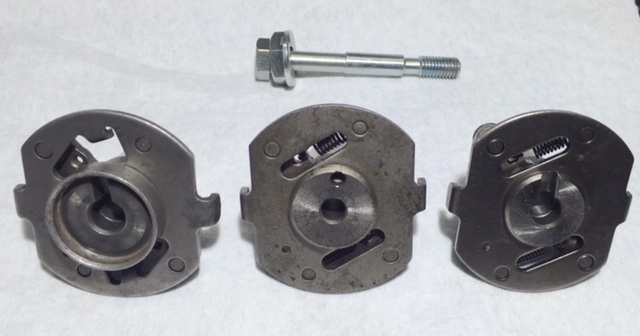 To attach the points plate I had to shorten 3 screws. The best way I’ve found to do this is to run a nut onto the screw, cut the screw, grind the screw making the grinding wheel cut towards the center of the screw (or dragging the metal away from the threads). Removing the nut will clean any swarf left in the threads. The nut should start back on the screw without problems, if not, I’ll clean the screw up some more with the grinder.
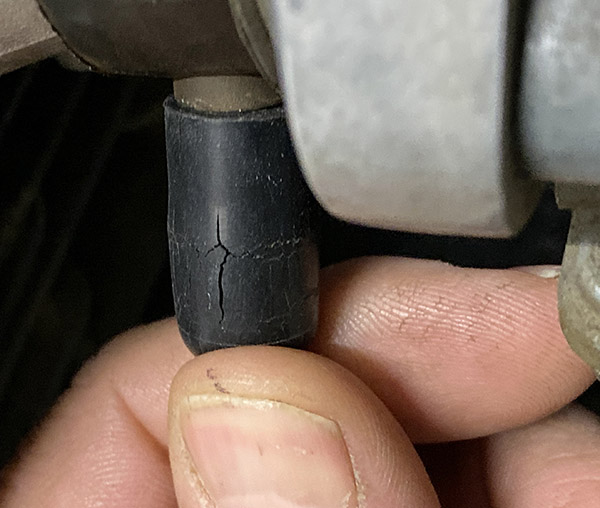
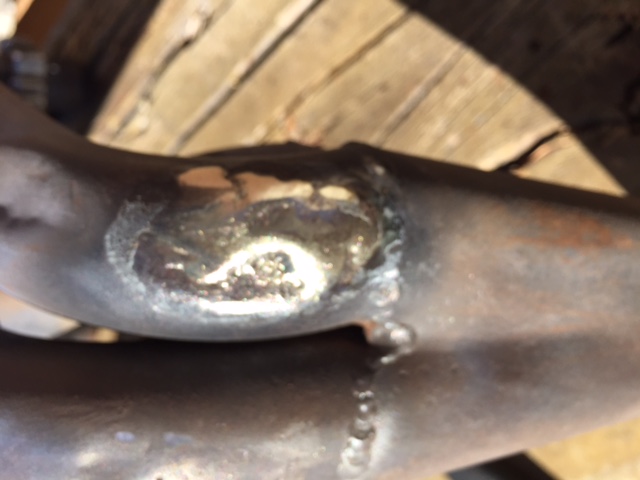
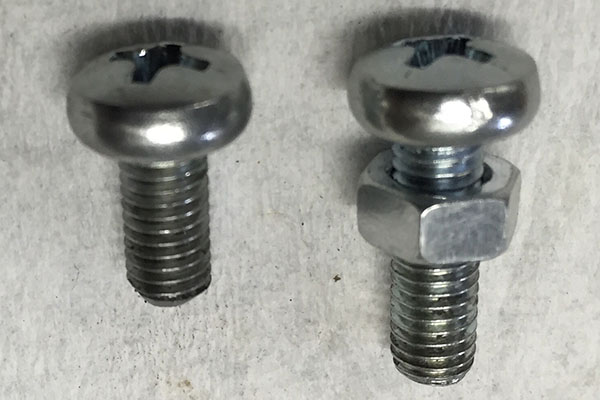 Zed’s exhaust system hangs low and as such has hit the ground frequently enough to create pinholes. When pipe gets this thin I prefer to braze the holes closed. The brazing rod requires less heat and leaves a nice, thick pad to give a dirt rider something to beat on.
 Finally, when I fit the exhaust headers I tape around the frame tubes to help prevent scratches. I also tape the headers to keep the exhaust collars from falling down the pipe scarring up the new paintwork.
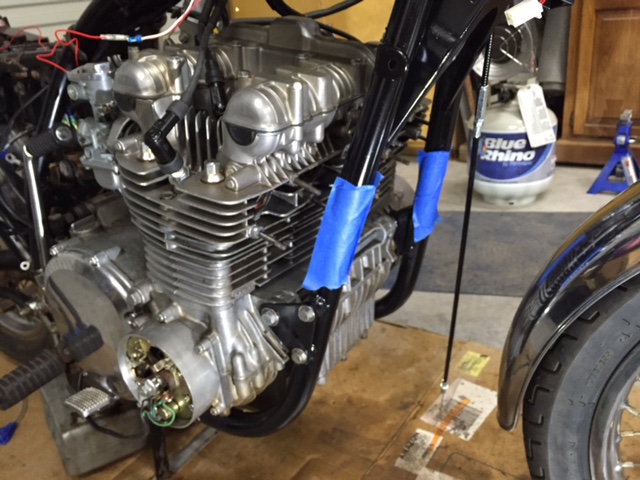
 This is not a restoration. This is a resurrection. I plan to ride Zed, not store it away like a stolen Rembrandt. The front down tubes were pretty chipped and scratched with lots of bare metal so I had to fog a little black paint onto them to slow down the rust. I know all things rust. As soon as ore is melted into steel it begins the long path back to earth. We live in a temporary world; as soon as we stop our struggles and ambitions the things we care about turn into dust. So I painted the Kawasaki’s down tubes.
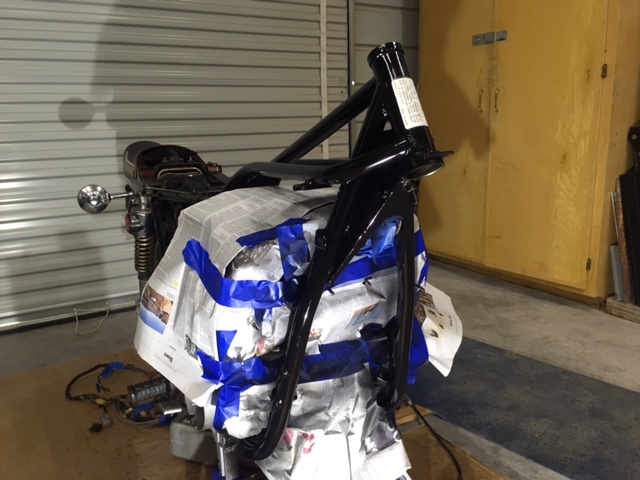 Next on my list were new steering head bearings. I have a Proto puller set that cost around $150 in 1970 and it mostly is still intact. From that kit I used the bearing separator to get behind the lower stem bearing. I clamped the stem in the vise and a few sharp raps later the bearing was off.
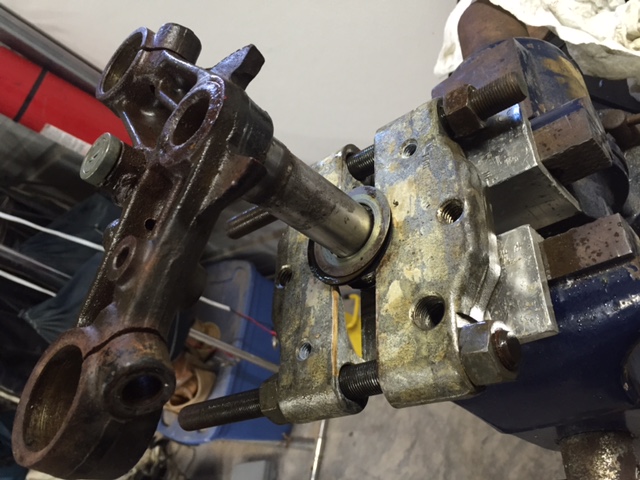
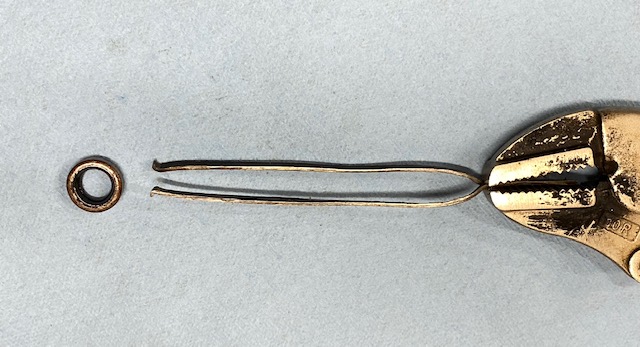
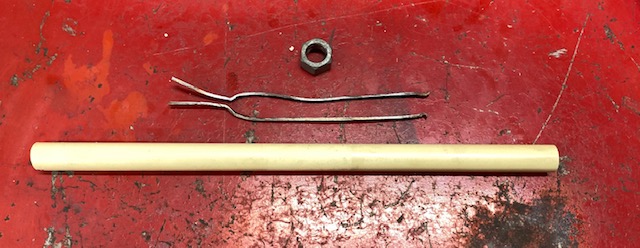
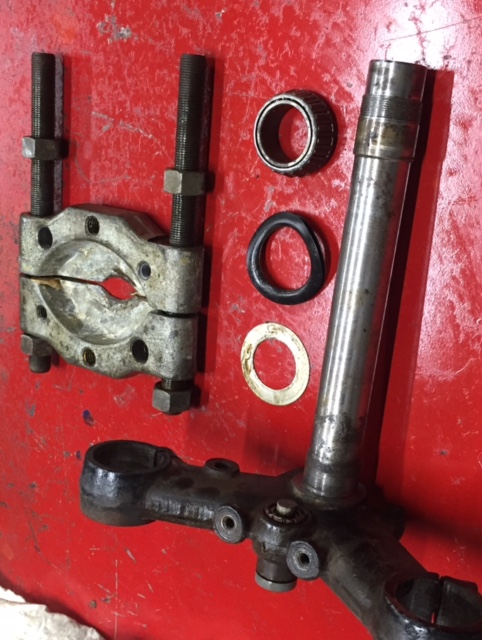 Removing the races pressed into the fork stem is a little harder. There isn’t a whole lot of meat exposed to get a purchase. Some people weld a bead on the race then use that to punch the race out. I’m sure there’s a correct way but I don’t know it so I use two puller claws and force them against each other to wedge the puller tips behind the race. Since you have to hold the claws together with one hand you’ll need a length of old bronze boat shaft to pound on the claws. Most Old Boat Shaft stores carry lengths of bronze shaft. It’s finding the store that’s the hard part.
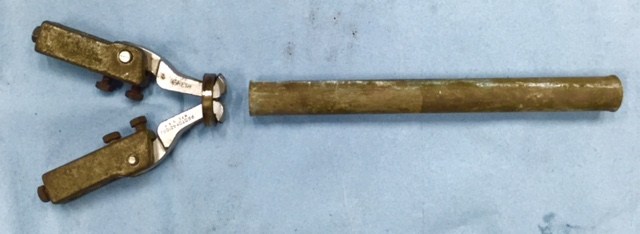 The new races pop in without trouble. I get them started with a dead blow hammer then finish seating them with a punch worked slowly around the circumference of the race. You can hear the hammer-tone change pitch when the race seats against the frame tube.
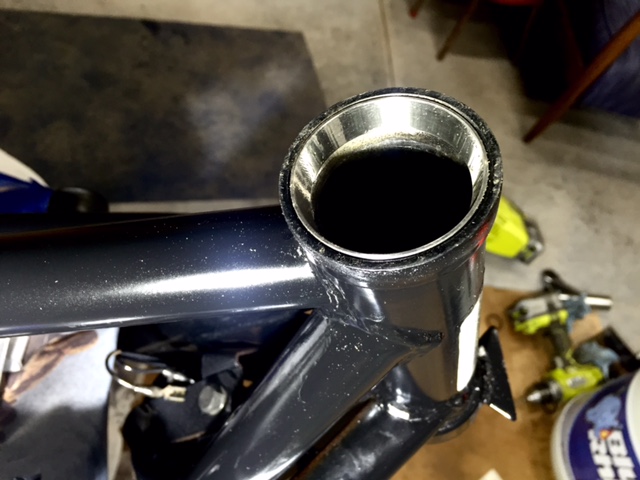 The triple clamps were a mess so I wire brushed them and shot some black paint on the things. I’m always aware that any paint work or cleaning I do destroys the originality of the bike so I try to keep it to a minimum. While the headlight ears were soaking in a vat of Evapo-rust I started assembling the forks.
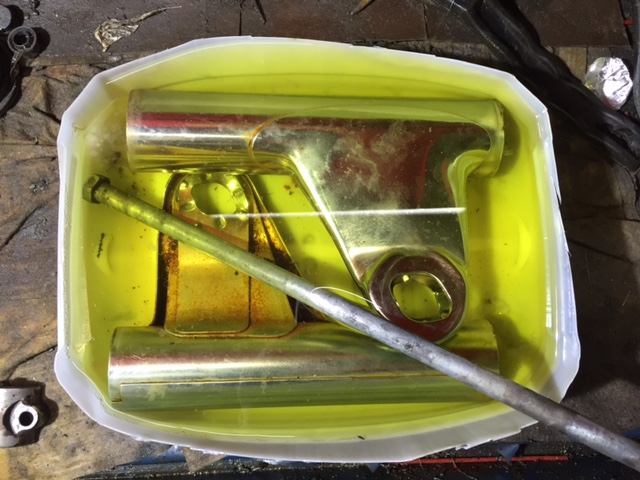 A new throttle/switch assembly from
 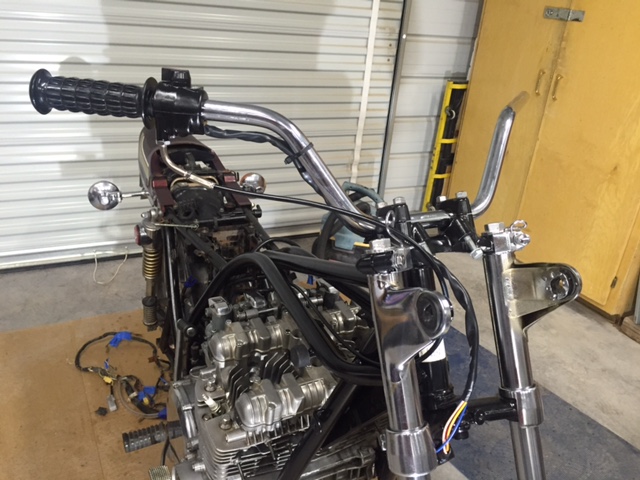 I’m close to $1000 in parts now. I’m replacing some wear items so I don’t think those should count against Zed.