
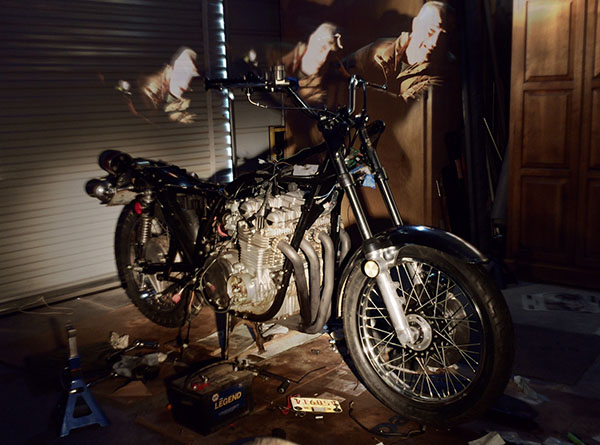
I’m not superstitious but the 13th installment of Zed’s Not Dead ran into a few problems. I’ve been having good luck misting a light coat of Krylon black spray paint onto bare metal sections of Zed. It really freshened the frame without looking like the frame had been completely repainted.
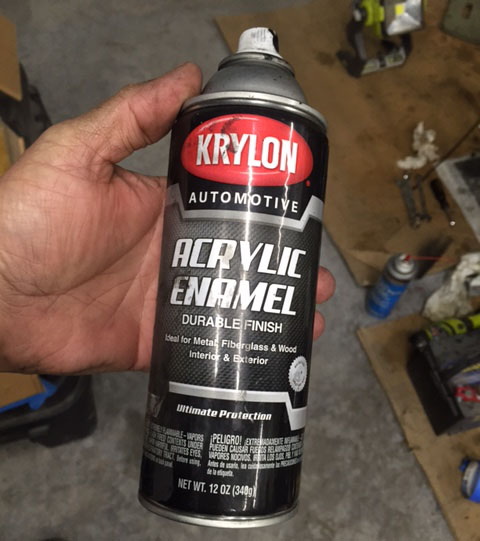 Until I misted the swing arm, for some reason the transition zone between bare metal and original paint bubbled up making a mess out of the thing. I don’t know what the difference was but after trying to remedy the situation four times I gave up, sanded the swing arm and shot it with primer. The black paint laid down nicely after that but so much for keeping it original-ish.
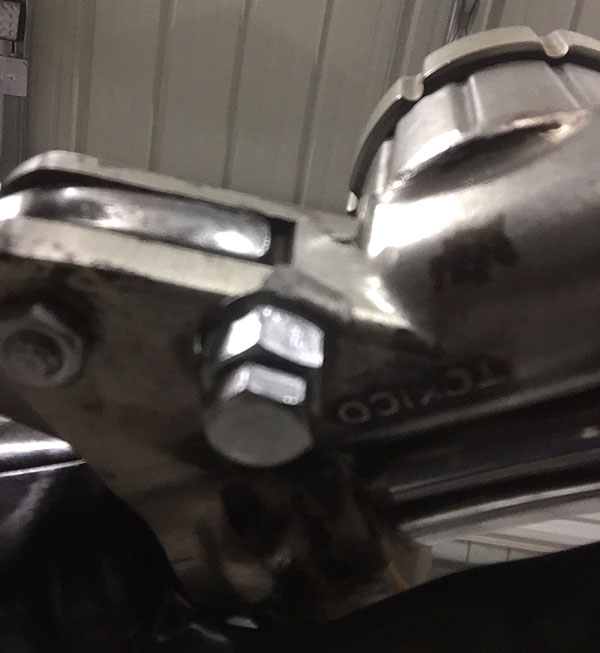 I started on the front brake system and noticed this cool little eccentric bolt that adjusts the free play on the master cylinder. There are so many nice touches like this on the Z1. Kawasaki tried to build the best motorcycle they could. The master cylinder was in good shape. These things are a bear to reassemble but after five tries I managed to get the plunger in the bore along with the c-shaped travel stopper and the snap ring. The only complaint I have against the Z1 Enterprises master cylinder kit is that it didn’t come with the rubber bellows (the part that keeps brake fluid from sloshing in the reservoir) so I’ll have to order that bit.
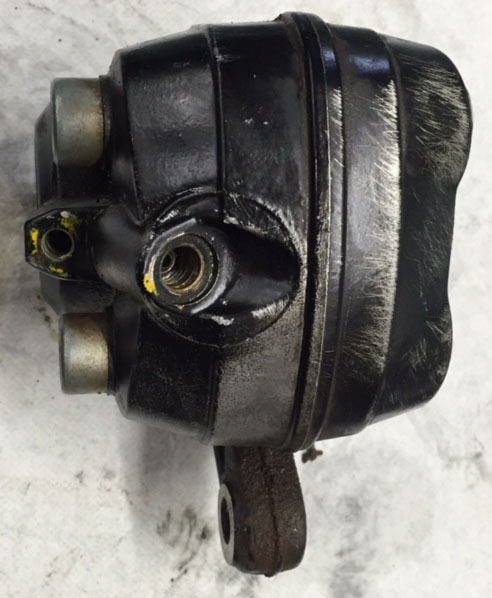 The metal brake line to the caliper was stuck mightily. I tried heat and penetrating oil and even bought a set of metric line wrenches but in the end it took a vise and brute force to remove the line. It’s not destroyed but I’ll be buying a new metal line along with both flexible hoses and the little bracket that holds the line away from the front fender.
 Once apart, the caliper was in excellent condition. I sanded the bore to remove corrosion and the Z1 Enterprises rebuild kit had everything I needed to reassemble what I hope is a good slave cylinder.
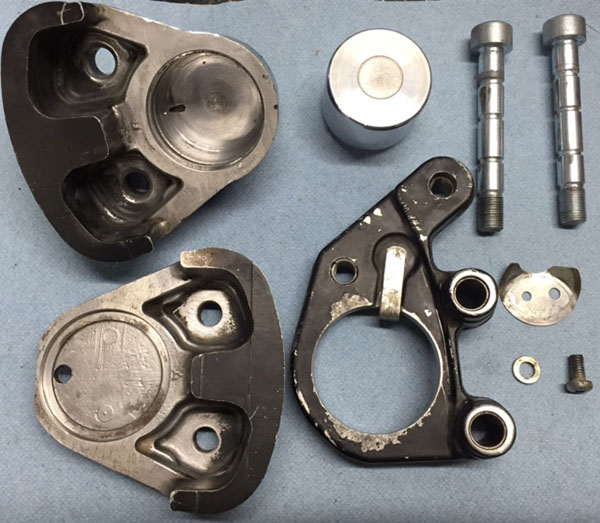
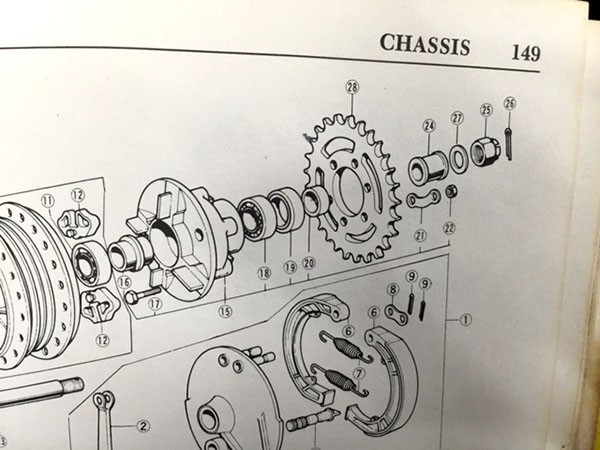 The previous owner had the rear axle assembled wrong and my book was illustrated with the spacers reversed so a quick message to Skip Duke and I had the spacer order correct.
 The sprocket side gets only the seal spacer while the drum brake side gets the long, necked-down spacer. The thick washer-spacer (that was jammed into the drum brake side) is actually a washer. It spaces the castle nut the correct distance for the cotter pin or hitch pin hole.
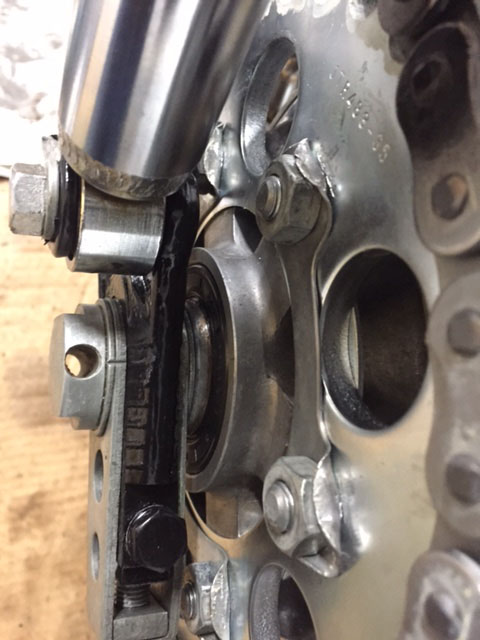
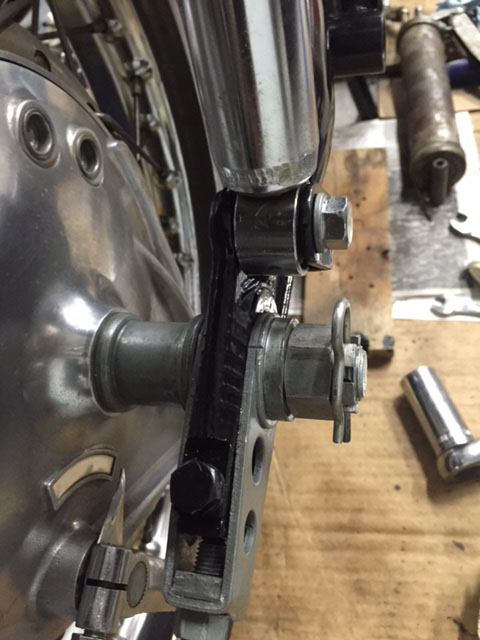
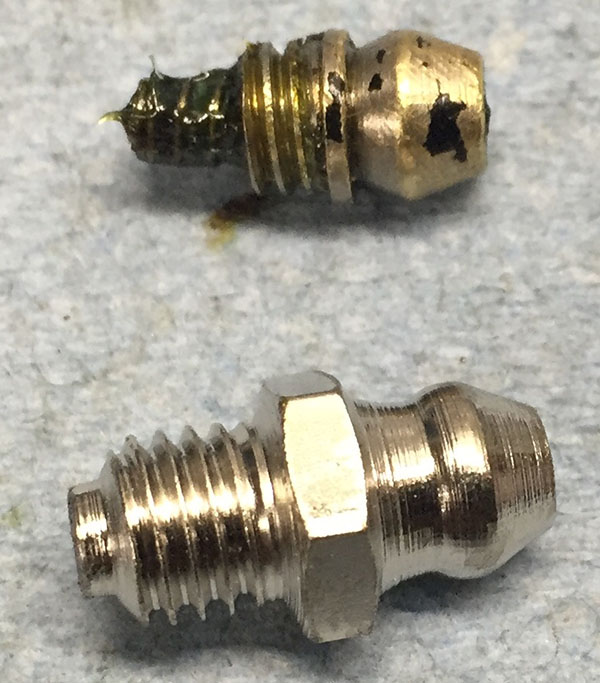 The stock swing arm grease nipple would not accept my grease gun fitting resulting in grease all over the place. In this photo you can see the differences. Rather than get the correct tool I tapped the fitting for a standard nipple and screwed the mess together.
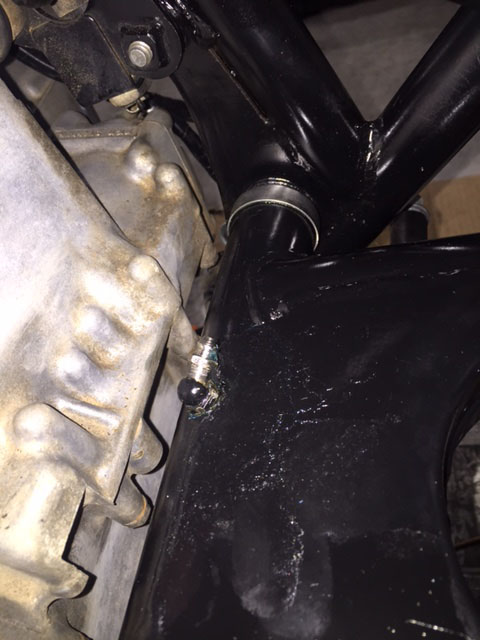 I’m not happy with the grease nipple set up although it did allow me to grease the swing arm. I’m going to remove the fitting and have another go at making it look better.
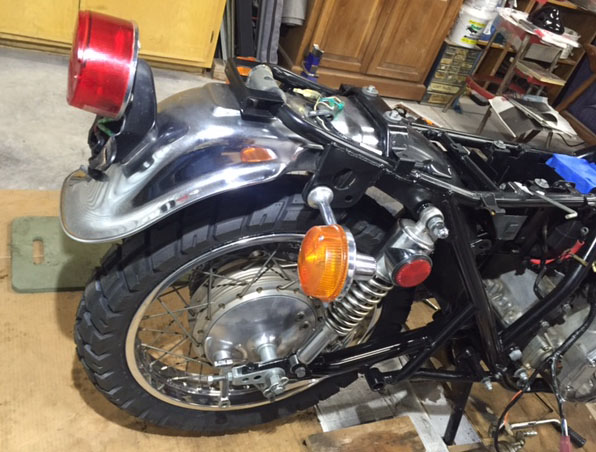 Zed’s rear end is coming along nicely. I think the 4.10X18 tire looks a little puny on the bike so you may get a Smokey burn out video after all. Next tire I get will be a 4.50X18.
I’m making a list for my next Z1 Enterprises order and this list should cover most everything I need to get the bike rideable. Those new bodywork sets they sell sure look nice and only $1300 for a tank, tail and side covers, all beautifully painted in stock striping. You can’t get your original stuff painted for $1300!
Want to see the rest of the Z1 resurrection? Just click here!
Looks like it’s coming along very nicely you can’t put lacquer over the top of enamel but you can put enamel over the top of lacquer
I used the same paint on the frame and had no trouble. The swing arm gave me fits. Maybe it had been repainted at some time in the past.
Wonder why there couldn’t be an “industry standard” on grease fittings and make life easier for everyone?