
 Progress has slowed on Zed. I really wanted to start the beast up. The problem is I haven’t figured out the ignition advancer issue yet. My E-buddy Skip sent me two of the things but neither one will work on the 1975 Z1 crankshaft end. I feel bad that Skip is trying to do me a favor and that the poor guy has to keep digging around in his parts stash. It goes to show you: no good deed goes unpunished. I am going to suck it up and buy a new, $159 advancer from Z1 Enterprises. Hopefully it will be the correct one and fit the crankshaft.
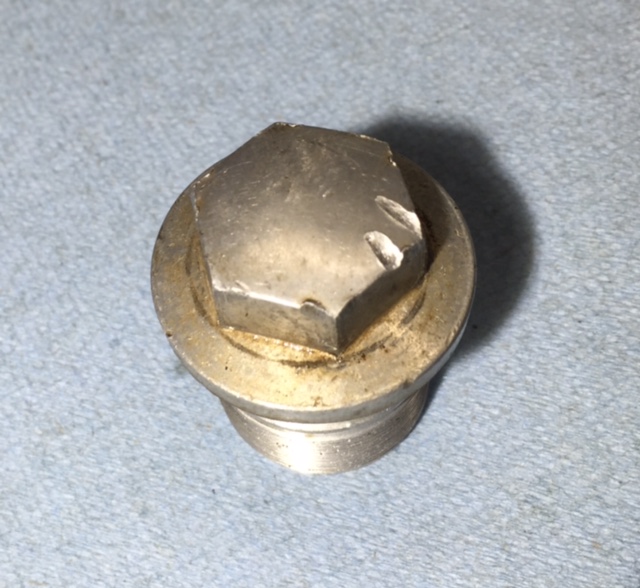
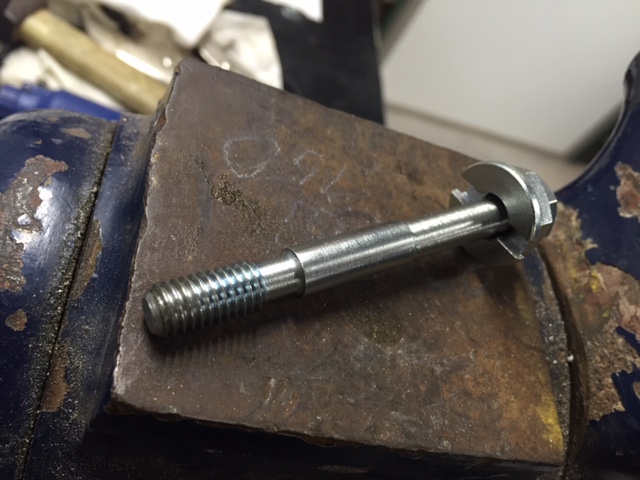
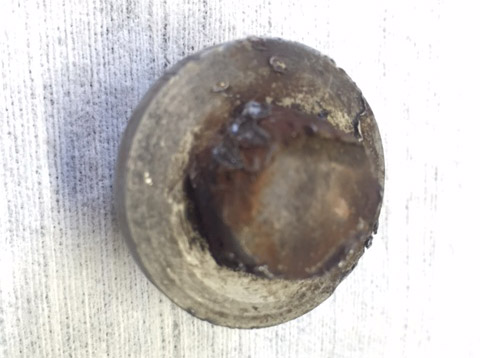
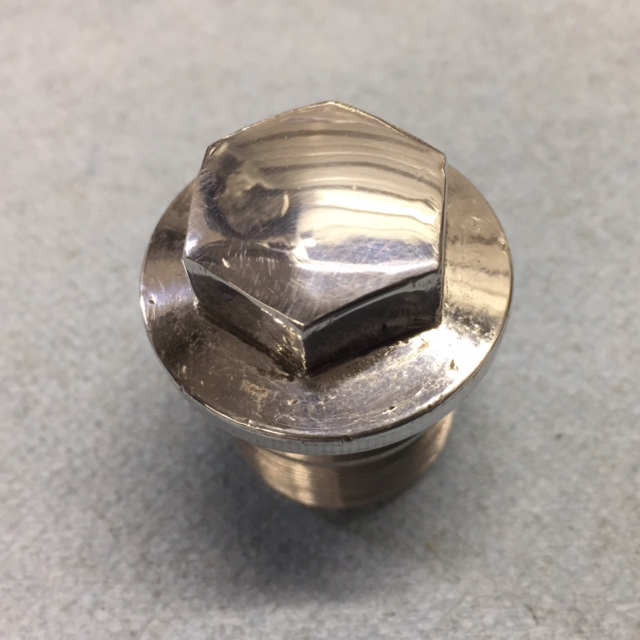 Meanwhile, I’m not ignoring the rest of the bike. Let’s face it, even if the engine is shot I have to get this bike running. The front forks were leaking and contained about 3 ounces of oil between both fork legs. This is down a bit from the 5.7 ounces per leg suggested in my shop manual. I know I said this was not going to be a show bike restoration but I couldn’t bear a future staring at this gouged fork cap bolt so I sanded the thing smooth and gave it a lick of polish. Of course this means that I have to do the other side also.
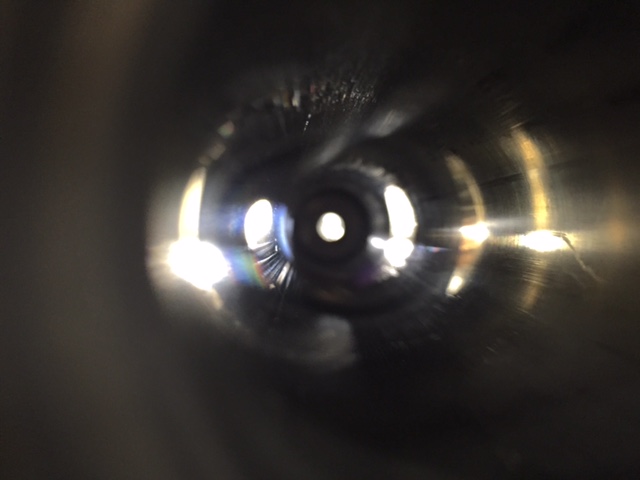 The internals of the forks were covered in sticky black goo, which required a ton of solvent and liberal doses of carb cleaner to cut loose. Then came rags stuffed down the tubes and pushed back and forth using a drill bit extension. The sliders came polished from the factory and since they were preserved under a coat of oil it took no time at all to spiff them up without crossing over to the dreaded Show Bike threshold.
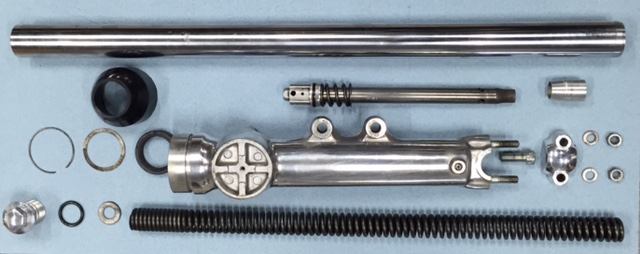 All the fork parts look usable if not perfect. The upper section of the fork tubes that were covered by the headlight brackets is pretty rusty. I’ve polished it off a bit and will lube the rusty areas to prevent further rust. None of the rust will show on the assembled forks but I’ll have to deduct points when the bike is in the Pebble Beach show.
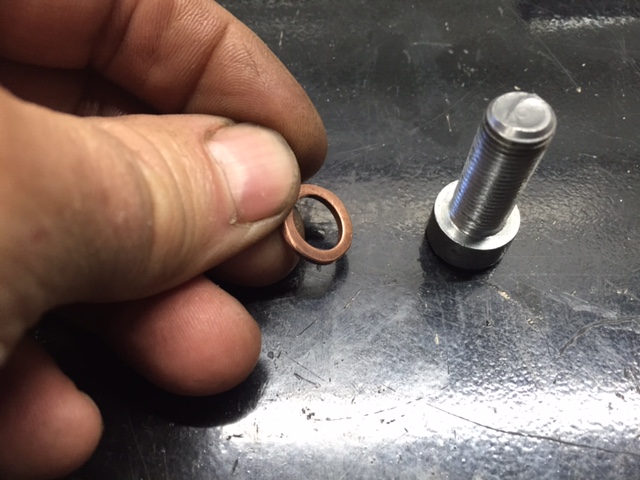 The fork sliders are held to the damping rod via this Allen-head bolt. There was a fiber washer to seal in the fork oil but I don’t have any fiber washers. I ended up grinding a copper washer to fit and I only have one of those. Looks like a trip to Harbor Freight is in order to buy their 5090 Copper Washer Warehouse kit.
 The clutch actuator was in good shape but dirty and dry. Most of the ones I bought for my old Yamaha had the helix cracked. I suffered along with the cracked helix until Hunter found a new, re-pop part and sent it to me, asking if he could have some of the ones I’d stolen from him in exchange. I have no idea what the old man is on about. This Kawasaki part is much sturdier than the Yamaha part and crack free so that’s one point to Kawasaki in the red-hot clutch actuator wars.
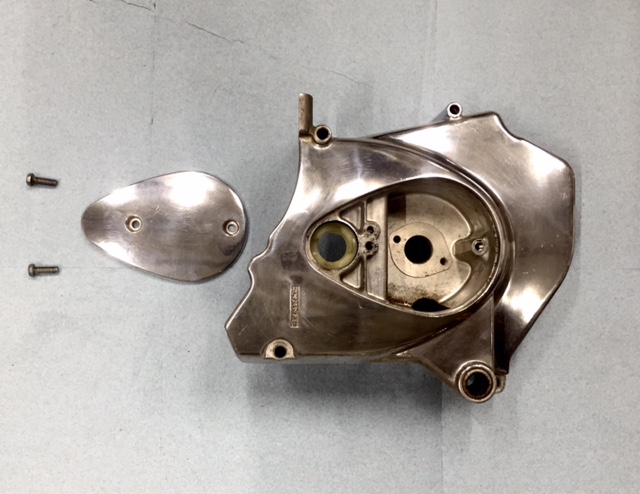
I gave the sprocket/clutch actuator cover a quick polish. The aluminum on Zed is in great shape. It took about 5 minutes to shine this cover because it was smooth to start with. I’ll let the cover oxidize naturally after the bike is built. I can’t be expected to clean a motorcycle more than once.
 I’m placing another big order with Z1 Enterprises today. They stock a lot of hard-to-find Z1 parts. It’s easier for me to order from one place and if your order is over $200 shipping is free. Who doesn’t blow $200 on bike parts? I don’t like filling out the credit card fields twenty times from a bunch of fly-by-night vendors and Z1E’s prices are in line with eBay sellers and other vintage parts sellers.
Want to catch up on the rest of the Z1 resurrection? Just click here!
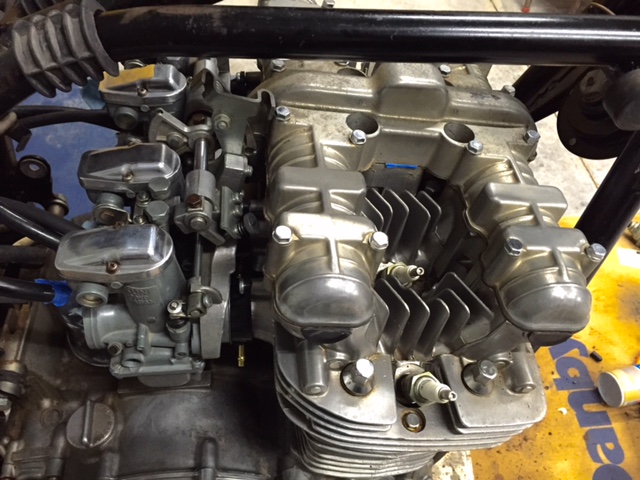
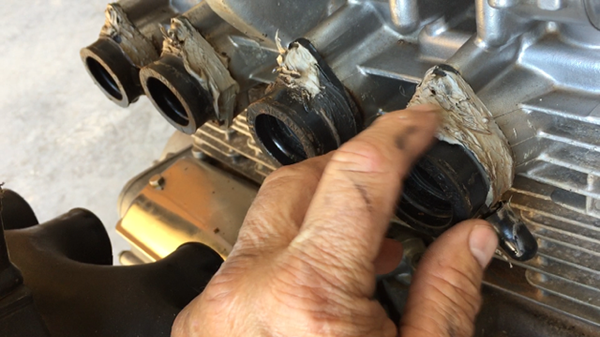
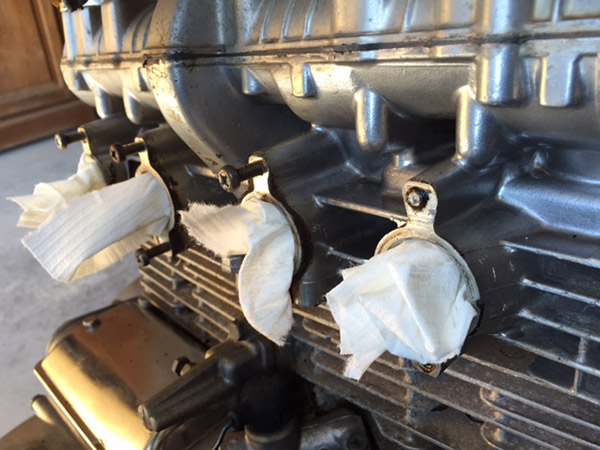
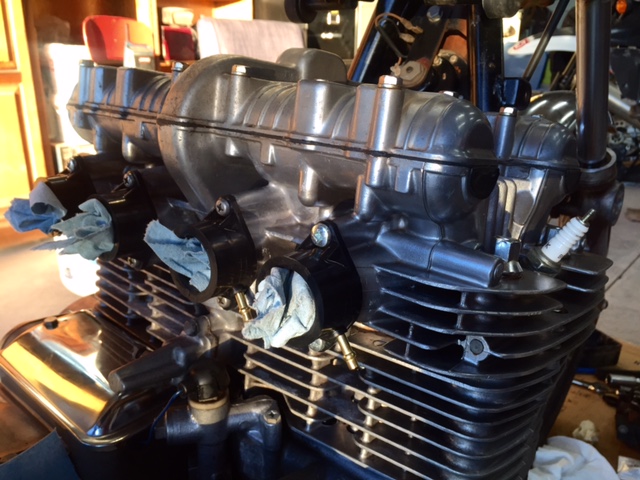 After trimming some rubber flashing where the brass manifold vacuum ports enter the new rubber manifolds I managed to get them installed without stripping any more 6mm screws. The manifold clamps are soaking in Evapo-rust as we type.
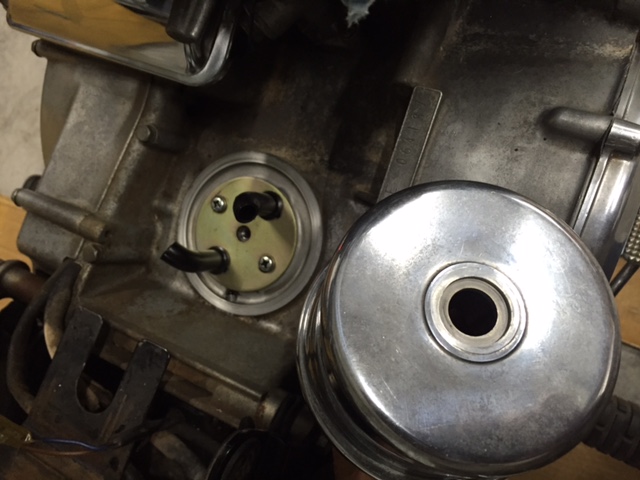 Next I checked the valve adjustment because I’ll be starting the beast soon and I don’t want to fight the system if the valves are way out of adjustment. Before removing the valve cover I marked the front in case it matters.
 The cams and valve shims look unworn. This bike shows 41,000 miles on the odometer! If this were a Honda the cam lobes would be galled. I know this because almost every Honda I’ve owned galled its cam lobes.
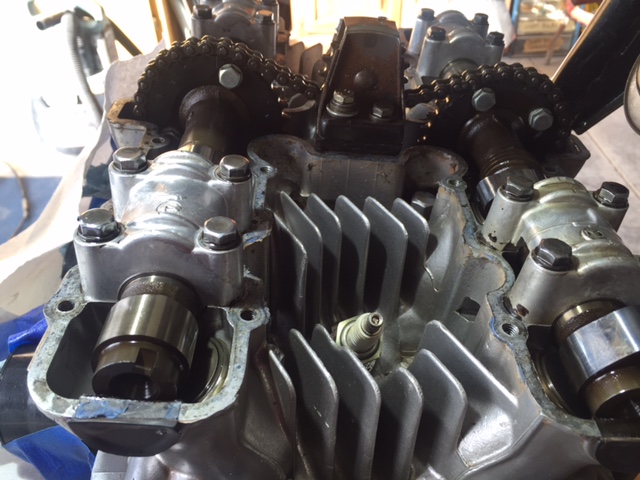 The valves are close enough to start the engine, two are on the tight side and two are on the loose side. Four valves are within spec. I’ll recheck everything after starting the engine in case a chunk of carbon or a mouse paw is affecting these readings.
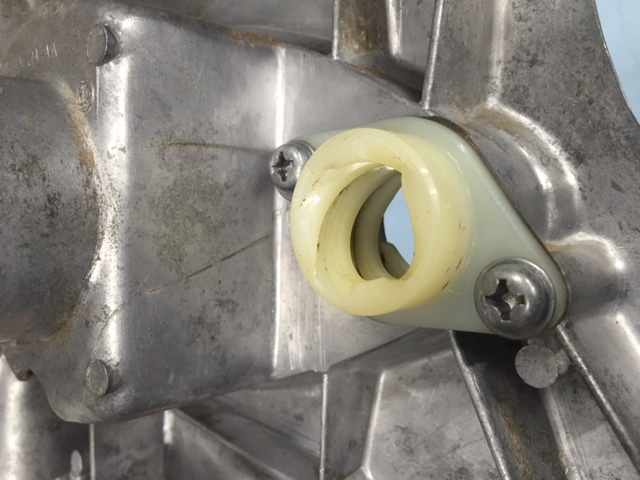
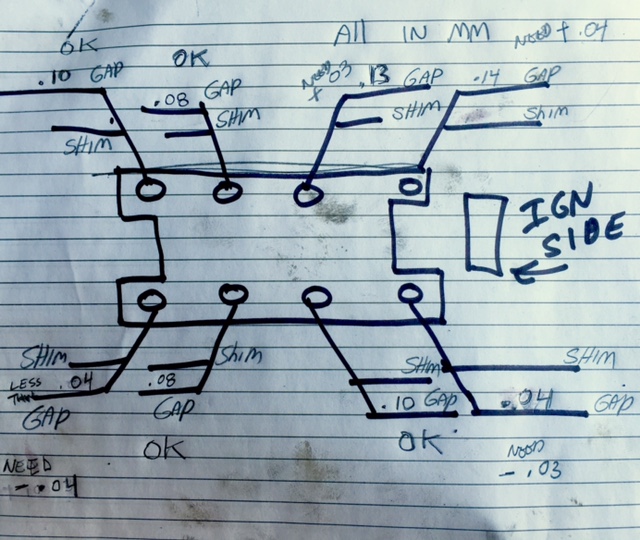 Zed’s clutch cable is in bad shape so I removed the clutch actuator housing/sprocket cover for replacement and cleaning/lube/adjustment. Inside I found the neutral light indicator switch broken off. I don’t think a ton of oil would have spewed out as the hole is not pressurized but it most likely would have leaked.
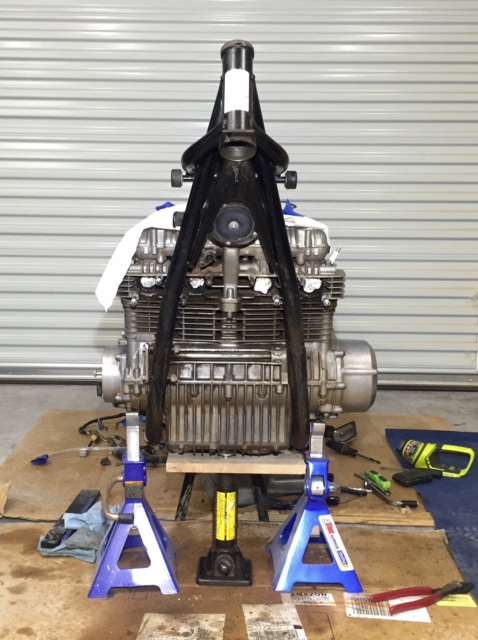
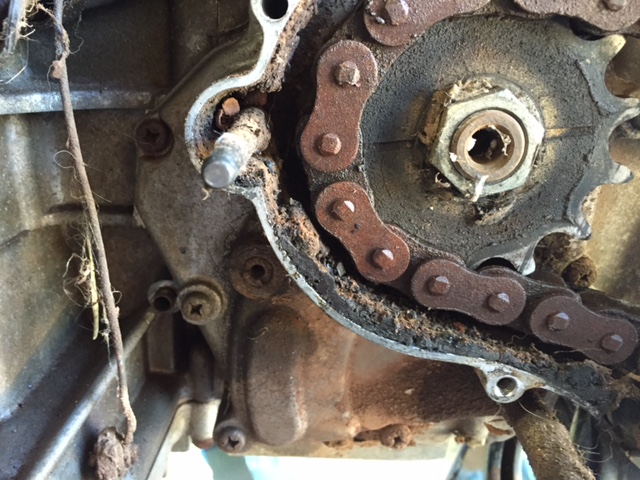 Zed appears to be going backwards but trust me she’s making progress. With the front of the bike jacked up you couldn’t miss the loose steering head bearings. Rather than just tighten them I took the forks apart to re-grease them. Much like removing the sprocket cover it’s a good thing I did. The top bearing looks fine but the bottom is pretty rusty. I’ve cleaned this mess up and in a pinch the bottom bearing, while pitted, could be used again but I’ll order new bearings. I’m in no mood to take the front apart again.
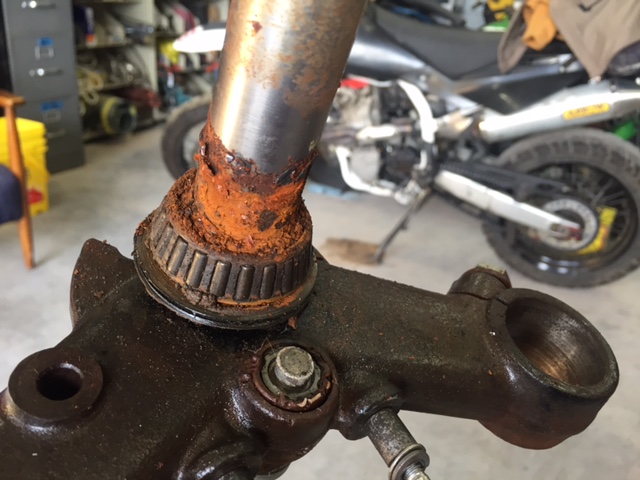 Zed’s fork seals were leaking. Another stroke of luck as the oil kept the lower section of the fork tubes from rusting. Under the headlamp ears the rust is worse. I’ll clean it off and coat that section with grease when I reassemble the forks. You’ll never see it. I’ve started cleaning the fork legs in preparation for disassembly. You probably already know this but remember to loosen the big bolt on top of the fork tube before removing the tubes and loosen the allen-head bolt on the bottom of the fork sliders (under the axle boss) before removing that big top bolt.
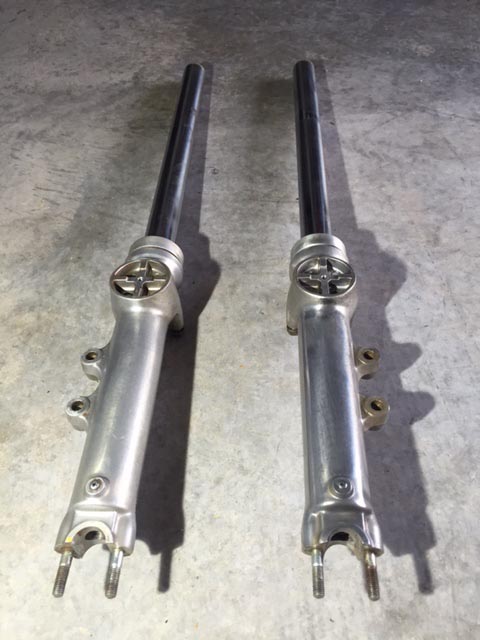 My buddy Skip sent what we hope is the correct spark advancer unit so Zed should have everything it needs to start soon. I’m a little concerned that I can only find first gear and neutral in the transmission. Hopefully, once the engine starts and oil is slung around the gearbox will shift.
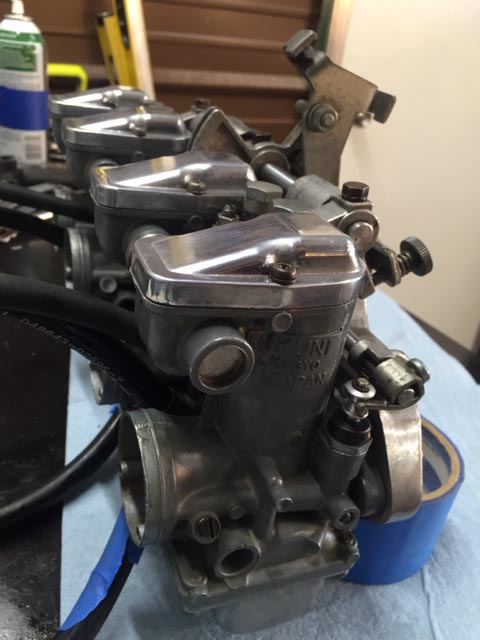
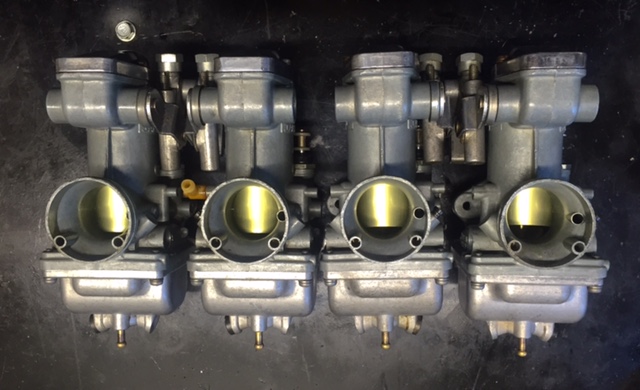 I’ve been spending some time with Zed’s carburetors, working on details that required home-brewed engineering. The Mikuni carbs on Zed don’t have a traditional choke (a flap that blocks air going into the carb causing a rich mixture) but we still call it a choke. Instead, Zed’s carbs employ an enrichener circuit, which is more like a tiny, completely separate carburetor grafted onto the main body of the carb. Sort of like the brain inside Krang’s stomach on the Teenage Mutant Ninja Turtles cartoon. The enrichener has its own air intake on the upwind side of the throttle slide. This fuel circuit is fixed; no adjustment needed and is controlled by a plunger on the downwind side of the throttle slide. Lifting the plunger allows air to flow through the tiny carburetor at a pre-set fuel/air mixture and if everything else is right, helps a cold Kawasaki engine start better.
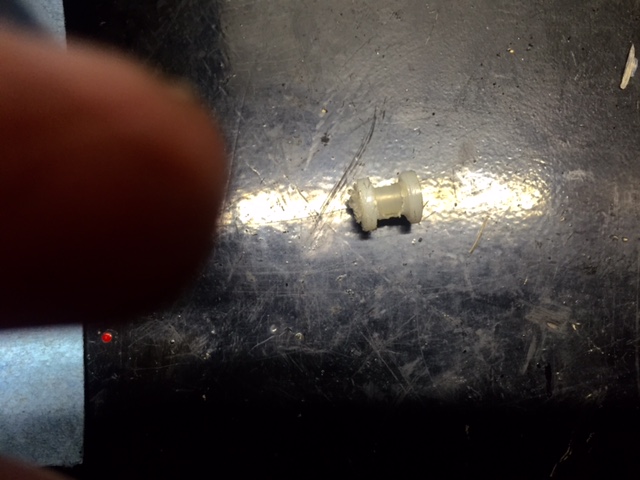 Back to square one. I noticed how the bobbin was nearly the same size as the pop rivets I’d been using to assemble parts of Tinfiny’s generator room. I have about 500 of these rivets in stock so I could afford to lose a few. Knocking the pin out of the pop rivet revealed a bore just a wee bit small for the plunger shaft but it was not a problem to run a drill bit through making the bore an exact fit for the plunger. A pop rivet only has one flanged side so I repeated the process on a second rivet, cut the two rivets to equal the length of a factory bobbin and assembled the mess. I cannot wait for a hard-core Z1 enthusiast to happen upon the aluminum bobbin. It’ll probably cause a heart attack as most Z1 fans are around 75 years old.
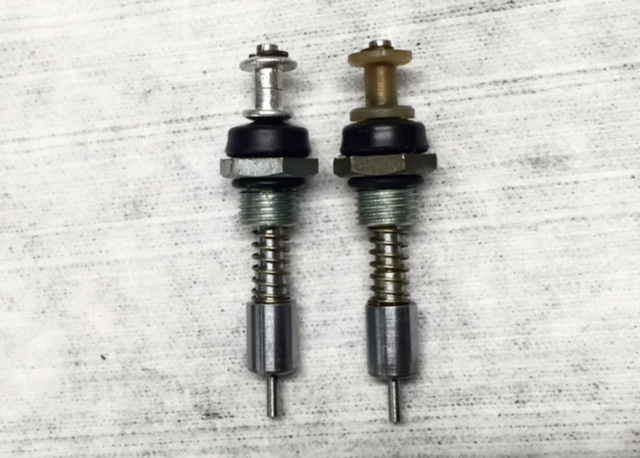 Between the throttle linkage pivots on each set of two carbs there are little dust covers made from a treated black paper. Or maybe the dust covers are rubber, I can’t tell. Three of the four covers were broken on Zed. The covers go over the springs and ball joints on the linkage. They don’t seal all that well but might keep a larger bug from crawling in there.
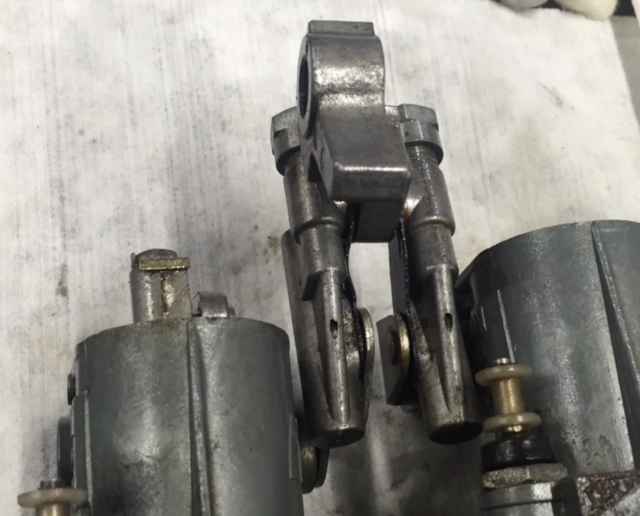 This is a part I didn’t bother looking for because I can make new ones in less time than it takes to look them up and order them. I used the thin plastic lid from a box of self-tapping sheet metal screws. Without a lid you know the screws are going to end up scattered across the shed floor. The dust covers didn’t come out as nice as I would have liked. Luckily, once installed you can’t see the things.
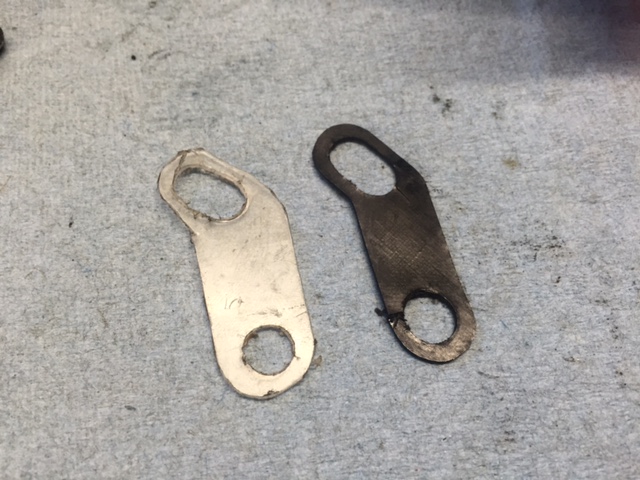 On the Z1 900cc, each set of two carbs share a fuel inlet pipe. The pipe goes between the carbs and is a metal Tee fitting with thick rubber o-rings cast onto the straight section of the Tee. This rubber hardens and shrinks resulting in a loose, leaky fit. You can buy new ones for 34 dollars but if you’ve read Zed’s Not Dead this far you know what is going to happen next.
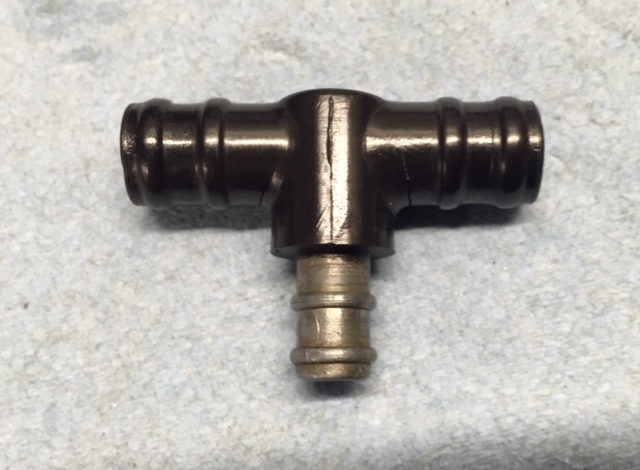 I cut the rubber away from the fuel pipe and polished the exposed metal to ensure a smooth sealing surface. Then I drilled a small hole near the end of the pipe in order to install a pin (made from the drill bit). The pin is the same length as the width of the fuel inlet bore so once it is installed in the carb body the pin can’t fall out.
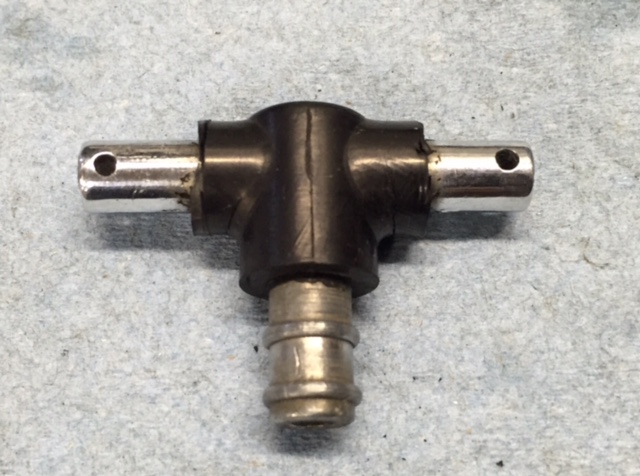 Now I used a ¼-inch length of rubber fuel hose (be sure to use the non-reinforced hose as cloth reinforcing strands will wick fuel, causing a leak) and slid this hose onto the fuel Tee. Next came washers and finally the pin. The assembly fits snugly into the carburetors. It helps to put the fuel feed hose on before you slide the carbs together. Hopefully it won’t leak.
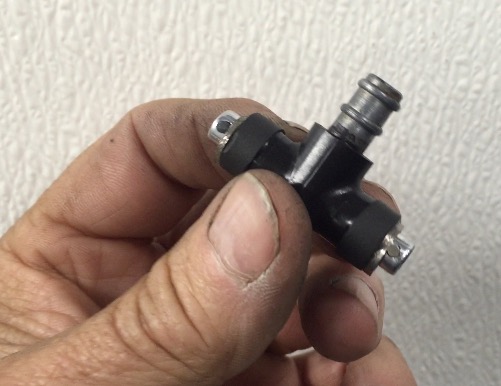 I’ve got the carbs assembled onto the rack and everything seems to work smoothly. I’ll be testing the float levels on the bench and will sync the throttle slides as close as I can get them. The idea being all four slides move the same distance in unison. Even if they’re not perfect the bike should run reasonably well. Later, manifold vacuum gauges can be used to adjust the carbs for any slight differences between cylinders.
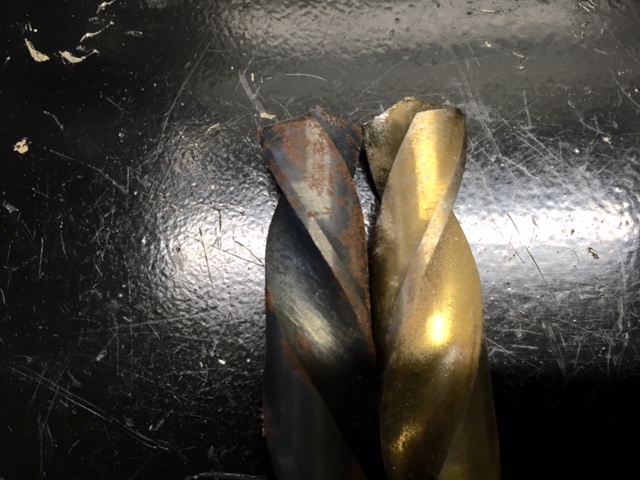 The reason lefty bits are the nads for removing stuck or broken bolts is because of their natural tendency to unscrew whatever they are drilling into. By increasing the bit size in stages hopefully you can get the offending screw so thin that the remaining threads weaken, collapse slightly and wind out of the hole looking like a coil spring. And that’s mostly what happened except the thread came out in pieces.
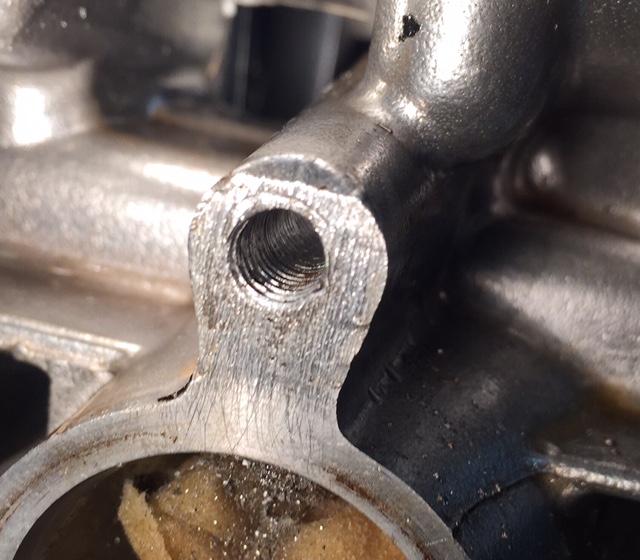 After clearing out the swarf I ran a bottoming tap into the hole and tidied up the threads as much as possible. I will use a slightly longer screw to compensate for the compromised hole but I’m pretty sure it will be fine and I have avoided using a Helicoil thread repair, which is the hack mechanic’s favorite crutch.
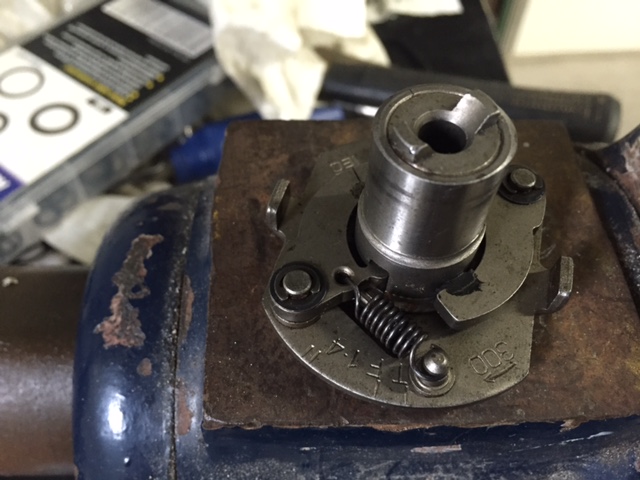
 I haven’t forgotten about the carburetors either. I’ve been soaking them in Evapor-rust and the stuff is doing a fine job. It’s very mild so you can leave zinc carb bodies immersed for days without fear of eating away the good parts. All four of the carbs are clean and I’m waiting on a few parts before I can reassemble the rack.
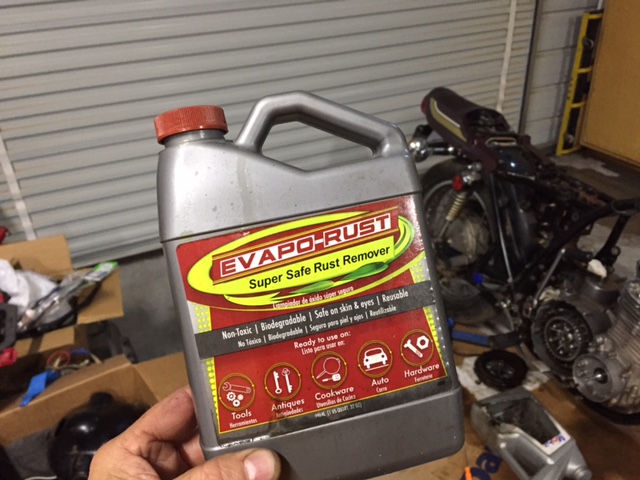 Zed’s little clutch-cover, oil level window was black with sitting-bike mung. It was so black the oil level could not be determined. I removed the cover and cleaned out behind the metal back-plate. Since I had the cover off I figured it would be a good idea to check the clutch plates for wear. The fibers are within tolerance and the steels are only slightly rusty so I’ll clean all those parts up and Zed should have a functioning clutch.
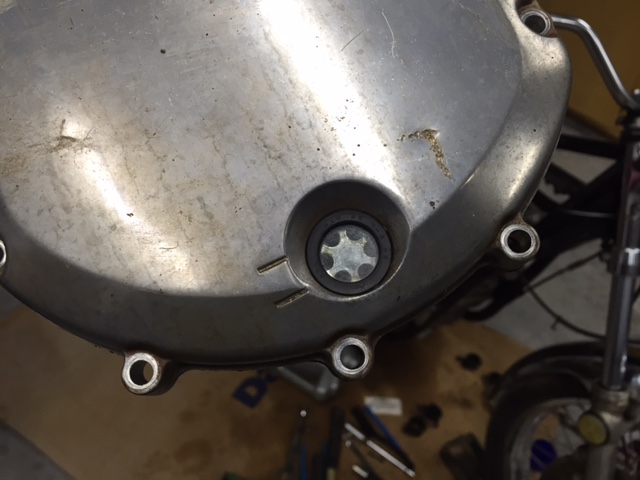 When Kawasaki designed the Z1 they went all out. This was Big K’s flagship motorcycle and the robust clutch is a fine example of strength. The large, straight-cut clutch gear would not look out of place in a one-ton manual truck transmission. The fingers that locate the fiber plates are surrounded by a steel band to prevent them from spreading under load. This clutch is awe-inspiring and looks like it could handle double the Z1’s 82 (claimed) horsepower. The bike has 41,000 miles showing on the clock and the metal parts show minimal wear. I am impressed.
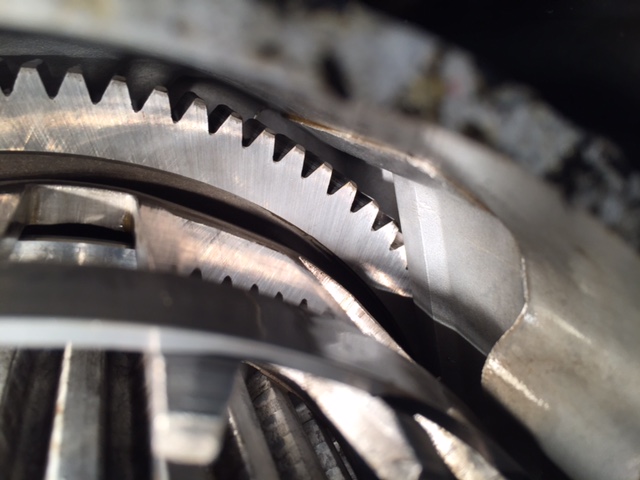 Don’t take my word for it, here is the author of the Z1 repair manual waxing eloquent over the Z’s clutch.
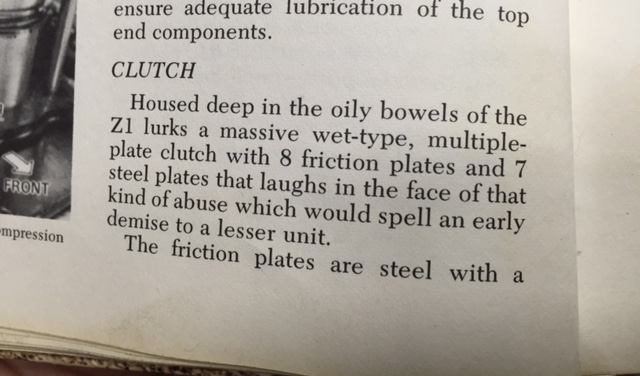 I’m making another list of parts and will be blowing more money on Zed. I really hope this engine runs without a lot of knocking and the transmission shifts like butter.
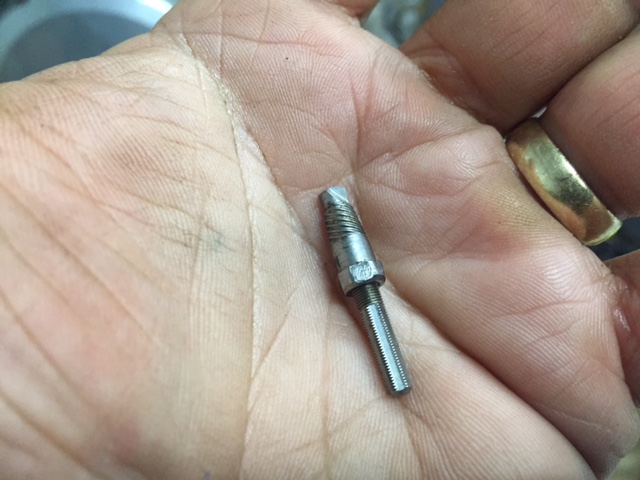 I drilled the screw in stages until I could try my handy-dandy left-hand drill/remover tool.
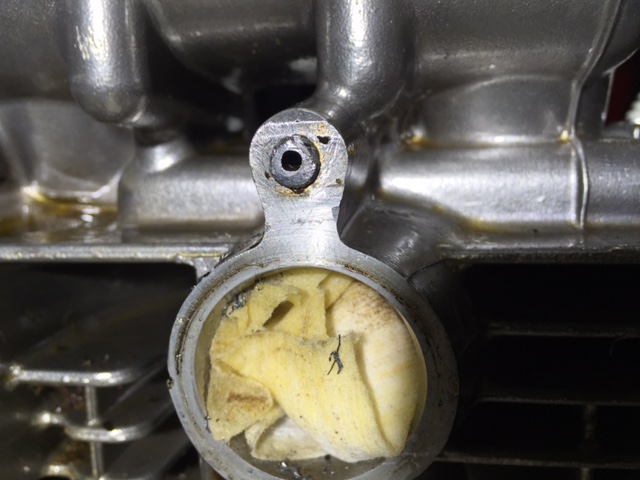
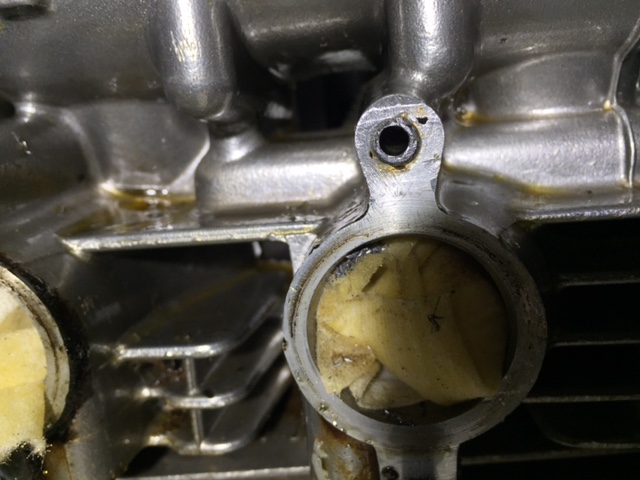 The broken screw is small, like a 4mm, maybe a 6mm and there’s not a lot of room for error. The little extractor tool had a good bite into the screw but the thing would not budge. One thing you don’t want to do is break off an easy out because they are super hard material. There’s no drilling the things and you are well and truly screwed if you manage to get the hole full of busted tool steel. I eased off. Sometimes you make more progress doing nothing rather than doing the wrong thing.
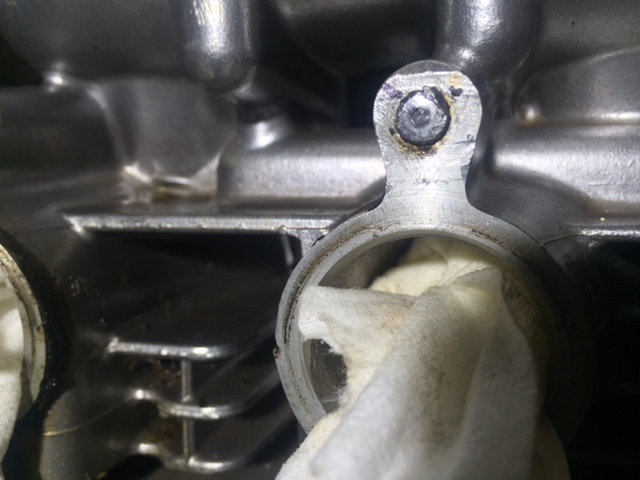 Admitting defeat today I decided to step away from the cylinder head and give the hole a few more days soaking with penetrating oil now that I can get to the backside of the situation. In addition to soaking I’ll heat-cycle the aluminum with a 1500-watt heat gun in the hopes of disrupting the steel screw/aluminum head interface. I guess the worse case would be to drill the thing all the way out and use a thread repair insert but I really don’t want to do that. That would be true hackery.
 A complete
 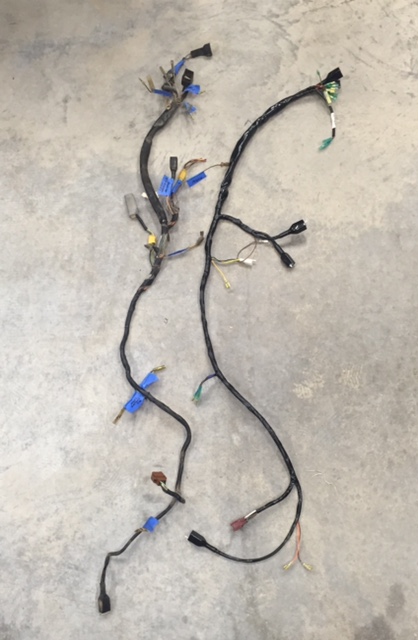 Included in the order was an O-ring for the re-sized drain plug and the washer that goes between the oil filter and the oil filter spring. With these parts I managed to get the bottom of the engine buttoned up. Progress has been fitful but Zed is getting closer. I’m really jonesing for concrete so I may have to pull off Zed and pour a yard to keep my soul on ice.
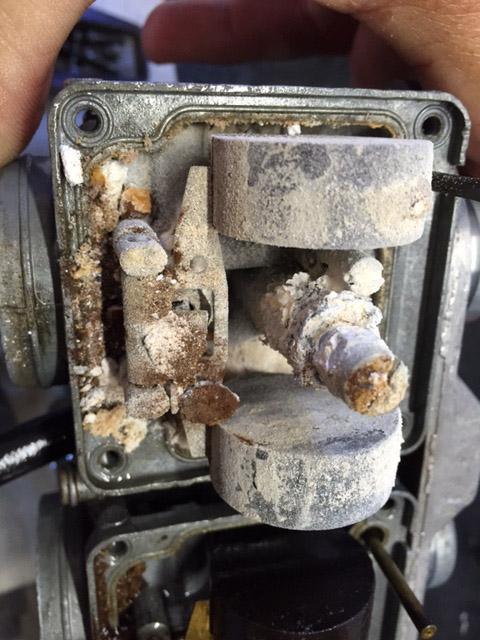 My idealized, simple douche with carb spray has turned into a complete tear down of the 4-carb bank. I haven’t counted but there must be well over 100 parts between the set. Cleaning the white, calcareous deposit liberally coating the inside of the float chamber has kept me occupied and humble.
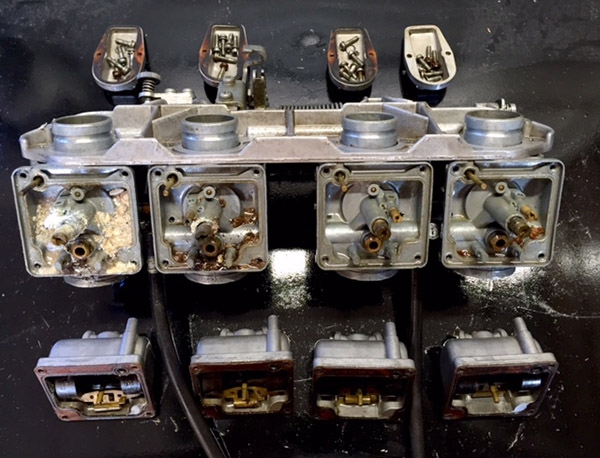 Parts for Zed have begun to trickle into Tinfiny Ranch’s high altitude motorcycle shop. I scored four new intake rubbers for $50 off of Ebay, which seemed like a good deal to me. Not such a good Ebay deal was the ignition advancer bolt and grooved washer. I paid $19 and later found the two parts on Z1 Enterprises for $13.
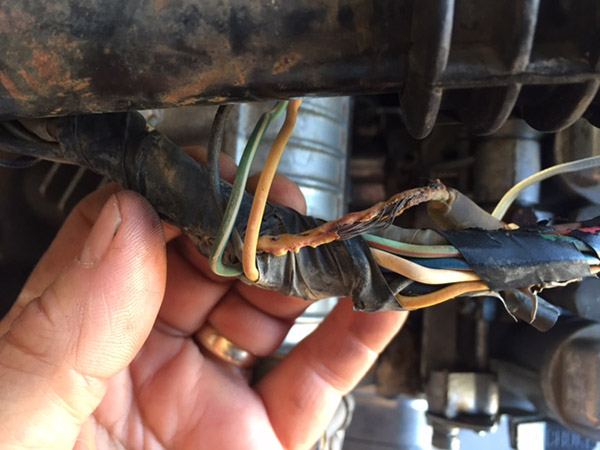
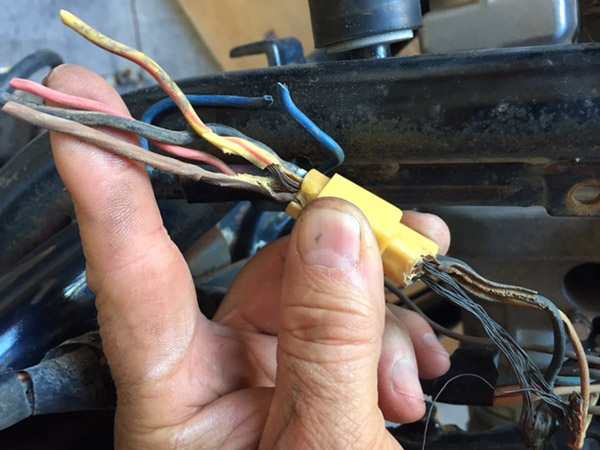
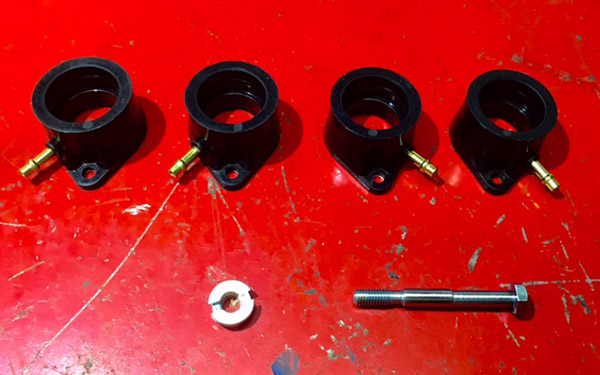 Z1 Enterprises has a lot of Kawasaki Z1 parts for not unreasonable prices. I bought a complete new wiring harness for $139. The harness comes with the main wiring loom, the gauge cluster loom, the rear tail light/blinker loom and the loom underneath the battery box that the regulator, stator, main harness and some other junk I can’t remember plug into.
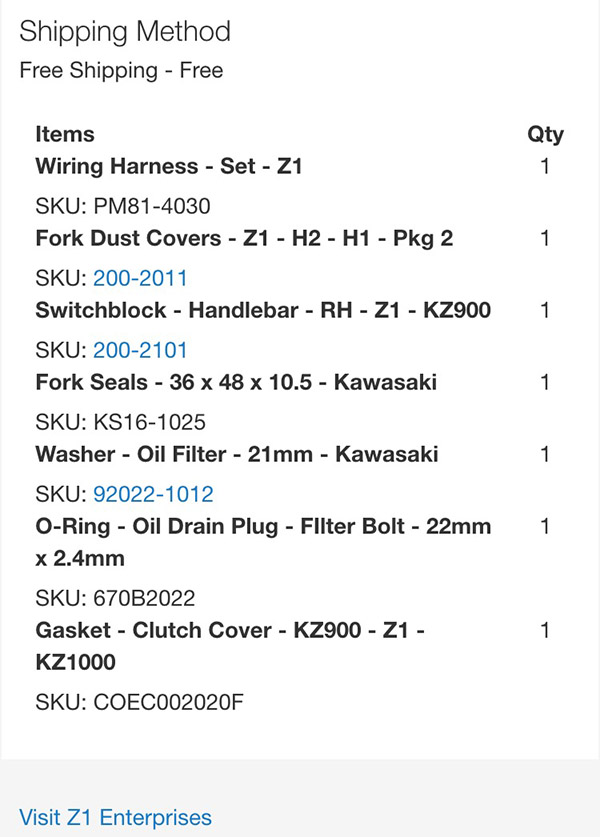 I’m into Zed’s resurrection for about $240 so far. I’ll be going back to carb cleaning now. The things are a mess and every time they dry out a new, white-powder film appears. I’m using mild solvents so far but I may have to step up my game to get the carbs spic and span. You know the routine; Part 4 to follow.
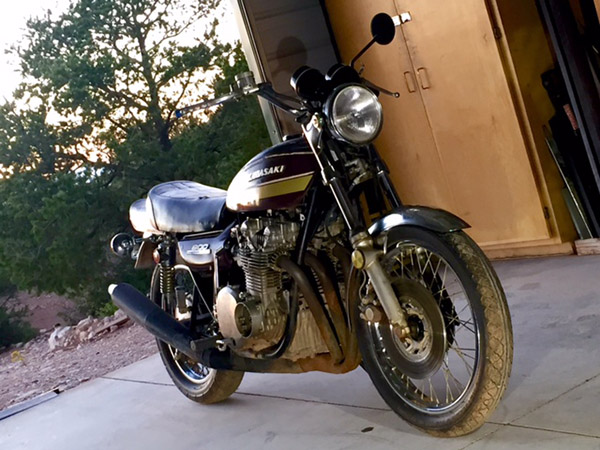


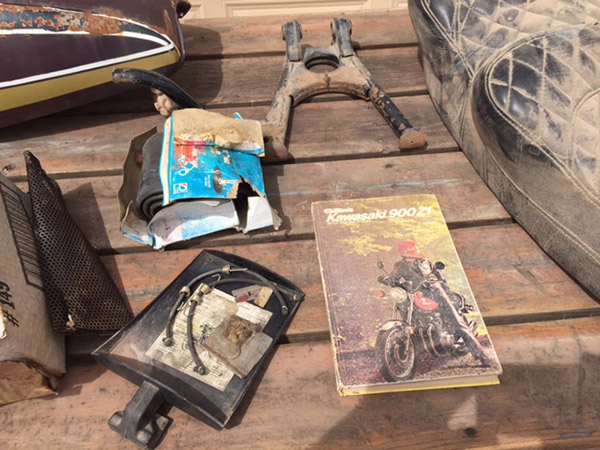
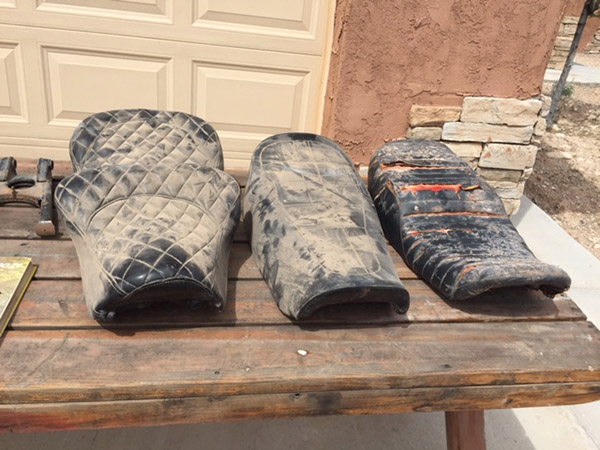
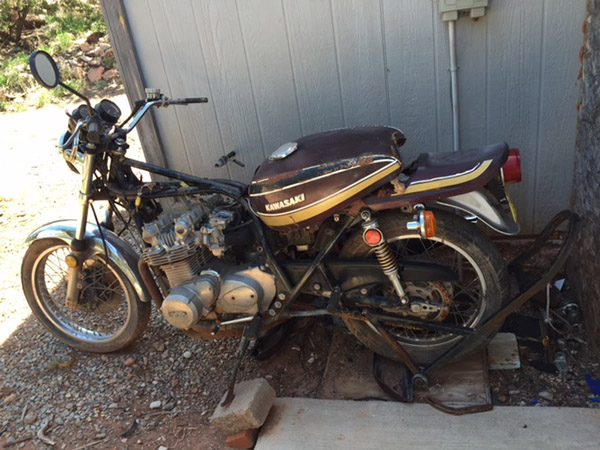 Zed came with no title, two Emgo café farings (one color-matched!), three seats, a box full of parts, a repair manual and any other bits I could find digging through the little junk-filled storage area next to the bike. Zed’s chain was rusted and the bike was difficult to push. I used a come-a-long to winch the thing up into the truck and hauled the mess back to our rental place.
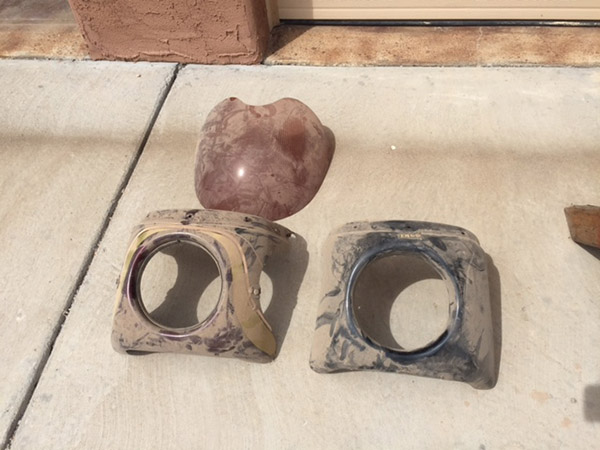
 Then they sold the place we were renting. CT (my wife) found another rental in Tularosa, 10 miles north of Alamogordo and we hauled all the junk we had accumulated, including Zed, to the new joint.
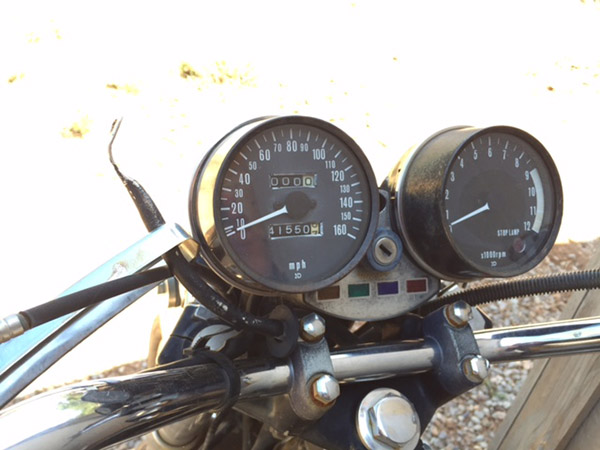 Yeah, I’m gonna fix it, but not a restoration, that’s for people who can’t accept a missing eye on an old teddy bear. Life leaves scars. This will be a repair, a salvage operation to get Zed back on the road. I don’t know how long it will take but I know now is the time to start. At this point in my life I’m in no rush and it looks like Zed isn’t going anywhere either.