 I managed to get all the cables routed and connected. The electrical wiring is concealed inside the large diameter front down tube along with the clutch and throttle. Mini Motor Madness was looking sharp but there were still a few more details to attend.
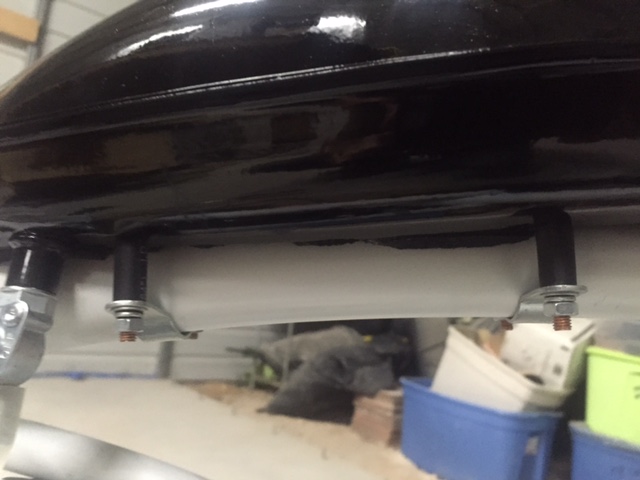
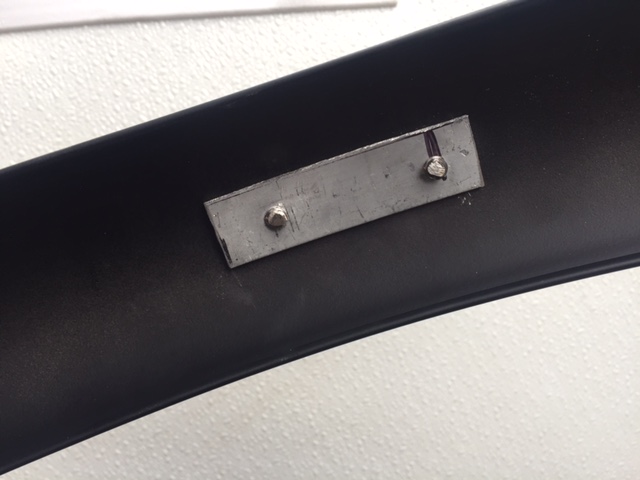
 The cute little gas tank has studs spot-welded onto the underside of the tank. Thin brackets fit onto these studs and clamp the tank to the top frame tube. Except that the brackets are so thin they distort when tightened. The studs needed a few spacers to give the nuts something to tighten against.
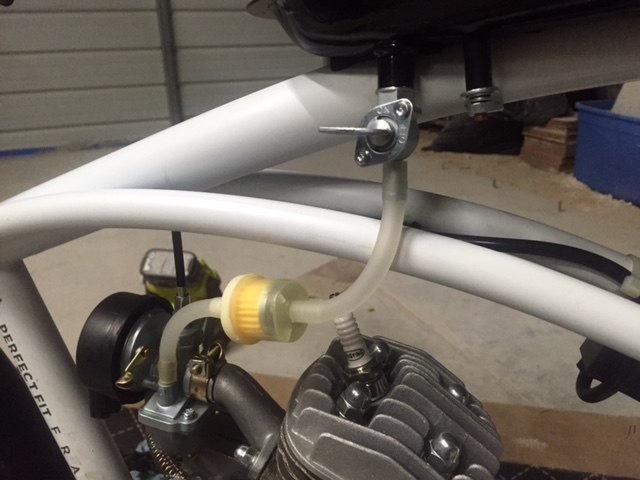
 From there it was a simple matter to connect the supplied fuel line and filter. The fuel line feels like silicone, it’s very soft and flexible, I don’t think it will need clamps. The kit came with a rubber gasket for the fuel petcock but it looked like the gasket would squirt out the side when the petcock was tightened. I used Teflon tape instead. It hasn’t leaked so far. So many little pieces came with this kit. It really is complete.
 The Wal-Mart fender supports were made from ultra thin sheet metal. Just by looking at them I created a fracture. I cut some scrap L angle aluminum into braces and made a backing plate to spread the load a bit. Hopefully the fender won’t tangle in the wheel.
 Long time Mini Moto Madness readers will recall the chain alignment issue I was having in an earlier episode. I meant to get back to the problem but the bike was nearly complete. I had to hear it run, man. I turned on the gas, pedaled down Tinfiny’s steep, rutted driveway, popped the clutch and the little motor fired right up. For about a second.
There was a loud grinding noise from aft and the rear wheel locked up. The chain, never really happy with the set up, was tangled in the rear wheel. It was so bad a 3-link section was missing! Luckily, the kit chain was extra long to suit many different bicycles and I was able to splice in a section, making sure to peen the pins after fitting.
 To ride this puppy I’d have to bite the bullet and take that damn rear sprocket off (again!) and fit spacers. Like I said earlier, this kit is complete. It had everything needed to shim the sprocket, although the shims were a little harder to access.
 After butchering the sprocket for shim stock I reinstalled the rear sprocket. Now on their 3rd round trip the elastic stop nuts were losing elasticity but I was all in, I had to ride the beast. The sprocket was a tad wobblier than I remember but my patented sprocket-tuning tool allowed me to true up the mess to a reasonable level.
 And it worked! The little beast fired up and settled into a retro idle, the smoke poured from the recommended 16:1 fuel mix ratio. I live in a steep, hilly area and the bike is geared too tall. I don’t know how fast it goes (that will have to wait for the full exhaustnotes.us road test) but it’s faster than any coaster brake bicycle should be going. The gearing would be ok in Florida but at 6000 feet elevation with 1st gear hills all around it’s Light Pedal Assist all the way.
I’ve ordered a 48-tooth sprocket to replace the stock 44 and my front brake should be here any day now. I’m calling this a win! The kit project is complete in my mind. So there! I finished one. The next phase will be modifications to make the rig suitable for my situation.
 Not only do I rarely finish projects, it takes forever for me not to finish them. I’m a slow worker. I get bogged down in details and miss the big picture. Details like the front engine mount on Mini Moto Madness. The front down tube on the Huffy is a large diameter pipe and the smaller, cast in semi-circle on the engine crankcase will not fit. The engine kit comes with a steel adapter plate and a U-bolt that fits the fat tube but the thing looks like hell.
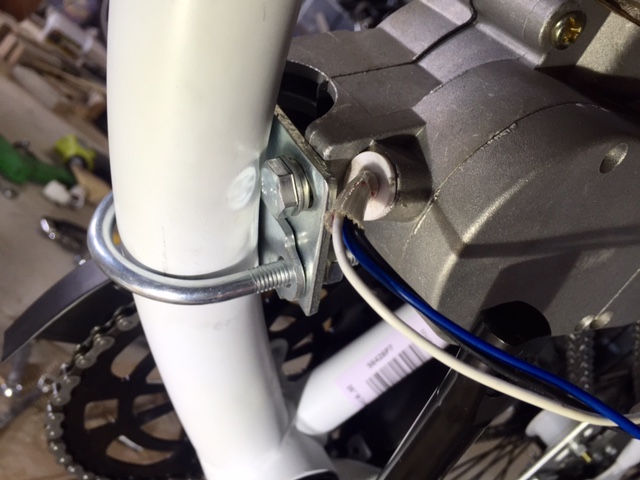 I got to thinking and planning, figuring on a chunk of aluminum to fit the two different pipe diameters, holes drilled, cuts made, longer bolts, it was getting out of hand, man. This time I was able to catch myself. What the hell am I doing? Every other mini motor I looked at used the stock mounting plates so I said, “Screw it.” and went with the popular choice. Right there is a two-day labor saving decision.
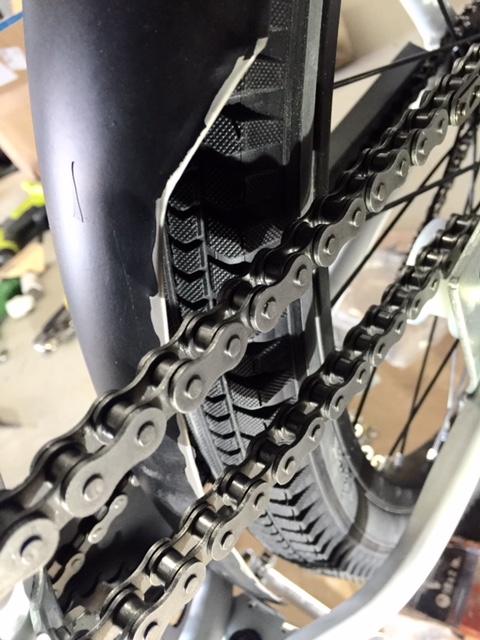 With the motor firmly in place I spent some time on the chain drive. The rear fender came in contact with the chain so I had to trim it and roll the sharp edge. It’ll need a paint job and stronger brackets but I’m going to wait until the mechanical is done before tackling cosmetics.
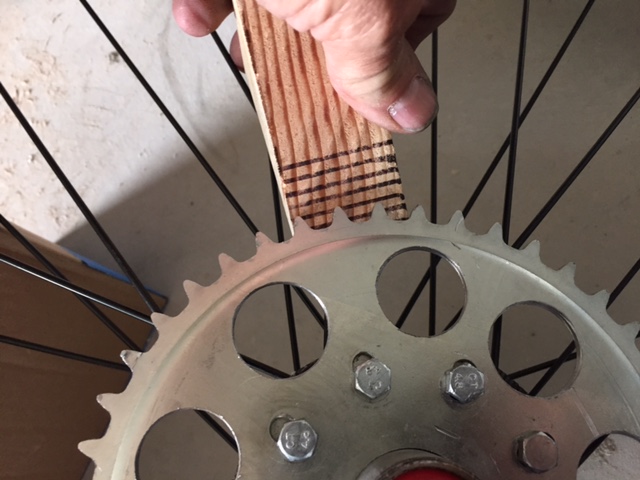
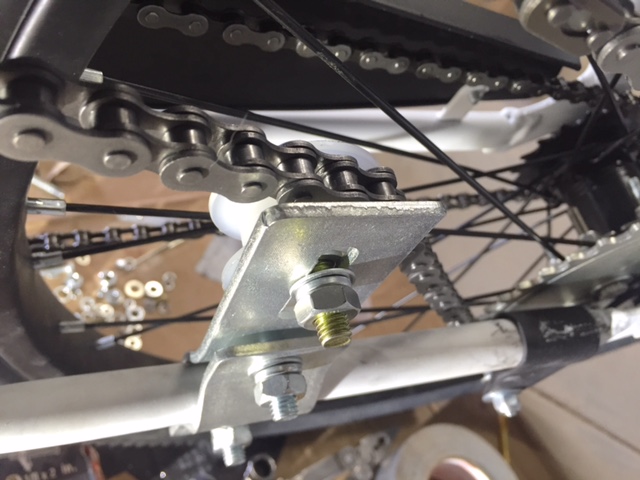 It’s almost impossible to get two chains to agree on length so the mini motor kit comes with an idle roller for tension adjustment. The idler also turns the chain angle upwards before the lower frame tubes get narrow, keeping the chain from rubbing. I don’t like the thing but I’m not sure what to do about it. My rear sprocket is slightly misaligned; the chain doesn’t jump off the sprocket but it sure favors the hub side. To center the chain the rear sprocket needs to go outboard 1/16” so that means making a spacer and reassembling the sprocket onto the wheel. I’m also considering adjusting the countershaft sprocket instead. I’ve decided to deal with this situation later.
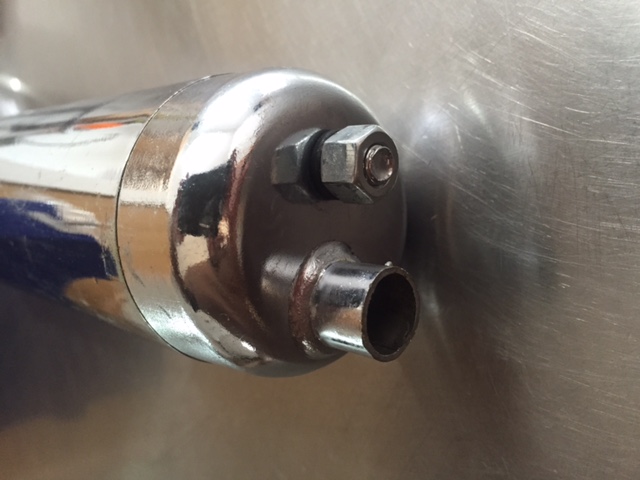
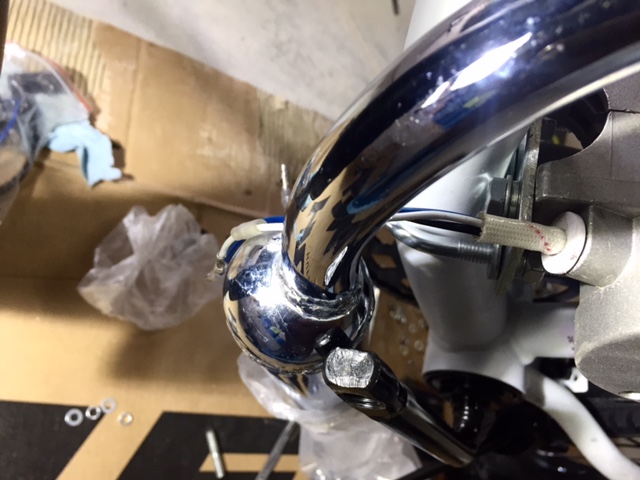 The pretty chrome exhaust pipe didn’t quite clear the Huffy’s crank arms. I didn’t want to mess up the chrome by cutting and welding the pipe so instead clamped the exhaust flange in the vise and twisted the pipe a few degrees. The pipe twisted beautifully with no wrinkles or kinks. The crank arms clear with room to spare. Sadly, the chrome plating did not go along with the program and delaminated. Pro Tip: Buy the kit with the black painted exhaust. It’s easier to modify for your particular bike.
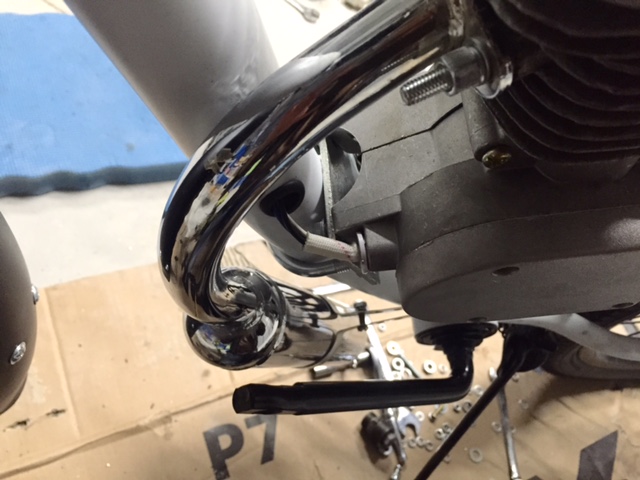 The ignition coil was a straightforward install. I’ve upped the difficulty rating by routing the wiring through the frame. Most of these bike builds look cluttered with wires and cables. I’ll run the controls inside the frame as much as possible.
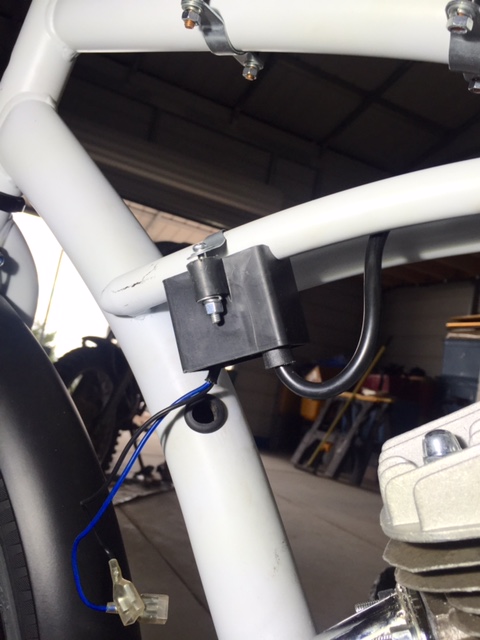 The rotor output wiring will also run internally. I’m sure this will end in tears but I saved a lot of time not fabricating a front engine mount so I’m using that time credit to tidy up the job.
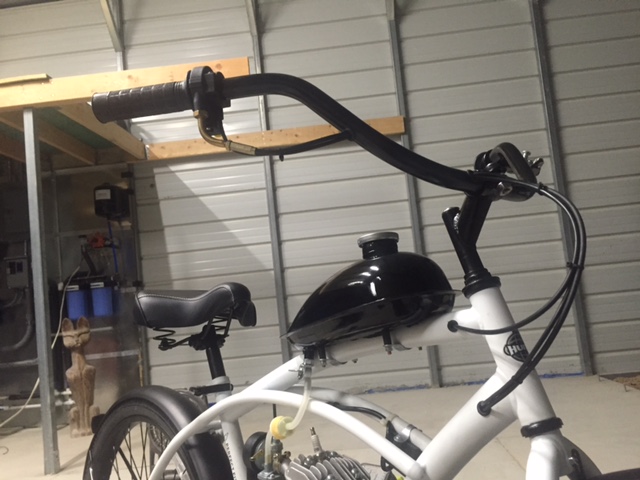
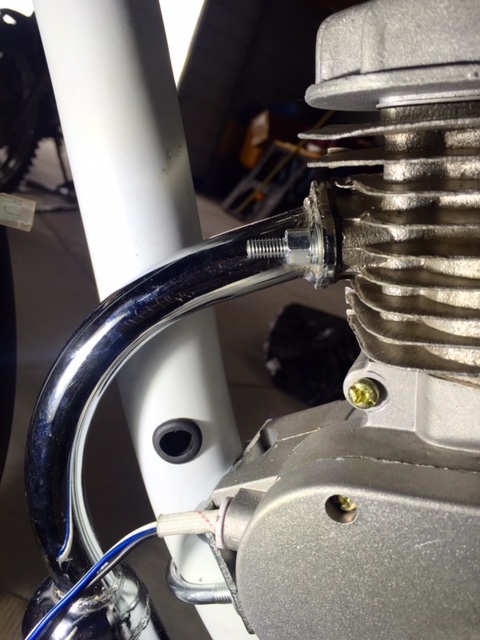 The other sloppy area on these builds is the handlebar. Unlike a motorcycle, there is no speedometers or bodywork to hide the throttle/clutch/kill wiring. I’ve drilled holes and snaked the stuff through the bars. It looks cleaner to me. Yes, I’ve weakened the handlebars. I’m willing to risk a crash from structural failure in support of aesthetics. We are all artists and it’s about time we started living like it.
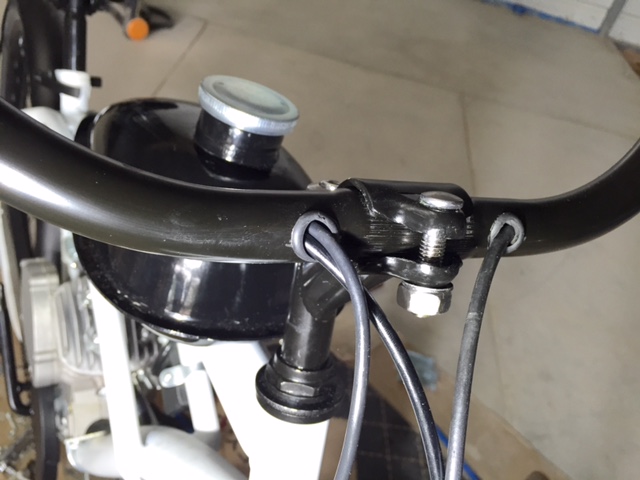
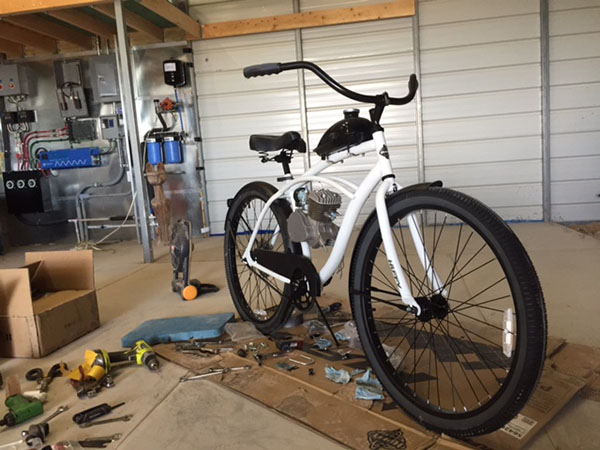 Assembling the Wal-Mart Huffy bicycle was fairly straightforward. When I was a kid, USA-built Huffy bikes were pretty crappy. They were ok if you rode them like a normal bicycle but jumping or rough scrambling would break the frames. Huffys are made in China now and the frame welds look attractive and strong. From the wheels to the handlebars the whole bike looks better than the Huffys of yesteryear. Which is a good thing because I’m strapping a 2 horsepower motor into the frame of the Huffy to see what she’ll do.
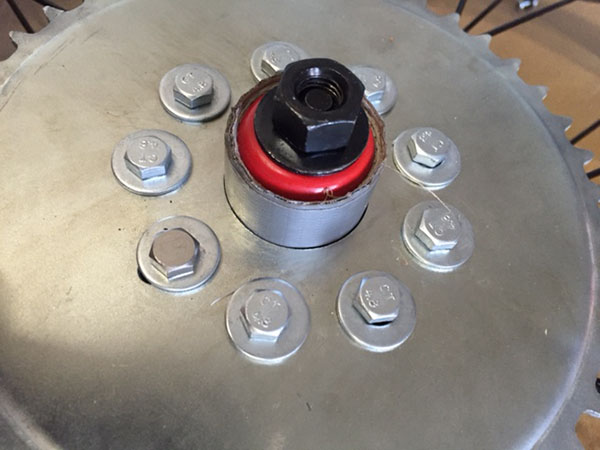 The job went well but when I went to spin the wheel to check the sprocket for square the wheel wouldn’t rotate on the axle. As it turns out a small metal dust cap got squeezed between the sprocket center and the hub, locking the wheel.
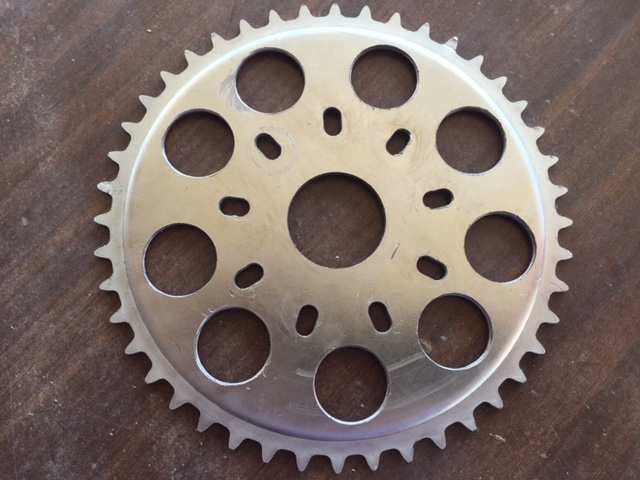
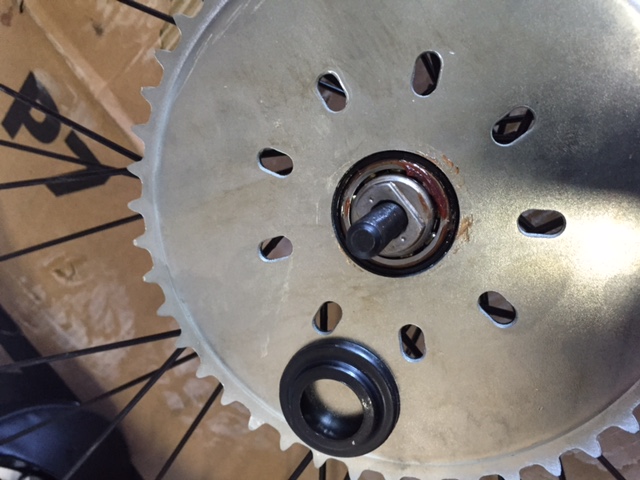 I dismantled the mess and removed the dust cap. After reinstalling and truing the sprocket I trimmed the dust cap to fit inside the center hole of the sprocket. The bolts for the sprocket are long but you’ll need that length to get the nuts started. One of the 9 bolts in my kit was a bit too short, or I lost the right one so I used a bolt from the junk drawer after cutting it to length. The sprocket to hub deal looks like poo-poo but the sprocket seems like it is attached well and no one complains about it online. We will see.
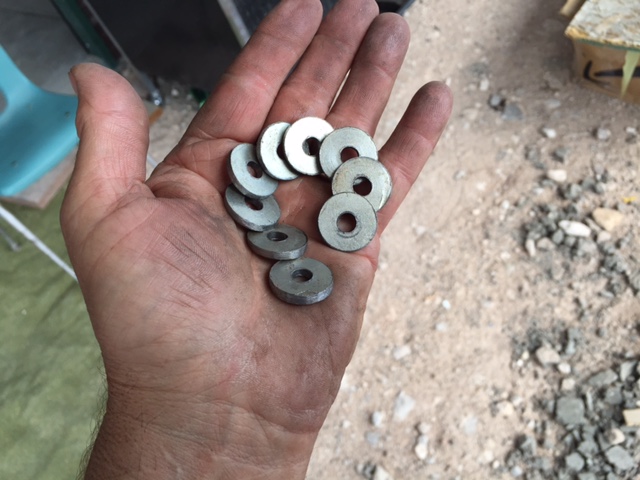
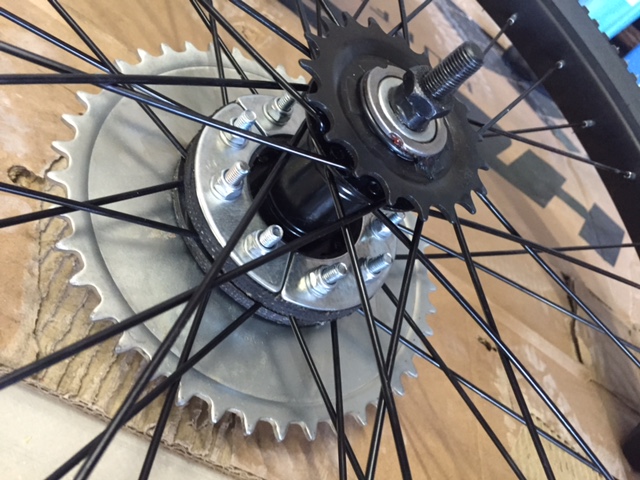 The sprocket holes are elongated to allow for different wheel hubs but I didn’t like the bit of hole showing so I put ¼” washers on the bolts to conceal the gap. This looks great except that the rear brake stay arm now came in contact with the bolt heads. It’s that tight! A quick realignment in the vise and the arm cleared the bolt heads.
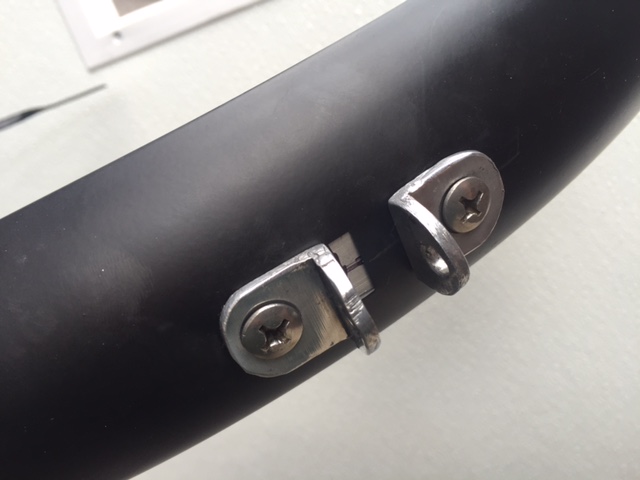
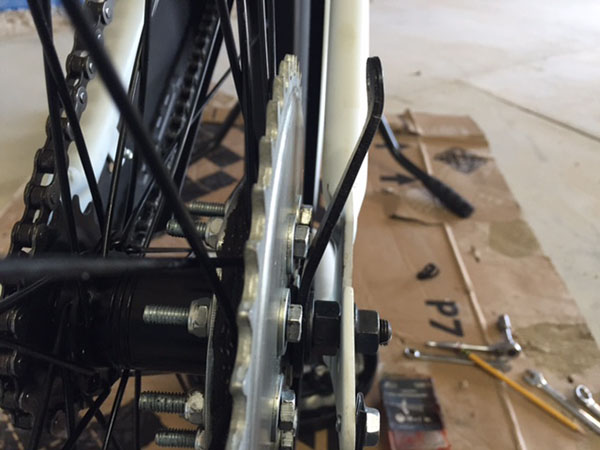 Of course when you alter one item it causes a chain reaction down stream. The re-bent brake stay arm no longer fit between the axle side-plates so I had to make a new clamp to stop the brake stay from rotating under braking. The stock clamp was super thin steel. I figured with 2hp pushing the Huffy to high speeds the clamp needed to be a bit heavier.
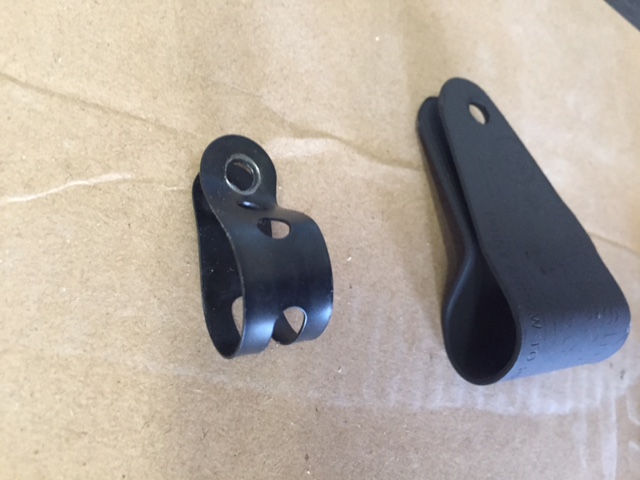 The bolt on the stock arm was a tiny #10. That didn’t look so hot to me so I bumped it up to a ¼” size. And since I couldn’t wait for the paint to dry the clamp got a little scratched up.
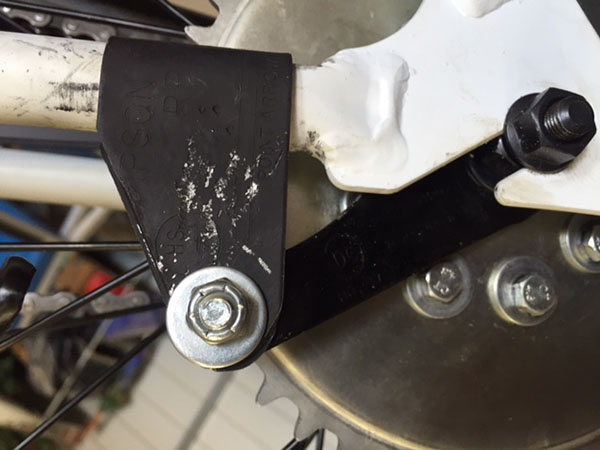 With the rear wheel fitted back into the frame I started test fitting parts. The rear motor mount clamps securely to the seat post but this frame has a large diameter front tube that is too wide for the bolt centers of the front mount. The motor kit comes with a U-bolt and clamp setup for wide front tubes. I could make it work but it looks horrible and most likely will rattle apart. I’ll have to rethink the front mount. The carb is a little close to the top tube. I will probably run the throttle cable inside the top tube to give it a larger radius bend. The chain run will determine final motor placement.
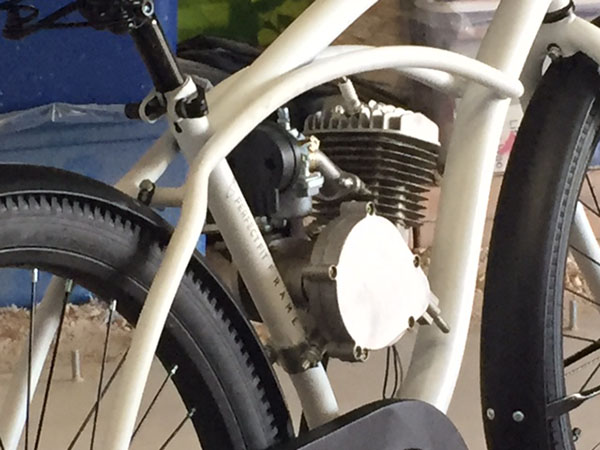
 It’s sort of futile hopping up a 2-horsepower bicycle engine because the rear sprocket-to-spoke connection is so weak. Spindly running gear has never stopped a hot-rodder before and bicycle motor aficionados are hot-rodders to the bone. While Mini Motor Madness is on hold awaiting parts I wandered into the wonderfully inexpensive world of high performance engine goodies.
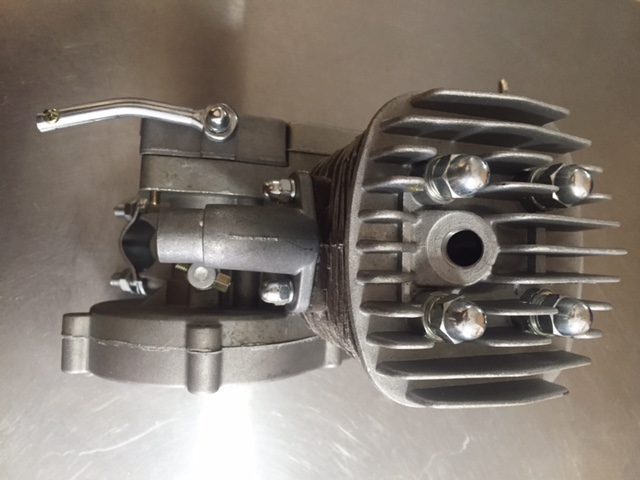
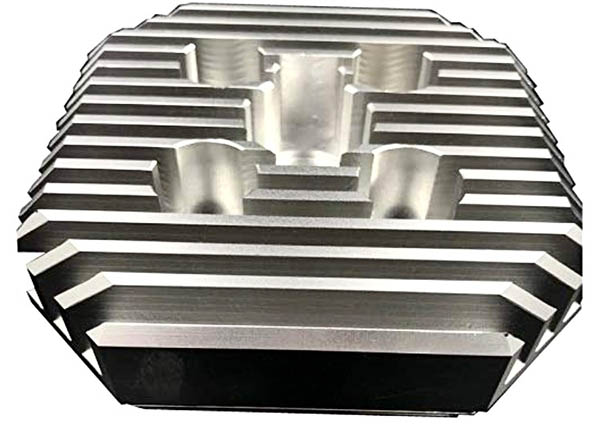 The bog standard bicycle motor is not heavily finned. Overheating doesn’t seem to be a problem but with an aluminum bore and a recommended 16:1 oil/gas ratio it is clearly something to watch out for. Like all parts for these little motors there are a zillion sellers insuring fierce competition and low prices for the thrifty Rodder. The increase in the quantity of cylinder head metal alone would be helpful in keeping things square and dampening noise. The large, deep fins must do a great job of lowering cylinder temperatures. A cooler cylinder means you’ll be able to run a leaner mixture without melting internal parts. Less oil means more room for fuel going through those tiny orifices in your carb. It’s like changing jet size by playing with the fuel ratio. Any compression increases would probably be nullified by the low-grade gasoline cheap mini motor fans cannot help but use.
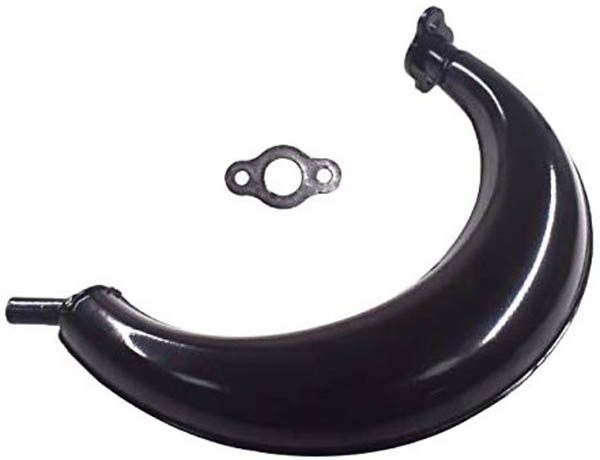 There is even more selection when it comes to exhaust systems. Two-piece, welded seam expansion chambers are the most numerous and various finishes are on offer to suit anyone’s budget. Expansion chambers are like free horsepower in that most times you won’t need to do much carburetor work to get the things in tune. Using a combination of black magic and sonic waves, expansion chambers most often move the powerband higher into the rev range and will allow the motor to spin up another few thousand RPM. Those extra RPM’s are a good thing for drafting Indian FTR750s on the long straightaways at The Sacramento Mile but a chambered motor may not get you over that last vertical shelf of a long, rocky hill climb. It’s the one where you don’t dare downshift for fear of losing momentum.
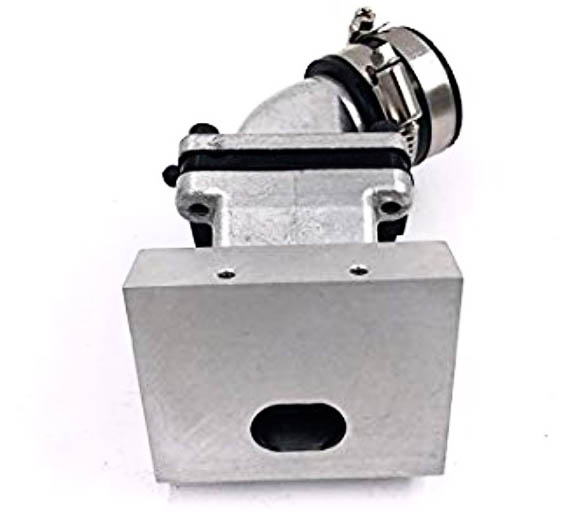 No matter how well designed, reed valves are an obstruction in the intake tract of a mini motor. They make up for this by stopping the constant re-carburation of the fuel mixture due to the reverse air pulses created by a sloppy piston port intake. Reeds also allow huge holes in the piston skirt to extend the degrees of rotation a crankcase can draw in the fuel/air mixture. Since nothing can blow back out the carburetor, an extra transfer port can be carved into the intake side of the cylinder wall. Combined with an expansion chamber, reed valves can more than make up for blocking the intake tract. Even without all the piston/transfer port butchery low speed running is improved by the cleaner intake signal.
 With all the excitement focused on pumping more air through your mini motor you’ll find the stock carb wanting. Large carburetors are really cheap online so why not go all the way? For less than $200 you can convert your mild-mannered, reliable mini motor into an atomic bomb ready to explode between your legs at any moment. Sure it’s stupid. Sure you will burn more fuel and annoy all you neighbors, but when have those things mattered to a Rodder?
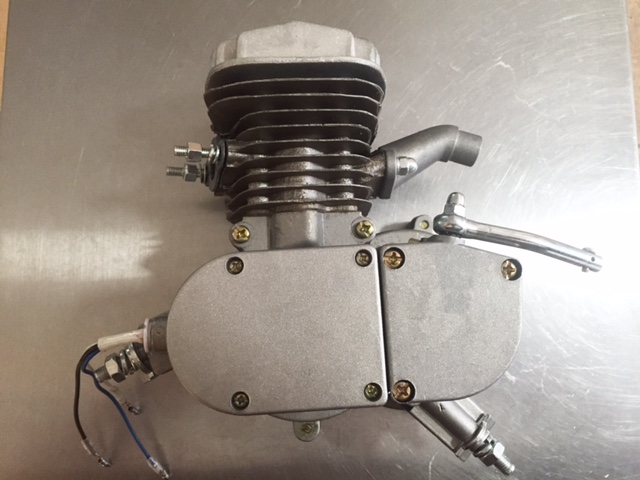 I know what you’re thinking: Yet another ExhaustNotes.us project to be half completed and then shunted aside to gather dust in Tinfiny’s ferrous expanses. I can’t blame you, that’s been the pattern throughout my life. It seems like I get a lot done but I don’t get anything Done with a capital “D.” My shed is littered with the semi-cool and the semi-finished.
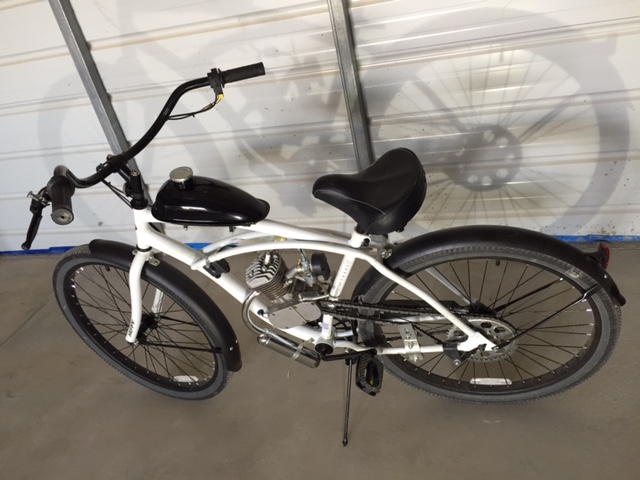
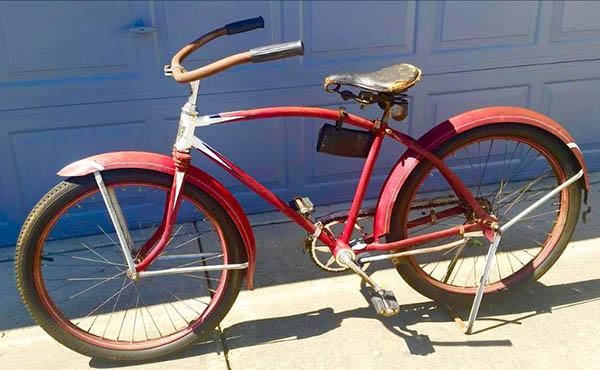 I started looking at new bikes, which led me to China’s little mom & pop store, Wal-Mart. Wally-World has a sweet 26” Huffy standard style bike for only $88 delivered to my door. Just think: new tires, shiny paint and no rust anywhere! At that low-low price why bother with garage sales and repairing trashed bicycles? So I took the plunge on a white-framed example that should look striking combined with The Jewel’s black fuel tank and chain guard. Assembly is not included with mail-order bikes but would you want some ham-fisted Wal-Mart garden center employee messing with your brand new ride?
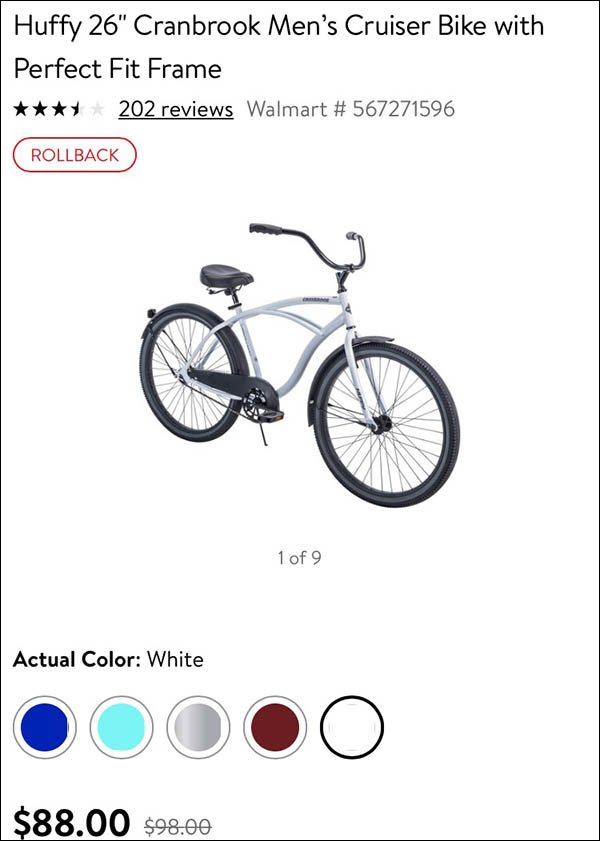 I’ve also tapped into a knowledge base at the Facebook page, Motorized Bicycle Builders. These gnarly veterans of the tiny-engine wars have seen it all and done it all. They have given the $88 Huffy two thumbs up providing I scrap the stock wheels, buy heavy-duty replacements, strip off the fenders and add a front brake. Unfortunately, this is valuable information that I will have to learn the hard way.
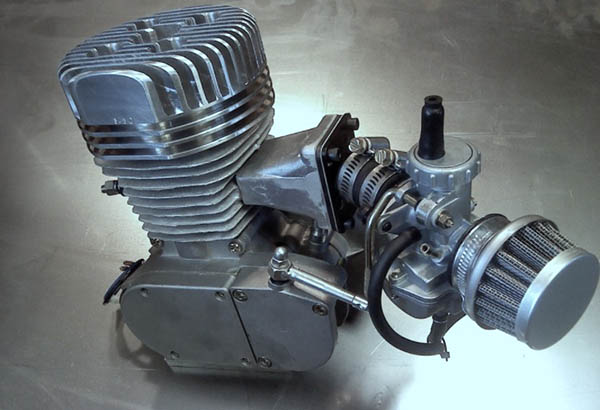
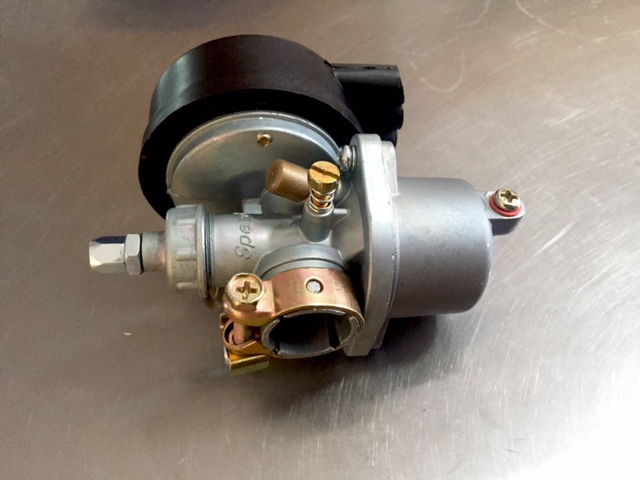 Amazon has pages and pages of bicycle motors and most of them look like the one I bought. Prices range from $90 to $200 for what looks like the same exact thing. There are 50cc kits and 80cc kits so I opted for the 80cc. YouTubers will tell you the 80cc engine measures out to around 60cc, which is a good thing because the engine fins don’t look large enough to cool a bigger bore. You can also buy 4-stroke kits but then you’d be no friend of mine. The main reason I sprung for this one was because it came with a chrome exhaust pipe.
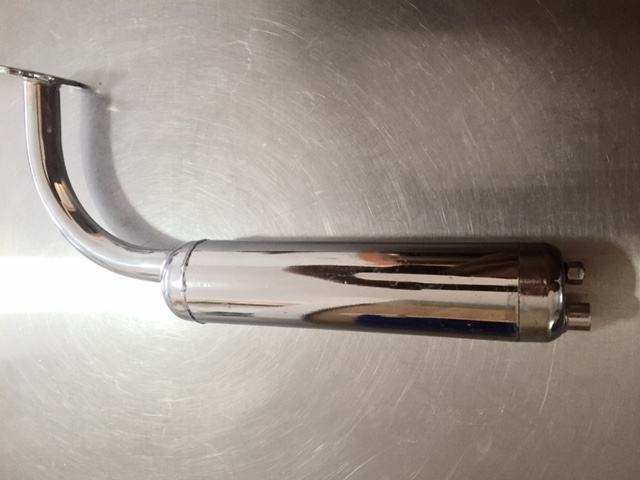
 The transmission is a one speed, manual clutch set up and you’ll get the throttle, throttle cable with a matching grip for the left side. A clutch lever with a push button latch allows you to disengage and lock the clutch for pedaling the bike as normal. Included on the throttle housing is a kill button that plugs into the ignition coil. Wiring couldn’t be easier as there are only two wires and I’m guessing it doesn’t matter how they connect.
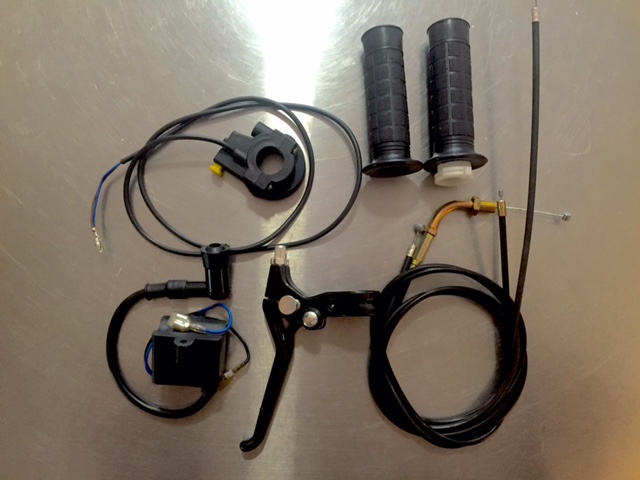 The hokiest part of the conversion is attaching the rear sprocket. Your average bicycle has no way to connect a rear sprocket so you have to use two rubber discs, three steel plates and the sprocket to sandwich the spokes. This seems like a bad idea from many angles but YouTubers say it works ok. Centering the sprocket is critical along with adjusting run-out. A flimsy looking chain idler pulley is included to keep the included chain from sawing through the lower frame rail but again, the Tubers say it ends up working well. Careful adjustment of the motor in the frame may eliminate the need for an idler. That’s what I’ll be shooting for.
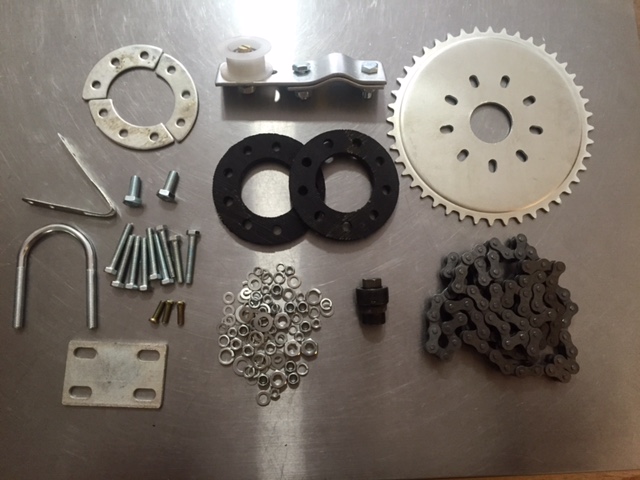 When I say complete I mean complete. You’ll get a chain guard, a petcock, a sparkplug and even fuel hose. Unless you want upgraded components there is really nothing else to buy.
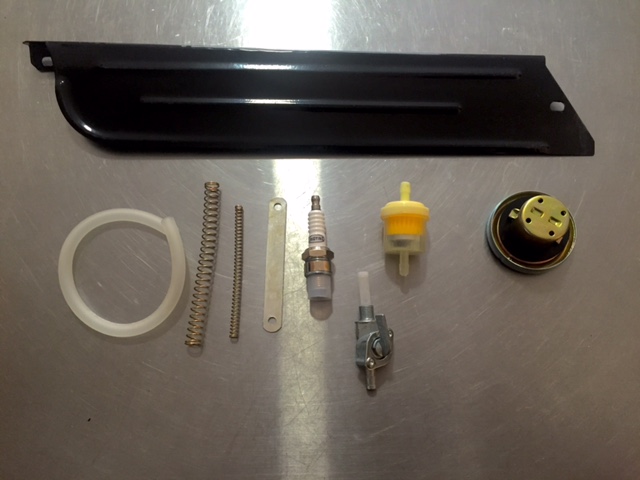 The kit comes with a cool teardrop gas tank that bolts to the top frame tube. The tank comes glossy black and would look great sitting atop an 80 cubic-inch Indian flathead drag bike. Handwrite “The Jewel” on the side of the tank in that yellow junkyard paint and you will win all the bike nights.
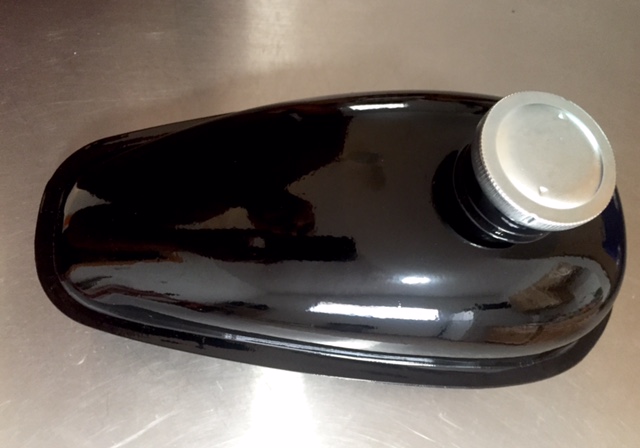 The sheer quantity of parts for $108 makes me happy (a fringed T-shirt for a Harley costs $100). For me, it almost doesn’t matter it the thing works or not. I like looking at all the new pieces. My next step is to find an older, one speed, balloon-tired 26-inch bicycle for a host. One with curving frame tubes and chrome fenders. I’ll let you know when I find it and I’ll do a story on the install and road test of the little motor.