
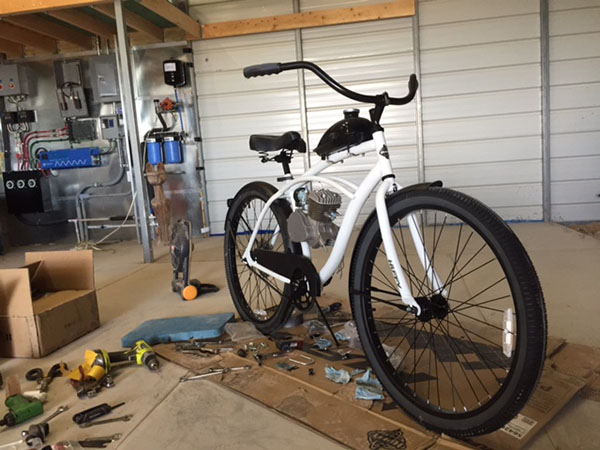
 Assembling the Wal-Mart Huffy bicycle was fairly straightforward. When I was a kid, USA-built Huffy bikes were pretty crappy. They were ok if you rode them like a normal bicycle but jumping or rough scrambling would break the frames. Huffys are made in China now and the frame welds look attractive and strong. From the wheels to the handlebars the whole bike looks better than the Huffys of yesteryear. Which is a good thing because I’m strapping a 2 horsepower motor into the frame of the Huffy to see what she’ll do.
As per the Bicycle Motor Builders Facebook page I packed heavy-duty wheel bearing grease into both wheels. This is a pretty simple job as you only need to loosen the bearing cones a bit to push grease into the gap.
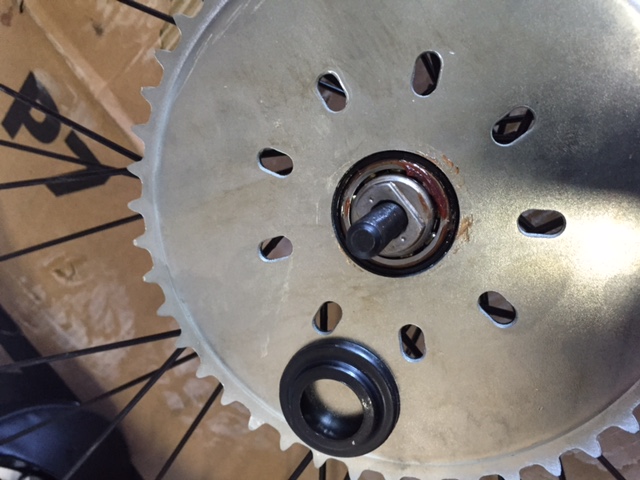
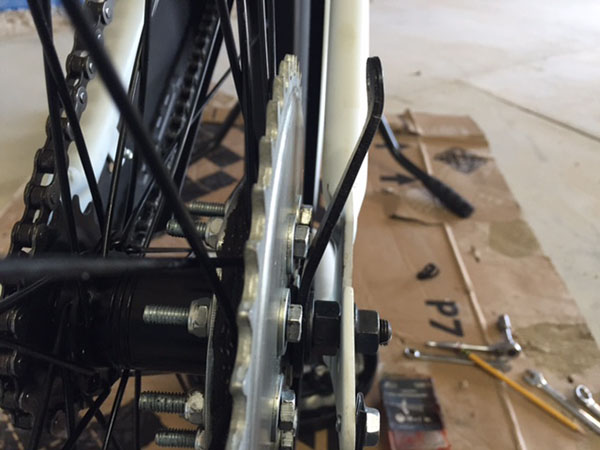
Once the bearings were greased I fitted the rear sprocket onto the wheel. This is the cheesiest part of the install as the sprocket sandwiches the spokes between 2 rubber spacers. Keeping the sprocket centered on the wheel is critical so I used a hole saw blade wrapped in duct tape as a mandrel.
 The job went well but when I went to spin the wheel to check the sprocket for square the wheel wouldn’t rotate on the axle. As it turns out a small metal dust cap got squeezed between the sprocket center and the hub, locking the wheel.
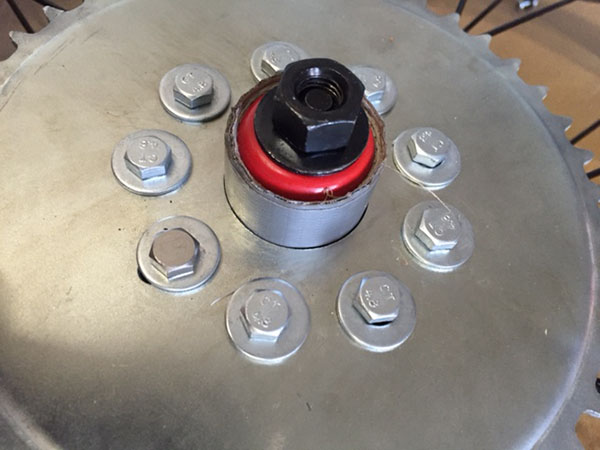
 I dismantled the mess and removed the dust cap. After reinstalling and truing the sprocket I trimmed the dust cap to fit inside the center hole of the sprocket. The bolts for the sprocket are long but you’ll need that length to get the nuts started. One of the 9 bolts in my kit was a bit too short, or I lost the right one so I used a bolt from the junk drawer after cutting it to length. The sprocket to hub deal looks like poo-poo but the sprocket seems like it is attached well and no one complains about it online. We will see.
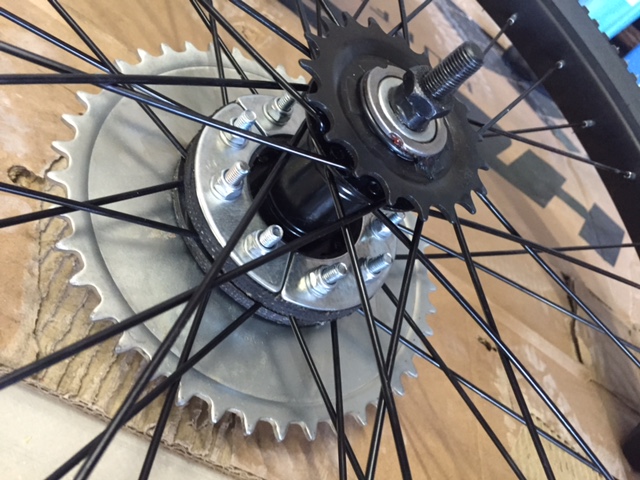 The sprocket holes are elongated to allow for different wheel hubs but I didn’t like the bit of hole showing so I put ¼” washers on the bolts to conceal the gap. This looks great except that the rear brake stay arm now came in contact with the bolt heads. It’s that tight! A quick realignment in the vise and the arm cleared the bolt heads.
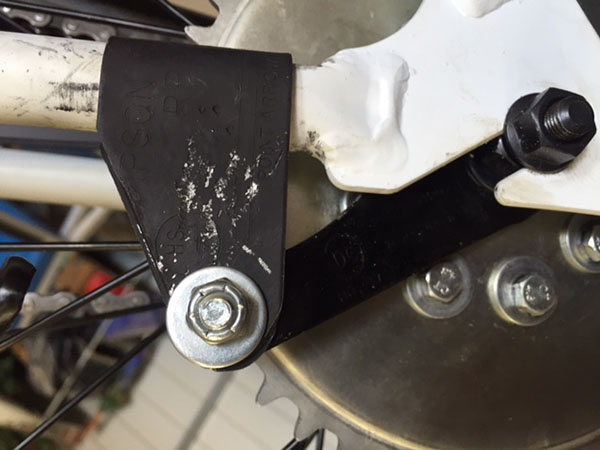
 Of course when you alter one item it causes a chain reaction down stream. The re-bent brake stay arm no longer fit between the axle side-plates so I had to make a new clamp to stop the brake stay from rotating under braking. The stock clamp was super thin steel. I figured with 2hp pushing the Huffy to high speeds the clamp needed to be a bit heavier.
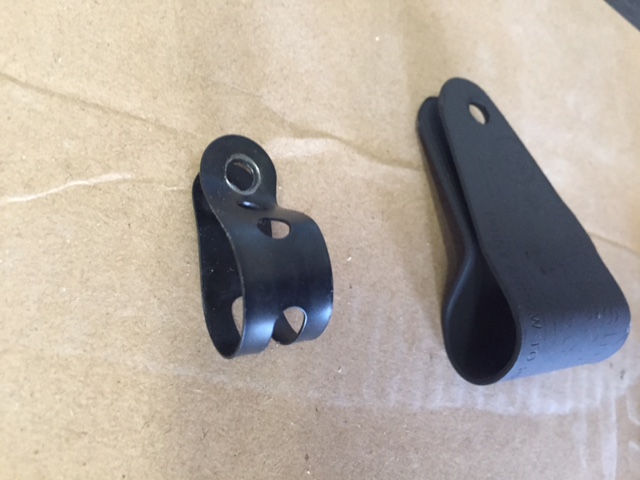 The bolt on the stock arm was a tiny #10. That didn’t look so hot to me so I bumped it up to a ¼” size. And since I couldn’t wait for the paint to dry the clamp got a little scratched up.
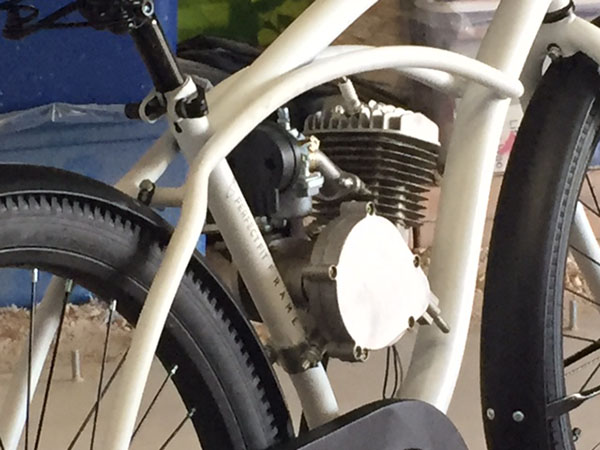
 With the rear wheel fitted back into the frame I started test fitting parts. The rear motor mount clamps securely to the seat post but this frame has a large diameter front tube that is too wide for the bolt centers of the front mount. The motor kit comes with a U-bolt and clamp setup for wide front tubes. I could make it work but it looks horrible and most likely will rattle apart. I’ll have to rethink the front mount. The carb is a little close to the top tube. I will probably run the throttle cable inside the top tube to give it a larger radius bend. The chain run will determine final motor placement.
That’s the progress I’ve made to date. The white frame with black trim looks sharp. The bike feels balanced and not heavy in the least.
True up the washers…… Nice build!!!!!!!
With all that room, maybe I could make it a twin…..
the washers are a tad sloppy. I’ll look for ones that fit better.
As Ralph said years ago: “Unsafe at any speed…”
Fun project! Can the entire motor slide down a little bit ?
Yes, the motor slides down to fit the front mount. You will see the motor secured in part 5. If I get that far…
I like it!
Are you going to do any brake improvements?
I’ve ordered a front brake for the thing. Caliper type on rim like a Buell.
Keep up the good work!
I’m so excited and can’t wait till you to join Berk for a ride to see the whales on powered Huffy’s!
Hundreds of us are living vicariously thru you since we wanted to do the same project but just didn’t get motivated.
“Of course when you alter one item it causes a chain reaction down stream.”
The universal truth.
What, no flame or tribal decals on this build?
was that motor one you had laying around ? U have inspired me…. i want to get a walmart fat bike and throw a 2T on it !!!! If i buy enough beer will you ride north to help ? LOL
No, I bought this on EBay. I see fat tire bikes with these motors on facebook so it can be done.
Motor Kit is around $100- 150