
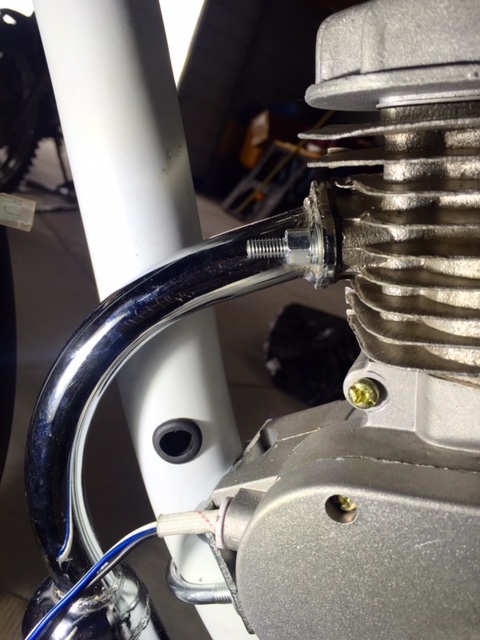
 Not only do I rarely finish projects, it takes forever for me not to finish them. I’m a slow worker. I get bogged down in details and miss the big picture. Details like the front engine mount on Mini Moto Madness. The front down tube on the Huffy is a large diameter pipe and the smaller, cast in semi-circle on the engine crankcase will not fit. The engine kit comes with a steel adapter plate and a U-bolt that fits the fat tube but the thing looks like hell.
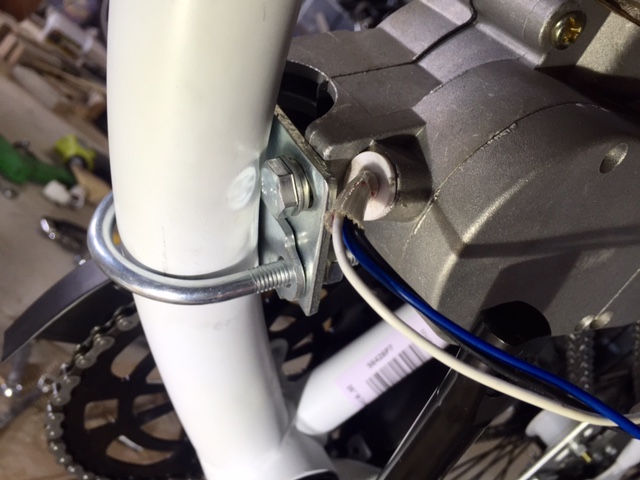 I got to thinking and planning, figuring on a chunk of aluminum to fit the two different pipe diameters, holes drilled, cuts made, longer bolts, it was getting out of hand, man. This time I was able to catch myself. What the hell am I doing? Every other mini motor I looked at used the stock mounting plates so I said, “Screw it.” and went with the popular choice. Right there is a two-day labor saving decision.
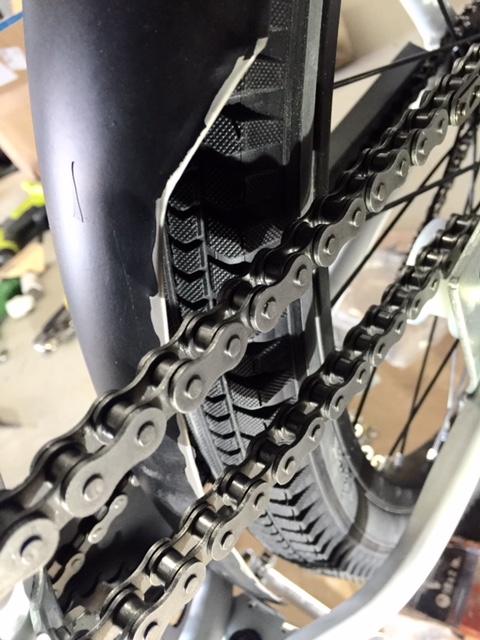 With the motor firmly in place I spent some time on the chain drive. The rear fender came in contact with the chain so I had to trim it and roll the sharp edge. It’ll need a paint job and stronger brackets but I’m going to wait until the mechanical is done before tackling cosmetics.
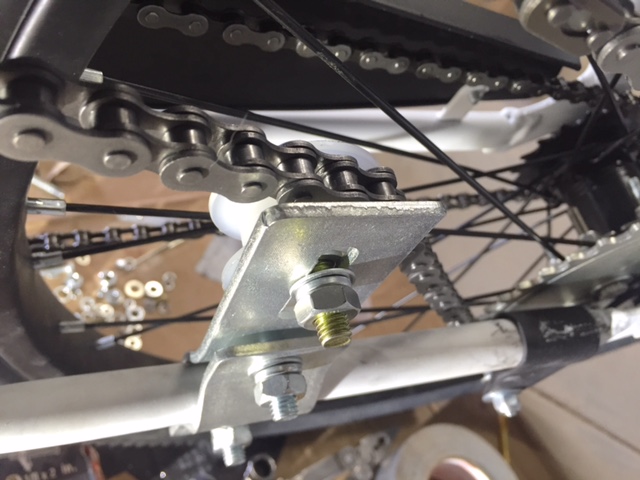 It’s almost impossible to get two chains to agree on length so the mini motor kit comes with an idle roller for tension adjustment. The idler also turns the chain angle upwards before the lower frame tubes get narrow, keeping the chain from rubbing. I don’t like the thing but I’m not sure what to do about it. My rear sprocket is slightly misaligned; the chain doesn’t jump off the sprocket but it sure favors the hub side. To center the chain the rear sprocket needs to go outboard 1/16” so that means making a spacer and reassembling the sprocket onto the wheel. I’m also considering adjusting the countershaft sprocket instead. I’ve decided to deal with this situation later.
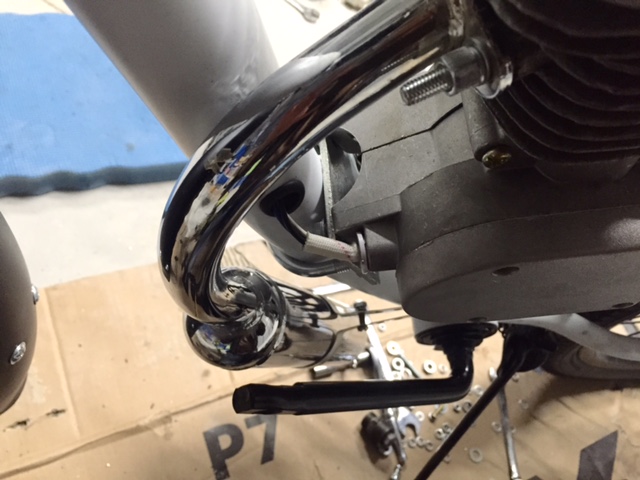
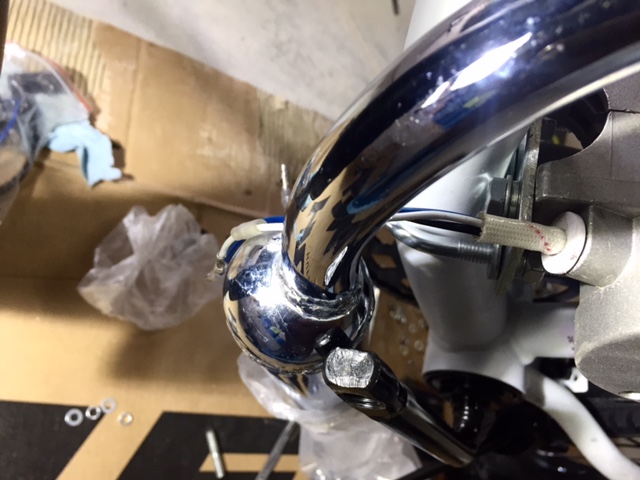 The pretty chrome exhaust pipe didn’t quite clear the Huffy’s crank arms. I didn’t want to mess up the chrome by cutting and welding the pipe so instead clamped the exhaust flange in the vise and twisted the pipe a few degrees. The pipe twisted beautifully with no wrinkles or kinks. The crank arms clear with room to spare. Sadly, the chrome plating did not go along with the program and delaminated. Pro Tip: Buy the kit with the black painted exhaust. It’s easier to modify for your particular bike.
 The ignition coil was a straightforward install. I’ve upped the difficulty rating by routing the wiring through the frame. Most of these bike builds look cluttered with wires and cables. I’ll run the controls inside the frame as much as possible.
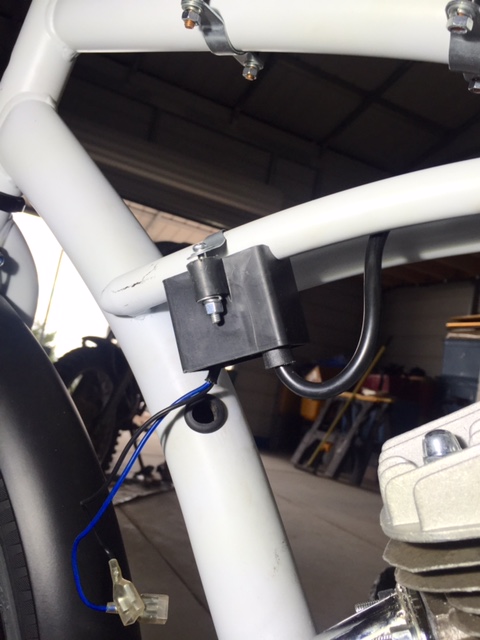 The rotor output wiring will also run internally. I’m sure this will end in tears but I saved a lot of time not fabricating a front engine mount so I’m using that time credit to tidy up the job.
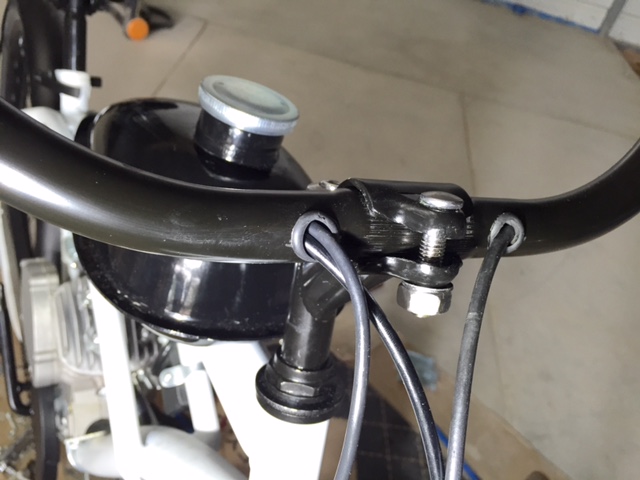
 The other sloppy area on these builds is the handlebar. Unlike a motorcycle, there is no speedometers or bodywork to hide the throttle/clutch/kill wiring. I’ve drilled holes and snaked the stuff through the bars. It looks cleaner to me. Yes, I’ve weakened the handlebars. I’m willing to risk a crash from structural failure in support of aesthetics. We are all artists and it’s about time we started living like it.
nice work,you should open Mini Moto dealership
Ha! I’d lose money on every bike!
The makings of a show stopper, with the attention to detail, good job, Joe. Keep it up
No wonder! That mole hills to mountains idea keeps popping up. Good Luck! I’m sure it will all work out! 😎
Nice job a little white paint on the frame mount and you’re good to go
I like the idea of routing the wires and cables internally, but boy those are some massive holes!
I’ll see you one broken frame and raise you a case of road rash!