The 9mm 1911 Resurrection

By Joe Berk

As mentioned in recent blogs on my 9mm Springfield Armory 1911, I took the gun to TJ’s Custom Gunworks to have it repaired and customized.  I have the gun back now and I am very satisfied with the work.

When I took the 1911 to TJ, I asked him to repair the damage I did to my 1911 and to add several custom touches.  That’s what he did, and I’ll describe them below.   Most of the photos in this blog are from TJ.   I took a few, too.

Fortunately, the 1911’s barrel was not damaged (the cartridge blew apart; the barrel and chamber survived).  TJ polished the barrel, the chamber, and the ramp.  The reinvigorated barrel looks great and it adds to the 1911’s appearance.

The polished 1911 barrel.
It looks great, doesn’t it?

TJ polished the 1911’s ramp and chamber.  This helps to prevent feed failures and assists in extraction.  The polished ramp also helps to prevent bullet pushback into the case as the ramp is pushed from the magazine into the chamber.

The feed ramp before polishing.
The feed ramp after polishing.

The trigger was in bad shape after the 9mm cartridge went into its sudden unintended disassembly mode.  TJ cleaned it up, but I’m going to have him fit a new target trigger at some point in the future.

The rigger before TJ cleaned and finished it.
The trigger and its bracket after brushing and polishing.

While TJ was in the gun, he removed and replaced the Springfield Armory firing pin and firing pin spring (which he does on all the Springfield Armory 1911s that come into his shop).   Springfield uses a titanium firing pin and a heavier firing pin spring, which is a bad combination.  I’ve had occasional misfires with my Springfield, and the primers have previously always shown light firing pin strikes.  With the new Wilson firing pin and firing pin spring TJ installed, that problem is in the rear-view mirror (where it belongs).

TJ found that the extractor on my Springfield Armory 1911 was terrible.  I thought that might be due the base of the cartridge bursting, but it was not.  It was just a factory goof up. The photo TJ included shows the extractor about as I remembered it before the event that set all this in motion.  The extractor had been extremely difficult to remove from the slide when I disassembled it for cleaning, but I never thought to check if it was engaging the cartridge (the gun had been ejecting).  You would think an outfit like Springfield would know what they are doing in this area, but apparently they did not.  TJ fit a new extractor to fix that problem.

This photo shows the original extractor not touching the cartridge case at all. It appears that the claw is just too short.
The new extractor TJ installed; note that it now has a firm grip on the case rim.
Another shot of the extractor on the case rim. It’s amazing the cartridges were extracting and ejecting before this fix.  They were flying everywhere.
The old extractor is on top; the new one is on the bottom. Note that the old extractor was not reaching in to engage the case.

Ejection is way better now.  The gun drops all the cases in the same spot just to my right (they don’t go flying all over creation like they used to).  It makes scooping up my brass a lot easier.

Reinstalling the slide release on my Springfield was difficult.  The slide release plunger was too long and the camming surfaces on the underside of the slide release were not cut at the correct angles.  TJ reconfigured both.  The slide release snaps into place in a very slick manner now.  There’s no more worry about scratching the receiver (the so-called idiot scratch) when the gun is reassembled.

The slide release plunger, as delivered by Springfield Armory, was originally too long. It made installing the slide release problematic. TJ shortened and recontoured it.
The slide release has a contoured bevel to push the slide release plunger in when the slide release is installed. As delivered by Springfield Armory, the angles were incorrect. TJ recontoured this area to make installing the slide release much easier.

TJ polished and fit a new hammer, which looks better than the original.  He also lightened the trigger pull.  The new trigger is light and I like it.

A polished hammer and sear.
The new hammer. It looks good.

The Springfield Armory 9mm 1911 came from the factory with a two-piece guide rod, which I hated.  It would constantly unscrew, even after applying blue Loctite after each cleaning.  The stock Springfield guide rod needed an Allen wrench to unscrew and remove it (Springfield provided one with the gun).  The gun required doing this to be able to rotate the barrel bushing after depressing the guide rod plug.  In my opinion, two-piece guide rods are a solution to a problem that doesn’t exist.  I don’t know why manufacturers fit them to new guns and I don’t why anybody would want one. I asked TJ to fit a polished one-piece guide rod to my 1911, and to make it short enough so that I could rotate the barrel bushing for disassembly without having to unscrew the guide rod.  I like the new set up a lot better.

TJ installed a one-piece guide rod. I like it. The original two-piece guide rod was always unscrewing.
The new guide rod in its bushing. TJ modified it so I could disassemble the 1911 without having to unscrew the guide rod. Not the polished end of the new guide rod, and the polished barrel end.

Finally, TJ polished the slide-to-receiver interface points.  You can see this work in the photos below.

The 1911 slide underside.
The 9mm 1911 receiver.

While TJ had the gun, I ordered new grips and a replacement magazine from the Springfield Armory website.  The original crossed-cannon cocobolo Springfield grips were damaged when the cartridge burst, so I bought another set (they were reasonably priced at $32.95).  The Springfield site also advertised a set of double-diamond checkered cocobolo grips (without the Springfield logo) for $15, so I checked that box, too (I like having an extra set of 1911 grips on hand).  The grips and the new magazine arrived a few days after I ordered them.

I picked up the repaired and reinvigorated 1911 from TJ this week. I’ve already been to the range with it and it works well.  Watch the blog; I’ll post a range report in the near term.  I’ve also had a few more thoughts on what might have caused the burst round that started this adventure, and we’ll have another blog on that as well.  Here are links to our prior blogs on this topic:

KABOOM!

Thoughts on the 9mm Double Charge


Help us bring more content to you…please click on the popup ads!


Seeing double? Nope. I liked my 9mm 1911 so much that when I saw the same gun in .45 ACP, I bought it, too. Watch for a report on it in an upcoming ExNotes blog.

Never miss an ExNotes blog:

A Tale of Two 9s

I recently tested two 9mm loads to assess:

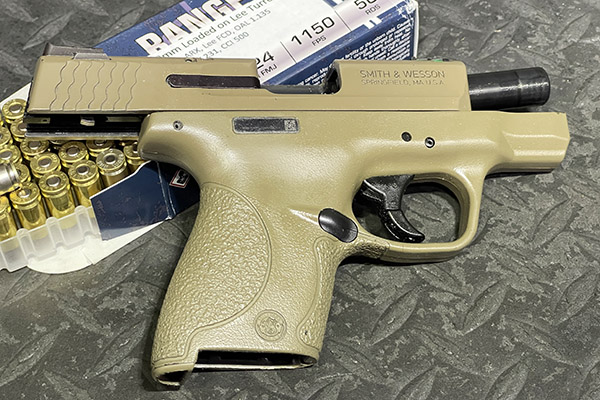
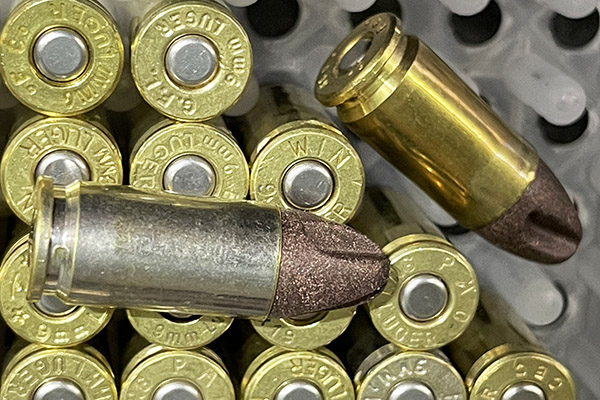
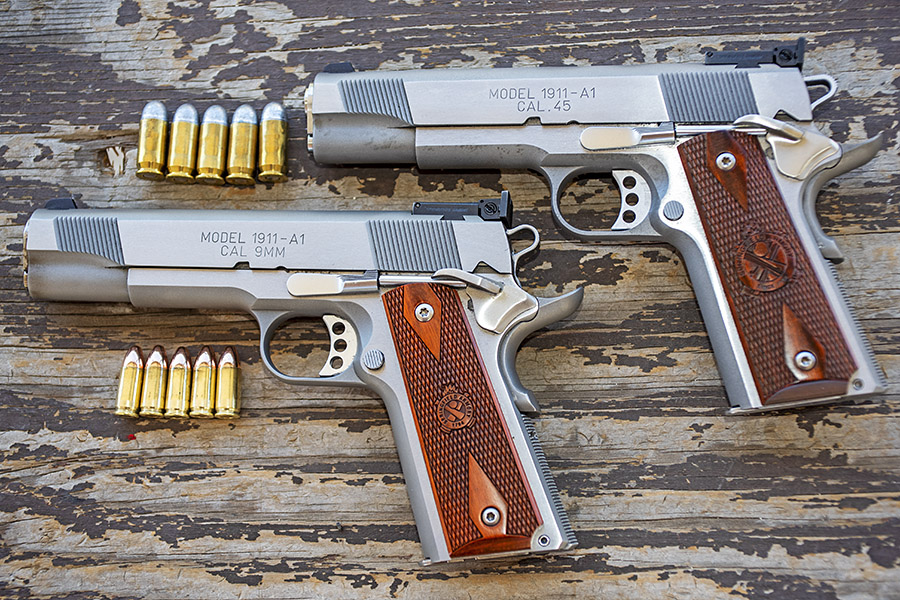
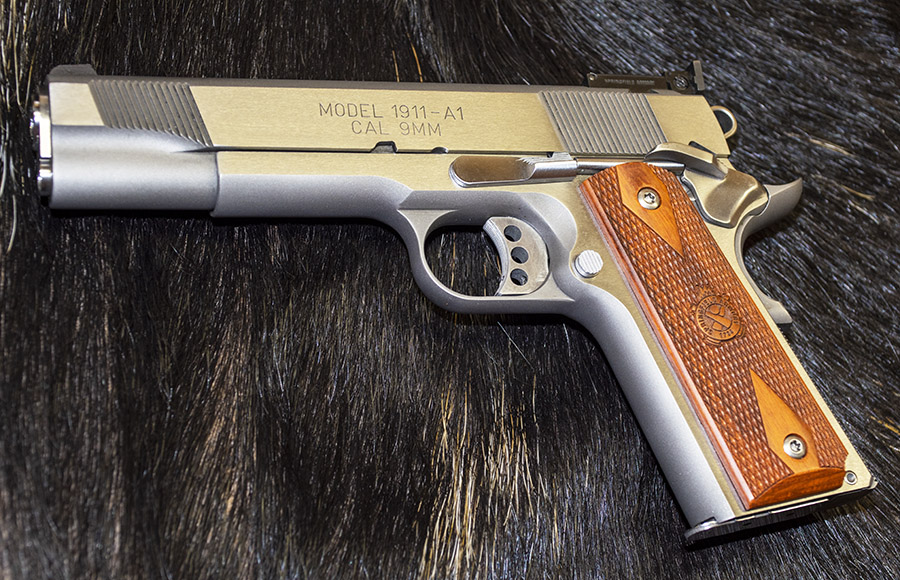
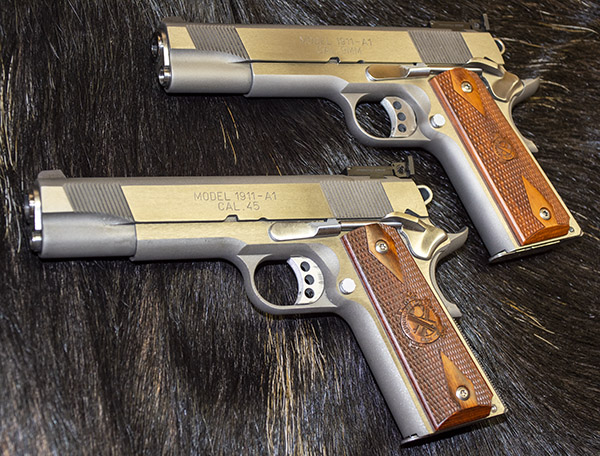
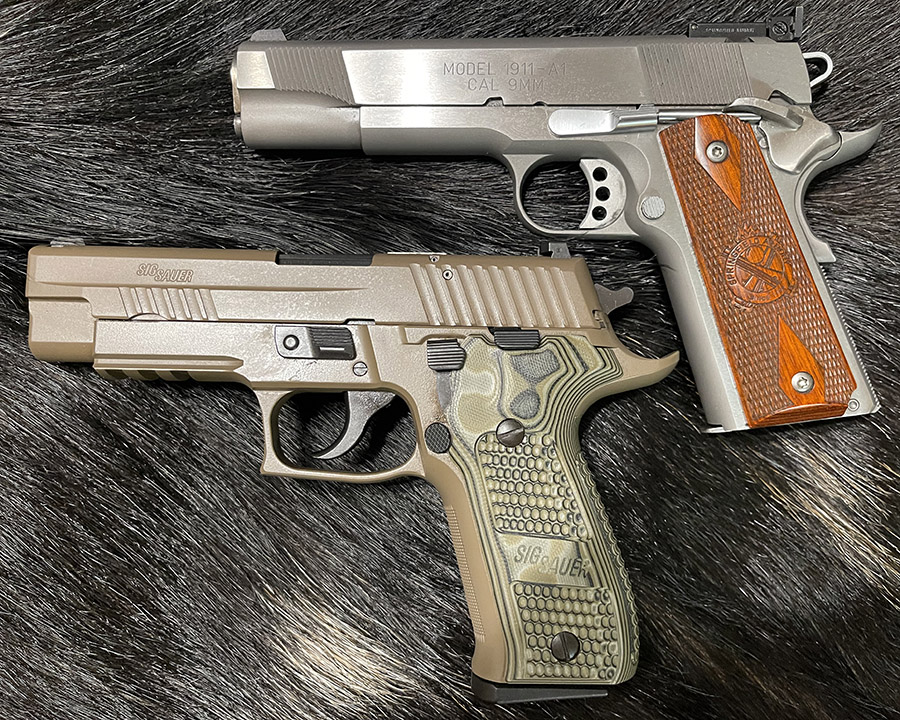
    • How 124-grain roundnose Boudreau powder-coated bullets performed in the SIG P226 and the Springfield Armory 1911, and
    • The effect of seating depth on accuracy with 124-grain roundnose Ranier plated bullets in the Springfield Armory 1911.

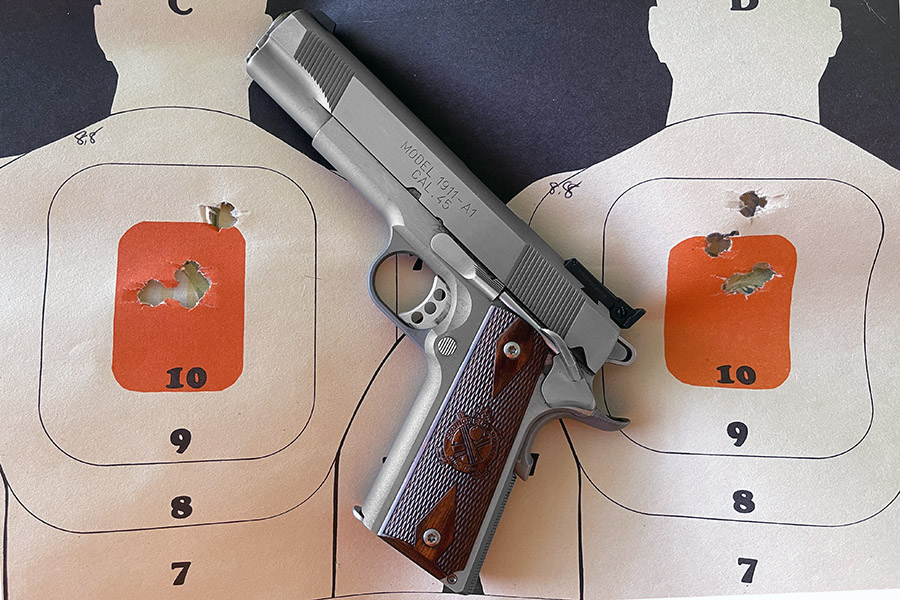
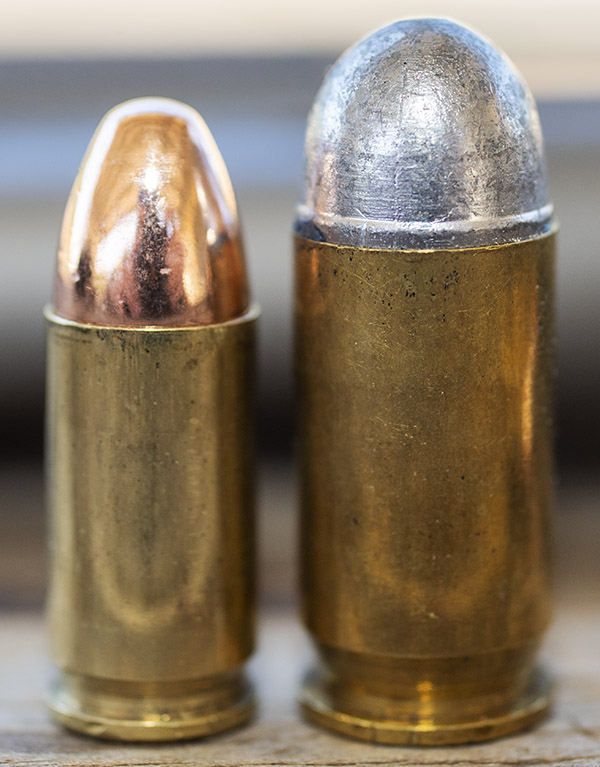
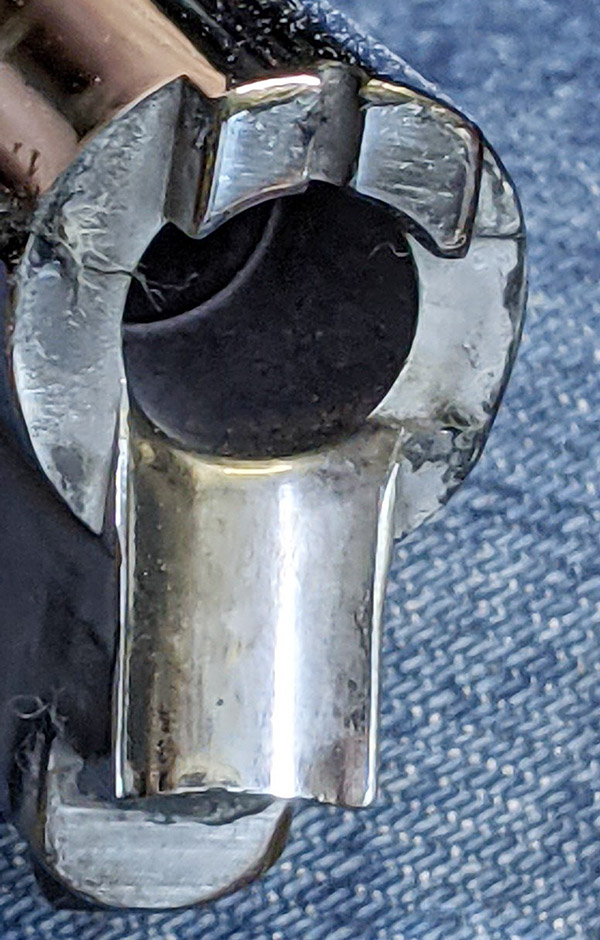
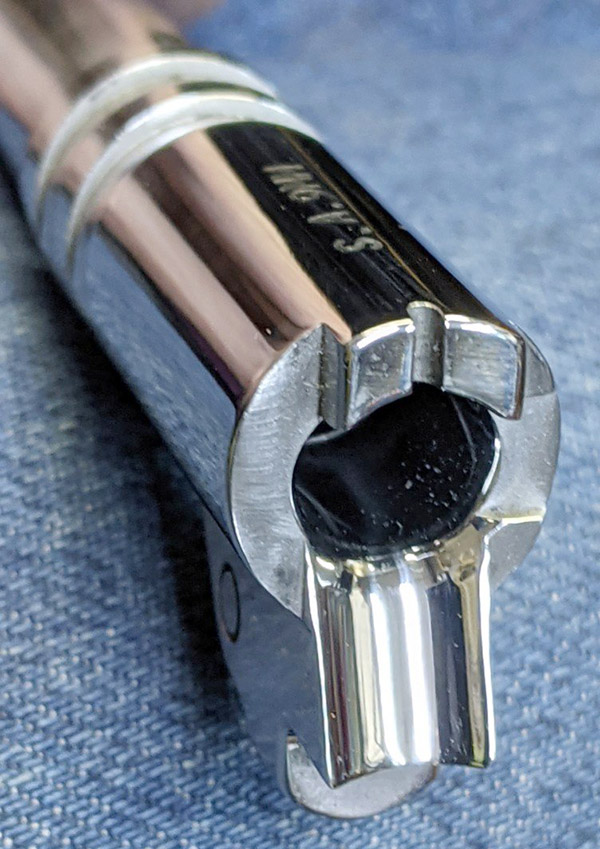
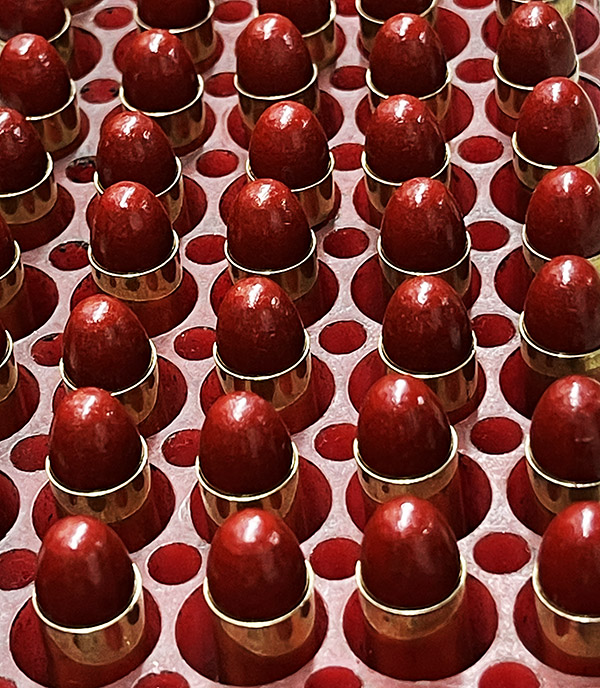
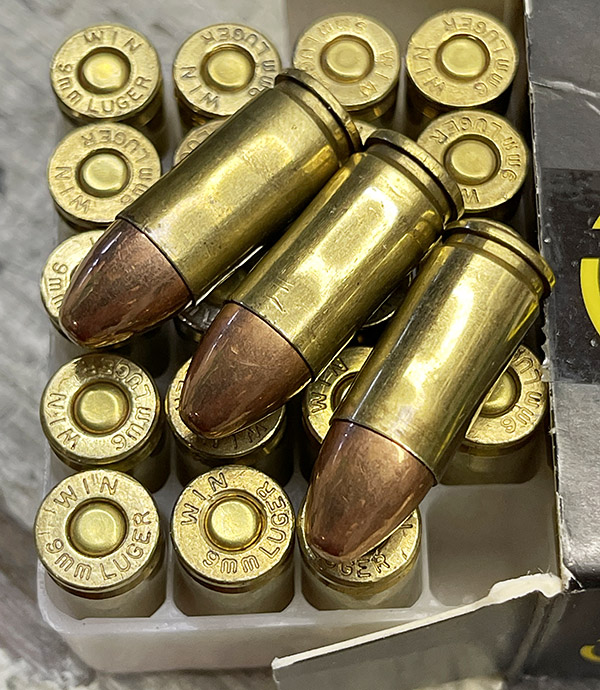
A friend of mine recommended Boudreau powder-coated bullets.  They are reasonably-priced and I liked the look.  Ralph, the Boudreau master caster, recommended seating the bullets at 1.055 or thereabouts, which is deeper into the case than I usually go but that’s what I did with these.  They look pretty cool.  One of my shooting buddies observed that the loaded rounds looked like lipstick.  That’s good; that’s the look I was going for.

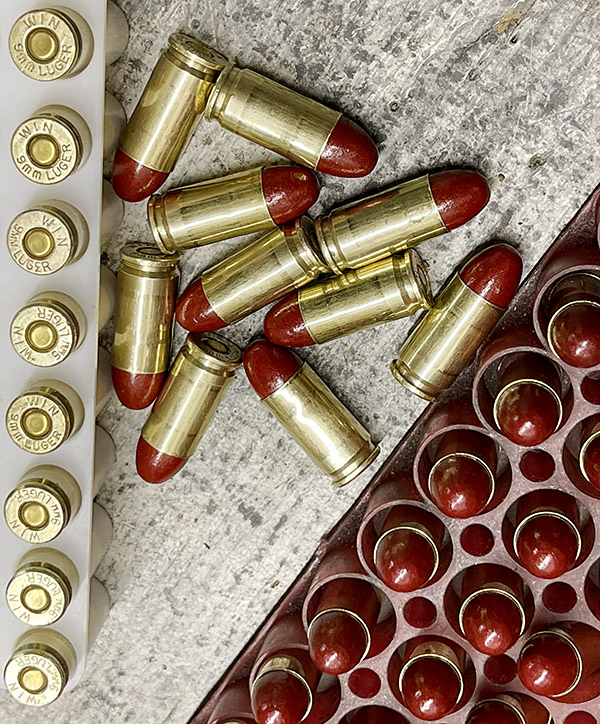
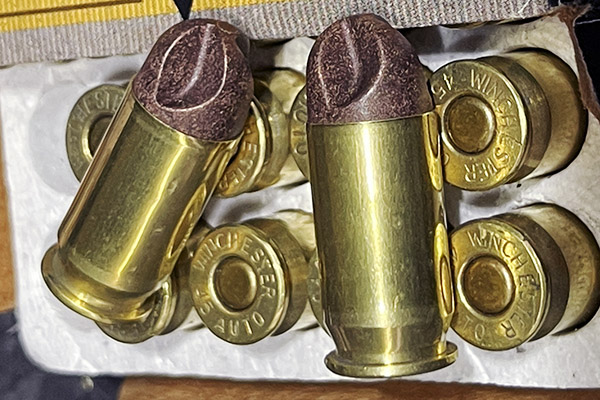
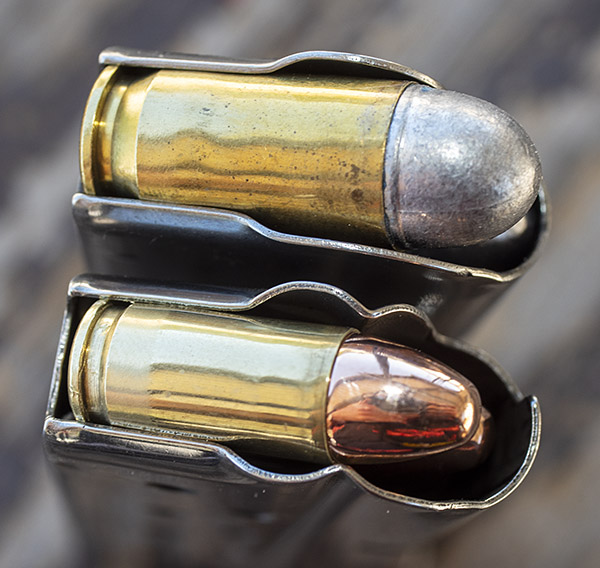
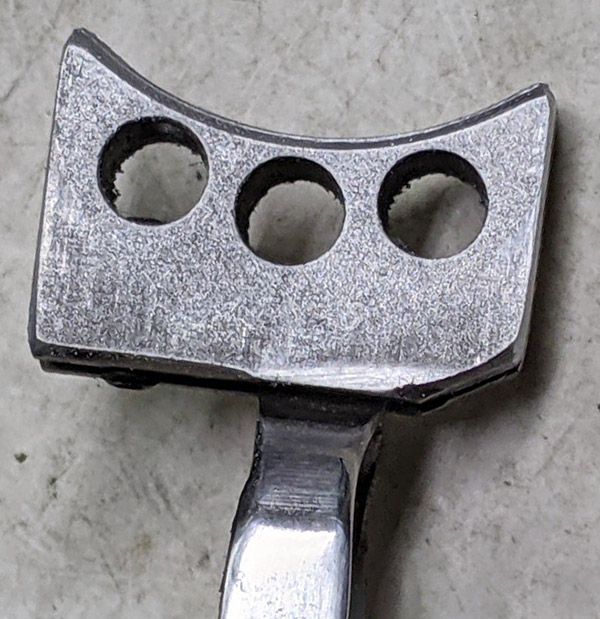
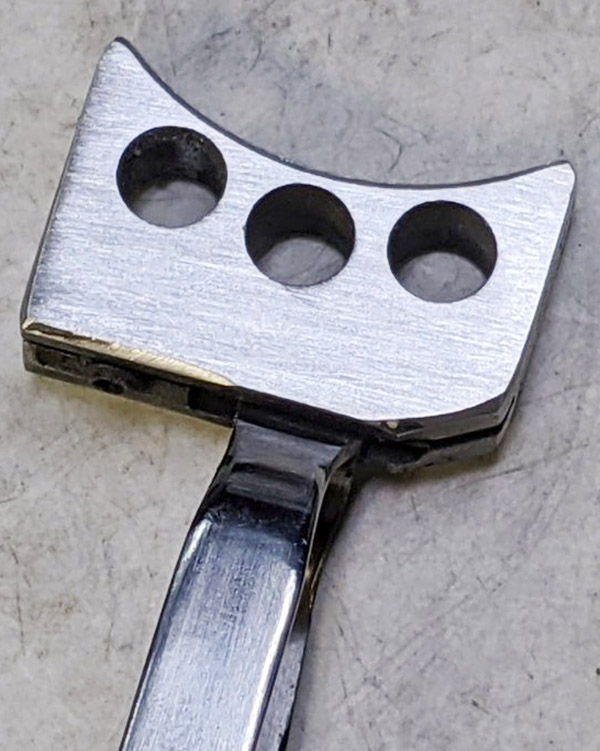
These are the Ranier plated bullets.

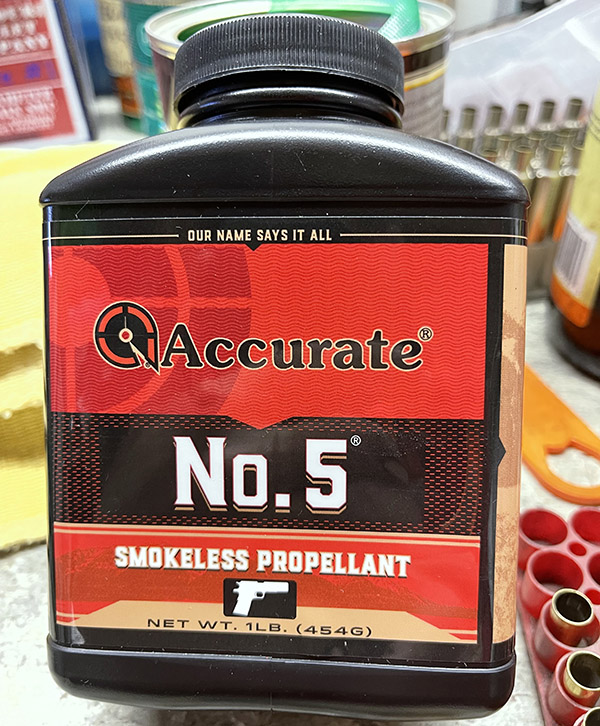
I tried Accurate No. 5 propellant for the first time.  My local reloading shop had this propellant in stock so I thought I would try it (these days, you take what you can get).  Accurate No. 5 is a flake powder like Unique, but it burns much cleaner.   It doesn’t leave the sooty residue Unique leaves, and there’s much less smoke (that’s partly due to the powder-coated bullets, too).

I also wanted to evaluate bullet seating depth’s effects on accuracy with the Ranier bullets.  There’s nothing too scientific or rigorous in this evaluation; I just wanted to get a feel if the 1911 was more accurate or less accurate with the bullets seated deeper in the case or further out (I didn’t do this evaluation with the SIG).

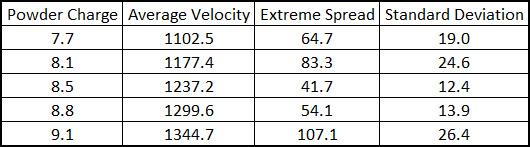
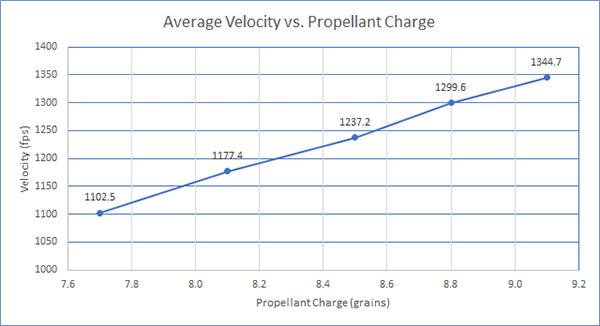
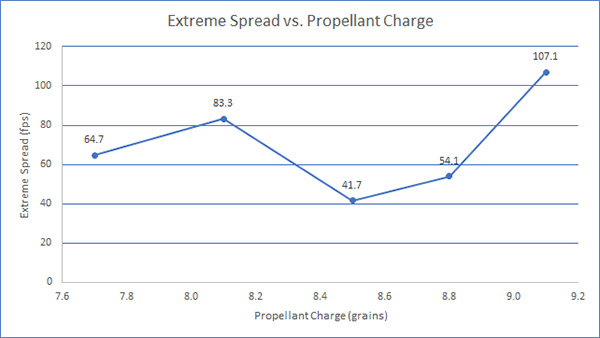
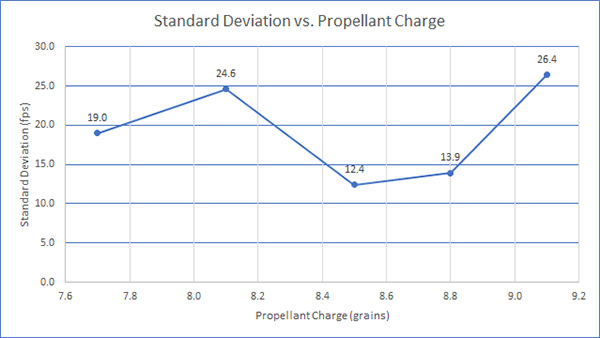
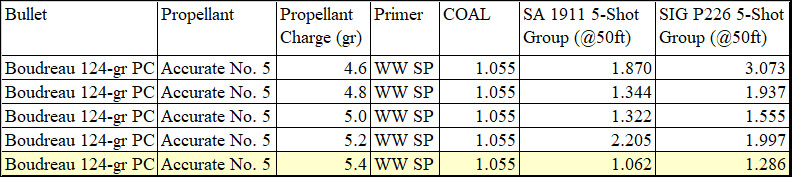
My load manuals don’t make a distinction between powder-coated bullets versus other bullets.  I read some comments online that indicate powder coated bullets get the same velocity with lighter propellant charges.  I finally found some data on the Hodgdon powder website for 124-grain powder coated bullets, and it showed the charge range running from 4.6 to 5.4 grains of their Accurate No. 5 powder.  This was a quick-look test, so I loaded 10 rounds at 4.6 grains, 10 rounds at 4.8 grains, 10 rounds at 5.0 grains, 10 rounds at 5.2 grains, and finally, 10 rounds at 5.4 grains.   As mentioned above and per Ralph’s suggestion I seated all bullets to a cartridge overall length (COAL) of 1.055 inches.  I fired one 5-shot group at each charge level with the 1911, and one single 5-shot group at each charge level with the SIG P226, all at 50 feet.  Like I said above, it was not a rigorous assessment; I just wanted to get a feel for what worked and what didn’t.  Here are the results:

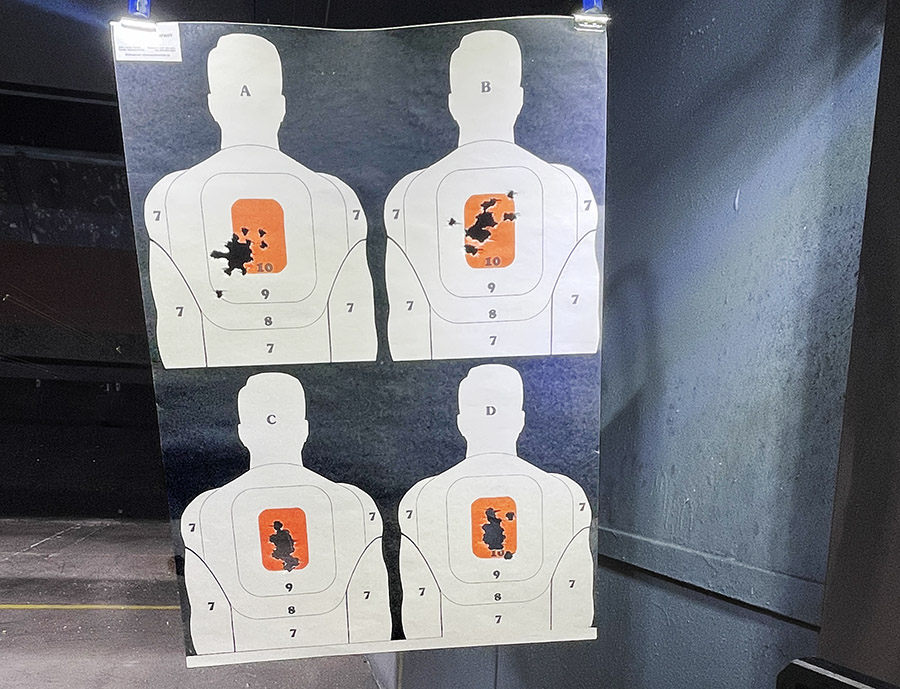
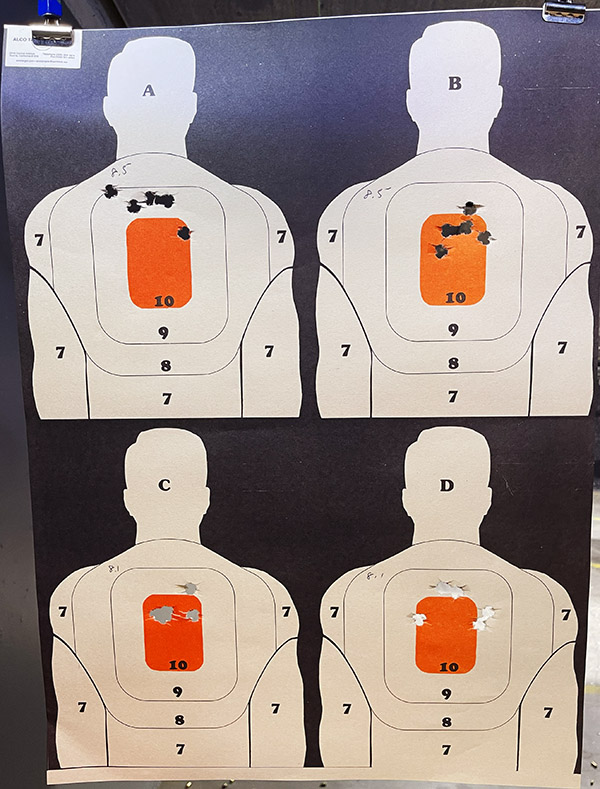
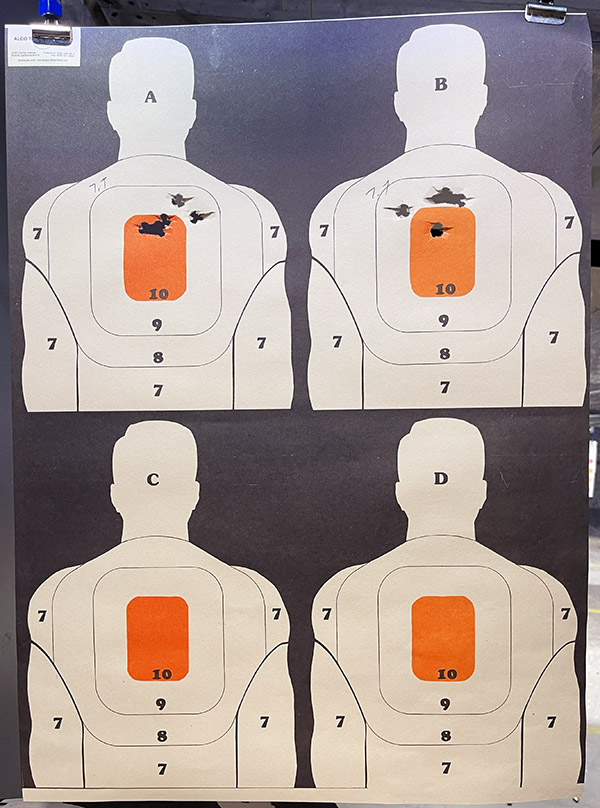
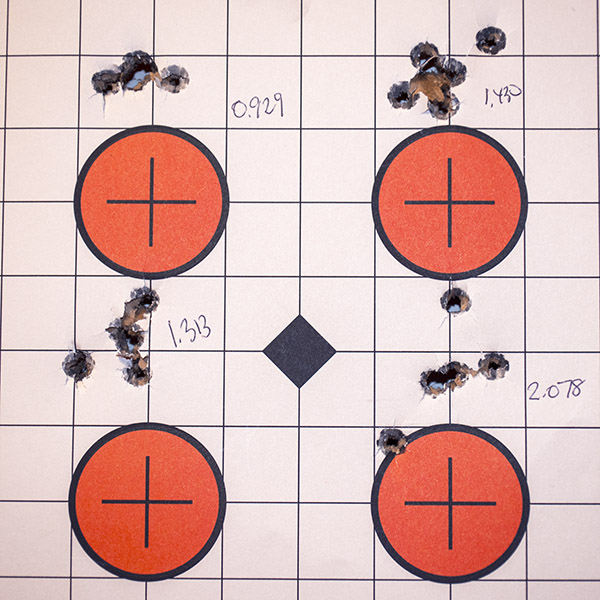
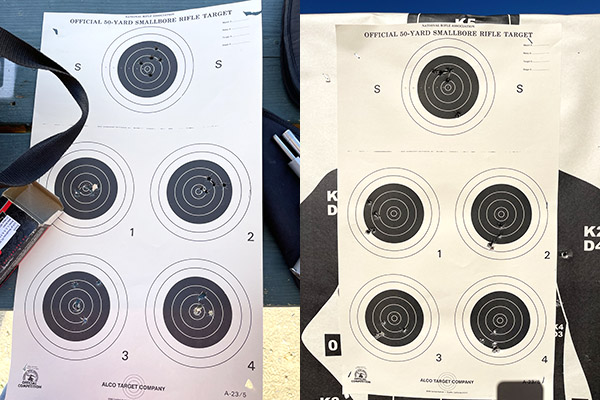
These are the targets (the Springfield 1911 target is on the left and the SIG P226 target is on the right).  I worked my way from the top down and left to right with each charge weight, so the top bullseye on each target is with 4.6 grains of Accurate No. 5 and the bottom right one on each target is with 5.4 grains of Accurate No. 5).

All of the powder-coated-bullet loads functioned perfectly in both guns and none of the cartridges exhibited any pressure signs.  The heaviest charge on the Accurate site (5.4 grains) gave the best accuracy in both guns.  That’s the load I’m going to go with on future loads with this bullet.   The load had modest recoil and it was pleasant shooting.  These are good bullets and they function well with the Hodgdon-recommended charges.  I will also mention that I was a little surprised:  This was the first time the Springfield Armory 1911 outshot the SIG.  In the past, my SIG P226 had been more accurate than any 9mm handgun I ever tested, including my 1911.

The next test was to assess the effects of seating depth on accuracy.  My buddy Paul and I had a discussion on this topic and we both realized that after sending 9mm projectiles downrange for 60 years and evaluating powder, bullets, primers, and more, we had never investigated bullet seating depth as a variable in 9mm reloading.  The 9mm cartridge is a short one, and most semi-autos have generous chambers to improve reliability.  The combination could naturally lead to the cartridges swimming around in the chamber, perhaps more so than a .45 ACP cartridge.  It stands to reason that a longer cartridge (i.e., not seating the bullet as deeply in the case) could minimize movement of the cartridge in the chamber and improve accuracy.  But there are other requirements at play, like getting the cartridges in the magazine, not seating the bullet so far out that it hits the rifling before the round is fully chambered, and reliable feeding of the bullets from the magazine into the chamber.  So I thought I’d run a quick experiment.

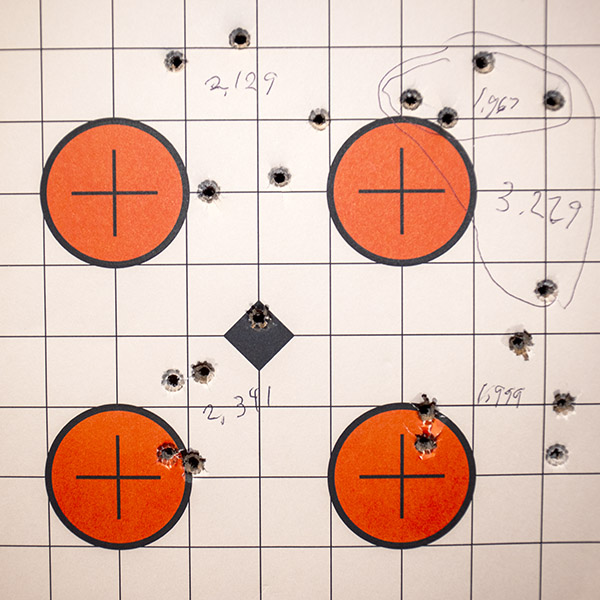
For these tests I used Ranier 124-grain plated roundnose bullets and the Springfield Armory 1911.  It was unscientific.  I made 25 rounds with 6.4 grains of Accurate No. 5 (a max load) and the Ranier bullets seated to a COAL 1.100 inches (which is about what I would normally do), and another 25 rounds with the same powder charge, but with the bullets seated to a COAL of 1.156 inches (which is a little more than a twentieth of an inch further out).  Here are the results:

It was an easy load to shoot and there were no flattened primers or other pressure signs.  All loads functioned reliably in the 1911.  There was little to no leading with the Ranier plated bullets, even though this was a max load.

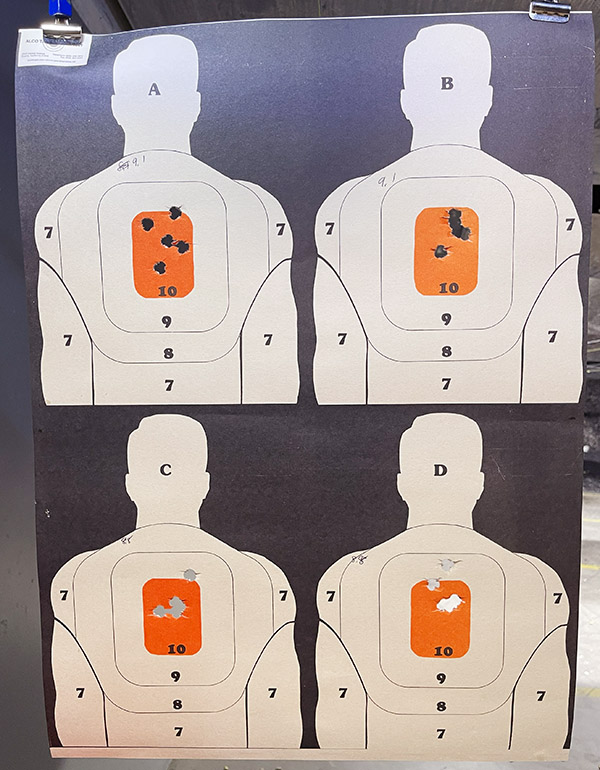
Here’s what the targets looked like.  The top two little guys are with the bullets seated out for a COAL of 1.156 inches; the bottom two little guys are with the bullets seated deeper and a COAL of 1.100 inches.

What this quick look says to me that the Ranier plated bullets are more accurate if they are seated further out.  These worked in my 1911 magazine; I didn’t check them in the SIG P226 magazine (nor did I shoot this load in the SIG).   If I was to do this test again, I’d check to make sure the longer cartridges would fit in the SIG’s shorter magazine and I’d also test them for accuracy in the SIG.

I haven’t assessed the Boudreau powder-coated bullets at different seating depths.  I will get to that later.  I’ve got a bunch of the Ranier bullets, and a bunch of the powder-coated bullets.  Primers…that’s another story.  Everybody needs primers.


The standard warning:  The load data included in this blog are for my guns.  Yours may be different.


Want more gun stories?   Please click on the popup ads!

Sign up here for a free subscription:


More Tales of the Gun!