ExhaustNotes Hasty Conclusions: First look At Shoei’s RF-SR Helmet

My nephew Anthony has been bugging me for years to buy a new motorcycle helmet. He was in the business as manager at Cycle Gear in Albuquerque, so he knew his helmets. Even I had to admit my tattered lids were getting old. I have a HJC from New Zealand bought in 2014 and a Speed and Strength from The Helmet House that dates all the way back to Motorcyclist magazine’s paper era.

Most brand name helmets have gotten pretty expensive. Since I’m so cheap I don’t like to give up old helmets until they kill me, or ideally, give them up a week before they kill me. But from a fiscal standpoint who can say which day that will be? Over the years I’ve bobbed and weaved around the topic so much that Anthony offered to send me a new helmet, any helmet I wanted. I mean, the guy is tying to support a family; I can’t have him buying helmets for me. That’s what wives are for.

My A-number-one, favorite helmet of all time is the Speed and Strength. That helmet fit my head better than any other and it felt lightweight. The aerodynamics are great on the thing also: no buffeting in the wind and fairly quiet to boot. Naturally, the same model is no longer made. CT and Anthony got together and always keeping a weather eye on my thrifty nature, decided a Shoei RF-SR would be a quality helmet without costing much more than the motorcycles I habituate.

The Shoei RF-SR model must be on its way out because finding one was not an easy task. CT ordered one from Dennis Kirk and after a few weeks she checked on the order status. The helmet was out of stock and on back order. It would have been a polite thing for DK to mention this at the checkout page. As usual Amazon had the helmet but only in silly teen-age Moto GP colors, white or flat black. I chose flat black to make myself less conspicuous. Kind of a, if-they-can’t-see-you-they-can’t-hit-you, loud pipes save lives type of reasoning.

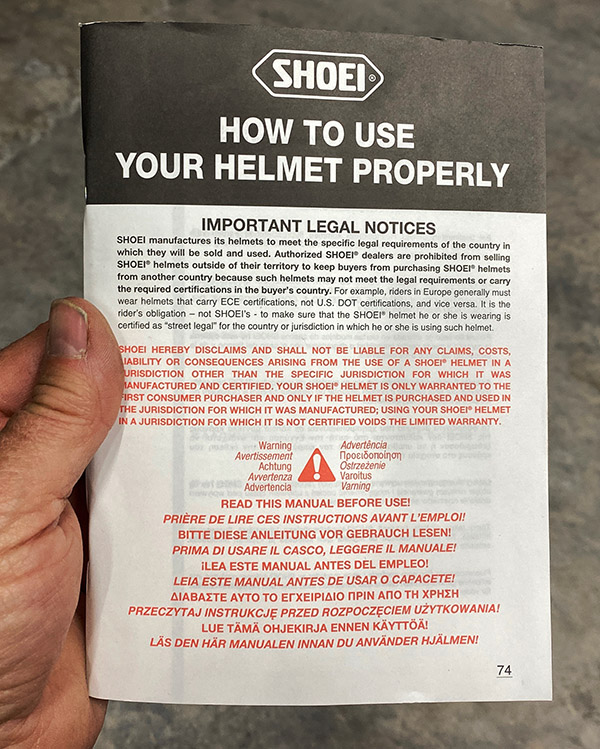
The Shoei came with a fat owner’s manual that consisted of page after page of responsibility disclaimers, warnings not to use anything but mild soap and water to clean the helmet and descriptions of all the ways the helmet could be made unsafe. I flipped through the manual and didn’t find much useful information but then I’m not a tort lawyer.

I was mostly concerned with fit, as the best helmet in the world won’t protect you if it is bouncing down the road without your head inside. Helmet brands are sized differently and with Internet purchases you can never be size-sure. Amazon’s easy return policy made the proposition a little less risky. My pea brain suits a medium helmet and the Shoei medium is a snug fit. Not painfully tight but you won’t forget you’re wearing a helmet. I think a large would be too loose.

I like a snug helmet. There’s nothing more annoying than a helmet wiggling around on your head causing double vision. I haven’t worn the helmet much but I think it will conform to my head shape after a few long rides. Or as they say on the British situation comedy Are You Being Served “It will ride up with wear.”

The Amazon shipping box felt very light and when I took the helmet out I commented how light it felt. I felt the urge to get all Cycle Magazine-y and put the thing on the scales. I was surprised to see the Shoei was heavier than both the HJC and my battered Speed And Strength.

The Shoei weighed 6 ounces more than the Speed And Strength, which seemed like a lot to me. The HJC, which always felt sort of heavy to me, split the difference. Oddly, the Shoei feels lighter when you pick it up and wear the thing. Maybe the hole it knocks in your wallet makes it seem lighter. This goes to show you I cannot be trusted when describing weights or measures.

There is a large, closeable front vent on the chin bar of the Shoei. I hit the opening with my Ryobi grass blower and the vent passed a decent quantity of air. The plastic latching bits seem fairly secure.

On the forehead area there are two small vents that also open and close. The Ryobi grass blower passed less air through these small vents but really the only way to see how all these holes work is to ride the bike.

Two back vents take advantage of a low-pressure area directly behind the helmet’s spoiler thingy to help draw cool air through the Shoei. These are fixed and cannot be closed but you really need some air exchange inside the lid to keep from falling asleep and crashing. Okay, I made that last part up. No one has fallen asleep from motorcycle helmet oxygen starvation. That I know of.

Also included inside the Shoei box was a nose guard and a chin cover. The nose guard helps direct your hot, steamy exhalations downward away from the face shield. This might help with fogging but I can’t say for sure as it rubs on my awesome beak so I leave it out. The chin cover fits along the front-bottom of the chin bar and seals that area off for cold weather riding. I don’t like the feel of the chin cover chafing against my waddle so I left that bit out also.

A pinlock anti-fog insert came in the Shoei box too, you get a lot of extras with a Shoei helmet. The pinlock fits inside your face shield creating a double pane window effect that is supposed to stop condensation and related fogging. It might do this but I’ll have to wait for conditions to worsen here in sunny, dry, New Mexico to test it out. Shoei included a couple of easily lost, pinlock posts in case your shield isn’t Pinlock ready. You’ll have to drill your shield and insert the little posts in the correct location. Right, that’s not gonna happen. Luckily for me the RF came with the posts already fitted.

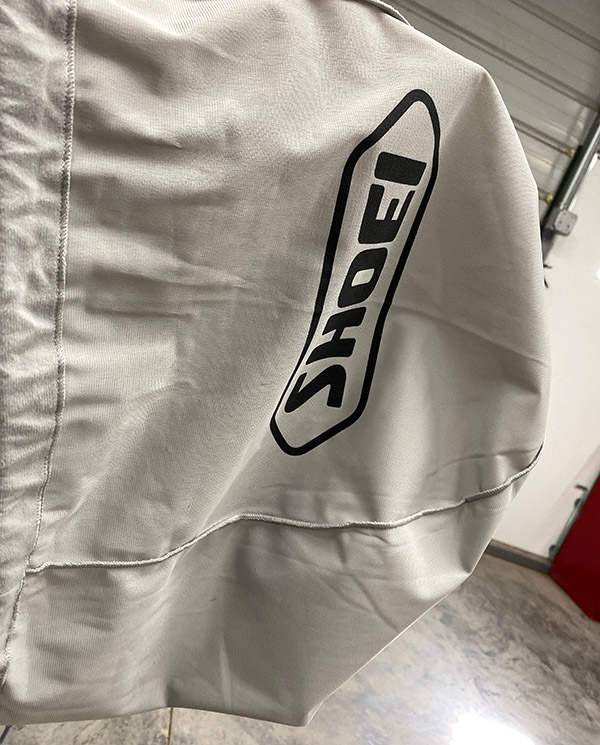
Lastly, a helmet bag and a tiny jar of Shoei oil were included in the box. I’m guessing the oil is for the face shield ratchet mechanism. I should put a little oil on there because the shield is kind of hard to open. I’m hoping it will ride up with wear.

Construction projects at Tinfiny ranch have been keeping me busy so I haven’t had a chance to test the Shoei beyond wearing it to bed for a couple Star Wars nights: “I’m your father, Luke!” I’ll try to get out in the next day or so with an ExhaustNotes follow up report with an additional surprise helmet widget review.


Never miss a single one of our blogs…sign up here for free:

Flipper Nation: How To Ruin a Fun Hobby By Squeezing Every Dime That You Can Out Of It

I realize we all have to make a living. Food has gone up, gas costs more and the rent is too damn high. Look, I have nothing against businessmen, as long as they play it straight and don’t scam customers. Go for it. Make all the money you can; see if I care. No, this story is about how all of us grease monkey types have forsaken the cool and the funky to become a bunch of soulless stock fluffers: a nation of pump-and-dump Hobby-Hawkers concerned only with what they can extract from the other, equally soulless fluffers.

Take Jeep YJ’s for instance. The square-headlight YJ has been the entry-level vehicle for 4-wheel drive buffs for the last 30 years. Shunned by other Jeep owners, despised for the simple crime of having headlights that actually align with their bodywork, Jeep YJ’s were the bottom rung. You could pick up a running YJ for a couple thousand dollars and hit the trails later that day. Light weight and simple suspension made the YJ very capable off-road and easy to fix when it broke down.

I bought my ’92 YJ for $2800 about ten years ago and the thing has been running good-ish ever since. If you believe the YJ groups I habituate, YJ’s are $20,000 rigs now. I see people posting up rusty old YJ’s for $6000/$8000 dollars. The users of YJ groups love it. Just sitting on their hands their investment (note: It’s no longer a Jeep or something they enjoy; it’s just an investment, like oil futures) goes up several thousand dollars a day. When someone online asks what their YJ is worth, which is every second question after which oil to use, the shills pipe in with ridiculous amounts of money that they themselves would never pay. All in service of bumping up the YJ’s stock price.

I could understand it better if Jeep YJ’s were sort of rare, but Jeep made 685,000 of the things over a nearly 10-year production run. They are everywhere, in fields, rusting in driveways, stacked in Jeep specific junkyards. That doesn’t stop the flippers from trying to run up the price. Everyday the imagined value of a Jeep YJ goes up another few hundred dollars. We may have missed out on Bitcoin but we’re darn sure not going to sell our clapped out old Jeeps for less than the price of a 2022 model. This money grab turns a fun hobby into just another IPO stock offering, something to own for its upside potential, not because you enjoyed it.

It’s the same with old motorcycles. The prices people are asking for any minor part that fits a vintage Japanese bike are just silly. I’m not immune to fluffer-fever. Prices for old Z1 Kawasaki’s have gotten so high I’m thinking of selling mine to cash in before the bubble bursts. My funky old motorcycle has turned into a savings account. And that’s the truly sad part: I enjoyed building the Z1 but now have to worry about where I park it due to its inflated value. I was going to ride it to Mexico with Berk but what if it gets stolen? The bike is no longer fun. In my mind’s eye it has become a stack of dollar bills waiting to be blown away by the slightest wind.

I know I’m ranting here but just once I’d like to log into a vintage motorcycle forum and not be bombarded with Internet shills asking for valuations or offering Jeeps and motorcycles for sale at stratospheric numbers. Old Jeeps, motorcycles and for that matter, vintage cars should mean more to us than how much return on the investment we can get from them. They should reach back into our memories and emotions; they should recall hot-metal smells and loves lost or found; they should be valued and not commoditized.

I guess what I really want is to remember the fun we had with our old cars and bikes before it all became a race to the top. I know the air will rarify and these old clunkers will become like casino chips: traded but never loved except for their monetary properties. You know, I used to hate the way people chopped up vintage Japanese motorcycles and turned them into goofy looking Brat style bikes but now I’m having second thoughts. Maybe by so thoroughly destroying the value of their motorcycles the Brat Butchers are actually saving the old bike’s true value as a motorcycle.


Never miss an ExNotes blog:


Read more about the Z1 and other projects here.

Once, I Knew One Thing: An ExhaustNotes Review

When I first started working on boats there were only two choices if you wanted a generator: Onan or Kohler. This was in the 1970s. Most all the equipment on boats was still made in the USA and China was largely an agrarian society with little industrial capacity. It seems impossible with today’s global economy and seemingly unlimited options but we got along fine with just the two manufacturers.

Onan generators were the most popular in the territory I covered which was from Balboa Island up near Los Angeles to San Diego. The company I worked for, Admiralty Marine, was on Shelter Island right off of Rosecrans Street. Admiralty Marine sold a lot of Onan generators. One year, Woody Peebles and I installed 51 new generators. That’s only one a week but you have to realize we also did engine installations, ElectroGuard corrosion control systems and repaired and serviced all those Onan generators.

To install a generator isn’t as easy as it sounds. You don’t just plop it on the deck and plug it in. The California boats were pleasure yachts and everything was varnished if it wasn’t polished or oiled. You had to cover all surfaces with cardboard and plywood before starting any work. Making things worse, the generator was usually buried in the engine room behind the main engines, batteries and a zillion other components down in the bilge.

To get the generator out might mean removing the rug, lifting heavy hatches, taking off exhaust manifolds on the mains or moving water tanks and cross beams. Then you had to brace underneath the deck to support the portable A-frame hoist used to lift the generator out of the hole.

The portable hoist was portable in name only. The thing weighed a ton. Consisting of two steel uprights, a steel crossbar, a chain-fall and a metal box full of wedges, lifting eyes and the carriage that slid on the crossbar. All in, the hoist weighed about 300 pounds. We didn’t trust aluminum. You had to carry each piece of the hoist down the dock and onto the boat without causing any damage. Except that anything the hoist touched was damaged.

There were no store-bought portable hoists; you had to make them yourself or pay someone to build a hoist for you. I made my own and still have it baking in the sun here at The Ranch in New Mexico. You never know when you’ll need to pull a boat engine 500 miles from the closest ocean. Working with the hoist all those years I became attached to the thing. We’ve been through a lot of wars, you know? So much heavy lifting, I can’t bring myself toss it out.

It took about three days for me and Woody to remove an old generator, clean up the mess and install a new generator, roughly 24 hours labor times two men. At my hourly rate I made 78 dollars for the job. Admiralty Marine charged my labor at 600 dollars for the install, clearing 522 dollars once you deduct my pay. I never knew what Woody was paid. Probably more than me as he was the brains of the operation. The cost breakdown on these jobs was a great lesson in capitalism for me.

On rare occasions we worked on gas-powered generators but they were usually old wooden boats with cash-strapped owners. The Onan generators we worked on were almost all diesel-powered. The block was modular: 1 cylinder for the 3000-watt, 2 cylinders for the 7500-watt and 4-cylinders for the 12,000-watt version. The 4-cylinder used two, two-cylinder heads.

The early models used a CT (current transformer) set up to control the field voltage, which controlled the voltage output. In a nutshell, the power output leads went through these big CT’s on the end of the generator causing an inductive current in the CT’s and the CT’s sent power to the field. It was self-regulating, always varying the field current to suit the load. I never fully understood CT generators but luckily they were fairly reliable. Newer, solid-state voltage regulators superseded the CT voltage regulators.

The new solid-state Onan generators were a mechanic’s best friend. They broke down at such a regular pace you could forecast your income years in advance. The start-stop-preheat circuits were analog. It looked kind of funny: the top of the control box where the voltage regulator lived was all space-age but underneath that were stone-age relays, big brown resistors and purple smoke.

None of the Onans had counter balancers so they shook violently when in operation. The single-cylinder was the worst; it had soft rubber mounts that insulated the boat from vibrations. Fortunately for us repairmen the relays and wiring was susceptible to vibrations and would shake to pieces. Parts were always breaking off the things.

One time I installed a single-cylinder Onan in a boat and a week later the owner called saying it had stopped running. I went to his boat and found the flange that the seawater pump bolted to had fractured. Without sea water to cool the heat exchanger the engine overheated and shut off. The flange was steel and it was sandwiched between the timing cover and the block so you had to dismantle the front of the engine to replace it. It was such a crappy design.

The “One Thing I Knew” was the control circuits for the Onan. I understood them better than the other guys at the shop and could trouble shoot a problem in no time flat. I didn’t fall into this easy knowledge; it took a few years of trial and error before I could visualize the flow of electrons on their path through the various old-fashioned relays and resistors. All the wiring was the same color. Onan printed numbers on the wires to help identify which was which. These numbers were not always intact or positioned in a way that you could see them.

We rebuilt the engines and the fuel systems as the twins and 4-cylinders had a habit of breaking crankshafts. The twin had two main bearings, the four had three mains. The cranks would often break where the alternator rotor connected. They would break in such a way that the generator would keep running until it was shut down, then the crank would bind and the owner would call us saying “I don’t understand it, the thing was running fine when I shut it off. Now it’s stuck” After a few years of rebuilding engines we discovered that Onan sold a new long block for about the same price as we could rebuild an engine. It even came with a warranty. That made turn around much faster.

The governor (that controlled the engine RPM, thus the frequency) was a ball and cup type of deal driven off the camshaft. Centrifugal force would move the balls outward pushing a cup away from the cam. The cup was connected to an arm that controlled the fuel control on the injector pump. With the balls at rest the fuel was set for full throttle. As the balls slung out it reduced fuel. This seesaw effect could be fine tuned by adjusting a governor spring. Both tension and leverage were set by the hapless mechanic moving one thing affected the other.

After a few thousand hours of steady state running the governor balls would wear a groove in the backing plate of the cam gear and no amount of tinkering could get the frequency steady. Pulling the cam gear was the only way to get the thing to run without hunting. I liked to tell the owners that they were lucky the thing ran long enough to wear out the governor.

All those things I knew are just trivia now but they seem as real as this computer I’m typing on. The old Onan generators are long gone, replaced by modern diesel engines made overseas. Nothing breaks off the new stuff. My brain is full of things no longer useful, information that has no application in today’s world. I wonder about the knowledge the old ones that came before me took to their graves and if someone in the far off future will wonder about mine.


Subscribe to ExNotes for free!


More Product Reviews are here!

The 2022 Tarantula 100

They say time flies and that’s corny-true but I think time accelerates the closer you get to the end. We have been living on Tinfiny Ranch for 6 years now and I have missed the Prairie Dawgs Tarantula 100 desert race each of those years. It seemed like there was always something that needed doing or I was off somewhere else. I usually hear about the race after it has run and say to myself: I’ve got to make it down to mile marker 45 and check it out next year.

This year was the someday year. My old high school chum Greg was in town so we burbled Brumby down Highway 54 early Sunday to catch the second day of Prairie Dawg action. The event is held at a huge off-road playpen about halfway between El Paso and Alamogordo. When we first moved to La Luz I attended a Prairie Dawg club meeting. They were a great bunch of guys and gals (another of those things I keep meaning to do is join The Dawgs). I’m not real big on organized motorcycle events preferring instead to toss about on the floor picking up cat hair like a gigantic sticky lint roller. To enter a race, to pre-run the course, to get in physical shape so that I could hold on to a bucking 1971 Yamaha 360 for 100 miles of desert seems like a lot of effort.

Effort that could be better spent consuming beer and eating beef jerky in the warm February New Mexico sunshine. So that’s what me and Greg did. We arrived on a perfect day just as the riders meeting was ending and wasted no time getting to the start line. The PD riders lined up according to class. The start is dead-engine. When the flagman, who gave no 30-second board or hint of when he was going to drop the flag, gave the signal you had to start your bike and off you go. It was so unexpected I missed several photos. With the dead-engine start, the electric start bikes had a bit of an advantage over the kick start bikes.

The race is run in 50-mile loops. When the riders come back through the pit area they ride underneath a red, pipefitting type of arch where the transponder records their time. We had a bit of a wait after the last class was on their way so we got our chairs, beer and beef jerky and settled down to discuss how old we were getting, the various ailments we were suffering under and to try and remember some long ago event that the other guy was reminiscing about.

One hour later the first of the Pro Class arrived at the transponder. Most everyone took on a gallon of gas, a swig of water and were on their way for the second lap. Some guys pushed their bikes under the yellow pit-tape ribbon and called it a day. Greg and I set up behind a hill at a spot that had a good view of the last mile or so of the course and the red transponder arbor. Some pits were located before the transponder, some after, but I guess it didn’t matter as the second lap was the one that counted. The sun beat down, the early morning chill was long gone, and our world became a balmy 70-degree red dirt sand dune. We shed our jackets and settled into a mellow, New Mexico low simmer.

Greg was heading to Fort Stockton, Texas later in the day so we decided to hang around until the first youth-class rider completed his lap. That came around 2 hours into the race or almost exactly twice the time it took the first pro-class rider. We folded up our chairs, shook the sand off and went back to the Alamogordo Moose Lodge where Greg had left his gigantic motorhome. I read later on the Prairie Dawg’s Facebook page that there was some trouble with the scoring system and I’m not real sure who won. I figure why mess up such a nice day out with accounting issues.

I don’t know if I’ll ever compete in the Tarantula 100. I’m still able to trail ride all day long but can only make about 2 miles at race pace. Staying up to speed for 100 miles would leave me rubbery-armed with blood pooled in my calves. I don’t want to take that helicopter ride. There is a 60+ class but those guys looked pretty fit. Maybe they’ll let me enter the mini-cycle class. Pouring concrete would be easy in comparison.


Never miss an ExNotes blog!


More Joe Gresh is here!

Hasty Conclusions: First Look At The Harbor Freight Tire Changer

I usually change my own motorcycle tires. I’ve been doing it since I was a small child and the job has never been all that easy. In fact, I dread changing tires but there is no other way. The thought of taking a motorcycle in for new tires was as alien and hoity-toity to me as having a live-in maid. The Husqvarna changed all that. The Husky’s wide, 17-inch rims combined with even wider tires really stymied me. I would pinch the tube nearly every time I put a tire on that bike.

One time after pinching the tube four times trying to get the last bit of bead over the rim I stuck the only tube I had in the 150/60-17 back wheel: a 21-inch dirt bike tube. That tube lasted for the duration of the tread life and when it came time for a new tire I folded my cards. I took the rim to our local independent motorcycle shop, Holiday Cycles.

Holiday Cycles charged me $25 to install whichever tire I supplied. Size did not matter. I didn’t need to buy the tire from them, as they don’t stock sizes to fit the Husky. What a relief to drop the new tire and wheel off at Holiday and pick it up a few hours later shiny and new. And there were no holes: the tire held air. This was a wonderful relationship. Holiday gradually raised the price of a tire change to $40 but it was still worth it to me. Avoiding hours of struggle only to have the tire leak was not the sort of thing I wanted to go back to.

Unfortunately, Holiday Cycles closed up recently and I’ve been lucky not to need a new tire on the Husky. There is a Yamaha and a Kawasaki dealer in town that change tires. I’ve never used them; I kind of liked Holiday Cycles.

My buddy Mike from the Carrizozo Mud Chucker’s bought a Harbor Freight motorcycle tire changer and said it was okay. Better than a 5-gallon bucket, I think were his words. Naturally anything Mike gets I have to copy.

Harbor Freight spammed my Facebook page with the motorcycle tire adaptor part for $32. This seemed like a good deal. My first thought was to just get the adaptor and make my own base. When I got to Harbor Freight I saw the base was only $44 and it was made for changing car tires. I looked at the bright red, powder-coated base and thought, no way can I make a base this nice for only $44. I bought the car-tire changer base. I was all in for $76, a little less than two tire changes at the old bike shop. You get a lot of steel for your money with Harbor Freight and I loaded up the weighty boxes of metal and drove home.

Like most of Harbor Freight’s shop equipment, you have to modify the things to make them work a little better or at all. One of the first things I did was take the motorcycle adaptor to Roy’s Welding to weld the three legs of the adaptor to the adaptor hub. The factory setup is a couple bolts on each leg. This does not work well as the bolts are squeezing on square tubing. No matter how tight you torque the bolts, right down to crushing the square tubing, the arms won’t stay flat and move up and down easily.

The whole purpose of the motorcycle adaptor is to secure the rim so that you can work on the beads without the whole assembly skidding across the shed floor. You don’t want the three legs flopping around. Roy had a hard time welding the legs because the powder coating was very thick. “Man, they put a ton on there.” I thanked Roy, paid my $15 and the welded legs are very secure now.

The way the motorcycle adaptor works is two of the legs have adjustable, pinned rim-grabbers. You adjust those to suit your rim size. The third leg has a screw-driven rim-grabber that tightens onto the rim like a vise. Initially I thought the grabbers worked from the inside out. Turns out they grab the outside of the rim.

Since the grabbers are flat-faced when you tighten them onto the rim it doesn’t hold well: the tire slips upward and out of the adaptor. Mike simply heated the grabber tips and bent them inward so that the rim can’t slip out. My other brother, Deet, who also has a Harbor Freight tire machine, made some nice, plastic rim protectors to grip the rim. I copied Deet’s system. We will see if it works or just snaps off the first time I use the motorcycle adaptor.

I had an old bead breaker but the Harbor Freight tire machine comes with a pretty good bead breaker built right into the base. You use the (included) long tire iron as a lever. The base unit for car tires looks like it should work well. I might try changing a few MGB-GT tires on the thing. I think it needs a sturdier center cone to hold automobile rims but maybe not.

Bolting the base unit to the concrete floor was fairly easy. A hammer drill does the job faster than a plain old rotary drill. I used 5/8” expansion studs on three of the base legs and a 3/8” expansion stud on the bead-breaker leg to keep the bolt size down in that area. I also added a few angle pieces to join the three base feet together. Harbor Freight should have welded the foot pieces but that would make the package larger. Shipping stuff from China isn’t cheap.

Adding it up, I have about $100 in the Harbor Freight tire machine with the motorcycle adaptor, anchor bolts and plastic. I had to clean out a section of the shed to make room for it but it looks the business sitting there doing nothing. The long tire iron that came with the base is sort of fat for motorcycle tires so I may look around or make something different, maybe something with plastic tips to keep from scratching chrome wheels. I’ll do an update when I get around to using the thing. I figure with the money I’ll save using the Harbor Freight motorcycle tire changer I can start interviewing for that live-in maid.


Help us continue to bring new stories to you:  Please click on the popup ads!

Whoa!  A free subscription to ExhaustNotes!  You bet!


More Joe Gresh?  You bet!


More ExNotes product reviews?  Absolutely!

Retail Therapy, Or How I Learned To Stop Worrying And Lower The Boom

Here at ExhaustNotes we like to support local businesses. Without local stores and a healthy business environment a town dries up and becomes a collection of houses. Interaction between the town populace slows to a crawl and sad as it is, the only action will be found at Walmart or the Chevron station out by the highway. That’s no way to live.

In the USA we operate on the capitalist economic system. This means I do your laundry and you do my laundry, we keep handing the same money back and forth. The cyclical movement, or pumping action, of these few, tattered dollars are where the magic happens. Capitalism relies on all of us constantly spending and gathering dollars: the trick is to keep that money supply moving. If no one buys anything no one earns anything and the whole system crashes.

When we buy stuff online that money goes out of our local economy to some far-fetched location. In other words, they do our laundry but take their laundry to another town or state. Maybe they don’t even get their laundry done. Maybe they invest in block-chain cyber securities and sit on it.

If the system is functioning correctly you will eventually do the laundry of someone who did the laundry for someone else three states over who did the laundry for someone else. Except when the system gets so large and ruthlessly efficient your town becomes unable to do laundry at the massive scale required to match the price of the other, Mega-Laundry-Towns.

The local pool of cash begins to flow in one direction: out of here. Your neighbors no longer want you to do their laundry. It’s easier and cheaper to send dirty clothes to an Internet laundry service. The people in your town become bitter, superstitious and convinced the system is rigged against them. Less money circulating means people have to shop for the cheapest place to get laundry done or forego clean clothes altogether, taking money out of circulation even faster.

Look around now: the people are wearing dirty clothes because no one can afford laundry service. There’s nothing to buy and no money to pay for it if you did find something to buy. Since there is no money circulating the pulse of your community grows weaker. Young people see a bleak future with no one to do laundry for and leave. They move elsewhere, anywhere clothing is being washed, leaving the halt and the lame behind.

Neighborhoods become run down due to deferred maintenance. Angry, desperate, hungry and poor, this is the point when you turn to a life of crime. You steal from other poor people, your neighbors, and get caught doing it. After the trial you are sent away to a privatized, for-profit prison because your local prison cannot compete with the private Mega-Prisons. There you are: locked up and forced to do laundry. For free.

So ExhaustNotes likes to shop local. Like the other day when my wife’s lock switch fell out of the driver’s door of her Jeep. It’s a Jeep thing. The plastic bezel that holds the switch has two little tabs that fit behind the door panel and the switch is held in by two metal flat springs. The whole magilla snaps into place and works fine unless the tabs break off. I spent 45 seconds on Amazon and found a replacement selling for $14 with free 2-day shipping. I was about to send the bezel to my cart when I thought about our local Jeep dealer and figured I’d practice what I preach. I like having a Jeep dealer in town and I want him to stay in business.

The Jeep dealer is about 23 miles away and I know I should have called first but I usually have a hard time describing what I want to the parts guy. I drove down the hill to the Jeep dealer and chatted up the parts guy. He found the driver’s side switch bezel on his computer after 15 minutes. “We don’t have it in stock, it’ll take a couple days.” I said, “go ahead and order it for me.” The price was $35. I asked the parts guy if he gave a local discount and he knocked $10 off. I was well-chuffed as they say in England.

A few days later the Jeep dealer called and said the part had arrived. I drove back down the hill and picked up the bezel. All was well with the world. Sure, I paid $10 more than Amazon but I had supported our local economy: I kept the money in town.

When I tried to install the bezel I noticed that it was the bezel for the passenger door. The little graphic of locked and un-locked would be upside down and the angle was wrong. Darn it. Ah well, mistakes happen. I rigged a few pieces of sheet metal to hold the switch in the door and drove back down to the Jeep dealer. I know I could have called but I figured I’d have a hard time explaining that they ordered the wrong part and it’s easier to deal in person. The parts guy looked the bezel over and apologized. He said he would order the driver’s side bezel for me.

A few days later the Jeep dealer called and said the part was in. I drove back down the hill and picked up the part. It was the correct one and fit perfectly. All in, I drove 184 miles to get a $25 switch bezel that cost $14 on Amazon. I used around 12 gallons of gas. Gas is right around $3 a gallon here so I spent $36 on gasoline. My time doesn’t really count because I enjoy riding around in old Brumby but if you’re counting I spent about 11 hours driving back and forth and talking with the parts guy.

I feel really good that I supported a local business. The money I spent was circulated to the gas stations, the Jeep place and a hamburger stand where I ate lunch on one of the four trips to the dealership. I really spread it around, man. I used my Social Security check to pay for the switch so that’s Uncle Sam’s money injected right into the veins of my town. Buying local is the best way we can work together to save capitalism… and have clean clothes to boot.


Never miss any of our missives…sign up here for free!

My 2022 Social Media New Year’s Resolutions

The New Year is a good time to take a clear-eyed look at your past and relive your many failures. It’s a time to regret what you have done, a time for guilt and bitterness, but no matter how badly you screwed things up the preceding year the New Year is also a chance to make things right. The New Year is like a fresh tub of store-brand guacamole, its smooth machine-made surface waiting for that first nacho chip. Full of promise, the New Year is a blank slate upon which to write your opus of good intentions. This is your moment, this is your time: don’t blow it by double dipping.

Making resolutions in real life often requires some effort on our part to accomplish. Things like losing weight or getting stronger, maybe to change into clean underwear, or foolishly, to drink less. These are hard things to do which is why so many New Year’s resolutions lie broken and forgotten by February. Social media resolutions are much easier to keep.  In fact, most of them only require you to pause, to not do, to disengage. With that here are my five social media resolutions for 2022.

Social Media Resolution Number 1:  I will stop informing Internet grifters… I mean sellers that the price they are asking for their well-used sale item (without shipping) exceeds the price of a brand new, duplicate item with shipping included. I don’t know why I have chosen to be Mr. Price Check on various forums but it needs to stop. If Joe Blow wants to list a rusty old Yamaha gas cap for three times more money than a new one from Yamaha who am I to post a link to the cheaper new item? Why do I care? Am I really trying to warn other idiots of the price gouging or am I a Bob Barker-like crusader for the frigging Price Is Right? From now on I vow to stay out of the grifter’s deal and let the buyer beware. Unless it’s a basket case JT1 Mini Enduro for 2800 dollars; then I have to pipe up.

Social Media Resolution Number 2: When some tasteless, classless, skill-deprived person puts up a photograph of their sad, pipe-wrapped, loop-butchered, Brat style motorcycle and then asks the hive mind what do we think about it, I vow to stop telling the builder what I think about it. It does the builder, and I use that term loosely, no good to list all the horrible things he has done to what was a pretty cool vintage Japanese bike. I promise to stop telling the idiots who vandalize a decent motorcycle that the bike is worthless now and they should give their 4-inch angle grinder to a chimpanzee because the average chimp has a better grasp of style and tool usage than the so-called builder. Look, if Brat builders had any chance of turning around their lives I’d go along with the god-awful mess as just a phase. I’d try to steer them in the right direction, you know? But that’s not going to happen. The Brat builder’s bad taste will only grow progressively worse, going from butchering Japanese bikes to big wheel baggers constructed entirely of Bondo to huge, jacked-up diesel pickup trucks with those 28-inch rims. Regardless, I will never comment on the Brat’s topic from this day forward.

Social Media Resolution Number 3: I will stop blocking people who answer, “Google is your friend” or “use the search function” in response to questions on a brand-specific motorcycle owner’s forum. Unlike these paragons of efficiency, you and I understand that owner’s groups exist for more than the just the facts. The owner’s group fosters camaraderie, and a sort of gallows humor develops regarding your particular motorcycle’s consistent failures. It’s reassuring to know that you’re not alone when your swing arm breaks. The search bar does not provide real-time condolences. After sufficient time any owner’s group will have covered all known problems and these issues will have been exhaustively discussed. At that advanced state of know-how answering a query with conventional wisdom becomes almost like a chant. Chanting is good for the soul; it wipes the mind clean, if only for a moment. I approach a Zen-like state when I repeat, “remove the sway bars” to a Jeep YJ owner for the 1000th time.

Social Media Resolution Number 4: I will stop trying to figure out Facebook. My Facebook account is slowly losing functionality. One by one, little features disappear. Facebook Messenger went away a few years ago. I can’t access the messages, but Messenger still sends me notices that a friend has left a message. I can no longer post videos unless I download them to YouTube first then paste a link on my page. YouTube uploads slowly with my weak Internet connection. A 5-minute video might take 8 hours to upload. Ain’t nobody got time for that.

I’m no longer in control of some Facebook pages I created. Group settings are changing and I didn’t change them. I used to shake my fist at Facebook and rail against the Face-less algorithms that keep eroding my online presence. For 2022 I’m going to let the anger go. I’m going to stop bitching about Facebook and let its perverse tentacles unwind themselves from my life at whatever pace their little robot-minds care to proceed. I have found that my opinion of humanity varies in an inverse proportion to how much I use the service: lots of time on Facebook depresses me, less time on Facebook and my outlook improves. Maybe human beings were never meant to know so much intimate detail about each other’s lives. In the past it took active agency to find out who was a jerk. Now people tell you they are jerks 10 or 15 times a day. In writing.

I now know jerks in every country of the world. I know jerks in India, I know jerks in Saudi Arabia, I know jerks in China, and I know jerks in every state of these United States and its territories. Before the Internet was created there was no way I could I dislike so many people. It’s a little overwhelming. I don’t believe we have evolved enough to cope with so many jerks all at once. Handing us a phone and an Internet connection is like taking a pre-contact tribesman from the Amazon jungle and dropping him off in the middle of the Las Vegas strip with a bag of halcyon-days meth and 7500 dollars cash. It’s too much, too soon and I’m going to stop trying to sort it all out.

These four social media resolutions seem eminently keepable to me. They seem like actions that will improve my life at absolutely no cost in time or effort on my part. I like that. What are your social media New Year’s resolutions?


Never miss an ExNotes blog!  Sign up here for free:

ExNotes Review: KooBee Fit-All Dirt Bike Headlight

My 2008 Husqvarna 510 came equipped from the factory with the worse headlight I’ve ever had on a motorcycle. What am I saying? It’s the worse headlight I’ve ever had on anything and that includes those old HO scale slot cars that had headlights actuated by the motor controller thingy.

Not only is the headlight dim: the most annoying thing is the way the Husky eats incandescent bulbs. I go through one bulb every 500 miles. The bulbs themselves are oddball scooter type and 35 watts barely casts a glow on the road. The lens is melting from the little bit of heat generated and the separate, small parking light bulb will no longer stay attached because the hole it fits into has melted into a large egg shape.

In an attempt to slow the destruction I installed a weak, low wattage LED bulb and that unit has managed to stay lit for 5000 miles. “Lit” is a relative term: the LED struggles to illuminate the leading edge of the Husky’s front fender. But it does stay on. It gets dark pretty early his time of year so I decided to take another shot at the headlight situation by buying an entirely new headlight.

The KooBee universal fit headlight comes with a halo-type parking light, a low beam and a high beam. The plastic lens is fitted into a plastic number plate faring that resembles the original Husky part. Included with the light were four of the rubber headlight mounts, the kind that go around the fork tube just like the originals the Husky came with. All in all the setup looks fairly well made for cheap plastic junk.

Fitting the light was a bit of an issue because the original headlight bucket was shallower and the whole unit fit closer to the fork tubes. The KooBee light fixture stuck out further and the mounting arms were too short. The light would have fit if I removed all the wiring, the horn, the speedometer and the anodizing on the fork tubes. Instead I made three aluminum extension arms to move the headlight a couple inches forward allowing the rat’s nest of wiring a little room to breathe. As it is I had to relocate the horn and rearrange the wiring to fit it all in.

The next problem was connecting the KooBee to the Husky’s headlight plug. The KooBee came with 4 loose wires in a pigtail with no plug or socket at all. Naturally, the Husky uses a strange 4-pin socket and plug, unlike the normal 3-pin type you see on most older motorcycles and cars. I lopped off the Husky plug and soldered the KooBee headlight wires to the Husky pigtail. I can unplug the headlight when it catches fire pretty fast now.

When it came time to fit the rubber mounts to the Husky forks the nice looking kit rubbers fell apart. The rubber looked ok and was molded well but it seemed like it was already partially decomposed. You could pull the things apart like Playdough Fun Factory clay. The kit rubbers were tossed into the trash bin and I used the original Husky rubbers, which still had life after 14 years.

With everything put back together I turned on the ignition and the halo/rim light was already brighter than my old LED on high beam. Firing the bike off lit the low beam and it was a huge improvement. I flicked the high beam on and got a nice bit of light. When I’m describing the light output you must take into consideration where I was starting from: near total darkness. The KooBee has an up-down adjuster screw but no side to side. For side adjustment you move the rubber bands that hold the light onto the forks. I haven’t tested the light at night because it’s too damn cold for that stuff right now. It almost doesn’t matter because it is what it is, there’s no putting a bigger bulb in the KooBee. If it goes out you replace the entire headlight. The KooBee was $45 on Amazon and if it stays on for a few thousand miles I’ll be happy.

I suspect the KooBee’s black plastic is sort of soft. I tried to wax the faring part so that bugs won’t stick but the wax seemed to take the gloss off. The stock Husky stuff dulled fast also. Maybe that’s just the way plastic body parts are. After it warms up a bit I’ll take a night ride to see how the KooBee works. I might need to adjust the thing but I know it’s much brighter than the stock light. Look for a mid-March KooBee follow up report here on ExhaustNotes.us.

ExNotes Review: Motorcycle Camping Stoves

In 1975 Greg Smith and I went on a long motorcycle ride. Greg had one of the first Goldwings, a pretty metallic blue motorcycle with a Windjammer faring. I had a BMW R75/5 also with a Windjammer faring and Samsonite bags. The ones with the soda machine, round key lock to hold the bags into the frames. We visited 41 US states and were on the road 3 months: Florida to California to Canada to Maine and most of the states between the coasts. In all that time I think we stayed in a motel three times; the rest was camping. Mostly we stayed at state parks for a dollar or commercial campgrounds with showers and toilets at the cost of around 2 dollars a night. If it was late or we were lost we would pull off the road and find an out of the way place to set up our tents. If it was really late or we were tired we would toss our sleeping bags on the ground and sleep just about anywhere.

Modern campgrounds are more like mini subdivisions now and the huge RV’s jammed cheek to jowl cost way more than houses did in 1975. But when we were discovering America on the Goldwing and BMW, tents were still popular. People camped out of their cars. KOA campgrounds were a luxury stay with plenty of hot water and clean bathrooms. We were on a strict 10 dollar-a-day budget back then, so eating at a restaurant was off limits except for cheap fast food places. We cooked all of our breakfasts and dinners. It was fun.

The very first motorcycle camp stove I bought was a Peak 1. Greg had one too.

New, the Peak 1 cost like 20 dollars, which was a huge amount of money back in 1975. I had bought many motorcycles for less money. The Peak was worth it, though, and has proven to be indestructible. It still works fine some 47 years later. Starting the Peak 1 has never been a simple process. You pump up the tank pressure and fiddle with the two fuel levers (instructions are printed on the side) and then a big yellow flame erupts from the stove. After a minute or so it settles down and you flip the small lever to normal operation. To adjust the flame use the long lever.

My Peak could use a new pump diaphragm but with determined pumping you can build enough pressure to light the thing off. After the cross tube gets hot the stove makes its own pressure. The colder it is the harder the stove is to start but it has never failed to start. The Peak 1 burns Coleman stove fuel or some stuff called white gas. White gas was available at many gas stations in the 1970’s so it was easy to fill the little tanks on our stoves for a few cents. A full tank would last a week of meals and coffee.

The Peak 1 is sort of big and heavy; I wouldn’t want to backpack with the thing. I don’t think gas stations sell white gas any more so you need the Coleman fuel. Any Wal-Mart has Coleman fuel. I used the Peak for many years until motorcycle camping became less likely to happen and I shoved the old warhorse onto a shelf.

For economy, nothing beats a penny, beer-can stove. They cost nothing. These little alcohol-burning stoves are super lightweight, probably the lightest you can get. You can’t buy a beer can stove, you’ll have to make one and YouTube has probably 1000 videos on how to build your own. The Cliff’s Notes version is you cut two beer cans and fit the two bottom bits together. Then you punch some holes for the flames to shoot out and a hole for filling the contraption. The penny serves to slightly pressurize the stove for a nice long flame. You’ll need some rocks or a wire frame to hold whatever you’re cooking. I used a bit of bent brazing rod.

Fuel for the stove is available everywhere. Drug stores, liquor stores (Everclear), auto stores (Heet) alcohol is ubiquitous in our country. The way it works is you fill the stove with a few ounces of alcohol, put the penny in the middle and light it up. The one I made lights easily.  Some builders complain about hard starting. One fill up will boil a quart of water and burns for 12 minutes or so. The beer-can stove has its drawbacks. Once the thing is lit you don’t want to move it or tip it over. It’s all too easy to set your arm on fire. Don’t try to conserve fuel, let the stove run until it’s out of alcohol. Lastly, the stove is fragile and easy to crush: pack accordingly.

Now we come to my favorite stoves: these little butane stoves cost between $10 and $15 on Amazon. They are extremely compact, like beer can stove size but not as light weight. They use slightly hard to get butane canisters (Walmart again) but they start easily and boil water fast. I have two sizes. The larger one was the first type I bought and it’s now my go-to motorcycle camping stove. My buddy, Mike, bought the smaller burner so I had to get one, too.  They’re cheap. The small one will fit anywhere.  Folded up it’s about the size of your thumb after you smashed your thumb with a hammer. The larger one actually works better because the flame is spread over a larger area. Water seems to heat faster with the big one but I haven’t timed it.

You can get butane fuel in several sizes. For a short, 2-3 day camping trip the small canister will do. Oddly, the large canister of butane costs less than the small one and it’s good for a week of camping. When I pack for a motorcycle camping trip I try to save space everywhere. It kills me to pay more for less fuel.

My newest stove is this wood burner. It’s so new I haven’t even used it yet. It’s bulky but not so heavy. The photo shows the stove fully assembled and ready for use, it breaks down to about 1/3 the size for packing. The big idea behind this stove is you don’t need any fuel to run the thing. Wood twigs, leaves, bits of brush, anything that will fit in the stove and burn are fair game. The stove is designed with side-draft vents to help cut down smoking. I got it because I like the idea of free fuel in an unlimited supply. I’ve yet to camp where there wasn’t enough stuff on the ground to make a pot of coffee. The top is cut away so you can feed a steady supply of soiled baby diapers, 12-pack Budweiser cardboard cartons and discarded Covid facemasks into the beast. Cook your dinner and clean up the environment at the same time! Drawbacks are you have to use the stove outside. No brewing a nice cup of Batdorf & Bronson coffee in the motel room.

There are many other types of small camp stoves. Everyone is trying to design a better, smaller, lighter stove. Some stoves cost hundreds of dollars. That’s not my bag, man. I guess I am into motorcycle camping stoves like Berk is into armaments: a stove for every pot, as it were.

Resurrections, KLR250 Part 5: Two Steps Back

In Part 4 of the KLR Chronicles I managed to damage the water pump oil seal. Never one to stand pat, in Part 5 I damaged the new water pump ceramic seal. It wasn’t easy and I’m still not sure how it happened.

After cleaning off the old gasket material stuck to the clutch cover I managed to get the new oil seal installed without drama. Next I used a suitable sized socket to pound the new ceramic seal into the water pump housing. This all went well and as such was probably where I broke the seal.

The clutch cover has two locating dowels but the gasket was sort of floppy and would slip out of place when I tried to install the cover. I ran down to NAPA and picked up a can of spray gasket High Tack goo and used that to hold the gasket while I messed with the cover.

Reassembling the mess was easy from then on and I filled the radiator with new coolant expecting success. I took the bike for a short ride and dammed if the water pump wasn’t leaking worse than when I started. Resigned to never getting the bike going I removed the water pump cover and water pump impeller. I thought maybe the impeller o-ring was the culprit so dismantled the cover and replaced the o-ring and tried again. It still leaked. Dismantling the pump for third time was when I found the crack.

The ceramic seal is a multi part extravaganza consisting of a flat seal area, a spring, a rubber bellows and the metal ring part that fits into the housing. I tried pulling the ceramic part off but it just crumbled. It took a bit of tugging to remove the bellows and spring from the metal. And then I remembered that when I removed the old seal the spring, bellows and seal fell out into my hand. This made me think that the old seal wasn’t leaking at the ceramic interface and, in fact, was leaking between the bellows and the metal ring part.

If you’ve followed my mechanical exploits you can guess what happens next. I cleaned the metal ring (still stuck in the housing) and the old seal bellows. Then I blobbed black RTV silicone on the ring and glued the old seal/spring/bellows into the new ring.

And it worked! The water pump no longer leaked. This kind of repair is not the sort of thing you want to rely on 50 miles out into the desert so I’ll have to order yet another water pump seal. This time I’ve got an idea and will try something different to remove the metal ring. I hope to not pull the clutch cover again. We will see.


More Resurrections are here!