Baja Breakdowns

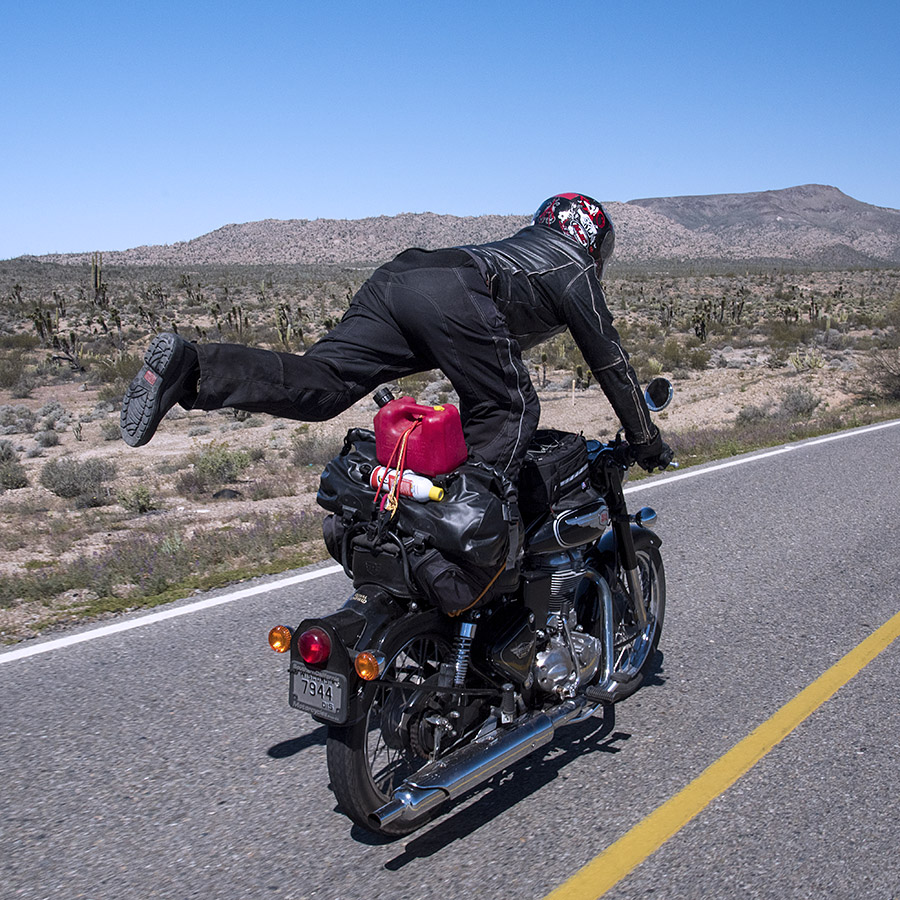
I’ve ridden motorcycles through Baja probably 30 times or more over the last 30 years, and it’s unquestionably the best place to ride a motorcycle I’ve ever experienced.  Many people are afraid to venture into the peninsula for fear of a breakdown.  Hey, it happens, but it’s not the end of the world and it doesn’t happen often.  They don’t call it adventure riding because it’s like calling for an Uber.

Not all “breakdowns” result in your motorcycle being nonoperational.  Some are just mere annoyances and you truck on.  A few breakdowns result in the bike not running, but there are usually ways to get around that.  When it happens, you improvise, adapt, and overcome.  Here are a few of mine.

Heritage Indeed

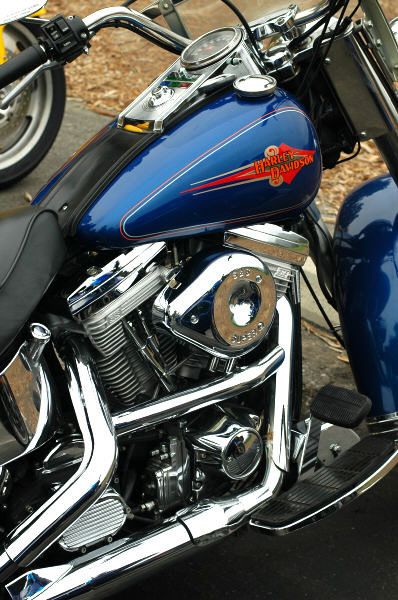
The first time I had a motorcycle act up was on my beloved ’92 Harley Softail.  It started clanging and banging and bucking and snorting somewhere around Ensenada.  I was headed south with my good buddy Paul from New Jersey.  It was obvious something wasn’t right and we turned around to head back to the US.   The Harley got me home, but I could tell:  Something major had happened.  The bike was making quite a bit of noise. I had put about 300 miles on it by the time I rode it back from Mexico.

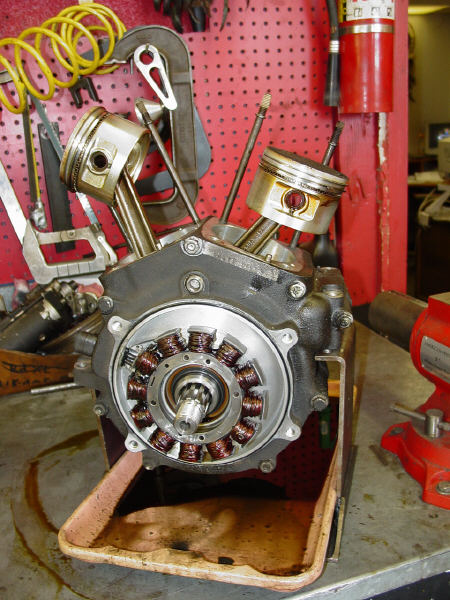
A roller lifter that converted to a solid lifter.

One of the Harley’s roller lifters stopped rolling, and that turned it into a solid lifter.   And when that happened, the little wheel that was supposed to rotate along the cam profile started wearing a path through the cam.  And when that happened, the metal filings migrated their way to the oil pump.  And when that happened….well, you get the idea.   My 80-cubic-inch V-Twin Evo motor decided to call it quits after roughly 53,000 miles.  It happens I guess.   Nothing lasts forever.

Potato, potato, potato.

Here’s where it started to get really interesting.  My local Harley dealer wouldn’t touch the bike.  See, this was around 2005 or so, and it seems my Harley was over 10 years old.   Bet you didn’t know this:  Many Harley dealers (maybe most of them) won’t work on a bike over 10 years old.   The service manager at my dealer explained this to me and I was dumbfounded.  “What about all the history and heritage and nostalgia baloney you guys peddle?” I asked.  The answer was a weak smile.  “I remember an ad with a baby in Harley T-shirt and the caption When did it start for you?” I said.  Another weak smile.

An S&S engine in my ’92 Softail. It let me ride a slow bike fast.

I was getting nowhere fast.  I tried calling a couple of other Harley dealers and it was the same story.  Over 10 years old, dealers won’t touch it.  I was flabbergasted. I tried as hard as I could, but there was no getting around it…the Harley dealer would not work on my engine.  It was over 10 years old.  That’s that; rules is rules. For a company that based their entire advertising program on longevity and heritage, I thought it was outrageous.  A friend suggested I go to an independent shop.  “It’s why they exist,” he said.  So I did.

So, I went with Plan B.  I took the Harley to a local independent shop, and they were more than happy to work on my bike.  I could have the Harley engine completely rebuilt (which it needed, because those metal bits had migrated everywhere), or I could have it rebuilt with an S&S motor. I went with the S&S motor (the cost was the same as rebuilding the Harley engine), doubling the horsepower, halving the rear tire life, and cutting my fuel economy from 42 to 33 mpg.

Justin’s Countershaft Sprocket

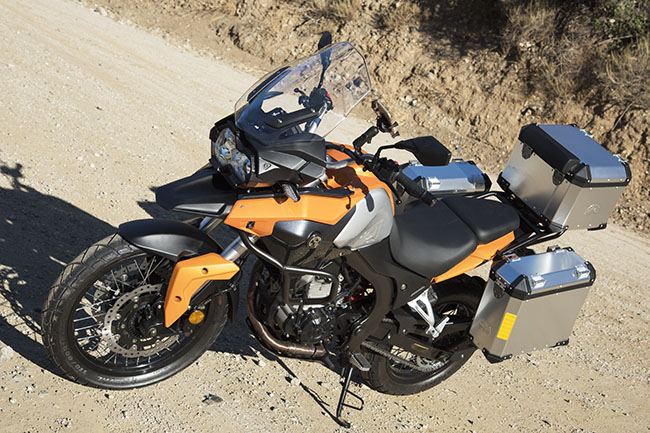
On the very first CSC Baja trip, I was nervous as hell.  The CSC bikes had received a lot of press and the word was out:  CSC was importing the real deal, a genuine adventure touring motorcycle for about one sixth of what a GS 1200 BMW sold for in those days.  The naysayers and keyboard commandos were out in force, badmouthing the Chinese RX3 in ways that demonstrated unbridled ignorance and no small amount of bias.  And here we were, taking 14 or 15 guys (and one gal) who had bought new RX3 motorcycles that had literally arrived in the US just a few days before our departure.  There was one thought in my  mind as we headed south from Azusa that morning:  What was I thinking?  If the bikes started falling out on this first trip, it would probably kill the RX3 in America.

Hey, it worked. Adapt, overcome, improvise. The adventure doesn’t start until something goes wrong.

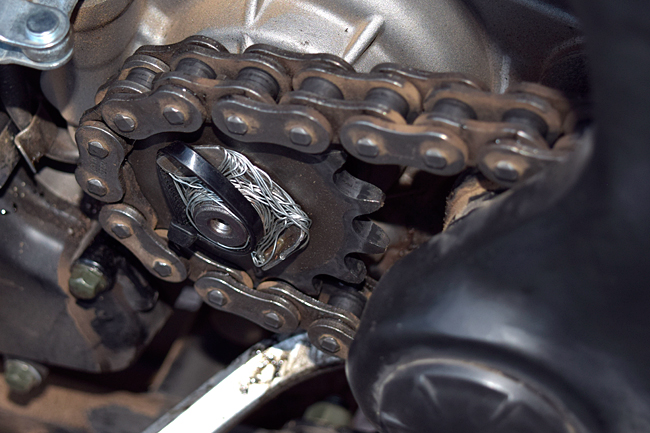
I need not have worried.  None of the engines failed.  We had a few headlights go out, but that’s not really a breakdown.  And then, when we were about halfway down the Baja peninsula, I took a smaller group of riders to see the cave paintings at Sierra San Francisco.  That trip involved a 140-mile round trip from Guerrero Negro into the boonies, with maybe 20 miles of that on a very gnarly dirt road.  As we were returning, good buddy Justin’s RX3 lost its countershaft sprocket.  We found it and Justin did a good enough MacGuyver job securing it to the transmission output shaft to get us back to Guerrero Negro, but finding a replacement was a challenge.  We finally paid a machinist at the Mitsubishi salt mining company to make a custom nut, and that got us home.

On every Baja trip after that, I took a spare countershaft sprocket nut, but I never needed any of them after that one incident on Justin’s bike.  Good buddy Duane had a similar failure, but that was on a local ride and it was easily rectified.

Jim’s Gearbox

Four or five Baja trips later, after we had ridden all the way down to Mulege and back up to the border, good buddy Jim’s transmission wouldn’t shift.

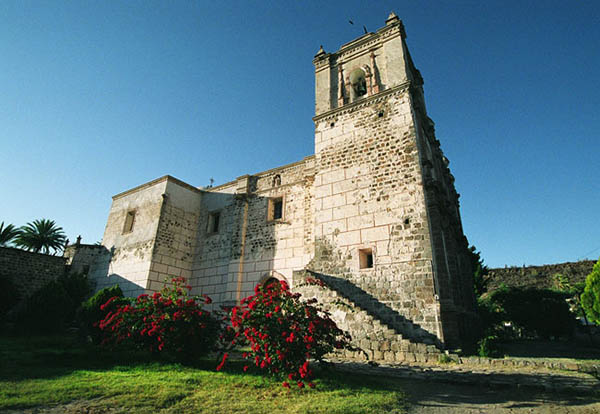
Good buddy Jim in the Mulege mission.

That’s the only breakdown I ever experienced anywhere on an RX3 that wouldn’t get us home, and that includes multiple multi-bike Baja trips, the multi-bike 5000-mile Western America adventure ride, the multi-bike 6000-mile ride across China, the 3000-mile circumnavigation around the Andes Mountains in Colombia, and quite a few CSC local company rides.  One of the guys on that Baja ride lived in the San Diego area and he owned a pickup truck, so he took the bike back up to Azusa for us.

Biting the Bullet

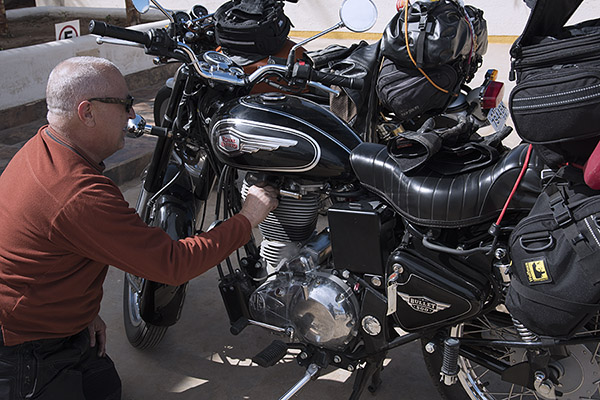
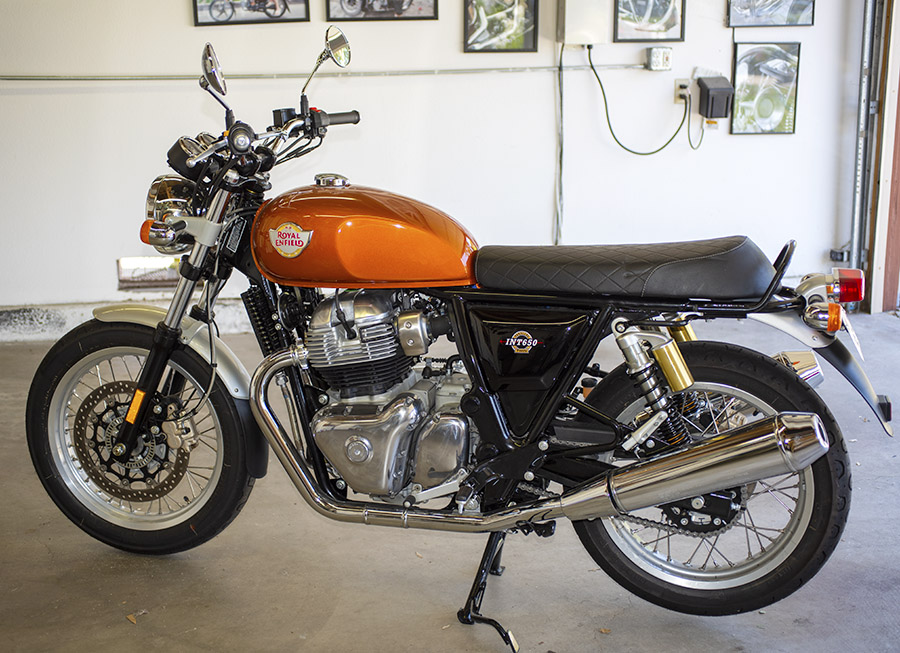
A couple of years ago Joe Gresh and I did a Baja road test with Royal Enfield press bikes.  One was the new 650 Interceptor twin (a bike I liked so much I bought one when I got home); the other was a 500 Bullet.  The Bullet was a disaster, but it really wasn’t the bike’s fault. The dealer who maintained the press fleet for Royal Enfield (I won’t mention them by name, but they’re in Glendale and they’re known for their Italian bikes) did a half-assed job maintaining the bike.  Actually, that’s not fair to people who do half-assed work (and Lord knows there a lot of them).  No, the maintenance on this bike was about one-tenth-assed.  It was very low on oil, it had almost no gas in it, the chain was loose and rusty, and on and on the writeup could go.  The bike kept stalling and missing, and it finally gave up the ghost for good at the Pemex station just north of Guerrero Negro.

Joe Gresh, inflight missile mechanic extraordinaire, getting intimate with the Bullet in Baja. “The Bullet needs me,” he said.

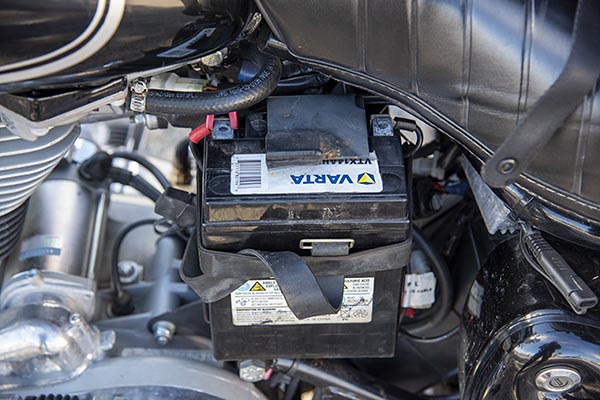
Fortunately for me, Gresh had one of those portable battery thingamabobbers (you know, the deals that are good for about 10 battery jumps) and it allowed us to start the bike.  We bought a new battery that didn’t quite fit the bike in Guerrero Negro (big hammers solve a lot of problems), but the entire episode left a bad taste in my mouth for the Bullet and for the Glendale Ducatimeister.

Big hammers fix all kinds of problems.

That bike had other problems as well.  The kickstand run switch failed on the ride home, and Gresh did an inflight missile mechanic bypass on it. Then, just before we made it back to my house in So Cal, the rear sprocket stripped.  Literally.  All the teeth were gone.  That was another one I had never experienced before.  The Bullet was sort of a fun bike, but this particular one was a disaster.  We joked about it.  The Bullet needs me, Gresh said.

John’s Silver Wing Leak

Ah this is another motofailure that tried but didn’t stop the show.  On one of my earlier Baja forays, Baja John had a Honda Silver Wing.  That’s a bike that was also known as the baby Gold Wing (it had all the touring goodies the Gold Wing had).  It was only a 500 or a 650 (I can’t remember which) and it had no problem keeping up with the Harleys (but then, it doesn’t take much to keep up with a Harley).

Baja John and the mighty Silver Wing, somewhere well south of the border.

The Silver Wing was a pretty slick motorcycle…it had a transversely-aligned v-twin like a Moto Guzzi and it had plenty of power.  Unlike the Guzzi, the Silver Wing was water cooled and that’s where our problem occurred.  John’s bike developed a coolant leak.  I was a little nervous about that.  We were more than halfway down the peninsula and headed further south when the bike started drooling, but John had the right attitude (which was not to worry and simply ignore the problem).   The little Silver Wing was like a Timex…it took the licking and kept on ticking, and to my great surprise, it simply stopped leaking after another hundred miles or so.  I guess it doesn’t really count as a breakdown.

John’s KLR 650 OPEC Bike

Baja John had another bike, a KLR 650, that developed a fuel petcock leak on another one of our Baja trips.  As I recall, it started leaking on the return run somewhere around El Rosario.   I get nervous around fuel leaks for the obvious reasons, but John stuck to his policy:  Don’t worry, be happy.

Baja John: The man, the legend.

We stayed in a hotel in Ensenada that night.  The hotel had an attached enclosed parking structure, which immediately started to smell like the inside of a gas tank.  Not that I’ve ever been inside a gas tank, but that parking garage pretty much had the aroma I imagine exists in such places.

John’s luck continued to hold, and we made it home without John becoming a human torch.

The Bottom Line

The bottom line is you basically need four things when headed into Baja:

      • A tool kit.
      • A good attitude that includes a sense of adventure.
      • A well maintained motorcycle.
      • Maybe some spare parts.

So there you have it.  If you’d like to know more about riding in Baja, please visit our Baja page and maybe pickup a copy of Moto Baja.


If you’re headed into Baja, don’t leave home without BajaBound Insurance.  They are the best there is.  If you are nice, they might even fix you up with a cool BajaBound coffee mug!


Never miss an ExNotes adventure!  Sign up here for free:

Favorite Baja Stops: The Rosarito Beach Hotel

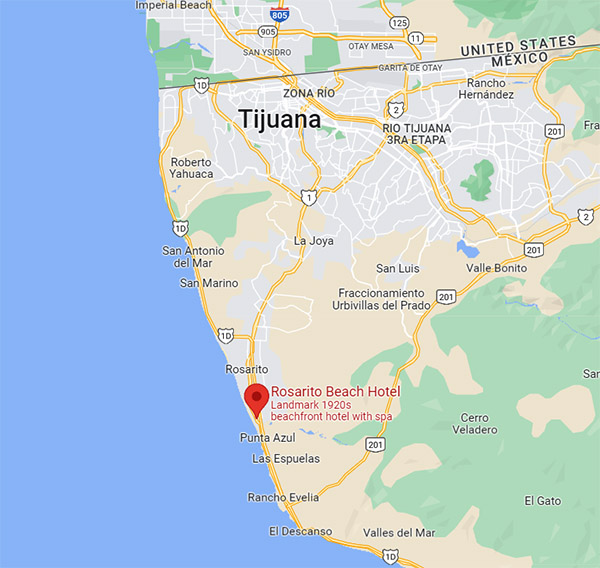
With the exception of our blogs on Tecate, most of what we write about Baja is well into the peninsula’s interior, far away from the touristy stuff clustered around Tijuana.  Today’s blog on the Rosarito Beach Hotel is an exception.  I love this place, and the beauty of it is that it’s only about 20 miles south of the border.  It will take you longer to get through Mexican Customs in TJ than it will to drive to the Rosarito Beach Hotel.

You can actually see the Rosarito Beach Hotel from the toll road. It’s a short drive from the US border.

To get there from So Cal, just take I-5 south until you run out of road.  Before you cross the border, though, make sure your car or motorcycle has Mexican insurance (we always use BajaBound).  After you’ve crossed the border you’ll need to stop at the Mexican Customs office (it’s huge and you can’t miss it), get your paperwork squared away, and continue south.  Watch the signs for the toll road to Ensenada; that’s the road you want.  Driving through TJ isn’t too bad; once you’re on the toll road it’s a pleasant drive along the Pacific Coast and you’ll soon see signs for Rosarito Beach.  Watch for the Rosarito Beach Hotel sign, head east, and after a couple of blocks you will be at the hotel entrance.

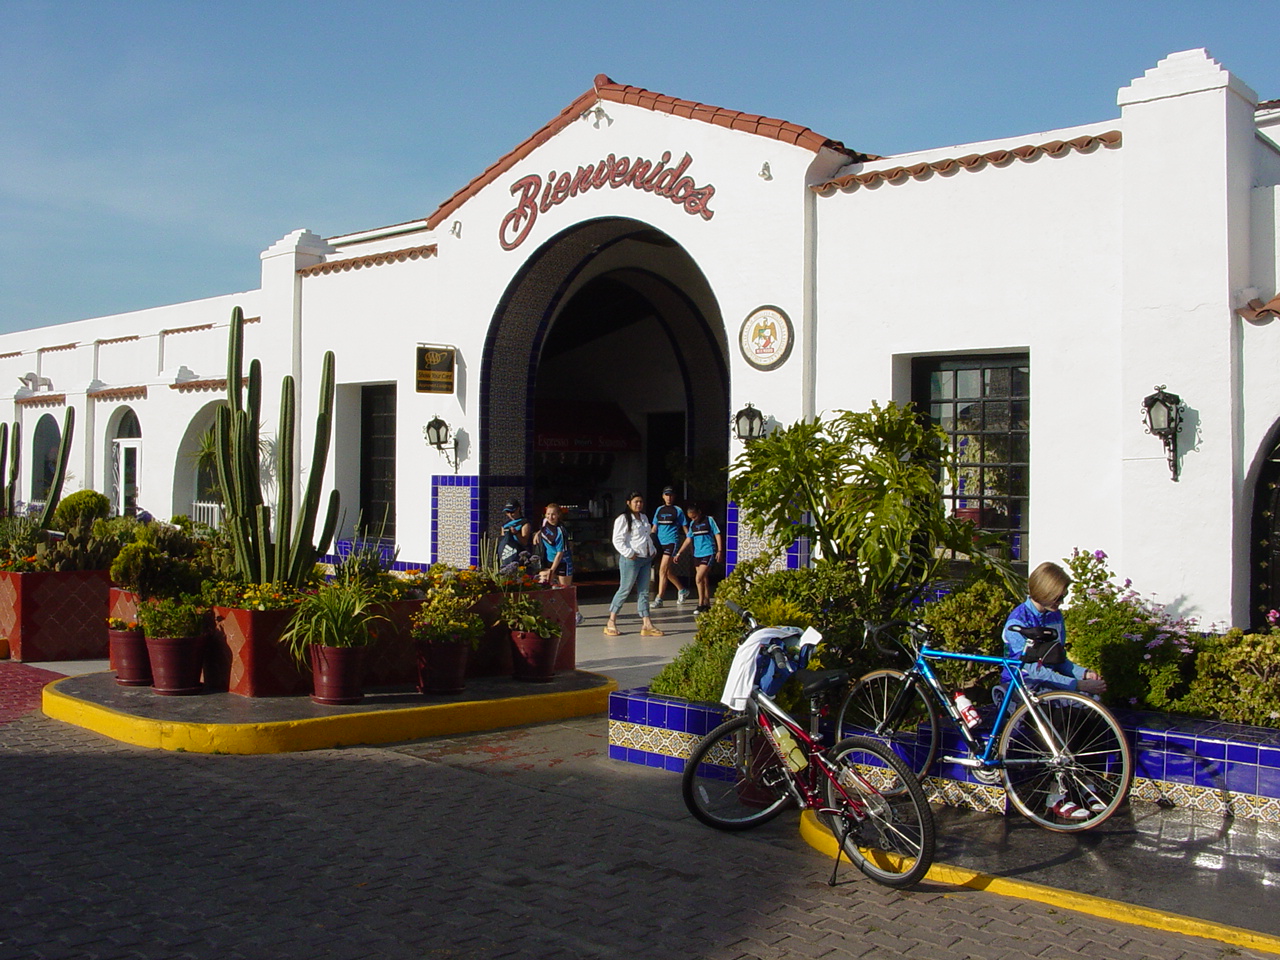
The Rosarito Beach Hotel. Susie and I used to ride in the 50-mile fun run bicycle ride from Rosarito Beach to Ensenada when it ran that route. Those were grand times.

The Rosarito Beach Hotel goes back to the 1920s when people like Clark Gable stayed there.  The bar is great, the restaurant is surprisingly good, their Sunday brunch is incredible (it’s worth the drive there just for that), and the first meal is on the house.  The rooms are modern and they are immaculate.  The grounds are beautiful and the hotel has secure parking.

The landscaping and layout of the Rosarito Beach Hotel are well done. The hotel is immaculate.
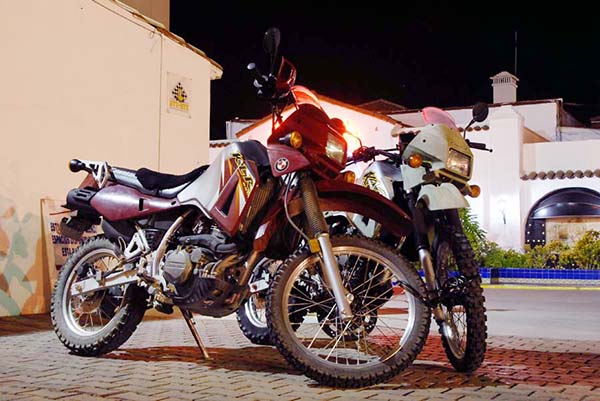
All parking at the Rosarito Beach Hotel is world class. Those two KLRs belonged to yours truly and Baja John. We rode them on several of many rides through Baja.  You can read about our Baja adventures here.
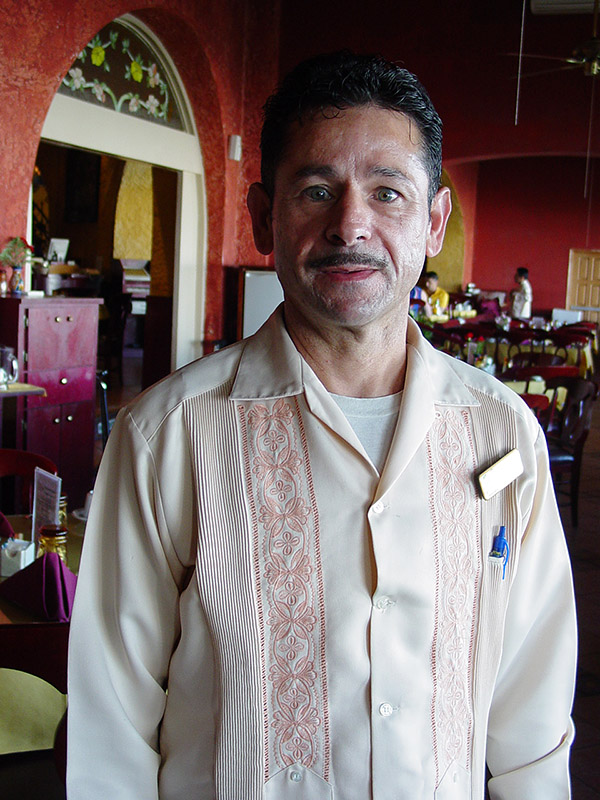
A member of the wait staff in the Rosarito Beach Hotel. The service was superb.
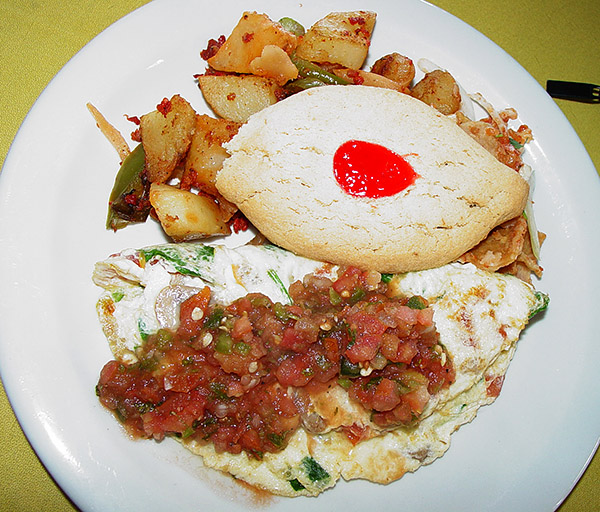
A Rosarito Beach Hotel breakfast. The Sunday morning brunch is exquisite.

Many times when we’re doing group rides, we’ll use the Rosarito Beach Hotel as a rally point after we’ve crossed the border.  It’s hard to miss when you’re on the toll road to Ensenada, and if your group gets separated in the complexity that is the Tijuana border area, the Rosarito Beach Hotel is a good place to meet.

As I mentioned above, the restaurant in the Rosarito Beach Hotel is good.  If you enjoy world-class fine dining, Susanna’s may well be the best kept secret in Rosarito Beach.  It’s just a bit north of the Rosarito Beach Hotel and within walking distance in the Pueblo Plaza courtyard collection of shops at Benito Juárez 4356 (walk north a block or two and turn right).   I have at least one dinner there every time I am in Rosarito Beach and I’ve never been disappointed.

Susanna in her world-class restaurant. I love this place.
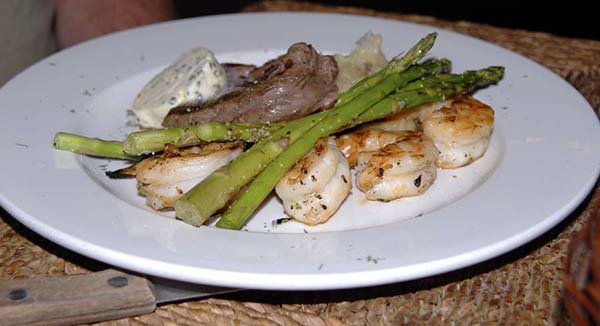
Shrimp and steak in Susanna’s, one of many fine dinners I’ve enjoyed there.

There you have it:  The Rosarito Beach Hotel.  If you’d like to read more about our favorite spots in Baja and some of the fabulous rides we’ve enjoyed south of the border, please visit our Baja page!


Never miss an ExNotes blog…sign up here for free!


Headed into Baja?  Make sure you have Baja insurance (it’s required by Mexican law).  Our choice is always BajaBound!

A Favorite: Hotel Mision Cataviña

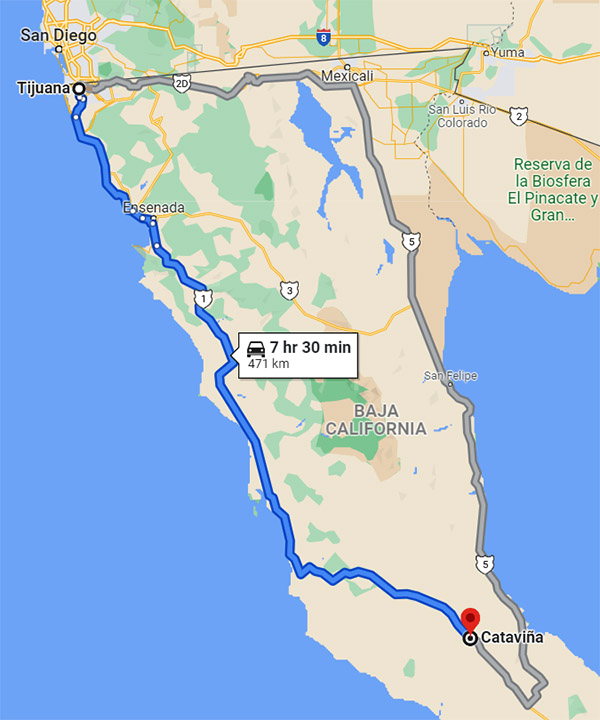
Located 297 miles south of the US border, Cataviña makes for a good spot to stop after your first day’s push into Baja.   You might also try to make it all the way to Guerrero Negro, but that’s another 140 miles.   When traveling in Baja through the mountains and all the small towns from Ensenada to El Rosario, you can’t grind out big miles like you can on a US freeway.  And, trust me on this, you don’t want to travel at night in Baja.   A 300-mile day in Baja when you’re starting at the US border is a good day, and that puts you smack dab in Cataviña.

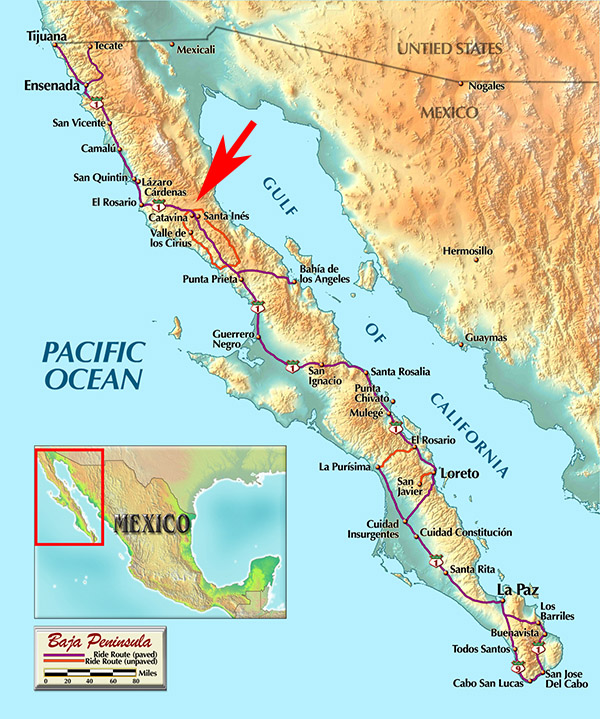
Cataviña’s location on the Baja peninsula.
It’s a full day’s drive from TJ to Cataviña.

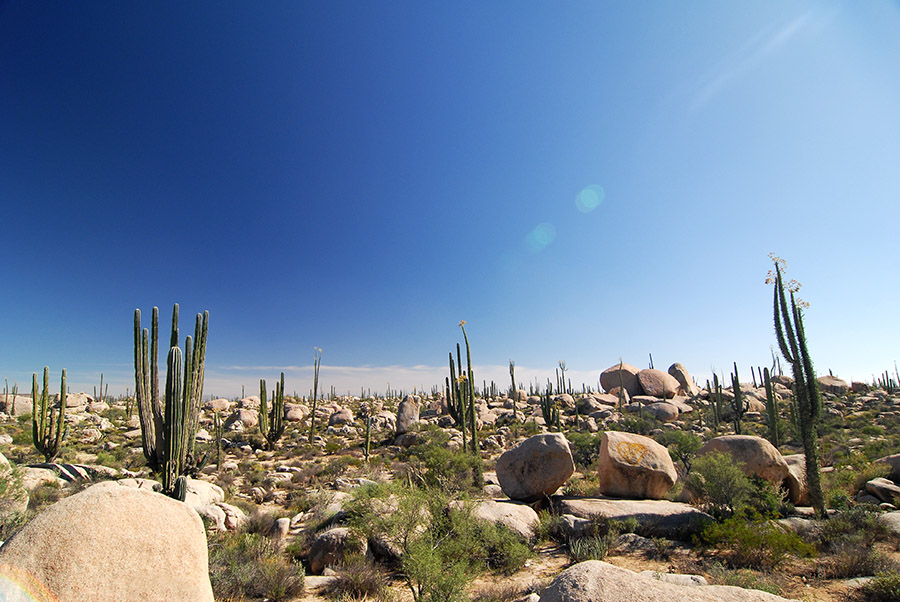
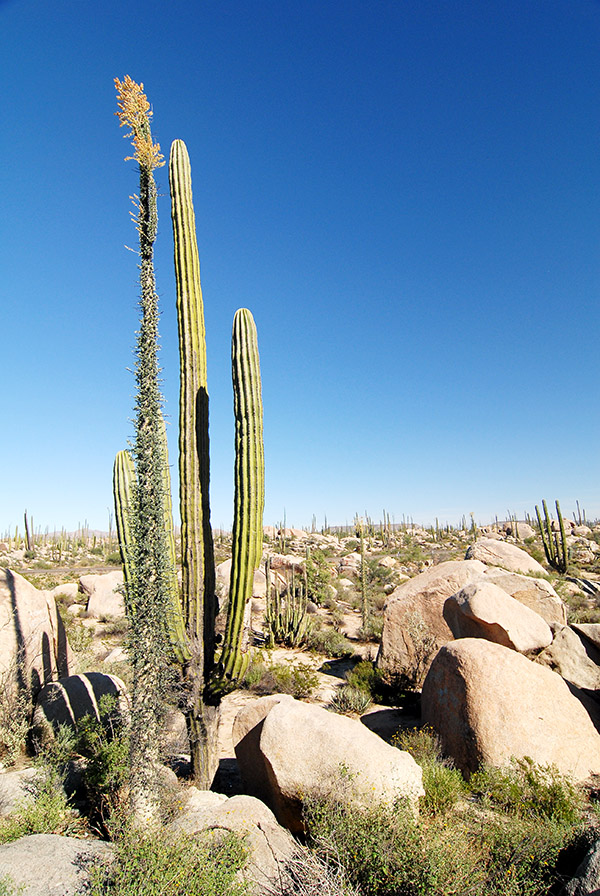
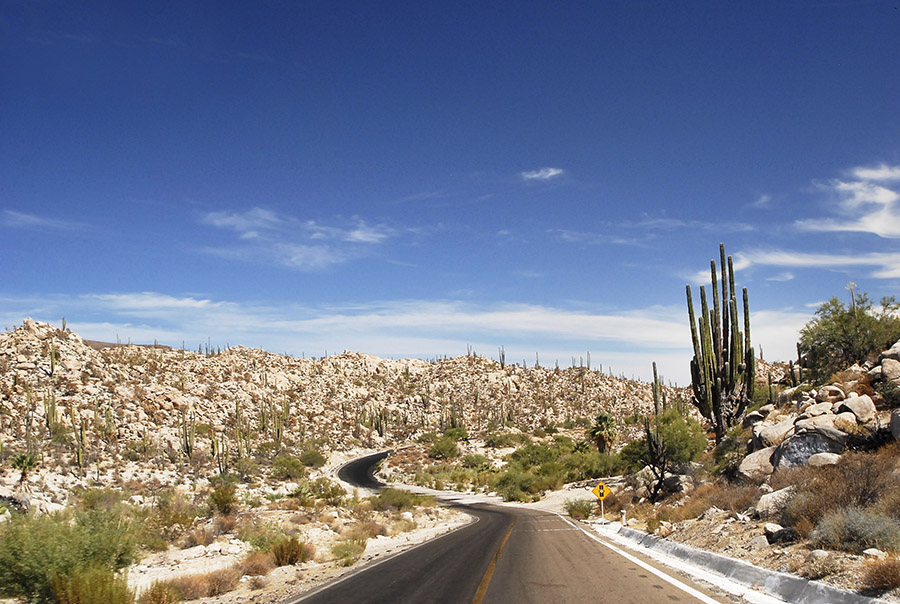
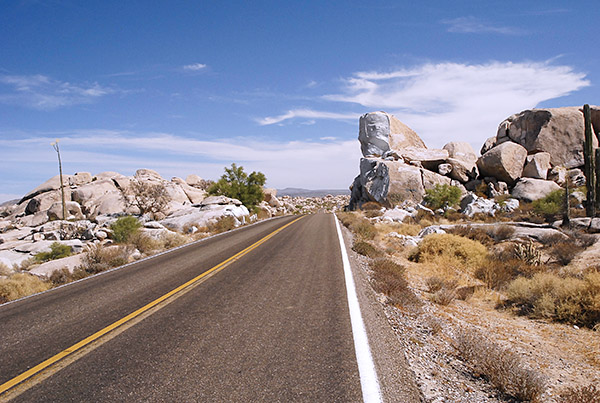
What’s cool about Cataviña is that it is in one of Baja’s boulder fields, as depicted in the big picture at the top of this blog.  Those are just flat wild…the stark landscape, the giant boulders, the Cardon and Cirio cacti…it’s all impressive.  The boulders were formed by wind erosion, which is kind of amazing.  I didn’t believe that at first, but I checked with one of my Cal Poly colleagues in the Geology Department (I’m a retired university professor) and he confirmed it for me.  Wow.

That’s a Cirio plant in front (the long thin one), and a giant Cardon cactus behind it, all in the boulder fields of Cataviña.

There’s only one decent hotel in Cataviña and it’s the Hotel Mision Cataviña.  It’s gone through a number of name changes in the 30+ years I’ve been traveling in Baja (the La Pinta, the Desert Inn, and maybe one or two others), but the hotel has stayed the same and that’s a good thing.   The Hotel Mision Cataviña has a good restaurant and bar.  It also has a nice swimming pool, and that pool has been just what the doctor ordered for me and my friends on more than a few occasions riding Mexico Highway 1 through Baja.

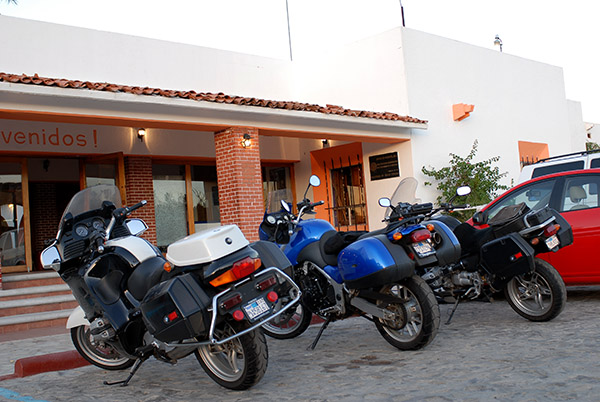
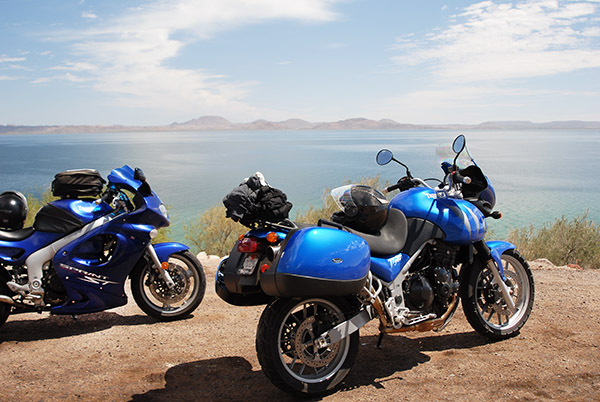
Parked in front of the Hotel Mision Cataviña. I’ve toured Baja on all kinds of bikes. The blue Triumph Tiger was my ride on this trip.
My friends and I once rode all the way to Cabo and back on 150cc CSC Motorcycles Mustang replicas.  You can read about that adventure here.  We spent the night in Cataviña.

At around $80 a night it’s a bit pricier than most other Baja hotels, but it’s still inexpensive by US standards.  There’s really nothing else in the Cataviña area for either hotels or restaurants other than a concrete-floored hotel on the other side of the highway.  We had to stay in that other hotel once when the Hotel Mision Cataviña was full.  That was more than 20 years ago and my wife still mentions it when she gets mad at me.  Take my advice on this:  The Hotel Mision Cataviña is where you want to stay.

One the Hotel Mision Cataviña’s coutyards. It’s a classy place.

I enjoy eating in the Hotel Mision Cataviña’s restaurant even if I’m just passing through.  If you let the staff know you’re in a hurry, they’ll get you in and out.  If you don’t, things kind of run on a Cataviña pace.  That’s cool if you’re staying for the night; it’s not if you’re trying to make Guerrero Negro.  I’ve done that, but it is a very long day.  The restaurant and bar have kind of an arched brick roof in the dining room.  It’s fun. As you might imagine, they are well stocked with Tequila and Tecate.

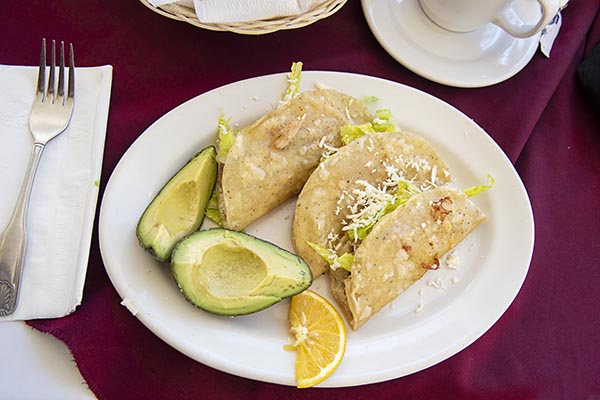
Joe Gresh enjoying chicken tacos during a brief stop at the Hotel Mision Cataviña restaurant.
They look good, don’t they?

If you’re traveling with a bunch of guys and you don’t mind sleeping 8 or 9 to a room, the Hotel Mision Cataviña built a separate just to the north of the main hotel and it has a dormitory style room.  I don’t know what it costs, but it’s got to be (on a per head basis) cheaper than one of the double rooms.  The rooms are nice.  The place is clean, it’s air conditioned, and its comfortable.  The only issue with the new building is that the hotel runs a diesel generator all night, and if you stay in the new building, it might keep you up.

Fuel is less of a concern today than it used to be.  We used to buy bottled gasoline from enterprising guys by the side of the road, but there’s a convenience store just across Highway 1 from the hotel now with gas pumps, so I think getting gasolina today is less of an issue.

If you would like to know more about the Hotel Mision Cataviña, you can do so here.


Headed into Baja?  Make sure you insure with the best, and that’s BajaBound!


Check out our reviews of other Baja hotels and restaurants, destinations, and more on our Baja page!


Never miss an ExNotes blog!  Sign up here for free!


Want to know more about some of our moto trips in Baja?  Pick up your own copy of Moto Baja!

Baja’s Sierra de San Francisco Cave Paintings

Real Indiana Jones stuff, this is:  Baja’s prehistoric cave paintings, or as they are known in BCS, Pinturas Rupestres en Baja California Sur.  They are in the Sierra de San Francisco mountains in an area north of San Ignacio on the eastern side of the peninsula.

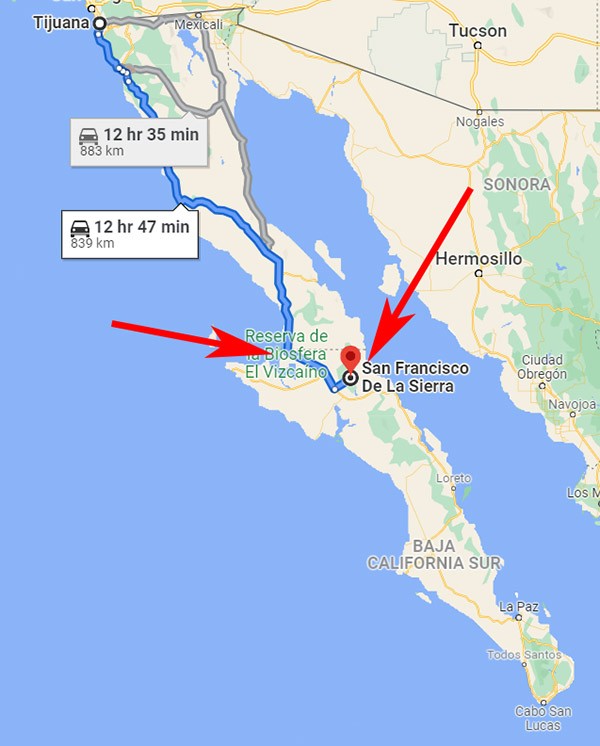
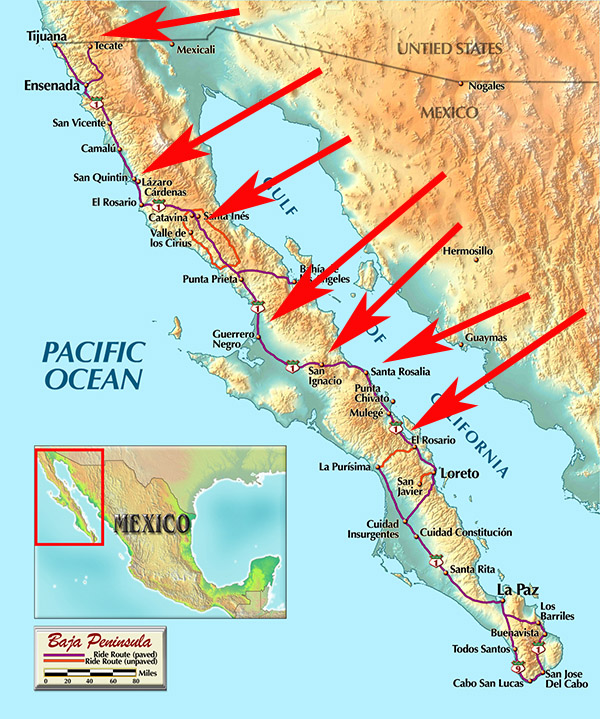
No one knows for certain how old these paintings are or who created them.  Conventional wisdom holds that the prehistoric Comondú people (ancestors of the Cochimí natives first encountered by Spanish explorers in the 1600s) created the paintings perhaps 7500 years ago, but like I said, no one knows for sure.   One of the very few relatively accessible sites is about 520 miles south of Tijuana, but don’t let the miles fool you.  You’ll need a very full day of hard traveling once you’ve crossed the border to reach Guerrero Negro, and it will be a full day from there to get to the cave paintings and return.

The red arrow on the left points to Guererro Negro; the red arrow on the right points to the cave paintings at Cueva del Raton.

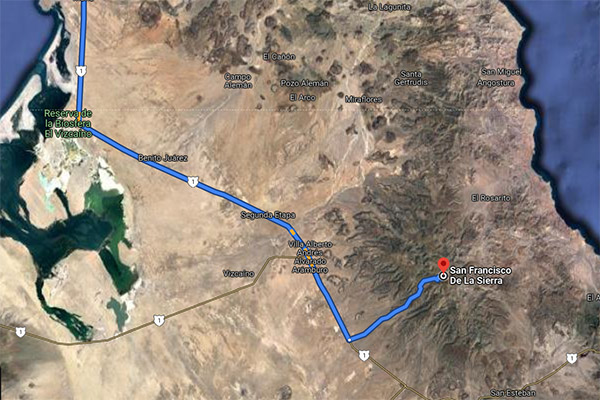
There are well over a hundred known prehistoric Baja cave painting sites throughout the peninsula (there may be others yet to be discovered) and with very few exceptions, most involve traveling by mule for a day or two through difficult terrain.  One of those exceptions, though, is the Cueva del Raton site (the subject of this blog).  Getting there makes for a grand adventure, and you can do it in a day if you’re already in San Ignacio to the south or Guerrero Negro to the north.   Our advice is to visit Guerrero Negro and take in the whale watching, have a grand breakfast at Malarrimo’s the next morning, and then head southeast on Mexico Highway 1.  Guerrero Negro is where Mexico Highway 1 turns to cut across the peninsula to the Sea of Cortez.   You’ll head southeast for about an hour.  Keep your eyes open and watch for the Pinturas Rupestres sign pointing to the left.   Trust me on this:  The ride into the mountains is grand.  The road runs straight as an arrow for maybe 15 miles, with the at first distant and magnificent Sierra de San Francisco mountains straight ahead.

The path into the Sierra de Francisco Mountains. Mexico Highway 1 bends southeast to go across the peninsula at Guerrero Negro on Baja’s Pacific Coast. The big lagoon is Scammon’s Lagoon, one of two choice whale watching locations in Baja.

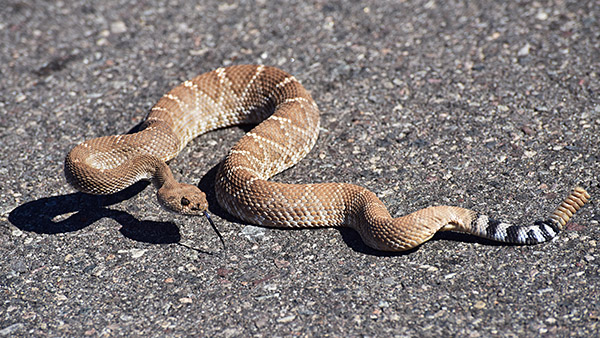
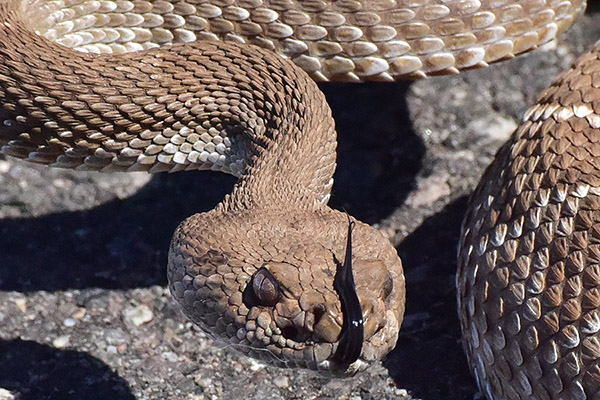
Then the road climbs through a series of desolate, precipitous, and tight switchbacks with stunning views in literally every direction.  I don’t use the word stunning lightly:  The ride into the Sierra de San Francisco Mountains is, all by itself, worth a Baja trip.   I’ve never seen other vehicles out there, unless they were fellow riders in the groups I’ve led to the cave paintings. I’ve seen goat herds tended by shepherds and sheep dogs (don’t tempt those dogs; sheep dogs in general are fiercely protective of their flock and the ones in this region seem particularly aggressive).  You may see other things out there as well.  On one trip, I had a close encounter with a very docile Mexican Red rattlesnake.

This guy (or gal; I wasn’t going to turn it over to check) was very polite. He (or she) was just outside my car door in the early morning hours. He (or she) didn’t rattle, although with those nine buttons I imagine its rattle would have been impressive.
They say few people (or even horses) survive a bite from one of these Mexican Red rattlers. This one’s previous meal might have been a rabbit; you can still see a hair on the right side of its mouth. I shot this photo with a 70×300 Nikkor lens (on a Nikon D810 camera) at 70mm. I was maybe 6 feet away in my Subaru with the window down, and the snake was just outside my door.

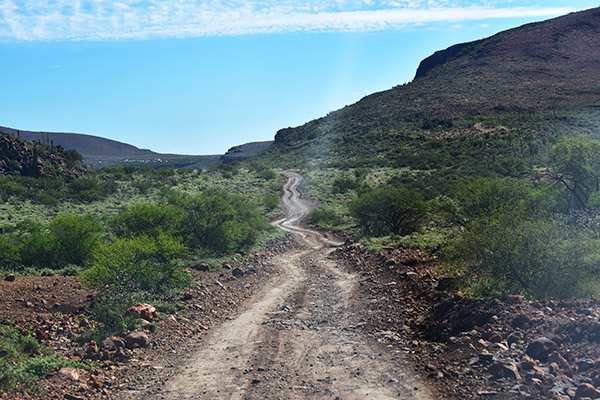
The road to the Cueva del Raton site (after you leave Mexico Highway 1) is paved for maybe 15 miles, and then the pavement ends for the next maybe 10 miles.  I would call it a fairly gnarly dirt road, but I’m an old guy and what’s gnarly to me may not be to you.  I wouldn’t attempt to ride it two up on a motorcycle.  I’ve done it in my Subaru with no problem and I’ve done it several times on my 250cc CSC RX3 motorcycle.   Depending on your skill level, you might be able to do it on a street bike.   Common sense is the order of the day:  If you’re on a Gold Wing or an FLH-anything, I would not think any less of you if you took a pass.  I think towing a trailer or driving a large recreational vehicle on this road would be a very bad move.

Twists and turns through the Sierra San Francisco Mountains.
When the pavement ends, this is what is ahead. It gets way rougher as you get into the mountains.
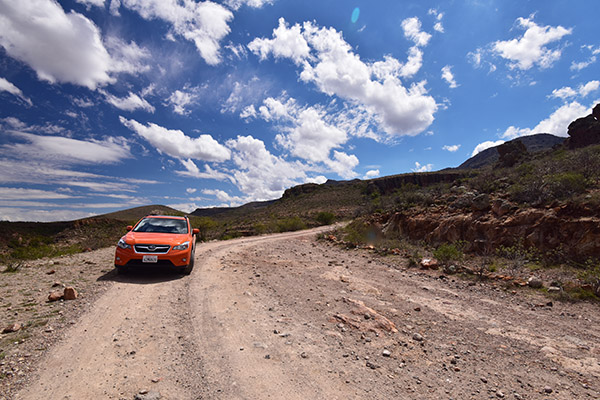
Traveling in style: My Subaru CrossTrek. It was a grand automobile for Baja exploration.
Don’t let this photo phool you. This was the only smooth stretch on the dirt road to the Cueva del Raton site.

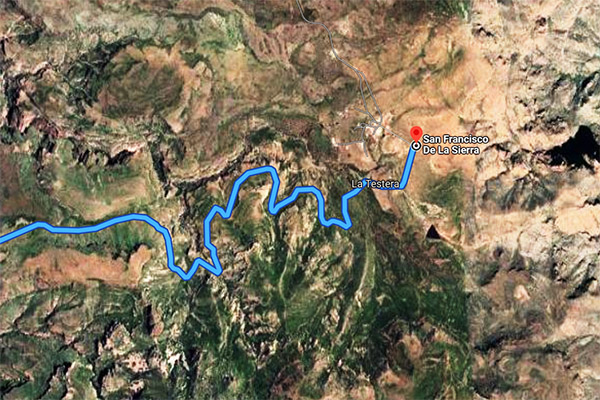
You’ll see the sign for the Cueva Del Raton cave paintings on your right, but you can’t just go in.  There’s a locked gate and a set of stairs to get to the cave paintings, and to get in, you’ll need to buy a ticket.  There are two little villages in this area.  One is almost directly opposite the Cueva Del Raton site; the other is another two or three miles along the same dirt road (which dead ends in the little village of San Francisco de la Sierra).   At times I’ve tried to buy tickets in the little village directly across from the cave painting site and they sent me on to San Francisco de la Sierra, and at other times I’ve gone up to San Francisco de la Sierra and they’ve sent me back to the little village near the cave paintings.   The fees are modest and I always use larger Mexican bills and tell the people there to keep the change.  You’ll have to sign in when you purchase your ticket.  The cave paintings are a UNESCO World Heritage site.   Seeing them is a big deal.

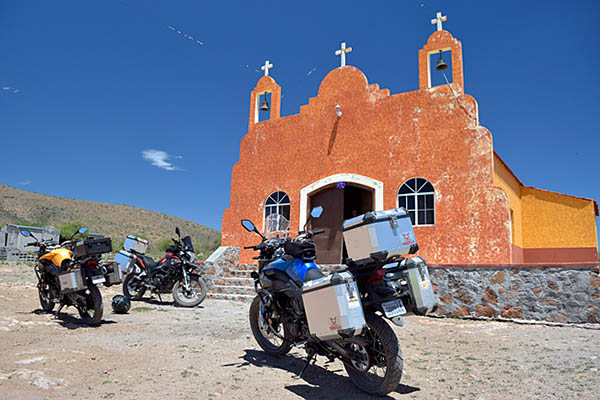
If you ride to the end of the road to the little village of San Francisco de la Sierra, there’s a cool little church that is normally left unlocked. It’s a good spot for grabbing photos.

After you have purchased your tickets, one of the guides will meet you at the locked entrance to the Cueva del Raton site.  He will walk down from the village, so you may have to wait a couple of minutes.  Sometimes two guides come along.  They don’t speak English, so they don’t provide much explanation.   But you don’t really need much narration.  The paintings speak for themselves, which is no doubt what the artists who created them thousands of years ago intended.

The Cueva del Raton entrance. I led groups of CSC RX3 riders to this site several times. CSC offered no-charge Baja trips to its riders as part of its marketing approach and it worked. I don’t know why other motorcycle manufacturers don’t do the same.
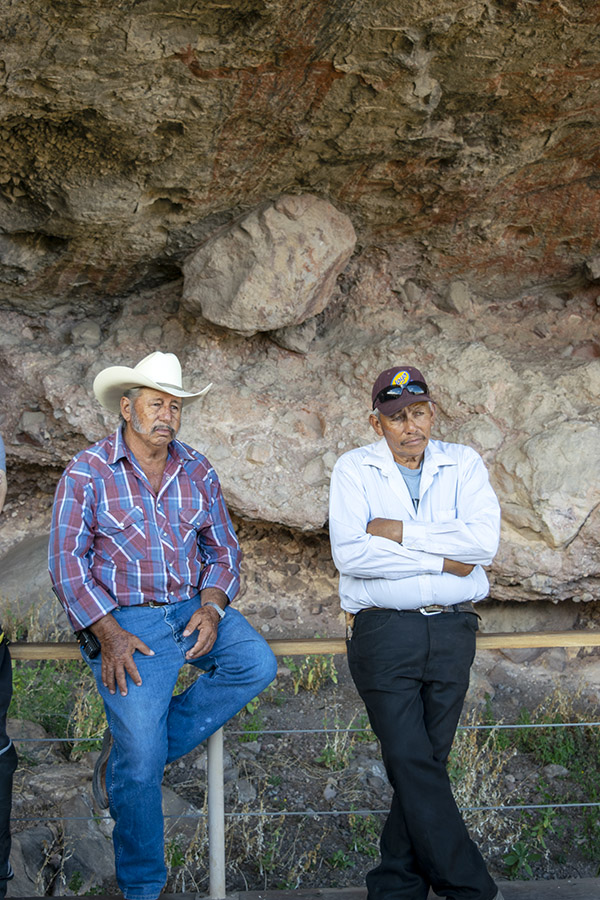
Our local guides. These fellows didn’t speak English, but they didn’t need to.  The paintings spoke to me.

Once the guide unlocks the gate, it’s a modest climb up about three flights of steps, and there you’ll see the cave paintings (the cave is actually more of an overhang).  The paintings are protected from the rain and the region’s arid climate have protected them well.

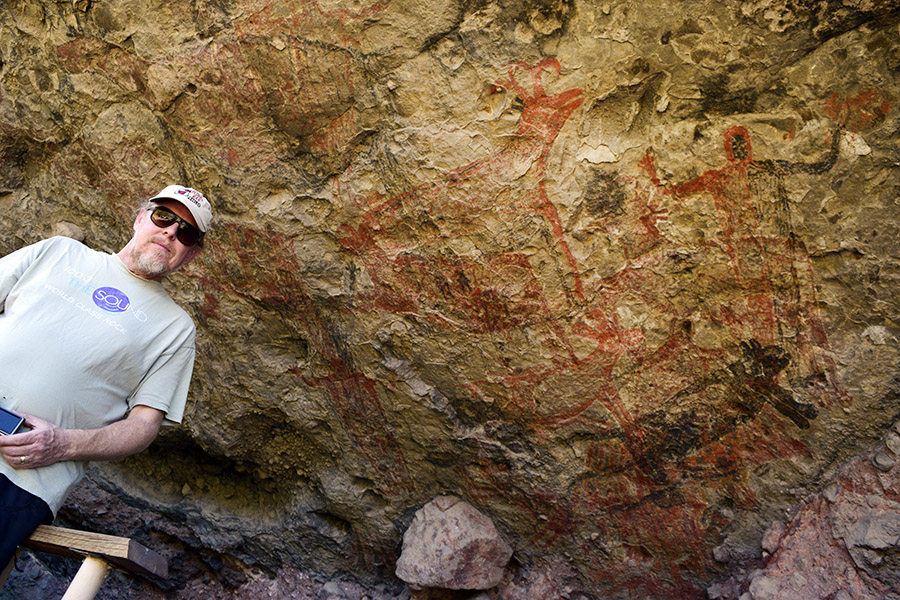
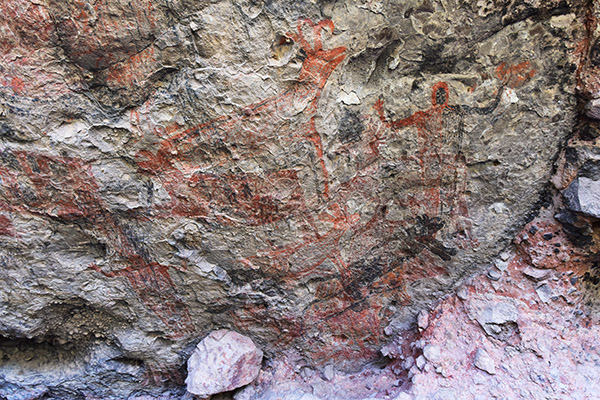
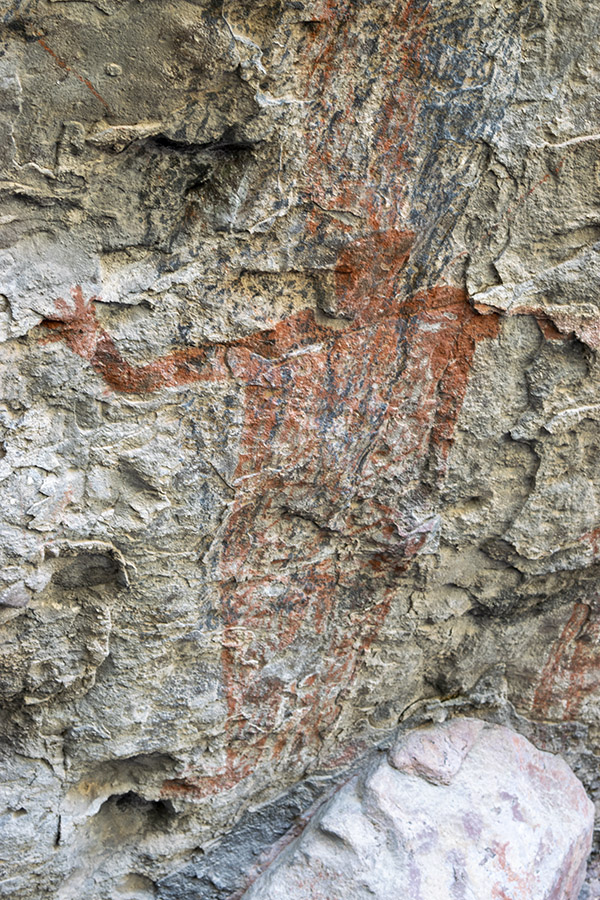
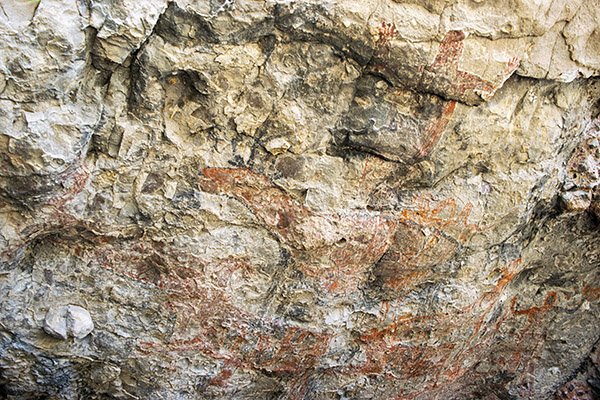
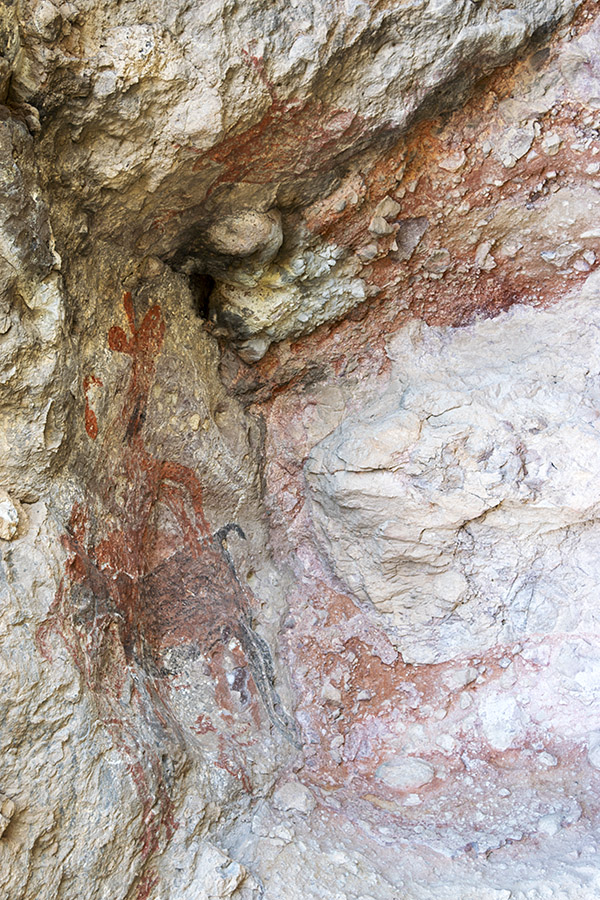
Deer, a puma, and a human with a black face. In the more than one hundred known Baja cave painting sites, only four instances of humans with a black face have been found.
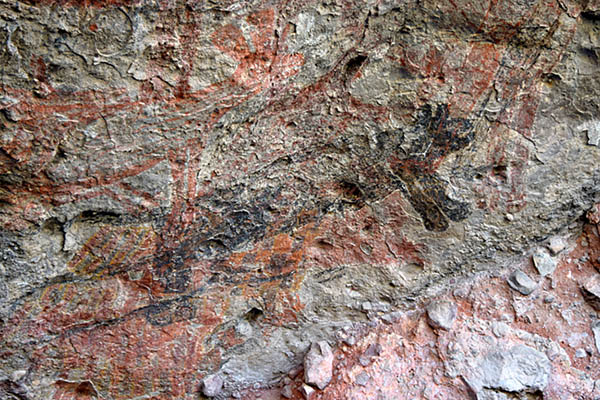
Another painting of a puma and a deer. In some cases, the paintings are done over other paintings. The black puma makes me wonder…was it really a cougar, or was it a jaguar? Jaguars have been found as far north as Arizona, even in modern times.
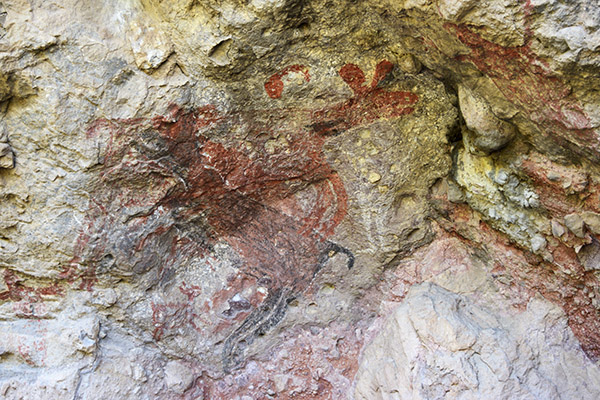
Goats? Or deer?
Another depiction of a person.
A better photo of the figures to the left of the humans.
And another. It was an eerie feeling, seeing these paintings and knowing they were done by a civilization that vanished thousands of years ago.

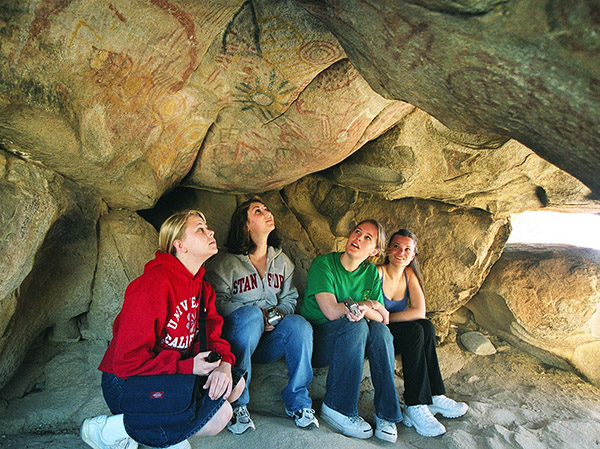
As I mentioned at the start of this blog, there are more than a hundred known cave painting sites throughout Baja and most are relatively inaccessible.  I’ve been a Baja traveler for more than 30 years, and many of my trips have been on Mexico Highway 1 down through the Cataviña boulder fields.   Several years ago I noticed a new sign for cave paintings just north of Cataviña on a trip with my daughter and three of her college friends.  We had to stop. These paintings were just off the main road and I’m pretty sure they were done by the famous Cochimí artist Sherwin Williams and his sidekick, Dutch Boy.  Don’t be taken in; you want the real deal and that’s the much further south Cueva del Raton.

A Spring Break trip through Baja with my daughter and three of her friends. All of these young ladies have gone on to very successful careers.

Our preference when traveling by car or motorcycle is BajaBound Insurance.  I’ve been using them for years and they are the best.


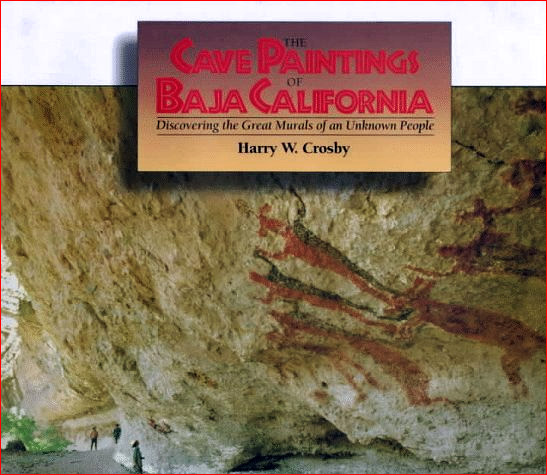
If you would like to learn more about Baja’s cave paintings, Harry Crosby’s The Cave Paintings of Baja California is a stellar reference with outstanding photos. It’s the best work of its kind on this fascinating topic.


Want more Baja moto adventure?  Check out our collection of stories on several trips in the full color Moto Baja book!


The six best bikes for Baja?  This one always gets the keyboard commandos wound up!


More on Baja, including favored restaurants, hotels, and destinations?  It’s all right here!

Seven Favorite Baja Destinations

Baja is a motorcycling paradise and I have a bunch of favorite destinations there.  Seven of them, to be precise, although truth be told, I like everything in Baja except for Tijuana and maybe La Paz and Loreto.  That said, my favorites are:

      • Tecate
      • San Quintin
      • Cataviña
      • Guerrero Negro
      • San Ignacio
      • Santa Rosalia
      • Concepcion Bay

Here’s where they are on a map:

So what’s so great about these places?  Read on, my friends.

Tecate

Tecate is the gateway to the middle of northern Baja, and it’s the easiest point of entry. Both Tijuana and Mexicali are too big and too complicated, and the Mexican Customs guys are too official in those bigger cities.  Tecate is a friendly place.  The last time I picked up a tourist visa in Tecate, the Customs officer tried to sell me salsa he and his family made as a side gig.  That’s what the place is like.  I love it.

If you’re into fine dining (not as in expensive dining, but just great food), it’s hard to go wrong anywhere in Baja.  Tecate has some of the best, from street taco vendors to Malinalli’s to Amore’s.  I could spend a week just in Tecate.  It’s that good.

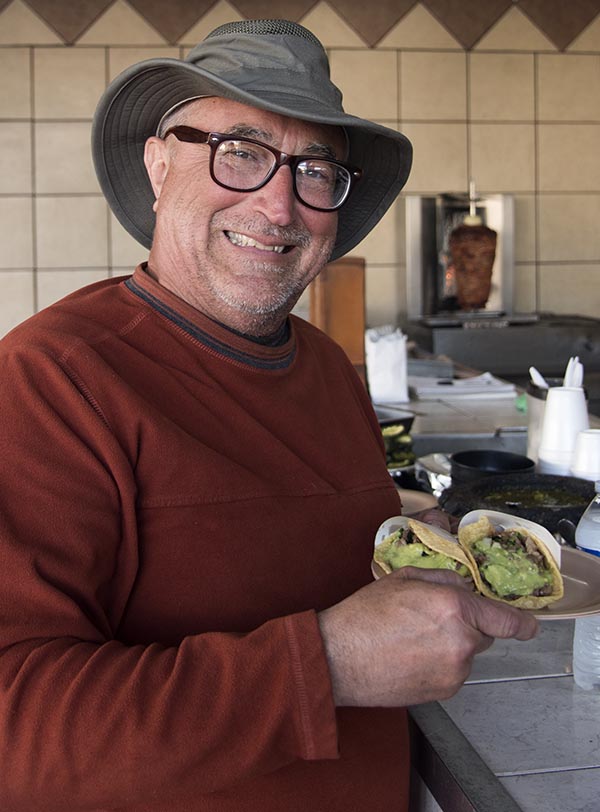
Uncle Joe Gresh with street tacos in Tecate. Wow, were they ever good.
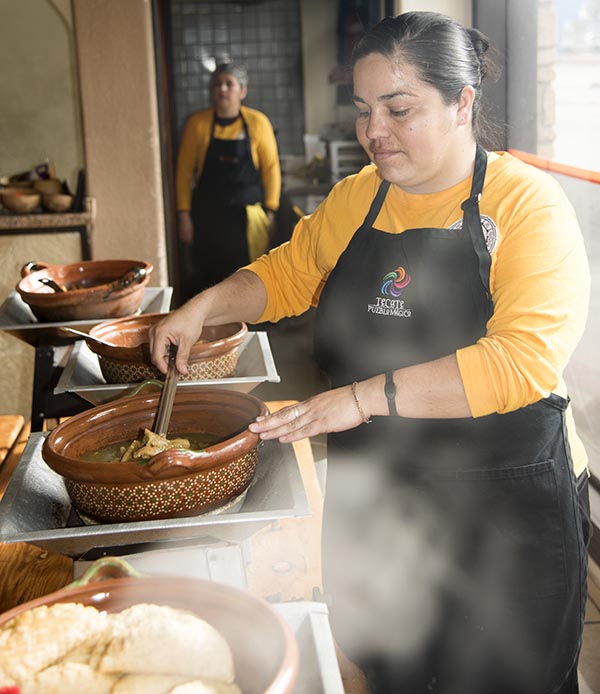
The buffet at Malinalli’s is regional, awesome, and inexpensive. It’s a hidden treasure.
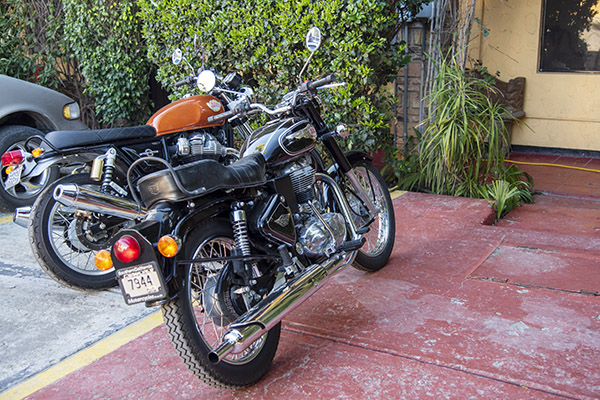
Dos Joes’ motos on an Enfield expedition that took us through Tecate.
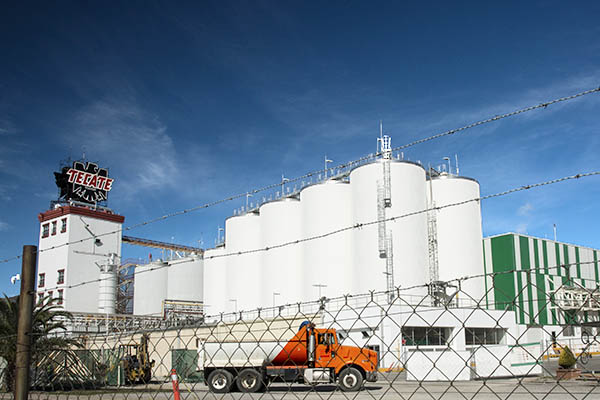
The Tecate brewery dominate the Tecate skyline and is visible from just about anywhere in town. A can of ice cold Tecate with sea salt around the rim and a bit of lime juice…life doesn’t get any better.

San Quintin

San Quintin is 186.4 miles south of the border on Baja’s Pacific coast.  It’s usually a quiet ag town that has a lot of things going for it, including interesting hotels, good food, and Bahia San Quintin.  The Old Mill hotel and its associated restaurant, Eucalipto, is my personal favorite.  The hotel is about 4 miles west of the Transpeninsular Highway, and what used to be a harrowing soft sand ride to it is now easy peasy…the road is paved and riding there is no longer a test of your soft sand riding skills.  The Eucalipto restaurant is second to none.

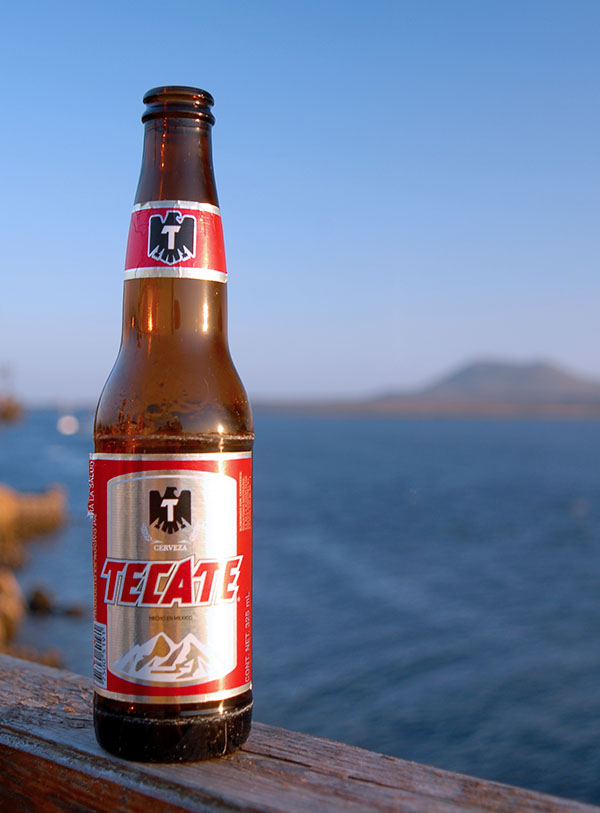
What could be better than an ice cold Tecate overlooking Bahia San Quintin after a day’s riding in Baja? We once saw a California gray whale from this very spot.

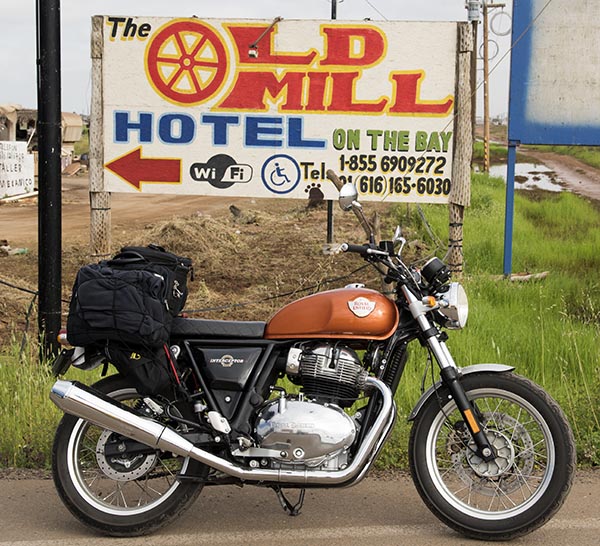
A man, a motorcycle, and Mexico….the sign on the Transpenisular Highway pointing toward Bahia San Quintin and the Old Mill Hotel. The bike? That’s the 650cc Royal Enfield, perfect for riding Baja. But then just about any motorcycle is perfect for riding Baja.
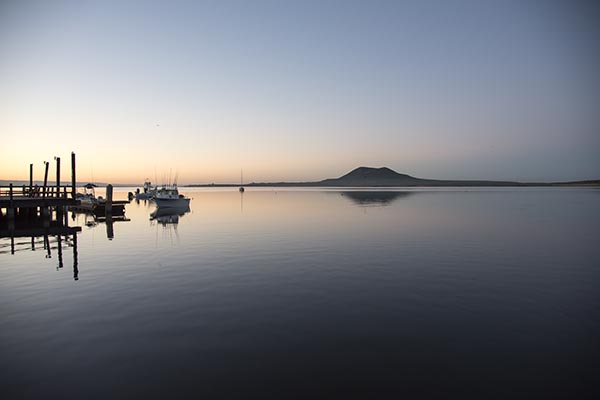
Bahia San Quintin at dawn. It’s an awesome spot.
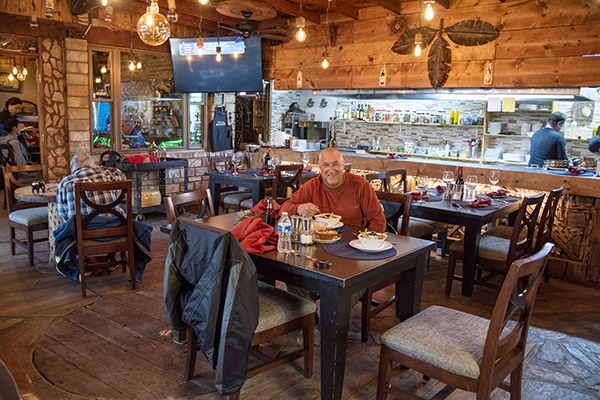
Uncle Joe enjoying breakfast in the Old Mill’s Eucalipto. It is an exquisite restaurant.

You’ll notice at the top of my scribblings about San Quintin I said it is usually a quiet town.  The one exception for us was when there was a labor riot and we were caught in it.  The Mexican infantryman about 80 miles north of San Quintin told me the road was closed, but his English matched my Spanish (neither are worth a caca), and without me understanding what I was riding into, he let me proceed.  It’s not an experience I would care to repeat.  But it’s the only event of its type I ever experienced in Old Mexico, and I’d go back in a heartbeat.

The Cataviña Boulder Fields

Ah, Cataviña.  Rolling down the Transpeninsular Highway, about 15 miles before you hit the wide spot in the road that is Cataviña you enter the boulder fields.  Other-worldly is not too strong a description, and if the place wasn’t so far south of the border it would probably be used more often by Hollywood in visits to other planets.  The boulders are nearly white, they are huge, and the juxtaposition of their bulk with the bright blue sky punctuated by Cardon cactus.

Pastel geology. The area really is as beautiful as the photos depict it to be.

I get a funny feeling every time I enter this part of Baja. Not funny as in bad, but funny as in I feel like I’m where I belong.  I once rolled through this region in the early morning hours with my daughter and she told me “you know, it’s weird, Dad.  I feel like I’m home.”  She understood (as in completely understood) the magic that is Baja.

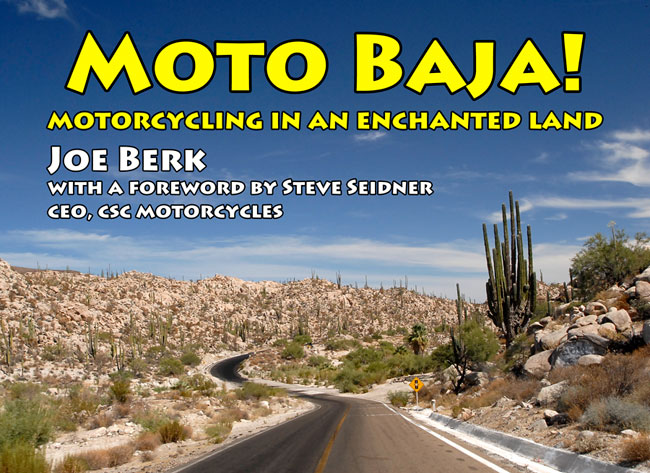
I like the area and its stark scenery so much that one of my photos became the cover of Moto Baja!  I grabbed that shot from the saddle at about 30 mph on a CSC 150 Mustang replica, which I subsequently rode all the way down to Cabo San Lucas (that story is here).

You should buy a copy or three. They make great gifts.

Every time I roll through Cataviña with other riders, the dinner conversation invariably turns to how the boulders formed.   When I was teaching at Cal Poly Pomona, I asked one of my colleagues in the Geology Department.  He know the area as soon as I mentioned it.  The answer?  Wind erosion.

Guerrero Negro

The Black Warrior.  The town is named after a ship that went down just off its coast.    It’s a salt mining town exactly halfway down the peninsula, and it’s your ticket in for whale watching and the best fish tacos in Baja (and that’s saying something).  I’ve had a lot of great times in Guerrero Negro.  It’s about 500 miles south of the border.  You can see the giant steel eagle marking the 28th Parallel (the line separating Baja from Baja Sur) a good 20 miles out, and from there, it’s a right turn for the three mile ride west into town.  Malarrimo’s is the best known hotel and whale watching tour, but there are several are they are all equally good.  It you can’t get a room at Malarrimo’s, try the Hotel Don Gus.

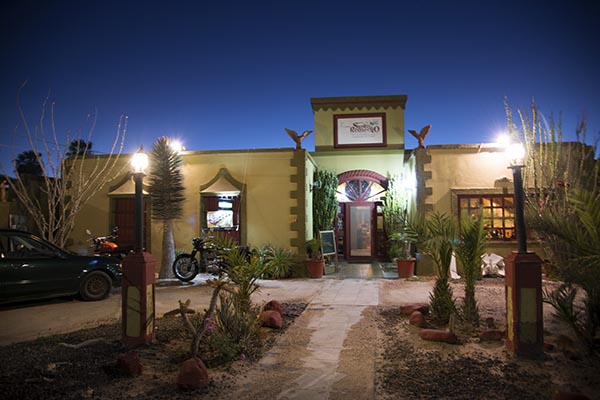
CSC RX3 motorcycles at the Hotel Don Gus. We used to do annual Baja tours with CSC…those were fun times and great trips, and introduced a lot of folks to the beauty of Baja.
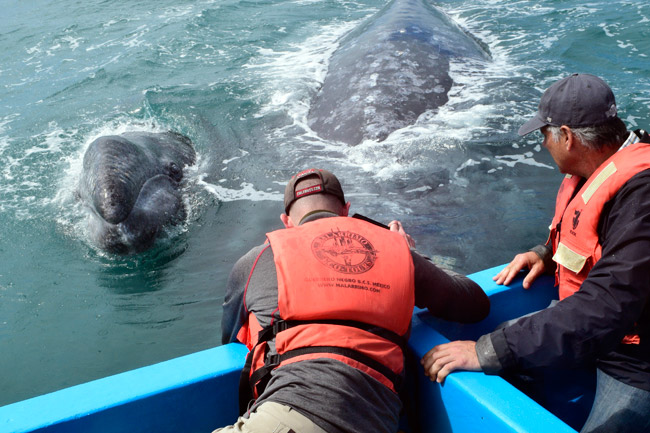
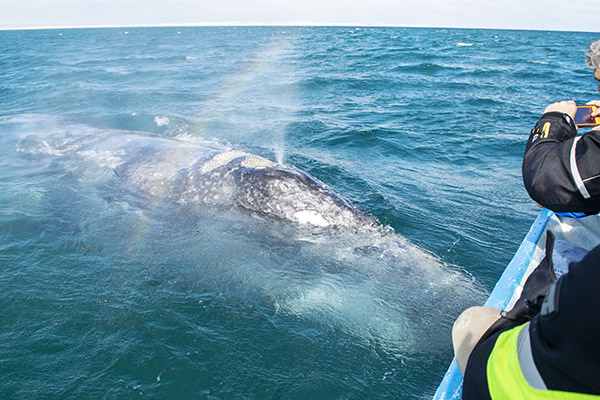
What it’s all about…getting up close and personal with the California gray whales. They are in town from January through March.
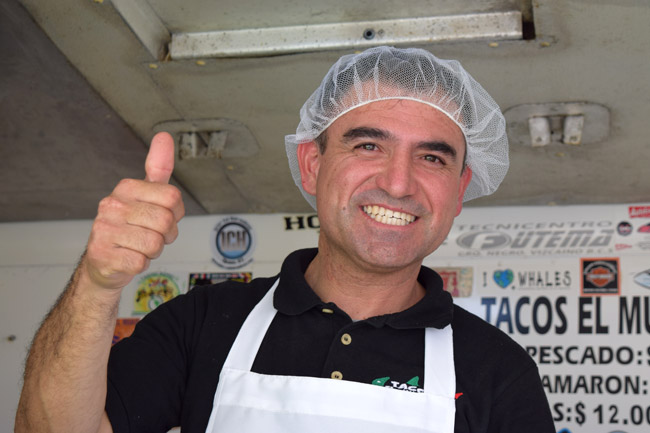
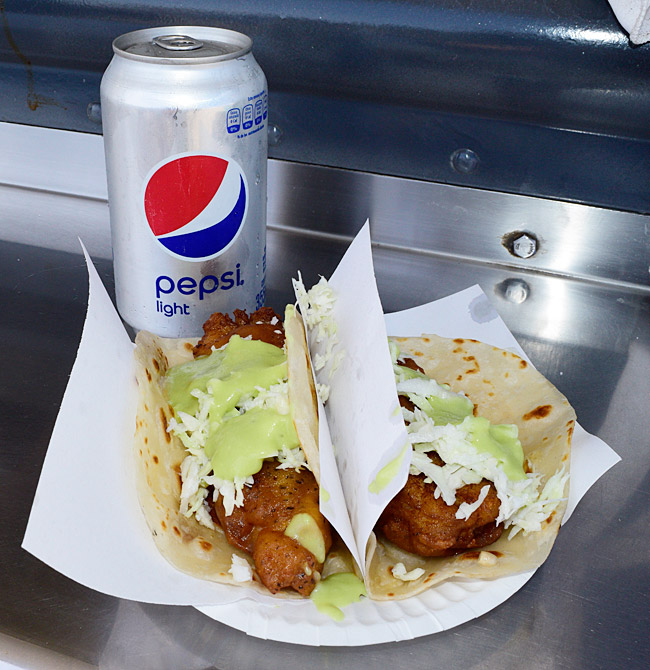
Tony, taco chef extraordinaire. You might think I’m exaggerating. I’m not.
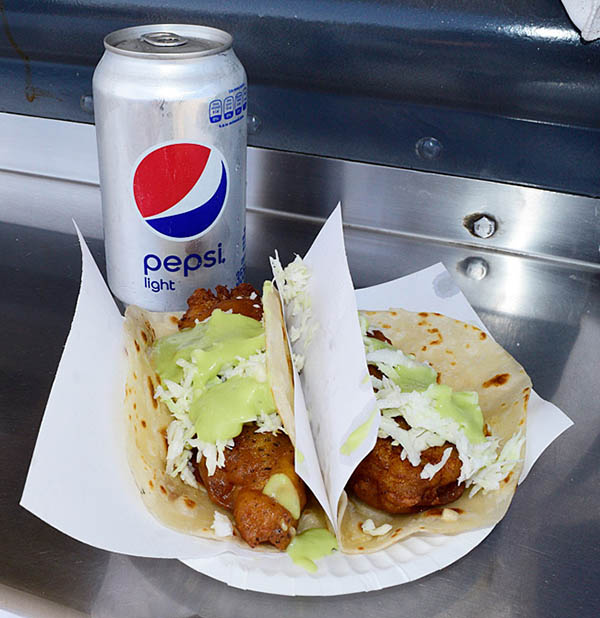
It’s worth the 500-miles trek to Guerrero Negro just to savor Tony’s fish tacos. You might think I’m exaggerating. But like I said above…I’m not.
Man does not live by fish tacos alone, so for breakfast or dinner, it’s either the restaurant at Malaririmo’s or the San Remedio, a block north of the main drag into town. You won’t be disappointed at either.
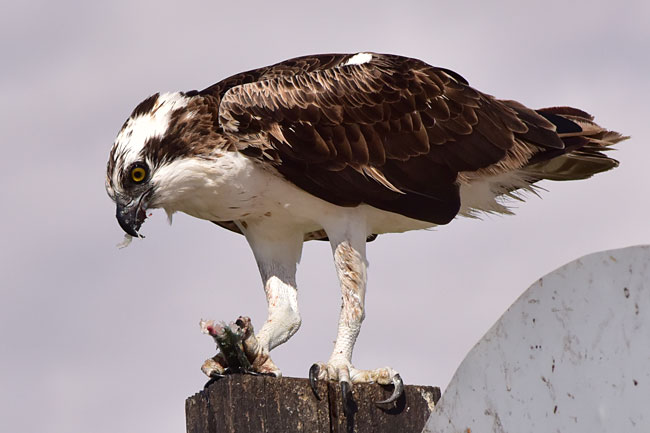
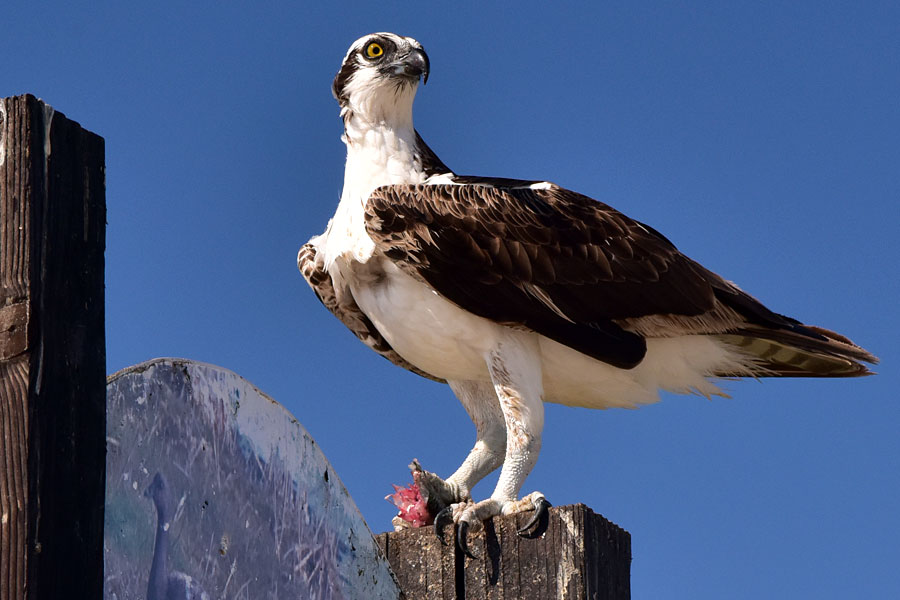
Sue’s photo of a Guerrero Negro osprey enjoying some sushi.

After you leave Guerrero Negro and continue south, the Transpeninsular Highway turns southeast to take you diagonally across the Baja peninsula. About 70 miles down the road (which is about half the distance to the eastern shores of Baja and the Sea of Cortez along Mexico Highway 1) you’ll see the turn for San Ignacio.  It’s another one of Baja’s gems.

San Ignacio

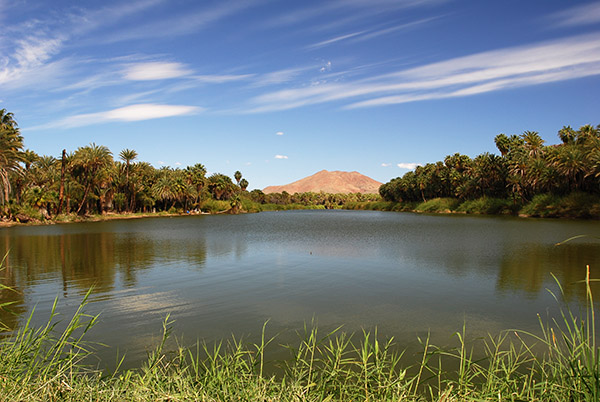
San Ignacio is an oasis in the middle of the desert that forms much of Baja.  The Jesuits introduced date farming to the region hundreds of years ago, and it’s still here in a big way.  Leave Guerrero Negro, head southeast on Mexico Highway 1, and 70 miles later you run into a Mexican Army checkpoint, a series of switchbacks through a lava field, and when you see the date palms, turn right.

An oasis is usually formed by a volcano, and when a volcano is done discussing politics, it forms a lake. That’s the San Ignacio volcano and its lake, visible on the left as you ride into town.
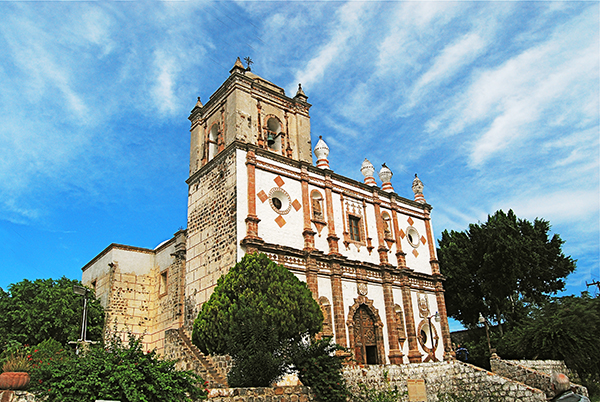
The San Ignacio church, built as a mission in the 1700s, dominates the center of San Ignacio. It’s a beautiful spot, one of the most photogenic in all of Baja.
Another photo of the San Ignacio Mission. You’ll want to grab some photos in San Ignacio.
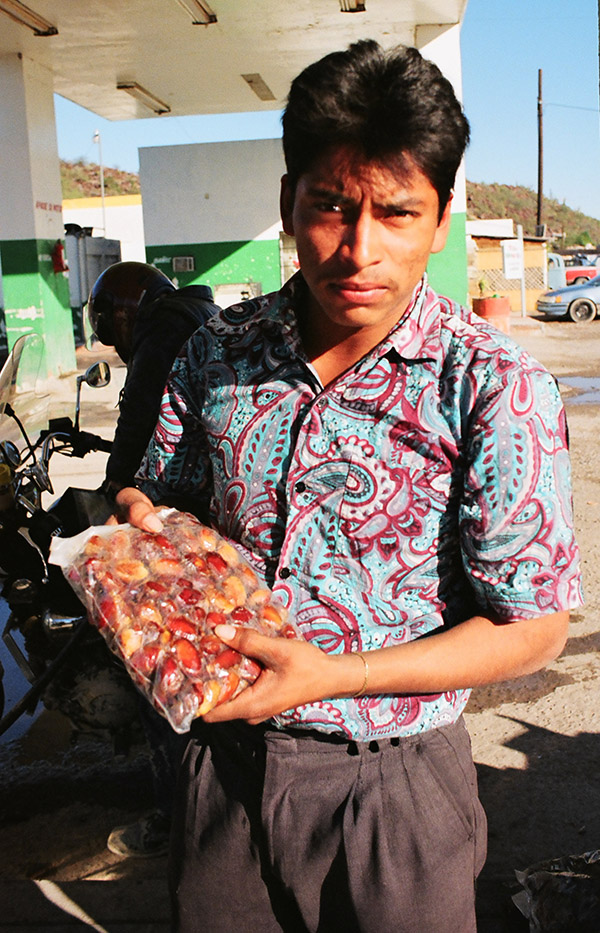
Dates? Nope, not on that trip, but dates are one of the things San Ignacio is known for. I’ll bet they are delicious.

San Ignacio has a town square that’s right out of central casting, there’s a little restaurant that serves the best chile rellenos in all of Mexico (I’m not exaggerating), and the place just has a laid back, relaxing feel about it.

Santa Rosalia

You know, this town is another one of Baja’s best kept secrets.  As you travel south on Highway 1, San Ignacio is the first town you encounter after traveling diagonally across the peninsula.  Folks dismiss it because it’s an industrial town, but they do so in ignorance.  There’s a lot of cool stuff in this place.

The ride into Santa Rosalia a few years ago with novelist Simon Gandolfi, Arlene Battishill, J Brandon, John Welker, and yours truly. That’s a dead fish I’m holding.  We did a round trip to Cabo San Lucas on 150cc Mustang replicas, just to say that we could.

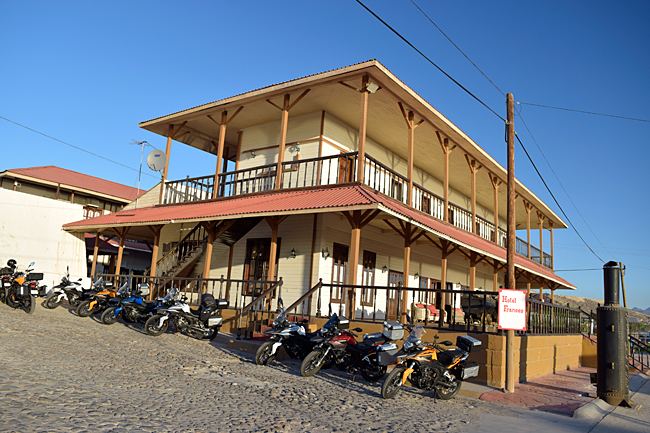
One of the things that’s unique about Santa Rosalia is the all-wooden architecture.  The town was originally built by a French mining company (Boleo) and they built it they way they did in France.  Like the Hotel Frances, which sits high on a mesa overlooking the town and the Sea of Cortez.  I love staying there.

The Hotel Frances. It used to be a brothel.

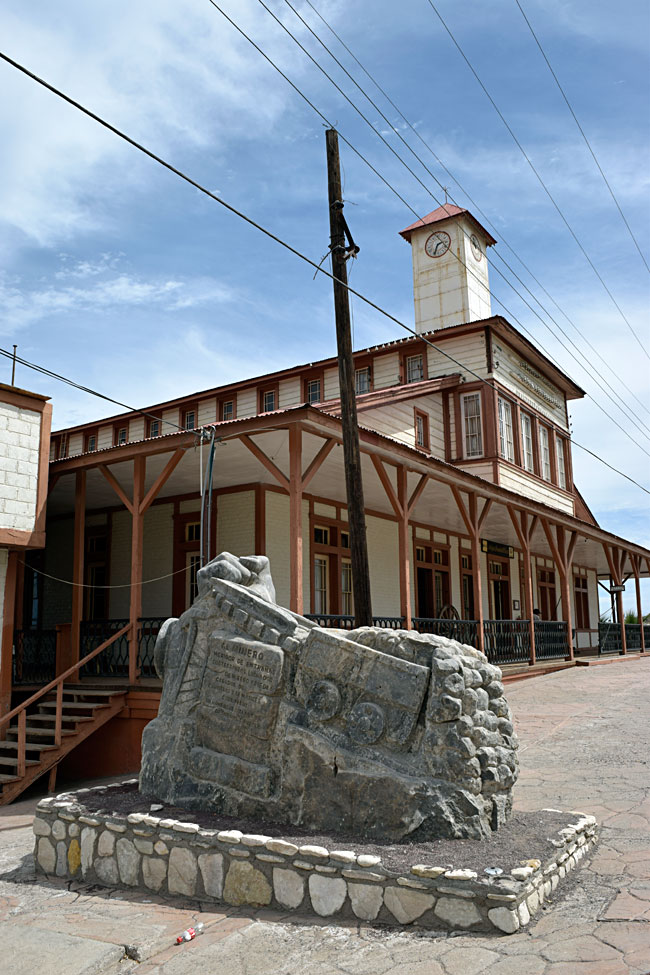
There’s a cool mining musuem a block or two away from the Frances, and it’s worth a visit, too.

The mining museum in Santa Rosalia.

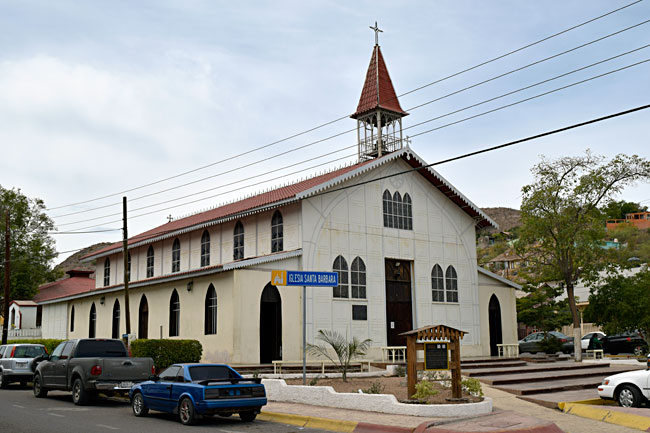
There are many cool things in Santa Rosalia, and one of the best is the Georg Eiffel church.  It was designed by the same guy guy who did the Eiffel town.

Santa Rosalia’s church. It’s an unexpected delight.  And I’m not even Catholic.
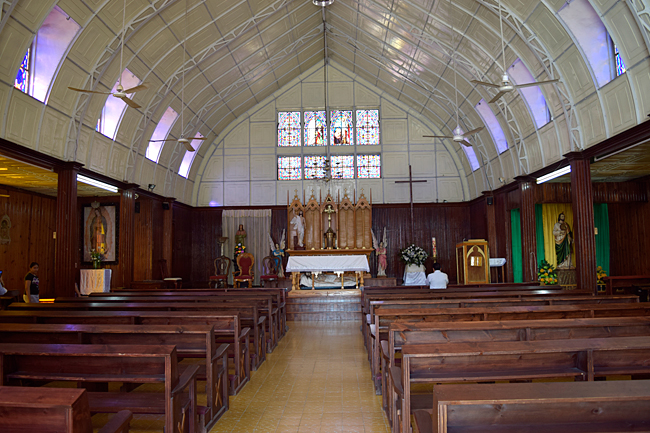
Inside Santa Rosalia’s Georg Eiffel church.
Stained glass. Photos ops abound in Santa Rosalia.

I’ve heard people dismiss Santa Rosalia as a gritty, industrial place not worth a stop.   Trust me on this:  They’re wrong.  It’s one of my favorite Baja spots.

Bahía Concepción

Concepción Bay is easily the most scenic spot in Baja.  It’s just south of Mulege (another delightful little town, and the subject of an upcoming ExNotes blog).  Bahía Concepción runs for maybe 20 miles along the eastern edge of the Baja peninsula.  I’ve seen whales from the highway while riding along its edge, the beaches are magnificent, and the photo ops just don’t stop.  The contrast between the mountains and Cardon cactus on one side and the pelicans diving into bright green water is view from the saddle you won’t soon forget.

On one of many rides along Bahía Concepción, good buddy Joe Lee and yours truly rode our Triumph Triples. This is a favorite shot of mine.
Besides “wow,” what can I say?
World-famous novelist and motorcycle adventurer Simon Gandolfi andn yours truly on 150cc scooters. We were on our way back from Cabo San Lucas when we stopped for this Bahía Concepción photo.  Hardtail 150cc scooters.  Up and down the length of Baja.  I think about that ride every time I see a GS parked at a Starbuck’s.

So there you have it:  My take on seven favorite spots in Baja?  How about you?  Do you have any favorite Baja destinations?  Let us know here in the comments sction!


More on Baja?  You bet!

Favorite Baja Hotels: Guerrero Negro’s Don Gus

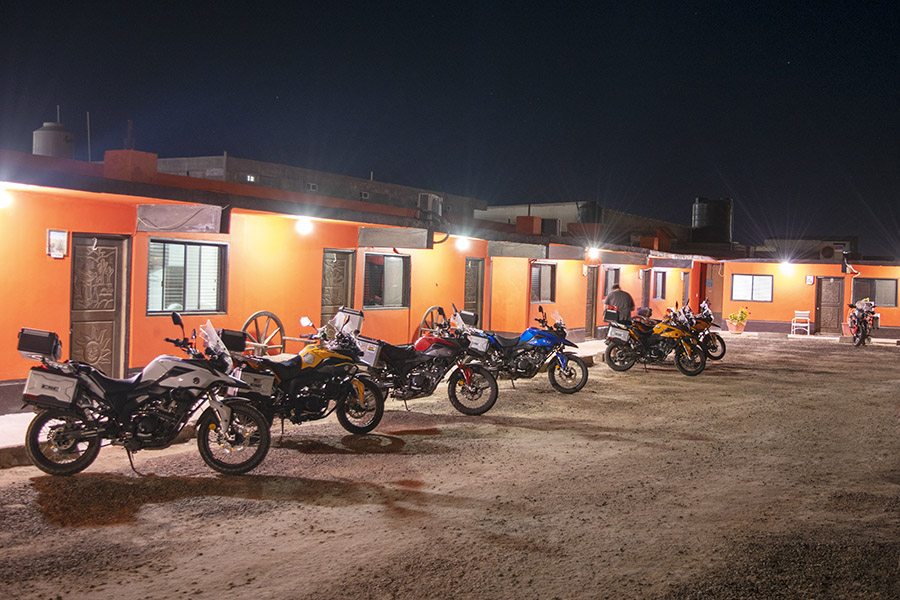
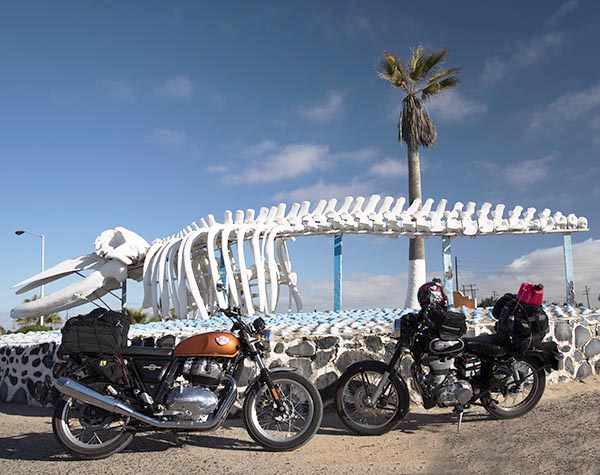
That photo above could also be in our Phavorite Photos series.  It’s the motorcycles on one of our Baja rides (all CSC RX3s) parked outside our rooms at the Don Gus Hotel in Guerrero Negro.  That photo has always been one of my favorites.

Not fancy, not expensive, and comfortable:  That’s how I would describe the Don Gus Hotel in Guerrero Negro (incidentally, that’s also a pretty good good description of the RX3).  The Don Gus is on the main drag on the left as you come into town, and it’s nearly directly across the street from the more well-known Malarimmo’s.   The Don Gus has a nice bar and the food is great.

Malarimmo’s usually fills up quickly when the California gray whales are in nearby Scammon’s Lagoon (that would be from January through March).  There are at least a half-dozen hotels in Guerrero Negro, and the Don Gus is the one I’d go for if Malarimmo’s is booked up.  The Don Gus is less expensive than Malarimmo’s and the restaurant maybe isn’t as fancy, but it’s a good place to stay and you won’t be disappointed.  If you want a whale watching tour and Malarrimo’s is full, let the folks at the Don Gus know the night before and they’ll hook you up with another tour company.  They’ve done so for me many times, and I’ve found that once you are out on the water who you tour with doesn’t make a difference.  They are all great.

Looking at these photos….man, I have got to get my knees in the breeze and point my Enfield south.  I am missing Baja big time.  Gresh, you up for Tony’s fish tacos?


When you ride in Baja, make sure you insure with our favorite:  BajaBound!


Want more Baja?  Here you go!


You know the drill.  Hey, it’s free…sign up here:

Enfield 650 Valve Adjustment

This blog explains how to adjust the valves on a Royal Enfield 650 Interceptor.   This was the first valve adjustment my motorcycle has had, and it occurred at the 500-mile mark.  The first valve adjustment is an important one, as decreases in the valve gap will typically be more severe as the engine is breaking in.  For the record, though, on my bike’s eight valves only one was slightly tight (and that was one of the intake valves).  The other seven were pretty much where they were supposed to be, but I loosened the adjusters and readjusted them just to see if any were difficult to access or if they would give me any problems.  Accessibility was superb and the adjustments were all easy to make.

Like most threaded adjuster valve adjustments, 90% of the job is just taking away or loosening the stuff you need to get at the valves (and then putting it all back on the bike).  On the Enfield, that’s the right side body panel, the seat, the fuel tank and its connections, an electrical subassembly between the upper frame rails, and the valve cover.  The actual valve adjustment only takes a few minutes.

You’ll need several tools for this job.  Here’s the list:

      • Feeler gage.
      • 17mm socket.
      • 8mm socket.
      • 10mm socket.
      • Sparkplug socket.
      • 14mm Allen drive.
      • 4mm Allen drive.
      • Ratchet with extensions.
      • 10mm wrench.
      • Flat blade screwdriver.

Because I’m an old fart and a pack rat, I had everything I needed except for the 14mm Allen drive (that was one I had to order on Amazon).  Odds are you already have most or all of this stuff already, too.  We tend to pick up oddball stuff over the years.  If you live on the Tinfiny Ranch, that includes stuff like lathes, concrete mixers, tillers, old MGs, and more.  But the only tools you’ll need for adjusting the Enfield 650’s valves are what I listed above.

The other thing we need to do is make sure the engine is completely cool.  You can’t ride the motorcycle, shut it off, and then adjust the valves.  The engine needs to be cold.

Adjusting the valves sounds way more intimidating than it is.  I took a couple of hours to adjust the valves on my Enfield and this was the first time I did it.  On subsequent valve adjustments I’m guessing I’ll need less than an hour now that I know my way around the bike.  Dealers charge up to $581 for this job, which is kind of a joke when you consider the amount of time it takes (that is, if you think getting ripped off by a dealer is funny).  The dealers are counting on you being intimidated.  You shouldn’t be.  This is not a hard thing to do.

Start by putting your motorcycle on the center stand, as you see in the big photo at the top of this blog.   That makes getting to both the left side and the right side of the bike easier.

Use your ignition key to unlock the right side body panel.  It pivots out from the bottom and then pulls down, and that will take it off the bike.
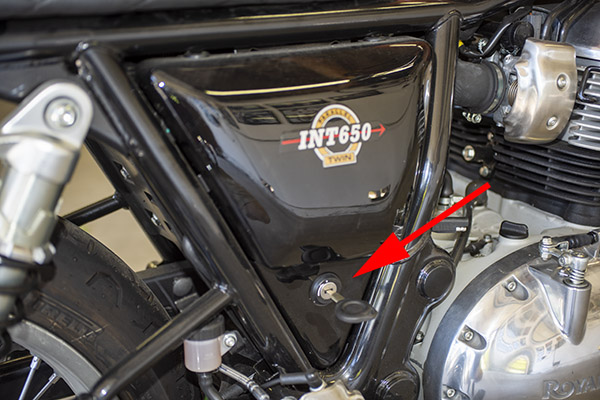
Once the right side body panel has been removed, you’ll have access to the seat release (shown by the red arrow).  Pull it out and remove the motorcycle seat by sliding the seat to the rear.
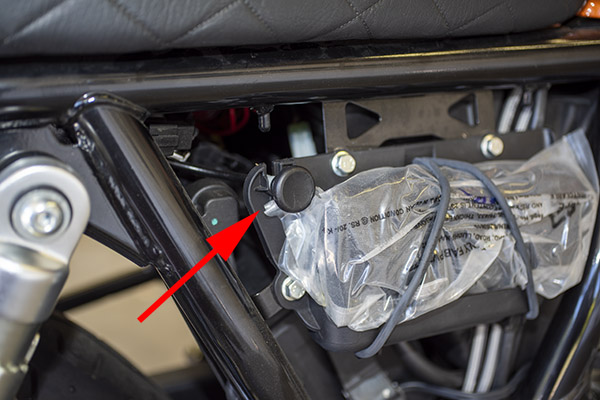
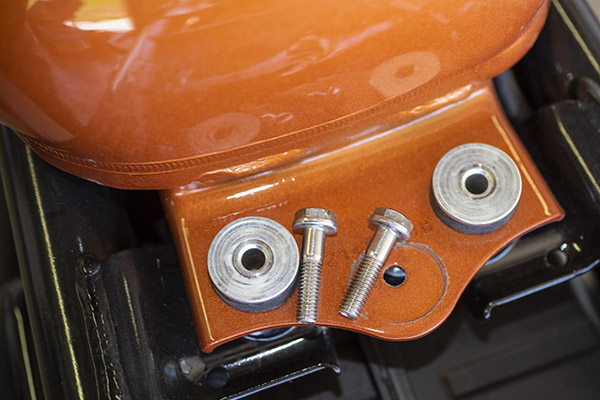
The next step is to remove the two 10mm bolts securing the fuel tank to the frame.  This job is a lot easier if you run the fuel level down (it makes the tank lighter and easier to handle when you disconnect the two electrical connections and the three hoses underneath the tank).  I had mine on E, but there was still a fair amount of fuel in the tank.
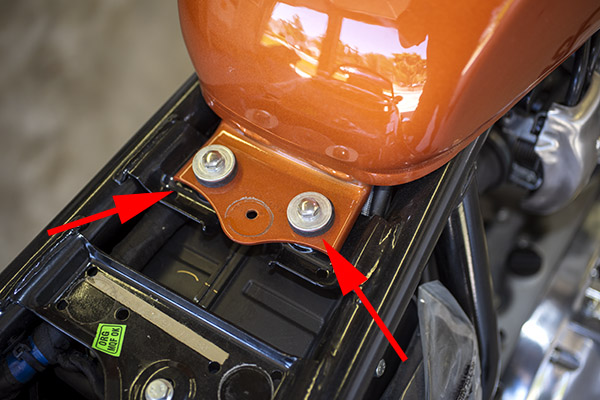
Once the two bolts are removed, set them aside (not like you see here; put them someplace where you won’t lose them).  The tank will then slide to the rear.  Put a shop rag on the frame behind the tank so you won’t scratch anything.
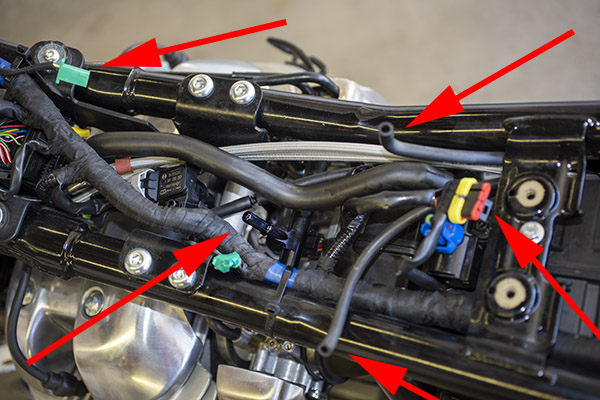
As mentioned above, there are five things that have to be disconnected underneath the fuel tank so that you can remove it from the motorcycle.  As seen in the photo below, going counterclockwise from the upper left corner of the photo, these five things are:

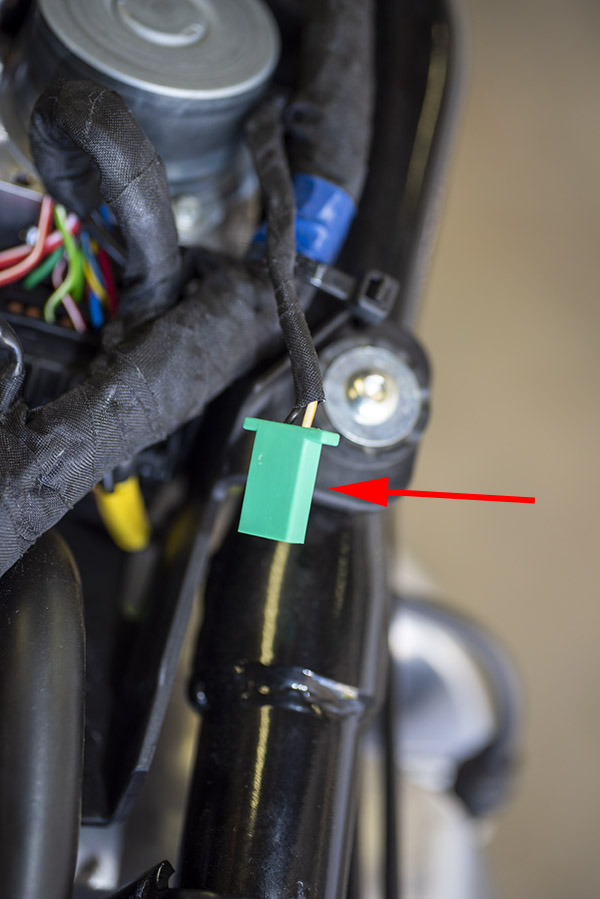
      • An electrical connector to the fuel gage (the green connector).
      • A fuel vent line.
      • The fuel pump electrical connector (the yellow, red, and black connector).
      • Another fuel tank vent line.
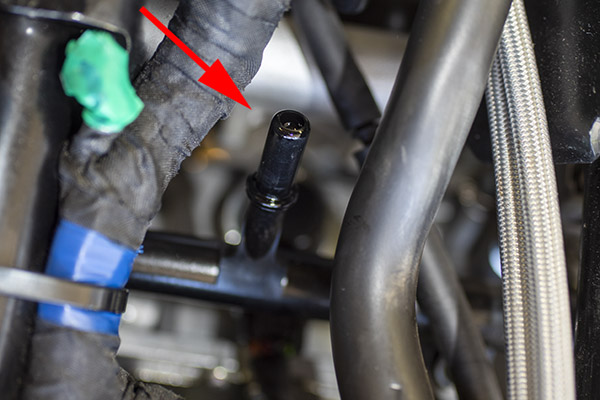
      • The fuel hose (this is mated with a quick-disconnect fitting that stays on the fuel tank; it has a button you press to allow pulling the fuel hose off).

I show this on the motorcycle side of the equation.  It would have been a little tough to get a photo of the bottom of the tank.
Here’s another shot of the fuel hose quick disconnect male end (it stays with the motorcycle).
This is another shot of the fuel level gage electrical connector.
And here’s a photo of one of the fuel vent lines and the fuel pump electrical connector.

After tilting the tank up and disconnecting all five of the connections described above, remove the tank and place it on a cloth to prevent scratching.

At this point, disconnect the sparkplug leads and remove both sparkplugs.  We are going to crank the engine by hand, and we don’t want to have to fight the engine’s compression as we do so.
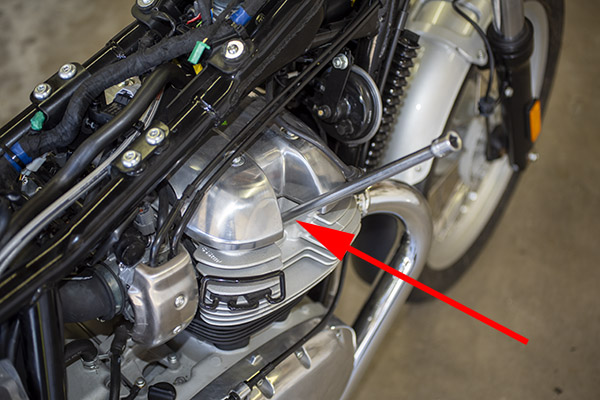
The next step is to remove the three Allen bolts that secure an electrical subassembly between the upper frame rails.  We don’t need to remove the subassembly; we just need it to be pushed up so that we can maneuver the valve cover out of the way (which, incidentally, I found to be the hardest part of the valve cover adjustment process).  Set the three Allen bolts aside in a secure location.

Next, remove the four 8mm bolts securing the valve cover.  Set them aside in a secure location.
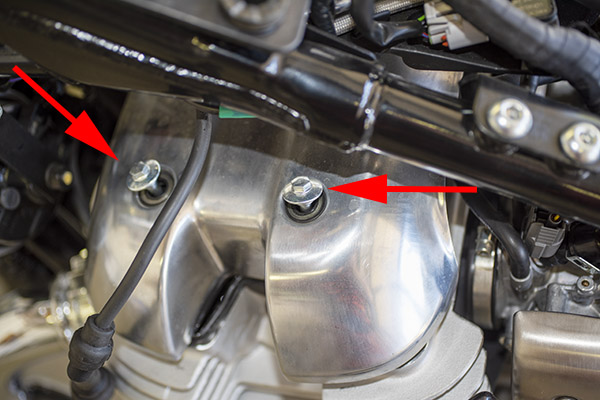
Once the four valve cover bolts are out, you can remove the valve cover.  It will slide out on the left side of the motorcycle.  You’ll probably invent a few cuss words when doing this.  The valve cover is a tight fit between the cylinder head and the motorcycle frame’s upper rails (it’s why we loosened that electrical subassembly described above).  There’s a complicated and reuseable rubber gasket that seals the valve cover to the cylinder head.  Be careful not to nick the gasket when you’re sweet-talking the valve cover off the engine.

Once the valve cover is off the engine, you’ll have access to the valve adjusters.  As this is an eight-valve engine, there are four adjusters for each cylinder (two intake and two exhaust valves).  The four valves on the right side of the engine are shown below.

And these are the four valves on the left side of the motorcycle.

Here’s where you’ll need that 14mm Allen drive mentioned above.  It was the only tool I didn’t already have.  It was something like $6 on Amazon, and I now have two of them.   Amazon sent me an email a couple of days after I ordered the tool because they felt like they lost one in shipment so they shipped it again, and then two arrived in separate packages on the same day.  Don’t tell Amazon.  I’m keeping both.  Bezos can afford it.
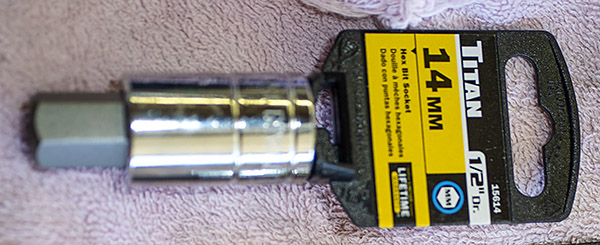
Here’s the access port cover on the left side of the engine.

Remove the access port cover on the left side of the engine with the 14mm Allen drive.
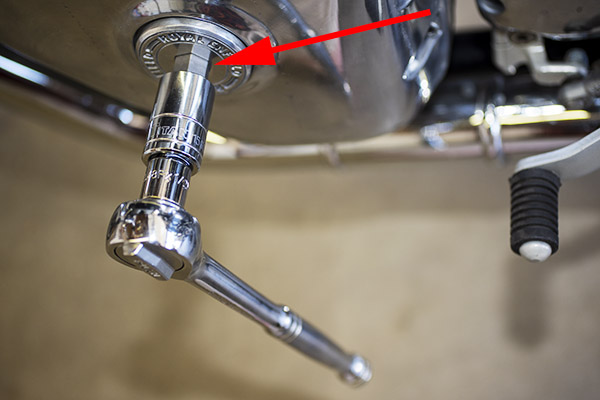
Note that the access port cover is sealed with a rubber o-ring.  Don’t lose this part.
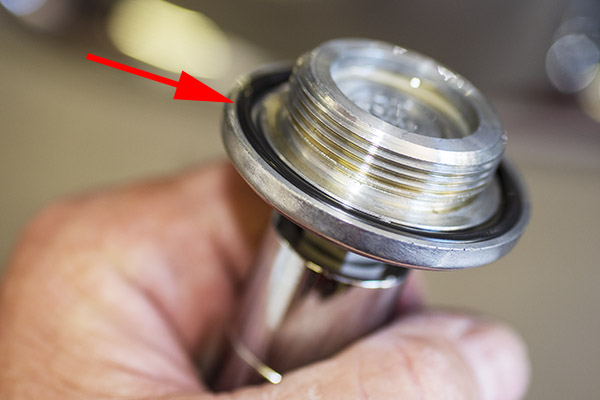
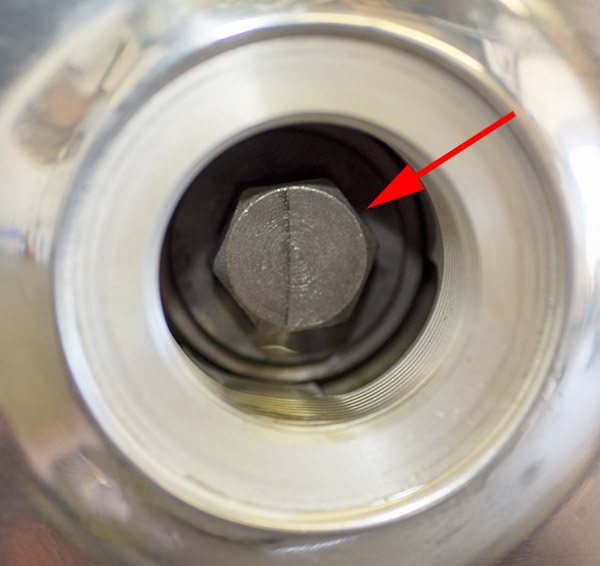
If you peek inside the access port, you’ll see a 17mm bolt head.  This is where the 17mm socket is used.  You can crank the engine by hand (always going counterclockwise, never clockwise) to bring the crank to a position where the valve being adjusted is not being lifted by the cam lobe.  This is known as getting the lifter on the cam’s base circle, and that’s what we want when we make the adjustment.
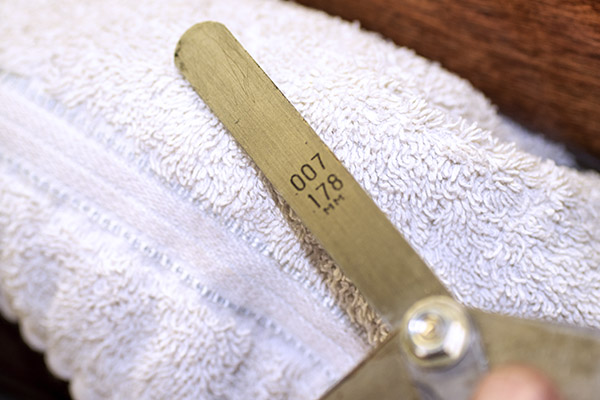
I had a feeler gage from way back tucked away in my tool cabinet.  If you don’t have one of these tools, they are available on Amazon.  We’ll need the 0.003 inch (or 0.076mm) feeler gage for the intake valve adjustment, and the 0.007 inch (or 0.178mm) feeler gage for the exhaust valve adjustment.  The intake valves are the ones on the rear of the engine (closest to the fuel injectors) and the exhaust valves are the ones on the front of the engine (closest to the exhaust headers).  I know.  Duh.

This valve adjusting business is done by feel with the use of the feeler gage.  I guess that’s why they call it a feeler gage.  You want to make the adjustment such that after you make it, there’s a slight drag on the gage as you move it back and forth between the valve stem and its actuator (you get the “feel” of this slight drag; hence the “feeler gage” name).
Enfield makes it easy to get the engine rotated to the right spot so that the lifter is on the cam’s base circle with a handy indicator located in the cylinder head.  It’s on the engine’s left side as shown in the photo below.  The indicator is marked with an L above a scribe line, and an R above a scribe line.
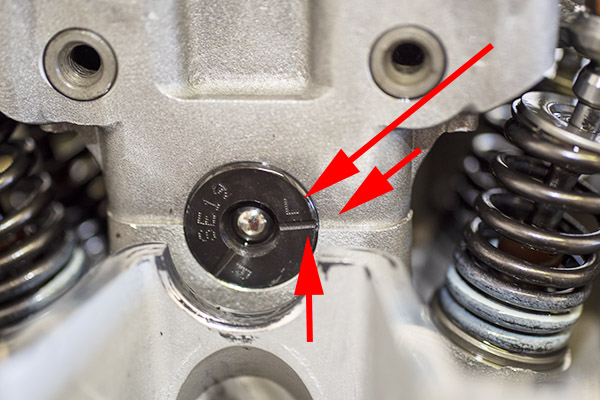
Turn the engine by hand with the 17mm socket (again, always counterclockwise, never clockwise) until the L and its scribe line are aligned with the line on the casting as shown below.   We want the L and its scribe line aligned with the corresponding line in the casting when we adjust the valves on the left side of the engine.  After we’ve adjusted the valves on the left side, we’ll want to do the same thing to get the R and its scribe line aligned with the line in the casting to adjust the valves on the right side of the engine.
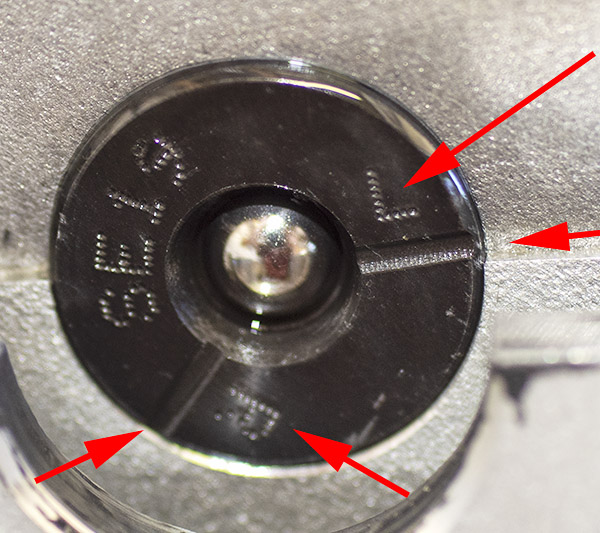
When the crank is appropriately positioned (for the left side of the engine, as shown above), we are now ready to adjust the valves.

The actual valve adjustment is accomplished by loosening the bronze-colored valve stem lock nut with a 10mm wrench, then making the adjustment with a flat bladed screwdriver in the adjuster screw slot, while positioning the appropriate feeler gage blade between the adjuster and the valve stem.  This is what controls the gap between the adjuster and the vavle stem.  When the gap is what it’s supposed to be, lock the adjuster in place with the locknut.  We do this for both intake valves with the 0.003-inch blade, and both exhaust valves with the .007-inch blade.

After we’ve done the left side of the engine, we similarly rotate the crank to align the R index mark and then we adjust the valves on the right side of the engine.  The R has to be on the right side of the index plate so it reads right side up.

At this point, I rotate the engine two complete turns by hand and use the feeler gage to check the valve gap again.  If it’s not good I redo the above adjustments.  This is just a check.  For me, it’s always been good.

So, about that valve cover and the complicated seal between it and the cylinder head.  Here’s what it looks like from underneath.

Note that the seal is orientation sensitive.  It’s got a little half moon in the seal on the left side.   As mentioned above, getting the valve cover off was a challenge.  Getting it back in place with the seal properly positioned was even more of a challenge.  But neither steps were really that bad.  The good news is that this was the toughest part of the job, and it wasn’t that tough.

After you finish adjusting the valves, assembly is the reverse of disassembly.  There are three cautionary notes:

      • Use a shop rag or two on the motorcycle frame so you don’t scratch the frame or the fuel tank when you reinstall the fuel tank.
      • When you remake the fuel line quick disconnect, make sure you feel it click into position.  It’s possible to not fully make the connection, which could result in pressurized fuel being pumped out over your hot engine.  That would not be a good thing.
      • When you reinstall the valve cover, make sure the seal between it and the cylinder head is correctly positioned.  If it is not, oil will leak from this interface.

So there you have it.  For me, that’s $581 (what the closest Enfield dealer charges for a valve adjustment) going in the Baja kitty.  Or maybe the reloading components fund.  Whatever.  It’s not going into the dealer’s pocket, and that’s the point.

Enfield did a nice job engineering these bikes, I think, and they made the valve adjustment process straightforward.  It would have really been cool if the valve cover was designed so that it could be removed without taking the body panel, seat, and fuel tank off (like on an old airhead BMW or a Moto Guzzi), but hey, it is what it is, and what it is is way less complicated than most other modern motorcycles.  There’s also an argument to be made for hydraulic valves (which never require adjustment), but hydraulic lifters weigh a little more and don’t work well at high rpm.


More on Enfields?   Hey, read our series on taking two Enfields (a 650 and a Bullet) through Baja.  It’s what prompted me to buy my Enfield!


This idea on online maintenance tutorials was something we started at CSC Motorcycles with the RX3 250cc adventure touring platform introduction.  The market received it well and we had a lot of fun assembling the tutorials.  CSC was well ahead of the curve on this sort of thing and it is one of the many reasons their bikes have done so well.
Favorite Baja Hotels: Guerrero Negro’s Malarrimo’s

This blog grew longer than I had planned.  I thought I would touch on Malarrimo’s (one of my favorite hotels in Baja) and that would be it, but I realized once I got into it that there’s a lot more to the story and Guerrero Negro.


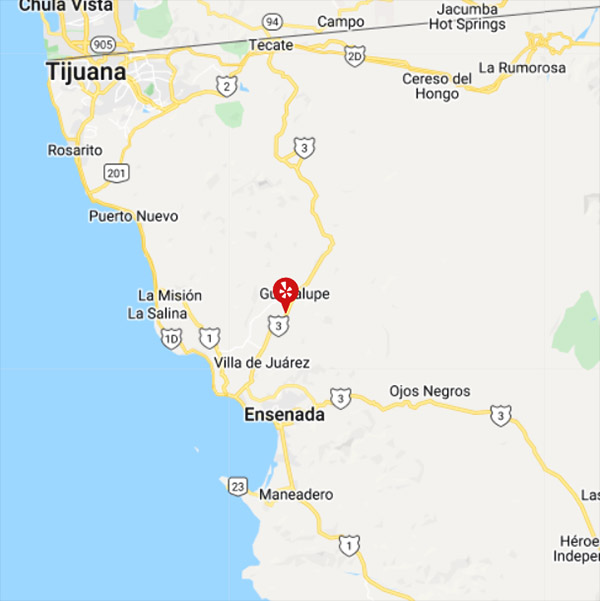
If you’re headed into Baja, especially if you’re headed there to see the whales, you’d be hardpressed to find a better hotel than Malarrimo’s in Guerrero Negro.  Guerrero Negro is at the halfway point when headed down the Baja peninsula (it’s about 450 miles south of the border).  It’s located along the 28th Parallel,  the dividing line between Baja and Baja Sur (Baja’s two Mexican states).

Although some might be inclined to dismiss Guerrero Negro because as little more than a gritty industrial town, it’s actually a pretty cool place to visit and a good base for further explorations.  There’s whale watching, the ecological preserve, salt mining, the nearby cave paintings, the food, and more.

Ah, the food.  As Gresh so aptly put it, no one loses weight on a Baja ride with me.  I’ll get to that in a minute.

Don Enrique Achoy founded Malarimmo’s about a half century ago, and it has remained a family business.  He was ahead of his time, offering eco tours to see the whales, the ecological preserve surrounding Scammon’s Lagoon, and more.   There are other hotels in Guerrero Negro, but I always check Malarimmo’s first.  It’s not fancy and at around $65 per night it’s a tiny bit expensive for Baja, but it is inviting. it’s clean, and I just feel good there.  The restaurant is arguably the best in town, and I love the bar (more on both in just a bit).

Getting There

Malarrimo’s is easy to find.  Just head south on the Transpeninsular Highway from the border for 450 miles.  You’ll see a huge metal eagle at Parallelo 28 and a Mexican military base.  Shortly after that, you’ll see a sign pointing to the right and Guerrero Negro.

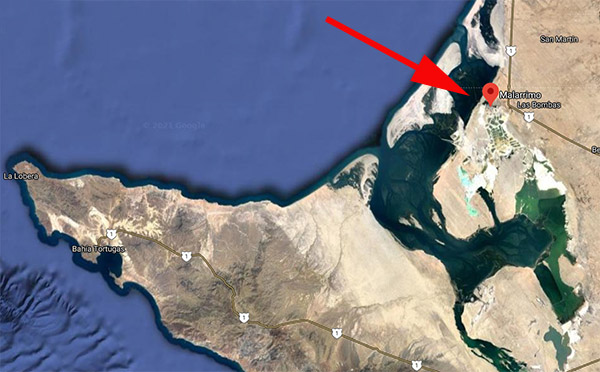
Take that right, and Malarimmo’s will be on your right as you enter town.  You can’t miss it.  Incidentally, the lagoon you see in the satellite photo above is Scammon’s Lagoon.  It’s where the whales will be, which takes me to our next topic.

Whale Watching

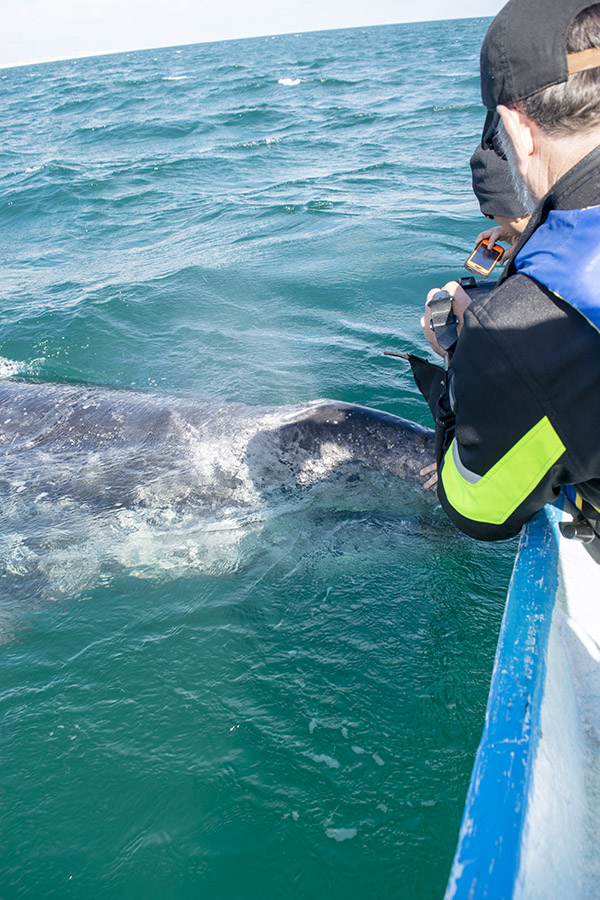
Whale watching tours are available from January through March when the California gray whales are in town, and it is a life changing experience. Those are strong words and you might be tempted to dismiss them as hyperbole.  Take one of Malarrimo’s 4-hour, $50 whale watching tours out on Scammon’s Lagoon and then you tell me.  I’ll bet you come away feeling the same way.

We have a lot more on whale watching on our Baja page, so I won’t spend too much time here on it.  Trust me on this, though:  It is like nothing you have ever done.

The Ecological Preserve

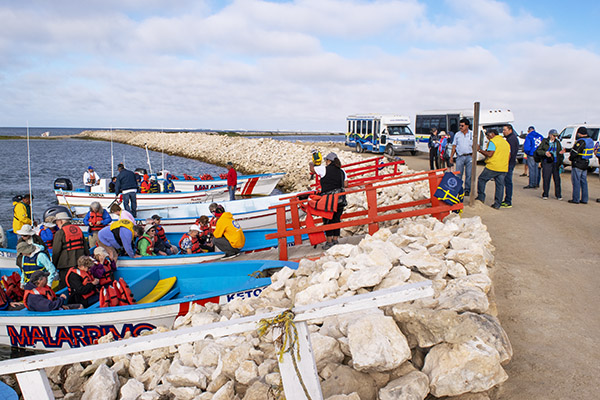
When you get a whale tour at Malarimmo’s, it will take about a half hour in a Malarimmo van to get to the where the pangas (the small boats that take you out to see the whales) are docked, and on that ride, you pass through an ecological preserve that is home to more than 150 wildlife species.  You’ll see many nesting ospreys (a bird of prey), and if you’re lucky (like we have been) you’ll get to see an osprey enjoying a bit of sushi.  It’s a fun thing to encounter.

Salt Mining

Guerrero Negro is a company town, and the company is Mitsubishi, which owns (along with the Mexican government) the salt processing operation.  It’s one of the largest salt producing regions in the world.  They use an interesting approach: Flooding the coastal plains near the town with seawater, allowing the water to evaporate, and then using earth moving equipment to scrape up the salt that remains behind.

Guerrero Negro Cuisine

No discussion of Guerrero Negro would be complete without a discussion of the cuisine down there.  In a word, it’s wonderful.  My favorite meal?  Fish tacos, served right off the truck (caught fresh daily) by my good buddy Tony.  No one I’ve ever taken there has had anything but high praise for these incredible treats.
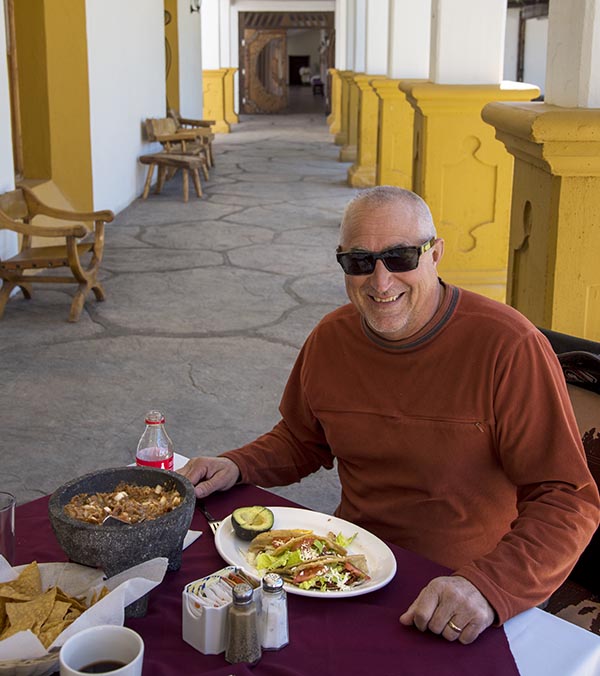
Another place I like is San Remedios, a restaurant a block or two north of the man drag through Guerrero Negro.  Just head west a few blocks from Malarrimo’s, turn right, and you’ll find it.  The food is awesome and the young ladies who serve it are stunning.

I’ve already mentioned the restaurant and bar at Malarimmo’s.  You can’t have a bad meal at the Malarrimo’s restaurant, and the bar…wow, it’s interesting.  The Guerrero Negro area forms a big hook out in the Pacific Ocean with the hook’s U facing north (you can see that in the satellite photo above).  As a result, a lot of interesting stuff washes up on shore in that area, and Malarrimo’s has a collection of it hanging from the roof in their bar.  It’s pretty cool.
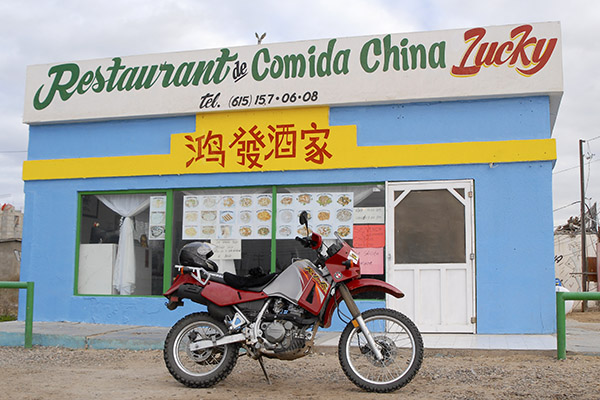
There are other restaurants in Guerrero Negro, too, and I try to make it a point to try a new one each time I am there.  Baja John and I enjoyed an amazing Chinese dinner in Guerrero Negro on one trip; try Lucky’s if you feel like something different.
The Cave Paintings

There are several cave paintings located throughout Baja.  This is real Indiana Jones stuff; the cave paintings are estimated to be about 10,000 years old and not much is known about the people who put them there.  They are all relatively remote, too, but one of the easier (I’m using that word in a comparative sense) ones to get to are the cave paintings in Baja’s Sierra San Francisco Mountains.

The cave paintings near Guerrero Negro are further south and east of the Transpeninsular Highway (Highway 1, the main and often only road running north and south in Baja).  You take Highway 1 south and then turn left after passing through the town of Vizcaino to head east and up into the Sierra Francisco mountains.  It’s a magnificent ride with an awesome climb into the mountains, then the road turns to dirt and then it becomes, for lack of a better word, gnarly.  You buy tickets and secure a guide in a small village, and then double back for maybe a mile to see the paintings.  If you have a 4WD car or a dual sport (or ADV) motorcycle, you can get there on your own; if you don’t, you can grab a tour that leaves from Malarimmo’s.  It will take most of a day to get out there, see the paintings, and get back to Guerrero Negro, but it’s well worth it.

There’s a lot more to Baja’s cave paintings, but it’s too much to include here.  Watch for a future blog on this topic.


So there you have it:  Guerrero Negro, Malarimmo’s, and a bunch of things you can do while in that area.  I love everything about Baja, and I especially love the Guerrero Negro area.  You will, too.


When you head into Mexico, make sure you insure with BajaBound.  They are the best, and they are the only insurance company we will ever use.

img


More Baja, including a list of our other favorite Baja hotels and things to see and do, is here on the ExNotes Baja page.


Never miss an ExNotes blog:  Sign up here!


So what’s it like to ride in Baja?  You can learn more with Moto Baja!

Enfield Recall and First Service Quotes

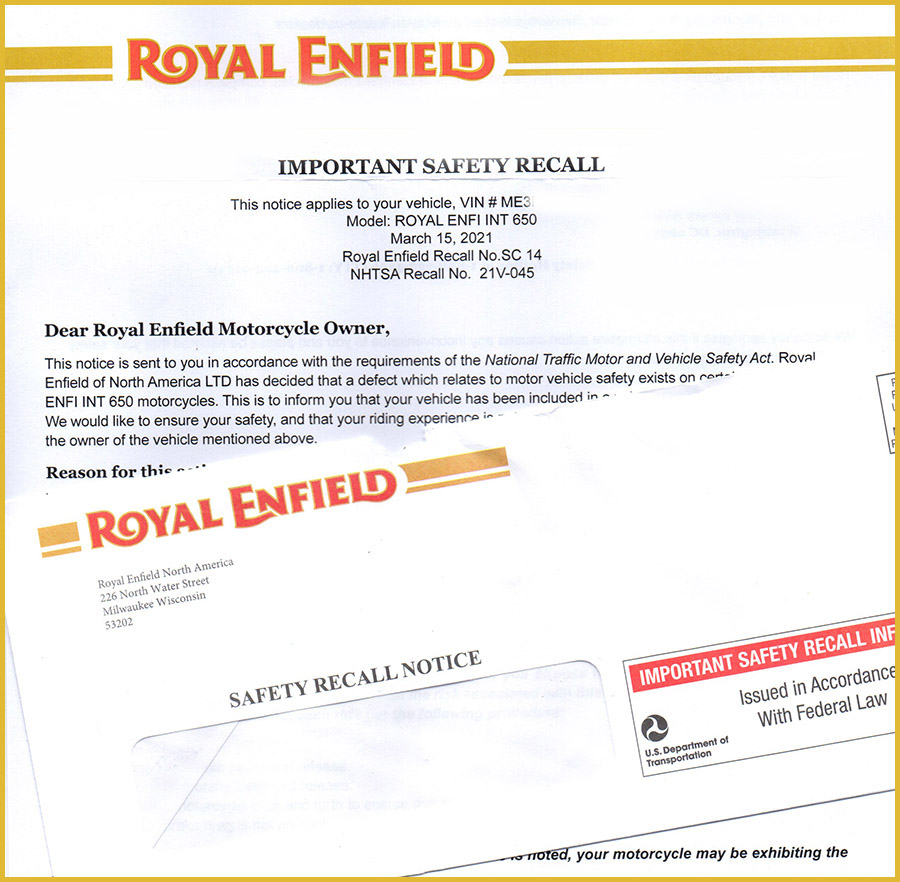
Things happen, I guess, and one of the things that’s happened to me lately is my new Royal Enfield 650 Interceptor was recalled.  As recalls go, it’s not that serious, I suppose.  It has to do with brake caliper corrosion, and from what I’ve read, it might be related to road salt as used in the snowy parts of our country.  Ain’t no snow in So Cal unless you get way up in the mountains, and we don’t use road salt.  Eh, I don’t know…if all the dealer is going to do is look at it and tell me it’s not corroded, hell, I can do that.  Maybe they’re replacing all of them.   I gotta look into this more.  I have had bad experiences on product recalls (including with my Henry 45 70 rifle), so unless the concern is real, I tend not to act on these things.

I thought that as long as I was going to be making an appointment to have the brake calipers checked out, I might as well go ahead and schedule the first maintenance.  Whoa, was that ever educational.  The first service is basically a valve adjustment, an oil and filter change, tightening the chain, checking the nuts and bolts for tightness, etc.  You know, basic stuff.

I started by calling the dealer closest to me (Southern California Royal Enfield), and they quoted $580 for the service.  Wow.  There’s no shims and buckets in the valve adjustment (it’s just threaded locknuts, like on the CSC bikes or a Moto Guzzi), so the valve adjustment should go pretty quickly.   $580. Wow, that’s steep, I thought.  Especially for a service that I doubt would take even two hours.  So I called Pro-Italia over in Glendale.  They came in at $110 less than the boys in Brea ($470 for the first service, after they first told me it was $440, then $450, and then finally when I asked if they were sure about the number, the kid looked it up and told me it was $470).  Wow, that’s quite a swing, and I’m not too sure about Glendale’s competence.   They’re the same boys who sent Gresh and me down to Baja on a Bullet with nearly no oil, a rusty chain, and a battery that died on Day 3 (you can read about that here).

Then I got interested in how much price variation for the same service I could find, so I called the Royal Enfield dealer in San Diego (Rocket Motorcycles).  They won the prize for the lowest quote at $368.55, which almost seemed sort of reasonable to me.  San Diego is 120 miles south of here, though, so it’s really a nonstarter for me.  I thought I would try one more, so I called the Royal Enfield dealer in San Jose, and not surprisingly, they got top billing at $600.  Hey, those Bay Area and Silicon Valley entrepreneurial types are rolling in dough.

If I lived in San Diego, I’d think about heading over there, but I’m not going to do that.  I’m the guy that wrote most of the service manuals for CSC (with a lot of the “how to” demonstrated and explained by Gerry Edwards), and the Royal Enfield service manual is a free download.

The biggest part of the first service is adjusting the valves, and I doubt that would take more than an hour.  I can change the oil and the filter, and I can tighten and lube a chain.  I know which way I’m going on this.  I may bring the Enfield in for the caliper recall because that’s a freebie.  As for the first service, I’ll pick up the synthetic oil and a filter, do the valve adjustment and the rest, and keep that $368, or $470, or $580, or $600 where it belongs:  In my pocket.


Never miss an ExNotes blog!


Read the entire Enfield Baja trials (for both the Bullet and the Interceptor) here!

A New BajaBound Atlas

Wow, check this out…a new Baja road and recreation atlas brought to us by the folks who know Baja best:  BajaBound Insurance!

I ordered mine already and I’m looking forward to getting it.   You can be sure I’ll put it to good use.  If you want to order yours, you can do so here!


If you’re headed into Baja, make sure you have your BajaBound motorcycle insurance!

img


Check our adventures in Baja!


Never miss an ExNotes blog.  Sign up here for free!