
By Joe Berk
Our story on the Lee Classic Turret Press Kit continues. There’s a lot in the kit, and we’re presenting articles on each item (links for our earlier Classic Turret Press Kit, its contents, and other Lee-related blogs are included at the end of this blog). Today’s blog focuses on the Lee bench plate. The bench plate allows quick installation and removal of any Lee press, and its price is $39. The bench plate idea is a good one. I own a couple of Lee progressive reloaders and I don’t have extensive real estate on my loading bench. The Lee bench plate is the answer.
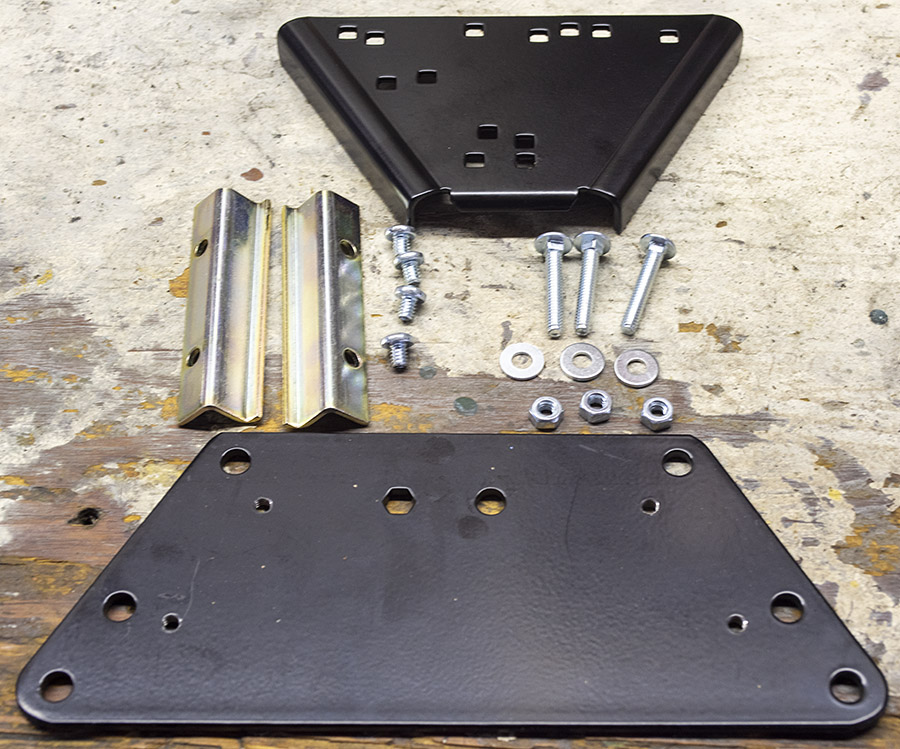
Here’s what you get in the Lee bench plate kit.

The smaller upper plate bolts to the press base (the red casting that forms the base of any Lee reloading press). The larger lower plate bolts to your reloading bench. The two zinc plated pieces are Z-bars that screw into the lower plate and capture the upper plate bolted to the press. The upper plate has several holes that allow it to be attched to any Lee press. You can buy extra upper plates if you have other presses. It makes it easier to change presses on your bench.
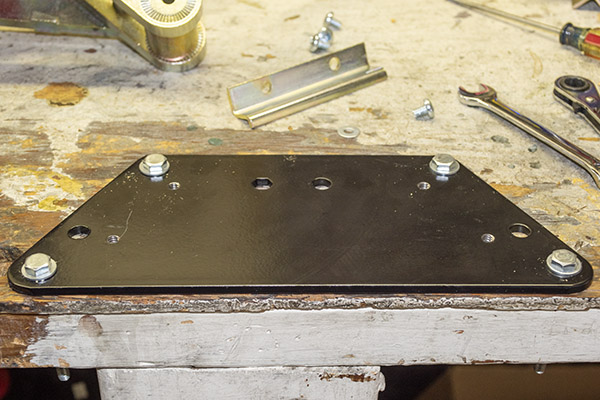
The Lee bench plate includes everything you’ll need except the bolts required to attach the lower plate to your reloading bench (that makes sense because Lee doesn’t know the thickness of your reloading bench). You have to drill four holes through your bench to attach the lower plate. Here’s what the lower plate looks like installed on my reloading bench.
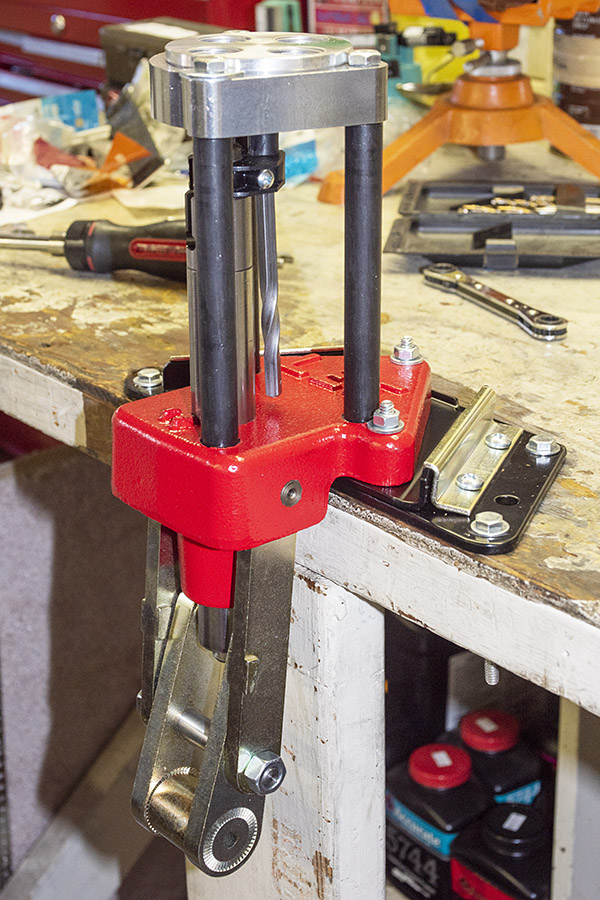
After attaching the lower plate to your reloading bench, the next step is to attach the upper plate to the reloading press. I installed the upper plate on my Lee Classic Turret Press using the three panhead bolts, nuts, and washers Lee includes. Note that the press is inverted in the photo immediately below.
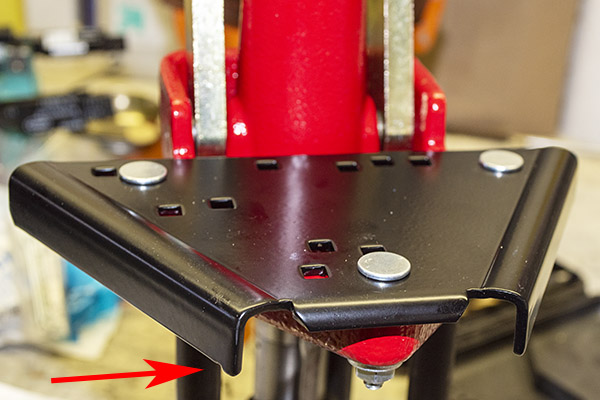
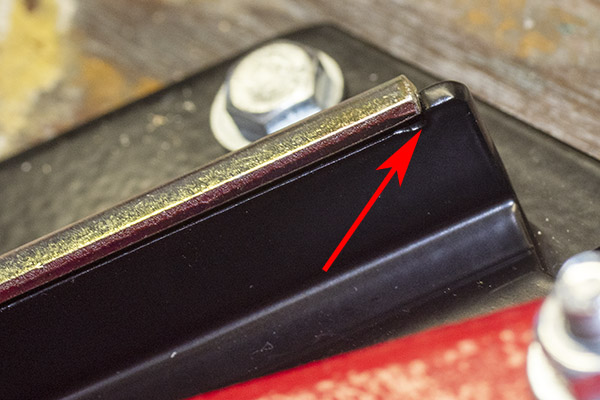
It’s not immediately apparent in the Lee instructions how to orient the upper plate (i.e., which side faces up). It should be installed such that the flat base of the plate is at the bottom, and the two lips on either side extend up. This will be more clear in the photos below.
Once the upper plate is attached to the press, the press and plate are set on the lower plate and the Z-bars can be secured to the lower plate with the four Phllips head screws Lee provides. The Z-bars capture the upper plate, securing the press to the lower plate and the reloading bench.
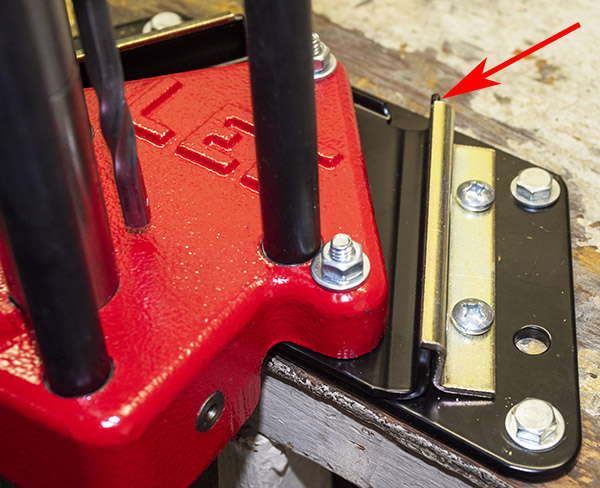
Here’s the press mounted on the bench with the Lee bench plate. It’s a clever approach.

If you have other Lee presses or reloading gear, you can purchase additional upper plates (Lee calls this part the steel base block) directly from Lee. Lee includes the mounting hardware (the panhead bolts, nuts, and washers) with each additional upper plate. Lee lists the other equipment items compatible with the bench plate in their instructions:
-
- Classic Turret Press
- Load-Master
- Breech Lock Reloader Press
- Breech Lock Challenger
- Classic Cast
- Breech Lock Classic Cast
- Pro 6000 Six Pack Progressive
- Red Base Pro 1000
- Red Base 4 Hole Value Turret Press
- Year 2018+ Pro 1000 Press
- Year 2018+ 4 Hole Value Turret Press
- Auto Breech Lock Pro Press
- Automatic Processing Press & Automatic Case Primer
- Auto Bench Prime
If you don’t want to purchase additional upper plates, you can make your own upper plate from 3/4-inch plywood. Lee includes a drawing in their instructions showing the dimensions of a plywood upper plate. That’s a nice touch. Lee also offers information on plywood bases for, as they describe it, “other color” presses. That’s a nice touch, too.
The key question in all of this is: Do you need the Lee bench plate? If you use one press only, the answer may be no. You could just mount your press directly to the bench and not use the plate at all. But if you own other Lee reloading gear (or another “other color” press), you might want to consider the Lee bench plate. Or, if you want to get your press out of the way to use your bench for other purposes (such as cleaning a gun), it makes sense. The bench plate greatly eases removing the Lee press for installing other equipment or to clear the bench. It’s a good idea and good value for the money. It makes sense for me.
Help us out, folks: Hit those popup ads!
Never miss an ExNotes blog:
Check out our other Lee reloading equipment blog posts:
Lee Modern Reloading Manual
Lee Safety Powder Scale
Lee Classic Turret Kit Unpacking
Lee .44 Magnum Dies 1
Lee .44 Magnum Dies 2
Lee .44 Magnum Dies 3
Lee .357 Magnum Dies
I thought this was about fitness and weight lifting? I am going to have get more knowledge on this gun stuff…and if I keep reading this blog, I guess I will!
Lee Precision reloading gear is a good way to get into it, Terry. We’ll have several more blogs on this in the near future.
Thanks for commenting.
Have you clicked your popup ads today?
Found the plate on midwayusa.com for $29.99 and free shipping.