ExNotes Battery Teardown: What’s Inside a Lithium Battery?

By Joe Gresh

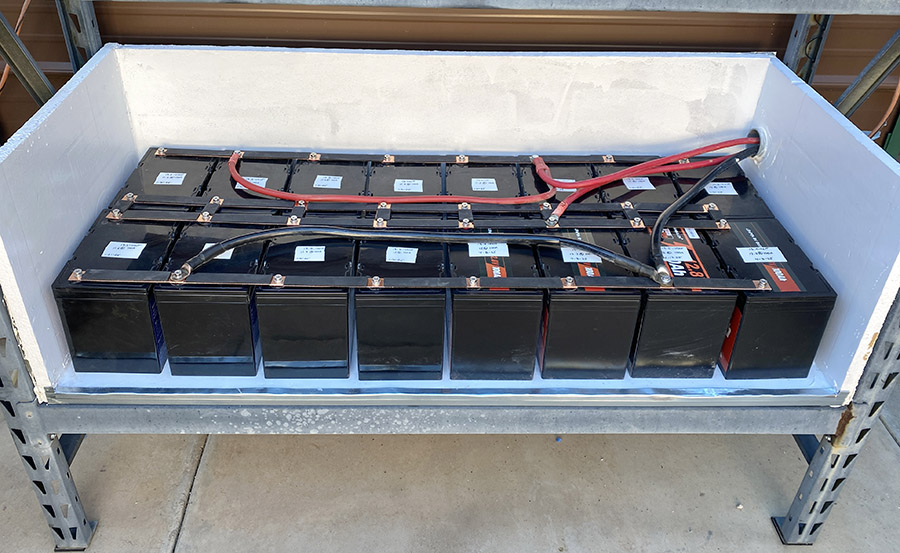
You’ve probably read the story of my new, solar, mondo lithium battery bank. It consists of 16, 12-volt, 100ah lithium batteries and so far is working well. What you don’t know is I actually have 17 lithium batteries.

This one was dead on arrival. Before tossing it, I decided to see what’s in the box.

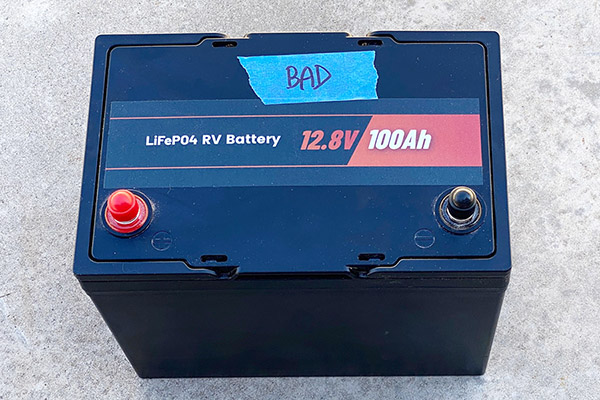
When I ordered the batteries one of them was dead on arrival. Like zero volts. This is a huge red flag because the LiFePo battery is know for its ability to hold a charge for long periods of time. I tried connecting a battery charger to the thing but all I got were sparks.

CT contacted the seller and they said it’s normal and to jump the battery with another (good) battery. I tried that and got even bigger sparks. The thing was shorted internally. CT went back and forth with them, and they wouldn’t send another battery. They did give us a refund, though, so it was all good and I bought another battery of a different brand.

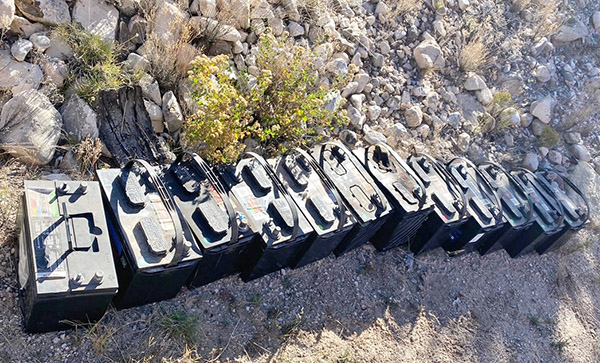
Once the new bank was online and operating well, I broke down all the shed-filling, cardboard packaging for 17 batteries and hauled it off to the La Luz dump (a very fine dump). This left me with a lone, dead lithium battery. I was going to toss it out anyway, so I decided to open it up and see what a lithium battery looks like inside.

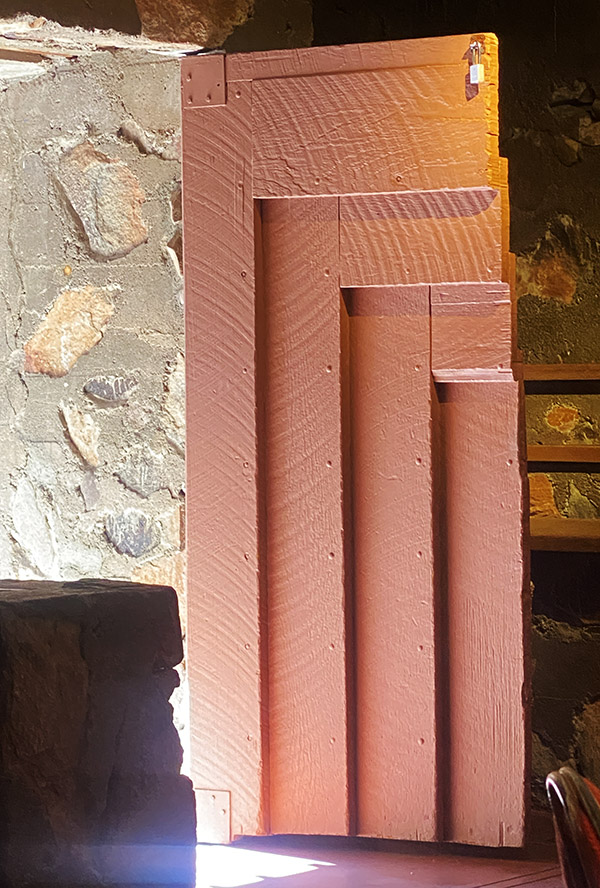
The top part of the battery box snaps into the bottom but I didn’t know that, so I set the circular saw to about 1/16″ depth and (after taking the battery outside in case it burst into flames) cut the top off.

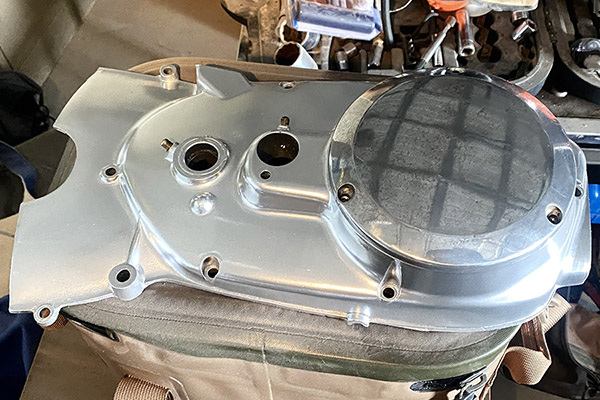
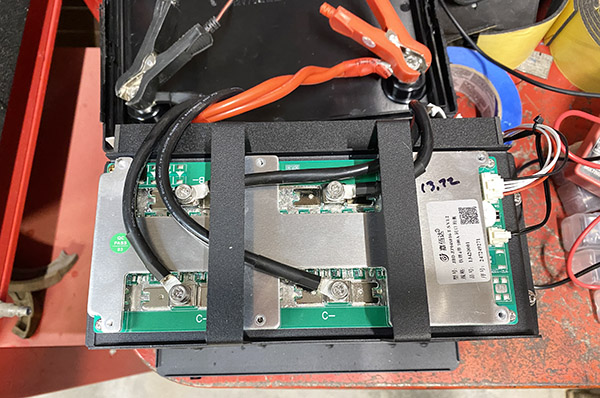
The top part was still attached.  I didn’t want to cut any deeper because I had no idea what was inside. Wedging a flat-head screwdriver under the saw-cut lip and working it around the perimeter of box released the lid. Turns out I didn’t need the circular saw. After removing the lid, the internal parts easily slid out of the box, all in a nice, neat tray.

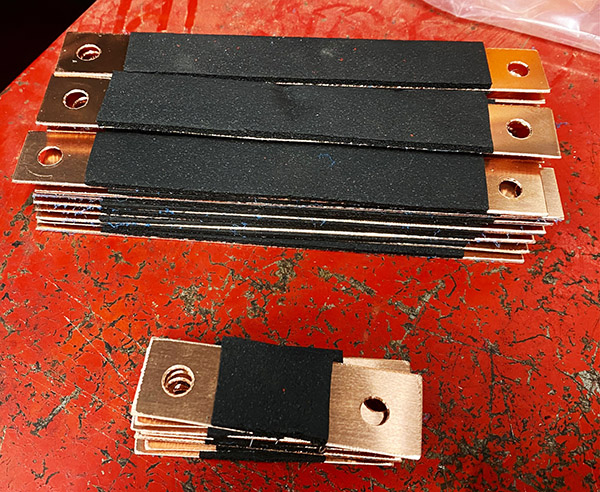
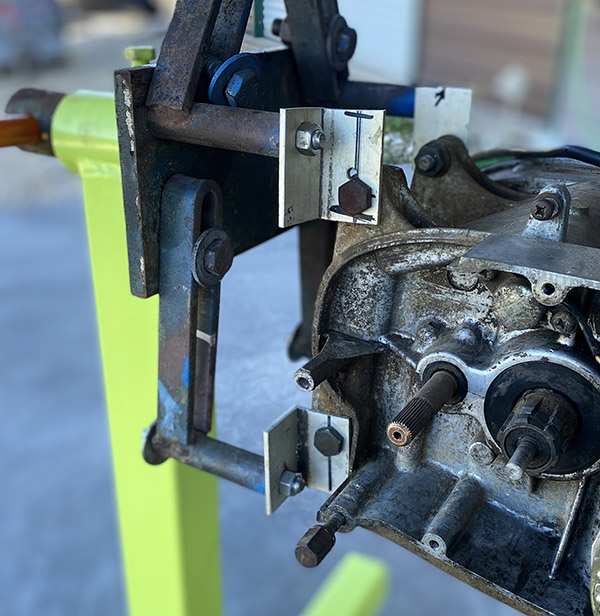
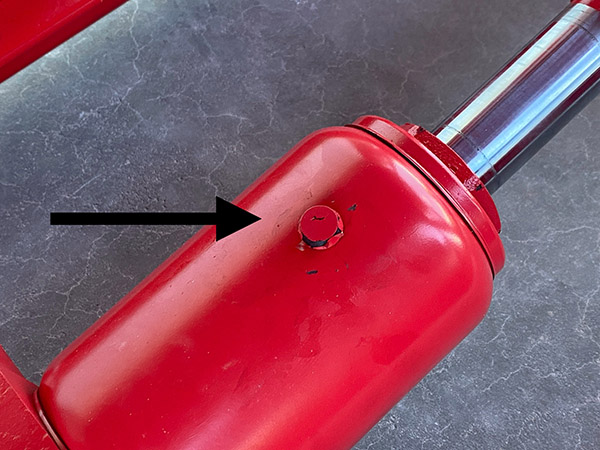
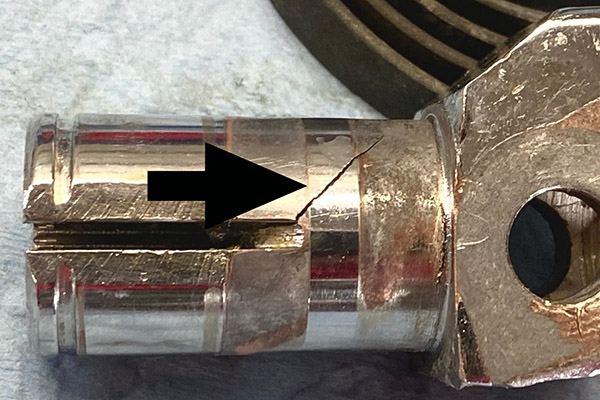
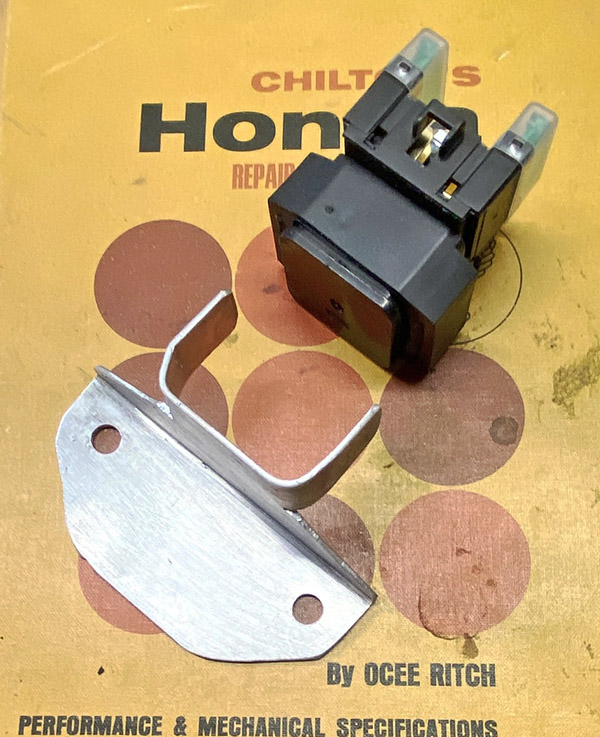
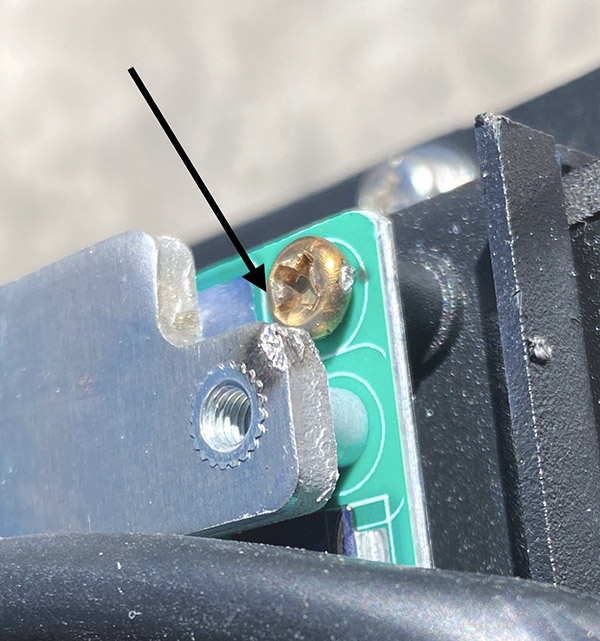
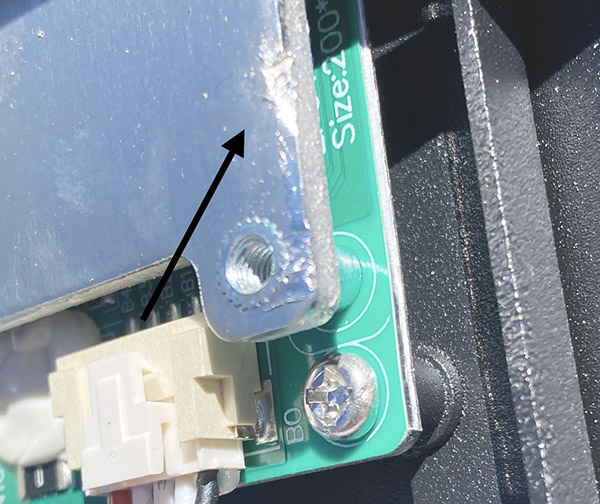
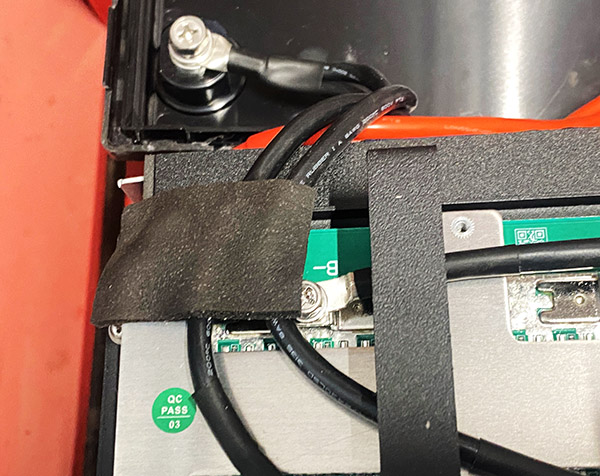
Once the thing was apart the problem was obvious. Both the positive and negative wiring to the output posts were shorted out on the big, metal plate.  The shorted metal plate covers the battery monitor circuit board.

This is where the battery was shorted.
Insulation chafing on the positive side.
Another shorted area.

The negative switch is how the battery monitor connects the internal bits with the external world. Over charge the battery? The battery monitor switch switches it off. Short out the battery? The battery monitor switch switches it off. Drain the battery too low? The battery monitor switch switches it off. For all I know there’s a high/low temperature cut off in the thing.

The heart and soul of the battery are these four big 3+volt, 100ah cells wired in series by those welded jumpers.

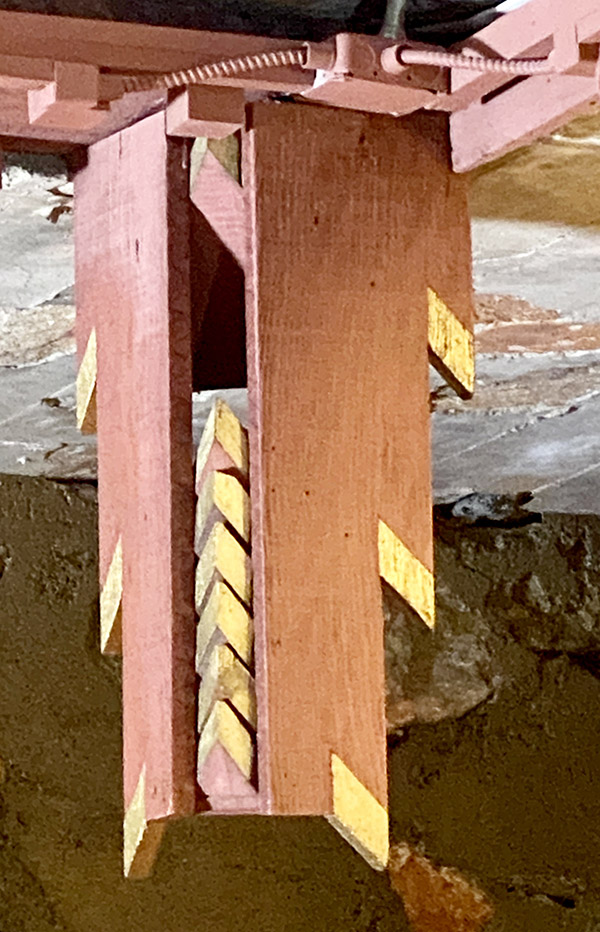
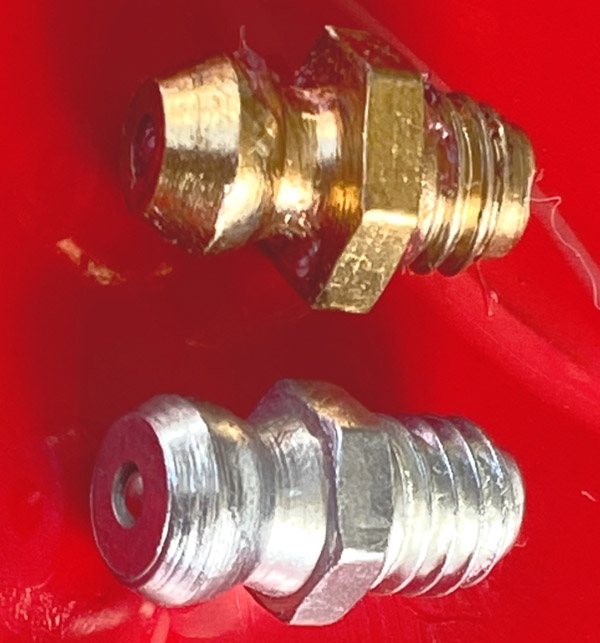
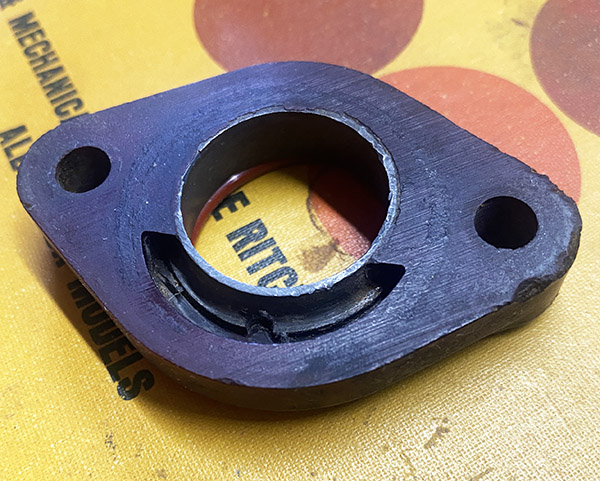
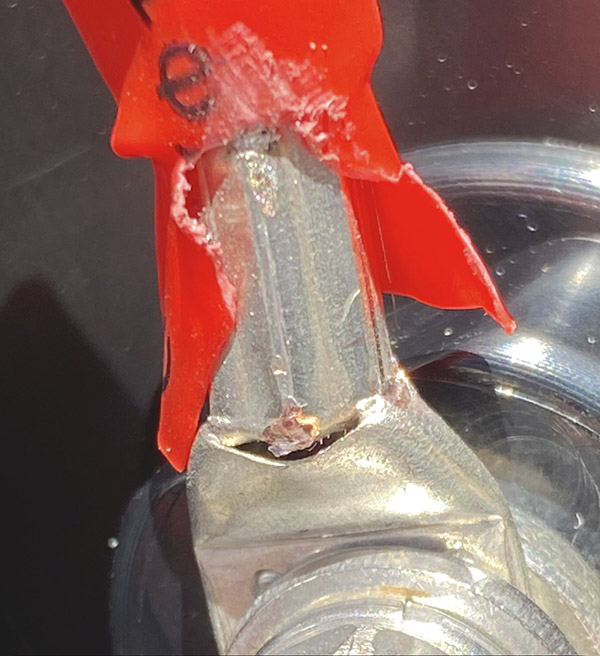
It turns out whoever built the battery put the terminals to the output posts on upside down. This moved the barrel/crimp part of the wire connection that much closer to the metal plate.

Under the metal plate sits the battery monitor system board. It connects to each individual cell and also saved the battery from bursting into flame from the short circuit.

All things considered, if you’re going to screw up the battery this was the least damaging way to do it. Since the + and – were directly shorted before it got to them, the electronics and lithium cells weren’t involved the short circuit. The battery monitor system kept the thing from burning up due to the short.

I added a bit of insulation to the burned areas that were shorted.

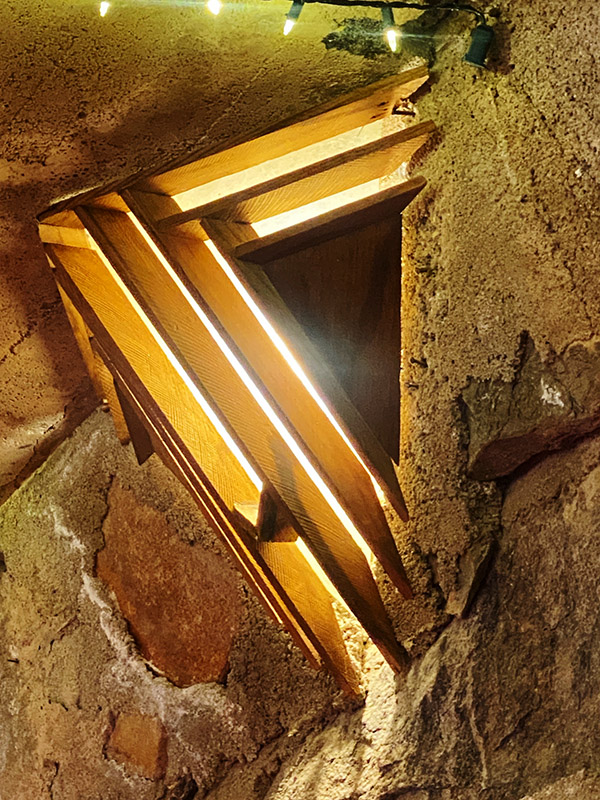
Once the lid was off and the source of the short removed, the battery showed voltage again. Pretty cool. I gave the battery a charge and all seemed normal. I load tested the thing at 100 amps and it held voltage fine. You know what this means.

The fix was as easy as flipping these connections 180 degrees. Photo shows the connection already flipped. The other way they contacted metal.

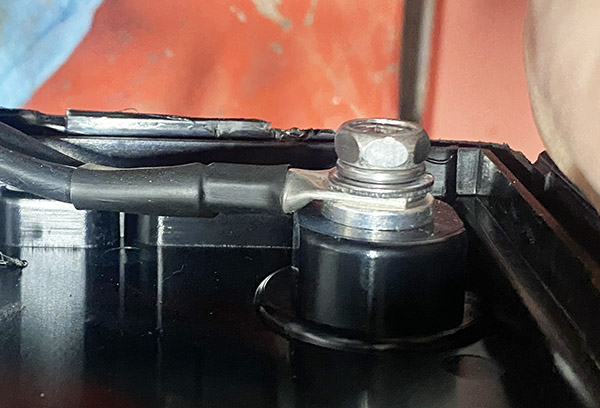
The fix was as simple as flipping the wire terminals over allowing that extra 3/16″ clearance. I reassembled the guts into the battery and snapped the lid back on and now I have an extra, good lithium battery. While technically it’s a free battery I have some time in the repair. Now I know what’s inside the black box. I’ll probably run some gorilla tape around the box so the iffy lid attachment stays put and call it a win.


Join our Facebook ExNotes page!


Never miss an ExNotes blog:


Help us keep the lights on:


Don’t forget: Visit our advertisers!


ExNotes Solar Series: Lithium Batteries

By Joe Gresh

I finally made the leap. My solar system went online in 2018 and except for a few snow days has produced reliable power in all that time. We’ve had around 30 power outages at the grid-tied Carriage House (some 5 minutes, some 5 hours) during the same time span.

The old, lead-acid bank gave great service but it is time to step into the future. I’ll be keeping the best of the old ones for a power source in the green house.

Initially we went with plain old lead-acid batteries because they were a third the cost of lithium batteries. The lead-acids worked well and since they’ve been around hundreds of years it was easy to predict performance and longevity.

The jumper cables are messy but effective.
The old bank was four boxes on two shelves. I never did get around to filling the last box.

The battery bank started small with just 4 batteries and grew with our budget to 12 total. There are two of the original 2018 batteries still functioning and I’ve replaced three batteries that failed. It’s easy to tell a bad lead-acid in a battery bank: it’s the hot one.

I haven’t been religious about topping up the electrolyte so some of the batteries might have failed due to misuse. Regardless, I’m happy with their performance and the lead-acids did me right.

Last year I noticed lithium batteries dropping in price. They ended up costing the same as the cheap Walmart lead-acids I was using. With new tariffs looming I decided to make the switch. I bought one batch in January and another batch in March, depending on whatever sale was on. My cost averaged around $119 per 12-volt, 100-ah battery. I wasn’t brand loyal, whatever was cheapest was fine by me.

With winter approaching and long cold nights of pipe heaters draining storage I built an insulated box to hold the new batteries. Advantages with the lithium are 16 batteries fit on one shelf, weight is half of lead acid, and there’s no need for a sealed battery box as there’s no acid to leak.

Most of this was replaced by copper bars.
Lots of copper buss bars took a couple days to make. Foam on top to prevent shorts in case a chunk of metal lands on the bank.

I also took the opportunity to clean up the installation, getting rid of messy-looking jumper cables and replacing them with solid copper buss bars. With everything on one shelf I eliminated several feet of cabling which can only be good.

Lithium batteries need a bit more charging voltage so I cranked up the solar regulator a 1/2 volt or so. I also reset the inverter charger setting to one more like lithium.

The batteries have sat on the shed floor for 6-8 months so when I connected them up to the solar they sucked a steady diet of 55 amps from the sun.

Theoretically I have 19,000 watts of storage now, more than double the 7200 watts of the old, lead-acid battery bank. In actuality it’s probably 80% of 19,000 watts because you don’t want to drain the batteries flat.

The new box is 1-inch foam skinned with sheet metal. Hopefully it will slow a fire.
All the batteries on one shelf cuts down on cabling. Buss bars make a tidier installation. With no acid fumes connections should stay cleaner. What’s not to like?

Some disadvantages to lithium batteries are they are more affected by cold temperatures (hence the insulated battery box), they are limited to 100-amp output per battery (not a problem as my inverter draws 250-amp max), and I can’t really think of any others.

Time will tell if the lithium batteries last the 10-year claimed life span. I’ve pre-tested each battery’s load capacity and marked the results on top of the battery. I should be able to compare results in the future to see if individual battery performance degrades. All in, I’m happy with the new batteries. Hopefully I’ll have about a 3-day reserve for those snow days.

Oh, and those tariffs? They don’t seem to apply to lithium batteries as you can still get 12-v, 100-ah lithiums for $119 on Amazon.


Join our Facebook ExNotes page!


Never miss an ExNotes blog:


Help us keep the lights on:


Don’t forget: Visit our advertisers!


Where Were You In ’62: Part 5

By Joe Gresh

The Dream is perched on the new Harbor Freight lift and slowly coming apart. I’ve been busy with other projects so don’t freak out if it seems like progress is slow. It’s not me. It’s the environment I work in.

This installment involves a bit of inventory control. I need a decent front rim but all the ones online look just as bad as the rim I have. The parts bike front rim is bad too. They are sturdy and run true but lots of surface rust makes them look bad. I can get new rims on eBay, sold in pairs for around $200 delivered, but I only need one rim. Anyone want to form a syndicate and go halvies on some 305 Dream rims?

$20 kickstand. Sometimes I do it the easy way.

Both of the Dreams were missing their side stands and I debated making one from scratch. Just for kicks I went on eBay and some hero had a side stand for $20 so I bought it. It’s kind of like cheating but It would take me two days to make a stand.

Hopefully these seals will work, keeping the oil inside where it belongs.

I’ve also ordered a set of engine seals. I’ll have the engine side covers off to free up the clutch plates and clean the centrifugal oil filter can. Also I need to remove the alternator to gain access to the starter clutch as it’s hit and miss. I figure it’s a good time to replace the seals. The only one leaking at the moment is the shift-shaft seal but you know how it goes with old rubber. Twenty miles down the road another seal will start leaking. Then another.

Deez Nuts were tight as hell. It took me two days to get them loose.

Getting the Dream’s steering stem apart was an Ossa. The top lock nut was knitted to the cone nut and the thing was tight as hell. Much hammering, heat and penetrating oil was used over the course of two days. The steering stem nuts finally unwed and spun off by hand. All the bearings and races look good with no divots or flat spots to cause erratic steering. There was even soft grease still inside! Impressive for a 63-year-old motorcycle.

The Dream on the maiden lift.

I’ve got the frame off the engine now. It’s a fairly lightweight sheet metal construction. Kind of like a monocoque Norton but with a separate fuel tank. Honda copied a lot of ideas from German and British sheet metal frame manufacturers.

The Dream frame is light. Easy to lift off the engine for an old man.

The frame has a few dings to fix and the Dream is made from pretty thick metal. The dents are hard to get behind to push out. I’ll try the painless/paintless dent remover but I don’t hold out much hope as the frame is twice as thick as gas tank metal. If that doesn’t work I’ll get a stud welder and pull the dents with a slide hammer.

Kind of Kawasaki green for the new paint on the stand. Almost safety vest green. I had a can in stock.

Since I have a new, shiny lift I decided to clean up the old, rusty engine stand to match. I’ve had this stand since the late 1970’s and it’s had everything from a 4-Cylinder Volvo marine engine, many Chevy small blocks and a big, heavy, Ford 427-inch OMC inboard strapped to the thing. The big Ford was pretty bouncy. With the cast iron, water-cooled exhaust manifolds the thing probably exceeded the stand’s weight rating by 300 pounds. I used a 2×4 in the front to help stabilize the engine.

A few aluminum tabs and the Dream engine bolted right up. I’m going to do this method on the next MC engine I work on.

In all those years this will be the first motorcycle engine I’ve had on the stand. It makes everything easy with the mill at hip level. You can rotate the engine 360 degrees by spinning the T-handle. Which begs the question: why didn’t I think of this before?

I’m thinking heavy metallic with candy-copper followed by 2K clear. What are the odds it won’t bubble?

I hear you: not much progress but I’m a bit lame right now and taking it easy for a week or so. What about a 3-part metallic orange for a color? Too much? Atomic Green? Black, red or white is boring.


More Joe Gresh motorcycle resurrections are here.


Join our Facebook ExNotes page!


Never miss an ExNotes blog:


Help us keep the lights on:


Don’t forget: Visit our advertisers!


ExNotes Architectural Review: Taliesin West, Arizona

By Joe Gresh

East of Scottsdale, Arizona, is a Frank Lloyd Wright house he named Taliesin West. The word “house” is being kind; it’s a mashup of tent and stone. The place is built using local rock and concrete, so you know I’m predisposed to like Taliesin.

Front view from the visitors entrance. The rocks blend in because they are from the site. We didn’t get to see the borrow pit.

I’m usually not a fan of Wright’s designs. They pointlessly stretch the function of materials and the idea of space in directions I dislike. Wright pushed the boundary of possibilities: A structure didn’t have to provide structure, it could exist simply as an idea. Take Falling Water.  It barges in on the environment lording itself over the river and unnecessarily cantilevering all over the place. It’s a rude work. Not to mention his stuff leaks.

Door into the Kiva room. Kivas in my neck of the woods are round inside and partially underground. Wright got the feel with a square room.
Detail of a plywood embellishment in the Kiva.

Taliesin West follows Wright’s usual distain for practicality and water tightness. Many roofs are canvas. Shutters open backwards so rain can blow in instead of shielding the windows. Painted plywood, probably the miracle material of the 1940s, is used extensively and today lends a cheap feel to the building. Not to mention the constant painting and replacement plywood requires. Odd little squares line the eaves requiring constant upkeep. Shallow reflecting pools breed slime and need cleaning frequently.

The entertainment room. Its low, heavy ceiling gives a crypt-like feel. Lots of windows to let dust and air inside.
Interior wall lamps. Painted wood. Taliesin uses cheap materials, easy to replace.

Over the entertainment area the roof is a series of angled concrete and stone boxes that look like ideal water traps. Ceilings are low most everywhere and typically large Americans had to duck to get inside rooms. There’s a reason we all live in boxes.  Boxes work.

Wright liked Chinese ceramics and design. Taliesin West looks sort of Oriental.

Having said all that, I loved Taliesin. Wandering around, my inability to think outside the box kept me shocked at the unsuitable designs Wright employed. I’ll never be as free as him. Things like moving a window because he didn’t want to move a vase amaze me. My values always default to sensible. I’m going to move the vase no matter how much I like it there. Wright doesn’t do sensible.

Sitting in the Garden Room, looking out the low, western wall, gave a feeling of it being a special place. None of the boxes I build feel special. The density of the walls with their large rocks strangled in concrete felt safe. My dry-stack rock walls can tumble down at any moment. Corrugated metal buildings feel anything but safe.

Water pump and surge tank. I’m not sure if this is for the house or the landscaping.

Taliesin started out as a 500-ace campsite and when Wright left for the summer the canvas roofs were removed and the buildings were left to the elements. Returning for winter the place would be reassembled and a crowd of designers worked there. Taliesin has a magical, Disney-theme-park feel. You expect a gnome to pop out and spin a hex around every corner.

My takeaway is this: I’m never going to build something that is doomed to fail, but I might be able to loosen up a bit and do some dumb things just because I want to. At least I’m going to try and stretch my thinking. Wright showed us that we don’t always have to follow the rules.


Join our Facebook ExNotes page!


Never miss an ExNotes blog:


Help us keep the lights on:


Don’t forget: Visit our advertisers!


ExNotes Review: Harbor Freight Motorcycle Lift

By Joe Gresh

One of the many red lines crossed on the way to becoming moto-saturated is owning a motorcycle lift. If a rider finds that he needs a lift then things have gone too far and he needs to reevaluate what the hell is actually up.

I’ve wanted a lift for many years but haven’t been able to justify the expense or space requirements a lift brings to the table. (ha!, get it? Table?)

The lift comes securely packaged in a wooden crate. If you know the price of wood nowadays the lift is almost free!

This particular lift from Harbor Freight cost around $300 when it first appeared on my radar 30 years ago. At the time my shop was a 10×10 metal shed and there just wasn’t enough space to park the thing.

Turns out it was a good thing I didn’t take  the plunge as my shed in Florida was flooded several times and the lift would have corroded away. (Ha! Get it? Plunge-flooded? I kill myself!)

My recent acquisition of a pair of Honda Dreams and subsequent crawling around on battered knees got me thinking about a lift again. I have the room now. Floods are unlikely where my shop is situated and the HF sale price of $399 defied quantitative easing, inflation-tracking and recent tariffs on China. In short, $399 seemed like a pretty good deal.

You definitely get your money’s worth in weight as the lift was a heavy bitch to load and unload. Plan on having a few strong backs to move the lift. The guys at Harbor Freight loaded it into the truck with a forklift but I don’t have any strong backs available at home.  I had to slide the crate out of the truck and let it fall the last two feet from the tail gate. It wasn’t really a free fall, I had a floor jack mid-crate to act as a fulcrum when the crate cleared the tailgate. Think of it as a controlled crash landing. The crate took the fall in stride and its contents were undamaged by my rough handling. Plus the lift is a sturdy thing, it would take some doing to bend it.

In this Harbor Freight photo you can see how the clamp won’t do much for holding the motorcycle upright.

The lift comes 99% assembled with only the wheels, tie down points and tire vise to bolt on. If you’re handy 1/2 hour should see the project through. There are a few niggling issues though.

Like most things from China Freight the lift needed a few modifications. It goes with the $399 price point.

Slightly reduced nipples to go with the reduced price. If you want to grease your new lift you’ll need to replace the gold Chinese nipples with good old USA style, silver Chinese nipples.

China must have different size grease guns because all of the grease fitting were slightly undersized and didn’t fit a US style grease gun. Attempts to grease the various grease points just pumped gook all around the nipple. I replaced the China-sized nipples with US-sized nipples and the pressurized grease flowed to the desired locations with no ooze-out around the fitting.

This rubber plug is where you add oil to the pump. Warning: it’s a bear (like Ossa!) to get back in the hole.

The owners manual that came with the lift recommended checking the hydraulic oil in the ram. It was slightly low so I put in a few ounces of fork oil. That was the easy part. Getting the little rubber plug back into the ram housing was a struggle with the lift in the lowered position. I finally gave up and raised the lift for access. It was still a PITA to get the plug back in.

Not much weld on sliding part of the clamp.
I stuck some more welding wire to help hold the slider together
Here it is in action. I’ve yet to clamp the rest of a motorcycle to the table so it may fall apart on me.

As delivered, the tire clamp installs in the wrong place. Down on the floor, it doesn’t provide much resistance to tipping leverage. There are many internet solutions for this issue but all of them required spending additional money. I figure at $400 you shouldn’t need to buy more stuff just to keep the bike from falling over.

As delivered the tire clamp is too close to the fulcrum of tip-ology.
If all you have is a hammer every problem is a nail. It’s the same when you get a welding machine. I added the tire clamp to the top of the tire stop to gain better leverage.
The repositioned tire clamp gets a higher grip for less tip.

The thriftiest way to fix the tire clamp is to relocate the thing on top of the tire stop. This gave me a chance to practice poor welding on a mission critical part. The sliding part of the clamp was lightly welded so I slathered on a bit more metal.

Once the clamp was in place I added a piece of angle iron to prevent jaw-spread, a common occurrence among older motorcyclists. Drilling two extra holes in the angle iron gave me another, more forward attachment point for tie down straps.

This all sounds like a lot of work but it took maybe 2-3 hours and that number includes thinking about things. I’ve got the Dream on the lift for its maiden voyage and it seems to be stable. I give the lift 5 stars for value and 2 deep vein thrombosis’ for HF still not quite getting it right after all these years. If you need a motorcycle lift and don’t mind tinkering and welding a bit the HF lift on sale is hard to beat.

The ’62 Dream gets the honor of being the first to sit atop the HF lift.

Join our Facebook ExNotes page!


Never miss an ExNotes blog:


Help us keep the lights on:


Don’t forget: Visit our advertisers!


ExNotes Review: Shenzhen 4000 Inverter Generator

By Joe Gresh

My nesting work here at the ranch is taking me further away from electrical power. A 100-foot extension cord isn’t cutting it anymore. The little Harbor Freight Tailgator has been a trooper, but 700-watts isn’t enough for the electric jackhammer or two concrete mixers at once, and besides that the urge to spend money is strong.

Lots of buttons and outlets on the 4000. A 12-volt cigarette lighter outlet is unusual for cheap stuff.
A cool little fuel gauge is fitted to the top of the tank.
Rated 3200 continuous and 4000 surge, the ‘Zhen seems to power most anything up to 26 amps. That’s  four times as much as the Tailgator.
The 30-amp, RV-type plug is great for welding.
But you’ll need an adaptor to plug your light duty flux core into the 4000.
This handy float bowl drain is a must-have for today’s crappy, alcohol laced fuel. Drain it after every use.
I’d like to see a little more weld on the frame. It would only take 30 seconds.
The inverter lives under the fuel tank. This is where the magic happens converting DC into AC.
Unlike a normal genset that hangs the AC portion off of the crankshaft opposite the pull start, the Shenzhen incorporates the power source inside the blower area and the rope start.
The generator came complete with a cute tool kit. You won’t get far with it but the thought counts.
The muffler isn’t super quiet like a Honda but it costs a lot less. The ShenZhen is around 63 decibels using my seat of the ear dyno.

I have more than the usual number of generators: in addition to the Tailgator, there’s a 10,000-watt Italian-Honda mash up and a 9,000-watt Predator (also from Harbor Freight), but both of those machines are heavy and hard to move on the steep and rocky New Mexico terrain we are currently beating into submission.

I wanted something light-ish that I could toss in a truck or carry downhill to a terracing job. It needed to have enough juice to run my equipment loads and if it could power the flux-core welder, that would be ideal.

At 60 pounds the Shenzhen 4000 seemed like the way to go. Amazon reviews on the generator were mostly good.

The ‘Zhen 4000 is an inverter-type generator. Unlike a standard AC generator which must run at a steady RPM to make 60 cycles per second, an inverter generator makes DC power (zero cycles or one endless cycle, depending on how you look at it).  That DC is then converted to AC by an inverter.

The advantages to inverter-type generators are several:

    1. The engine RPM can vary according to load making the unit more economical for powering lighter loads. At full load there probably isn’t much difference.
    2. The frequency can be tightly controlled, putting out 60 hz regardless of the load.
    3. The sine wave form can be cleaner with less noise. Small generators induce jagged wave forms due to the slight increase/decrease in crankshaft rotation speed through the engines power cycle.
    4. There’s less noise at lighter loads, because the engine speed can be slowed to meet demand.

The disadvantage to inverter-type generators is basically a more complicated generator with more parts to fail. There is a slight efficiency loss converting DC to AC voltage but it’s kind of a wash (see Item 1 above)

The Shenzhen I bought from Amazon was $299. Now that I’ve bought it, my ever-alert Facebook algorithm is sending fly-by-night offers for the same unit at $149. If you can get it for that price without being scammed, it’s a hell of a deal. $299 isn’t bad either.

The choke was labeled backwards which led to a lot of rope pulling. It might be ok in the southern hemisphere but around here we peel the sticker off and flip It over.

The unit started right up once I realized the choke was labeled backwards and seems to have plenty of power. It runs my little flux core welder better than a regular receptacle. I’m mobile!

Time will mention under its breath if the ‘Zhen holds up and I’ll be sure to let you know if it’s junk. For now, it’s the real deal.

The Shenzhen 4000 runs the flux core welder nicely. I can crank it all the way up, a setting that pops a 15-amp breaker after a minute.

Join our Facebook ExNotes page!


Never miss an ExNotes blog:


Help us keep the lights on:


Don’t forget: Visit our advertisers!


Where Were You In ’62: Part 4

By Joe Gresh

When I was younger (by a lot) I used to modify all my motorcycles. Different forks, different gas tanks, different wheels. I never left well enough alone. Until I bought a new, 1983 Honda XL600, I only had a few stock bikes. The XL600 was so good it started me thinking about why I kept messing with original bikes. And so I stopped.

I found the reason why the kickstart splines slip. The lever knuckle is cracked allowed the splines to expand when kicking. Luckily the spare engine has the part.

I pretty much leave motorcycles stock now. It’s a lot easier and quieter.  Let’s face it: The bikes are more reliable stock. Reliability is important to me now. Along with resale value.

I’ve been polishing the turd a bit. The aluminum color is too bright, I’ll try something else but the bike should clean up and look decent.

Lately, the Dream 305 decision tree has branched off in a different direction. Getting the bike running was exciting but figuring out how to proceed has not been. What to do with this beast? If the engine was bad things would be easy: Part it out. But the engine is not bad.

The main issue is the low value of restored Dreams. A couple thousand bucks will get you a nice rider that needs nothing. My ’62 is an early model that has some cachet, but not enough to make much difference.

I was going to leave the bike rough and stock, just get it operational, but deep down, I don’t like the way a Dream looks. The engine is fine. I like the close-set fins, but It’s those fender flares. They make the bike look stodgy and old.

Front brake shoes are cheap and available for the Dream but rear shoes have a different mounting set up. At $38 each shoe I’ll be running the old ones. Hopefully the lining stays glued on and doesn’t come loose and lock up the wheel.

I’ll be the first guy to tell you don’t modify old bikes because it lessens interest and value, but what if the bike has little value to start with? I’ve decided the flares have to go. Kind of a return to my roots on a bike that isn’t in great shape.

The rear rim is in fairly good shape, and the new Kenda fit will. Neither of the front rims are very good. They are round and straight, but the chrome is shot. As this is a budget build, I may try some chrome spray paint just to get the bike on the road.

Hear me out: Modding this bike is not a big deal as I have a bit of metalworking to do on the Dream’s sheet metal frame and have decided to take the bike completely apart to allow easy access and flat welding.

The Dream has been down sometime in the last 60 years. I’ve tweaked the front fender straight-ish. A little welding and trimming will make it usable.
The taillight area is kind of a mess. I’ll use the flare cut-off to supply original sheet metal when I plug this hole.

The front fender has a crack and the flare is bent; it will need some massaging and removing the flare removes one problem. The rear fender has a gaping hole where the taillight sat, and I’ll be welding that closed. There are a few dents that would be easier to beat out with the frame upside down. The bike won’t be original, but it won’t be far off original. And most importantly, I’ll like the way it looks. I’m shallow that way.

These square shocks are iconic Dream bits. No longer held to a high standard, I won’t be looking to replace the eroded plastic covers.

Things are hopping at the ranch, so I have made little progress (but not zero progress). Just having clarity, freedom and a plan saves on lateral moves.


Join our Facebook ExNotes page!


Never miss an ExNotes blog:


Help us keep the lights on:


Don’t forget: Visit our advertisers!


Where Were You In ’62? Part 3

By Joe Gresh

Originality is rare in the mechanical world. Designers build on other’s work. The clean sheet stays clean and so the Honda Dream was heavily influenced by German motorcycles of the 50’s. Just like Honda’s 305 inspired Laverda’s 750 of the mid-1960’s.

The Dream borrowed a lot of ideas from the German NSU.
And then Laverda borrowed a lot of ideas from Honda’s 305 engine.

Of course, none of that has to do with the job at hand: getting the 1962 Dream running as cheaply as possible.

The running part was easy: you can’t kill these old Hondas. I cleaned the carb, squirted some oil in the cylinders and onto the valve train, rigged a battery and a hot wire to the ignition, stabbed the starter wire onto the positive-battery and the Honda fired right up.

The sprag clutch (red arrow) will need some work. It skips and grabs intermittently.

Not right-right up as the electric starter’s sprag clutch is a hit and miss affair. (I’ll work on that later) once the engine turned over it ran.

Of course, clouds of smoke poured out of the tail pipes, as all that oil I squirted in the cylinder was burning off. Then the left cylinder stopped firing. I discovered the Tytronic ignition puts out a strong spark when I electrocuted myself pulling the left-side spark plug lead to confirm it wasn’t hitting.

Next I swapped leads to check the secondary of the ignition coil and the problem stayed on the left side. Since there’s only one carb, that left the spark plug. I swapped plugs and the problem moved to the right side.

The Dream came with three boxes of parts, and inside those boxes were at least eight new spark plugs. All were the wrong ones (the reach was too long). I kept digging and found a used plug with the correct reach but a different part number. Regardless, I screwed the thing in and the Honda ran on both cylinders.

The rear fender is kind of a mess.

I shifted the gearbox through its four speeds. The countershaft rotation speed increased with each up shift. I didn’t hear any untoward noises except for the taillight. At some point the taillight cracked the rear fender. Someone, probably an engineer, welded the light to a back plate and then to the fender. Which should have been fine. It wasn’t. The welds broke and the taillight rattled like a loose roofing panel.

I like the way the Dream looks with the fenders shaved. (Photo from internet, I don’t know who took it.)

A hacksaw remedied the taillight situation. I ran the Honda until it quit smoking. The bike kept running better the longer it ran. I have something to work with, baby. Now I can move on to the running gear.

The old speedo cable took a beating.

Unfortunately, my budget-build took a setback with the speedometer cable. The cable stuck in the housing and twisted the end off near the wheel side. Fiscally, I was going to fix it. The dried grey plastic around the housing flaked off easily. I managed to get the cable out and since the speedo cable was a bit long I figured to shorten it by a 1/2-inch and re-crimp the drive tang and end piece. For the plastic cover I was going to use black, heat shrink tubing.

All was going well. I decided to wire wheel the rust on the cable housing.  Long-time wire-wheelers will be able to predict what came next. I must have momentarily relaxed my grip on the housing. The wheel grabbed the housing and wound it around the grinder shaft. The loose end flailed like a weed whacker string. I was lucky to escape un-whacked. The worst part is I kind of knew it was going to happen but I kept going anyway.

Four cables for $100! Such a deal!

A new speedometer cable was around $50 on eBay. Or, I can get a complete set of speedometer, clutch, throttle and front brake cables for $100. My budget swelled with excitement. At least I won’t have to watch those other three cables wind around the wire wheel.

I’m using a generic starter relay. These are cheap and available. I’ll need to make a bracket to mount the thing to my bike.
Interesting duct work on the 305’s phenolic carb spacer

Then came a bridge rectifier, a starter solenoid, a chain, some o-rings, and new spark plugs. When the stuff shows up I’ll have more work to do.

Still on the list is tires and tubes, a seat cover, cleaning out the gas tank liner crap, and all the wiring. The plan now is to get the bike operational and ride it around a bit to see if it’s worth messing with further.


For Where You in ’62 Parts 1 and 2, as well as earlier Joe Gresh Resurrections, click here.


Join our Facebook ExNotes page!


Never miss an ExNotes blog:


Help us keep the lights on:


Don’t forget: Visit our advertisers!


Where Were You In ‘ 62: Part 2

By Joe Gresh

It’s monsoon season here in New Mexico and the hard rain mixed with hail has me wasting time indoors…I mean tinkering with the Dream 305.

The most annoying problem on the black Dream was the clutch lever wouldn’t move. The cable was like a banjo string, the lever wouldn’t move and the kickstart spun freely. I guess the Dream doesn’t have primary gear start.

The clutch released after I removed the right cover. Several sessions of Gunk got it looking a bit cleaner.

I took off the right-side engine cover and that released the clutch. Once the cable was loose I slipped the cover back on and the kicker turned over the engine with a slipping gear sound.

The kickstart splines look ok but the start lever slips. I’m thinking a keyway might solve the problem.

Turns out the kick lever slides onto the kickstart shaft and is kept from turning by shallow splines in the shaft and kick lever.  My Dream must have been kicked a lot. I’m not sure how to fix the problem, maybe grind a keyway?

Sprockets don’t wear out this much in 4000 miles. I suspect the white Dream is the low mileage bike. This black Dream has been around the block.

The sprocket area was a greasy mess so I cleaned it up and removed the worn out countershaft sprocket. The kickstarter and the sprockets have me thinking the 4000 miles on the odometer isn’t accurate. The white Dream looks more like the low-mileage bike.

The wiring was a snarl of mismatched colors. When things get this bad it’s time to start over.

Moving on, the wiring was a mess. The main harness looks like it was new in the past 10 years. Everything else was a tangle so I removed all the wiring to get a clear view of the situation. I’ll start fresh if the engine proves usable.

I’m going to check the valve clearances but the round rocker covers are 23mm. I started easing into the cover with a large adjustable wrench but it felt like the aluminum might round off. 23mm is a socket I don’t have. I’ve ordered a socket from Amazon and when it shows up I’ll tackle the valves.

The carb bits looked good. The Dream is a simple machine to work on and tune.
63 years old and doesn’t look a day over 40. The single small venturi and two, 150cc pistons promise many miles per gallon.

I also removed the carb for cleaning. At first glance it seemed not too bad and the second glance confirms it. Everything was in good shape inside so I reused all the bits.

The Tytronic system is easy to connect once you have a diagram. I don’t like the single Allen head set-screw holding on the magnetic trigger.

The Dream came with a Tytronic electronic ignition system. Whoever wired it connected the ground side of the coil in series with the condenser then to the ignition module. I don’t see how that can work. Condensers are used with points to help with arcing when the points break so why would an electronic ignition use one?

Thank you to the internet hero who took the time to draw a diagram. Something Tytronic should have done instead of their lame, verbal-to-text description.
The simplified coil/ ignition wiring. Blue and red go to Tytronic module. Battery positive to red, battery negative to frame.

Clear information on the Tytronic set up wiring was hard to find. The factory instructions online used wire colors, most of the colors didn’t match what I have. I like a wiring diagram but all I found was “connect the yellow to the blue” type of stuff. Luckily some brave soul posted a diagram of his set up. I rigged the Tytronic as the line drawing showed. Next I used a test light across the coil connections to set the timing. It’s really simple. I hope the Tytronic actually works.

Oh, how I hate tank liner. Anyone using this crap is not professional.

I’m kind of all over the map on the Dream but as issues are resolved you’ll see a more organized approach. The gas tank has that horrible tank-liner crap inside. It’s delaminating so I pulled some big pieces out. Now only 90% of the liner needs to be removed. There are very few occasions when tank liner is required. Don’t do it.

The near-term goal is to see if the engine is good. After that I don’t know where this project is going. I’m not spending any money on the bike or making a decision until I hear the engine run.


Join our Facebook ExNotes page!


Never miss an ExNotes blog:


Help us keep the lights on:


Don’t forget: Visit our advertisers!


Where Were You In ’62?

By Joe Gresh

Motorcycles, like cats, tend to find you when you’re not looking for either. I never wanted a Z1, but the 1975 Zed forced its way into my life. And now it’s Honda Dream 305s meowing at the door.

Low miles, if it runs at all it won’t be hurt too bad.

When I was 17 years old I had a 1960-ish Dream 305 built from an assortment of bikes I picked up for little money. History is repeating itself here and two 305 Dreams have occupied the ranch.

The darker it gets the better a Dream looks.

I’m running out of room for motorcycles in the shed. I have no time to mess with these bikes as my nesting has gone into overdrive. But the deal, the deal dammit, was too good to pass up.

De-gunked and pressure washed. It still looks rough.

The Black Dream is a 1962 model and is mostly complete. It looks like the one I had at 17 except mine was red. I guess mine is black now. Of course it needs a thorough going over and every nut, bolt and part needs attention. The engine ran when parked but then they all run right before they quit running.

Tire pump holder. The tire pump Is long gone.

The white one has a nicer frame, with no dents or rust, I think it’s ’65-ish/’67-ish. I’d like to use the white frame but I only have a title to the black frame. I wonder if anyone would care?

Darren bought lots of parts before he lost ambition. This cuts down on things I would need to buy.

Darren, the seller, was going to fix the black one but lost ambition, wisely in my book. He bought a bunch of bits and pieces and the bike came with 3 boxes of junk, a spare engine (status unknown) an extra gas tank and two seats.

I don’t need this hassle man. Why do I keep doing the same thing expecting different results? CT, wife of the year, knows a good deal and handed me cash, “Go get that pile.”

So far I’m not in very deep. Only $500 that I could have used elsewhere. I’ve inventoried the extra parts, de-gunked and pressure washed the bikes. I burned the pressure hose on the washer’s exhaust so add a new hose to the motorcycle cost.

I’d like to say the bikes cleaned up nicely but I’d be lying. So now I’m wondering why I took on another project when I have 23 unfinished projects. It’s an illness.

I have a few options: CT and I want to start an eBay store to get rid of all our junk. I could part out the whole mess and probably make more than I paid. I could go all in and restore one, complete, Dream, but Dreams aren’t worth much money and I would lose on the deal.

Or I could see just how cheap I can get the Dream safely operating, a challenge, like the Youtubers do. My first impression is tires and a seat cover, along with a headlight trim ring, are the major purchases needed. All the rest can be nursed back to usable-but-crappy level.

Between two engines I should be able to get something that runs and shifts. Black is easy to spray paint using rattle cans. And then what?  Then what, man?  Would I ride it?  Sell it for a loss?  The only positive spin is that it would give me something to write about.

I don’t need this stress.


Join our Facebook ExNotes page!


Never miss an ExNotes blog:


Help us keep the lights on:


Don’t forget: Visit our advertisers!