Enfield 650 Valve Adjustment

This blog explains how to adjust the valves on a Royal Enfield 650 Interceptor.   This was the first valve adjustment my motorcycle has had, and it occurred at the 500-mile mark.  The first valve adjustment is an important one, as decreases in the valve gap will typically be more severe as the engine is breaking in.  For the record, though, on my bike’s eight valves only one was slightly tight (and that was one of the intake valves).  The other seven were pretty much where they were supposed to be, but I loosened the adjusters and readjusted them just to see if any were difficult to access or if they would give me any problems.  Accessibility was superb and the adjustments were all easy to make.

Like most threaded adjuster valve adjustments, 90% of the job is just taking away or loosening the stuff you need to get at the valves (and then putting it all back on the bike).  On the Enfield, that’s the right side body panel, the seat, the fuel tank and its connections, an electrical subassembly between the upper frame rails, and the valve cover.  The actual valve adjustment only takes a few minutes.

You’ll need several tools for this job.  Here’s the list:

      • Feeler gage.
      • 17mm socket.
      • 8mm socket.
      • 10mm socket.
      • Sparkplug socket.
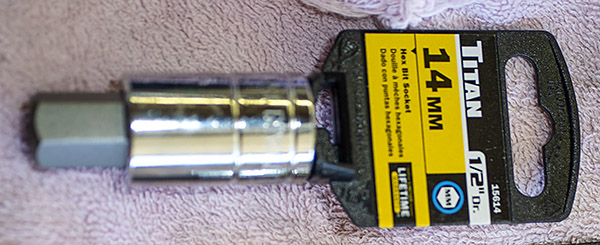
      • 14mm Allen drive.
      • 4mm Allen drive.
      • Ratchet with extensions.
      • 10mm wrench.
      • Flat blade screwdriver.

Because I’m an old fart and a pack rat, I had everything I needed except for the 14mm Allen drive (that was one I had to order on Amazon).  Odds are you already have most or all of this stuff already, too.  We tend to pick up oddball stuff over the years.  If you live on the Tinfiny Ranch, that includes stuff like lathes, concrete mixers, tillers, old MGs, and more.  But the only tools you’ll need for adjusting the Enfield 650’s valves are what I listed above.

The other thing we need to do is make sure the engine is completely cool.  You can’t ride the motorcycle, shut it off, and then adjust the valves.  The engine needs to be cold.

Adjusting the valves sounds way more intimidating than it is.  I took a couple of hours to adjust the valves on my Enfield and this was the first time I did it.  On subsequent valve adjustments I’m guessing I’ll need less than an hour now that I know my way around the bike.  Dealers charge up to $581 for this job, which is kind of a joke when you consider the amount of time it takes (that is, if you think getting ripped off by a dealer is funny).  The dealers are counting on you being intimidated.  You shouldn’t be.  This is not a hard thing to do.

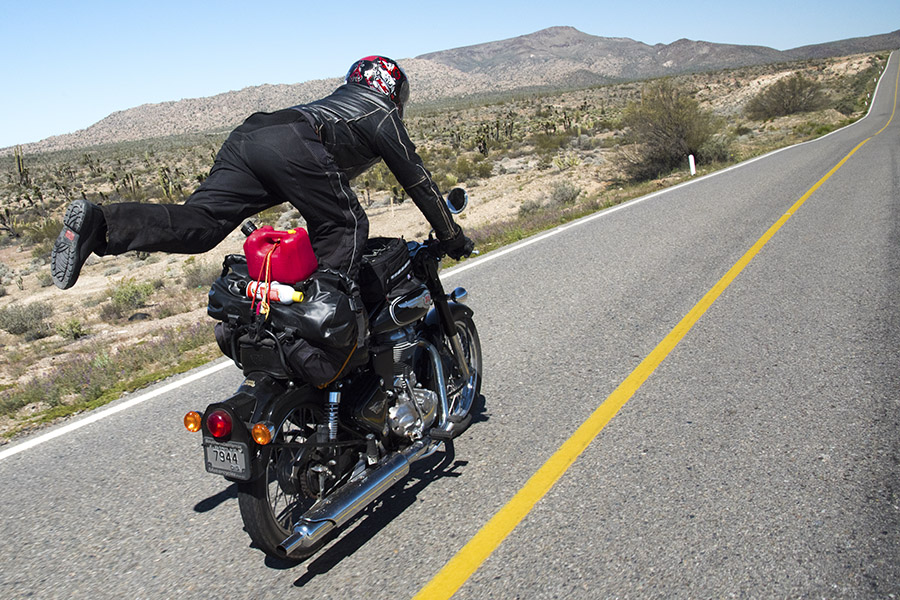
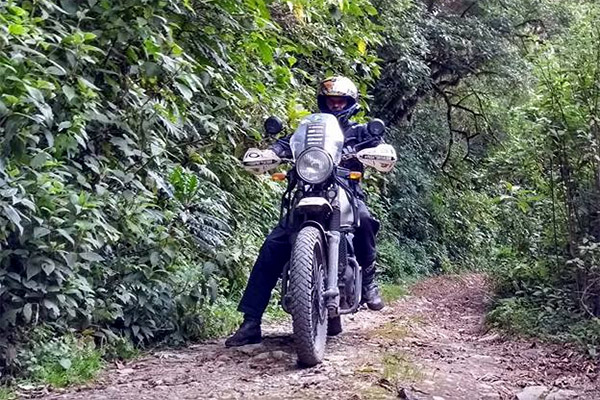
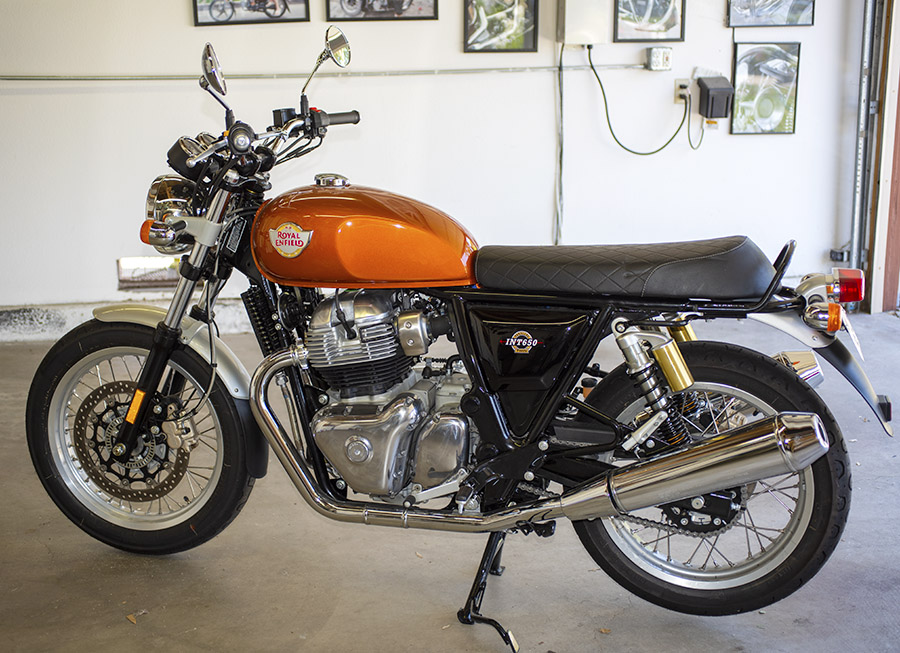
Start by putting your motorcycle on the center stand, as you see in the big photo at the top of this blog.   That makes getting to both the left side and the right side of the bike easier.

Use your ignition key to unlock the right side body panel.  It pivots out from the bottom and then pulls down, and that will take it off the bike.
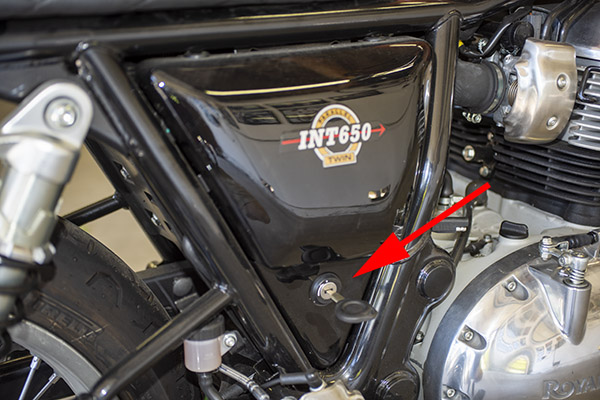
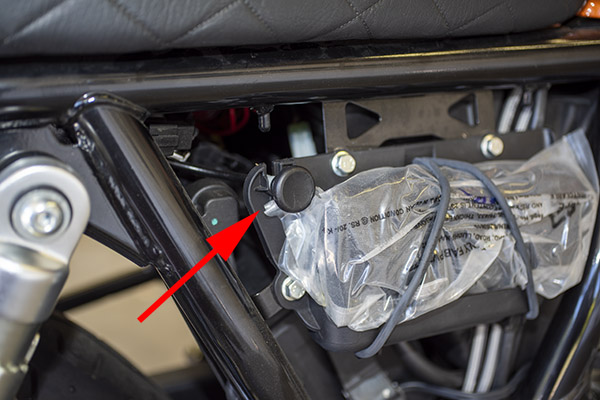
Once the right side body panel has been removed, you’ll have access to the seat release (shown by the red arrow).  Pull it out and remove the motorcycle seat by sliding the seat to the rear.
The next step is to remove the two 10mm bolts securing the fuel tank to the frame.  This job is a lot easier if you run the fuel level down (it makes the tank lighter and easier to handle when you disconnect the two electrical connections and the three hoses underneath the tank).  I had mine on E, but there was still a fair amount of fuel in the tank.
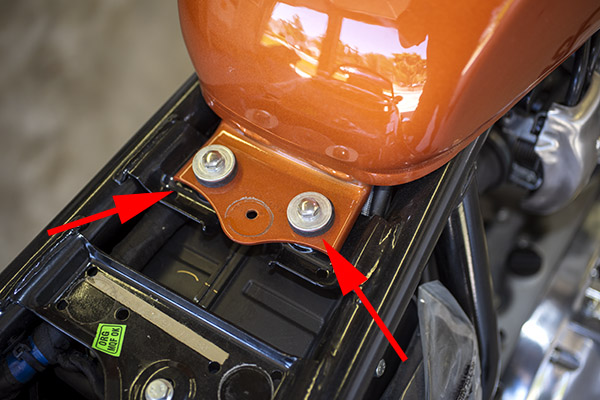
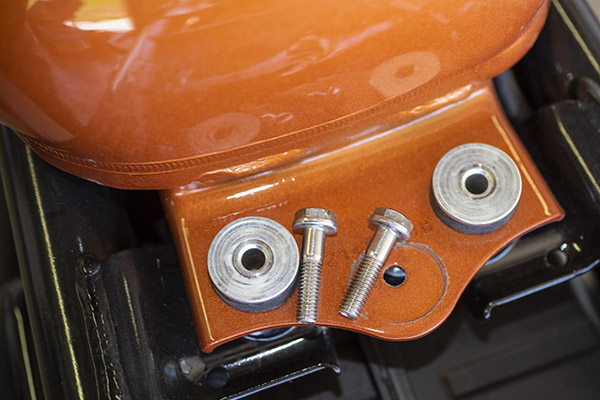
Once the two bolts are removed, set them aside (not like you see here; put them someplace where you won’t lose them).  The tank will then slide to the rear.  Put a shop rag on the frame behind the tank so you won’t scratch anything.
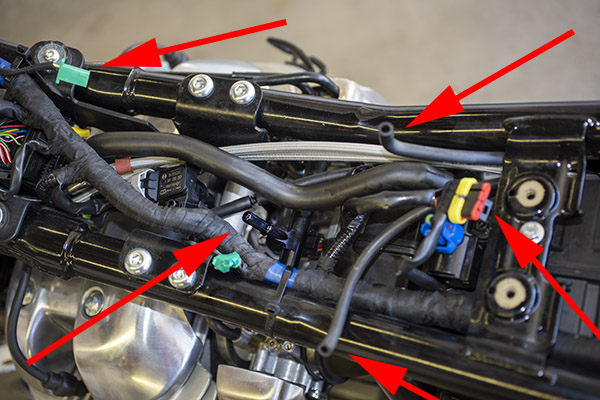
As mentioned above, there are five things that have to be disconnected underneath the fuel tank so that you can remove it from the motorcycle.  As seen in the photo below, going counterclockwise from the upper left corner of the photo, these five things are:

      • An electrical connector to the fuel gage (the green connector).
      • A fuel vent line.
      • The fuel pump electrical connector (the yellow, red, and black connector).
      • Another fuel tank vent line.
      • The fuel hose (this is mated with a quick-disconnect fitting that stays on the fuel tank; it has a button you press to allow pulling the fuel hose off).

I show this on the motorcycle side of the equation.  It would have been a little tough to get a photo of the bottom of the tank.
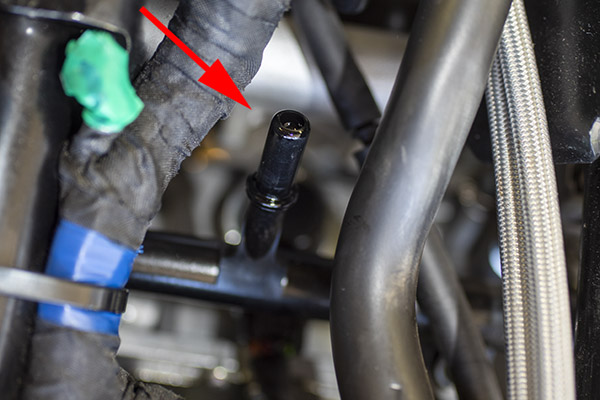
Here’s another shot of the fuel hose quick disconnect male end (it stays with the motorcycle).
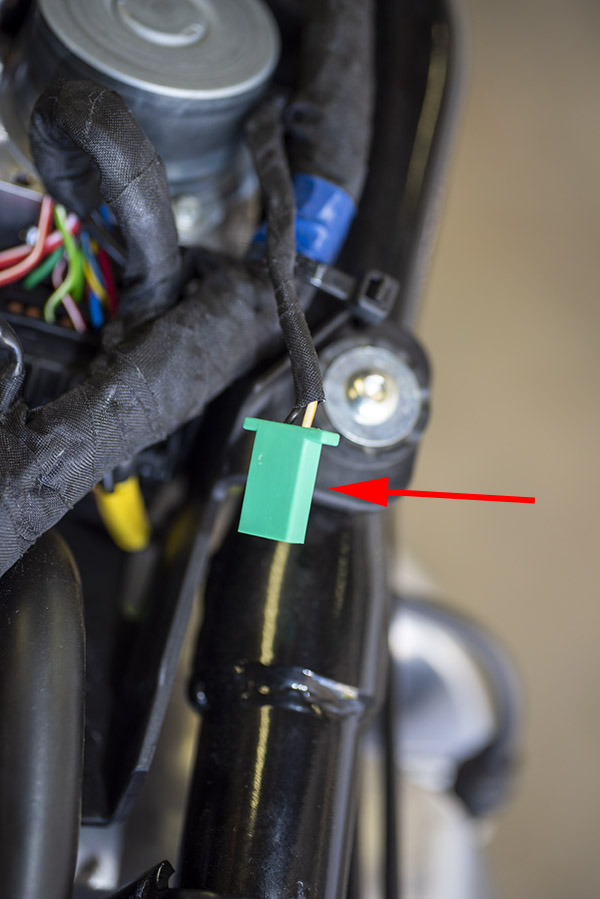
This is another shot of the fuel level gage electrical connector.
And here’s a photo of one of the fuel vent lines and the fuel pump electrical connector.

After tilting the tank up and disconnecting all five of the connections described above, remove the tank and place it on a cloth to prevent scratching.

At this point, disconnect the sparkplug leads and remove both sparkplugs.  We are going to crank the engine by hand, and we don’t want to have to fight the engine’s compression as we do so.
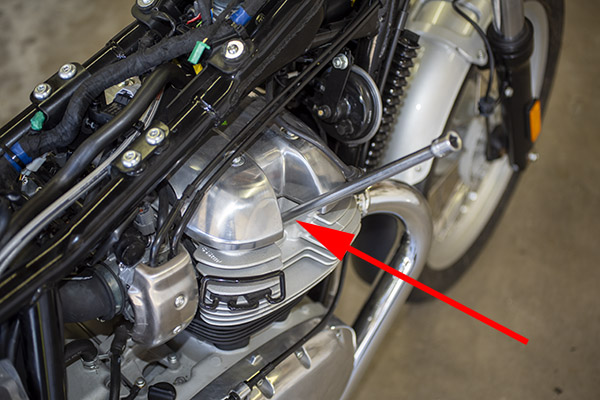
The next step is to remove the three Allen bolts that secure an electrical subassembly between the upper frame rails.  We don’t need to remove the subassembly; we just need it to be pushed up so that we can maneuver the valve cover out of the way (which, incidentally, I found to be the hardest part of the valve cover adjustment process).  Set the three Allen bolts aside in a secure location.

Next, remove the four 8mm bolts securing the valve cover.  Set them aside in a secure location.
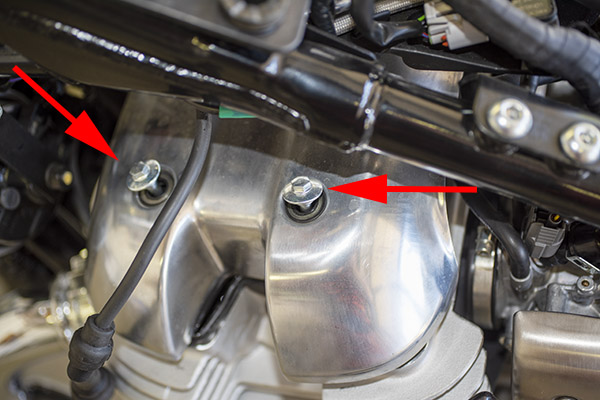
Once the four valve cover bolts are out, you can remove the valve cover.  It will slide out on the left side of the motorcycle.  You’ll probably invent a few cuss words when doing this.  The valve cover is a tight fit between the cylinder head and the motorcycle frame’s upper rails (it’s why we loosened that electrical subassembly described above).  There’s a complicated and reuseable rubber gasket that seals the valve cover to the cylinder head.  Be careful not to nick the gasket when you’re sweet-talking the valve cover off the engine.

Once the valve cover is off the engine, you’ll have access to the valve adjusters.  As this is an eight-valve engine, there are four adjusters for each cylinder (two intake and two exhaust valves).  The four valves on the right side of the engine are shown below.

And these are the four valves on the left side of the motorcycle.

Here’s where you’ll need that 14mm Allen drive mentioned above.  It was the only tool I didn’t already have.  It was something like $6 on Amazon, and I now have two of them.   Amazon sent me an email a couple of days after I ordered the tool because they felt like they lost one in shipment so they shipped it again, and then two arrived in separate packages on the same day.  Don’t tell Amazon.  I’m keeping both.  Bezos can afford it.
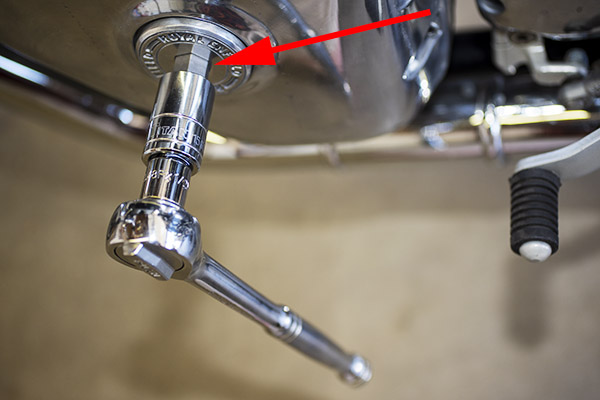
Here’s the access port cover on the left side of the engine.

Remove the access port cover on the left side of the engine with the 14mm Allen drive.
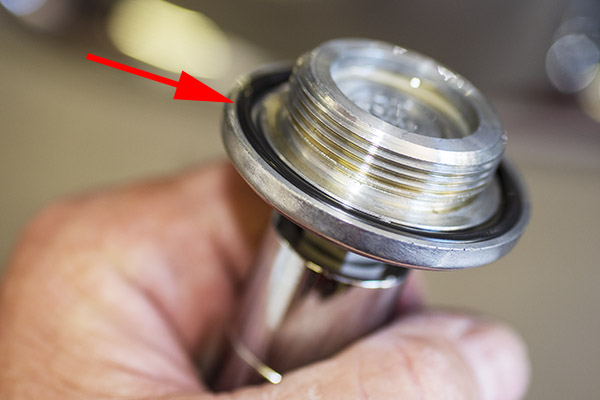
Note that the access port cover is sealed with a rubber o-ring.  Don’t lose this part.
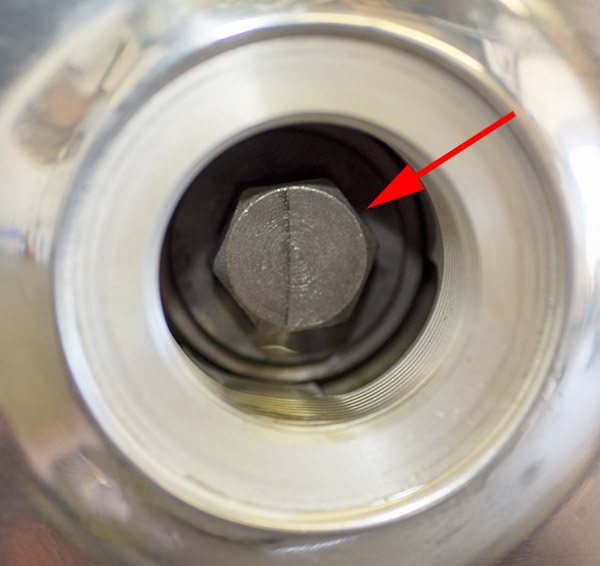
If you peek inside the access port, you’ll see a 17mm bolt head.  This is where the 17mm socket is used.  You can crank the engine by hand (always going counterclockwise, never clockwise) to bring the crank to a position where the valve being adjusted is not being lifted by the cam lobe.  This is known as getting the lifter on the cam’s base circle, and that’s what we want when we make the adjustment.
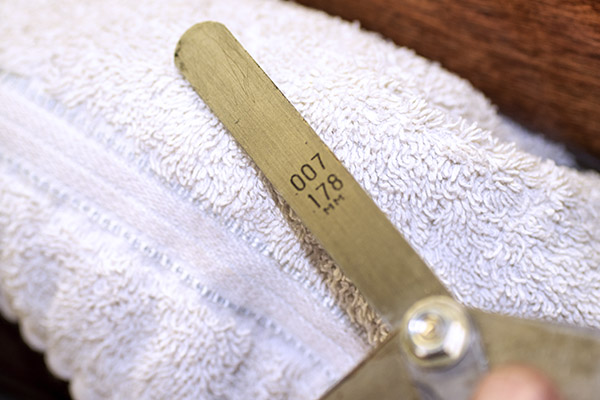
I had a feeler gage from way back tucked away in my tool cabinet.  If you don’t have one of these tools, they are available on Amazon.  We’ll need the 0.003 inch (or 0.076mm) feeler gage for the intake valve adjustment, and the 0.007 inch (or 0.178mm) feeler gage for the exhaust valve adjustment.  The intake valves are the ones on the rear of the engine (closest to the fuel injectors) and the exhaust valves are the ones on the front of the engine (closest to the exhaust headers).  I know.  Duh.

This valve adjusting business is done by feel with the use of the feeler gage.  I guess that’s why they call it a feeler gage.  You want to make the adjustment such that after you make it, there’s a slight drag on the gage as you move it back and forth between the valve stem and its actuator (you get the “feel” of this slight drag; hence the “feeler gage” name).
Enfield makes it easy to get the engine rotated to the right spot so that the lifter is on the cam’s base circle with a handy indicator located in the cylinder head.  It’s on the engine’s left side as shown in the photo below.  The indicator is marked with an L above a scribe line, and an R above a scribe line.
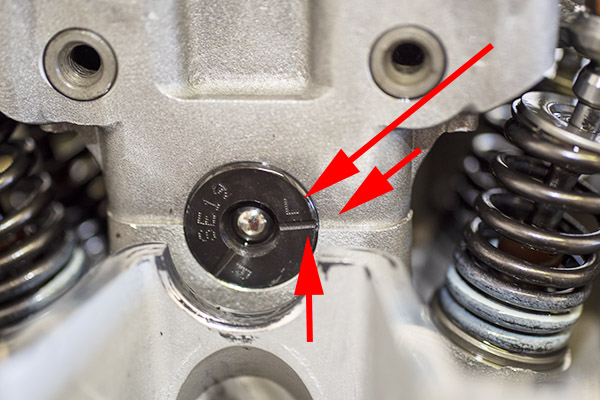
Turn the engine by hand with the 17mm socket (again, always counterclockwise, never clockwise) until the L and its scribe line are aligned with the line on the casting as shown below.   We want the L and its scribe line aligned with the corresponding line in the casting when we adjust the valves on the left side of the engine.  After we’ve adjusted the valves on the left side, we’ll want to do the same thing to get the R and its scribe line aligned with the line in the casting to adjust the valves on the right side of the engine.
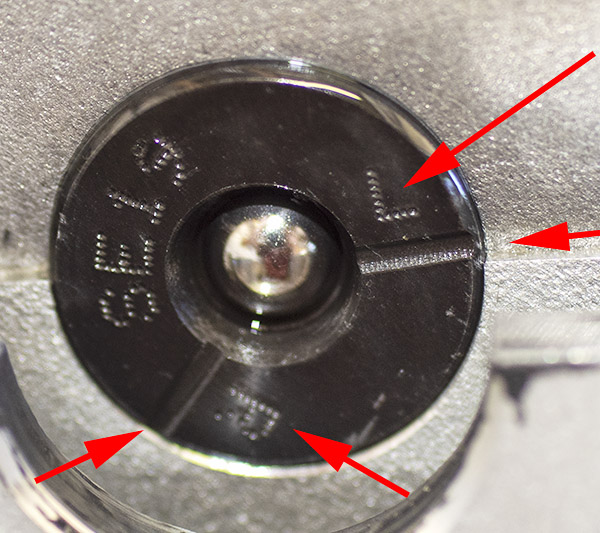
When the crank is appropriately positioned (for the left side of the engine, as shown above), we are now ready to adjust the valves.

The actual valve adjustment is accomplished by loosening the bronze-colored valve stem lock nut with a 10mm wrench, then making the adjustment with a flat bladed screwdriver in the adjuster screw slot, while positioning the appropriate feeler gage blade between the adjuster and the valve stem.  This is what controls the gap between the adjuster and the vavle stem.  When the gap is what it’s supposed to be, lock the adjuster in place with the locknut.  We do this for both intake valves with the 0.003-inch blade, and both exhaust valves with the .007-inch blade.

After we’ve done the left side of the engine, we similarly rotate the crank to align the R index mark and then we adjust the valves on the right side of the engine.  The R has to be on the right side of the index plate so it reads right side up.

At this point, I rotate the engine two complete turns by hand and use the feeler gage to check the valve gap again.  If it’s not good I redo the above adjustments.  This is just a check.  For me, it’s always been good.

So, about that valve cover and the complicated seal between it and the cylinder head.  Here’s what it looks like from underneath.

Note that the seal is orientation sensitive.  It’s got a little half moon in the seal on the left side.   As mentioned above, getting the valve cover off was a challenge.  Getting it back in place with the seal properly positioned was even more of a challenge.  But neither steps were really that bad.  The good news is that this was the toughest part of the job, and it wasn’t that tough.

After you finish adjusting the valves, assembly is the reverse of disassembly.  There are three cautionary notes:

      • Use a shop rag or two on the motorcycle frame so you don’t scratch the frame or the fuel tank when you reinstall the fuel tank.
      • When you remake the fuel line quick disconnect, make sure you feel it click into position.  It’s possible to not fully make the connection, which could result in pressurized fuel being pumped out over your hot engine.  That would not be a good thing.
      • When you reinstall the valve cover, make sure the seal between it and the cylinder head is correctly positioned.  If it is not, oil will leak from this interface.

So there you have it.  For me, that’s $581 (what the closest Enfield dealer charges for a valve adjustment) going in the Baja kitty.  Or maybe the reloading components fund.  Whatever.  It’s not going into the dealer’s pocket, and that’s the point.

Enfield did a nice job engineering these bikes, I think, and they made the valve adjustment process straightforward.  It would have really been cool if the valve cover was designed so that it could be removed without taking the body panel, seat, and fuel tank off (like on an old airhead BMW or a Moto Guzzi), but hey, it is what it is, and what it is is way less complicated than most other modern motorcycles.  There’s also an argument to be made for hydraulic valves (which never require adjustment), but hydraulic lifters weigh a little more and don’t work well at high rpm.


More on Enfields?   Hey, read our series on taking two Enfields (a 650 and a Bullet) through Baja.  It’s what prompted me to buy my Enfield!


This idea on online maintenance tutorials was something we started at CSC Motorcycles with the RX3 250cc adventure touring platform introduction.  The market received it well and we had a lot of fun assembling the tutorials.  CSC was well ahead of the curve on this sort of thing and it is one of the many reasons their bikes have done so well.

Product Review: Turn and Washington’s Spies

Sue and I are Netflix junkies, and an evening in front of the big screen watching a Netflix series is a typical night here at the suburban version of Tinfiny Ranch.  We recently watched Turn.  It’s the story of Washington’s spy ring during the Revolutionary War, and folks, it was good.   It’s four seasons long and each season has 10 episodes.  The first season was a bit slow, but we’d heard good things so we stuck it out and we’re glad we did.  The action picked up dramatically in the second season and it continued nonstop thereafter.

The Turn story occurred mostly in and around New York, New Jersey, and Long Island.  Although filmed in Virginia, the terrain looks exactly like my old stomping grounds (central Jersey, where many American Revolution events occurred).  The battle that turned the war happened 10 miles from my home, and every time I’m back there I take in a bit more.

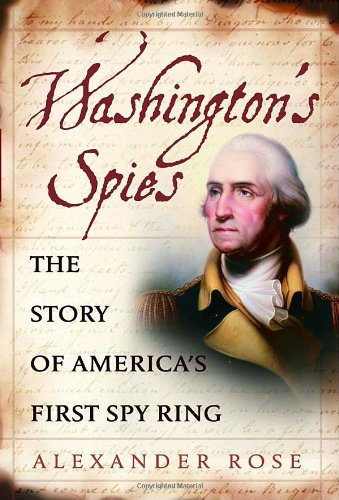
Turn is based on the Alexander Rose book, Washington’s Spies.  I enjoyed the Netflix series so much I read the book.   Like the television series, Washington’s Spies started slowly and then the action accelerated rapidly.

Trust me on this:  You won’t go wrong with either Turn or Washington’s Spies.  Jump into either and you can thank me later.


More ExNotes product reviews are here!


Never miss an ExNotes blog!

My 1st International Motorcycle Adventure, Eh?

Everybody has their preferred riding schtick and for me it’s international motorcycle travel.  Anyone can ride their cruiser to a local hangout for a beer or their GS to Starbuck’s for a $6 cup of coffee.  My riding is all about crossing international borders and collecting cool photos in places most two-legged mammals only dream about.  Just to make a point, I once rode a 150cc scooter (my CSC Mustang) to Cabo San Lucas and back.  The day after we returned, I needed something at Costco and I rode the little CSC there.  When I parked it, a beer-bellied dude in a gigondo 4×4 pickup told me, “that’s a little cute bike.”  He didn’t intend it to be a compliment.
“Thanks,” I said.

“I ride a (brand name deleted to protect the guilty),” he announced, his chest swelling with Made in ‘Merica pride to the point it almost equalled his waistline.   “We ride all over.”  He emphasized the “all” to make sure I got the point.

“Cool,” I said.  “Where do you go?”

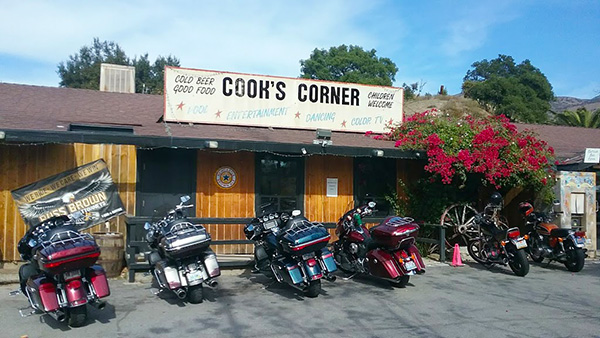
Cook’s Corner, the ultimate So Cal burger/biker stand.

“Last week,” he told me, “we rode to Cook’s Corner!”

Cook’s Corner is a southern California burger joint about 40 miles from where we were talking.

“Where do you all go on that little thang?” He actually said “you all” and “thang,” but he didn’t have the accent to match the colloquialisms.  Okay, I had the guy dialed.

“Well, we rode to Cabo San Lucas and back last week.” I said.

Mr. 4×4’s jaw dropped.  Literally.  He looked at me, speechless, dumbfoundedly breathing through his open mouth.  Without another word he climbed into his big truck and rode off.  Our conversation was over.  So much for the biker brotherhood, I guess.

My 150cc CSC Baja Blaster. I had a lot of fun and covered a lot of miles on that little Mustang.

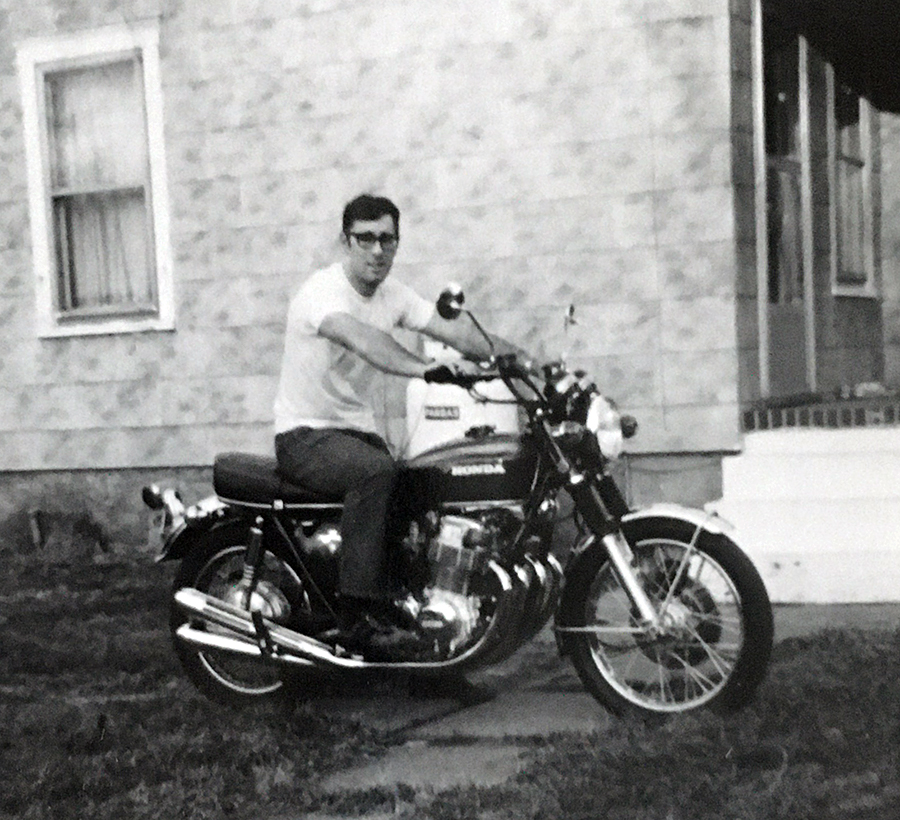
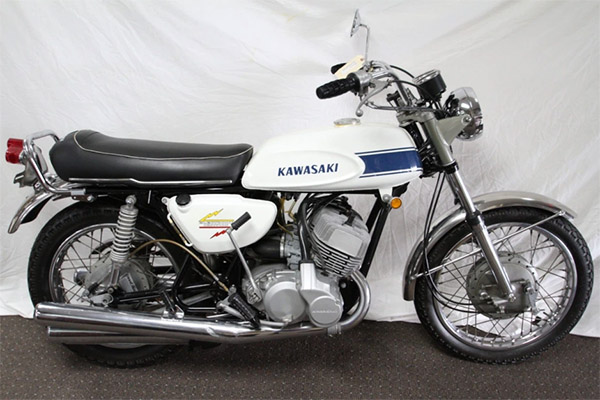
The international motorcycle travel bug bit me when I was still in school.  I had a ’71 Honda 750 Four back in the day (that’s me 50 years ago in the big photo up top).  One of my Army ROTC buddies had the first-year Kawasaki 500cc triple.  It was a hellaciously-fast two stroke with a white gas tank and  blue competition stripes.  We were in New Jersey and we wanted to do something different, so we dialed in Canada as our destination.  They say it’s almost like going to another country.

And so we left.  Our gear consisted of jeans, tennis shoes, windbreaker jackets, and in a nod toward safety, cheap helmets (ATGATT hadn’t been invented yet).  We carried whatever else we needed in small gym bags bungied to our seats.  Unfortunately, in those days “whatever else we needed” did not include cameras so I don’t have any photos from that trip.  That’s okay, because all they would have shown was rain.

A 1969 Kawasaki 500cc, two-stroke triple. Widowmakers, they were called, in a nod to their often unpredictable handling.

As two Army guys about to become Second Louies, we joked about being draft dodgers in reverse.  We were looking forward to active duty (me in Artillery and Keith in Infantry).  We were going to Canada not to duck the draft, but as a fling before wearing fatigues full time.  We didn’t really know what we were doing, so we took freeways all the way up to the border. It rained nearly the entire time.  All the way up and all the way back.  We bought sleeping bags because they looked cool on the bikes (it was a Then Came Bronson thing), but we stayed in hotels.  It was raining too hard to camp, and besides, the sleeping bags were soaked through and we didn’t think to bring a tent.  We got as far as Montreal, which seemed far enough to give us Canada bragging rights.  We spent that single Montreal night in a cheap dive and pointed the bikes south the next day.

These days, I know to check the weather, bring rain gear (even if none is forecast), and study a map to find the most interesting roads (rather than the fastest).  But hey, we were young and dumb, it was an adventure ride, it crossed an internationational border, and riding four days in a steady cold rain was a lot of fun.  I didn’t think so at the time, but that’s how I remember it today.  In fact, I remember that ride like it was last month.  And it got me hooked on international motorcycle adventures.  Canada was to be the first of many.


Never miss an ExNotes blog.  Sign up here for free, unless you have a .ru in your email address!


More epic international rides?  Right here, folks!

Favorite Baja Hotels: Guerrero Negro’s Malarrimo’s

This blog grew longer than I had planned.  I thought I would touch on Malarrimo’s (one of my favorite hotels in Baja) and that would be it, but I realized once I got into it that there’s a lot more to the story and Guerrero Negro.


If you’re headed into Baja, especially if you’re headed there to see the whales, you’d be hardpressed to find a better hotel than Malarrimo’s in Guerrero Negro.  Guerrero Negro is at the halfway point when headed down the Baja peninsula (it’s about 450 miles south of the border).  It’s located along the 28th Parallel,  the dividing line between Baja and Baja Sur (Baja’s two Mexican states).

Although some might be inclined to dismiss Guerrero Negro because as little more than a gritty industrial town, it’s actually a pretty cool place to visit and a good base for further explorations.  There’s whale watching, the ecological preserve, salt mining, the nearby cave paintings, the food, and more.

Ah, the food.  As Gresh so aptly put it, no one loses weight on a Baja ride with me.  I’ll get to that in a minute.

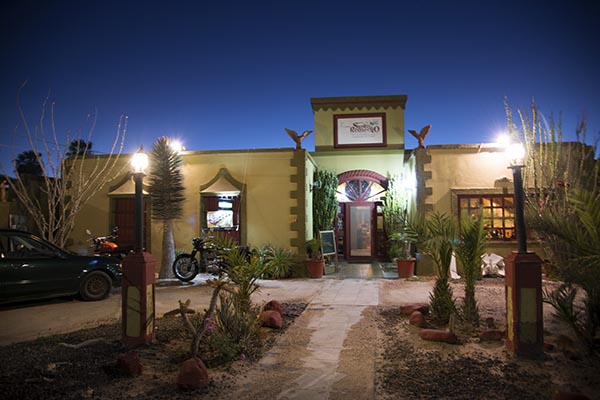
Don Enrique Achoy founded Malarimmo’s about a half century ago, and it has remained a family business.  He was ahead of his time, offering eco tours to see the whales, the ecological preserve surrounding Scammon’s Lagoon, and more.   There are other hotels in Guerrero Negro, but I always check Malarimmo’s first.  It’s not fancy and at around $65 per night it’s a tiny bit expensive for Baja, but it is inviting. it’s clean, and I just feel good there.  The restaurant is arguably the best in town, and I love the bar (more on both in just a bit).

Getting There

Malarrimo’s is easy to find.  Just head south on the Transpeninsular Highway from the border for 450 miles.  You’ll see a huge metal eagle at Parallelo 28 and a Mexican military base.  Shortly after that, you’ll see a sign pointing to the right and Guerrero Negro.

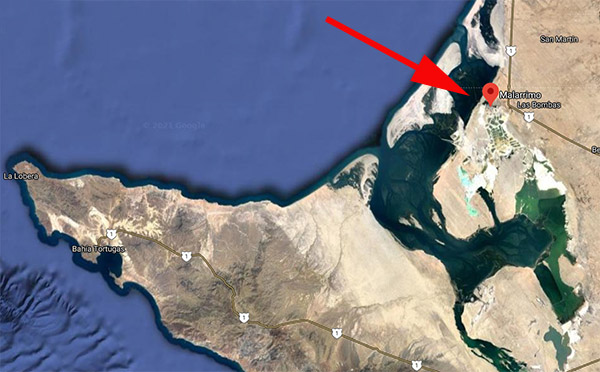
Take that right, and Malarimmo’s will be on your right as you enter town.  You can’t miss it.  Incidentally, the lagoon you see in the satellite photo above is Scammon’s Lagoon.  It’s where the whales will be, which takes me to our next topic.

Whale Watching

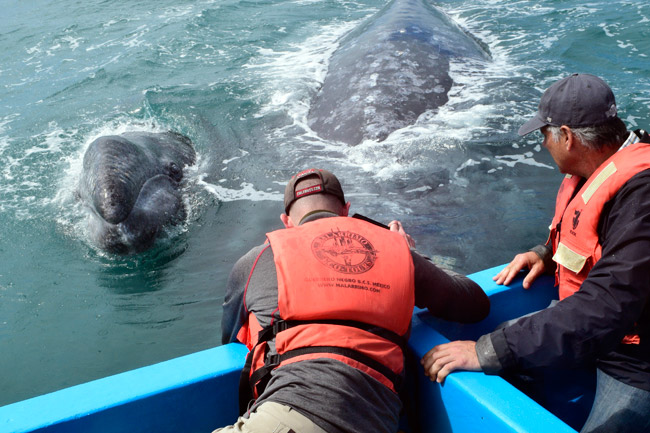
Whale watching tours are available from January through March when the California gray whales are in town, and it is a life changing experience. Those are strong words and you might be tempted to dismiss them as hyperbole.  Take one of Malarrimo’s 4-hour, $50 whale watching tours out on Scammon’s Lagoon and then you tell me.  I’ll bet you come away feeling the same way.

We have a lot more on whale watching on our Baja page, so I won’t spend too much time here on it.  Trust me on this, though:  It is like nothing you have ever done.

The Ecological Preserve

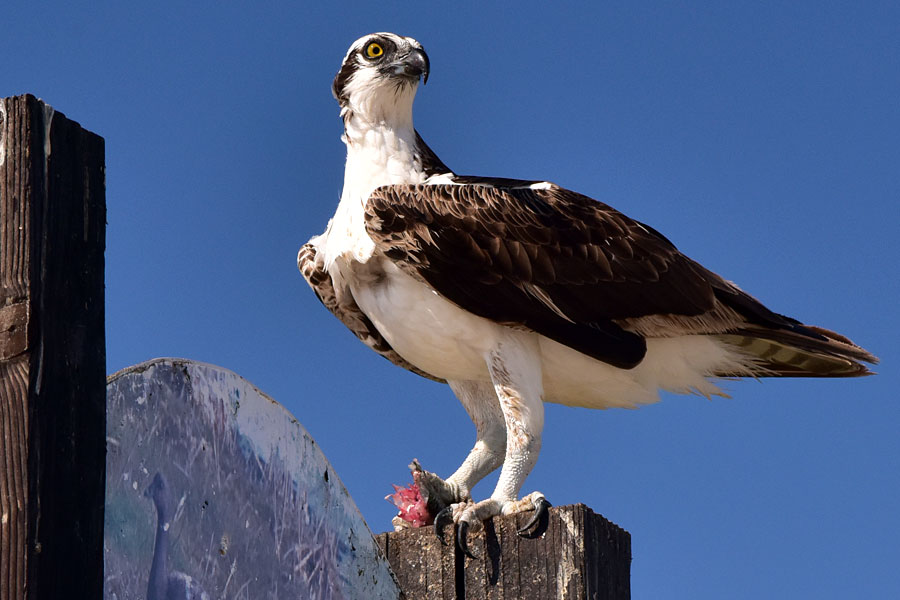
When you get a whale tour at Malarimmo’s, it will take about a half hour in a Malarimmo van to get to the where the pangas (the small boats that take you out to see the whales) are docked, and on that ride, you pass through an ecological preserve that is home to more than 150 wildlife species.  You’ll see many nesting ospreys (a bird of prey), and if you’re lucky (like we have been) you’ll get to see an osprey enjoying a bit of sushi.  It’s a fun thing to encounter.

Salt Mining

Guerrero Negro is a company town, and the company is Mitsubishi, which owns (along with the Mexican government) the salt processing operation.  It’s one of the largest salt producing regions in the world.  They use an interesting approach: Flooding the coastal plains near the town with seawater, allowing the water to evaporate, and then using earth moving equipment to scrape up the salt that remains behind.

Guerrero Negro Cuisine

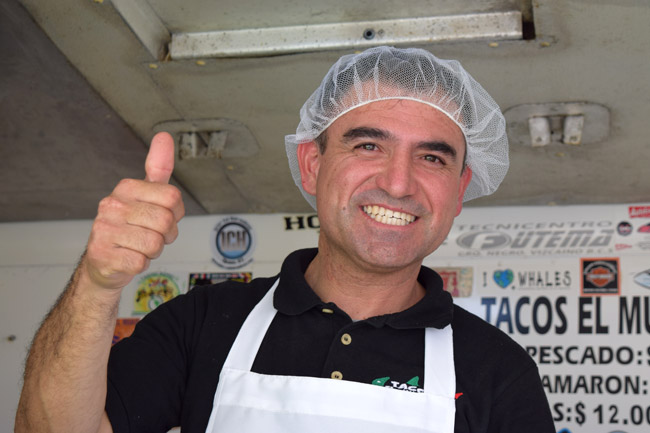
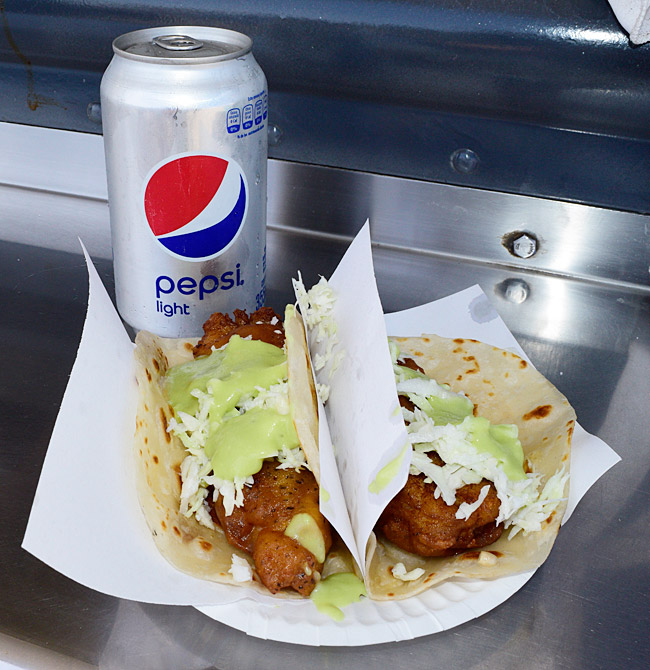
No discussion of Guerrero Negro would be complete without a discussion of the cuisine down there.  In a word, it’s wonderful.  My favorite meal?  Fish tacos, served right off the truck (caught fresh daily) by my good buddy Tony.  No one I’ve ever taken there has had anything but high praise for these incredible treats.

Another place I like is San Remedios, a restaurant a block or two north of the man drag through Guerrero Negro.  Just head west a few blocks from Malarrimo’s, turn right, and you’ll find it.  The food is awesome and the young ladies who serve it are stunning.

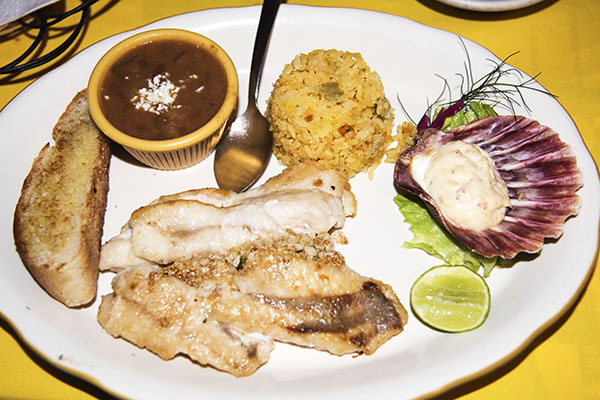
I’ve already mentioned the restaurant and bar at Malarimmo’s.  You can’t have a bad meal at the Malarrimo’s restaurant, and the bar…wow, it’s interesting.  The Guerrero Negro area forms a big hook out in the Pacific Ocean with the hook’s U facing north (you can see that in the satellite photo above).  As a result, a lot of interesting stuff washes up on shore in that area, and Malarrimo’s has a collection of it hanging from the roof in their bar.  It’s pretty cool.

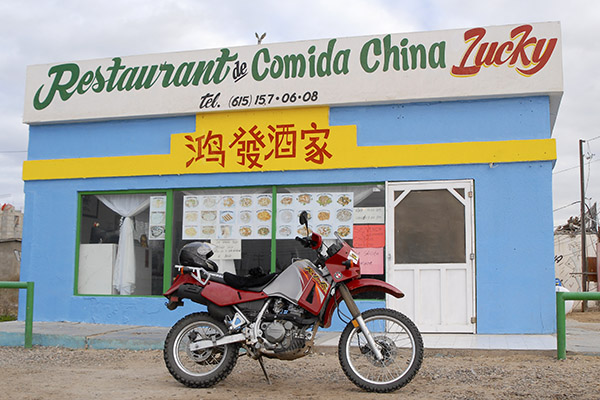
There are other restaurants in Guerrero Negro, too, and I try to make it a point to try a new one each time I am there.  Baja John and I enjoyed an amazing Chinese dinner in Guerrero Negro on one trip; try Lucky’s if you feel like something different.

The Cave Paintings

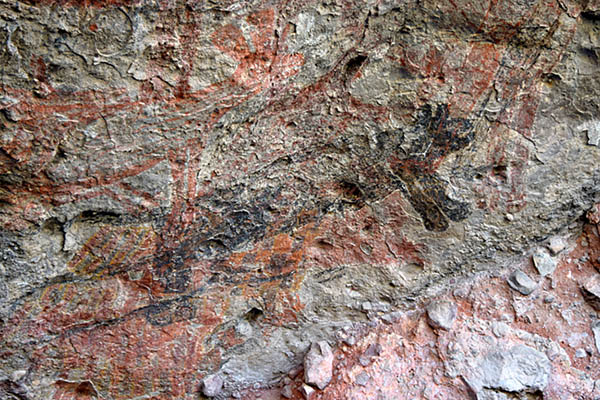
There are several cave paintings located throughout Baja.  This is real Indiana Jones stuff; the cave paintings are estimated to be about 10,000 years old and not much is known about the people who put them there.  They are all relatively remote, too, but one of the easier (I’m using that word in a comparative sense) ones to get to are the cave paintings in Baja’s Sierra San Francisco Mountains.

The cave paintings near Guerrero Negro are further south and east of the Transpeninsular Highway (Highway 1, the main and often only road running north and south in Baja).  You take Highway 1 south and then turn left after passing through the town of Vizcaino to head east and up into the Sierra Francisco mountains.  It’s a magnificent ride with an awesome climb into the mountains, then the road turns to dirt and then it becomes, for lack of a better word, gnarly.  You buy tickets and secure a guide in a small village, and then double back for maybe a mile to see the paintings.  If you have a 4WD car or a dual sport (or ADV) motorcycle, you can get there on your own; if you don’t, you can grab a tour that leaves from Malarimmo’s.  It will take most of a day to get out there, see the paintings, and get back to Guerrero Negro, but it’s well worth it.

There’s a lot more to Baja’s cave paintings, but it’s too much to include here.  Watch for a future blog on this topic.


So there you have it:  Guerrero Negro, Malarimmo’s, and a bunch of things you can do while in that area.  I love everything about Baja, and I especially love the Guerrero Negro area.  You will, too.


When you head into Mexico, make sure you insure with BajaBound.  They are the best, and they are the only insurance company we will ever use.

img


More Baja, including a list of our other favorite Baja hotels and things to see and do, is here on the ExNotes Baja page.


Never miss an ExNotes blog:  Sign up here!


So what’s it like to ride in Baja?  You can learn more with Moto Baja!

Tough Rides: Brazil

We recently wrote a review of Tough Rides China, and as it turns out, that was one of three rides Ryan Pyle did that are available on Amazon Prime.  A couple of days ago I watched Tough Rides Brazil, one of the other two.  It was a six-part series about a circumnavigation around Brazil, and Ryan did this one without his brother Colin.

Although I enjoyed it, I didn’t think Tough Rides China was as good as the Himalaya Calling series about going overland from Germany to India, and I said so in my earlier review.  Tough Rides Brazil, however, was stellar, and it was every bit the equal of Himalaya Calling.  I thoroughly enjoyed it.

A gold-lined church in one of the mining towns in Brazil. Pyle took us into many worthy destinations on his Tough Rides Brazil series.

You know, it’s a funny thing.  I’ve been down on motorcycle adventure stories that focus too much on mysticism, philosophy, and other wordcount-inflating bullhockey and not enough on motorcycle riding (which is why I didn’t think much of Zen and the Art of Motorcycle Maintenance but I loved Dave Barr’s Riding the Edge).  Somehow in Tough Rides Brazil, Pyle focused only a bit on the riding and spent most of his time on the things he did in each of perhaps a dozen destinations on his 14,000 kilometer journey around Brazil, and it worked.  I watched all six Tough Rides Brazil episodes in a single sitting (it was that good).   It’s easy to do; they are each not that long and the story line and photography are superior.

You might check out Tough Rides Brazil on either Amazon Prime (by buying each episode) or by joining Amazon Prime and watching it on your TV or your computer.  Tough Rides Brazil is included with Amazon Prime.  Trust me on this:  I think you will enjoy it.  It’s got me thinking about visiting Brazil.  This is heresy, but I don’t think I’d want to do it on a motorcycle.  I’d like to fly there and see the place as a regular non-moto-borne tourist.  Brazil looks like a fascinating place and the Tough Rides Brazil series has me thinking deep thoughts in that direction.


See our other television, movie, and book reviews here.


Never miss an ExNotes blog.  Sign up here for free:

Tough Rides: China

Here’s another Amazon Prime television show and video review.  This one (as the blog title suggests) is on a series titled Tough Rides China.  It’s about two Canadian brothers (Ryan and Colin Pyle) who circumnavigated China on BMW F800 motorcycles, and you can either watch it on Amazon Prime (if you have that streaming service) on your TV or on your computer.

The bottom line first:  I enjoyed this 6-part series.  A big part of that was because Joe Gresh and I rode around China with the cult of the Zong and we had a whale of a time, so it was easy to relate to what these two fellows did.

I didn’t think this series was as good as the one I reviewed recently about the two German dudes who rode from Germany to India (Himalaya Calling, which was a stellar production), but I still enjoyed it.

Surprisingly, the Pyle brothers’ BMWs broke down a couple of times during the trip, which suprised me.  They were concerned about how long it would take to get parts and the lack of a strong BMW presence in China (now there’s a switch).   For the record, our ten Zongshen RX1 and Rx3 motorcycles didn’t have a single breakdown during our ride.  The Pyle brothers had breakdowns that mandated trucking the bikes significant portions of the trip (does GS actually stand for Go Slow?).

The Pyles also put their bikes on trucks when they wanted to get on the freeways because motorcycles are not allowed on some Chinese freeways.  When Gresh and I were over there with the Zongers, we rode them anyway.  It made me nervous that we rode around the toll gate arms (without paying the toll) and I asked one of our Chinese brothers about it.  “We’re not allowed on the freeways, so if we tried to pay, they wouldn’t know what to do,” he told me.

Tough Rides China has a long introduction at the beginning of every episode, and it was the same in every episode.   That became a bit distracting, and I blitzed through the lengthy and redundant intro after watching the first two episodes.

Tough Rides China featured the giant sand dunes and camels in the Gobi Desert around Dun Huang.  Gresh and I were there.  It was an awesome place, as was all of China.  It really was the adventure of a lifetime.

Tough Rides China is part of a series.  The Pyle brothers have done similar series in Brazil and India, too.  I’ll have to look for those.  While I didn’t think this series was as good the Himalaya Calling adventure ride we recently reviewed, it was still good and I recommend seeing it.


Never miss an ExNotes blog.  Sign up here:


Would you like to read about the Zong trip when Gresh and I rode around China?  Hey, just click right here!

Himalaya Calling

Himalaya Calling is the best motorcycle adventure travel series I’ve ever seen.  Yes, that’s a strong statement, but this is a grand four-part series that I thoroughly enjoyed watching.  It’s about two German guys (Erik Peters and Alain Beger) who rode Yamaha Teneres from Germany to India.  No support mechanics, no movie star nonsense, mud and snow on the highest mountain passes in the world, and absolutely super photography and riding.

You can watch Himalaya Calling on Amazon Prime TV, or buy the show through the Amazon website.  Trust me on this:  You’ll love it.


Never miss an ExNotes blog.  Subscribe here for free:

The Six Best Motorcycles for Baja

This is a blog that is sure to be controversial and elicit a few comments. It attempts to answer a very specific question: Which motorcycles are best for Baja?

As a qualifier, let me mention a few things up front:

    • Most of my Baja riding is on asphalt, and that necessarily colors my opinions. Yeah, there’s a lot of great dirt riding in Baja, but I am a streetster at heart. Your mileage may vary.
    • You don’t need to spend $30K on a Baja blaster.  What good is driveway jewelry if you are afraid to get it dirty and if you’re constantly worried about where you parked?  In Baja, a big, heavy motorcycle (ADV-styled or otherwise) puts you at a disadvantage.  I am not a fan of huge displacement, tall, expensive motorcycles.  For real world riding (especially in Baja), monster motorcycles are more of a liability than an asset.  Even that new one that’s 20 years late to the party.
    • What I think you need in Baja is a comfortable bike with range. There are places where you can go more than a hundred miles between fuel stops, and you need a bike that can go the distance. That means good fuel economy and a good-sized fuel tank.
    • Luggage capacity is a good thing, but if your bike doesn’t have bags, you can make do with soft luggage. In fact, I’d argue that soft luggage is better, because it’s usually easier to detach and bring in with you at night.

With that said, here goes:

CSC’s RX3

Say what you want about Chinese bikes, and say what you want about smallbore bikes, I’m convinced my 250cc CSC RX3 was the best bike ever for Baja.

The RX3 tops out at about 80 mph and that’s more than enough for Baja’s Transpeninsular Highway (the road that runs from the US border all the way down to Cabo San Lucas). The bike is comfortable and it gets 70 mpg. The fuel tank holds over 4 gallons. I could carry everything I needed (including a laptop, a big Nikon and a couple of lenses, and clothes) in the bike’s standard panniers and topcase. I also carried tools and spare parts, but I never needed them. It was superbly well suited for Baja exploration, as I and more than a few others know.   One more thought…before you pummel me with the inevitable “Ah need at least a thousand cc” comments, take a look at our earlier blog, Why a 250?

Kawasaki’s KLR 650

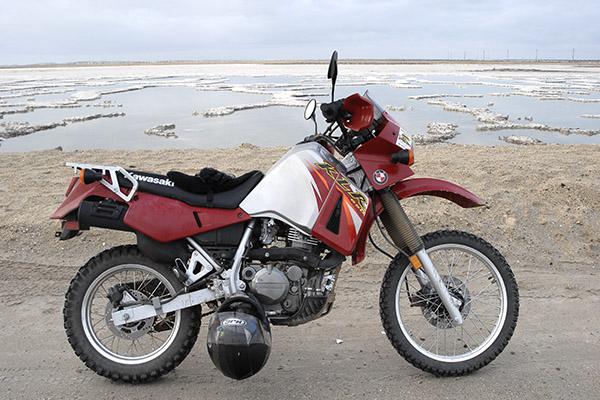
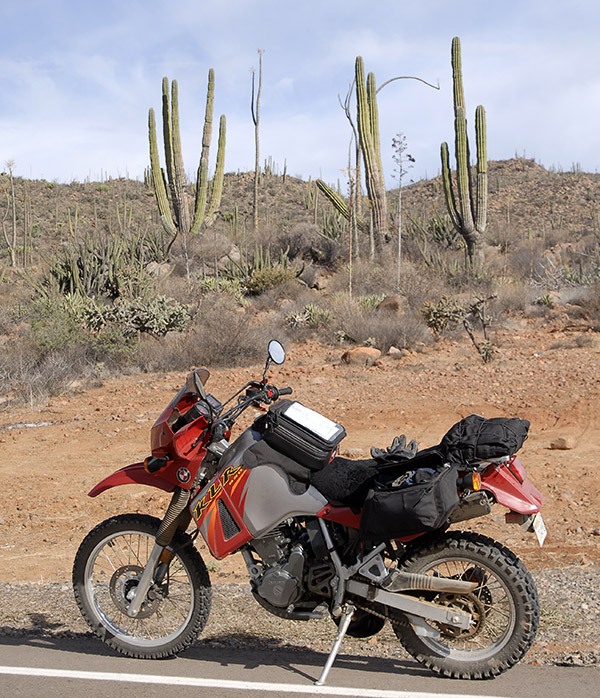
I owned a 2006 KLR 650 Kawasaki for about 10 years. I bought it new and I loved the thing.  I think it is one of the best bikes I’ve ever ridden in Baja.  Yeah, it was a little tall, but once in the saddle I had no problem touching the ground.

The Kawi didn’t come with luggage, but I bought the cheap Kawasaki soft luggage panniers and a Nelson Rigg tankbag and I was good to go (I didn’t need the obligatory KLR milk crate). Although the KLR was heavy, it did surprisingly well off road (especially running at higher speeds over the rough stuff), and I did more offroad riding with the KLR than I have with any of the other motorcycles I brought into Baja. It averaged 56 mpg, and with its 6-gallon gas tank, I could make the trek between El Rosario and that first Pemex 200 miles further south without stopping for fuel.

CSC’s RX4

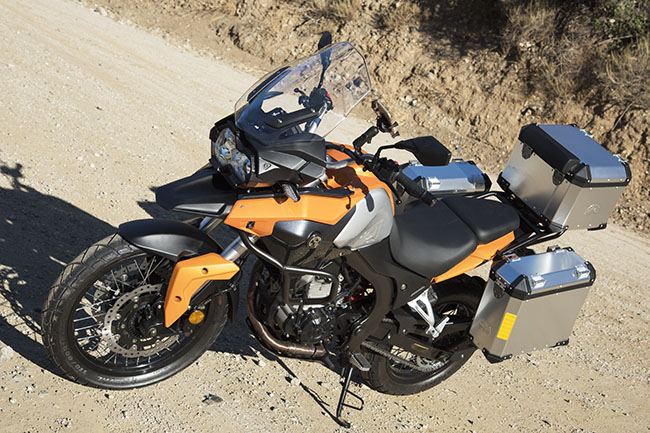
I’ve never owned an RX4, but I’ve ridden one a fair amount and I’ve done detailed comparisons between the RX4, the RX3, and the KLR.

I’ve never taken an RX4 into Baja, but I’ve ridden both (the RX4 and Baja) enough to know that it would do well down there. Think of the RX4 as an RX3 with more top end, more acceleration, and a bit more weight. It’s got the luggage and the ground clearance for extended travels with some offroad thrown in, and it also gets about the same fuel economy as the RX3. Fit and finish on the RX4 is superior (it’s almost too nice to take offroad).  The RX4 is a lot of motorcycle for the money.  The pandemic hit our shores not too long after the RX4 did, or I would have seen more of the RX4 south of the border.

Genuine’s G400c

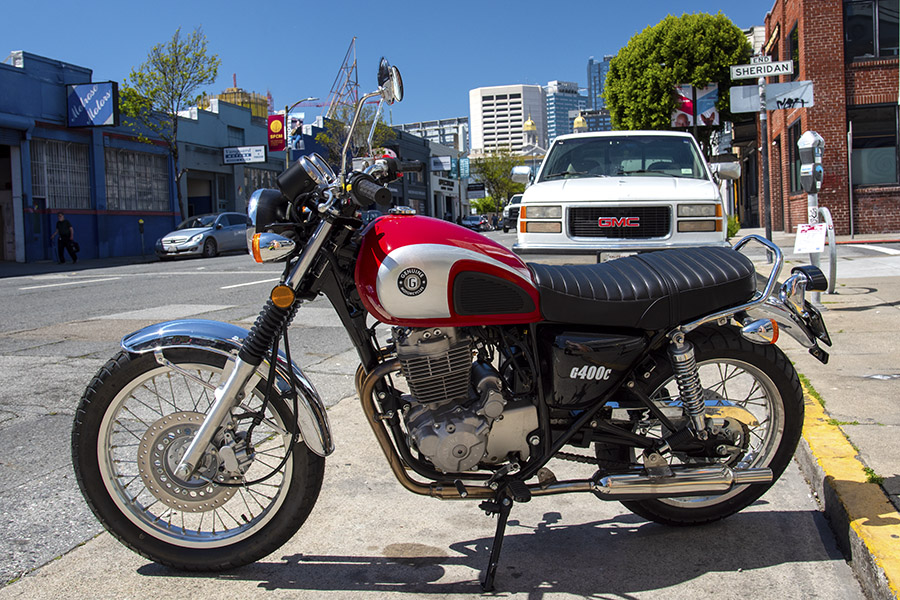
I rode Genuine’s new G400c in San Francisco, courtesy of good buddy Barry Gwin’s San Francisco Scooter Center, and I liked it a lot.  It’s compact, it has adequate power, it has an instrument layout I like, and it’s a fairly simple motorcycle.

I think with soft luggage, the Genuine G400c would make an ideal Baja blaster, and the price is right:  It rings in right around $5K.  With its Honda-clone 400cc motor (one also used in the Chinese Shineray line and others), it has enough power to get up to around 90 mph, and that’s plenty for Baja.  I rode a different motorcycle with this powerplant in China and I was impressed.  I think this would be an ideal bike for exploring Baja.

Royal Enfield’s 650 Interceptor

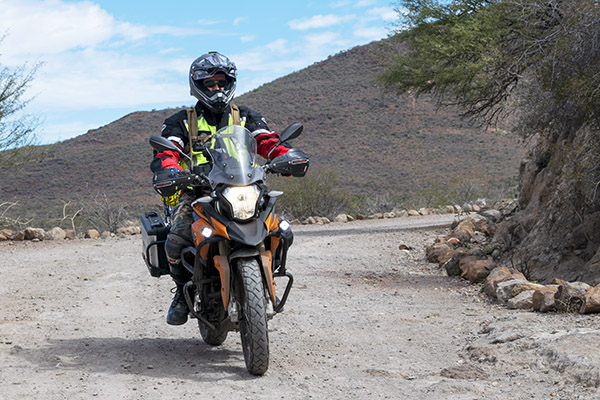
Yeah, I know, the new Enfield Interceptor is a street bike with no luggage. But with a Nelson Rigg tailpak and Wolf soft luggage, the Interceptor was surprisingly in its element in Baja. Gresh will back me up on this.

We had a whale of a time exploring Baja on a loaner 650 Enfield (thanks to Enfield North America and good buddy Bree), and I liked the bike so much I bought one as soon as I could find a dealer that didn’t bend me over a barrel on freight and setup. There’s one parked in my garage now. The bike is happy loping along at 65-70 mph, it’s comfortable (although I’ll be the first to admit it needs a sheepskin cover on that 2×4 of a seat), and it gets 70 miles per gallon. I wouldn’t take it off road (except maybe for that 10-mile stretch to go see the cave paintings in the Sierra San Francisco mountains), but like I said at the beginning of this conversation starter, I’m mostly a street rider.

Royal Enfield’s 400cc Himalayan

I’ve seen these but not ridden one yet.  Good buddy Juan Carlos, a great guy with whom I rode in Colombia, has gone all over South America on Enfield’s new Himalayan and he loves it (that’s his photo below).  Juan knows more about motorcycles than I ever will, and if Juan says it’s good, it’s good.

I like the look of the Himalayan and I like its single-cylinder simplicity (come to think of it, with the exception of the Enfield Intercepter, every bike on this list is a single).  400cc, I think, is about the right size for Baja. The price is right, too.   Royal Enfield is making fine motorcycles that won’t break the bank.  I think the Enfield Himalayan would be a solid choice for poking around the Baja peninsula, one that probably has the best off-road capabilities of any bike in this list.


I’m sure I’m ruffling a few feathers with this piece, and I’m doing that on purpose.  I’ve been taking pot-stirring lessons from Gresh (that’s him in the photo at the top of this blog).  We’d like to hear your comments if you disagree with any of the above. Do us a favor and leave them here on the ExNotes blog (don’t waste your time posting on Facebook as that stuff will scroll on by and be gone; ExNotes is forever).

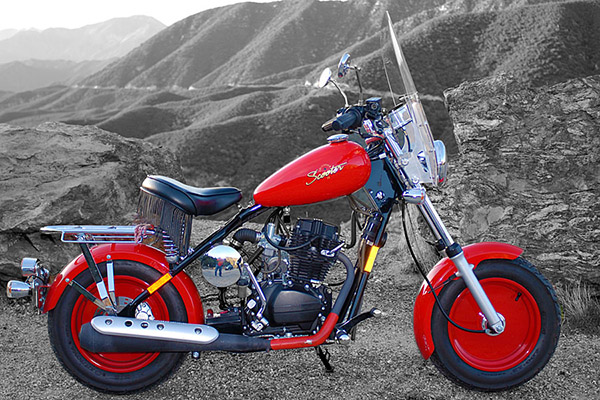
All the above notwithstanding, I’ll add one more point:  The best Baja motorcycle for each of us is the one we have.  You can ride Baja on just about anything.  I’ve been to Cabo San Lucas and back on everything from a 150cc California Scooter to a Harley Heritage Softail cruiser.  They’re all good.  Don’t put off a trip because you don’t think you have the perfect motorcycle for a Baja adventure.  Baja is the best riding I’ve ever done.


Please visit our advertisers and click on the ads!


I’ve done a lot of riding on a lot of different motorcycles in Baja.  You can read all about that in Moto Baja!


Heading into Baja?  Make sure you insure with BajaBound, our choice for the best motorcycle insurance in Mexico!


More info on Baja?  It’s right here!


Never miss an ExNotes blog.  We cover an eclectic mix of topics, including motorcycles, travel, bicycles, construction, guns, reloading, all kinds of product reviews, and more.  Subscribe here for free:

Sam Manicom: Master Story Teller

When I rode to the Overland Expo in Arizona a few years ago with good buddies Duane and Paul on CSC RX3 motorcycles, I met a bunch of interesting people.   One man I saw at that event but didn’t meet was Sam Manicom.   When this quiet and friendly-looking guy stopped by the CSC booth and left a flyer, I stuck the flyer in my pocket, from there it went into my saddlebag for the freeway blast back to California, and a week or so later I read it.

My first reaction when I read the flyer was that I had missed an opportunity.    Had I known who Sam was back then I would not have let him slip by without a conversation.   Just a few lines into the flyer I knew I wanted to read his books.  I did (I bought and read all of them) and they were great.  In fact, I’m wondering now why I didn’t include them in the Five Best Moto Books blog I recently wrote (they were that good).  I should have, and I’m making up for that oversight with this blog.

Fast forward a few years, and I was at another adventure touring motorcycle event (the Horizons Unlimited gathering in Mariposa), and Sam was there as a speaker.  I wasn’t going to make the same mistake again.  I met Sam, we had a great conversation, and I attended his presentation later that evening.  The guy is a mesmerizing story teller, and Sue and I enjoyed his travel descriptions.  He has a voice and a manner of speaking that made us feel like kids listening to stories around a campfire.  The word “hypnotic” comes to mind.  Trust me on this, folks:  Don’t miss an opportunity to listen to one of Sam’s talks or read his books.   The guy is a master.

I wrote about Sam when I was doing the CSC blog, and the thought occurred to me I might post an updated blog here on ExNotes.  I wrote to Sam to make sure he was okay with that, and he is.  Sam sent materials and links to me for inclusion here on the ExNotes blog, and I’m sharing them with you today.


So who is Sam Manicom?  Well, this is a man who went out and did what many have always wanted to do. Chuck it all in and set off on an epic motorcycle adventure.

A senior manager in retail, but wanting to do something completely different, Sam learned to ride a motorcycle and set off to ride the length of Africa on a 1991 BMW R80GS. He’d been riding a bike for just three months the day he arrived at the Sahara. This one-year trip turned into an 8-year, 55-country, 6-continent adventure (Europe, Africa, Asia, the Middle East, Eastern Europe, Africa again, South, Central and North America).

But there’s a twist. Sam now has four books published about the journey, and he never intended to write a thing. The point for him was to hunt out new adventures, but along the way other travellers encouraged him to write magazine articles.

He did this successfully over the latter four years of the ride, but he’s quick to point out, “Writing never took over as being the point of the journey. I was out there to learn, to have fun and to enjoy the freedom travelling by motorcycle was giving me. But sometimes you find yourself in places for longer periods of time. It might be because you are on a visa hunt that takes longer than anticipated, or that you have simply found yourself in a place that you really don’t want to leave in a hurry. I wrote all of my articles in times such as these. The journey is what really matters.”

Sam’s first book, Into Africa, was written as a result of readers’ letters to editors.  His other books include Under Asian Skies, Distant Suns, and Tortillas to Totems.  He’s been described as being one of the foremost and most readable adventure motorcyclists writing about their adventures on two wheels, and I will tell you that description is accurate.

Why attempt to write the books?  As Sam tells it, “I guess it was a new challenge and I’d spent time during the last year or so on the road, wondering what I could do with all that I’d learnt. Not only would trying to write a book be a new adventure for me but I had another thought in mind. In part my books are aimed at those fortunate enough to know that they actually can go out and live the dream, with the hope that they might encourage them to just do it. But also for those who love the sound of travelling but are quite happy with adventure from the pages. I’ve also consciously written them for those who live in circumstances that may never allow them to ride into adventure.”

Sam writes for ADVMoto Magazine, Overland Magazine, Motorcycle Sport and Leisure, Adventure Bike Rider, Motorcycle Monthly and various other motorcycle magazines and newspapers around the world. He is a regular presenter at BMW dealerships, and Horizons Unlimited, Overland Expo, and Adventure Bike Rider Festival events. Sam is also a co-host of the Adventure Rider Radio RAW show.

Sam has a fairly unusual background in that he was born in the Belgian Congo in Central West Africa. His parents worked and lived through the two rebellions that preceded the change of the country’s name to Zaire. They brought the family home to England when he was ten years old. For the first few years at school in the UK he was known as “Jungle Boy.”

Sam’s first solo journey was by bicycle age 16. His next big trip was a backpacking, seat-of-the-pants voyage of discovery across Europe, India and Australia, which often saw him down to his last $10. On arrival in Australia, no one asked him if he had any money and a return ticket. He had neither. What was needed, he earned along the way and this he says was a great learning experience.

Though not looking for a girlfriend, Sam met his partner Birgit Schuenemann in New Zealand during year two of his 8-year motorcycle trip. After riding pillion with him for 3 months through Nepal and India she joined him for the latter four years across Africa and the Americas. She was travelling by bicycle when they met but transferred steeds to ride her own motorcycle, a 1971 BMW R60/5. She started her ride in Africa with just 600 miles experience on a motorcycle.  Sam’s BMW R80GS, at the time of writing, has 278,000 miles under its wheels and is still his only means of transport in the UK where he is based. He also owns an F800GS which he keeps in the USA for his regular trips to the States.

For more information about Sam and his books check out www.sam-manicom.com.  Sam’s books are available from Amazon and The Book Depository with free delivery.  All four of Sam’s books are available as Kindles (and you can find them at the links provided above), and also as as Audiobooks and on iTunes.  You can get free audio sample chapters from each of Sam’s books (Into Africa, Under Asian Skies, Distant Suns, and Tortillas to Totems).  And if that’s not enough to pique your interest, you should watch Sam’s Adventure Bike TV Under the Visor interview on Youtube, as well as a Youtube conversation between Sam and Ted Simon.


So there you have it:  My thoughts on one of the best adventure motorcycle story tellers ever.  Take advantage of the links we’ve provided above.  You can thank me later.

Favorite Baja Stops: Santa Rosalia’s Hotel Frances

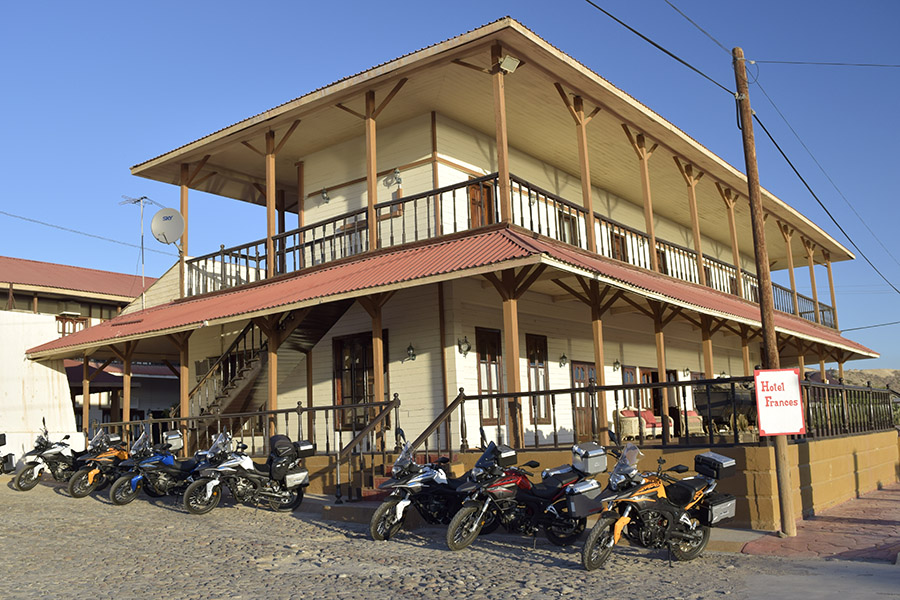
A hidden treasure and one of Mexico’s national historic monuments, you might blow through Santa Rosalia on a trip through Baja and miss the Hotel Frances.  That would be a bad thing.  A stay in the Frances is one of Baja’s great pleasures, and Santa Rosalia is a fun town to explore.

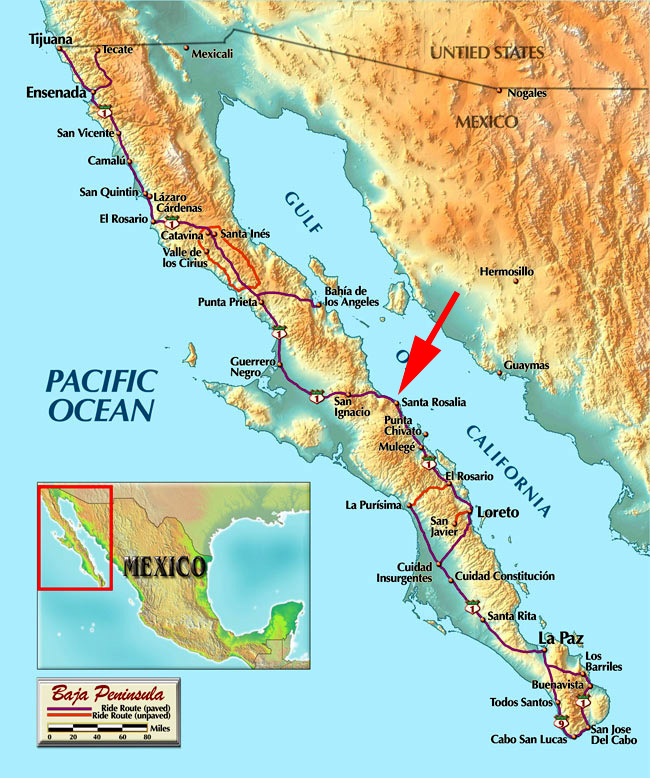
Santa Rosalia is the first town you ride into after crossing from the Pacific side of Baja to the Sea of Cortez side.

Santa Rosalia is the first town on the Transpeninsular Highway along the Sea of Cortez after you cross the peninsula.  The highway drops sharply as you descend Baja’s eastern seaboard through a series of dramatic and delightful twisties.  The stretch is called La Cuesta del Infierno, and I could make the case that this road, all by itself, is worth a Baja visit.  After that, it’s a short ride along the Sea of Cortez, and then you enter Santa Rosalia.  There’s a main street that cuts due west (Alvaro Obregon) into Santa Rosalia, and the Hotel Frances sits high on a mesa to the right as you enter the downtown area.

The central part of Santa Rosalia runs roughly east and west, and the Hotel Frances is on the right as you enter town.

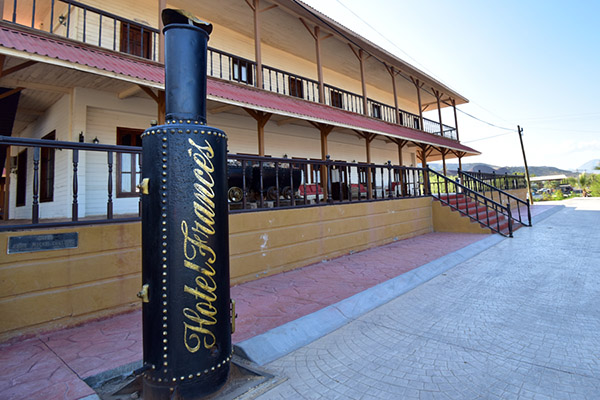
The Hotel Frances is constructed entirely of wood in a colonial style, as is most of Santa Rosalia.   It was built in 1886 when the French Boleo company mined copper in this region.   I started to say I could write a book about all this, but I guess I already did.  Two, in fact.  But I’ll give you the commercial at the end of this blog.

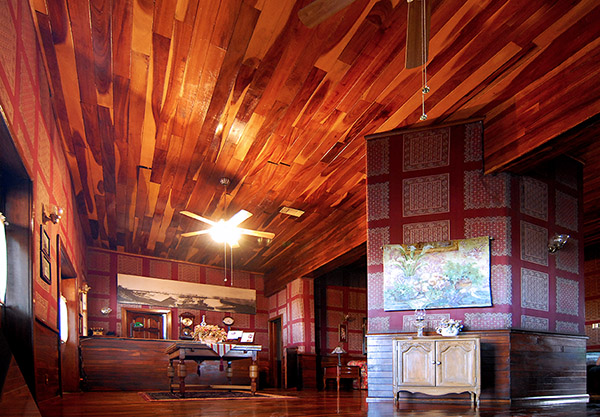
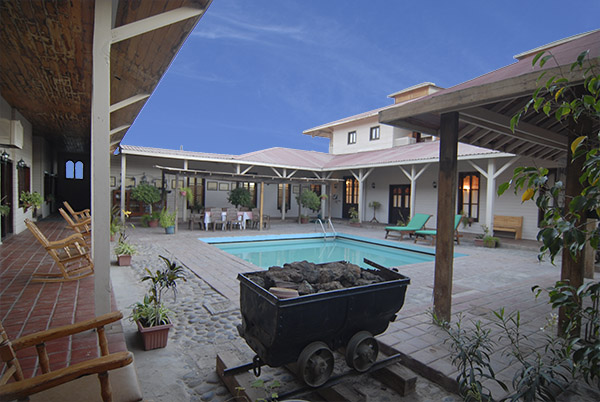
The gorgeous Hotel Frances wood lobby. It’s like stepping back a century, but in a good way.
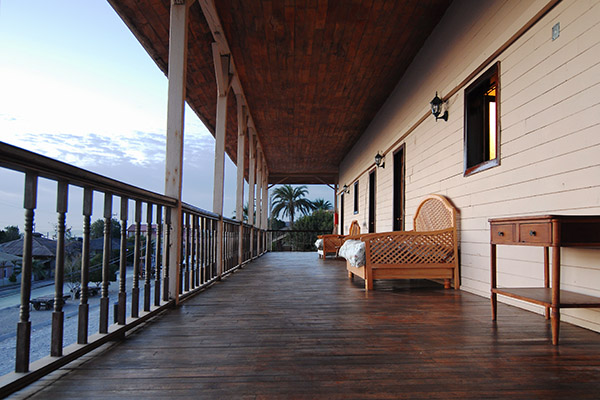
Fabulous balconies run all around the hotel. I like to savor a cup of hot coffee and watch the sun rise from that balcony.  In the evening I do the same, but with a Tecate.
An early evening photo.  The Frances has a nice pool in the courtyard. After a couple of days riding through Baja (it’s at least a two-day ride from the border), it feels great.
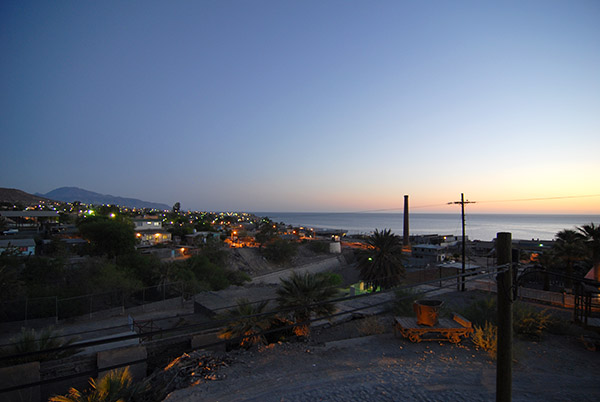
The view from the balcony, watching northern Santa Rosalia wake up.  I can smell the coffee just looking at this photo.
Spacious, luxurious, and comfortable describe the Frances’ balconies, as seen in this early morning photo.

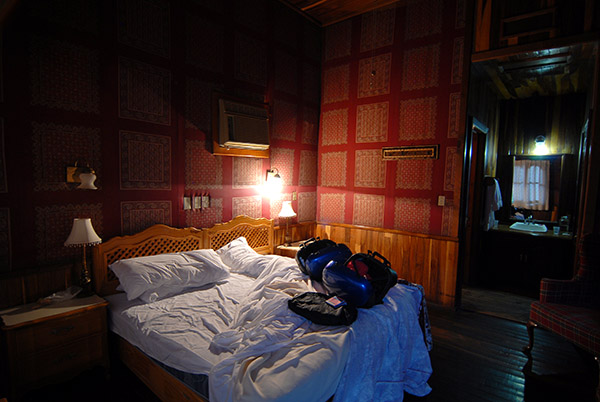
I’ve taken more than a few photos in and around the Frances, but as I looked through them to write this blog, I only found one inside any of the hotel rooms.  The rooms are wood, too, and they really are unique.

The floors, the walls, the ceiling…everything is wood and it’s more than a century old. It all creaks when you walk.

I shot that photo above as I was packing my Triumph Tiger’s panniers, and I guess I probably should have grabbed a shot with the bed made the night before.  But that’s okay.  It gives me a reason to return.  Not that I need a reason beyond simply wanting to tour Baja again.  In my book, that’s reason enough.

You might be wondering about security and safety.  You know, if you read the papers, Mexico is a dangerous place.  But not these small towns in Baja.  One time when I stayed at the Frances, I noticed an older Mexican fellow in the parking lot.  He was a security guard, the first I had ever seen in the area.

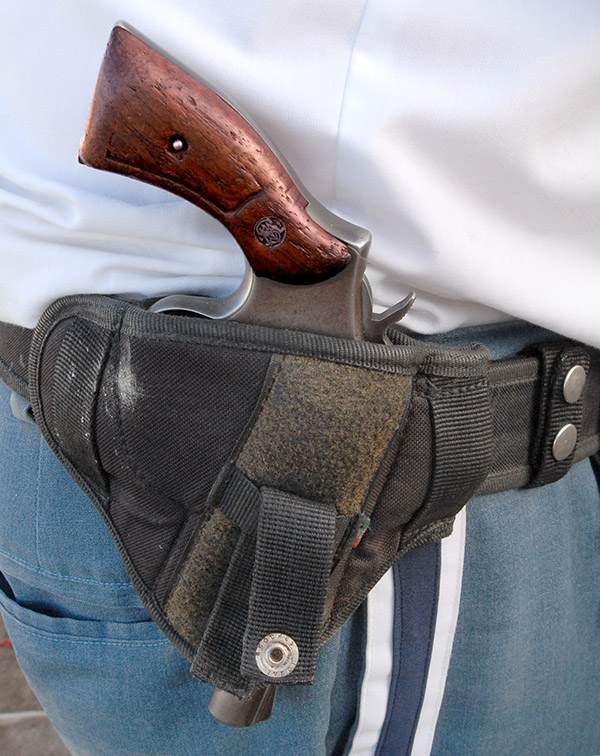
A well-armed graduate of the Barney Fife School of Hotel and Restaurant Security, and a charismatic Smith and Wesson Model 10.

The security guard didn’t speak English and I don’t speak much Spanish, but we had a nice conversation.  Being a gun nut, I asked him about his Smith and Wesson.  He took it out of his holster and handed it to me. I was shocked, but I quickly saw that his well worn revolver was unloaded.  I asked about that and he smiled a knowing smile.  My new friend reached in his shirt pocket, withdrew a single crusty old .38 cartridge, and held it up to show he was strapped and ready for action. What do you know…I was having a conversation with the real deal:  Baja’s very own Barney Fife!

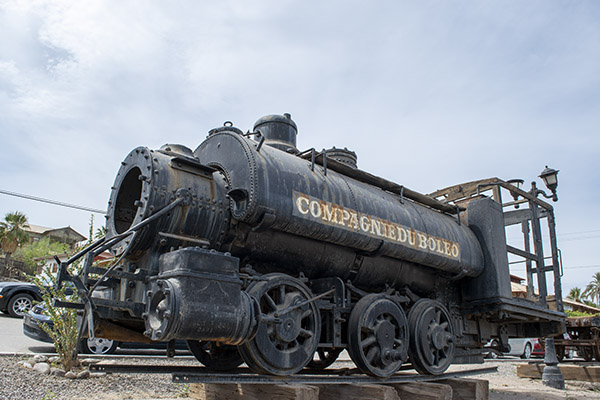
The mesa the Frances sits on is an interesting part of town.  There’s a mining museum there, an old steam locomotive, and other mining things.  Santa Rosalia, you see, used to be a mining town until the copper played out.  But then the price of copper went up sharply, and now it’s being mined again.

Santa Rosalia grew up as a company mining town, and Boleo was the French company that owned it.
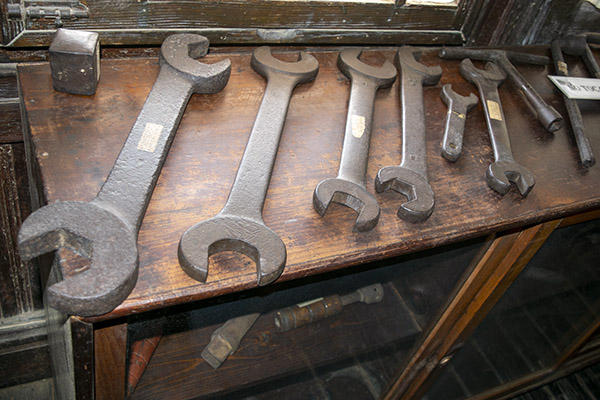
Tools on display in the Santa Rosalia mining museum. It’s across the street from the Frances.

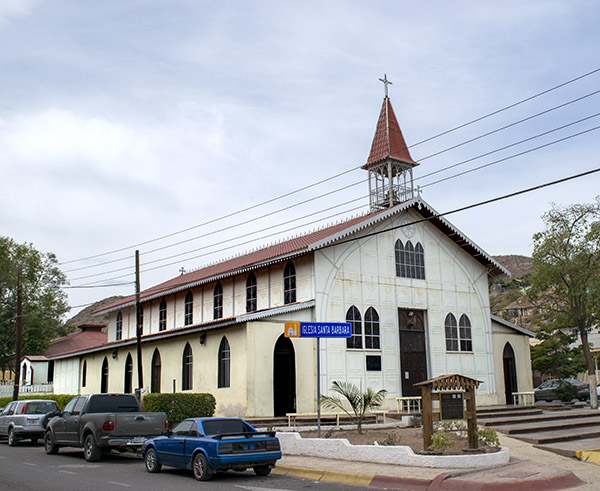
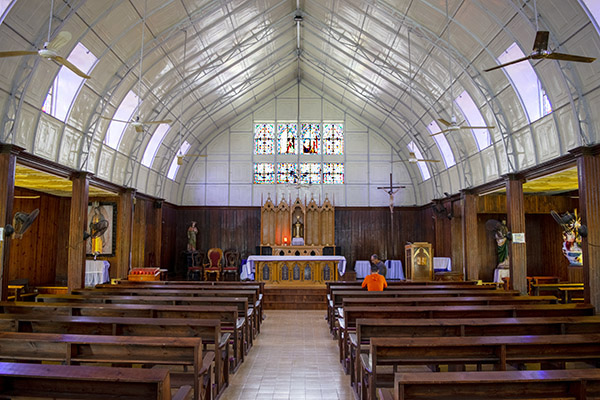
I’ve always liked Santa Rosalia. There are good restaurants in town, the place has a nice feel to it, and there’s the Iglesia de Santa Bárbara, an old all-metal church unlike any I’ve ever seen in Mexico (or anywhere else, for that matter).  I first heard it was designed by Gustav Eiffel (the same guy who designed the Eiffel Tower); more recently, I’ve read that story wasn’t true.  Whatever version you subscribe to, it’s a beautiful church that was built in 1897 and it’s right at the bottom of the hill from the Frances.

Santa Rosalia’s Iglesia de Santa Bárbara. This church, all by itself, is another reason for a trip to Santa Rosalia.
Stained glass in the Iglesia de Santa Bárbara.
Ah, the wonders of shooting RAW photos. The camera catches details way beyond what I could see when I grabbed this Iglesia de Santa Bárbara interior shot.  You can get photos like this, too, with the entry-level Nikon digital single lens reflex camera.

The El Muelle restaurant is catty-cornered one block away from the church, and the seafood there is excellent (El Muelle means “the dock” in Spanish).  There’s an old bakery a block or two west on Alvaro Obregon, the Boleo Panaderia, that offers outstanding pastries.  There’s a Chinese restaurant, the Comida China, about a half mile south of town on the Transpeninsular Highway that is surprisingly good.  And there are taco stands and other interesting spots throughout Santa Rosalia.  At night, Santa Rosalia is a hopping place.

A pleasnt young tortilla lady on Santa Rosalia’s Alvaro Obregon. To me, this photo defines Santa Rosalia’s friendly feel.
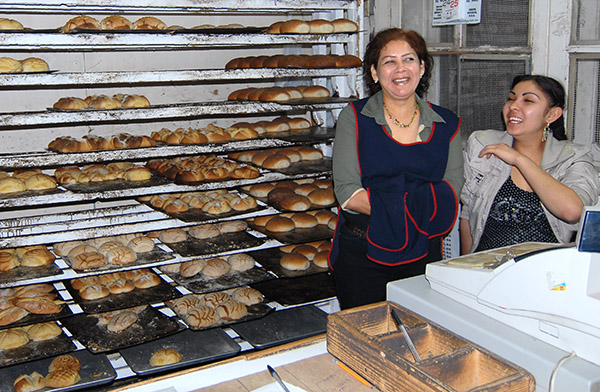
After dinner at the El Muelle, it’s a short walk for pastries to the Boleo Panaderia.  When I asked if I could take a photo, these ladies laughed and responded with a quick “Si.”

A walk through the downtown area is a rewarding experience.  Like I said earlier, all the architecture is wood, as is fitting for an old mining town of French ancestry.  It’s just a fun place, and it’s one of my favorites in Baja. Trust me on this: You’ll enjoy a stay in Santa Rosalia.

The phone number for the Frances Hotel is (011-52-115)-2-20-52. Last I checked, there’s no email address.  The lack of an email address notwithstanding, the Frances Hotel has great wi fi coverage and I’ve posted more than a few blogs from there during my several visits. I love the place and I think you will, too.


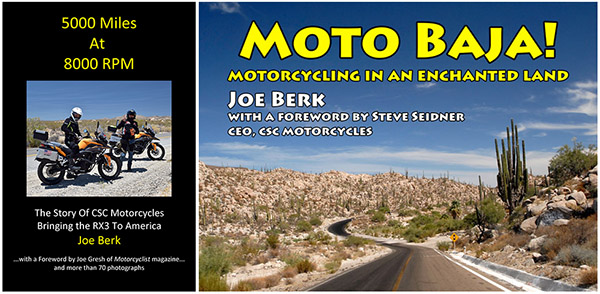
On that book commercial I promised above:  I’ve written two books in which Santa Rosalia figures prominently.  One is Moto Baja; the other is 5000 Miles at 8000 RPM.   You will enjoy both.


Subscribe to ExNotes for free here:


Want more info on riding in Baja?   We’ve got it on our Baja page and on our Epic Rides page.


Headed into Baja on your motorcycle or in your car?  Don’t leave home without insuring through BajaBound.com!